1
User Manual
High Definition Digital Camcorder
www.samsung.com/register
HMX-H200BP/HMX-H200SP/HMX-H200LP/HMX-H200RP
HMX-H203BP/HMX-H203SP/HMX-H203LP/HMX-H203RP
HMX-H204BP/HMX-H204SP/HMX-H204LP/HMX-H204RP
HMX-H205BP/HMX-H205SP/HMX-H205LP/HMX-H205RP
HMX-H220BP/HMX-H220SP/HMX-H220LP/HMX-H220RP
key features of your full HD camcorder
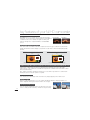
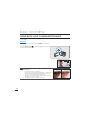
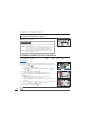
High Sensitive BSI CMOS Sensor
BSI CMOS Sensor is a image sensor newly developed by
Samsung. You can get much clearer images in lower lighting
condition as this sensor doubles the light sensitivity and
reduces the light loss compared with the normal CMOS
sensor.
Normal CMOS
BSI CMOS
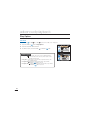
Full HD 1080 Viewing Performance
This camcorder uses advanced H.264 compression technology to realise the clearest video
quality. Its full HD resolution displays your pictures clearer than normal standard (SD)-quality
pictures.
High-Definition (Full HD)
Standard-Definition (SD)
1920
720
1080
<Wide Full HD Camcorder (1080i/16:9)>
576
<Standard Digital Camcorder (576p)>
SSD (Solid State Drive) Adopted as Built-in Storage Media (HMX-H203/H204/H205 only)
SSD based on flash memory has been adopted as internal memory for the camcorder.
SSD helps the camcorder boot, read data and operate the software much faster than normal
HDD (Hard Disk Drive).
Also, SSD is very stable, durable and makes less noise while in operation. It is environmentfriendly because low electric power is required.
Touch panel adopted
You can play recorded images and set functions by simply tapping on the LCD screen.
Dual Recording
While recording full HD videos, you can capture still images with the simple operation of a
button. Capture still images and save them to the storage.
ii
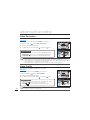
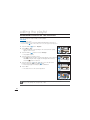
Shooting Custom Scenes
In Scene mode, appropriate options are already set for each
scene so that you can select any of them for easy shooting.
Shift over wider range of motion with Smart OIS (Optical Image Stabilization)
Smart OIS improves on existing Optical Image Stabilization by allowing the camcorder lens
to shift over wider range of motion in wide/tele zoom position. This allows the camcorder to
compensate for greater degrees of camcorder shake and deliver a stunning level of image
smoothness.
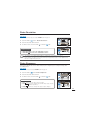
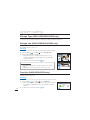
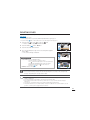
Magic Finger Focus, Magic Finger Shot
To focus on a subject, just touch the screen and shoot.
Your camcorder optimizes the focus for the touched
point, enabling you professional results with this simple
operation. You can also focus on your subject and take a
photo with a touch of your finger.
STBY
00:00:00
[307Min]
9999
MENU
Smart Auto with Self-Decision on Situation
In Smart Auto mode, your camcorder automatically chooses the appropriate camcorder
settings based on a detected type of scene. It will be helpful if you are not familiar with the
camcorder settings for various scenes.
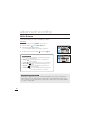
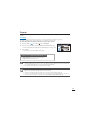
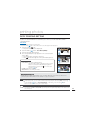
Time Lapse Recording Catches the Moment
You can record a long scene in short intervals. Record
artistic, documentary videos including the passage
of clouds, blooming flowers, etc. Use this function
to make UGC (User-Generated Contents) videos,
educational programmes or for other various purposes.
Make All Your Recordings with a Simple VIEW Button!
This function provides the preview of storyboard to be
printed, which gives you digest of the recorded video without
viewing the whole sequence of it.
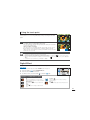
Make a digest of Your Video with Storyboard Printing!
This function captures 16 still images arbitrarily from the
selected video and saves them into the storage media. It
presents a quick overview of your video, helping you to
understand the overall topic.
Direct Upload of Your Videos to the Web!
The built-in editing Intelli-studio software
installs directly from this camcorder to your
PC, enabling convenient connection only with
a USB cable. Intelli-studio also allows direct
uploading of your contents to YouTube, Flickr,
or Facebook. Sharing the contents with your
friends is simpler than ever before.
iii
before reading this user manual
SAFETY WARNINGS
What the icons and signs in this user manual mean;
Means that there is a potential risk of death or serious injury.
WARNING
CAUTION
CAUTION
Means that there is a potential risk of personal injury or damage to the
product.
To reduce the risk of fire, explosion, electric shock, or personal injury when
using your camcorder, follow these basic safety precautions.
Means hints or referential pages that may be helpful when operating the
camcorder.
These warning signs are here to prevent injury to you and others.
Please follow them explicitly. After reading this section, keep it in a safe place for future
reference.
PRECAUTIONS
Warning!
t 5IJTDBNDPSEFSTIPVMEBMXBZTCFDPOOFDUFEUPBO"$PVUMFUXJUIBQSPUFDUJWF
grounding connection.
t #BUUFSJFTTIBMMOPUCFFYQPTFEUPFYDFTTJWFIFBUTVDIBTTVOTIJOFmSFPSUIFMJLF
Caution
Danger of explosion if battery is incorrectly replaced.
Replace only with the same or equivalent type.
To disconnect the apparatus from the mains, the plug must be pulled out from the mains
socket, therefore the mains plug shall be readily operable.
iv
IMPORTANT INFORMATION ON USE
Before using this camcorder
t 5IJTDBNDPSEFSSFDPSETWJEFPJO)
(MPEG4 part10/AVC) format and in High
Definition Video (HD-VIDEO) or Standard
%FmOJUJPO7JEFP4%7*%&0
t 1MFBTFOPUFUIBUUIJTDBNDPSEFSJTOPU
compatible with other digital video
GPSNBUT
t #FGPSFSFDPSEJOHJNQPSUBOUWJEFPNBLFB
USJBMSFDPSEJOH
Play back your trial recording to make sure
the video and audio have been recorded
properly.
t The recorded contents cannot be
compensated for:
- Samsung cannot compensate for any
damage caused when a recording cannot
be played back because of a defect in the
camcorder or memory card.
Samsung cannot be responsible for your
recorded video and audio.
- Recorded contents may be lost due to a
mistake when handling this camcorder or
memory card, etc. Samsung shall not be
responsible for compensation for damages
due to the loss of recorded contents.
t Make a backup of important recorded
EBUB
Protect your important recorded data by
copying the files to a PC. We also recommend
you to copy it from your PC to other recording
media for storage. Refer to the software
installation and USB connection guide.
t Copyrights: Please note that this
camcorder is intended for individual use
POMZ
Data recorded on the storage media in this
camcorder using other digital/analogue media
or devices is protected by the copyright act
and cannot be used without permission of the
owner of the copyright, except for personal
enjoyment.
Even if you record an event such as a show,
performance or exhibition for personal
enjoyment, it is strongly recommended that
you obtain permission beforehand.
About this user manual
Thank you for purchasing this Samsung Camcorder.
Please read this user manual carefully before you
use the camcorder and keep it handy for future
reference. Should your camcorder fail to operate
correctly, refer to Troubleshooting.
This User Manual covers HMX-H200, HMX-H220,
).9)).9)BOE).9)NPEFMT
t The HMX-H203, HMX-H204, and HMX-H205
have a 8GB, 16GB, and 32GB built-in storage
media (SSD) respectively but also use memory
cards.
t 5IF).9))EPOPUIBWFCVJMUJO
storage media (SSD) and use memory cards.
Although some features of HMX-H200/H220
models are different, they operate in the same
way.
t *MMVTUSBUJPOTPGNPEFM).9)BSFVTFEJOUIJT
user manual.
t 5IFEJTQMBZTJOUIJTVTFSNBOVBMNBZOPUCF
exactly the same as those you see on the LCD
screen.
t %FTJHOTBOETQFDJmDBUJPOTPGUIFDBNDPSEFS
and other accessories are subject to change
without any notice.
t *OUIJTVTFSNBOVBMUIFJDPOPSTZNCPMJOUIF
parenthesis appearing in a description of a
submenu item indicates it will appear on the
screen when setting the corresponding item.
Ex) Submenu item of “Video Quality”
page 54
- “Super Fine” ( ): Records in the Super
Fine quality. (If set, corresponding icon
( ) will appear on the screen.)
v
before reading this user manual
The following terms are used in this
manual:
• ‘Scene’ refers to the point where you
press the Record Start/Stop button to
start recording until you press again to
pause the recording.
• The terms ‘photo’ and ‘still image’ are
used interchangeably with the same
meaning.
For Open Source License information, refer to
the “OpenSource-H200.pdf” in the provided
CD-ROM.
Correct disposal of batteries in this
product
(Applicable in the European Union
and other European countries with
separate battery return systems)
This marking on the battery, manual
or packaging indicates that the
batteries in this product should not be disposed of with
other household waste at the end of their working life.
Where marked, the chemical symbols Hg, Cd or Pb
indicate that the battery contains mercury, cadmium
or lead above the reference levels in EC Directive
2006/66. If batteries are not properly disposed of, these
substances can cause harm to human health or the
environment.
To protect natural resources and to promote material
reuse, please separate batteries from other types of
waste and recycle them through your local, free battery
return system.
vi
Correct Disposal of This Product
(Waste Electrical & Electronic
Equipment)
(Applicable in the European Union
and other European countries with
separate collection systems)
This marking shown on the product
or its literature, indicates that it
should not be disposed with other
household wastes at the end of its working life. To
prevent possible harm to the environment or human
health from uncontrolled waste disposal, please separate
this from other types of wastes and recycle it responsibly
to promote the sustainable reuse of material resources.
Household users should contact either the retailer where
they purchased this product, or their local government
office, for details of where and how they can take this
item for environmentally safe recycling. Business users
should contact their supplier and check the terms and
conditions of the purchase contract. This product should
not be mixed with other commercial wastes for disposal.
Notes regarding trademarks
• All the trade names and registered
trademarks mentioned in this manual or
other documentation provided with your
Samsung product are trademarks or
registered trademarks of their respective
holders.
• The SD logo is a trademark. The SDHC
logo is a trademark.
• Microsoft®, Windows®, Windows Vista
® and DirectX® are either registered
trademarks or trademarks of the Microsoft
Corporation in the United States and/or
other countries.
• Intel®, Core™, and Pentium® are the
registered trademarks or trademarks of
the Intel Corporation in the United States
and other countries.
• Macintosh, Mac OS are either registered
trademarks or trademarks of Apple Inc. in
the United States and/or other countries.
• YouTube is a trademark of Google Inc.
• Flickr™ is a trademark of Yahoo.
• Facebook is a trademark of Facebook Inc.
• HDMI, the HDMI logo and High-Definition
Multimedia Interface are trademarks or
registered trademarks of HDMI Licensing
LLC.
• Adobe, the Adobe logo, and Adobe
Acrobat are either registered trademarks
or trademarks of Adobe Systems
Incorporated in the United States and/or
other countries.
• All the other product names mentioned
here in may be the trademark or registered
trademarks of their respect companies.
Furthermore, “TM” and “®” are not
mentioned in each case in this manual.
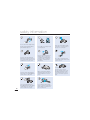
safety information
The safety precautions illustrated below are to prevent personal injury or material damages.
Heed all instructions carefully.
WARNING
Prohibited action.
Do not touch the product.
Do not disassemble the
product.
This precaution must be kept.
Means that there is a potential
risk of serious personal injury.
CAUTION
Means that there is a potential
risk of personal injury or
damage to the product
Unplug from the power supply.
W
W
4
4
WARNING
W
4
W
4
Do not allow water or metal and
inflammable matter to enter the
camcorder or AC power adaptor.
Doing so may pose a fire hazard.
W
4
OI
L
Do not overload outlets or
extension cords as this may
result in abnormal heat or fire.
Using the camcorder at
temperatures over 60Ⳅ(140ⳅ)
may result in fire. Keeping the
battery at a high temperature
may cause an explosion.
W
SAND
4
No sand or dust! Fine sand or
dust entering the camcorder or
AC power adaptor could cause
malfunctions or defects.
No oil! Oil entering the camcorder
or AC power adaptor could cause
electric shock, malfunctions or
defects.
Do not aim the camcorder directly
into the sun. Doing so could cause
eye injuries, as well as lead to
malfunctioning of internal parts of
the product.
Do not bend the powercord
or damage the AC power
adaptor by pressing on it with a
heavy object. There may be a risk
of fire or electric shock.
Do not disconnect the AC adaptor
by pulling on its power-cord, as this
could damage the power-cord.
Do not use the AC adaptor if it has
damaged, split or broken cords or
wires. Doing so may cause fire or
electric shock.
vii
safety information
ng
ani
cle
Do not dispose of battery in a fire
as it may explode.
Never use cleaning fluid or similar
chemicals. Do not spray cleaners
directly on the camcorder.
Keep the used lithium battery or
memory card out of the reach
of children. If the lithium battery
or memory card is swallowed
by children, consult physician
immediately.
Do not plug or unplug the power
cord with wet hands. There is a risk
of electric shock.
W
4
Do not connect the AC adaptor unless
the plug can be fully inserted with no
part of the blades exposed.
d
flui
W
4
W
4
Keep the camcorder away from
water when used near the beach or
pool or when it rains. There is a risk
of malfunction or electric shock.
W
4
When cleaning the AC adaptor,
unplug the power-cord. There is
a risk of malfunction or electric
shock.
W
4
Keep the power-cord unplugged
when not in use or during lightning
storms. There is a risk of fire.
W
4
viii
If the camcorder malfunctions,
immediately detach the AC adaptor
or battery from the camcorder.
There is a risk of fire or injury.
Do not attempt to disassemble,
repair, or reform the camcorder or
the AC adaptor to avoid a risk of
fire or electric shock.
If the camcorder makes an
abnormal sound, or smell or
smokes, unplug the power-cord
immediately and request service
from a Samsung service centre.
There is a risk of fire or personal
injury.
W
4
CAUTION
W
4
Do not drop or expose the camcorder,
battery, AC adaptor or other accessories
to severe vibrations or impact. This may
cause a malfunction or injury.
Do not use the camcorder on a
tripod (not supplied) in a place
where it is subject to severe
vibrations or impact.
Do not leave the camcorder in
a closed vehicle for a long time,
where the temperature is very high.
Do not expose the camcorder to
soot or steam. Thick soot or steam
could damage the camcorder case
or cause a malfunction.
W
4
Do not press the surface of the
LCD with force, or hit it with a sharp
object. If you push the LCD surface,
display unevenness may occur.
W
4
W
4
Do not use the camcorder
near direct sunlight or heating
equipment. This may cause a
malfunction or injury.
W
INSECT
ICIDE
4
Do not expose the camcorder to
insecticide. Insecticide entering the
camcorder could fail the product to
operate normally. Turn the camcorder
off and cover it with vinyl sheet, etc.
before using insecticide.
Do not expose the camcorder to sudden
changes in temperature or a humid place.
There is also a risk of defect or electric
shock when using outdoors during
lightning storms.
W
4
Do not use the camcorder near dense
exhaust gas generated by gasoline
or diesel engines, or corrosive gas
such as hydrogen sulphide. Doing so
may corrode the external or internal
terminals, disabling normal operation.
W
4
Do not place the camcorder with
the open LCD screen down
Do not wipe the camcorder
body with benzene or thinner.
The exterior coating could peel
off or the case surface could
deteriorate.
Do not leave the LCD screen open
when not using the camcorder.
ix
W
4
W
4
safety information
W
4
W
4
Do not use the camcorder near
TV or radio: This could cause
noise on the TV screen or to radio
broadcasts.
Do not use the camcorder near
strong radio waves or magnetism
such as speakers and a large
motor. Noise could enter video or
audio that are being recorded.
W
4
w
T
Do not hold the camcorder by the
LCD monitor when lifting it. The
LCD screen could detach and the
camcorder may fall.
w
T
W
W
4
Use Samsung-approved accessories
only. Using products from other
manufacturers may cause
overheating, fire, explosion, electric
shock or personal injuries caused by
abnormal operation.
W
4
Use the mains plug where it can be
readily operable. If any problem occurs
with the product, the mains plug must
be removed to disconnect power
completely. Turning off the power button
on the product does not completely
disconnect the power.
x
4
Place the camcorder on a stable
surface and a place with ventilation
openings.
Keep important data separately.
Samsung is not responsible for
data loss.
contents
07
You can record videos in H.264 format!
GETTING TO KNOW THE
CAMCORDER
11
12
14
8IBUTJODMVEFEXJUIZPVSDBNDPSEFS
Location of controls
Identifying the screen displays
11
16
GETTING STARTED
18
Using the battery
Checking the battery state
BASIC OPERATION OF THE
CAMCORDER
21
22
23
24
24
Turning your camcorder on/off
Switching to the power saving mode
Setting the operation modes
Using the display(
) button
Using the touch panel
25
Setting the time zone and date/time
for the first time
Selecting the languages
QUICK START GUIDE
07
21
25
FIRST TIME SETTINGS
GETTING READY TO START
RECORDING
27
26
27
28
29
31
32
32
33
Selecting the storage media
(HMX-H203/H204/H205 only)
Inserting / ejecting a memory card (not supplied)
Selecting a suitable memory card (not supplied)
Recordable time and capacity
Attaching the grip belt
Adjusting the LCD screen
Basic camcorder positioning
3
contents
BASIC RECORDING
34
34
36
42
Recording videos
Capturing photos during video
recording (dual recording)
Recording photos
Recording with ease for beginners
(Smart Auto)
Capturing photos while playing back
videos
Zooming
Setting the anti-shake
(OIS: Optical Image Stabiliser)
Using back light compensation mode
43
44
46
47
48
Changing the playback mode
Playing back videos
Viewing photos
Viewing a slide show
Zooming during photo playback
49
50
52
53
54
54
55
55
56
58
59
59
60
61
62
63
63
64
64
65
66
68
69
Handling menus and quick menus
Menu items
Quick menu items
Scene
Video Resolution
Video Quality
Photo Resolution
Photo Sharpness
White Balance
Aperture
Shutter
EV
Focus
Digital Effect
Fader
Tele Macro
Cont. Shot
Wind Cut
Digital Zoom
Self Timer
Time Lapse REC
Quick View
Guideline
37
38
39
40
41
BASIC PLAYBACK
43
49
ADVANCED RECORDING
4
70
71
72
73
73
Play Option
Highlight
VIEW
Story-Board Print
File Info
SYSTEM SETTING
74
74
74
75
76
76
77
77
78
78
79
79
80
80
81
82
83
84
84
85
86
87
87
88
88
89
Storage Type (HMX-H203/H204/H205 only)
Storage Info (HMX-H203/H204/H205 only)
Card Info (HMX-H200/H220 only)
Format
File No.
Time Zone
Date/Time Set
Date Type
Time Type
Date/Time Display
LCD Brightness
Auto LCD Off
Beep Sound
Shutter Sound
Auto Power Off
Quick On STBY
PC Software
USB Connect
HDMI TV Out
Analogue TV Out
TV Connect Guide
TV Display
Default Set
Language
Demo
Anynet+ (HDMI-CEC)
EDITING VIDEO CLIPS
90
91
Dividing a video
Combining videos
92
93
94
95
Playlist
Creating the playlist
Arranging videos in the playlist
Deleting videos from the playlist.
ADVANCED PLAYBACK
70
74
90
92
EDITING THE PLAYLIST
5
contents
FILE MANAGEMENT
96
99
102
107
PRINTING PHOTOS
CONNECTING TO A TV
DUBBING VIDEOS
USING WITH A WINDOWS
COMPUTER
108
TROUBLESHOOTING
MAINTENANCE &
ADDITIONAL INFORMATION
SPECIFICATIONS
97
98
Protection from accidental erasure
Deleting files
Copying files (HMX-H203/H204/H205 only)
99
DPOF printing setting
100 Direct printing with a pictbridge printer
102 Connecting to a high definition TV
104 Connecting to a regular TV
106 Viewing on a TV screen
107 Dubbing to a VCR or DVD/HDD recorder
108 Checking your computer type
109 What you can do with a windows
computer
110 Using the Intelli-studio programme
115 Using as a removable storage device
117 Warning indicators and messages
121 Symptoms and solutions
128 Maintenance
129 Additional information
130 Using your camcorder abroad
131 Specifications
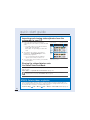
quick start guide
This quick start guide introduces the basic operation and features of your camcorder. See the
reference pages for more information.
:PVDBOSFDPSEWJEFPTJO)GPSNBU
You can record videos in H.264 format that is convenient to email and share with your friends and
family. You can also take photos with your camcorder.
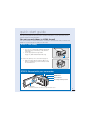
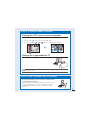
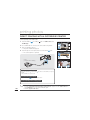
STEP1: Get ready
1. Insert a memory card.
t :PVDBOVTFDPNNFSDJBMMZBWBJMBCMF4%)$4%
High Capacity) or SD memory cards with this
camcorder.
t Set the appropriate storage media.
page 27 (HMX-H203/H204/H205 only)
Label pasting portion
2. Attach the battery to the camcorder. page 16
t Align the battery with the indicator (▲) on the
battery compartment, push the battery toward
the arrow direction.
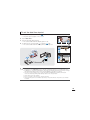
STEP2: Record with your camcorder
Zoom lever
PHOTO button
MODE button
Mode indicator
Recording start/stop button
LCD screen
Your camcorder turns on when you open the LCD screen.
7
quick start guide
Recording videos with
HD (high definition)
image quality
Your camcorder uses advanced H.264
compression technology to realise the
clearest video quality. page 54
1. Open the LCD screen.
t :PVSDBNDPSEFSUVSOTPOXIFO
you open the LCD screen.
Recording photos
1. Open the LCD screen.
2. Press the PHOTO button lightly to
adjust the focus, then press it fully (a
shutter click sounds).
2. Press the Recording start/stop
button.
t 5PTUPQSFDPSEJOHQSFTTUIF
Recording start/stop button.
00:00:00
[307Min]
MENU
Tip Using ‘Quick On STBY’ by opening/closing the LCD screen. page 82
When you close the LCD screen during standby, your camcorder goes to Quick On STBY
mode (power saving mode). You can start recording quickly when you open the LCD screen.
t :PVSDBNDPSEFSJTDPNQBUJCMFXJUI)GPSNBUi[HD]1080/50i” which provides highly
detailed, beautiful images.
t 5IFEFGBVMUTFUUJOHJTi[HD]1080/50i”. You can also record with SD (standard definition)
video quality.
t :PVDBOBMTPUBLFQIPUPTXIJMFSFDPSEJOHWJEFPTpage 36
8
STEP3: Play back videos or photos
Viewing the LCD screen of your camcorder
You can find your desired recordings quickly by using the thumbnail index view.
1. Touch the Play (
) tab on the screen in STBY mode.
2. Touch the thumbnail (
STBY 00:00:00
HD
/
SD
/
) tab, then touch the desired image.
[307Min]
HD
SD
9999
3/3
MENU
MENU
Viewing on a high definition TV
t :PVDBOFOKPZ)%IJHIEFmOJUJPO
WJEFPTpages 102~103
You can also play back videos on a SD (standard definition) image quality TV.
pages 104~105
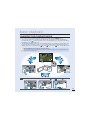
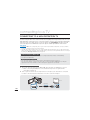
STEP4: Save recorded videos or photos
Simple and fun! Enjoy the various features of Intelli-studio
POZPVS8JOEPXTDPNQVUFS
Using the Intelli-studio programme built in your camcorder, you
can import videos/photos onto your computer, edit or share
the videos/photos with your friends. For details, see pages
110~114.
9
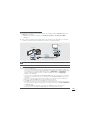
quick start guide
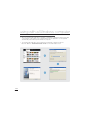
Importing and viewing videos/photos from the
camcorder to your PC
1. Launch the Intelli-studio programme by
connecting the camcorder to your PC via USB
cable.
t "OFXmMFTBWJOHTDSFFOBQQFBSTXJUIUIF
Intelli-studio main window.
Click “Yes”, the uploading procedure will
start.
Contents Manager
Saved files into your PC
2. The new files are saved to your PC and
registered to “Contents Manager” on the
Intelli-studio programme.
t :PVDBOBSSBOHFUIFmMFTCZEJGGFSFOU
options such as Date, Location, etc.
3. You can double-click on the file you would like
to start playback.
Folders directory on your PC
Sharing the videos/photos onto
YouTube/Flickr/FaceBook
Share your contents with the world, by uploading videos and photos directly to web site
with one click.
Click “Share” i6QMPBEwUBCPOUIFCSPXTFSpage 113
The Intelli-studio runs automatically once the camcorder is connected to a Windows
computer (when you specify “PC Software: On”). page 83
STEP5: Delete videos or photos
If the storage media is full, you cannot record new videos or photos. Delete videos or
photos data that has been saved on a computer from the storage media. Then you can
record new videos or photos on newly freed up space.
Touch the Play (
10
) tab Menu (
) tab i%FMFUFwPOUIF-$%TDSFFO page 97
getting to know the camcorder
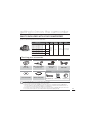
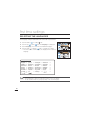
WHAT'S INCLUDED WITH YOUR CAMCORDER
Your new camcorder comes with the following accessories. If any of these items is missing from
ZPVSCPYDBMM4BNTVOHT$VTUPNFS$BSF$FOUSF
Model name
HMX-H200BP/HMX-H200SP
HMX-H200LP/HMX-H200RP
HMX-H220BP/HMX-H220SP
HMX-H220LP/HMX-H220RP
HMX-H203BP/HMX-H203SP
HMX-H203LP/HMX-H203RP
HMX-H204BP/HMX-H204SP
HMX-H204LP/HMX-H204RP
HMX-H205BP/HMX-H205SP
HMX-H205LP/HMX-H205RP
Internal
memory
Colour
Memory
card slot
LCD
screen
Lens
Black/
Silver/
Blue/
Red
1 slot
Colour /
Touch panel
20x (Optical)
200x (Digital)
-
8GB
16GB
32GB
t "MUIPVHITPNFGFBUVSFTPGUIFNPEFMTBSFEJGGFSFOUUIFZPQFSBUFJOUIFTBNFXBZ
Battery
AC power adaptor
(IA-BP210E)
(AA-MA9 type)
DI
AU
O
Checking your accessories
Component/
AV cable
USB cable
Optional accessories
User manual CD
Quick start guide
Mini HDMI cable
Memory card
Carrying case
t 5IFFYBDUBQQFBSBODFPGFBDIJUFNNBZWBSZCZNPEFM
t 5IFDPOUFOUTNBZWBSZEFQFOEJOHPOUIFTBMFTSFHJPO
t 1BSUTBOEBDDFTTPSJFTBSFBWBJMBCMFGPSQVSDIBTFBUZPVSMPDBM4BNTVOHEFBMFS4".46/(JT
not responsible for reduced battery life time or malfunctions caused by any unauthorised use of
accessories such as the AC power adaptor or the batteries.
t A memory card is not included. See page 29 for memory cards compatible with your camcorder.
t :PVSDBNDPSEFSJODMVEFTUIFVTFSNBOVBM$%BOERVJDLTUBSUHVJEFQSJOUFE
11
getting to know the camcorder
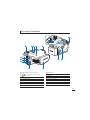
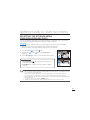
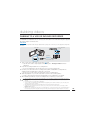
LOCATION OF CONTROLS
Front/Left
Lens
Lens open/close switch
Q.MENU button
Zoom (W/T) button
Recording start/stop button
TFT LCD screen (Touch screen)
Jack cover (
)
Component/AV jack
HDMI jack
USB jack
Power ( ) button
Display ( ) button
Backlight ( ) button
Anti-shake (OIS) ( ) button
SMART AUTO / VIEW button
During a recording, be careful not to block the internal microphone and lens.
12
Rear/Right/Top/Bottom
MODE button / Mode indicator
: Record mode (Video/Photo)
: Play mode
Zoom (W/T) lever
PHOTO button
Built-in speaker
Internal microphone
Recording start/stop button
Charging (CHG) indicator
DC IN jack
Jack cover
Grip belt
Battery release switch
Tripod receptacle
Memory card slot
Memory card cover
Grip belt hook
13
getting to know the camcorder
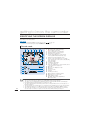
IDENTIFYING THE SCREEN DISPLAYS
The available functions vary depending on the selected operation mode, and different indicators appear
depending on the setting values.
PRECHECK!
t This On Screen Display (OSD) is shown in the record (
) mode only.
t Select the record mode by pressing the MODE button. page 23
Record mode
1
2
3
STBY
00:00:00
b
4
1Sec/24Hr
5
[307Min]
8
9999
9
a
0
)
(
F3.5
*
- 0.3
!
Card Full !
@
01/JAN/2010 00:00
&
^
%
MENU
$ #
1
6
b
2
)
$
(
S.1/50
t
t
t
t
t
14
1
2
6 7
3
4
5
7
8
9
10
11
12
13
14
15
17
18
19
20
21
22
Record mode (Video/Photo)
Operating status (STBY (standby) /
(recording)) / Self Timer*
Time counter (video recording time)
Warning indicators and messages
Remaining recordable time
Storage media (Memory card or internal
memory (HMX-H203/H204/H205 only))
Battery info.(remaining battery level)
Image counter (total number of recordable
photo images), Photo Resolution, Video Quality,
Video Resolution
Anti-shake (OIS)
Tele Macro*, Back light
Cont. Shot, Wind cut
Analogue TV Out (when component/AV cable is
connected), Photo sharpness
Menu tab
Optical zoom / Digital zoom bar
Date/Time
Time Zone (visit)
Play tab
EV (Exposure Value)*
Manual aperture* / Manual shutter*
Manual focus* / Touch Point*
White Balance, Fader*
SCENE / Smart Auto, Digital Effect,
Time Lapse REC*
'VODUJPOTNBSLFEXJUIXJMMOPUCFSFUBJOFEXIFOUIFDBNDPSEFSJTQPXFSFECBDLPO
5IFPOTDSFFOJOEJDBUPSTBSFCBTFEPOBO(#4%)$NFNPSZDBSEDBQBDJUZ
5IFBCPWFTDSFFOJTJMMVTUSBUFEGPSFYQMBOBUJPOQVSQPTFTBOENBZEJGGFSGSPNUIFBDUVBMEJTQMBZ
'PSXBSOJOHJOEJDBUPSTBOENFTTBHFTTFFQBHFT_
5IFBCPWFJMMVTUSBUFEJUFNTBOEUIFJSQPTJUJPOTDBOCFDIBOHFEXJUIPVUOPUJDFGPSUIFQVSQPTFPG
better performance.
t 5IFUPUBMOVNCFSPGSFDPSEBCMFQIPUPTJTDPVOUFECBTFEPOBWBJMBCMFTQBDFPOUIFTUPSBHFNFEJB
t The maximum number of recordable photo images on the On Screen Display (OSD) is “9999.”
t This camcorder provides one record mode which combines the video and photo record modes.
You can easily record videos or photos in the same mode without having to change it.
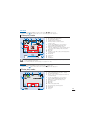
PRECHECK!
t This On Screen Display (OSD) is shown in video play ( HD / SD ) mode only.
) tab on the LCD screen to select the play mode. page 23
t Select the Play (
Video play mode
1 23
%
4
5
6 7
00:00:05/00:00:50
100_0001
$
01/JAN/2010 00:00
#
8
9
9
10
11
MENU
!
7
8
Card Full !
@
1
2
3
4
5
0
6
15
5
12
13
14
15
Video play mode
Operating status (play/pause)
File name (file number)
Playback time/recorded time
Warning indicators and messages/
Volume control
Storage media (Memory card or internal
memory (HMX-H203/H204/H205 only))
Battery info.(remaining battery level)
Analogue TV Out (when component/AV cable is
connected), Video Quality, Video Resolution
Date/Time
Menu tab
Playback control tabs (skip/search/play/pause/
slow playback)
Return tab
Volume tab
Protect
Play Option
t 5IFQMBZCBDLDPOUSPMUBCTEJTBQQFBSBGFXTFDPOETBGUFSBWJEFPQMBZCBDL5PVDIBOZXIFSFPOUIF
screen to display them again.
t 'PSXBSOJOHJOEJDBUPSTBOENFTTBHFTTFFQBHFT_
PRECHECK!
t This On Screen Display (OSD) is shown in photo play ( ) mode only.
) tab on the LCD screen to select the play mode. page 23
t Select the Play (
Photo play mode
1 2
3
4
1
2
3
4
5 6
1/10
$
#
7
100-0001
01
01/JAN/2010 00:00
8
MENU
@
2
!
X1.1
0
9
5
5
7
8
9
10
11
12
13
14
Photo play mode
Slide show/Playback zoom (X1.1 ~ X8.0)
File name (file number)
Image counter (current image/total number of
recorded images)
Storage media (Memory card or internal
memory (HMX-H203/H204/H205 only))
Battery info. (remaining battery level)
Photo Resolution
Date/time
Menu tab
Slide show playback tab
Previous image, Next image tab
Return tab
Print Mark
Protect
15
getting started
USING THE BATTERY
Purchase extra battries to allow continuous use of your camcorder.
Attaching the battery
Align the battery with the indicator (▲) on
the battery compartment, push the battery
toward the arrow direction.
Detaching the battery
Slide the Battery release switch and pull out
the battery.
t (FOUMZTMJEFUIFBattery release switch in
the direction as shown in the figure.
t 6TFPOMZ4BNTVOHBQQSPWFECBUUFSJFT%POPUVTFCBUUFSJFTGSPNPUIFSNBOVGBDUVSFST0UIFSXJTF
there is a danger of overheating, fire or explosion.
t 4BNTVOHJTOPUSFTQPOTJCMFGPSQSPCMFNTPDDVSSJOHEVFUPVTJOHVOBQQSPWFECBUUFSJFT
t %FUBDIUIFCBUUFSZGSPNUIFDBNDPSEFSXJUIDBSFQSFWFOUJOHGSPNGBMMJOHJU
Charging the battery with the AC power adaptor
PRECHECK!
Before starting the following procedure, make sure that the battery is attached in your camcorder.
1. Press the Power (
page 21
) button to turn off the camcorder and then close the LCD screen.
2. Open the jack cover and connect the AC power adaptor to the DC IN jack.
3. Connect the AC power adaptor to a wall socket.
t 5IFDIBSHJOH$)(
JOEJDBUPSMJHIUTVQBOEDIBSHJOHTUBSUT"GUFSUIFCBUUFSZJTGVMMZ
charged, the charging (CHG) indicator turns green.
t 5IFCBUUFSZJTOPUDIBSHFEEVSJOHUIFQPXFSTBWJOHNPEFXIJDINBZLFFQUIFNPEFJOEJDBUPSPO
or flashing. Start charging the battery after turning off the camcorder by pressing the Power ( )
button.
t *UJTSFDPNNFOEFEZPVUPIBWFPOFPSNPSFBEEJUJPOBMCBUUFSJFTUPBMMPXDPOUJOVPVTVTFPGZPVS
camcorder.
17
getting started
CHECKING THE BATTERY STATE
You can check the charging state and remaining battery capacity.
To check the charging state
The colour of the LED indicates the power or
charging state.
Charging (CHG) indicator
The colour of the charging indicator shows the charging state.
Charge
Charging state
LED colour
Fully discharged
Charging
Fully charged
Error
(Red)
(Orange)
(Green)
(Red blink)
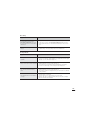
Battery level display
The battery level display shows the amount of battery power remaining in the battery.
Battery level
indicator
18
-
State
Message
Fully charged
-
25~50% used
-
50~75% used
-
75~95% used
-
95~98% used
-
Exhausted (flickers):
The device will soon turn off.
Change the battery as soon as possible.
-
The device will be forced to turn off
after 3 seconds.
“Low
Battery”
STBY 00:00:00
[307Min]
9999
MENU
t "CPWFmHVSFTBSFCBTFEPOBGVMMZDIBSHFECBUUFSZBUBOPSNBMUFNQFSBUVSF
Low ambient temperature may affect the use time.
t #BUUFSZDBQBDJUZEFDSFBTFTPWFSUJNFBOEUISPVHISFQFBUFEVTF,FFQUIFDBNDPSEFSUVSOFEPGG
while not operating it.
t 4UPSFUIFCBUUFSZTFQBSBUFMZXIFOmOJTIFEDIBSHJOHPSXIFOOPUVTJOHJUGPSBMPOHUJNF5IJTXJMM
help extend the life of the battery.
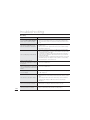
Available running time for the battery
Battery type
IA-BP210E
Charging time
Approx. 180min.
Video resolution
HD
SD
Continuous recording time
Approx. 120min.
Approx. 130min.
Playback time
Approx. 160min.
Approx. 180min.
(Unit: minutes.)
t $IBSHJOHUJNF"QQSPYJNBUFUJNFNJO
SFRVJSFEXIFOZPVGVMMZDIBSHFBDPNQMFUFMZ
exhausted battery.
t 3FDPSEJOH1MBZCBDLUJNF"QQSPYJNBUFUJNFNJO
BWBJMBCMFXIFOZPVGVMMZDIBSHFEUIFCBUUFSZ
A)%TUBOETGPSIJHIEFmOJUJPOJNBHFRVBMJUZBOEA4%TUBOETGPSTUBOEBSEJNBHFRVBMJUZ
About battery
t 5IFCBUUFSZTIPVMECFSFDIBSHFEJOBOFOWJSPONFOUUIBUJTCFUXFFO¡'¡$
BOE¡'
¡$
)PXFWFSXIFOJUJTFYQPTFEUPDPMEUFNQFSBUVSFTCFMPX¡'¡$
JUTVTBHFUJNF
reduces and it may cease to function. If this happens, place the battery in your pocket or
other warm, protected place for a short time, then re-attach it.
t %POPUQVUUIFCBUUFSZOFBSBOZIFBUTPVSDFJFmSFPSBIFBUFS
t %POPUEJTBTTFNCMFBQQMZQSFTTVSFUPPSIFBUUIFCBUUFSZ
t %POPUBMMPXCBUUFSZUFSNJOBMTUPCFTIPSUDJSDVJUFE*UNBZDBVTFMFBLBHFHFOFSBUFIFBUPS
cause fire.
Maintaining the battery
t 5IFSFDPSEJOHUJNFJTBGGFDUFECZUFNQFSBUVSFBOEFOWJSPONFOUBMDPOEJUJPOT
t 8FSFDPNNFOEPOMZVTJOHUIFPSJHJOBMCBUUFSZUIBUJTBWBJMBCMFGSPNZPVS4BNTVOHSFUBJMFS8IFO
the battery reaches the end of its life, please contact your local dealer. The batteries have to be
dealt with as chemical waste.
t .BLFTVSFUIBUUIFCBUUFSZJTGVMMZDIBSHFECFGPSFTUBSUJOHUPSFDPSE
t 5PQSFTFSWFCBUUFSZQPXFSLFFQZPVSDBNDPSEFSUVSOFEPGGXIFOZPVBSFOPUPQFSBUJOHJU
t &WFOXIFOUIFQPXFSJTTXJUDIFEPGGUIFCBUUFSZXJMMTUJMMEJTDIBSHFJGJUJTMFGUBUUBDIPOUIF
camcorder. It is recommended that you remove the battery from the camcorder.
t *GUIFCBUUFSZJTOPUVTFEGPSBMPOHUJNFGVMMZDIBSHFUIFCBUUFSZBOEVTFJUVQPOZPVSDBNDPSEFS
once per 6 months to maintain proper function. To store the battery, remove it from your
camcorder and put it in a dry, cool place.
19
getting started
About the battery life
t #BUUFSZDBQBDJUZEFDSFBTFTPWFSUJNFBOEUISPVHISFQFBUFEVTF*GEFDSFBTFEVTBHFUJNF
between charges becomes significant, it is probably time to replace it with a new one.
t &BDICBUUFSZTMJGFJTBGGFDUFECZTUPSBHFPQFSBUJOHBOEFOWJSPONFOUBMDPOEJUJPOT
About the running time
t 5JNFTNFBTVSFEXIFOVTJOHUIFDBNDPSEFSBU25˚C (77˚F). As the environmental
temperature and conditions vary, the actual battery time may differ form the approximate
times given in the table.
t 5IFSFDPSEJOHBOEQMBZCBDLUJNFXJMMCFTIPSUFSEFQFOEJOHPOUIFDPOEJUJPOTVOEFSXIJDI
you use your camcorder. In actual recording, the battery may discharge 2-3 times faster
than this reference, since the Record start/stop and Zoom are being operated, and playback
is performed. Assume that the recordable time with a fully charged battery is between
1/2 and 1/3 of the time in the table, so have enough batterys to allow for the time you are
planning to record on the camcorder.
t 5IFSFDPSEJOHBOEQMBZCBDLUJNFXJMMCFTIPSUFSXIFOZPVVTFZPVSDBNDPSEFSJOMPX
temperatures.
On the battery
t 5IFDIBSHJOH$)(
JOEJDBUPSCMJOLTEVSJOHDIBSHJOHPSCBUUFSZ*OGPXJMMOPUCFDPSSFDUMZ
displayed under the following conditions:
- The battery is not attached correctly.
- The battery is damaged.
- The battery is worn-out. (For the battery information only)
Using an AC power source
It is recommended that you use the AC power adaptor to power the camcorder from a household
AC outlet when you perform settings on it, play back, or edit images, or use it indoors. Make the
same connections as you do when charging the battery. page 17
On the AC power adaptor
20
t 6TFBOFBSCZXBMMPVUMFUXIFOVTJOHUIF"$QPXFSBEBQUPS%JTDPOOFDUUIF"$QPXFSBEBQUPS
from the wall outlet immediately if any malfunction occurs while using your camcorder.
t %POPUVTFUIF"$QPXFSBEBQUPSQMBDFEJOBOBSSPXTQBDFTVDIBTCFUXFFOBXBMMBOE
furniture.
t %POPUTIPSUDJSDVJUUIF%$QMVHPGUIF"$QPXFSBEBQUPSPSCBUUFSZUFSNJOBMTXJUIBOZNFUBMMJD
objects. This may cause a malfunction.
t &WFOJGZPVSDBNDPSEFSJTUVSOFEPGG"$QPXFSJTTUJMMTVQQMJFEUPJUXIJMFDPOOFDUFEUPUIFXBMM
outlet via the AC power adaptor.
basic operation of the camcorder
This chapter introduces you to the basic operation procedures of this camcorder, such as turning
the power on/off, switching modes, and setting on-screen indicators.
TURNING YOUR CAMCORDER ON/OFF
1. Open the LCD screen to turn on the
camcorder.
t :PVSDBNDPSEFSUVSOTPOBVUPNBUJDBMMZ
when you open the LCD screen.
2. To turn off the camcorder, press the
Power ( ) button for about one second.
t $MPTJOHUIF-$%TDSFFOXJMMOPUUVSOPGG
the camcorder.
t 4FUUIFEBUFBOEUJNFXIFOVTJOHZPVS
camcorder for the first time. page 25
LCD screen
Power (
) button
t 5IFDBNDPSEFSPQFSBUFTUIFTFMGEJBHOPTJTGVODUJPOXIFOQPXFSFEPO*GBXBSOJOHNFTTBHF
BQQFBSTSFGFSUPAwarning indicators and messagesQBHFT_
BOEUBLFDPSSFDUJWFBDUJPO
t *GZPVDMPTFUIF-$%TDSFFOXIFOUIFQPXFSJTPOUIFQPXFSTBWJOHNPEFBDUJWBUFT
When using this camcorder for the first time
When you use your camcorder for the first time or reset it, the time zone screen appears for
the start-up display. Select your geographical location and set the date and time. page 25
If you do not set the date and time, the time zone screen appears every time you turn on the
camcorder.
21
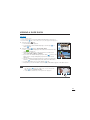
basic operation of the camcorder
SWITCHING TO THE POWER SAVING MODE
If you need to use camcorder for the extended time, the following functions enable you to prevent
unnecessary energy consumption.
Quick On STBY Mode in the STBY mode
t The camcorder switches to "Quick On STBY" mode when the LCD screen is closed. page 82
Sleep Mode in the play mode (includes the thumbnail index view)
t 5IFDBNDPSEFSTXJUDIFTUPUIFTMFFQNPEFXIFOUIF-$%TDSFFOJTDMPTFEBOEUIFOJGJEMF
for more than 20 minutes, the camcorder turns off. However, if “Auto Power Off: 5 Min” is
set, the camcorder turns off in 5 minutes.
t *GZPVPQFOUIF-$%TDSFFOPSDPOOFDUBDBCMFUPUIFDBNDPSEFSEVSJOHTMFFQNPEFUIF
sleep mode ends and returns back to the last used operation mode.
LCD screen is closed
HD
After 20 minutes
SD
3/3
<Sleep mode>
<Power off>
t The power saving mode does not work in the following situations:
- When the camcorder has a cable connection. (USB, Component/AV, or AC power adaptor, etc.)
- While recording, playback, or the slideshow is being operated.
- When the LCD screen is opened.
t 5IFDBNDPSEFSDPOTVNFTMFTTCBUUFSZQPXFSJOUIFQPXFSTBWJOHNPEF)PXFWFSJGZPVQMBOUPVTFUIF
camcorder for an extended time, it is recommended to turn off the camcorder by pressing the Power ( )
button when not using it.
22
SETTING THE OPERATION MODES
You can switch the operating mode in
the following order each time you press
the MODE button.
Record mode (
) ↕ Play mode ( ).
t &BDIUJNFUIFPQFSBUJPONPEF
changes, the respective mode
indicator lights on.
t 5PVDIJOHUIF1MBZ ) tab in the
record mode switches the operation
mode into the play mode.
MODE button
STBY
Mode
indicators
[307Min]
9999
MENU
Play tab
Mode
00:00:00
Mode indicators
Functions
Record mode
To record videos or photos.
Play mode
To play videos or photos, or edit them.
This camcorder provides one record mode which combines the video and photo record modes.
You can easily record videos or photos in the same mode without having to change it.
23
basic operation of the camcorder
USING THE DISPLAY(
) BUTTON
Switching the information display mode
You can switch the on-screen information display mode.
Press the Display(
CVUUPO
t 5IFGVMMBOENJOJNVNEJTQMBZNPEFTXJMMBMUFSOBUF
STBY 00:00:00
[307Min]
9999
MENU
<Full display mode>
STBY
<Minimum display mode>
t 5IF8BSOJOHJOEJDBUPSTBOENFTTBHFTNBZBQQFBSEFQFOEJOHPOUIFSFDPSEJOHDPOEJUJPOT
) button does not work in the menu or quick menu screen.
t The Display (
USING THE TOUCH PANEL
The touch panel allows you to enjoy
playback and recording with a simple
touch of your finger. Place your hand on
the rear side of the LCD screen to support
it. Then, touch the items displayed on the
screen.
Touch panel
STBY
00:00:00
[307Min]
9999
MENU
t %POPUQMBDFBQSPUFDUJWFmMNPOUIF
LCD screen.
t *GBmMNJTBQQMJFEGPSBMPOHXIJMF
strong cohesion on the surface of the
screen may cause a malfunction of
the touch panel.
24
t #FDBSFGVMOPUUPBDDJEFOUBMMZQSFTTUIFCVUUPOTOFBSUIF-$%QBOFMXIJMFVTJOHUIFUPVDIQBOFM
t 5IFUBCTBOEJOEJDBUPSTUIBUBQQFBSPOUIF-$%TDSFFOEFQFOEPOUIFDVSSFOUSFDPSEJOHQMBZCBDL
status of your camcorder.
first time settings
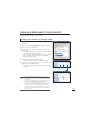
SETTING THE TIME ZONE AND DATE/TIME
FOR THE FIRST TIME
Set the date and time of your local area when turning on this camcorder for the first time.
1. Open the LCD screen to turn on the camcorder.
t :PVSDBNDPSEFSUVSOTPOBVUPNBUJDBMMZXIFOZPVPQFOUIF
LCD screen.
t 5IFUJNF[POFiHome”) screen appears based on Lisbon,
London (Greenwich Mean Time).
t :PVDBOBMTPTFUZPVSDVSSFOUUJNF[POFGSPNUIFiSetting”
menu. page 76
2. Select your local area on the map by touching the left (
( ) tab on the LCD screen, then press the ( ) tab.
t 5IFiDate/Time Set” screen appears.
Home
London, Lisbon
[GMT 00:00] 01/JAN/2010 00:00
OK
Date/Time Set
) or right
Day
01
Month
/
Hr
00
JAN
Year
/
2010
Min
:
00
3. Touch the date and time information, and change the setting
values by using the up ( ) or down ( ) tabs.
4. Make sure the clock is correctly set, then touch the (
t 5IFNFTTBHFiDate/Time Set” appears.
OK
Date/Time Set
) tab.
Year
Month
Date/Time Set
2009
01
Day
06
01/JAN/2010
00:00
Hr
Min
1/1
11
55
AM
OK
t 5IFZFBSDBOCFTFUVQUPCBTFEPOiHome” item.
t 4FUiDate/Time Display” to On. page 78
t "DUJWBUJOHUIF ) icon forwards the time by 1 hour.
Built-in rechargeable battery
t :PVSDBNDPSEFSJODMVEFTBCVJMUJOSFDIBSHFBCMFCBUUFSZUIBUSFUBJOTUIFEBUFBOEUJNFTFUUJOHTFWFO
after the power is turned off.
t 0ODFUIFCBUUFSZJTEFQMFUFEUIFQSFWJPVTEBUFUJNFWBMVFTBSFBMMSFTFUUPEFGBVMUTBOEZPVOFFEUP
recharge the built-in rechargeable battery. The date/time must be set again.
Charging the built-in rechargeable battery
t 5IFCVJMUJOCBUUFSZJTBMXBZTSFDIBSHFEXIJMFZPVSDBNDPSEFSJTDPOOFDUFEUPUIF"$QPXFSPSXIJMF
the battery is attached.
t *GUIFDBNDPSEFSJTOPUJOVTFGPSBCPVUXFFLTXJUIPVUDPOOFDUJOHUPUIF"$QPXFSPSBUUBDIJOHUIF
battery, the built-in battery fully discharges. If this occurs, charge the built-in battery by connecting to
the supplied AC adaptor for 24 hours.
25
first time settings
SELECTING THE LANGUAGES
You can select the language to display the menu screen or messages.
The language setting is retained when the camcorder is powered off.
1. Touch the Menu (
2. Touch the up (
) Setting ( ) tab.
)/down (
) tab until “Language” is displayed.
Default Set
Language
3. Touch “Language,” then touch the desired OSD language.
6/6
Demo
Anynet+ (HDMI-CEC)
4. Touch the Exit ( ) or Return ( ) tab to complete the setting.
t 5IFNFOVTDSFFOBOENFTTBHFTBSFEJTQMBZFEJOUIFTFMFDUFE
language.
Language
English
한국어
1/8
Français
Deutsch
Submenu items
“English” “Italiano” “Svenska” “Polski” “Română” “Hrvatski” “瀌煓铅” “
” “⦽ǎᨕ” “Español” “Suomi” “Čeština” “Български” “Українська” “ไทย”
“
”
“Français” “Português” “Norsk”
“Slovensky” “Ελληνικά” “Русский” “Türkçe” “Deutsch”
“Nederlands”
“Dansk”
“Magyar”
“Srpski”
“፩ၭ”
”
“
t iLanguage” options may be changed without prior notice.
t 4FMFDUFEMBOHVBHFJTSFUBJOFEFWFOXJUIPVUUIFCBUUFSZPS"$QPXFSBEBQUPS
t 5IFEBUFBOEUJNFGPSNBUNBZDIBOHFEFQFOEJOHPOUIFTFMFDUFEMBOHVBHF
getting ready to start recording
SELECTING THE STORAGE MEDIA
(HMX-H203/H204/H205 ONLY)
You can record videos and photos on the internal memory or a memory card, so you should
select the desired storage media before starting recording or playback.
PRECHECK!
t :PVDBOVTF4%PS4%)$DBSETPOZPVSDBNDPSEFS4PNFDBSETBSFOPUDPNQBUJCMF
depending on the memory card manufacturer and memory card type.)
t #FGPSFJOTFSUJOHPSFKFDUJOHUIFNFNPSZDBSEUVSOUIFDBNDPSEFSPGG
1. Touch the Menu (
2. Touch the up (
displayed.
) Setting ( ) tab.
)/down (
) tab until “Storage Type” is
Storage Type
Storage Info
1/ 7
3. Touch “Storage Type,” then touch the desired storage media.
Submenu items
t Internal Memory ( ): When using the internal memory
(SSD, Solid State Drive).
t Card ( ): When using the memory card (SD or SDHC
card).
Format
File No.
Storage Type
Internal Memory
Card
1/1
t %POPUGPSNBUUIFTUPSBHFNFEJBJOUFSOBMNFNPSZPSNFNPSZDBSE
POB1$
t 8IFOZPVJOTFSUBNFNPSZDBSEUIFTUPSBHFNFEJBTFUVQTDSFFOBQQFBST5PVDIiYes” if you want
to use a memory card, or “No” if not.
t %POPUSFNPWFUIFQPXFSCBUUFSZPS"$QPXFSBEBQUPS
XIFOBDDFTTJOHTUPSBHFNFEJBGPS
recording, playback, format, delete, etc. The storage media and its data may be damaged.
t %POPUFKFDUBNFNPSZDBSEXIJMFJUJTCFJOHVTFEJOUIFDBNDPSEFS5IFNFNPSZDBSEBOEJUTEBUB
may be damaged.
t :PVDBOBMTPBDDFTTJUCZVTJOHUIF2.&/6 button.
t 44%CBTFEPOnBTINFNPSZIBTCFFOBEPQUFEBTJOUFSOBMNFNPSZGPSUIFDBNDPSEFS
27
getting ready to start recording
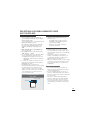
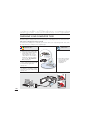
INSERTING / EJECTING A MEMORY CARD
(NOT SUPPLIED)
Label pasting portion
To insert a memory card
To eject a memory card
1. Open the memory card cover.
1. Open the memory card cover.
2. Insert the memory card into the card slot
until it softly clicks.
t .BLFTVSFUIBU4%4%)$DBSEMPHPJT
facing up and the camcorder is placed
as shown in the figure.
2. Gently push the memory card to eject it.
3. Close the memory card cover.
3. Close the memory card cover.
t 5PBWPJEUIFEBUBMPTTUVSOPGGUIFDBNDPSEFSCZQSFTTJOHUIFPower ( ) button for one second
before inserting or ejecting the memory card.
t #FDBSFGVMOPUUPQVTIUIFNFNPSZDBSEUPPIBSE5IFNFNPSZDBSENBZTVEEFOMZQPQPVU
28
Your camcorder supports only SD (Secure Digital) and SDHC (Secure Digital High Capacity) cards.
The compatibility with the camcorder may vary depending on manufacturers and types of the memory
cards.
SELECTING A SUITABLE MEMORY CARD
(NOT SUPPLIED)
Compatible memory cards
t 5IJTDBNDPSEFSDBOCFVTFEXJUI4%
(Secure Digital) and SDHC (Secure Digital
High Capacity) cards.
It is recommended to use an SDHC (Secure
Digital High Capacity) card.
SD cards up to 2GB are supported with
this camcorder. Normal operation is not
guaranteed with SD cards bigger than
2GB.
t ..$.VMUJ.FEJB$BSE
BOE..$1MVT
are not supported.
t $PNQBUJCMFNFNPSZDBSEDBQBDJUZ4%_
2GB, SDHC 4 ~ 32GB
t Use compatible memory card brands. Others
are not guaranteed to work. Check the
compatibility when buying a memory card.
- SDHC/SD cards: Panasonic, SanDisk,
TOSHIBA
t 'PSWJEFPSFDPSEJOHVTFBNFNPSZDBSE
that supports faster write speeds (above
SDHC Class 6 card).
t 4%4%)$NFNPSZDBSETIBWFB
mechanical write-protection switch. Setting
the switch prevents accidental erasure
of files recorded on the card. To enable
writing, move the switch up in the direction
of the terminals.To set write protection,
move the switch down.
Usable memory card
(1GB~32GB)
Protection tab
Terminals
<SD/SDHC>
SDHC (Secure Digital High Capacity) cards
t 4%)$4FDVSF%JHJUBM)JHI$BQBDJUZ
memory card
- An SDHC card is a higher version
(Ver.2.00) of SD card and supports
capacity above 2GB.
- Cannot be used with current SD
enabled host devices.
Common cautions for memory cards
t %BNBHFEEBUBNBZOPUCFSFDPWFSFE*U
is recommended you make a back-up of
important data separately on the hard disk
of your PC.
t 5VSOJOHUIFQPXFSPGGPSSFNPWJOHB
memory card during an operation such
as formatting, deleting, recording, and
playback may cause data loss.
t "GUFSZPVNPEJGZUIFOBNFPGBmMFPSGPMEFS
stored in the memory card using your PC,
your camcorder may not recognise the
modified file.
Handling a memory card
t *UJTSFDPNNFOEFEUIBUZPVQPXFSPGG
before inserting or removing the memory
card to avoid data loss.
t *UJTOPUHVBSBOUFFEUIBUZPVDBOVTFB
memory card formatted by other devices.
Be sure to format your memory card using
this camcorder.
t :PVIBWFUPGPSNBUOFXMZQVSDIBTFE
memory cards, memory cards with data
that your camcorder cannot recognise
or are saved by other devices. Note that
formatting erases all data on the memory
card.
29
getting ready to start recording
t *GZPVDBOOPUVTFBNFNPSZDBSEUIBUIBT
been used with another device, format it
with your camcorder. Note that formatting
erases all information on the memory card.
t "NFNPSZDBSEIBTBDFSUBJOMJGFTQBO*G
you cannot record new data, you have to
purchase a new memory card.
t %POPUCFOEESPQPSDBVTFTUSPOHJNQBDU
to the card.
t %POPUQMBDFGPSFJHOTVCTUBODFTPOUIF
memory card terminals. Use a soft dry
cloth to clean the terminals if required.
t %POPUQBTUFBOZUIJOHPUIFSUIBOMBCFM
provided with the card on the label pasting
section.
t #FDBSFGVMUPLFFQUIFNFNPSZDBSEPVUPG
the reach of children, who might swallow
it.
Notes on use
t 4BNTVOHJTOPUSFTQPOTJCMFGPSEBUBMPTT
due to misuse.
t 8FSFDPNNFOEVTJOHBNFNPSZDBSE
case to avoid losing data from moving and
static electricity.
t "GUFSBQFSJPEPGVTFUIFNFNPSZDBSE
may get warm. This is normal and is not a
malfunction.
30
The camcorder supports SD and
SDHC memory cards for data storage
preference!
The data storage speed may differ,
according to the manufacturer and
production system.
t 4-$TJOHMFMFWFMDFMM
TZTUFNGBTUFS
write speed enabled.
t .-$NVMUJMFWFMDFMM
TZTUFNPOMZ
lower write speed is supported.
For best results, we recommend using a
memory card that supports faster write
speed.
Using a lower write speed memory card
for recording video may cause difficulties
when storing.
You may even lose your video data during
the recording.
In an attempt to preserve any bit of the
recorded video, the camcorder forcibly
stores the video on the memory card and
displays a warning:
i-PXTQFFEDBSE1MFBTFSFDPSEBUB
MPXFSSFTPMVUJPOw
If you are unavoidably using a low speed
memory card, resolution and quality of
the recording may be lower than the set
value. page 54
The higher the resolution and quality, the
more memory will be used.
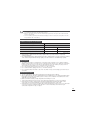
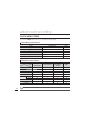
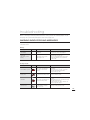
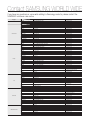
RECORDABLE TIME AND CAPACITY
Recordable time available for video
Resolution
Quality
Super Fine
Storage media (Capacity)
1GB
2GB
4GB
8GB
(#
32GB
8min
15min
30min
61min
125min
253min
Fine*
9min
18min
36min
74min
152min
307min
Normal
12min
23min
46min
94min
193min
390min
Super Fine
11min
21min
42min
86min
177min
357min
Fine*
14min
28min
57min
115min
235min
475min
Normal
21min
42min
84min
171min
351min
708min
Super Fine
32min
63min
126min
254min
521min
1051min
Fine*
42min
83min
166min
336min
688min
1387min
Normal
62min
123min
244min
494min
1011min
2039min
[HD]1080/50i*
[HD]720/50p
[SD]576/50p
(Unit: Approximate minutes of recording)
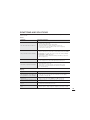
Recordable number of photos
Photo resolution
Storage media (Capacity)
1GB
2GB
4GB
8GB
(#
32GB
2880x1620*
656
1251
2482
5014
9999
9999
1920x1080
1173
2346
4654
9402
9999
9999
(Unit: Approximate number of images)
1GB ⴊ 1,000,000,000 bytes : actual formatted capacity may be less as the internal firmware
uses a portion of the memory.
t
t
t
t
t
t
t
t
t
5IFmHVSFTJOUIFUBCMFNBZEJGGFSEFQFOEJOHPOUIFBDUVBMSFDPSEJOHDPOEJUJPOTBOETVCKFDU
5IFIJHIFSUIFRVBMJUZBOESFTPMVUJPOUIFNPSFNFNPSZJTVTFE
-PXFSSFTPMVUJPOBOERVBMJUZJODSFBTFTUIFSFDPSEJOHUJNFCVUUIFJNBHFRVBMJUZNBZTVGGFS
5IFCJUSBUFBVUPNBUJDBMMZBEKVTUTUPUIFSFDPSEJOHJNBHF"DDPSEJOHMZUIFSFDPSEJOHUJNFNBZWBSZ
.FNPSZDBSETCJHHFSUIBO(#NBZOPUPQFSBUFOPSNBMMZ
8IFOBWJEFPmMFFYDFFET(#UIFOFYUWJEFPmMFJTDSFBUFEBVUPNBUJDBMMZ
5IFNBYJNVNOVNCFSPGSFDPSEBCMFQIPUPBOEWJEFPmMFTJTSFTQFDUJWFMZ
5IFBCPWFJUFNTNBSLFEXJUIJOEJDBUFUIFEFGBVMUTFUUJOH
The recording length of a Time Lapse REC may vary depending on settings.
31
getting ready to start recording
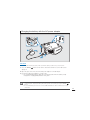
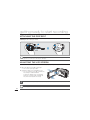
ATTACHING THE GRIP BELT
Adjust the length of grip belt so that the camcorder is stable when you press the Recording
start/stop button with your thumb.
Please note if the grip belt is adjusted too tight and you use excessive force to insert your hand, the
grip belt hook of the camcorder may be damaged.
ADJUSTING THE LCD SCREEN
The wide LCD screen on your camcorder offers high quality image viewing.
1. Open the LCD screen with your finger.
t 5IFTDSFFOPQFOTVQUP¡
2. Rotate the LCD screen towards the lens.
t :PVDBOSPUBUFJUVQUP¡UPXBSETUIF
MFOTBOEVQUP¡CBDLXBSE
To view recordings more conveniently,
SPUBUFUIFTDSFFOCZ¡UPXBSETUIF
lens, then fold it back to the body.
Excessive rotation may damage the connective hinge between the screen and the camcorder.
Clean fingerprints or dust on the screen with a soft cloth.
32
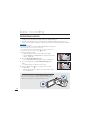
BASIC CAMCORDER POSITIONING
Use both hands while taking a video or photo to prevent the camcorder from shaking.
Try to avoid any slight movement while shooting.
Adjusting the shooting angle
Aim the camcorder as shown in the illustration.
1. Hold the camcorder with your both hands.
2. Hook up the grip belt to your hand.
3. Make sure your footing is stable and there
is no danger of colliding with another
person or object.
4. Aim and focus as shown in the illustration.
It is recommended to keep the sun behind you while shooting.
33
basic recording
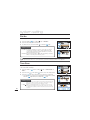
RECORDING VIDEOS
t 5IJTDBNDPSEFSTVQQPSUTCPUI)JHI%FmOJUJPO)%
BOE4UBOEBSE%FmOJUJPO4%
JNBHF
resolutions. Set your desired resolution before recording. page 54
t 5IJTDBNDPSEFSQSPWJEFTPOFSFDPSENPEFXIJDIDPNCJOFTUIFWJEFPBOEQIPUPSFDPSE
modes. You can easily record videos or photos in the same mode without having to change it.
PRECHECK!
t Insert a memory card.
t Set the appropriate storage media. (HMX-H203/H204/H205 only) page 27
t Open the LCD screen to turn on the camcorder.
t Your camcorder turns on automatically when you open the LCD screen.
t Set the Lens open/close switch to open ( ). page 12
1. Select a subject to record.
t "EKVTUUIF-$%QBOFMUPUIFCFTUBOHMFGPSSFDPSEJOH
t 6TFUIFZoom lever or Zoom button to adjust the size of the
subject. page 40
00:00:00
[307Min]
2. Press the Recording start/stop button.
t 5IFSFDPSEJOH) indicator appears, and recording starts.
3. To stop recording, press the Recording start/stop button
again.
t 5IF2VJDL7JFXJDPOBQQFBSTPOUIFTDSFFO
4. Touch the Quick View ( ) icon to view the most recently
recorded video.
t "GUFSUIF2VJDL7JFXJTDPNQMFUFZPVSDBNDPSEFSSFUVSOTUP
the standby mode.
Two recording start/stop buttons to suit your preference!
This camcorder features two Recording start/stop buttons.
One is on the rear side of the camcorder, the other is on the
LCD screen. Select the one that works best for you.
34
MENU
STBY 00:00:00
[307Min]
9999
MENU
t *GQPXFSJTJOUFSSVQUFEPSBOFSSPSPDDVSTEVSJOHSFDPSEJOHUIFWJEFPNBZOPUCFSFDPSEFEFEJUFE
t 4BNTVOHJTOPUSFTQPOTJCMFGPSBOZEBNBHFPDDVSSFECZBGBJMVSFPGOPSNBMSFDPSEJOHPSQMBZCBDL
operation because of memory card error.
t /PUFUIBUEBNBHFEEBUBDBOOPUCFSFDPWFSFE
t 7JEFPTBSFDPNQSFTTFEJOUIF).1&("7$
GPSNBU
t &KFDUUIFCBUUFSZXIFOZPVIBWFmOJTIFESFDPSEJOHUPQSFWFOUVOOFDFTTBSZCBUUFSZQPXFS
consumption.
t 'PSUIFPOTDSFFOJOGPSNBUJPOEJTQMBZTFFQBHF
t 'PSBQQSPYJNBUFSFDPSEJOHUJNFTFFQBHF
t 4PVOEJTSFDPSEFEGSPNUIFJOUFSOBMTUFSFPNJDSPQIPOFBUUIFUPQPGUIFMFOT.BLFTVSFUIBUUIF
microphone is not blocked.
t #FGPSFSFDPSEJOHBOJNQPSUBOUWJEFPNBLFTVSFUPUFTUUIFSFDPSEJOHGVODUJPOCZDIFDLJOHJGUIFSF
is any problem with the audio and video recording.
t 5IFCSJHIUOFTTPGUIF-$%TDSFFODBOCFBEKVTUFEJOUIFNFOVPQUJPOT"EKVTUJOHUIF-$%TDSFFO
does not affect the image being recorded. page 79
t 'PSWBSJPVTGVODUJPOTBWBJMBCMFEVSJOHSFDPSEJOHTFFi3FDPSEJOHNFOVJUFNTw pages 53~69
t %POPUUVSOPGGUIFDBNDPSEFSPSSFNPWFUIFNFNPSZDBSEXIJMFBDDFTTJOHUIFTUPSBHFNFEJB
Doing so may damage the storage media or the data in the storage media.
t *GUIFQPXFSDBCMFCBUUFSZJTEJTDPOOFDUFEPSSFDPSEJOHJTEJTBCMFEEVSJOHSFDPSEJOHUIFTZTUFNJT
switched to the data recovery mode. While data is being recovered, no other function is enabled.
t 5IFNFOVTFUUJOHUBCTTIPXOPOUIF-$%TDSFFOEPOPUBGGFDUUIFJNBHFCFJOHSFDPSEFE
t *OUIFSFDPSENPEFZPVDBOTFUUIF2VJDL7JFXNFOVPQUJPO5IF2VJDL7JFXJDPOBQQFBSTXIFO
you have set the Quick View menu option to On.
t 6OEFSTPNFMPXMJHIUDPOEJUJPOTUIBUNBZCFFODPVOUFSFEUIFWJEFPNPUJPONBZOPUCFnVJEBT
under normal light conditions.
35
basic recording
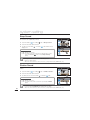
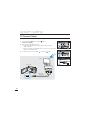
CAPTURING PHOTOS DURING VIDEO
RECORDING (DUAL RECORDING)
Your camcorder can capture photos without interrupting video recording.
PRECHECK!
t Insert a memory card.
t Set the appropriate storage media.
(HMX-H203/H204/H205 only) page 27
t Open the LCD screen to turn on the camcorder.
t Your camcorder turns on automatically when you open
the LCD screen.
t Set the Lens open/close switch to open ( ). page 12
1. Press the Recording start/stop button.
t 5IFSFDPSEJOH) indicator will display, and
recording will start.
2. Press the PHOTO button at the scene you want while recording
videos.
t 8IFOUIF) indicator disappears, the photo image is
recorded without a shutter sound.
t 7JEFPLFFQTSFDPSEJOHFWFOXIJMFQIPUPTBSFUBLFO
t 5PTUPQSFDPSEJOHQSFTTUIFRecording start/stop button
again.
00:00:30
[307Min]
MENU
00:00:32
[307Min]
MENU
<Dual recording during video
recording>
t :PVDBOOPUDBQUVSFQIPUPTJOUIFGPMMPXJOHDPOEJUJPOT
- When time lapse recording is performed.
t 1IPUPJTDBQUVSFEJOYSFTPMVUJPOSFHBSEMFTTUPUIFSFTPMVUJPOPGUIFWJEFPSFDPSEJOH
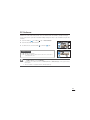
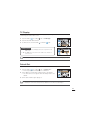
RECORDING PHOTOS
You can take photos and store them in the storage media. Set the desired resolution before
recording. page 55
PRECHECK!
t Insert a memory card.
t Set the appropriate storage media.
(HMX-H203/H204/H205 only) page 27
t Open the LCD screen to turn on the camcorder.
t Your camcorder turns on automatically when you open the
LCD screen.
t Set the Lens open/close switch to open ( ). page 12
1. Select a subject to record.
t "EKVTUUIF-$%QBOFMUPUIFCFTUBOHMFGPS
recording.
t 6TFUIFZoom lever or Zoom button to adjust the size of the
subject. page 40
9999
2. Adjust the subject at the centre of the LCD screen, and half-press
the PHOTO button.
t :PVSDBNDPSEFSBEKVTUTUPUIFJEFBMBQFSUVSFBOEGPDVT
automatically (if “Aperture” and “Focus” are set to “Auto”
pages 56, 60).
t 8IFOUIFTVCKFDUJTJOGPDVT) indicator appears green. If it
appears red, readjust the focus.
3. Fully press the PHOTO button.
t 5IFTIVUUFSTPVOEJTIFBSEXIFOiShutter Sound: On” is set).
t 5PDPOUJOVFSFDPSEJOHXBJUVOUJMUIFDVSSFOUQIPUPJTDPNQMFUFMZ
saved on the storage media.
t 8IFOUIFQIPUPJTSFDPSEFEPOUIFTUPSBHFNFEJBUIF2VJDL7JFXJDPOBQQFBSTPOUIF
screen.
4. Touch the Quick View ( ) icon to view the most recently recorded photo.
t 5PSFUVSOUPUIFTUBOECZNPEFUPVDIUIF3FUVSO ) tab.
t
t
t
t
3FDPSEBCMFOVNCFSPGQIPUPTWBSJFTEFQFOEJOHPOUIFQIPUPSFTPMVUJPOpage 31
"VEJPJTOPUSFDPSEFEXIFOUBLJOHQIPUPT
*GGPDVTJOHJTEJGmDVMUVTFUIFNBOVBMGPDVTGVODUJPOpage 60
%POPUUVSOPGGUIFDBNDPSEFSPSSFNPWFUIFNFNPSZDBSEXIFOUBLJOHQIPUPTBTJUNBZEBNBHF
the storage media or data.
t 'PSUIFPOTDSFFOEJTQMBZJOGPSNBUJPOTFFQBHF
t "EKVTUCSJHIUOFTTPGUIF-$%TDSFFOVTJOHNFOVJUFNT%PJOHTPEPFTOPUBGGFDUUIFSFDPSEFE
image. page 79
t 1IPUPmMFTDPOGPSNUPUIF%$'%FTJHOSVMFGPS$BNFSB'JMFTZTUFN
TUBOEBSEFTUBCMJTIFECZ+&*5"
(Japan Electronics and Information Technology Industries Association.)
37
basic recording
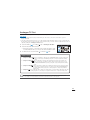
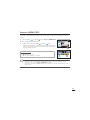
RECORDING WITH EASE FOR BEGINNERS
(SMART AUTO)
In Smart Auto mode, your camcorder automatically chooses the appropriate camcorder settings based on a
detected type of scene. It will be helpful if you are not familiar with the camcorder settings for various scenes.
PRECHECK!
Select the record mode by pressing the MODE button. page 23
1. Press the SMART AUTO button.
) indicator is
t 4NBSU"VUP ) and Anti-shake (
displayed on the LCD screen.
2. Align your subject in the frame.
t 5IFDBNDPSEFSBVUPNBUJDBMMZEFUFDUTUIFTDFOF
when aligning focus with the camcorder.
t 5IFBQQSPQSJBUFTDFOFJDPOJTEJTQMBZFEPOUIF
LCD screen.
Appears when recording a very bright scene. (White)
STBY 00:00:00
Appears when recording an outdoor scene. (Landscape)
[307Min]
9999
Appears when recording indoors. (Indoor)
Appears when recording at night. (Night)
Appears when recording with a close-up. (Macro)
MENU
<When recording with close-up>
3. Press the Recording start/stop button or PHOTO button.
pages 34, 36
t 5PSFDPSEWJEFPTQSFTTUIFRecording start/stop button.
To record photos, press the PHOTO button.
4. To cancel Smart Auto mode, press the SMART AUTO button again.
38
t 6OBWBJMBCMFCVUUPOTEVSJOH4NBSU"VUPPQFSBUJPO
Menu ( ) tab / 2.&/6 button/ etc. Most settings are automatically adjusted in Smart Auto mode. To
set or adjust functions on your own, release the Smart Auto mode first.
t 4NBSU"VUPGVODUJPOJTOPUBWBJMBCMFXIJMFSFDPSEJOH4FUUIJTGVODUJPOCFGPSFSFDPSEJOH
t When the camcorder is failed to recognise the recording situations, it records in the basic setting (
).
t The camcorder may not select the correct scene depending on shooting environments, such as
camcorder shake, lighting and distance to the subject.
t When recording more than one scenes at the same time, Smart Auto prioritizes as below: Macro White Landscape Night Indoor
For example, a) If White and Indoor can be applied at the same time, then White is selected and
corresponding icon displays.
b) If White and Landscape are applied at the same time, then White is selected and
corresponding icon displays.
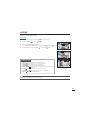
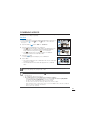
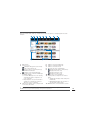
CAPTURING PHOTOS WHILE PLAYING BACK VIDEOS
You can capture photos during video playback.
PRECHECK!
t Insert a memory card.
t Set the appropriate storage media. (HMX-H203/H204/H205 only) page 27
) tab on the LCD screen to select the play mode. page 23
t Touch the Play (
1. Recorded videos appear in a thumbnail index view.
t 5PVDIUIFVQ )/down ( ) tab to move to the
previous/next page.
2. Touch the video clip you want.
t 5IFTFMFDUFEWJEFPJTQMBZFE
3. Press the PHOTO button halfway at the scene you
want to capture.
t 5IFQMBZCBDLTDSFFOJTQBVTFE
4. Press the PHOTO button fully down.
t 5IFDBQUVSFETUJMMJNBHFJTSFDPSEFEJO+1&(GPSNBU
5. When the photo is recorded on the storage media, touch the
Return ( ) tab to view the thumbnail index.
t Touch the Photo (
) tab to view the recorded photos.
page 46
HD
SD
3/3
MENU
00:00:05/00:00:50
100_0013
MENU
9998
100_0013
t You cannot capture photos in the following conditions:
- The time lapse videos cannot be captured as a still image.
t 1IPUPJTDBQUVSFEJOYSFTPMVUJPOSFHBSEMFTTUPUIFSFTPMVUJPOPGUIFWJEFPSFDPSEJOH
39
basic recording
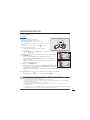
ZOOMING
This camcorder allows you to record using
optical 20x power zoom and digital zoom with
the Zoom lever or the Zoom button on the
LCD panel.
PRECHECK!
Select the record mode by pressing the MODE
button. page 23
To zoom in
Press the T (zoom) button on the LCD panel or
slide the zoom lever towards T (telephoto).
t 5IFEJTUBOUTVCKFDUJTHSBEVBMMZNBHOJmFE
and can be recorded.
W : Wide angle
T : Telephoto
To zoom out
Press the W (zoom) button on the LCD panel
or slide the zoom lever towards W (wide angle).
t 5IFTVCKFDUNPWFTGVSUIFSBXBZ
00:00:00
[307Min]
MENU
Tip When using the zoom function, its speed can be decreased by slowly moving the Zoom (W/T) lever.
A fast moving increases the zoom speed. However, the Zoom (W/T) button on the LCD panel cannot
adjust the zoom speed.
40
t 6TJOHUIFPQUJDBM[PPNEPFTOPUEFHSBEFUIFJNBHFRVBMJUZBOEDMBSJUZ
t 6TFUIFEJHJUBM[PPNXIFOZPVXBOUUP[PPNNPSFUIBOUIFPQUJDBM[PPNSBOHFpage 64
t 'PDVTJOHNBZCFDPNFVOTUBCMFXIFOSFDPSEJOHXJUIBGBTU[PPNPS[PPNJOHJOUPBTVCKFDU
standing too far away. In this case, use the manual focus function. page 60
t 5IFNJOJNVNQPTTJCMFEJTUBODFCFUXFFODBNDPSEFSBOETVCKFDUXIJMFNBJOUBJOJOHTIBSQGPDVTJT
about 1cm (about 0.4 inches) for wide angle and about 1m (about 39.4 inches) for telephoto. If you
want to shoot the object close to the lens at a wide angle, use the Tele Macro function.
page 63
t 8IFOVTJOHUIF[PPNGVODUJPOXIJMFIPMEJOHUIFDBNDPSEFSXJUIZPVSIBOEVTF"OUJTIBLF0*4
for stable recording. page 41
t 'SFRVFOUVTFPGUIF[PPNGVODUJPODPOTVNFTNPSFQPXFS
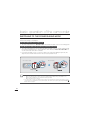
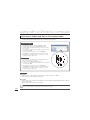
SETTING THE ANTI-SHAKE
(OIS: OPTICAL IMAGE STABILISER)
Use the Anti-shake (OIS: Optical Image Stabiliser) function to compensate for unstable images
caused by shaking movements when holding the camcorder.
PRECHECK!
Select the record mode by pressing the MODE button. page 23
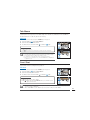
Press the Anti-shake (OIS) ( ) button to toggle the
Anti-shake (OIS) mode between On and Off.
STBY 00:00:00
[307Min]
9999
MENU
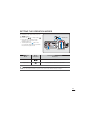
Tip Use the Anti-Shake function in the following cases:
t 8IFOSFDPSEJOHXIJMFXBMLJOHPSXIFOSFDPSEJOHJOB
moving car.
t 8IFOSFDPSEJOHXJUIUIF[PPNGVODUJPO
t 8IFOSFDPSEJOHTVCKFDUTPGBTNBMMTJ[F
t 5IF4NBSU"VUPNPEFBVUPNBUJDBMMZTFUTUIF"OUJTIBLF0*4
UP0O
t Gross camcorder shake may not be entirely corrected even if the Anti-shake is set to On.
Firmly hold the camcorder with both hands.
t 8IFOUIJTGVODUJPOJTTFUUP0O, the actual movement of the subject and the movement displayed
on the screen may be slightly different.
t 8IFOSFDPSEJOHJOEBSLMJHIUJOHBUIJHINBHOJmDBUJPOXIJMFUIJTGVODUJPOJTTFUUPOn, after-images
may stand out. In this case, we recommend using a tripod (not supplied) and turning the Anti-shake
to Off.
41
basic recording
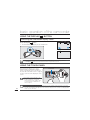
USING BACK LIGHT COMPENSATION MODE
When a subject is lit from behind, this function will compensate for lighting so that the subject is
not too dark.
PRECHECK!
Select the record mode by pressing the MODE button. page 23
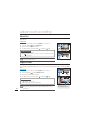
Press the Back light ( ) button to toggle the back light
mode between On and Off.
STBY 00:00:00
[307Min]
9999
MENU
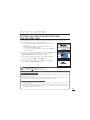
Tip Back lighting exists when the subject is darker than the
background:
- The subject is in front of a window.
- The person to be recorded is wearing white or shiny clothes
BOEJTQMBDFEBHBJOTUBCSJHIUCBDLHSPVOEUIFQFSTPOT
face is too dark to distinguish his/her features.
- The subject is outdoors and the background is overcast.
- The light sources are too bright.
- The subject is against a snowy background.
42
basic playback
CHANGING THE PLAYBACK MODE
t You can set the record mode and the play mode in turn with the MODE button.
t You can also switch the operation mode directly into the playback thumbnail display by
touching the Play (
) tab on the LCD screen. You will find the most recently created file is
highlighted in the thumbnail view.
t 5IFUIVNCOBJMEJTQMBZPQUJPOTBSFTFMFDUFEEFQFOEJOHPOUIFTUBOECZNPEFUIBUXBTVTFE
for the last time, however, you can choose the video (HD or SD) or photo thumbnail view
display options by touching the HD ( HD ), SD ( SD ), or photo ( ) tab on the LCD screen.
Understanding how to change the operation modes
You can simply change the operation modes by touching the LCD screen or using the buttons as
shown in the following figures:
STBY
00:00:00
[307Min]
9999
MENU
HD
HD
SD
3/3
SD
3/3
MENU
MENU
HD
Tip
SD
You can choose the thumbnail display options from 3x2 (
HD
HD
SD
), 4x3 (
), and Date (
HD
SD
).
SD
01/JAN/2010 (17)
3/3
2/2
3/3
MENU
MENU
43
basic playback
PLAYING BACK VIDEOS
You can preview recorded videos in a thumbnail index view. Find your desired video quickly,
and playback directly.
PRECHECK!
t Insert a memory card.
t Set the appropriate storage media. (HMX-H203/H204/H205 only) page 27
) tab on the LCD screen to select the play mode. page 23
t Touch the Play (
1. Touch the HD ( HD ) or SD ( SD ) tab.
t 7JEFPUIVNCOBJMTDPSSFTQPOEJOHUPUIFTFMFDUFEWJEFP
resolution appear on the screen.
t 5PDIBOHFUIFDVSSFOUUIVNCOBJMWJFXTFMFDUUIF ),
(
), or (
) tab on the screen.
t *GZPVTFMFDUUIFUIVNCOBJMEJTQMBZCZUIFEBUF (
), you can
sort videos by specific dates. page 43
t 5PDIBOHFUIFDVSSFOUUIVNCOBJMQBHFUPVDIUIFVQ ) or
down( ) tab.
2. Touch the desired video clip.
t 5IFTFMFDUFEWJEFPJTQMBZFEBOEQMBZCBDLDPOUSPMUBCTBQQFBS
briefly. They reappear when touching anywhere on the screen.
t :PVDBOTFUQMBZCBDLTFUUJOHTVTJOHUIFiPlay Option” menu.
page 70
t 5PTUPQQMBZCBDLBOESFUVSOUPUIFUIVNCOBJMTUPVDIUIF
Return ( ) tab.
STBY 00:00:00
[307Min]
9999
MENU
HD
SD
3/3
MENU
00:00:05 / 00:00:50
100_0013
MENU
44
t *UNBZUBLFTPNFUJNFUPTUBSUQMBZCBDLEFQFOEJOHPOUIFTJ[FBOERVBMJUZPGUIFTFMFDUFEWJEFP
t The camcorder may not play the following video files:
- A video edited by using the different software that was not built-in your camcorder, or whose file
name is changed on a PC
- A video recorded on other devices
- A video whose file format is not supported on the camcorder
t :PVDBOVTFWBSJPVTQMBZPQUJPOTEVSJOHUIFWJEFPQMBZCBDLpage 45
t 5IFSFDPSEFEWJEFPTDBOCFQMBZFEPOB57PS1$pages 102, 110
) tab or 2.&/6 button during playback, play is paused and the menu
t *GZPVUPVDIUIF.FOV
screen appears.
Various playback operations
Playback / Pause / Stop
t 1MBZCBDLBOEQBVTFBMUFSOBUFTXIFOUPVDIJOHUIF1MBZ
playback.
t 5PVDIUIF3FUVSO ) tab to stop playback.
) / Pause (
Search playback
During playback, each touch of the Reverse search ( ) / Forward search (
the play speed:
t 3143FWFSTF1MBZCBDL4FBSDI
SBUFY x4 x8 x2
t '14'PSXBSE1MBZCBDL4FBSDI
SBUFY x4 x8 x2
) tab during
) tab increases
Skip playback
Touch the Reverse skip ( ) / Forward skip ( ) tab during playback.
t 5PVDIJOHUIF'PSXBSETLJQ ) tab plays the next video.
t 5PVDIJOHUIF3FWFSTFTLJQ ) plays the beginning of the scene. If reverse skip ( ) is
touched within 3 seconds from the start of the file, the previous video is played.
t Place and hold your finger on the Reverse skip ( ) / Forward skip ( ) tab to search the
desired video number quickly. When you lift off your finger, the selected video is played.
Slow playback
During a pause, touching the Reverse slow ( ) / Forward slow ( ) tab reduces the playback
speed:
t 3FWFSTFGPSXBSEQMBZCBDLTMPXSBUFY x1/4 x1/8 x1/2
Frame by frame playback
t %VSJOHQBVTFUPVDIUIF3FWFSTFGSBNFBEWBODF( ) / Forward frame advance (
makes play go reverse or forward one frame at a time.
To adjust the volume
) tab
00:00:05 / 00:00:50
100_0013
You can hear the recorded sound from the built-in speaker.
The sound level is adjusted between “0~19.” When the level is at “0,” you cannot
hear sound.
1. Touch the Volume (
) tab on the LCD screen.
)/(
) tab to increase or decrease audio volume.
2. Touch the (
)/(
) tab for a long time, the sound level will be
t *GZPVUPVDIthe (
adjusted continuously.
MENU
00:00:05 / 00:00:50
100_0013
15
45
basic playback
VIEWING PHOTOS
You can view recorded photos by using various playback functions.
PRECHECK!
t Insert a memory card.
t Set the appropriate storage media. (HMX-H203/H204/H205 only) page 27
) tab on the LCD screen to select the play mode. page 23
t Touch the Play (
1. Touch the Photo ( ) tab.
t 5IFUIVNCOBJMWJFXBQQFBST
t 5PDIBOHFUIFDVSSFOUUIVNCOBJMWJFXTFMFDU ), ( ),
or ( ) tab on the screen.
t *GZPVTFMFDUUIFUIVNCOBJMEJTQMBZCZUIFEBUF ( ), you can
sort photos by specific dates. page 43
t 5PDIBOHFUIFDVSSFOUUIVNCOBJMQBHFUPVDIUIFVQ ) or
down ( ) tab.
2. Touch your desired photo to play back.
t 5IFTFMFDUFEQIPUPJTEJTQMBZFEJOGVMMTDSFFOBOEQMBZCBDL
control tabs appear briefly. They reappear when touching
anywhere on the screen.
t 5PVDIQSFWJPVTJNBHF )/ next image ( ) tab to view the
previous and next photo.
t 1MBDFBOEIPMEZPVSmOHFSPOUIFQSFWJPVTJNBHF )/next
image ( ) tab to search the desired photo number quickly.
When you lift off your finger, the selected photo is displayed.
3. To return to the thumbnails, touch the Return (
HD
SD
3/3
MENU
HD
SD
3/3
) tab.
MENU
14/17
100-0014
MENU
t %POPUQPXFSPGGPSFKFDUUIFNFNPSZDBSEEVSJOHQIPUPQMBZCBDL%PJOHTPNBZEBNBHFUIF
recorded data.
t Your camcorder may not playback the following photo files normally:
- A photo with its file name changed on a PC.
- A photo recorded on other devices.
- A photo with a file format not supported on this camcorder (does not conform to DCF
standards).
Loading time may vary depending on the size and quality of the selected photo.
VIEWING A SLIDE SHOW
You can view a photo slide show.
PRECHECK!
t Insert a memory card.
t Set the appropriate storage media. (HMX-H203/H204/H205 only) page 27
) tab on the LCD screen to select the play mode. page 23
t Touch the Play (
1. Touch the Photo ( ) tab.
t 5IFUIVNCOBJMWJFXBQQFBST
t 5PDIBOHFUIFDVSSFOUUIVNCOBJMQBHFUPVDIUIFVQ
down ( ) tab.
Slide Show Start
) or
Slide Show Option
1/2
Delete
2. Touch the Menu ( ) tab “Slide Show Start”
Protect
t 5IF ) indicator is displayed. The slide show starts from the
current selected photo.
1/17
100_0001
t "MMQIPUPTBSFQMBZCBDLDPOUJOVPVTMZJOUIFTFUTMJEFTIPX
option (“*OUFSWBMwi.VTJDwi&GGFDU”)
t *GZPVTFMFDUUIFUIVNCOBJMEJTQMBZCZUIFEBUF ), photos only
taken on the corresponding date play back in a slide show.
page 43
t :PVDBOBEKVTUUIFCBDLHSPVOENVTJDTWPMVNFMFWFMVTJOHUIF
Volume ( ) tab while playing back the slide show with music.
t 5PTUPQUIFTMJEFTIPXUPVDIUIF3FUVSO ) tab.
t &WFSZUJNFZPVUPVDIUIF-$%TDSFFOUIFQMBZSFMBUFEUBCTBQQFBSPOUIF-$%TDSFFO
Tip t To start the slide show during a playback of a single photo, touch
) tab on the LCD screen, or you can touch the
the slide show (
) tab “4MJEF4IPX4UBSU”
Menu (
t A slide show is available also in the quick menu. page 52
14/17
100-0014
MENU
47
basic playback
Using the Slide Show Option
While playing back the slide show, you can use the “Slide Show
Option” menus as follows:
Slide Show Start
Slide Show Option
Submenu items
Delete
1/2
t Interval: Photos play back continuously in the set slide show interval
(1sec or 3sec).
t Music: You can turn the built-in background music on or off.
This camcorder has 7 tunes of background music by default,
stored in the boot-up flash memory. Starting a slide show
begins to play back 7 background music in shuffle mode.
t Effect: Continuously plays back photos with the fade in / out effect
between image transitions.
Protect
ZOOMING DURING PHOTO PLAYBACK
You can magnify a playback image. Touch the up (
the desired area to magnify.
)/down (
)/left (
)/right (
PRECHECK!
t Insert a memory card.
t Set the appropriate storage media. (HMX-H203/H204/H205 only) page 27
) tab on the LCD screen to select the play mode. page 23
t Touch the Play (
1. Touch the Photo ( ) tab.
t 5IFUIVNCOBJMWJFXBQQFBST
t 5PDIBOHFUIFDVSSFOUUIVNCOBJMQBHFUPVDIVQUIF ) or
down ( ) tab.
2. Touch the desired photo to magnify.
t 5IFTFMFDUFEQIPUPJTEJTQMBZFEPOUIFGVMMTDSFFO
3. Adjust the magnification with the Zoom (W/T) button or
Zoom (W/T) lever.
t .BHOJmDBUJPOTUBSUTGSPNUIFUIFDFOUSFPGUIFQIPUP
t You can zoom in from x1.1 to x8.0.
t 8IJMFUIFQMBZCBDL[PPNJTJOVTFPUIFSJNBHFTDBOOPUCF
selected.
4. Touch the up ( )/down ( )/left ( )/right ( ) tab to view the
area you want on the magnified photo.
5. To cancel, touch the Return ( ) tab.
48
HD
) to select
SD
3/3
MENU
14/17
100-0014
Photos recorded on other devices or those edited on a PC cannot be magnified.
MENU
X1.1
advanced recording
HANDLING MENUS AND QUICK MENUS
Follow the instructions below to use each of the menu items listed in this manual.
This chapter uses “Aperture,” and “Focus” functions of the record mode as an example.
PRECHECK!
t Open the LCD screen to turn on the camcorder.
t Your camcorder turns on automatically when you open the
LCD screen.
t Select the record mode by pressing the MODE button.
page 23
Using the Menu (
STBY 00:00:00
[307Min]
9999
MENU
2.&/6CVUUPO
) tab
Menu (
) tab
1. Touch the Menu ( ) tab on the touch panel.
t 5IFNFOVTDSFFOBQQFBST
t 5PDIBOHFUIFDVSSFOUQBHFUPVDIUIFVQ )/down ( ) tab.
2. Touch “"QFSUVSF” (The Aperture function is used here as an
example.)
3. Touch the desired option.
t Adjust the setting values accordingly.
t 5PVDIUIFEFDSFBTF ) or increase ( ) tab to adjust the
aperture as you want.
t 5PFYJUUIFNFOVUPVDIUIF&YJU ) or Return ( ) tab.
Photo sharpness
White Balance
Aperture
2/5
Shutter
Aperture
Auto
Manual
1/1
Using the Q.MENU button
1. Press the 2.&/6 button on your camcorder to see the available
menu options.
t 5IFRVJDLNFOVTDSFFOBQQFBST
2. Touch “'PDVT” (The Focus function is used here as an example.)
3. Touch the desired option.
t "EKVTUUIFTFUUJOHWBMVFTBDDPSEJOHMZ
t 5PFYJUUIFNFOVUPVDIUIF&YJU ) or Return ( ) tab.
t 8IFOVTJOHUIF.FOV
) or Quick menu items, some menu items
can not be used at the same time, or may be greyed out.
t 'PSNPSFJOGPSNBUJPOTFFUIF5SPVCMFTIPPUJOHQBHF
t 'PSUIFQVSQPTFPGFBTZVOEFSTUBOEJOHBMMUIFNFOVTFUUJOHFYBNQMFT
from this page are explained based on the simplest methods. The
menu setting methods can be different depending on the user's
chosen menu options.
WB
Resolution
SCENE
EV
Focus
Focus
Auto
Manual
TouchPoint
49
advanced recording
MENU ITEMS
t "DDFTTJCMFJUFNTJONFOVWBSZEFQFOEJOHPOUIFPQFSBUJOHNPEF
t 'PSPQFSBUJPOEFUBJMTTFFUIFDPSSFTQPOEJOHQBHF
Recording menu items
Items
SCENE
Video Resolution
Video Quality
Photo Resolution
Photo Sharpness
White Balance
Aperture
Shutter
EV
Focus
Digital Effect
Fader
Tele Macro
Cont. Shot
Wind Cut
Digital Zoom
Self Timer
Time Lapse REC
Quick View
Guideline
Default value
Auto
[HD]1080/50i
Fine
2880x1620
Normal
Auto
Auto
Auto
0
Auto
Off
Off
Off
Off
Off
Off
Off
Off
On
Off
Page
53
54
54
55
55
56
58
59
59
60
61
62
63
63
64
64
65
66
68
69
Playback menu items
Operation mode
Items
Play Option
Highlight
Playlist
Delete
Protect
Story-Board Print
Copy *
Divide
Edit
Combine
File Info
Slide Show Start
Slide Show Option
Print Mark (DPOF)
50
Video (Thumbnail)
Video (Single)
X
X
X
X
X
X
X
X
Photo
(Thumbnail/Single)
X
X
X
X
X
X
Items marked with * are available only with HMX-H203/H204/H205 models.
Default value
Page
Play All
70
71
93
97
Off (Single)
96
73
98
90
91
73
47
48
99
: available, X : not available
Setting menu items
Items
Storage Type *
Storage Info *
Card Info **
Format
File No.
Time Zone
Date/Time Set
Date Type
Time Type
Date/Time Display
LCD Brightness
Auto LCD Off
Beep Sound
Shutter Sound
Auto Power Off
Quick On STBY
PC Software
USB Connect
HDMI TV Out
Analogue TV Out
TV Connect Guide
TV Display
Default Set
Language
Demo
Anynet+(HDMI-CEC)
Default value
Internal Memory
Series
Home
01/JAN/2010 00:00
(Summer Time : Off)
01/JAN/2010
24 Hr
Off
18
Off
On
On
5 Min
5 Min
On
Mass Storage
Auto
Component 1080i
On
On
On
Page
74
74
74
75
76
76
77
77
78
78
79
79
80
80
81
82
83
84
84
85
86
87
87
88
88
89
t 5IFTF*UFNTBOE%FGBVMUWBMVFTNBZCFDIBOHFEXJUIPVUOPUJDF
t 5IFSFBSFTPNFGVODUJPOTZPVDBOOPUBDUJWBUFTJNVMUBOFPVTMZJOUIFNFOV:PVDBOOPUTFMFDUUIF
grey menu items.
t *UFNTNBSLFEXJUIBSFBWBJMBCMFPOMZXJUI).9)))NPEFMT
t Items marked with ** are available only with HMX-H200/H220 models.
t 5IFUJNFUZQFNBZDIBOHFEFQFOEJOHPOUIFTFMFDUFEMBOHVBHF
51
advanced recording
QUICK MENU ITEMS
Your camcorder provides quick menus consisting of the functions you may frequently use.
Pressing the 2.&/6 button will let you start making settings directly.
Recording menu items
Items
Storage *
SCENE
Resolution
WB
EV
Focus
Default value
Int. Memory
Auto
1080/50i, 2880x1620
Auto
0
Auto
Page
27
53
54, 55
56
59
60
Playback menu items
Operation
mode
Item
Storage *
Highlight
Playlist
Delete
Protect
Divide
Edit
Combine
File Info
Slide Show
Print Mark
Video
(Thumbnail)
X
X
X
Video (Single)
X
X
X
X
Photo
(Thumbnail/
Single)
X
X
X
X
Page
27
71
93
97
96
90
91
73
47
99
: available, x : not available
52
Items marked with * are available only with HMX-H203/H204/H205 models.
SCENE
This camcorder automatically sets the shutter speed and aperture according to the subject and
brightness for optimal recording.
PRECHECK!
Select the record mode by pressing the MODE button. page 23
1. Touch the Menu (
) tab “ 4$&/&”
2. Touch the desired submenu item.
t 5PDIBOHFUIFDVSSFOUQBHFUPVDIUIFVQ
3. To exit the menu, touch the Exit (
) or Return (
SCENE
)/down (
) tab.
) tab.
Video Resolution
1/5
Video Quality
Photo Resolution
SCENE
Auto
Sports
1/2
Portrait
Spotlight
Submenu items
STBY 00:00:00
[307Min]
9999
t
t
t
t
t
Auto: In normal conditions, recording naturally.
Sports ( ): Recording people or objects in motion.
Portrait ( ): Recording skin colour naturally.
Spotlight ( ): When strong light strikes the object.
Beach/Show ( ): Where reflection of light is intense like a snowfield
or beach.
t Food ( ): Represent colour of food more colourful.
t Candle Light ( ): Recording the soft glow of candlelight.
t Indoor ( ): Indoor with artificial light.
MENU
When you specify “Aperture:Manual” or “Shutter:Manual,” the SCENE mode is cancelled.
(Manual Aperture/Manual Shutter priority)
53
advanced recording
Video Resolution
You can select the resolution of video to be recorded on storage media.
PRECHECK!
Select the record mode by pressing the MODE button. page 23
1. Touch the Menu (
) tab “7JEFP3FTPMVUJPO”
2. Touch the desired submenu item.
3. To exit the menu, touch the Exit ( ) or Return (
) tab.
SCENE
Video Resolution
1/5
Photo Resolution
Video Resolution
Submenu items
t [HD]1080/50i (
t [HD]720/50p (
t <4%>Q
Video Quality
[HD]1080/50i
): Records in the HD (1920x1080/50i) format.
): Records in the HD (1280x720/50p) format.
): Records in the SD (720x576/50p) format.
[HD]720/50p
1/1
[SD]576/50p
t iJwJOEJDBUFTUIFDBNDPSEFSXJMMSFDPSEJOJOUFSMBDFETDBONPEFBUmFMETQFSTFDPOE
t iQwJOEJDBUFTUIFDBNDPSEFSXJMMSFDPSEJOQSPHSFTTJWFTDBONPEFBUGSBNFTQFSTFDPOE
t 3FDPSEFEmMFTBSFFODPEFEXJUI7BSJBCMF#JU3BUF7#3
7#3JTBOFODPEJOHTZTUFNUIBUBVUPNBUJDBMMZ
adjusts the bit rate according to the recording image.
t 5IFBWBJMBCMFWJEFPSFDPSEJOHUJNFEJGGFSTBDDPSEJOHUPUIFTFMFDUFEWJEFPSFTPMVUJPO
Video Quality
You can select the quality of video to be recorded.
PRECHECK!
Select the record by pressing the MODE button. page 23
1. Touch the Menu ( ) tab “7JEFP2VBMJUZ”
2. Touch the desired submenu item.
3. To exit the menu, touch the Exit ( ) or Return (
SCENE
Video Resolution
1/5
Photo Resolution
) tab.
Video Quality
Submenu items
t Super Fine ( ): Records videos at the super fine image quality.
t Fine ( ): Records videos at the fine image quality.
t Normal ( ): Records videos at the normal image quality.
54
Video Quality
Super Fine
Fine
1/1
Normal
The higher the resolution is, the shorter the recording time becomes, on the other hand, the lower the
resolution, the longer the recording time.
Photo Resolution
You can select the resolution of photo to be recorded.
PRECHECK!
Select the record mode by pressing the MODE button. page 23
1. Touch the Menu (
) tab “1IPUP3FTPMVUJPO”
SCENE
Video Resolution
2. Touch the desired submenu item.
3. To exit the menu, touch the Exit (
1/5
) or Return (
Video Quality
Photo Resolution
) tab.
Photo Resolution
2880x1620
Submenu items
1920x1080
t Y
t 1920x1080 (
3FDPSETJOUIFYSFTPMVUJPO
3FDPSETJOUIFYSFTPMVUJPO
1/1
t 5IFOVNCFSPGSFDPSEBCMFJNBHFTEJGGFSTBDDPSEJOHUPUIFTFMFDUFEQIPUPSFTPMVUJPO
t 1IPUPTUIBUBSFSFDPSEFEPOZPVSDBNDPSEFSNBZOPUQMBZCBDLQSPQFSMZPOPUIFSEJHJUBMEFWJDFT
that do not support this photo size.
Photo Sharpness
This function allows the user to obtain sharper photo images by processing the image after
recording photos.
PRECHECK!
Select the record by pressing the MODE button. page 23
1. Touch the Menu (
) tab “1IPUP4IBSQOFTT”
2. Touch the desired submenu item.
Photo Sharpness
White Balance
3. To exit the menu, touch the Exit (
) or Return (
) tab.
2/5
Aperture
Shutter
Submenu items
t Soft ( ): Smooths the edges of photo images.
t Normal ( ): The photo images appear with sharp edges and are
suitable for printing.
t Sharp ( ): Enhances to sharpen the edges of photo images.
Photo Sharpness
Soft
Normal
1/1
Sharp
55
advanced recording
White Balance
This camcorder automatically adjusts the colour of the subject. You can record in natural
colours depending on the subject and lighting conditions.
PRECHECK!
Select the record by pressing the MODE button. page 23
1. Touch the Menu (
) tab “8IJUF#BMBODF”
2. Touch the desired submenu item.
t 5PTFUUIFXIJUFCBMBODFNBOVBMMZTFFQBHF
3. To exit the menu, touch the Exit (
) or Return (
) tab.
Photo Sharpness
White Balance
2/5
Aperture
Shutter
White Balance
Submenu items
t Auto: Controls the white balance automatically depending on
the recording conditions.
t Daylight ( ): Controls the white balance according to the
outdoor lighting.
t Cloudy ( ): When recording in the shade or cloudy weather.
t Fluorescent ( ): When recording under white fluorescent
lights.
t Tungsten ( ): When recording under halogen lamps and
incandescent lights.
t Custom WB ( ): You can manually adjust the white balance
to match the light source or situation.
Auto
Daylight
1/2
Cloudy
Fluorescent
Understanding White Balance
White balance (WB) is the process of removing unrealistic colour casts, so that objects
which appear white are rendered white in your image. Proper white balance has to take
into account the “colour temperature” of a light source, which refers to the relative warmth
or coolness of white light.
To set the white balance manually
1. Touch the Menu ( ) tab “White Balance” “$VTUPN8#”
t 5IFi ) Set White Balance” indicator is displayed.
2. Fill the screen with a white object, and touch the (
t 5IFXIJUFCBMBODFTFUUJOHJTTUPSFE
White Balance
Tungsten
) tab.
Custom WB
2/2
3. To exit the menu, touch the Exit ( ) or Return ( ) tab.
t 5IFTUPSFEXIJUFCBMBODFTFUUJOHXJMMCFBQQMJFEUIFOFYUUJNF
you record.
White thick
paper
Custom WB
Set White Balance
Auto
OK
t 8IFOTFUUJOHUIFXIJUFCBMBODFNBOVBMMZUIFTVCKFDUNVTUCFXIJUFPUIFSXJTFZPVSDBNDPSEFS
may not detect an appropriate setting value.
t 5IFBEKVTUFETFUUJOHSFNBJOTVOUJMZPVTFUUIFXIJUFCBMBODFBHBJO
t %VSJOHOPSNBMPVUEPPSSFDPSEJOHTFUUJOHUPiAuto” may provide better results.
t $BODFMUIFEJHJUBM[PPNGVODUJPOGPSDMFBSBOEQSFDJTFTFUUJOH
t 3FTFUUIFXIJUFCBMBODFJGMJHIUDPOEJUJPOTDIBOHF
57
advanced recording
Aperture
The camcorder adjusts the aperture automatically depending on the subject and recording
conditions. You can also manually adjust the Aperture to your preference.
PRECHECK!
Select the record by pressing the MODE button. page 23
1. Touch the Menu (
) tab “Aperture”
2. Touch the desired submenu item.
Photo Sharpness
White Balance
3. To exit the menu, touch the Exit (
) or Return (
) tab.
2/5
Aperture
Shutter
Aperture
Submenu items
t Auto: Sets the aperture value automatically.
FXX): Touch decrease (
) or increase (
) tab to
t Manual (
adjust the aperture as you want.
The setting values are as follows:
F1.8, F2, F2.8, F4, F5.6, F8, F11, F16
Auto
Manual
1/1
Understanding Aperture
The aperture value can be adjusted to control the amount of
light reaching the image sensor.
The aperture value needs to be adjusted in the following
cases:
t 8IFOTIPPUJOHBHBJOTUUIFMJHIUPSXIFOUIFCBDLHSPVOEJT
too bright.
t 8IFOTIPPUJOHPOBSFnFDUJWFOBUVSBMCBDLHSPVOETVDIBT
at the beach or when skiing.
t 8IFOUIFCBDLHSPVOEJTPWFSMZEBSLGPSFYBNQMFOJHIU
scenery).
When you specify “Aperture: Manual,” the SCENE mode is cancelled and “Shutter” is set to “Auto”
automatically. (Manual Aperture priority)
58
Shutter
The camcorder automatically sets the shutter speed depending on the scene's brightness.
You can also manually adjust the shutter speed according to the scene conditions.
PRECHECK!
Select the record by pressing the MODE button. page 23
1. Touch the Menu ( ) tab “4IVUUFS”
2. Touch the desired submenu item.
3. To exit the menu, touch the Exit ( ) or Return (
Photo Sharpness
White Balance
) tab.
Aperture
2/5
Shutter
Submenu items
t Auto: The camcorder automatically sets the appropriate shutter
speed value.
1/XX): Touch decrease (
) or increase (
) tab to
t Manual (
adjust the setting values as you want. The setting
values are as follows: 1/50,1/120, 1/250, 1/500,
1/1000, 1/2000, 1/4000, or 1 /10000.
Shutter
Auto
Manual
1/1
t 5IFJNBHFNBZOPUTFFNTNPPUIXIFOBIJHITIVUUFSTQFFEJTTFU
t 8IFOSFDPSEJOHXJUIBTIVUUFSTQFFEPGPSIJHIFSNBLFTVSFUIFTVOJTOPUEJSFDUMZTIJOJOHJOUPUIFMFOT
t 8IFOZPVTQFDJGZiShutter: Manual,” the SCENE mode is cancelled and “Aperture” is set to “Auto” automatically.
(Manual Shutter priority)
t *ODBTFPGQIPUPUIFNBYJNVNTIVUUFSTQFFEJTMJNJUFEUP
EV
Using the EV function, you can manually adjust the video and photo image brightness.
PRECHECK!
Select the record mode by pressing the MODE button. page 23
1. Touch the Menu ( ) tab “&7”
2. Touch the decrease ( ) or increase ( ) tab to adjust the setting
values as you want.
t &7WBMVFT ): -2.0, -1.5, -1.0, -0.5, 0, +0.5, + 1.0, +1.5, +2.0
3. To exit the menu, touch the Exit ( ) or Return ( ) tab.
EV
-0.5
Understanding EV (Exposure Value)
Exposure value is the total amount of light allowed to fall on the
photographic medium (Image sensor) during the process of taking
photos or videos as well.
Darker(-)
Brighter(+)
Neutral(0)
59
advanced recording
Focus
The camcorder usually focuses on a subject automatically (auto focus). When the camcorder is
turned on, auto-focus will always be set. You can also manually focus a subject depending on
the recording conditions.
PRECHECK!
Select the record mode by pressing the MODE button. page 23
1. Touch the Menu ( ) tab “'PDVT"
2. Touch the desired submenu item.
3. To exit the menu, touch the Exit ( ) or Return (
EV
) tab.
Focus
Digital Effect
3/5
Submenu items
Fader
t Auto: In most situations, it is better to use the automatic focus feature, as it
enables you to concentrate on the creative side of your recording.
t Manual ( ): Manual focusing may be necessary under certain conditions that
make automatic focusing difficult or unreliable.
) or (
) tab to adjust the setting values you want.
Touch (
t Touch Point ( ): You can simply touch the subject shown on the LCD screen
you would like to focus.
Focus
Auto
Manual
Touch Point
1/1
Focusing manually during recording
This camcorder automatically focuses a subject from close-up to
infinity. However, the correct focus may not be obtained depending
on the recording conditions. In this case, use the manual focus mode.
Manual
Focusing in a nearer subject
To focus on a nearer subject, touch the nearer
) tab.
subject (
Focusing on a further subject
<Nearer subject>
To focus on a further subject, touch the further
) tab.
subject (
t 5IFOFBSFSPSGVSUIFSJDPO / ) appears in the
centre when focus adjustment reaches the end.
t 5IFBEKVTUFEWBMVFJTBQQMJFESJHIUBGUFSUPVDIJOH
) or (
) tab.
the (
Tip
<Further subject>
*OUIFGPMMPXJOHTJUVBUJPOTZPVNBZPCUBJOCFUUFSSFTVMUTCZBEKVTUJOHUIFGPDVTNBOVBMMZ
t "QJDUVSFDPOUBJOJOHTFWFSBMPCKFDUTTPNFDMPTFUPUIFDBNDPSEFSPUIFSTGVSUIFSBXBZ
t "QFSTPOFOWFMPQFEJOGPHPSTVSSPVOEFECZTOPX
t 7FSZTIJOZPSHMPTTZTVSGBDFTMJLFBDBS
t 1FPQMFPSPCKFDUTNPWJOHDPOTUBOUMZPSRVJDLMZMJLFBOBUIMFUFPSBDSPXE
30CM
Using the touch point
Using the Touch Point function, you can focus on a small section
of the picture. Focus on the particular point by touching the desired
point.
STBY 00:00:00
[307Min]
9999
MENU
Tip To activate the touch point with a long touch
You can activate the touch point by pressing the same point for about 1
second on the LCD screen.
One-touch photo recording
You can focus on your subject and take a photo with a touch of your
finger. When the touch point function is enabled, simply touch the
subject shown on the LCD screen that you would like to focus on, then
hold for about 3 seconds.
00:00:00
[307Min]
9999
t 5IF"VUP'PDVT"'
TFUUJOHJTVTFGVMXIFOZPVPQFSBUFUIF[PPNGVODUJPOCFDBVTFZPVNJHIUOPUCFBCMFUPLFFQ
accurate focus after the zoom ratio has been changed.
t *OUIFNBOVBMGPDVTTFUUJOHNFOVTDSFFOBVUPGPDVTJTBWBJMBCMFCZVTJOHUIF"' ) tab on the screen. you can
return to manual focus by touching the manual focusing tabs.
t 8IFOUIF5PVDI1PJOUGVODUJPOJTFOBCMFEZPVDBOUPVDIUIF"' ) tab on the LCD screen to set the “Focus” to
“"VUP”
t 5PEJTBCMFUIF5PVDI1PJOUGVODUJPOTFUiFocus” to “"VUP”
Digital Effect
Using the Digital Effect function gives your recording a creative look.
PRECHECK!
Select the record mode by pressing the MODE button. page 23
1. Touch the Menu ( ) tab “%JHJUBM&GGFDU”
2. Touch the desired submenu item.
3. To exit the menu, touch the Exit ( ) or Return (
Digital Effect
Off
Black&White
1/2
) tab.
Sepia
Negative
Examples of 5 Digital Effect options
Off
Without any Digital Effect, a normal, natural
image is displayed during recording or playback.
Black & White ( )
This mode changes the image to black and
white.
Sepia ( )
This mode gives the image a reddish brown
look.
Negative ( )
This mode reverses the colours, creating a
negative image.
Art ( )
This mode helps adjust for facial imperfections.
advanced recording
Fader
You can give your recording a professional look by using special effects such as fade in at the
beginning of a sequence or fade out at the end of a sequence.
PRECHECK!
Select the record mode by pressing the MODE button. page 23
1. Touch the Menu (
) tab “'BEFS”
2. Touch the desired submenu item.
3. To exit the menu, touch the Exit (
EV
) or Return (
Focus
) tab.
3/5
Digital Effect
Fader
Submenu items
t
t
t
t
Off: Disables the function
In ( ): As soon as you start recording, it will fade in.
Out ( ): When the recording is done, it will fade out.
In-Out ( ): When you start or stop recording, the fader will be
function accordingly.
Fader
Off
In
1/1
Out
In-Out
Recording a video with Fade effect
Fade in
Press the Recording start/stop button when
“Fader” is set to “In.”
Recording starts with a dark screen and then
the image and sound are faded in.
Fade In (Approx. 3 seconds)
Fade out
Press the Recording start/stop button when
“Fader” is set to “Out.”
Recording stops as the image and sound are faded out.
Fade Out (Approx. 3 seconds)
Fade in-out
Press the Recording start/stop button when “Fader” is set to “In-Out.”
Recording starts with a dark screen and then the image and sound are faded in.
Recording stops as the image and sound are faded out.
This function is disabled after being used one time.
Tele Macro
Using the Tele Macro function, you can get close up images which were created by focusing on
a small portion of a large object at a wide angle. The effective focal distance in the Tele Macro
mode is between 1 to 50 cm. (0.4 to 19.7 inches)
PRECHECK!
Select the record mode by pressing the MODE button. page 23
1. Touch the Menu ( ) tab “5FMF.BDSP”
2. Touch the desired submenu item.
3. To exit the menu, touch the Exit ( ) or Return (
Tele Macro
) tab.
Cont. Shot
4/5
Submenu items
Wind Cut
Digital Zoom
t Off: Disable the function.
t On ( ): You can focus on a small portion of a large object at a wide angle.
Tele Macro
Off
t
t
t
t
t
8IFOSFDPSEJOHJO5FMF.BDSPNPEFUIFGPDVTTQFFENBZCFMPXFSFE
6TFBUSJQPEOPUTVQQMJFE
UPQSFWFOUIBOETIBLFJOUIF5FMF.BDSPNPEF
"WPJETIBEPXTXIFOSFDPSEJOHJOUIF5FMF.BDSPNPEF
"TUIFEJTUBODFUPUIFTVCKFDUEFDSFBTFTGPDVTJOHBSFBOBSSPXT
8IFOZPVDBOOPUHFUQSPQFSGPDVTNPWFUIFZoom button or Zoom lever
to adjust the focus.
On
1/1
$POU4IPU
This function allows you to capture photos in succession to give you more photo-taking
opportunities when recording moving subjects.
PRECHECK!
Select the record mode by pressing the MODE button. page 23
1. Touch the Menu ( ) tab “$POU4IPU”
2. Touch the desired submenu item.
3. To exit the menu, touch the Exit ( ) or Return (
Tele Macro
Cont. Shot
4/5
Wind Cut
Digital Zoom
) tab.
Cont. Shot
Submenu items
t Off: Records only one photo image.
t On ( ): When pressing the PHOTO button, you can take up to 8
photos in 1second.
Off
On
1/1
t 8IFOBOFSSPSPDDVSTJOUFSOBMNFNPSZGVMMFUD
EVSJOHDPOUJOVPVTTIPUUIFSFDPSEJOHTUPQTBOE
an error message is displayed.
t 8IFOi$POU4IPU” is set to “On,” the photo resolution is fixed to 1920 x 1080.
advanced recording
Wind Cut
Using the Wind Cut function, you can reduce wind noise when recording sound from the built-in
microphone.
PRECHECK!
Select the record mode by pressing the MODE button. page 23
1. Touch the Menu ( ) tab “8JOE$VU”
2. Touch the desired submenu item.
3. To exit the menu, touch the Exit ( ) or Return (
Tele Macro
Cont. Shot
) tab.
4/5
Wind Cut
Digital Zoom
Submenu items
t Off: Disables the function.
t On ( ): Reduces wind noise when recording sound from the built-in
microphone.
Wind Cut
Off
On
1/1
Using the Wind Cut function also removes some low-frequency
sound with the wind noise.
Digital Zoom
The digital zoom enables higher zoom magnification than the optical zoom ratio.
The optically magnified image by the lens can be electronically magnified up to maximum 4000
times.
Digital Zoom
PRECHECK!
Select the record mode by pressing the MODE button. page 23
1. Touch the Menu ( ) tab “%JHJUBM;PPN”
2. Touch the desired submenu item.
3. To exit the menu, touch the Exit ( ) or Return (
Off
On
1/1
) tab.
STBY 00:00:00
[307Min]
9999
Submenu items
t Off : Disables the function.
t On : Enables higher zoom magnification.
With the digital zoom, the image is digitally processed more than
the optical zoom modes. As a result, the image resolution may
deteriorate.
MENU
The right side of the bar shows
the digital zooming zone.
The zooming zone appears
when you move the zoom lever.
Self Timer
When the self-timer is enabled, there is a time delay after you actually press the Record
Start/Stop or PHOTO button. You can use this function when you want to take a shot of many
people including yourself.
PRECHECK!
Select the record mode by pressing the MODE button. page 23
1. Touch the Menu (
) tab “4FMG5JNFS”
2. Touch the desired submenu item.
Self Timer
Time Lapse REC
3. To exit the menu, touch the Exit (
) or Return (
) tab.
5/5
Quick View
Guideline
Self Timer
Submenu items
t Off: Disables the function
t 10 Sec ( ): There is a time delay for 10 seconds when you press
the Record Start/Stop or PHOTO button.
Off
10 Sec
1/1
This function is disabled after used for one time.
advanced recording
Time Lapse REC
Using the time lapse feature, your camcorder can be programmed to automatically record a
number of frames over a period of time or with a certain time interval between each frame. For
instance, a camcorder on a tripod (not supplied) in time lapse mode could be set up to shoot
frames of a flower opening or a bird building a nest.
PRECHECK!
Select the record mode by pressing the MODE button. page 23
To record in the Time Lapse REC mode, you need to set the recording interval and the total
recording time from start to finish using the menu.
1. Touch the Meun ( ) tab. “Time Lapse REC” i0Ow
t 5IFNFOVTDSFFOBQQFBST
2. Touch the desired items (Interval, Rec Limit) and then touch the up
( ) or down ( ) tab to set the values.
Self Timer
Time Lapse REC
Quick View
5/5
Guideline
3. Touch the (
) tab to finish the setting.
4. To exit the menu, touch the Exit (
) or Return (
) tab.
5. After setting the Time Lapse REC mode, press the Recording
start/stop button.
t Then the Time Lapse recording starts.
t For Time Lapse REC, the [HD]720/50p resolution and Super
Fine quality are supported only.
Time Lapse REC
Off
On
1/1
Time Lapse REC
Interval
1
REC limit
Sec/
24
HR
REC Time : 28Min 48Sec
Submenu items
t Off: Disables the function.
t On ( ):
- Interval (“Sec”): Image of the subject is captured by set interval.
Images are automatically shot a frame at a time at the specified
interval and stored in the storage media. 1 3 5
- REC Limit (“Hr”): Total time from start to finish of recording.
24 48 72
[HD]720/50p SF
00:00:00
OK
[307Min]
1Sec/24Hr
Time Lapse Recording
MENU
Example of Time Lapse Recording
Total time for recording
Recording interval
Timeline
The Time Lapse Recording function
records image frames at the predefined
interval over the total recording time to
produce a time-lapse video.
For example, the Time Lapse
Recording is useful for filming in the
following situations:
Time for recording on the
storage media (a video clip of
Time Lapse REC)
00:00:20 / 00:20:00
100_0017
00:00:25 / 00:20:00
100_0017
t #MPPNJOHnPXFST
t "CJSECVJMEJOHBOFTU
t $MPVETSPMMJOHCZJOUIFTLZ
00:00:30 / 00:20:00
100_0017
t 5JNFMBQTFSFDPSEJOHNPEFJTSFMFBTFEPODFSFDPSEJOHIBTCFFOmOJTIFE5PTUBSUBOPUIFS5JNF-BQTF
Recording, repeat steps 1-5.
t DBQUVSFEJNBHFTDPNQPTFBWJEFPPGTFDPOEMFOHUI4JODFUIFNJOJNVNMFOHUIPGBWJEFPUPCF
saved by your camcorder is one second, the interval defines how long the time lapse recording should be
taken. For example, if you set the interval to “30 Sec,” time lapse recording should be taken for at least 1
hour to record a minimum video length of 2 seconds (100 images).
t 0ODFUIFtime lapse recording finishes recording for its total recording time, it switches to the standby
mode.
t 1SFTTUIFRecording start/stop button if you want to stop the time lapse recording.
t "VEJPJTOPUSFDPSEFEEVSJOHtime lapse recording.
t 8IFOBWJEFPSFDPSEJOHmMMTVQ(#PGTUPSBHFNFNPSZBOFXSFDPSEJOHmMFJTBVUPNBUJDBMMZTUBSUFEBU
that point.
t 8IFOUIFCBUUFSZDIBSHFXBTFYIBVTUFEEVSJOHUIFtime lapse recording, it saves recording up to that point
and switches to standby mode. After a while, it displays a warning message, then turns off automatically.
t 8IFOUIFNFNPSZTQBDFPGUIFTUPSBHFNFEJBJTJOTVGmDJFOUEVSJOHUIFtime lapse recording, it switches to
the standby mode after saving the recording up to its maximum.
t During Time Lapse REC, the zoom and focus functions are fixed so that you cannot change the settings.
Even though the subject is moved, the focus cannot be changed.
t When a time lapse recording starts, the “Time Lapse Recording” message blinks on the screen and
it appears that the screen has stopped. This is a normal operation; do not remove the power source or
memory card from the camcorder.
t 8FSFDPNNFOEVTJOHUIF"$QPXFSBEBQUPSGPSBtime lapse recording.
advanced recording
Quick View
Using the Quick View function, you can view the most recently recorded video and photo
images as soon as the recording is finished.
PRECHECK!
Select the record mode by pressing the MODE button. page 23
1. Touch the Menu (
) tab “2VJDL7JFX”
2. Touch the desired submenu item.
Self Timer
Time Lapse REC
3. To exit the menu, touch the Exit (
) or Return (
) tab.
Quick View
5/5
Guideline
Quick View
Submenu items
Off
t Off: Quick View icon does not appear on the screen after you finish
the recording.
t On: Quick View icon appears on the screen as soon as you finish
the recording. Touch the Quick View icon to view the most
recent video or photo you have recorded. After the Quick View
is completed, your camcorder switches back to the standby
mode.
Tip If you touch the delete (
On
1/1
) tab during Quick View, the file is deleted.
00:00:05/00:00:50
100_0013
Quick View
t 5IF2VJDL7JFXGVODUJPOJTOPUBWBJMBCMFJOUIFGPMMPXJOHDPOEJUJPOT
- If the mode has been changed after the recording
- If the USB cable is connected to the camcorder.
- If the camcorder has been restarted after the recording
- After playing Quick View
t 'PSQIPUPTSFDPSEFEXJUIUIFi$POU4IPU,” only the most recent file is played.
Guideline
Guideline displays straight line patterns on the LCD screen that can help you set the image
composition when recording images. The camcorder provides 3 types of guidelines.
PRECHECK!
Select the record mode by pressing the MODE button. page 23
1. Touch the Menu (
) tab “(VJEFMJOF”
Self Timer
2. Touch the desired guideline according to the subject.
t 5IFTFMFDUFEHVJEFMJOFBQQFBSTPOUIFTDSFFO
Time Lapse REC
5/5
3. To exit the menu, touch the Exit (
) or Return (
) tab.
Quick View
Guideline
Guideline
Off
Submenu items
t Off: Disables the function.
: Placing the subject at the centre cross point puts the subject in
t
the middle of the frame.
: Positioning subjects within the Safety Zone rectangle ensures
t
they will be recorded.
: For recording multiple subjects. Putting subjects at or near the
t
grid cross points creates a balanced composition.
STBY 00:00:00
[307Min]
9999
MENU
t 1PTJUJPOJOHBTVCKFDUBUUIFDSPTTQPJOUPGBHVJEFMJOFQSPWJEFTBCBMBODFEDPNQPTJUJPO
t (VJEFMJOFTBSFOPUSFDPSEFE
advanced playback
Play Option
You can set a specific playback style according to your preference.
PRECHECK!
Touch the Play (
) HD (
1. Touch the Menu (
HD
) or SD (
SD
) tab on the LCD screen. page 43
) tab “1MBZ0QUJPO”
2. Touch the desired submenu item.
Play Option
Highlight
3. To exit the menu, touch the Exit (
) or Return (
) tab.
1/ 2
Playlist
Delete
Play Option
Submenu items
Play All
t Play All (
): Plays video clips in succession starting from the
selected video to the last one, then returns to the
thumbnail index view.
t Play One ( ): Plays the selected video only and returns to the
thumbnail view.
t Repeat All ( ): Repeats playing all the video clips until the
) tab is touched.
Return (
t Repeat One ( ): Repeats playing the selected video only until the
) tab is touched.
Return (
70
Play One
1/1
Repeat All
Repeat One
Highlight
This camcorder shows a section of the recorded video(s) at random.
PRECHECK!
Touch the Play (
) HD (
1. Touch the Menu (
HD
) or SD (
SD
) tab on the LCD screen. page 43
) tab. “)JHIMJHIU”
2. Touch the desired submenu item.
Play Option
Highlight
3. To exit the menu, touch the Exit ( ) or Return ( ) tab.
t 8IFOUIFIJHIMJHIUWJFXJTmOJTIFEUIFWJEFPUIVNCOBJMWJFX
appears.
t *OUIFIJHIMJHIUQMBZNPEFZPVDBOBEKVTUUIFWPMVNFCZ
touching the screen and can also cancel the playback.
1/ 2
Playlist
Delete
Highlight
Recent
All
1/1
Submenu items
t Recent ( ): Shows a section of the videos that were created within
the last 24 hours.
t All ( ): Shows a section of all video files.
Tip
Highlight playback time to the recording time for a video
Time recorded
Less than 5 sec.
5 to 30 sec.
30 sec. to 5 min.
5 min. to 10 min.
Over 10 min.
Highlight playback time
Full playback
Plays 5 seconds.
Plays 5 seconds of each 30 second section.
Plays 11 seconds of each 2 minute section.
Plays 15 seconds of each 3 minute section.
If you execute the Highlight function in the date thumbnail display, all the files in the selected date set
appear on the LCD screen.
71
advanced playback
VIEW
This function provides the preview of storyboard to be printed, which gives you digest of the
recorded video without viewing the whole sequence of it.
PRECHECK!
Touch the Play (
) HD (
HD
) or SD (
SD
) tab on the LCD screen. page 43
1. Press the VIEW button.
2. Touch the desired video.
t Sampling 16 i-Frame images appears on the LCD
screen.
t The images from the selected video are selected
arbitrarily, and compose the preview of storyboard
to be printed.
t 8IFOBUIVNCOBJMJTTFMFDUFEBNPOHJ'SBNF
images, playback starts from the thumbnail.
3. To save the storyboard image on the storage media, touch the
) tab “Yes.”
Story-board print (
t You can find the saved storyboard image in the photo
thumbnail view.
View
3/3
72
*OUIFGPMMPXJOHDBTFJUDBOOPUCFFYUSBDUFEXJUIBMMJ'SBNFUIVNCOBJMT
).
- In case thumbnail is displayed by the date (
- Recorded video is too short (to extract 16 i-Frame thumbnails from a video, its recorded time
should be longer than 32 seconds.)
Story-Board Print
Using the storyboard printing, you can make the digest image of your video abridging its story.
This function captures 16 still images arbitrarily from the selected video and makes up one still
image of 16-splits to save it into the storage media. It presents a quick overview of your video,
helping you to understand the whole story of the video.
PRECHECK!
Touch the Play (
) HD (
1. Touch the Menu (
HD
) or SD (
SD
) tab on the LCD screen. page 43
) tab “Story-Board Print.”
2. Touch the desired video “Yes.”
t Printed storyboard image file appears on the LCD screen for a
while.
t Images to be captured are selected arbitrarily, and composes
storyboard of one still image with 16-split still frames.
t You can also find the saved storyboard image in the photo
thumbnail view.
Protect
Story-Board Print
2/ 2
Edit
File Info
Story-Board Print
3/3
t The Story-Board Print function is not available in the
following conditions:
- If free space available on the storage is insufficient.
t 5IFTUPSZCPBSEQSJOUJOHNBZOPUTIPXBMMJ'SBNF
thumbnails in following case:
- Recorded video is too short (to extract 16 i-Frame thumbnails
from a video, its recorded time should be longer than 32
seconds.)
File Info
You can see the image information for all images.
PRECHECK!
Touch the Play (
Protect
) tab on the LCD screen to select the play mode. page 23
1. Touch the Menu (
) tab i'JMF*OGPw
Story-Board Print
2/ 2
Edit
File Info
2. Select the desired file to view the file information.
t 5IFJOGPSNBUJPOPGUIFTFMFDUFEmMFBQQFBST
File Info
3. To exit the menu, touch the Return (
) tab.
100VIDEO
HDV_0017.MP4
Date
Duration
Size
Resolution
: 01. JAN. 2010
: 00:00:05
: 9.56MB
: HD 1080 50i F
73
system setting
Storage Type (HMX-H203/H204/H205 only)
You can record videos and photos on the internal memory or a memory card, so you should
select the desired storage media before starting recording or playback. page 27
Storage Info (HMX-H203/H204/H205 only)
This function shows you the storage information of the selected storage media, such as used
and available memory space, etc.
PRECHECK!
Insert a memory card in the camcorder before viewing the storage information.
1. Touch the Menu ( ) Setting ( ) tab “Storage Info.”
2. Touch the desired submenu item.
t 6TFENFNPSZTQBDFBWBJMBCMFNFNPSZTQBDFGPSVTF
and the recordable time depending on the selected video
resolution appears.
3. To exit the menu, touch the Return ( ) tab.
Storage Type
Storage Info
1/ 7
Format
File No.
Storage Info
Submenu items
t Internal Memory: Displays the storage information of the internal
memory.
t Card: Displays the storage information of the memory card.
Internal Memory
Card
1/1
Card Info (HMX-H200/H220 only)
This function shows you the storage information of the memory card, such as used and
available memory space, etc.
PRECHECK!
Insert the memory card in the camcorder before viewing the storage information.
1. Touch the Menu ( ) Setting ( ) tab “Card Info.”
t Used memory space, available memory space for use, and the
recordable time depending on the selected video resolution
appears.
2. To exit the menu, touch the Return ( ) tab.
74
Card
• Used: 40.5MB
• Free: 30.8GB
[HD]1080/50i
Super Fine :
Fine
:
Normal
:
253Min
307Min
390Min
Format
Use this function if you want to delete all files completely or to correct problems on the storage
media.
PRECHECK!
You can completely delete all files and options on the storage media, including protected files.
This enables stable speeds and operation when accessing the storage media.
#FBXBSFUIBUBMMmMFTBOEEBUBJODMVEJOHQSPUFDUFEmMFTXJMMCFFSBTFE
1. Touch the Menu (
) Setting ( ) tab “'PSNBU”
2. Touch the desired submenu item. (HMX-H203/H204/H205 only)
t "NFTTBHFBQQFBSTBTLJOHBCPVUGPSNBUUJOHUIFNFNPSZDBSE
Card Info
Format
1/ 6
3. Touch “:FT”
t 5IFGPSNBUJTFYFDVUFEXJUIBNFTTBHF
File No.
Time Zone
Submenu item (HMX-H203/H204/H205 only)
t Internal Memory: Formats the internal memory.
t Card: Formats the memory card.
t %POPUSFNPWFUIFTUPSBHFNFEJBPSQFSGPSNBOZPUIFSPQFSBUJPOTVDIBTUVSOJOHPGGUIFQPXFS
during formatting. Also, be sure to use the provided AC power adapter, as the storage media may
be corrupted if the battery becomes exhausted during formatting.
t *GUIFTUPSBHFNFEJBCFDPNFTDPSSVQUFEGPSNBUJUBHBJO
t %POPUGPSNBUUIFTUPSBHFNFEJBPOB1$PSPUIFSEFWJDF
Make sure to format the storage media on this camcorder.
t "NFNPSZDBSEXJUIUIFQSPUFDUJPOUBCTFUUPMPDLXJMMOPUCFGPSNBUUFEpage 29
t *GUIFSFJTOPTUPSBHFNFEJBJOTFSUFEJUDBOOPUCFTFMFDUFE5IFOJUXJMMCFEJNNFEPOUIFNFOV
t 5IFNFNPSZDBSEGPSNBUJTFYFDVUFECZUPVDIJOHiFormat.” (HMX-H200/H220 only)
75
system setting
'JMF/P
File names (numbers) are assigned to recorded images according to the selected numbering option.
1. Touch the Menu ( ) Setting ( ) tab “'JMF/P”
2. Touch the desired submenu item.
3. To exit the menu, touch the Exit ( ) or Return ( ) tab.
Card Info
Format
1/ 6
Time Zone
Submenu items
t Series : Assigns file numbers in sequence even after you replace
or format the storage media or delete all files. Each file
is given with a unique file number that allows convenient
image management on a PC.
t Reset : Resets the file number to 0001 after formatting or deleting
all files or inserting a new memory card.
File No.
File No.
Series
Reset
1/1
When you set “'JMF/P” to “4FSJFT” each file is assigned with a different number so as to avoid
duplicating file names. It is convenient when you want to manage your files on a computer.
Time Zone
You can easily set the clock to the local time when using your
camcorder while traveling.
1. Touch the Menu ( ) tab Setting ( ) tab “Time Zone” “7JTJU”
2 Touch the left ( ) or the right ( ) tab to select the visited area.
3. Touch the ( ) tab when the time zone setting is completed.
t 5IFUJNF[POFTFUWBMVFJTOPUBQQMJFEJGZPVmOJTIUIFTFUUJOH
with the ( ) tab without touching the ( ) tab.
Card Info
Format
1/ 6
File No.
Time Zone
Time Zone
Home
Visit
1/1
Submenu items
t Home : The clock will be used according to your setting on the Date/Time Set
menu. Select it when using this camcorder for the first time or when
returning the clock to your hometown date/time setting.
t Visit ( ): When you visit a different time zone, it allows you to use the local
time without changing your hometown time setting. The clock will
be adjusted in accordance with the time difference between the two
locations.
Visit
London, Lisbon
[HOME 00:00] 01/JAN/2010 00:00
OK
Cities used to set the time zone
Cities
London, Lisbon
Rome, Paris, Berlin, Stockholm, Madrid,
Frankfurt
Athens, Helsinki, Cairo, Ankara
Moskva, Riyadh
Teheran
Abu Dhabi, Muscat
Kabul
Tashkent, Karachi
Calcutta, New Delhi
Kathmandu
Time zone
+00:00
Cities
Adelaide
Time zone
+09:30
+01:00
Guam, Sydney, Brisbane
+10:00
+02:00
+03:00
+03:30
+04:00
+04:30
+05:00
+05:30
+05:45
+11:00
+12:00
-11:00
-10:00
-09:00
-08:00
-07:00
-06:00
Almaty, Dacca
+06:00
Yangon
Bangkok
Hong Kong, Beijing, Taipei, Singapore, Manila
Seoul, Tokyo, Pyongyang
+06:30
+07:00
+08:00
+09:00
Solomon Islands
Wellington, Fiji
Samoa, Midway
Honolulu, Hawaii, Tahiti
Alaska
LA, San Francisco, Vancouver, Seattle
Denver, Phoenix, Salt Lake City
Chicago, Dallas, Houston, Mexico City
New York, Miami, Washington D.C., Montreal,
Atlanta
Caracas, Santiago
Buenos Aires, Brasilia, Sao Paulo
Fernando de Noronha
Azores, Cape Verde
-05:00
-04:00
-03:00
-02:00
-01:00
Date/Time Set
By setting the date and time, you can display the date and time of the recording during
playback. page 25
Date Type
You can set the display type for the date set according to the selected option.
1. Touch the Menu (
) Setting ( ) tab “%BUF5ZQF”
2. Touch the desired submenu item.
Date/Time Set
Date Type
3. To exit the menu, touch the Exit (
) or Return (
) tab.
2/ 6
Time Type
Date/Time Display
Submenu items
t 2010/01/01 : The date is displayed in the order of year/month
(two-digit)/date.
t JAN/01/2010 : The date is displayed in the order of month/date/year.
t 01/JAN/2010 : The date is displayed in the order of date/month/year.
t 01/01/2010 : The date is displayed in the order of date/month
(two-digit)/year.
Date Type
2010/01/01
JAN/01/2010
1/1
01/JAN/2010
01/01/2010
This function depends on “Date/Time Display” setting.
77
system setting
Time Type
You can set the display type for the time set according to the selected option.
1. Touch the Menu (
) Setting ( ) tab “5JNF5ZQF”
2. Touch the desired display option.
Date/Time Set
Date Type
3. To exit the menu, touch the Exit (
) or Return (
) tab.
2/ 6
Time Type
Date/Time Display
Submenu items
t 12Hr : Displays the time information in 12 hour units.
t 24Hr : Displays the time information in 24 hour units.
Time Type
12 Hr
24 Hr
This function depends on “Date/Time Display” setting.
1/1
Date/Time Display
You can set the date and time to be displayed on the LCD screen
according to the selected option.
Date/Time Set
PRECHECK!
Before you use the “Date/Time Display” function, you must set the date and
time. page 78
1. Touch the Menu ( ) Setting ( ) tab “%BUF5JNF%JTQMBZ”
2. Touch the desired submenu item.
3. To exit the menu, touch the Exit ( ) or Return ( ) tab.
t 5IFEBUFUJNFJTEJTQMBZFEPOUIF-$%TDSFFOBDDPSEJOHUPUIF
selected option.
Submenu items
t
t
t
t
78
Off : Current date/time information is not displayed.
Date : Displays the current date.
Time : Displays the current time.
Date & Time : Displays the current date and time.
t 5IFEBUFUJNFXJMMSFBEi01/JAN/2010 00:00” in the following
cases:
- When the built-in rechargeable battery is depleted.
t 5IJTGVODUJPOEFQFOETPOiDate Type” and “Time Type” setting.
Date Type
2/ 6
Time Type
Date/Time Display
Date/Time Display
Off
Date
1/1
Time
Date & Time
STBY 00:00:00
[307Min]
9999
01/JAN/2010 00:00
MENU
LCD Brightness
You can adjust the brightness of the LCD screen to compensate for ambient lighting conditions.
1. Touch the Menu ( ) Setting ( ) tab “LCD Brightness”
2. Touch the decrease ( ) or increase ( ) tab to adjust the setting
values as you want.
t :PVDBOTFUWBMVFTGPS-$%CSJHIUOFTTCFUXFFOBOE
3. To exit the menu, touch the Exit ( ) or Return ( ) tab.
LCD Brightness
Auto LCD Off
Beep Sound
3/ 6
Shutter Sound
LCD Brightness
t *GUIFTVSSPVOEJOHJTUPPCSJHIUBEKVTUUIFCSJHIUOFTTPGUIF-$%
screen.
t Adjusting the LCD screen does not affect the image being
recorded.
t Brighter LCD screen consumes more power.
18
Auto LCD Off
To reduce power consumption, the brightness of the LCD screen is
automatically dimmed if the camcorder is idle for more than 2 minutes.
LCD Brightness
1. Touch the Menu ( ) Setting ( ) tab “"VUP-$%0GG”
2. Touch the desired submenu item.
3. To exit the menu, touch the Exit ( ) or Return ( ) tab.
Auto LCD Off
Beep Sound
3/ 6
Shutter Sound
Auto LCD Off
Submenu items
Off
t Off : Disable the function.
t On : When the camcorder is idle for more than 2 minutes in the STBY
mode, or for more than 5 minutes when recording a video, the
power saving mode starts by dimming the LCD screen.
STBY
00:00:00
After 2 minutes
[307Min]
9999
STBY
00:00:00
[307Min]
00:00:00
On
1/1
After 5 minutes
[307Min]
00:00:00
[307Min]
9999
MENU
< In the STBY mode>
MENU
<LCD screen is darkened>
MENU
<During recording>
MENU
<LCD screen is darkened>
t 8IFOUIJTiAuto LCD Off” function is enabled, you can press any button on the camcorder to
return LCD brightness to normal.
t "VUP-$%0GGXJMMCFEJTBCMFEJOUIFGPMMPXJOHDBTFT
- If the AC power adaptor is connected.
- While the Demo function is in operation.
79
system setting
Beep Sound
This setting allows operations such as touching tabs and buttons on
the screen to be signaled by a beep.
LCD Brightness
1. Touch the Menu (
) Setting ( ) tab “#FFQ4PVOE”
Auto LCD Off
3/ 6
2. Touch the desired submenu item.
3. To exit, touch the Exit (
disappears.
Beep Sound
Shutter Sound
) or Return (
) tab until the menu
Beep Sound
Off
Submenu items
On
t Off : Disables the function.
t On : You will hear a beep sound when operating buttons or tabs
such as the Power ( ) button or recording start/stop
button.
1/1
The Beep Sound is cancelled in the following cases:
- During recording, playing
- When the camcorder has a cable connection. (component/AV cable, HDMI cable, etc.)
Shutter Sound
You can turn the shutter sound on or off when pressing the PHOTO
button.
1. Touch the Menu (
LCD Brightness
) Setting ( ) tab “4IVUUFS4PVOE”
Auto LCD Off
3/ 6
2. Touch the desired submenu item.
3. To exit the menu, touch the Exit (
Beep Sound
Shutter Sound
) or Return (
) tab.
Shutter Sound
Submenu items
t Off : Disable the function.
t On : You will hear the shutter sound when operating the PHOTO
button.
80
Off
On
1/1
The Shutter Sound is not heard in the following conditions:
- In case of using the PHOTO button during video recording.
- When the camcorder has a cable connection. (component/AV cable, HDMI cable, etc.)
Auto Power Off
You can set your camcorder to automatically turn off if it is idle for 5 minutes without an
operation. This function will prevent unnecessary power consumption.
1. Touch the Menu (
) Setting ( ) tab “"VUP1PXFS0GG”
2. Touch the desired submenu item.
Auto Power Off
Quick On STBY
3. To exit the menu, touch the Exit (
) or Return (
) tab.
4/ 6
PC Software
USB Connect
Auto Power Off
Submenu items
t Off : Disable the function.
t 5 Min : The camcorder turns off if idle for 5 minutes without an
operation.
Off
5 Min
1/1
t "VUP1PXFS0GGEPFTOPUXPSLJOUIFGPMMPXJOHTJUVBUJPOT
- When the camcorder has a cable connection. (HDMI cable, component/AV cable, USB cable,
etc.)
- While the Quick On STBY function is in operation.
- While the Demo function is in operation.
- While in recording, playing (except pause), photo slide show.
t 5PPQFSBUFUIFDBNDPSEFSBHBJOQSFTTUIFPower ( ) button.
81
system setting
Quick On STBY
When you are going to record frequently for an extended time, use the Quick On STBY
function. In standby mode, closing the LCD screen will commence the Quick On STBY mode to
reduce energy consumption. Once you are ready to record again, this function enables to the
camcorder to come on quickly from the power saving mode.
1. Touch the Menu (
) Setting ( ) tab “2VJDL0O45#:”
2. Touch the desired submenu item.
Auto Power Off
Quick On STBY
3. To exit the menu, touch the Exit ( ) or Return ( ) tab.
t *OUIFTUBOECZNPEFDMPTJOHUIF-$%TDSFFOXJMMTPPOFYFDVUF
the Quick On STBY mode, and then the camcorder turns off
after the selected time setting.
4/ 6
PC Software
USB Connect
Quick On STBY
Off
5 Min
Submenu items
t Off : In the standby mode, closing the LCD screen turns off the
camcorder.
t 5 Min : In the standby mode, closing the LCD screen will soon
execute the Quick On STBY mode, and then the camcorder
turns off after 5 minutes.
t 10 Min : In the standby mode, closing the LCD screen will
soon execute the Quick On STBY mode, and then the
camcorder turns off after 10 minutes.
t 20 Min : In the standby mode, closing the LCD screen will
soon execute the Quick On STBY mode, and then the
camcorder turns off after 20 minutes.
1/1
10 Min
20 Min
t 5VSOJOHPGGUIFDBNDPSEFSBGUFSVTFJTBMXBZTSFDPNNFOEFEUPSFEVDFUIFFOFSHZDPOTVNQUJPO
however, you can effectively use the Quick On STBY function for the frequent shooting conditions
in the specified time schedule.
t 5IFNPEFJOEJDBUPSLFFQTCMJOLJOHJOUIF2VJDL0O45#:NPEF
t 5IF2VJDL0O45#:NPEFJTOPUBWBJMBCMFJOUIFGPMMPXJOHDPOEJUJPOT
- When the LCD screen is open.
- When a video cable (HDMI, Component/AV) or the USB cable is connected to the camcorder.
- When operating the buttons on the camcorder.
82
PC Software
If you set PC Software to On, you can simply use the PC software by connecting the USB cable
between the camcorder and your PC. You can download the stored video and photo images
POUIFDBNDPSEFSUPZPVS1$TIBSEEJTL&EJUJOHWJEFPQIPUPmMFTJTBMTPBWBJMBCMFVTJOHUIF1$
software.
1. Touch the Menu (
) Setting ( ) tab “1$4PGUXBSF”
2. Touch the desired submenu item.
Auto Power Off
Quick On STBY
3. To exit the menu, touch the Exit (
) or Return (
) tab.
4/ 6
PC Software
USB Connect
PC Software
Submenu items
t Off : Disables the function.
t On : The built-in editing software launches when the camcorder is
connected to the PC.
Off
On
1/1
t The PC Software function is not available in the following conditions:
- If “USB Connect” is set to “PictBridge”
t 5PFOBCMFUIF1$4PGUXBSFGVODUJPOTFUiUSB Connect” to “Mass Storage,” in the system setting
menu option.
t 5IF1$4PGUXBSFJTDPNQBUJCMFXJUIUIF8JOEPXT04POMZ
83
system setting
USB Connect
You can transfer data to a PC or print photos directly by establishing the USB connection.
1. Touch the Menu (
) Setting ( ) tab “64#$POOFDU”
2. Touch the desired submenu item.
3. To exit the menu, touch the Exit (
Auto Power Off
) or Return (
) tab.
Quick On STBY
4/ 6
PC Software
USB Connect
Submenu items
t Mass Storage : Connect to a PC to transfer videos or photos.
page 115
t PictBridge : Connect to a PictBridge printer to print photos directly
(when using the PictBridge function). page 100
USB Connect
Mass Storage
PictBridge
1/1
Before connecting a USB cable, check whether the current USB
mode is appropriate for the function to be used.
HDMI TV Out
You can set the HDMI video output to match the TV you have connected.
PRECHECK!
Using the HDMI cable (not supplied), connect the camcorder to your TV. page 102
1. Touch the Menu (
) Setting ( ) tab “)%.*570VU”
2. Touch the desired submenu item.
HDMI TV Out
Analogue TV Out
3. To exit the menu, touch the Exit (
) or Return (
) tab.
5/ 6
TV Connect Guide
TV Display
Submenu items
t Auto : The video signals are output in the same format as the
recorded file. Use this setting only when connecting to an
HDTV.
t Q : The recorded file is output in the 720x576p format. Use this
setting only when connecting to a regular TV which supports
the progressive scan at the SD (Standard Definition) level by
using the HDMI jacks.
84
HDMI TV Out
Auto
576p
1/1
Analogue TV Out
You can set the component or composite video output to match the TV you have connected.
PRECHECK!
t Using the component/AV cable provided with your camcorder, connect the camcorder to your TV.
page 103~104
t This camcorder provides the two-in-one component/AV cable that fits the purpose of the component and
the AV cable. Therefore, when using the component/AV cable, you must check the right method for the TV
output by setting the “Analogue TV Out” menu.
1. Touch the Menu (
) Setting ( ) tab “"OBMPHVF570VU”
2. Touch the desired submenu item.
t $IFDLUIF57UZQFDPOOFDUJPOKBDLBOEUIFSFTPMVUJPOPGUIF
recorded video before you choose the desired submenu item.
3. To exit the menu, touch the Exit (
) or Return (
) tab.
HDMI TV Out
Analogue TV Out
5/ 6
TV Connect Guide
TV Display
Submenu items
t $PNQPOFOUJ
) : The recorded file is output in the 1920x1080i format. Use this setting only
when connecting to an HDTV by using the component (Y/PB/PR, Audio)
jacks.
576P
t $PNQPOFOUQ ): The recorded file is output in the 720x576p format. Use this setting only
when connecting to a regular TV which supports the progressive scan at
the SD (Standard Definition) level by using the component (Y/PB/PR, Audio)
jacks.
576i
t $PNQPOFOUJ ): The recorded file is output in the 720x576i format. Use this setting only when
connecting to a regular TV which only supports the SD (Standard Definition)
resolution without the progressive scan by using the component (Y/PB/PR,
Audio) jacks.
t $PNQPTJUF ): The composite video signals are output via the component/AV cable (blue). Use this
setting only when connecting to a regular TV that has no component video jacks.
t 5IF"OBMPHVF570VUJOEJDBUPSJTEJTQMBZFEPOMZXIFOUIFDBNDPSEFSJTDPOOFDUFEUPB57
t 'PSEFUBJMTPO57TQFDJmDBUJPOSFGFSUPUIFVTFSNBOVBMPGUIFDPOOFDUFE57
85
system setting
TV Connect Guide
You can view the TV Connect Guide before you connect the camcorder to your TV set.
1. Touch the Menu ( ) tab Setting ( ) tab “57$POOFDU(VJEF”
HDMI TV Out
2. Touch the desired submenu item.
t 57$POOFDU(VJEFBQQFBSTEFQFOEJOHPOUIFTFMFDUFE
submenu items.
t 3FGFSUPUIF57$POOFDU(VJEFXIFODPOOFDUZPVSDBNDPSEFS
with other external devices.
3. To exit the menu, touch the Exit (
) or Return (
Analogue TV Out
5/ 6
TV Connect Guide
TV Display
TV Connect Guide
) tab.
HDMI
Component
1/1
HDTV
Composite
TV Connect Guide
Component
TV
Camcorder
Y
PB
PR
L
R
Camcorder
COMPONENT IN AUDIO IN
R
Y PB PR L
Signal flow
Component/AV cable
Component
Audio
TV Display
You can enable or disable the On Screen Display (OSD) that appears on the TV screen when
connecting your camcorder to a TV.
1. Touch the Menu (
) Setting ( ) tab “57%JTQMBZ”
2. Touch the desired submenu item.
HDMI TV Out
Analogue TV Out
3. To exit the menu, touch the Exit (
) or Return (
) tab.
5/ 6
TV Connect Guide
TV Display
Submenu items
t Off : The OSD (On Screen Display) menus are only shown on the
LCD screen.
t On : The OSD menus are shown on the LCD screen and the TV
screen as well.
TV Display
Off
On
1/1
The thumbnail display and demo screens are shown on the TV even if you set “TV Display” to “0GG”
Default Set
You can restore all menu settings to the default conditions.
1. Touch the Menu ( ) Setting ( ) tab i%FGBVMU4FU”
t "NFTTBHFBQQFBSTBTLJOHGPSZPVSDPOmSNBUJPO
2. Touch "Yes" if you want all the settings return to the default.
t 5IF5JNF;POFTDSFFOBQQFBSTBGUFSBMMTFUUJOHTSFUVSOUPUIF
default.
Default Set
Language
6/ 6
Demo
Anynet+ (HDMI-CEC)
3. Set the date and time again. page 25
t %POPUUVSOPGGUIFQPXFSXIJMFVTJOHUIJTGVODUJPO
t *OJUJBMJTJOHUIFDBNDPSEFSTFUUJOHTUPGBDUPSZEFGBVMUTEPFTOPUBGGFDUSFDPSEFEJNBHFT
87
system setting
Language
You can select a desired language to display the menu and messages. page 26
Demo
Demo mode automatically shows you the major functions that are included with your camcorder
so that you may use them more easily.
1. Touch the Menu (
) Setting ( ) tab “%FNP”
2. Touch the desired submenu item.
3. To exit the menu, touch the Exit (
Default Set
) or Return (
) tab.
Language
6/ 6
Demo
Anynet+ (HDMI-CEC)
Demo
Submenu items
t Off : Disable the function.
t On: Enables the Demo function.
Off
On
1/1
Using the Demo function
The Demo mode is cancelled in the following cases:
- If the LCD screen is touched.
- If any button is operated (Recording start/stop, 2.&/6,
Display (
), SMART AUTO, MODE, PHOTO, etc.)
However, the camcorder will enter the Demo mode
automatically after 5 minutes in STBY mode if it is idle for 5
NJOVUFTXJUIPVUBOPQFSBUJPO*GZPVEPOUXBOUUIF%FNP
function starts, set “Demo” to “Off”.
The Demo function does not operate in the following cases:
- If “Auto Power Off” is set to “5 Min”(uses the battery as main power), the Auto Power Off function
will turn the camcorder off before Demo can run.
88
Anynet+ (HDMI-CEC)
This camcorder supports Anynet+. Anynet+ is an AV network system that enables you to
control all connected Samsung AV devices with an Anynet+ supported Samsung TV remote
control.
1. Touch the Menu (
) Setting ( ) tab “"OZOFU)%.*$&$
”
2. Touch the desired submenu item.
Default Set
Language
3. To exit the menu, touch the Exit ( ) or Return ( ) tab.
t 8IFOUIFDBNDPSEFSJTDPOOFDUFEUPUIF"OZOFUTVQQPSUFE
TV, you can operate some functions of the camcorder using
UIF57TSFNPUFDPOUSPM
6/ 6
Demo
Anynet+ (HDMI-CEC)
Anynet+ (HDMI-CEC)
Off
Submenu items
t Off: Disable the function.
t On: The Anynet+ function is enabled.
On
1/1
t 8IFOZPVUVSOPOUIFDBNDPSEFSUIBUJTDPOOFDUFEUPBO"OZOFUTVQQPSUJOH57XJUIBO)%.*
cable, the TV (Anynet+ supported) is automatically turned on. If you do not want to use this
Anynet+ function, set the “Anynet+ (HDMI-CEC)” to “0GG”
t 'PSEFUBJMTPOUIF"OZOFU)%.*$&$
GVODUJPOSFGFSUPUIFVTFSNBOVBMPG4BNTVOHT"OZOFU
supported TV.
89
editing video clips
DIVIDING A VIDEO
You can divide a video into two, and easily delete a section you no longer need. As this function
edits the original file, make sure to back up important recordings separately.
PRECHECK!
t Insert a memory card.
t Set the appropriate storage media. (HMX-H203/H204/H205 only) page 27
) HD ( HD ) or SD ( SD ) tab on the LCD screen.
t Touch the Play (
page 43
Protect
Story-Board Print
1. Touch the Menu ( ) tab “Edit” “%JWJEF”
2. Touch the desired video to edit.
t 5IFTFMFDUFEWJEFPJTEJTQMBZFEBTQBVTFE
3. Search the point of division by touching playback control tabs.
t 1MBZCBDLDPOUSPMUBCT / / / / /
4. Touch the pause ( ) tab at the point of division, then touch the
Cutting (
) tab.
t "NFTTBHFBQQFBSTBTLJOHGPSZPVSDPOmSNBUJPO
5. Touch “:FT”
t 5IFTFMFDUFEWJEFPJTEJWJEFEJOUPUXPWJEFPDMJQT
t 5IFTFDPOEDMJQPGUIFEJWJEFEWJEFPJTEJTQMBZFEBTUIFMBTU
thumbnail.
t "GUFSUIFEJWJTJPOZPVDBOQBSUJBMMZEFMFUFBVOOFDFTTBSZTFDUJPO
or combine with other videos.
2/ 2
Edit
File Info
Edit
Divide
Combine
1/1
00:00:05/00:00:50
100_0013
Divide
Do not eject a memory card or power off while editing a video recorded on the storage media.
Doing so may damage the storage media or data.
90
t :PVDBOOPUEJWJEFmMFTUIBUBSFQSPUFDUFE ) indicator is written on. Cancel the protect function
first. page 96
t 5IFEJWJEFEWJEFPNBZESJGUCFGPSFPSBGUFSUIFEJWJTJPOQPJOUCZBQQSPYTFDPOET
t 5IF%JWJEFGVODUJPOJTOPUBWBJMBCMFJOUIFGPMMPXJOHDPOEJUJPOT
- If the total recorded time of the video is less than 6 seconds.
- If you trying to divide sections without leaving 3 seconds at the beginning and the end.
- If the video file is recorded in the Time Lapse REC mode.
- If the remaining section of the memory space is less than 15MB.
- Videos recorded or edited by other devices.
- Photos cannot be divided.
t 5IFEJWJTJPOGVODUJPOEPFTOPUXPSLJGBWBJMBCMFTQBDFPOUIFTUPSBHFJTJOTVGmDJFOU
Delete unnecessary videos.
t 8IFOUIFWJEFPJTEJWJEFEJOUPUXPPOMZUIFmSTUWJEFPDMJQJTTUPSFEJOUIFQMBZMJTUBHBJO
COMBINING VIDEOS
You can combine two different videos. As this function edits the original file, make sure to back
up important recordings separately.
PRECHECK!
t Insert a memory card.
t Set the appropriate storage media. (HMX-H203/H204/H205 only) page 27
t Touch the Play (
) HD ( HD ) or SD ( SD ) tab on the LCD screen.
page 43
1. Touch the Menu (
) tab “Edit” “$PNCJOF”
2. Touch the video thumbnails to be combined.
t 5IF ) indicator and the order number are displayed on the
selected videos. Touching the video thumbnail toggles the
image between being selected ( ) or not selected.
t 5IF ) indicator does not appear if there is a different
resolution between selected videos files.
Protect
Story-Board Print
2/ 2
File Info
Edit
Divide
Combine
1/1
) tab.
3. Touch the (
t "NFTTBHFBQQFBSTBTLJOHGPSZPVSDPOmSNBUJPO
4. Touch “:FT”
t 5IFTFMFDUFEWJEFPmMFTBSFDPNCJOFEJOUIFDIPTFOPSEFSBOE
stored as one video.
t 5IFUIVNCOBJMPGUIFmSTUWJEFPXJMMBQQFBSJOUIFDPNCJOFE
video.
Edit
Combine
1
3/3
OK
Do not eject a memory card or power off while editing a video recorded on the memory card.
Doing so may damage the storage media or data.
t :PVDBOOPUDPNCJOFmMFTXJUIUIFQSPUFDU ) indicator is written on. Cancel the protect function
first. page 96
t 5IFPSJHJOBMWJEFPXJMMOPUCFQSFTFSWFE
t The combine function is not available in the following conditions:
- Videos in different resolution formats (Videos recorded at “Video Resolution: [HD]1080/50i”
and “Video Resolution: [HD]720/50p”) cannot be combined.
- The file size of the combined videos cannot exceed 1.8 GB.
- The video file recorded in the Time Lapse REC mode cannot be edited.
- If the remaining section of the memory space is less than 15MB, the files cannot be combined.
- Videos recorded or edited by other devices.
- Photos cannot be combined.
91
editing the playlist
PLAYLIST
What’s a “Playlist?”
You can create a playlist on the same storage media by gathering your favourite scenes from
the recorded videos. Adding or deleting videos from a playlist does not affect the original video
images.
Example: You have recorded a few scenes on the storage media. You want to save the original
recording, but you also want to create a digest by putting your favourite scenes together. In this
case, you can create a playlist by selecting your favourite scenes, leaving the original recording
as it is.
)%
4%
MENU
Recorded videos
30. JAN. 2010
15. JAN. 2010
Video clip 1
10:00
Video clip 2
10:30
Video clip 3
11:30
Video clip 4
14:00
Video clip 5
16:10
Video clip 6
18:20
Video clip 7
20:00
Playlist
92
t 0OFQMBZMJTUDBOCFDSFBUFEQFSFBDISFTPMVUJPOTFUi)%)JHIEFmOJUJPO
wBOEi4%4UBOEBSE
Definition).”
t 5IFNBYJNVNOVNCFSPGWJEFPTPOUIFQMBZMJTUWJEFPT
t *GPSJHJOBMWJEFPTBSFEFMFUFETDFOFTPOUIFQMBZMJTUDSFBUFEXJUIUIFTFWJEFPTBSFBMTPEFMFUFE
CREATING THE PLAYLIST
You can create a playlist by gathering your desired videos from the recorded video.
PRECHECK!
t Insert a memory card.
t Set the appropriate storage media. (HMX-H203/H204/H205 only) page 27
) tab on the LCD screen to select the play mode. page 23
t Touch the Play (
1. Touch the Menu ( ) tab i1MBZMJTUw
t 5IFNFOVXJOEPXBQQFBSTGPSTFMFDUJOHUIFWJEFPSFTPMVUJPO
Play Option
2. Touch “HD” or “4%”
t 5IFUIVNCOBJMEJTQMBZBQQFBSTBDDPSEJOHUPUIFTFMFDUFE
resolution.
Highlight
1/ 2
Delete
3. Touch the Menu ( ) tab, then touch “"EE”
t 7JEFPUIVNCOBJMTDPSSFTQPOEJOHUPUIFTFMFDUFEWJEFP
resolution appear on the screen.
4. Touch the desired video to be added to the playlist.
) indicator is displayed on the selected video.
t 5IF
Touching the video toggles the image between being selected
(
) and not selected.
Playlist
HD
SD
1/1
) tab.
5. Touch the (
t "NFTTBHFBQQFBSTBTLJOHGPSZPVSDPOmSNBUJPO
6. Touch “:FT”
t 5IFQMBZMJTUJTDSFBUFE
t :PVDBOQMBZUIFQMBZMJTUJOUIFTBNFNBOOFSBTZPVQMBZB
video.
Playlist
Add
Arrange
1/1
Delete
Add
3/3
OK
While editing the playlist, do not eject the memory card or power off the camcorder.
Doing so may damage the storage media or data.
t *GBWBJMBCMFTQBDFPOUIFTUPSBHFJTJOTVGmDJFOUZPVDBOOPUDSFBUFPSBEEBQMBZMJTU
Delete unnecessary videos.
t :PVDBOOPUTFMFDUUXPEJGGFSFOUSFTPMVUJPOJNBHFTGPSQMBDFNFOUJOUIFQMBZMJTU
93
editing the playlist
ARRANGING VIDEOS IN THE PLAYLIST
You can change the order of videos on the playlist.
PRECHECK!
t Insert a memory card.
t Set the appropriate storage media. (HMX-H203/H204/H205 only) page 27
) tab on the LCD screen to select the play mode. page 23
t Touch the Play (
1. Touch the Menu (
) tab “1MBZMJTU”
2. Touch “HD” or “4%”
t 7JEFPUIVNCOBJMTDPSSFTQPOEJOHUPUIFTFMFDUFEWJEFPRVBMJUZ
appear on the screen.
Play Option
Highlight
1/ 2
Playlist
Delete
3. Touch the Menu ( ) tab, then touch “"SSBOHF”
t 5IFQMBZMJTUBQQFBST
Playlist
4. Touch the video you want to move.
t 5IF ) indicator and the selection bar appear on the selected
video. Touching the video toggles the image between being
selected ( ) and not selected.
HD
SD
1/1
) tab to move the bar to the
5. Touch the previous ( )/ next (
position you want, then touch the (
) tab.
t "NFTTBHFBQQFBSTBTLJOHGPSZPVSDPOmSNBUJPO
6. Touch “:FT”
t 5IFWJEFPNPWFTUPUIFTFMFDUFEQPTJUJPO
Add
Arrange
1/1
Delete
Arrange
3/3
OK
While editing the playlist, do not eject the memory card or power off the camcorder.
Doing so may damage the storage media or data.
94
DELETING VIDEOS FROM THE PLAYLIST
You can delete undesired videos from the playlist.
PRECHECK!
t Insert a memory card.
t Set the appropriate storage media. (HMX-H203/H204/H205 only) page 27
) tab on the LCD screen to select the play mode. page 23
t Touch the Play (
1. Touch the Menu (
) tab “1MBZMJTU”
2. Touch “HD” or “4%”
t 7JEFPUIVNCOBJMTDPSSFTQPOEJOHUPUIFTFMFDUFEWJEFPRVBMJUZ
appear on the screen.
Play Option
Highlight
1/ 2
Delete
3. Touch the Menu ( ) tab, then touch “%FMFUF”
t 5IFQMBZMJTUBQQFBST
4. Touch the video you want to delete.
t 5IF ) icon and the selection bar appear on the selected
video. Touching the video toggles the image between being
selected ( ) and not selected.
Playlist
Playlist
HD
SD
1/1
) tab.
5. Touch the (
t "NFTTBHFBQQFBSTBTLJOHGPSZPVSDPOmSNBUJPO
6. Touch “:FT”
t 5IFTFMFDUFEWJEFPTBSFEFMFUFEGSPNUIFQMBZMJTU
Add
Arrange
1/1
Delete
Delete
3/3
OK
While editing the playlist, do not eject the memory card or power off the camcorder.
Doing so may damage the storage media or data.
95
file management
PROTECTION FROM ACCIDENTAL ERASURE
You can protect important recordings from accidental erasure. The protected videos and
photos are not deleted unless they are formatted or the protection is cancelled.
PRECHECK!
t Insert a memory card.
t Set the appropriate storage media. (HMX-H203/H204/H205 only) page 27
) tab on the LCD screen to select the play mode. page 23
t Touch the Play (
1. Touch the HD ( HD ), SD ( SD ) or Photo (
t 7JEFPTPSQIPUPTBQQFBSBTUIVNCOBJMT
2. Touch the Menu (
) tab.
Protect
) tab “Protect.”
3. Touch the desired submenu item.
t The corresponding message to the selected option appears.
Story-Board Print
2/ 2
Edit
File Info
4. Touch “:FT”
t 5IFQSPUFDUJPOJTTFUUPPOPSPGG
t 5IF ) indicator appears on the protected file.
Protect
Select Files
All On
All Off
1/1
Protect
Submenu items
t Select Files: Protects individual images.
Touch the images to protect from erasure.
The ( ) indicator is displayed on the selected images.
Touching the thumbnail image toggles the image
between being selected ( ) or not selected.
) tab.
Touch the (
t All On: Protects all images.
t All Off: Releases the protected images all at once.
3/3
t :PVDBOBMTPPQFSBUFUIJTGVODUJPOJOUIFGVMMBOETJOHMFJNBHFEJTQMBZNPEF
t *GUIFXSJUFQSPUFDUJPOUBCPOUIFNFNPSZDBSEJTTFUUPMPDLZPVDBOOPUTFUUIJTGVODUJPO
page 29
OK
DELETING FILES
You can erase your recordings one by one, or at once.
PRECHECK!
t Insert a memory card.
t Set the appropriate storage media. (HMX-H203/H204/H205 only) page 27
) tab on the LCD screen to select the play mode. page 23
t Touch the Play (
1. Touch the HD ( HD ), SD ( SD ) or Photo (
t 7JEFPTPSQIPUPTBQQFBSBTUIVNCOBJMT
2. Touch the Menu (
) tab.
Play Option
) tab “%FMFUFw
3. Touch the desired submenu item.
Highlight
1/ 2
Playlist
Delete
4. The corresponding message to the selected option appears.
Touch “:FT”
t 5IFTFMFDUFEJNBHFJTEFMFUFE
Delete
Select Files
All Files
1/1
Submenu items
t Select Files: Deletes individual images.
Touch the images you want to delete.
The ( ) indicator is displayed on the selected images.
Touching the thumbnail image toggles the image
between being selected ( ) or not selected.
) tab.
Touch the (
t All Files: Deletes all images.
Delete
3/3
OK
t %FMFUFEJNBHFTDBOOPUCFSFDPWFSFE
t %POPUFKFDUBNFNPSZDBSEPSQPXFSPGGXIJMFEFMFUJOHWJEFPTSFDPSEFEPOUIFTUPSBHFNFEJB
Doing so may damage the storage media or data.
t 5PQSPUFDUJNQPSUBOUJNBHFTGSPNBDDJEFOUBMFSBTVSFBDUJWBUFUIFJNBHFQSPUFDUJPOGVODUJPOJO
advance. page 96
t :PVDBOOPUEFMFUFQSPUFDUFEmMFT$BODFMUIFQSPUFDUGVODUJPOmSTU
t *GUIFXSJUFQSPUFDUJPOUBCPOUIFNFNPSZDBSEJTTFUUPMPDLZPVDBOOPUEFMFUFUIFJNBHFT
page 29
t :PVDBOBMTPPQFSBUFUIJTGVODUJPOJOUIFGVMMBOETJOHMFJNBHFEJTQMBZNPEF
t 5IFEFMFUFGVODUJPOEPFTOPUXPSLJGCBUUFSZDIBSHFJTJOTVGmDJFOU*UJTSFDPNNFOEFEUPVTF"$
power to continue power supply during the deletion.
97
file management
COPYING FILES (HMX-H203/H204/H205 ONLY)
Videos and photos stored in the internal memory can be copied to the external flash memory
card. Copying to the memory card does not delete originals in the internal memory.
PRECHECK!
t Insert the memory card in your camcorder.
t Touch the Play (
) tab on the LCD screen to select the play mode. page 23
1. Touch the HD ( HD ), SD ( SD ) or Photo (
t 7JEFPTPSQIPUPTBQQFBSBTUIVNCOBJMT
) tab.
Protect
2. Touch the Menu (
) tab “$PQZw
3. Touch the desired submenu item.
Story-Board Print
2/ 3
Copy
Edit
4. The corresponding message to the selected option appears.
Touch “Yes.”
t 5IFTFMFDUFEJNBHFTBSFDPQJFE
Copy
Select Files
All Files
1/1
Copy
Submenu items
t Select Files: Copy individual images.
Touch the images you want to copy.
The ( ) indicator is displayed on the selected images.
Touching the thumbnail image toggles the image
between being selected ( ) or not selected.
) tab.
Touch the (
t All Files: Copy all images.
3/3
Remain:2GB
OK
Remaining free space in the
destination memory card
t :PVDBOBMTPPQFSBUFUIJTGVODUJPOJOUIFGVMMBOETJOHMFJNBHFEJTQMBZNPEF
t *GUIFXSJUFQSPUFDUJPOUBCPOUIFNFNPSZDBSEJTTFUUPMPDLZPVDBOOPUDPQZUIFJNBHFT
page 29
t :PVDBOOPUDPQZBmMFJGUIFNFNPSZDBSEIBTJOTVGmDJFOUGSFFTQBDF3FNPWFVOOFDFTTBSZmMFT
before proceeding. page 97
t 5IFDPQZGVODUJPOEPFTOPUXPSLJGCBUUFSZDIBSHFJTJOTVGmDJFOU*UJTSFDPNNFOEFEUPVTF"$
power to continue power supply during the copying.
98
printing photos
DPOF PRINTING SETTING
On your memory card, you can write the print-out information including the number of copies
to print. The saved information is used when you connect your camcorder with a DPOFcompatible printer.
PRECHECK!
t Insert a memory card in your camcorder.
t Touch the Play (
) tab on the LCD screen to select the play mode. page 23
1. Touch the Photo (
) tab.
t 5IFQIPUPUIVNCOBJMTBSFEJTQMBZFE
2. Touch the Menu ( ) tab “1SJOU.BSL%10'
”
3. Touch the desired submenu item.
4. The corresponding message appears to the selected option.
Touch “:FT”
t 5IFQSJOUNBSLJTTFMFDUFEPSSFNPWFE
t 5IF 01) indicator appears on the print-marked photos.
Print Mark (DPOF)
File Info
2/2
Print Mark (DPOF)
Select Files
Set All
Submenu items
t Select Files: Print-marks individual images.
The print marks indicator is displayed on the selected
images. Touching the thumbnail image toggles the
image between being selected ( ) or not selected.
) tab.
Touch the (
t Set All: Print-marks all images.
t Reset All: Removes all the print-marks.
Reset All
1/1
Print Mark (DPOF)
01
01
3/3
OK
Understanding DPOF
DPOF (Digital Print Order Format) allows you to set which still images on the memory card are to be
printed, together with information on the number of copies to be printed.
Tip In single display mode, you can set the number of prints by using the decrease (
tab.
) tab "Print Mark (DPOF)" decrease (
- Touch the Menu (
- Up to 99 copies can be set to print of each image.
) or increase (
) or increase (
)
) tab.
t 8IFOZPVTFMFDUUIFiSet All” option, the number of copies to be printed is set to 01.
t 4FMFDUJOHUIFiSet All” or “Reset All” options may take a long time depending on the number of the
selected copies.
99
printing photos
DIRECT PRINTING WITH A PICTBRIDGE PRINTER
You can print photos directly by connecting this camcorder to a PictBridge printer
(sold separately) and a USB cable.
1. Touch the Menu (
“1JDU#SJEHF”
) Setting (
) tab “USB Connect” Auto Power Off
2. Use a USB cable to connect your camcorder to the printer.
Quick On STBY
4/ 6
3. Turn your printer power on.
t 5IFQIPUPUIVNCOBJMTBQQFBS
4. Touch the photos to be print, then touch the Print (
t 5IFTFMFDUFEQIPUPJTQSJOUFE
PC Software
USB Connect
) tab.
USB Connect
Mass Storage
PictBridge
Camcorder
1/1
Printer
(Compatible with PictBridge)
14/17
100-0014
01
MENU
To set the number of prints
Touch the decrease (
)/increase (
to print.
t 5IFOVNCFSPGDPQJFTJTTFU
) tab to set the number of copies
To cancel the print setting
Touch the Return (
) tab on the LCD screen.
To stop printing after printing starts
Touch “Cancel” on the screen.
100
t *GUIFDBNDPSEFSJTDPOOFDUFEUPBQSJOUFSXIJMFiUSB Connect” is set to “Mass Storage,” the
message “Fail USB Connecting Change AUSB Connect’” appears. Set the “USB Connect” to
the “PictBridge” then connect the USB cable again.
t 6TFUIFTVQQMJFE64#DBCMF
To set the date/time imprint
1. In the printer mode, touch the Menu ( ) tab.
t 5IFQSJOUPQUJPOTBQQFBSPOUIFTDSFFO
14/17
100-0014
01
2. Touch “%BUF5JNF”
3. Touch the desired submenu item.
t 5IFTFMFDUFEEBUFBOEUJNFEJTQMBZPQUJPOJTTFU
MENU
4. To exit the menu, touch the Exit ( ) or Return ( ) tab.
t 5IFTFMFDUFEEBUFBOEUJNFXJMMCFQSJOUFEPOUIFQIPUPT
Date/Time
1/1
JAN/01/2
010 12:00
14/17
100-0014
00
12:
10
/2001
/01
Date/Time
Off
N
JA
Date
1/1
MENU
Time
Date & Time
t 5IFEBUFUJNFJNQSJOUPQUJPONBZOPUCFTVQQPSUFECZBMMQSJOUFST$IFDLXJUIZPVSQSJOUFS
manufacturer. The “Date/Time” menu cannot be setup if the printer does not support this option.
t 1JDU#SJEHFJTBSFHJTUFSFEUSBEFNBSLPG$*1"$BNFSB*NBHJOH1SPEVDUT"TTPDJBUJPO
BOJNBHF
transfer standard developed by Canon, Fuji, HP, Olympus, Seiko Epson, and Sony.
t 6TFUIF"$QPXFSBEBQUPSGPSZPVSDBNDPSEFSEVSJOH1JDU#SJEHFEJSFDUQSJOUJOH5VSOJOHUIF
camcorder off during printing might damage data on the storage media.
t 7JEFPJNBHFTDBOOPUCFQSJOUFE
t 1IPUPTSFDPSEFEPOPUIFSEFWJDFTDBOOPUCFQSJOUFE
t 7BSJPVTQSJOUJOHPQUJPOTBSFBWBJMBCMFEFQFOEJOHPOUIFQSJOUFS3FGFSUPUIFQSJOUFShTVTFSNBOVBM
for details.
101
connecting to a TV
CONNECTING TO A HIGH DEFINITION TV
You can enjoy High Definition (HD) quality videos, recorded in “[HD]1080/50i” or “[HD]720/50p”
resolution using an HDTV. The connection methods and quality of the image viewed on the TV screen
differ depending on what type of TV is connected, and the connectors used. To playback high quality
videos from your camcorder, check if your TV set supports the “[HD]1080/50i” resolution. This HD
camcorder supports both HDMI and component output to deliver high-definition video transfer.
PRECHECK!
t Select the HDMI or the component jack on your TV. For more information about the connectors and the
connection methods, refer to the TV user manual.
t This HD camcorder provides a two-in-one component/AV cable that functions as an component and AV
cable. Therefore, when using the component/AV cable, you must select the right method for the TV output
by setting the “Analogue TV Out” menu. page 85
Understanding the HDMI cable
HDMI (High Definition Multimedia Interface) is a compact audio/video interface for transmitting
uncompressed digital data.
What is Anynet+ function?
You can use the same remote control for devices that support the Anynet + function.
You can use the Anynet + function if the camcorder is connected with an HDMI cable to an Anynet+
TVQQPSUFE57'PSNPSFJOGPSNBUJPOSFGFSUPUIF"OZOFUTVQQPSU57TVTFSNBOVBM
Type A: Using a mini HDMI cable
1. Turn on the camcorder and connect a Mini HDMI cable (optional) to the HDMI jack on your TV.
t 8IFODPOOFDUJOHWJB)%.*UIFDPOOFDUFEEFWJDFNBZOPUCFSFDPHOJTFEJGUIF
camcorder is turned off.
2. 5VSOPOZPVS57BOETFUUIF57TJOQVUTFMFDUPSUPUIF*OQVUZPVSDBNDPSEFSJTDPOOFDUFE
UP3FGFSUPUIF57TJOTUSVDUJPONBOVBMUPTFFIPXUPTFMFDUUIF57JOQVU
Camcorder
HDTV
Signal flow
102
Mini HDMI Cable
(optional)
Type B: Using a component/AV cable
1. Connect the provided component/AV cable to the component jack, Y-PB-PR (Video) and
L-R (Audio) on your TV.
t "GUFSUIFDPOOFDUJPOJTDPNQMFUFTFUiAnalogue TV Out” to “$PNQPOFOUJ”
page 85
2. 5VSOPOZPVS57BOETFUUIF57TJOQVUTFMFDUPSUPUIF*OQVUZPVSDBNDPSEFSJTDPOOFDUFE
UP3FGFSUPUIF57TJOTUSVDUJPONBOVBMUPTFFIPXUPTFMFDUUIF57JOQVU
HDTV
Camcorder
Signal flow
Component/AV cable
(component connection)
If the PB, PR, or Y jack is not connected correctly, the TV screen may appear red or blue.
t 8IFODPOOFDUJOHUP57VTJOHUIFDPNQPOFOU"7DBCMFNBUDIUIFDPMPVSTCFUXFFOUIFDBCMFTBOE
the corresponding jacks.
t 7JEFPTSFDPSEFEVTJOHUIF)%DBNDPSEFSXJMMQMBZCBDLPOBO)%57JOUIFPSJHJOBMSFTPMVUJPOZPV
set in the camcorder. Videos recorded in SD quality cannot playback on an HDTV in the HD quality.
For example, videos recorded in HD quality (resolution of “[HD]1080/50i” or “[HD]720/50p”)
playback in HD quality while the videos recorded in SD quality (resolution of “<4%>Q”)
playback in the SD quality.
t 5IJTDBNDPSEFSJTQSPWJEFEXJUIUIFiTV Connect Guide” menu function. If you try to connect the
camcorder to a TV (without using the user manual), use the “TV Connect Guide” menu function.
page 86
t :PVNVTUVTFUIFQSPWJEFEDPNQPOFOU"7DBCMF%POPUVTFDBCMFTGSPNPUIFSNBOVGBDUVSFST
t 0OMZB$UP"UZQF.JOJ)%.*DBCMFDBOCFVTFEXJUIUIJTDBNDPSEFS
t 5IF)%.*KBDLPOUIFDBNDPSEFSJTQSPWJEFEGPSUIFPVUQVUVTBHFPOMZ
t *GUIF"OZOFUTVQQPSUFE57JTDPOOFDUFEXJUIUIFDBNDPSEFSUVSOJOHPOUIFDBNDPSEFSNBZUVSO
UIF57hT57QPXFSPO"OZOFUGVODUJPO
*GZPVEPOUXBOUUIJTGVODUJPOTFUiAnynet+ (HDMI-CEC)”
to “0GG” page 89
t 6TFPOMZUIF)%.*DBCMFXIFODPOOFDUJOHUPUIF)%.*KBDLPGUIJTDBNDPSEFS*GUIF
camcorder is connected with other HDMI cables, the screen display may not work.
103
connecting to a TV
CONNECTING TO A REGULAR TV
You can enjoy images recorded with your HD camcorder on a regular TV that supports
standard definition. *NBHFTSFDPSEFEXJUI)%IJHIEFmOJUJPO
JNBHFRVBMJUZJFSFTPMVUJPO
of “[HD]1080/50i” or “[HD]720/50p”) are played back with SD (standard definition) image
RVBMJUZ
The connection methods and quality of the image viewed on the TV screen differ depending
on what type of TV is connected, and the connectors used. This HD camcorder supports both
component and composite output for standard definition video transfer.
PRECHECK!
t Check your TV connection jack and select the connection method depending on the component or the
composite jack. For more information about the connection jack and the method, refer to the TV user
manual.
t This HD camcorder provides a two-in-one component/AV cable that functions as an component and
AV cable. Therefore, when using the component/AV cable, you must select the right method for the
camcorder's output by setting the “Analogue TV Out” menu. page 85
Type A: Connecting a component/AV cable for the component output
1. Connect the provided component/AV cable to the component jack, Y-PB-PR (Video) and
L-R (Audio) on your TV.
t "GUFSUIFDPOOFDUJPOJTDPNQMFUFTFUiAnalogue TV Out” to “$PNQPOFOUQor
$PNQPOFOUJ” page 85
2. 5VSOPOZPVS57BOETFUUIF57TJOQVUTFMFDUPSUPUIF*OQVUZPVSDBNDPSEFSJTDPOOFDUFE
UP3FGFSUPUIF57TJOTUSVDUJPONBOVBMUPTFFIPXUPTFMFDUUIF57JOQVU
Regular TV
Camcorder
Signal flow
Component/AV cable
(component connection)
104
Type B: Connecting a component/AV cable for the composite output
1. Connect the provided component/AV cable to the composite jack, Video and L-R (Audio)
on TV. Use the blue plug with the yellow label to connect to the Video input on your TV.
t "GUFSUIFDPOOFDUJPOJTDPNQMFUFDIFDLUIFEFTJSFE57PVUNFUIPECZTFUUJOHiAnalogue
TV Out” to “$PNQPTJUF” page 85
2. 5VSOPOZPVS57BOETFUUIF57TJOQVUTFMFDUPSUPUIF*OQVUZPVSDBNDPSEFSJTDPOOFDUFE
to.
t 5IJTJTPGUFOSFGFSSFEUPBTiMJOFw
t 3FGFSUPUIF57TJOTUSVDUJPONBOVBMUPTFFIPXUPTFMFDUUIF57JOQVU
Regular TV
Camcorder
Signal flow
Component/AV cable
(composite connection)
If the PB, PR, or Y jack is connected incorrectly, the TV screen may appear red or blue.
t $IFDLUIFDPOOFDUJPOTUBUVTCFUXFFOUIF)%DBNDPSEFSBOE57UIF57TDSFFONBZOPUEFMJWFS
the right video information if connected incorrectly.
t 8IFOUIFDBNDPSEFSJTDPOOFDUFEUPB57XJUINPSFUIBOPOFDBCMFUIFPVUQVUTJHOBMJTGPMMPXFE
in the order of priority: HDMI component/AV output.
t %POPUVTFFYDFTTJWFGPSDFXIFODPOOFDUJOHUIFDBCMFT
t 'PSNPSFJOGPSNBUJPOBCPVUUIF57DPOOFDUJPOKBDLBOEUIFDPOOFDUJOHNFUIPESFGFSUPUIF57
user manual.
t 'PMMPXJOHNFUIPEType B above, the blue plug may not match the Video input on your TV due to
the VIDEO input being labelled differently. Sometimes the TV has a Y input jack instead of 7*%&0
105
connecting to a TV
VIEWING ON A TV SCREEN
You can enjoy the enjoy widescreen videos on a HDTV (or a regular TV) after recording videos
using the camcorder.
1. You see video from the camcorder on your TV if the connection status is set correctly.
pages 102~105
t 5IF57KBDLTBSFDPOOFDUFEXJUIUIFSJHIUDBCMFT
t *GUIFDPNQPOFOU"7DBCMFJTVTFEiAnalogue TV
OutwJTTFUDPSSFDUMZ
t *OQVUTPVSDFMJTUJTDPSSFDUMZTFUUPWJFXUIFQMBZCBDL
GSPNUIFDBNDPSEFS
2. Select the playback mode on your camcorder and start
to playback videos. page 44
t "EKVTUUIFWPMVNFUPBNPEFSBUFMFWFM*GUIFWPMVNFJTUPPIJHIUIFWJEFPJOGPSNBUJPONBZJODMVEF
noise.
t *GUIFiTV Display” is set “Off,” the TV screen does not include the OSD (On Screen Display)
menus. page 87
t :PVXJMMPOMZIFBSBVEJPGSPNUIFDBNDPSEFSPOZPVS57JOUIFWJEFPQMBZNPEF
Playback on a TV
Recording ratio
Images recorded in a 16:9 ratio
t 7JEFPJNBHFT
t Photo images
t Photo capture images
8JEF
57
4:3 TV
dubbing videos
DUBBING TO A VCR OR DVD/HDD RECORDER
You can dub images played back on you camcorder to other recording devices, such as VCRs
or DVD/HDD recorders. Be sure to connect your camcorder to the wall outlet using the supplied
AC power adaptor for this function.
PRECHECK!
Since dubbing is performed via analogue data transfer (composite connection), use the supplied component/
AV cable.
VCR or DVD/HDD
recorder
Camcorder
Signal flow
Component/AV cable
1. Turn on your camcorder and touch the play ( ) tab.
t 4FUUIFDBNDPSEFSTPVUQVUTJHOBMUPUIF57VTJOHUIFiAnalogue TV Out” function.
page 85
2. Insert the recording media in the recording device.
t *GZPVSSFDPSEJOHEFWJDFIBTBOJOQVUTFMFDUPSTFUJUUPUIFJOQVUNPEF
3. Connect your camcorder to the recording device (VCR or DVD/HDD recorder) with the
supplied component/AV cable (composite connection).
t $POOFDUZPVSDBNDPSEFSUPUIFJOQVUKBDLTPGUIFSFDPSEJOHEFWJDF
4. Start the playback on your camcorder, and record it on the recording device.
t 3FGFSUPUIFJOTUSVDUJPONBOVBMTTVQQMJFEXJUIZPVSSFDPSEJOHEFWJDFGPSEFUBJMT
5. When dubbing is finished, stop the recording device, and then your camcorder.
t 7JEFPTSFDPSEFEPOUIJTDBNDPSEFSDBOCFEVCCFECZDPOOFDUJOHXJUIUIFTVQQMJFEDPNQPOFOU"7DBCMF"MMUIF
recorded videos will be dubbed with SD (standard definition) image quality, regardless of the recording resolution
(HD/SD).
t :PVDBOOPUEVCUPBSFDPSEFSXJUIBO)%.*DBCMF
t 5PDPQZBWJEFPSFDPSEFEXJUI)%IJHIEFmOJUJPO
JNBHFRVBMJUZVTFUIFCVJMUJOTPGUXBSFPGZPVSDBNDPSEFSBOE
copy the images to your computer.
t 4JODFEVCCJOHJTQFSGPSNFEWJBBOBMPHVFEBUBUSBOTGFSUIFJNBHFRVBMJUZNBZEFUFSJPSBUF
t 5PIJEFUIFTDSFFOJOEJDBUPSTTVDIBTBDPVOUFSFUD
POUIFTDSFFOPGUIFNPOJUPSEFWJDFDPOOFDUFETFUiTV
Display: Off.” page 87
t When you are connecting your camcorder to a monaural device, connect the blue plug of the component/AV cable to
the video input jack, and the red (right channel) or the white (left channel) plug to the audio input jack on the device.
107
using with a Windows computer
CHECKING YOUR COMPUTER TYPE
This chapter explains how to connect the camcorder to a computer using the USB cable.
Read this chapter carefully and be free from your burden of handling two devices at the same time.
Check your computer type before using!!!
To view your recordings on a computer, you need to check your computer type first. Then, take
the steps below according to your computer type.
If you are using a
Windows PC
Connect your camcorder to the
computer using the USB cable.
t 5IFCVJMUJOFEJUJOHTPGUXBSF
Intelli-studio runs on the
PC automatically once the
camcorder is connected to
Windows computer. (When
you specify “PC Software:
On”). page 83
Play back or edit your recordings
on the computer using the builtin Intelli-studio application.
page 112
You can also upload your
recordings to YouTube or other
web sites using the Intelli-studio.
page 113
108
If you are using
a Macintosh
t 5IFCVJMUJOTPGUXBSF
on your camcorder,
A*OUFMMJTUVEJPJT
not Macintosh
compliant.
WHAT YOU CAN DO WITH A WINDOWS COMPUTER
You can enjoy the following operations by connecting your camcorder to your Windows
computer by using the USB cable.
Main functions
t #ZVTJOHUIFCVJMUJO*OUFMMJTUVEJPFEJUJOHTPGUXBSFPOZPVSDBNDPSEFSZPVDBOFOKPZUIF
following operations.
- Playing back recorded videos or photos. page 112
- Editing recorded videos or photos. page 112
- Uploading the recorded videos and photos to YouTube, Flickr, Facebook, etc. page 113
t :PVDBOUSBOTGFSPSDPQZUIFmMFTWJEFPTBOEQIPUPT
TBWFEPOUIFTUPSBHFNFEJBJOUPZPVS
computer. (the mass storage function) page 115
System requirements
The following requirements must be satisfied to use built-in editing software (Intelli-studio):
Items
Requirement
OS
Microsoft Windows XP SP2, Vista, or Windows 7
CPU
Intel® Core 2 Duo® 1.66 GHz or higher is recommended
AMD Athlon ™ X2 Dual-Core 2.2 GHz or higher is recommended
(Notebook: Intel Core2 Duo 2.2GHz or AMD Athlon X2 Dual-Core 2.6GHz
or higher recommended)
RAM
1 GB and above recommended
Video Card
nVIDIA Geforce 7600GT or higher Ati X1600 series or higher
Display
1024 x 768, 16-bit colour or higher (1280 x 1024, 32-bit colour
recommended)
USB
USB 2.0
Direct X
DirectX 9.0c or higher
t 4ZTUFNSFRVJSFNFOUTNFOUJPOFEBCPWFBSFSFDPNNFOEBUJPOT&WFOPOBTZTUFNUIBUTBUJTmFTUIF
requirements, operations may not be ensured depending on the system.
t 0OBTMPXFSDPNQVUFSUIBOSFDPNNFOEFEWJEFPQMBZCBDLNBZTLJQGSBNFTPSPQFSBUF
unexpectedly.
t 8IFOUIFWFSTJPOPG%JSFDU9POZPVSDPNQVUFSJTMPXFSUIBODJOTUBMMUIFQSPHSBNNFXJUIUIF
version of 9.0c or higher.
t It is recommended to transfer the recorded video data to a PC before playing back or editing the
video data.
t For doing this, a laptop computer requires higher system requirements than a desktop PC.
109
using with a Windows computer
USING THE Intelli-studio PROGRAMME
Using the Intelli-studio programme built-in your camcorder, you can transfer video/photo files
onto your PC and edit them on your computer. Intelli-studio offers the most convenient way for
you to manage the video/photo files by using the simple USB cable connection between the
camcorder and your PC.
4UFQ$POOFDUJOHUIF64#DBCMF
1. Set the “USB Connect: Mass Storage” and “1$4PGUXBSF0O”
t :PVXJMMmOEUIFEFGBVMUNFOVTFUUJOHTBSFTFUBTUIFBCPWF
2. Connect the camcorder and the PC with the USB cable.
t "OFXmMFTBWJOHTDSFFOBQQFBSTXJUIUIF*OUFMMJTUVEJPNBJO
window.
t "DDPSEJOHUPZPVSDPNQVUFSUZQFUIFDPSSFTQPOEJOH
removable disk window appears.
PC Software
Off
On
1/1
3. Click “Yes,” the uploading procedure will start. Click “Yes” to
confirm.
t *GZPVEPOPUXBOUUPTBWFBOFXmMFTFMFDUi/P”
To disconnect the USB cable
After completing the data transfer, make sure to disconnect the cable in the following way:
1. Click the “Safely Remove Hardware icon” icon on the taskbar.
2. Select “USB Mass Storage Device,” and then click “4UPQ”
3. If the “Stop a Hardware device” window appears, click “0,”
4. Disconnect the USB cable from the camcorder and PC.
t
t
t
t
t
t
t
t
t
110
6TFUIFQSPWJEFE64#DBCMF4VQQMJFECZ4BNTVOH
%POUBQQMZFYDFTTJWFGPSDFXIFOJOTFSUJOHPSFYUSBDUJOHUIF64#DBCMFJOUPGSPNB64#KBDL
*OTFSUB64#BGUFSDIFDLJOHUIFEJSFDUJPOPGJUTJOTFSUJPOJTDPSSFDU
8FSFDPNNFOEVTJOHUIF"$QPXFSBEBQUPSBTUIFQPXFSTVQQMZJOTUFBEPGUIFCBUUFSZ
8IFOUIF64#DBCMFJTDPOOFDUFEUVSOJOHUIFDBNDPSEFSPOPSPGGNBZDBVTFUIF1$UP
malfunction
*GZPVEJTDPOOFDUUIF64#DBCMFGSPNUIF1$PSUIFDBNDPSEFSXIJMFUSBOTGFSSJOHUIFEBUB
transmission will stop and the data may be damaged.
*GZPVDPOOFDUUIF64#DBCMFUPB1$WJBB64#)6#PSTJNVMUBOFPVTMZDPOOFDUUIF64#DBCMF
along with other USB devices, the camcorder may not work properly. If this occurs, remove all USB
devices from the PC and reconnect the camcorder.
"DDPSEJOHUPZPVSDPNQVUFSUZQFUIF*OUFMMJTUVEJPQSPHSBNNFNBZOPUBVUPNBUJDBMMZSVO*OUIJT
case, open the desired CD-ROM drive that has the Intelli-studio programme in My Computer and
run iStudio.exe.
8IFOBO64#DBCMFJTDPOOFDUFEBDDPSEJOHUPUIFBQQMJDBUJPOQSPHSBNNFFH&NP%JP
JOTUBMMFE
on your computer, the corresponding programme may start first of all.
4UFQ"CPVUUIF*OUFMMJTUVEJPNBJOXJOEPX
When the Intelli-studio starts up, thumbnails of videos and photos are displayed in the main
window.
1 2
3 4
5 6
7
8
9
0
@
!
1. Menu items
2. Shortcut icons
Navigates files (previous and next).
Prints selected photo(s).
Views location of selected photo(s)
with GPS information.
Registers to Contents Manager.
3. Shows directories of Contents Manager
and My Computer
t $POUFOUT.BOBHFS:PVDBODMBTTJGZ
and manage videos and photos on
your computer.
t .Z$PNQVUFS:PVDBOWJFXWJEFPT
and photos saved in the selected
directory of your computer.
4. Switches to Library of the computer and
connected camcorder.
5.
6.
7.
8.
9.
Switches to Photo Edit mode.
Switches to Movie Edit mode.
Switches to Share mode.
Changes the size of thumbnails.
Displays all files (videos and photos).
Displays video files only.
Displays photo files only.
Displays voice files only.
10. Selects the connected device.
11. Displays videos and photos in various
ways.
t 5IVNCOBJMT%JTQMBZTWJEFPBOEQIPUP
thumbnails
t (MPCBM.BQ%JTQMBZTUIFMPDBUJPOPG
shooting place with a map.
12. Minimises the connected device screen.
Intelli-studio is a programme commonly used in Samsung camcorders or digital cameras. Some
functions may not work depending on the purchased product.
111
using with a Windows computer
4UFQ1MBZJOHCBDLUIFWJEFPTPSQIPUPT
You can play back the recordings conveniently using the Intelli-studio application.
1. Run the Intelli-studio programme. page 110
2. Click the desired folder to display your
recordings.
t 7JEFPPSQIPUP
UIVNCOBJMTBQQFBSPOUIF
screen, according the selected source.
3. Choose the video (or photo) that you want to
play.
t :PVDBODIFDLUIFmMFJOGPSNBUJPOCZ
moving the mouse on over the file.
t $MJDLJOHPOBWJEFPUIVNCOBJMPODFXJMM
show the video playback inside the
thumbnail frame, allowing you to search for
a desired video with ease.
4. Once you select the desired video (or photo),
double-click to play back.
t 1MBZCBDLTUBSUTBOEQMBZCBDLDPOUSPMT
appear.
The following is the file format supportable in Intelli-studio:
- Video formats: MP4 (Video: H.264, Audio: AAC), WMV (WMV 7/8/9)
- Photo formats: JPG, GIF, BMP, PNG, TIFF
4UFQ&EJUJOHUIFWJEFPTPSQIPUPT
With Intelli-studio, you can edit the videos or
photos in various ways.
(Change Size, Fine-Tuning, Image Effect, Insert
Frame, etc.)
t To edit a file using the Intelli-studio, ensure
to use a copy of the desired file saved in My
Computer before clicking on the “Movie Edit”
or “Photo Edit” icon.
112
4UFQ4IBSJOHUIFWJEFPTQIPUPTPOMJOF
Share your contents with the world, by uploading
photos and videos directly to a web site with one
click.
1. Select the desired videos or photos to share.
2. Click “Share” on the browser.
t 5IFTFMFDUFEmMFBQQFBSTPOUIFTIBSJOH
window.
3. Click the web site you would like to upload
files.
t :PVDBODIPPTFi:PV5VCFwi'JDLSw
“Facebook, ” or the specified web site
you want to set for your uploading
management.
4. Click “Upload” to start uploading.
t "QPQVQXJOEPXBQQFBSTBTLJOHZPVS*%
and the password.
5. Enter your ID and the password to access.
t "DDFTTUPUIFXFCTJUFDPOUFOUTDBOCF
limited depending on your web access
environment.
For more information about Intelli-studio use, see
the Help Guide by clicking “)FMQ”
Flickr is an image and video hosting website, web services suite, and online community
platform. In addition to being a popular website for users to share personal photographs,
the service is widely used by bloggers as a photo repository.
http://www.flickr.com/
Facebook is a global social networking website that is operated and privately owned by
Facebook, Inc. Users can add friends and send messages, and update their personal
profiles to notify friends about themselves. Additionally, users can join networks
organized by city, workplace, school, and region.
http://www.facebook.com/
YouTube is a video sharing website. Users can upload, view, and share personalized
video clips. The San Bruno-based service uses Adobe Flash technology to display
a wide variety of users-generated contents including video clips, TV clips and music
videos, as well as amateur contents such as video blogging and short original videos.
http://www.youtube.com/
113
using with a Windows computer
Installing Intelli-studio application on the Windows computer
t When the Intelli-studio application is installed on a Windows computer, it will run faster after
connecting the camcorder to your computer. Moreover, the application can be updated
automatically and run directly in the Windows computer.
t The Intelli-studio application can be installed on a Windows computer as follows:
Click the “Tool” “Install Intelli-studio on PC” on the Intelli-studio screen.
114
USING AS A REMOVABLE STORAGE DEVICE
You can copy video or photo files recorded by the camcorder to a Windows computer by
connecting the USB cable to the camcorder.
Viewing the contents of storage media
1. Check out the “USB Connect: Mass Storage” setting.
page 84
2. Check out the “PC Software: Off” setting. page 83
3. Check out the storage media.
4. Connect the camcorder to the PC with the USB cable.
page 110
t 5IFi3FNPWBCMF%JTLwPSi4BNTVOHwXJOEPXBQQFBST
POUIF1$TTDSFFOBGUFSBNPNFOU
t 5IFSFNPWBCMFEJTLBQQFBSTXIFODPOOFDUJOHB64#
t 4FMFDUi0QFOGPMEFSTUPWJFXmMFTVTJOH8JOEPXT
Explorer” and click “OK.”
5. The folders in the storage media appear.
t %JGGFSFOUmMFUZQFTBSFTUPSFEJOEJGGFSFOUGPMEFST
6. Select the desired folder (or files) to copy, then drag and
drop it into the destination folder.
t 5IFGPMEFSPSmMFT
JTDPQJFEGSPNUIFTUPSBHFNFEJB
to the PC.
Photos
Videos
Setting data (DPOF, Playlist, etc.)
t *GUIFi3FNPWBCMF%JTLwXJOEPXEPFTOPUBQQFBS
confirm the connection (page 110 or perform steps 1
and 4 again.
t 8IFOUIFSFNPWBCMFEJTLEPFTOPUBQQFBSBVUPNBUJDBMMZ
open the removable disk folder of My Computer.
t *GUIFDPOOFDUFEDBNDPSEFSTEJTLESJWFEPFTOPUPQFO
or the context menu that appears when right clicking
your mouse (open or browse) appears broken, your
computer is suspected to be infected by Autorun virus.
It is recommended to update the anti-virus software for
its latest version.
115
using with a Windows computer
Structure of folders and files on the storage media
t 5IFGPMEFSBOEmMFTUSVDUVSFGPSTUPSBHFNFEJBJTBTGPMMPXT
t 5IFmMFOBNJOHGPMMPXT%$'%FTJHOSVMFGPS$BNFSB'JMF4ZTUFN
7JEFPmMF)
➀
t 5IF)%RVBMJUZWJEFPTIBWF)%[email protected]
t 5IF4%RVBMJUZWJEFPTIBWF4%[email protected]
t 5IFmMFOVNCFSBVUPNBUJDBMMZJODSFBTFTXIFOBOFXWJEFP
file is created.
t "OFXGPMEFSJTDSFBUFEXIFOUIFOVNCFSPGmMFTJOBGPMEFS
exceeds 999~1,000.
t The folder names are given in order of 100VIDEO,
101VIDEO. The maximum number of the folders is 999.
t The maximum of 9,999 files can be created in a storage
media by using the camcorder.
Photo file ➁
t "TJOWJEFPmMFTUIFmMFOVNCFSBVUPNBUJDBMMZJODSFBTFT
when a new photo file is created.
t 5IFQIPUPTIBWF4".@+1(GPSNBU
t "OFXGPMEFSJTDSFBUFEXIFOUIFOVNCFSPGmMFTJOBGPMEFS
exceeds 999~1,000.
t 5IFGPMEFSOBNFTBSFHJWFOJOPSEFSPG1)050
101PHOTO. The maximum number of the folders is 999.
t 5IFNBYJNVNPGmMFTDBOCFDSFBUFEJOBTUPSBHF
media by using the camcorder.
File format
Video files
t Video files are compressed in H.264 format. The file extension is “.MP4.”
t Refer to page 54 for the video resolution.
Photo files
t Photo images are compressed in JPEG (Joint Photographic Experts Group) format. The file
extension is “.JPG.”
t Refer to page 55 for the photo resolution.
The name of a video file recorded by the camcorder should not be modified, since proper playback by
the camcorder requires original folder and file naming convention.
troubleshooting
Before contacting a Samsung authorised service centre, perform the following simple checks.
They may save you the time and expense of an unnecessary call.
WARNING INDICATORS AND MESSAGES
Problems may occur because of the following reasons. Check the information and take
corrective action.
Battery
*OGPSNTUIBU
Action
-
The battery is almost
discharged.
t 3FQMBDFXJUIBDIBSHFECBUUFSZPS
connect the AC power adaptor.
-
The battery can not pass
authenticity check.
t $IFDLXIFUIFSUIFCBUUFSZJTBVUIFOUJD
and change to new one.
t *UJTSFDPNNFOEFEUIBUPOMZHFOVJOF
Samsung batteries are used in this
camcorder.
*OGPSNTUIBU
Action
Internal Memory Full
There is not enough space
to record on the internal
memory.
t %FMFUFVOOFDFTTBSZmMFTPOUIFJOUFSOBM
memory.
t #BDLVQmMFTUPZPVS1$PSBOPUIFS
storage media and delete files.
t 6TFBNFNPSZDBSE
Insert card
There is no memory card
inserted in the memory card
slot.
t *OTFSUBNFNPSZDBSE
Card Full
t %FMFUFVOOFDFTTBSZmMFTPOUIFNFNPSZ
card.
There is not enough space to t #BDLVQmMFTUP1$PSBOPUIFSTUPSBHF
record on memory card.
media and delete files.
t $IBOHFNFNPSZDBSEUPBOPUIFSPOF
has enough free space.
Card Locked
The write protection tab on
an SD or SDHC card has
been set to lock.
Message
Low Battery
Check the
authenticity of this
battery
Icon
Storage media
Message
Icon
t 3FMFBTFXSJUFQSPUFDUJPOUBC
117
troubleshooting
*OGPSNTUIBU
Action
Card Error
The memory card has some
problem and can not be
recognised.
t $IBOHFNFNPSZDBSEXJUIBOPUIFSPOF
Not Formatted
The memory card is not
formatted.
t 'PSNBUUIFNFNPSZDBSEVTJOHUIF
menu.
Not Supported
Format
The memory card may have
been formatted by another
device and may still have
existing images on it.
t The image format is not supported.
Check the supported file format.
t Format the memory card using menu
item.
Not Supported Card
The memory card is not
supported in this camcorder.
t $IBOHFUIFNFNPSZDBSEXJUIUIFPOF
recommended.
Message
Low speed card.
Please record at a
lower resolution.
Icon
-
The memory card does not
t 3FDPSEWJEFPBUBMPXFSRVBMJUZ
have enough performance to
t $IBOHFNFNPSZDBSEXJUIBPOF
record.
Recording
Message
*OGPSNTUIBU
Action
t 5VSOUIFDBNDPSEFShTQPXFSPGGBOEPO
for data recovery.
t *GBmMFJTOPUSFDPWFSFEGPSNBUTUPSBHF
media using menus after back-up
important files to PC or another storage
media.
Write Error
-
Some problem occurred
while writing data to storage
media.
Release the Smart
Auto
-
You can not operate some
functions manually when
Smart Auto is activated.
t 3FMFBTF4NBSU"VUPGVODUJPO
Recovering Data…
Don't power off and
keep card inside.
-
The file was not created
normally.
t 8BJUVOUJMEBUBSFDPWFSZJTmOJTIFE
t /FWFSUVSOPGGUIFQPXFSPSFKFDU
memory card during recording.
The number of video files
that can be stored is 9,999.
t %FMFUFVOOFDFTTBSZmMFTPOUIFTUPSBHF
media.
t #BDLVQmMFTUPZPVS1$PSBOPUIFS
storage media and delete files.
t $IBOHFXJUIBOPUIFSDBSEXIJDIIBT
enough free space.
The number of video
files is full.
Cannot record video.
118
Icon
-
Recording
Message
Icon
*OGPSNTUIBU
Action
The number of photo
files is full.
Cannot take a photo.
-
The number of photo files
that can be stored is 9,999.
t %FMFUFVOOFDFTTBSZmMFTPOUIFTUPSBHF
media.
t #BDLVQmMFTUPZPVS1$PSBOPUIFS
storage media and delete files.
t $IBOHFXJUIBOPUIFSDBSEXIJDIIBT
enough free space.
File number is full.
Cannot record video.
-
Folder and file number have
reached maximum number
and you can not record.
t 4FUi'JMF/P” to “Reset” and format the
storage media.
File number is full.
Cannot take a photo.
-
Folder and file number have
reached maximum number
and you can not record.
t 4FUi'JMF/P” to “Reset” and format the
storage media.
Lens cover is closed.
t Open the lens cover.
*OGPSNTUIBU
Action
Check the lens cover
Playback
Message
Icon
Total file size is over
1.8GB.
-
Total file size that can be
combined is limited to 1.8GB. t $PNCJOFEmMFTNVTUCFMFTTUIBO(#
Select 2 files for
combine.
-
You can not combine more
than 2 different videos into
one.
t *UJTQPTTJCMFUPDPNCJOFVQUPEJGGFSFOU
videos into one.
Cannot select
different resolution
-
The files you want to
combine have different
resolutions.
t *UJTOPUQPTTJCMFUPDPNCJOFUIFmMFTUIBU
have different resolutions.
Read Error
-
Some problems occurred
when reading data from the
storage media.
t 'PSNBUUIFTUPSBHFNFEJBVTJOHNFOVT
after backing up important files to a PC or
another storage device.
Corrupted file
-
This file can not be read.
t 'PSNBUUIFTUPSBHFNFEJBVTJOHNFOVT
after back up important files to a PC or
another storage device.
Not enough free
space in Internal
Memory
-
File editing functions can not
be performed because there
is not enough free space in
the internal memory.
t Delete unnecessary files on the storage
media.
t Back up files to a PC or another storage
media and delete files.
Not enough free
space in Card
-
File editing functions can not
be performed because there
is not enough free space in
the memory card.
t %FMFUFVOOFDFTTBSZmMFTPOUIFTUPSBHF
media.
t #BDLVQmMFTUPB1$PSBOPUIFSTUPSBHF
media and delete files.
119
troubleshooting
USB
*OGPSNTUIBU
Action
-
A problem occurred when
connecting the camcorder
via USB to a printer.
t $IFDLUIF64#DBCMF
t 5SZUIFDPOOFDUJPOQSPDFEVSFBHBJO
t 4XJUDIiUSB connect” function to
“1JDU#SJEHF”
Fail USB Connecting
Change 'USB
Connect'
-
A problem occurred when
connecting the camcorder
via USB to a PC.
t $IFDLUIF64#DBCMF
t 5SZUIFDPOOFDUJPOQSPDFEVSFBHBJO
t 4XJUDIiUSB connect” function to “Mass
4UPSBHF”
Ink Error
-
There is a problem with the
ink cartridge.
t $IFDLUIFJOLDBSUSJEHF
t 1VUBOFXJOLDBSUSJEHFJOUIFQSJOUFS
Paper Error
-
There is a problem with the
paper.
t $IFDLUIFQBQFSJOUIFQSJOUFS*GUIFSFJT
no paper, insert the paper.
File Error
-
There is a problem with the
file.
t :PVSDBNDPSEFSEPFTOPUTVQQPSUUIJTmMF
format.
t 5SZBOPUIFSmMFSFDPSEFEPOZPVS
camcorder.
Printer Error
-
There is a problem with the
printer.
t 5VSOUIFQSJOUFSTQPXFSPGGBOEPO
t $POUBDUUIFQSJOUFSNBOVGBDUVSFSTTFSWJDF
centre.
Print Error
-
A problem occurred during
printing.
t %POPUSFNPWFQPXFSTPVSDFPSFKFDU
memory card during printing.
Message
Fail Printer
Connecting
Change 'USB
Connect'
Icon
When there is dew condensation, put the camcorder aside for a while before using
t 8IBUJTEFXDPOEFOTBUJPO
Dew condensation happens when a camcorder is moved to a place where there is a significant
temperature difference from the previous place. The Dew condenses on the external or internal
parts of the camcorder, and on the reflection lens. When this happens, it may cause a malfunction
or damage to the camcorder when using the device with the power on while there is dew
condensation.
t 8IBUDBO*EP
Turn the power off and detach the battery, and leave it in a dry area for 1~2 hours before using it.
t 8IFOEPFTUIFEFXDPOEFOTBUJPOPDDVS
When the device is relocated to a place with a higher temperature than the previous location, or
when using it in a hot area suddenly, it will cause condensation.
- When recording outside in cold weather during the winter and then using it in indoors.
- When recording outside in hot weather after being indoors or inside a car where the A/C was
running.
120
SYMPTOMS AND SOLUTIONS
If these instructions do not solve your problem, contact your nearest Samsung authorised
service centre.
Power
Symptom
Explanation/Solution
The camcorder does not turn on.
t 5IFCBUUFSZNBZOPUCFJOTUBMMFEPOZPVSDBNDPSEFS*OTFSUUIF
battery to the camcorder.
t 5IFJOTFSUFECBUUFSZNBZCFEJTDIBSHFE
Charge the battery or replace it with a charged one.
t *GZPVVTFUIF"$QPXFSBEBQUPSNBLFTVSFJUJTQSPQFSMZ
connected to a wall outlet.
The power turns off automatically.
t *T“Auto Power Off” set to “5 Min” *GOPCVUUPOJTQSFTTFEGPS
about 5 minutes, the camcorder is automatically turned off (“Auto
Power Off”). To disable this option, change the setting of “Auto
Power Off” to i0GGw page 81
t 5IFCBUUFSZJTBMNPTUFYIBVTUFE$IBSHFUIFCBUUFSZPSSFQMBDFJU
with a charged one.
Power cannot be turned off.
t 3FNPWFUIFCBUUFSZPSVOQMVH"$QPXFSBEBQUPSBOEDPOOFDUUIF
power supply to the camcorder again before turning it on.
The battery is quickly discharged.
t 5IFUFNQFSBUVSFJTUPPMPX
t 5IFCBUUFSZJTOPUGVMMZDIBSHFE$IBSHFUIFCBUUFSZBHBJO
t 5IFCBUUFSZSFBDIFEJUTMJGFTQBOBOEDBOOPUCFSFDIBSHFE
Use another battery.
Display
Symptom
Explanation/Solution
The TV screen or LCD display has
distorted images or has stripes at
the top/bottom or on the left/right.
Unknown image appears on the
LCD screen.
Unknown indicator appears on the
screen.
t *UDBOPDDVSXIFOSFDPSEJOHPSWJFXJOHBSBUJPJNBHFPO
a 4:3-ratio TV, or vice versa. For more details, see the display
specification. page 106
t 5IFDBNDPSEFSJTJO%FNPNPEF*GZPVEPOPUXBOUUPTFF%FNP
image, change the setting “Demo” to i0GGw page 88
t "XBSOJOHJOEJDBUPSPSNFTTBHFBQQFBSTPOUIFTDSFFO
pages 117~120
The afterimage remains on the LCD t 5IJTPDDVSTJGZPVEJTDPOOFDUUIF"$QPXFSBEBQUPSPSSFNPWFUIF
screen.
battery before turning the power off.
The image on the LCD screen looks
t "NCJFOUMJHIUUPPCSJHIU"EKVTUUIFCSJHIUOFTTBOEBOHMFPG-$%
dark.
121
troubleshooting
Recording
Symptom
Explanation/Solution
Pressing the Recording start/stop
button does not start recording.
t 1SFTTUIFMODE button to set the record mode. page 23
t 5IFSFJTOPUFOPVHIGSFFTQBDFUPSFDPSEPOUIFTUPSBHFNFEJB
t $IFDLJGNFNPSZDBSEJTOPUJOTFSUFEPSXSJUFQSPUFDUUBCJTTFUUP
lock.
The actual recording time is less
than the estimated recording time.
t 5IFFTUJNBUFESFDPSEJOHUJNFNBZWBSZEFQFOEJOHPODPOUFOUBOE
features used.
t 8IFOZPVSFDPSEBOPCKFDUUIBUNPWFTGBTUUIFBDUVBMSFDPSEJOH
time may be shortened.
The recording stops automatically.
t 5IFSFJTOPNPSFGSFFTQBDFGPSSFDPSEJOHPOUIFTUPSBHFNFEJB
Back up important files on your PC and format the storage media
or delete the unnecessary files.
t *GZPVNBLFSFDPSEJOHTPSEFMFUFmMFTGSFRVFOUMZUIFQFSGPSNBODF
of the storage media will be deteriorated. In this case, format the
storage media again.
t *GZPVVTFUIFNFNPSZDBSEXJUIMPXXSJUJOHTQFFEUIFDBNDPSEFS
automatically stops recording the videos and the corresponding
message appears on the LCD screen.
When recording a subject
illuminated by bright light, a vertical
line appears.
t 5IJTJTOPUBNBMGVODUJPO
When the screen is exposed to
direct sunlight during recording, the
t 5IJTJTOPUBNBMGVODUJPO
screen becomes red or black for an
instant.
122
During recording, the date/time
does not display.
t “Date/Time Display” is set to “Off.” Set the “Date/Time Display”
to On. page 78
You cannot record a photo image.
t 4FUZPVSDBNDPSEFSUPUIFSFDPSENPEFpage 23
t 3FMFBTFUIFMPDLPOUIFXSJUFQSPUFDUJPOUBCPGUIFNFNPSZDBSEJG
any.
t 5IFTUPSBHFNFEJBJTGVMM6TFBOFXNFNPSZDBSEPSGPSNBUUIF
storage media. page 75 Or remove unnecessary images.
page 97
The shutter sound is not heard
when you record a photo image.
t 4FU“Shutter Sound” toi0Ow
t During dual recording, the Shutter Sound is not heard.
The beep sound is not heard.
t 4FUiBeep Sound” to “0O”
t #FFQTPVOEJTUFNQPSBMMZPGGXIJMFSFDPSEJOHWJEFPT
Recording
Symptom
Explanation/Solution
There is a time difference between
the point where you press the
Recording start/stop button and
the point where the recorded video
starts/stops.
t 0OZPVSDBNDPSEFSUIFSFNBZCFBTMJHIUUJNFEFMBZCFUXFFOUIF
point when you press the Recording start/stop button and the
actual point where the recorded video starts/stops. This is not an
error.
Horizontal stripes appear on the
images.
t 5IJTPDDVSTXIFOSFDPSEJOHJNBHFTVOEFSBnVPSFTDFOUMBNQ
sodium lamp, or mercury lamp. This is not a malfunction.
Storage Media
Symptom
Explanation/Solution
Memory card functions are not
operable.
t *OTFSUBNFNPSZDBSEJOUPZPVSDBNDPSEFSQSPQFSMZpage 28
t *GZPVVTFBNFNPSZDBSEGPSNBUUFEPOBDPNQVUFSGPSNBUJUBHBJO
directly on your camcorder. page 75
Image cannot be moved or deleted.
t 3FMFBTFUIFMPDLPOUIFXSJUFQSPUFDUUBCPGUIFNFNPSZDBSE
(SDHC/SD memory card), if any. page 29
t :PVDBOOPUNPWFPSEFMFUFUIFQSPUFDUFEJNBHFT3FMFBTFUIF
protection of the image on the storage media. page 96
You cannot format the memory
card.
t 3FMFBTFUIFMPDLPOUIFXSJUFQSPUFDUUBCPGUIFNFNPSZDBSE
(SDHC/SD memory card), if any. page 29
t 5IFNFNPSZDBSEJTOPUTVQQPSUFEPOZPVSDBNDPSEFSPSDBSEIBT
some problems.
The data file name is not indicated
correctly.
t 5IFmMFNBZCFDPSSVQUFE
t 5IFmMFGPSNBUJTOPUTVQQPSUFECZZPVSDBNDPSEFS
t 0OMZUIFmMFOBNFJTEJTQMBZFEJGUIFEJSFDUPSZTUSVDUVSFDPNQMJFT
with the international standard.
123
troubleshooting
Adjusting the image during recording
Symptom
Explanation/Solution
Focus does not adjust
automatically.
t 4FU“Focus” toi"VUPw page 60
t 5IFSFDPSEJOHDPOEJUJPOTBSFOPUTVJUBCMFGPSBVUPGPDVT"EKVTUUIF
focus manually. page 60
t 5IFMFOTJTEVTUZPOUIFTVSGBDF$MFBSUIFMFOTBOEDIFDLUIF
focus.
t 3FDPSEJOHJTCFJOHNBEFJOBEBSLMPDBUJPO
Use a light to brighten the area.
The image appears too bright or
flickering, or changes in colour.
t 5IJTNBZPDDVSXIFOZPVNBLFBSFDPSEJOHVOEFSBnVPSFTDFOU
sodium or or mercury lamp.
Cancel “ SCENE” to avoid or minimise this phenomenon.
page 53
*NBHFTDPMPVSCBMBODFJTOPU
natural.
t 8IJUFCBMBODFBEKVTUNFOUJTSFRVJSFE"EKVTUUPUIFQSPQFS“White
#BMBODFw page 56
The subject passing by the frame
appears very quickly.
t 5IJTJTDBMMFEUIFGPDBMQMBOFQIFOPNFOPO5IJTJTOPUB
malfunction. Because of the way the image device (CMOS sensor)
reads out video signals, the subject passing by the frame rapidly
may appear to bend, depending on the recording condition.
Playback on your camcorder
124
Symptom
Explanation/Solution
Playback (play/pause) function does
not work.
t *NBHFmMFTSFDPSEFEVTJOHBOPUIFSEFWJDFNBZOPUCFQMBZFEPO
your camcorder.
t $IFDLPVUUIFNFNPSZDBSEDPNQBUJCJMJUZpage 29
Photo images stored on a storage
media are not displayed in the
actual size.
t 1IPUPJNBHFTSFDPSEFEPOPUIFSEFWJDFNBZOPUBQQFBSJOUIF
actual size. This is not an error.
Playback is interrupted
unexpectedly.
t $IFDLJGUIF"$QPXFSBEBQUPSPSCBUUFSZCBDLJTQSPQFSMZ
connected and secure.
1MBZCBDLPOPUIFSEFWJDFT57FUD
Symptom
Explanation/Solution
You cannot view the image or hear
the sound from the connected
device.
t $POOFDUUIFBVEJPPGUIFDPNQPOFOU"7DBCMFUPZPVSDBNDPSEFS
or connected device (TV, HD recorder, etc.).
(Red colour- right, White colour- left)
t 5IFDPOOFDUJPODBCMFDPNQPOFOU"7DBCMF
JTOPUDPOOFDUFE
properly. Make sure that the connection cable is connected to the
proper jack. pages 103~104
t 8IFOZPVBSFVTJOHUIFDPNQPOFOU"7DBCMFNBLFTVSFUIFSFE
and white plugs of your component/AV cable are connected.
pages 103~104
t 5IJTDBNDPSEFSEPFTOPUTVQQPSUUIFBVEJPPVUQVUTJHOBMXIFOUIF
camcorder is connected with TV in the record mode. The audio
output signal is supported as long as the camcorder is connected
in the video playback mode. This is not an error.
The image appears distorted on a
TV.
t 5IJTQIFOPNFOPOJTDBVTFECZDPOOFDUJOHUPUIF57XJUI
aspect ratio.
You cannot view the image or hear
the sound from a TV connected
using the HDMI cable.
t *NBHFTXJMMOPUCFPVUQVUGSPNUIF)%.*KBDLJGUIFNBUFSJBMJT
copyright protected.
$POOFDUJOH%VCCJOHXJUIPUIFSEFWJDFT3FDPSEFS1$1SJOUFSFUD
Symptom
Explanation/Solution
You cannot dub correctly using the
HDMI cable.
t :PVDBOOPUEVCJNBHFTVTJOHUIF)%.*DBCMF
You cannot dub correctly using the
component/AV cable.
t 5IFDPNQPOFOU"7DBCMFJTOPUDPOOFDUFEQSPQFSMZ.BLFTVSF
that the component/AV cable is connected to the proper jack, i.e.
to the input jack of the device used for dubbing images from your
camcorder. page 107
Printouts cannot be made using a
PictBridge printer.
t :PVSQSJOUFSNBZOPUQSJOUJNBHFTFEJUFEPOBDPNQVUFSPS
recorded using other device. This is not an error.
125
troubleshooting
Connecting to a computer
Symptom
Explanation/Solution
The computer does not recognise
your camcorder.
t %JTDPOOFDUUIF64#DBCMFGSPNUIFDPNQVUFSBOEDBNDPSEFS
restart the computer, then connect it again correctly.
Cannot play a video file properly on
a PC.
t "WJEFPDPEFDJTOFFEFEUPQMBZUIFmMFSFDPSEFEPOZPVS
camcorder. Install the software provided with your camcorder.
page 114
t .BLFTVSFZPVJOTFSUUIFDPOOFDUPSJOUIFDPSSFDUEJSFDUJPOBOE
connect the USB cable to the USB jack on your camcorder firmly.
t %JTDPOOFDUUIFDBCMFGSPNUIFDPNQVUFSBOEDBNDPSEFSSFTUBSU
the computer. Connect it again properly.
t 5PQMBZCBDLBO)%WJEFPmMFBDPNQVUFSXJUICFUUFSTQFDJmDBUJPO
is required.
Check a computer with recommended specification. page 109
Intelli-studio does not function
properly.
t &YJUUIF*OUFMMJTUVEJPBQQMJDBUJPOBOESFTUBSUUIF8JOEPXT
computer.
Intelli-studio is not performed.
t 4FU1$4PGUXBSFUP0OJOUIF4FUUJOHTNFOVPSJOTUBMM*OUFMMJTUVEJP
in the computer. pages 83, 114
The image or sound on your
camcorder is not played on your
computer properly.
t 7JEFPQMBZCBDLPSTPVOENBZTUPQUFNQPSBSJMZEFQFOEJOHPOZPVS
computer. The video or sound copied to your computer is not
affected.
t *GZPVSDBNDPSEFSJTDPOOFDUFEUPBDPNQVUFSUIBUEPFTOPU
support Hi-speed USB (USB2.0), the image or sound may not be
played correctly. The image and sound copied to your computer
are not affected.
The playback screen is paused or
distorted.
t $IFDLUIFTZTUFNSFRVJSFNFOUTUPQMBZBWJEFP
t &YJUPUIFSBMMBQQMJDBUJPOTSVOOJOHPOUIFDVSSFOUDPNQVUFS
t *GBSFDPSEFEWJEFPJTQMBZFEPOZPVSDBNDPSEFSDPOOFDUFEUPB
computer, the image may not play smoothly, depending on the
transfer speed. Please copy the file to your PC, and then play it
back.
Overall operations
Symptom
Explanation/Solution
The date and time are incorrect.
t )BTUIFDBNDPSEFSCFFOMFGUVOVTFEGPSBMPOHQFSJPEPGUJNF
The backup built-in rechrgeable battery may be discharged.
page 25
Menu items that cannot be used at the same time
Symptom
Cannot use
Because of the following settings
“ SCENE”
“Aperture : Manual,” “Shutter : Manual”
“Aperture: Manual”
“Shutter : Manual,” “ SCENE”
“Shutter: Manual”
“Aperture : Manual,” “ SCENE”
“Video Resolution,”
“Video Quality,”
“Fader”
“Time Lapse REC”
“Photo Resolution”
i$POU4IPUw
Menu items are greyed out
t :PVDBOOPUTFMFDUHSFZFEJUFNTJOUIFDVSSFOUSFDPSEJOHQMBZCBDLNPEF
t 5IFSFBSFTPNFGVODUJPOTZPVDBOOPUBDUJWBUFTJNVMUBOFPVTMZ
The list shown above shows examples of unworkable combinations of functions and menu
items.
t .FOVBOERVJDLNFOVDBOOPUCFVTFEJO4NBSU"VUPNPEF
t 5IFGPMMPXJOHGVODUJPOTDBOOPUCFVTFEEVSJOHWJEFPSFDPSEJOH
“Video Resolution,” “Video Quality,” “Photo Resolution,” “Photo Sharpness,” “Fader,”
“$POU4IPU,” “Digital Zoom,” “Self Timer,” “Time Lapse REC.”
t 5IFGPMMPXJOHGVODUJPOTBSFBVUPNBUJDBMMZTFUUP0GGPS"VUPNPEFJOUIF4NBSU"VUPNPEF
“ SCENE”, “Shutter”, “Digital Effect”, “Tele Macro”, etc.
t In the Smart Auto mode, your camcorder automatically chooses the appropriate camcorder
settings based on a detected type of scene. Most settings are automatically adjusted in
Smart Auto mode. And so, to set or adjust functions on your own, release the Smart Auto
mode first.
127
maintenance & additional information
MAINTENANCE
Your camcorder is a product of superior design and craftsmanship and should be treated with
care.
The suggestions below will help you fulfill any warranty obligations and allow you to enjoy this
product for many years.
t 'PSTBGFLFFQJOHPGUIFDBNDPSEFSUVSOPGGUIFDBNDPSEFS
- Remove the battery and AC power adaptor. pages 16, 20
- Remove the memory card. page 28
Cautions when storing
t Do not leave the camcorder in a place where the temperature is very high for a long
period of time:
The temperature inside a closed vehicle or trunk can become very high in a hot weather.
If you leave the camcorder in such a place, it could malfunction or the case could be
damaged. Do not expose the camcorder to a direct sunlight or place it near a heater.
t Do not store the camcorder in a place where the humidity is high or in a dusty place:
Dust entering the camcorder could cause a malfunction. If humidity is high, the lens could
become mouldy, and the camcorder could become inoperative. It is recommended that you
put the camcorder in a box together with a small silica bag when storing it in a closet, etc.
t Do not store the camcorder in a place subject to strong magnetism or intense
vibration:
This could cause malfunctions.
t Detach the battery from the camcorder and store it in a cool place:
Leaving the battery attached or storing it at a high temperature could shorten its life.
128
Cleaning the camcorder
#FGPSFDMFBOJOHUVSOPGGUIFDBNDPSEFSBOESFNPWFUIFCBUUFSZBOE"$QPXFSBEBQUPS
t To clean the exterior
- Wipe gently with a soft dry cloth. Do not apply excessive force when cleaning, gently rub
the surface.
- Do not use benzene or thinner to clean the camcorder. The coating of exterior could peel
off or the case could deteriorate.
t To fix the case the LCD screen
Wipe gently with a soft dry cloth. Be careful not to damage the monitor.
t To clean the lens
Use an optional air blower to blow out dirt and other small objects. Do not wipe the lens with
cloth or your fingers.
If necessary, wipe gently with lens with a paper.
- Mould may form if the lens is left dirty.
- If the lens looks dim, turn off the camcorder and leave it for about 1 hour.
ADDITIONAL INFORMATION
Storage media
t Be sure to follow the guidelines below to prevent corruption or damage to your
SFDPSEFEEBUB
- Do not bend or drop the storage media, or subject it to strong pressure, jolts or
vibrations.
- Do not splash the storage media with water.
- Do not use, replace, or store the storage media in locations that are exposed to a strong
static electricity or electrical noise.
- Do not turn off the camcorder power or remove the battery or AC power adaptor during
recording, playback, or when accessing the storage media.
- Do not bring the storage media near to objects that have a strong magnetic field or that
emit strong electromagnetic waves.
- Do not store the storage media in locations with high temperature or high humidity.
- Do not touch the metal parts.
t $PQZUIFSFDPSEFEmMFTUPZPVS1$4BNTVOHTIBMMOPUCFSFTQPOTJCMFGPSBOZMPTU
EBUB*UJTSFDPNNFOEFEUIBUZPVDPQZUIFEBUBGSPNZPVS1$UPPUIFSNFEJBGPS
TUPSBHF
t "NBMGVODUJPONBZDBVTFUIFTUPSBHFNFEJBUPGBJMUPPQFSBUFQSPQFSMZ4BNTVOHXJMM
OPUQSPWJEFBOZDPNQFOTBUJPOGPSBOZMPTUDPOUFOUT
LCD screen
#FGPSFDMFBOJOHUVSOPGGUIFDBNDPSEFSBOESFNPWFUIFCBUUFSZBOE"$QPXFSBEBQUPS
t To clean the exterior
- Do not push it too hard or knock it on anything.
- Do not place the camcorder with the LCD screen facing the bottom.
t 5PQSPMPOHUIFTFSWJDFMJGFBWPJESVCCJOHJUXJUIBDPBSTFDMPUI
t #FBXBSFPGUIFGPMMPXJOHQIFOPNFOBGPS-$%TDSFFOVTF5IFZBSFOPUNBMGVODUJPOT
- While using the camcorder, the surface around the LCD screen may heat up.
- If you leave power on for a long time, the surface around the LCD screen becomes hot.
129
maintenance & additional information
USING YOUR CAMCORDER ABROAD
t &BDIDPVOUSZPSSFHJPOIBTJUTPXOFMFDUSJDBOEDPMPVSTZTUFNT
t #FGPSFVTJOHZPVSDBNDPSEFSBCSPBEDIFDLUIFGPMMPXJOHJUFNT
Power sources
The provided AC adaptor features automatic voltage selection in the AC range from 100 V
to 240 V. You can use your camcorder in any countries/regions using the AC power adaptor
supplied with your camcorder within the AC 100 V to 240 V, 50/60 Hz range.
Use a commercially available AC plug adaptor, if necessary, depending on the design of the
wall outlet.
Viewing videos recorded with HD (high definition) image quality
In countries/regions where 1080/50i is supported, you can view the images with the same HD
(high definition) image quality as that of the recorded images. You need an PAL-system-based
and 1080/50i compatible TV (or monitor) with an HDMI or component/AV cable connected.
Viewing videos recorded with SD (standard definition) image quality
To view images recorded with SD (standard definition) image resolution, you need an PALsystem-based TV with audio/video or component input jacks, and an component/AV cable
connected.
On TV colour systems
Your camcorder is an PAL-system-based camcorder.
If you want to view your recordings on a TV or to copy it to an external device, it must be an
PAL-system-based TV or an external device and have the appropriate Audio/Video jacks.
Otherwise, you may need to use a separate video format transcoder (PAL-NTSC format
converter).
The format transcoder is not provided by Samsung.
PAL-compatible countries/regions
Australia, Austria, Belgium, Bulgaria, China, CIS, Czech Republic, Denmark, Egypt, Finland,
France, Germany, Greece, Great Britain, Holland, Hong Kong, Hungary, India, Iran, Iraq,
Kuwait, Libya, Malaysia, Mauritius, Norway, Romania, Saudi Arabia, Singapore, Slovak
Republic, Spain, Sweden, Switzerland, Syria, Thailand, Tunisia, etc.
NTSC-compatible countries/regions
Bahamas, Canada, Central America, Japan, Korea, Mexico, Philippines, Taiwan, United
States of America, etc.
You can make recordings with your camcorder and view pictures on the LCD screen from
anywhere in the world.
130
specifications
Model name
System
LCD screen
HMX-H200BP/HMX-H200SP/HMX-H200LP/HMX-H200RP
HMX-H203BP/HMX-H203SP/HMX-H203LP/HMX-H203RP
HMX-H204BP/HMX-H204SP/HMX-H204LP/HMX-H204RP
HMX-H205BP/HMX-H205SP/HMX-H205LP/HMX-H205RP
HMX-H220BP/HMX-H220SP/HMX-H220LP/HMX-H220RP
Video signal
Picture compression format
Audio compression format
Image device
Lens
Focal length
Filter diameter
Size/dot number
LCD screen method
Composite output
Component output
Connectors
HDMI output
Audio output
USB output
Power source
Power source type
General
Power consumption
(Recording)
Operating temperature
Storage temperature
Storage media
External dimensions
(WxHxD)
Weight
Internal MIC
PAL
H.264 (MPEG-4.AVC)
AAC (Advanced Audio Coding)
1/4.1”, 3.32M Pixel CMOS
F1.8 ~ F3.7, 20x optical zoom,
200x digital zoom
3.2mm ~ 64mm
Ø 34
2.7” Wide Touch LCD (960x240) / 230k
TFT LCD
1Vp-p (75 Ω terminated)
Y: 1 Vp-p, 75 Ω
PB/PR: 0.350Vp-p, 75 Ω
C type connector
-7.5 dBs (600 Ω terminated)
mini USB-B type (USB2.0 High Speed)
DC 5 V, Lithium Ion battery pack 3.7 V
Lithium Ion battery pack, Power supply
(100 V ~ 240 V) 50/60 Hz
3.2W (LCD on)
0 ˚C ~ 40 ˚C (32 ˚F~104 ˚F)
-20 ˚C ~ 60 ˚C (-4 ˚F ~ 140 ˚F)
Internal memory (SSD)
(HMX-H203/H204/H205 only),
Memory card (SD/SDHC) (optional)
Approx. 58.5 mm (2.3 inches) x 59.3 mm
(2.33 inches) x 111.65 mm (4.4 inches)
Approx. 283 g (0.62 lb, 9.98 oz) (Except for
Lithium Ion battery)
Omni-directional stereo microphone
These technical specifications and design may be changed without notice.
131
Power Sources (United Kingdom Only)
The mains lead on the power adapter is supplied with a moulded plug incorporating a fuse.
The value of the fuse is indicated on the pin face of the plug and, if it requires replacing, a fuse
approved to BS1362 of the same rating must be used.
Never use the plug with the fuse cover omitted if the cover is detachable.
If a replacement fuse cover is required, it must be of the same colour as the pin face of the plug.
Replacement covers are available from your dealer.
If the fitted plug is not suitable for the power points in your house or the cable is not long
enough to reach a power point, you should obtain a suitable safety approved extension lead or
consult your dealer for assistance.
However, if there is no alternative to cutting off the plug, remove the fuse and then safely
dispose of the plug.
Do NOT connect the plug to a mains socket as there is a risk of shock hazard from the bared
flexible cord.
IMPORTANT
The wires in the mains lead are coloured in accordance with the following code:
BLUE = NEUTRAL
BROWN = LIVE
As these colours may not correspond to the coloured markings identifying the terminals in your
plug, proceed as follows:
The wire coloured BLUE must be connected to the terminal marqueed with the letter N or
coloured BLUE or BLACK.
The wire coloured BROWN must be connected to the terminal marqueed with the letter L or
coloured BROWN or RED.
Do not connect either wire to the earth terminal marqueed with the letter E or the earth symbol,
coloured GREEN or GREEN and YELLOW.
This page is applicable to Great Britain only.
132
, or
Contact SAMSUNG WORLD WIDE
If you have any questions or comments relating to Samsung products, please contact the
SAMSUNG customer care centre.
Region
North America
Latin America
Europe
CIS
Asia Pacific
1-800-SAMSUNG(726-7864)
01-800-SAMSUNG(726-7864)
1-800-SAMSUNG(726-7864)
0800-333-3733
0800-124-421, 4004-0000
800-SAMSUNG(726-7864)
00-1800-5077267
800-7919267
0-800-507-7267
1-800-10-7267
800-6225
1-800-299-0013
1-800-234-7267
800-7267
1-800-682-3180
1-800-751-2676
1-800-SAMSUNG(726-7864)
0-800-100-5303
01-8000112112
0810 - SAMSUNG (7267864, € 0.07/min)
BELGIUM
02-201-24-18
CZECH
DENMARK
FINLAND
FRANCE
GERMANY
HUNGARY
ITALIA
LUXEMBURG
NETHERLANDS
NORWAY
POLAND
PORTUGAL
SLOVAKIA
SPAIN
SWEDEN
U.K
IRELAND
800 - SAMSUNG(800-726786)
70 70 19 70
030 - 6227 515
01 48 63 00 00
01805 - SAMSUNG(726-7864 € 0,14/Min)
06-80-SAMSUNG(726-7864)
800-SAMSUNG(726-7864)
261 03 710
0900-SAMSUNG (0900-7267864) (€ 0,10/Min)
815-56 480
0 801 1SAMSUNG(172678), 022-607-93-33
80820-SAMSUNG(726-7864)
0800-SAMSUNG(726-7864)
902-1-SAMSUNG (902 172 678)
0771 726 7864 (SAMSUNG)
0845 SAMSUNG (7267864)
0818 717100
Switzerland
0848 - SAMSUNG(7267864, CHF 0.08/min)
LITHUANIA
LATVIA
ESTONIA
RUSSIA
Georgia
Armenia
Azerbaijan
KAZAKHSTAN
UZBEKISTAN
KYRGYZSTAN
TADJIKISTAN
8-800-77777
8000-7267
800-7267
8-800-555-55-55
8-800-555-555
0-800-05-555
088-55-55-555
8-10-800-500-55-500
8-10-800-500-55-500
00-800-500-55-500
8-10-800-500-55-500
UKRAINE
0-800-502-000
Belarus
Mouldova
AUSTRALIA
New zealand
CHINA
810-800-500-55-500
00-800-500-55-500
1300 362 603
0800 SAMSUNG (0800 726 786)
400-810-5858, 010-6475 1880
HONG KONG
(852) 3698-4698
INDIA
INDONESIA
JAPAN
MALAYSIA
3030 8282, 1800 110011, 1800 3000 8282, 1800 266 8282
0800-112-8888, 021-5699-7777
0120-327-527
1800-88-9999
1-800-10-SAMSUNG(726-7864), 1-800-3-SAMSUNG(726-7864),
1-800-8-SAMSUNG(726-7864), 02-5805777
1800-SAMSUNG(726-7864)
1800-29-3232, 02-689-3232
0800-329-999
1 800 588 889
444 77 11
0860-SAMSUNG(726-7864 )
800-SAMSUNG (726-7864)
8000-4726
800-22273
0800-726786
9200-21230
800-2255
1825-22-73
PHILIPPINES
Middle East & Africa
Contact Centre
Country
CANADA
MEXICO
U.S.A
ARGENTINE
BRAZIL
CHILE
Nicaragua
Honduras
COSTA RICA
ECUADOR
EL SALVADOR
GUATEMALA
JAMAICA
PANAMA
PUERTO RICO
REP. DOMINICA
TRINIDAD & TOBAGO
VENEZUELA
COLOMBIA
AUSTRIA
SINGAPORE
THAILAND
TAIWAN
VIETNAM
Turkey
SOUTH AFRICA
U.A.E
Bahrain
Jordan
Egypt
KSA
Qatar
Syria
Web Site
www.samsung.com
www.samsung.com
www.samsung.com
www.samsung.com
www.samsung.com
www.samsung.com
www.samsung.com
www.samsung.com
www.samsung.com
www.samsung.com
www.samsung.com
www.samsung.com
www.samsung.com
www.samsung.com
www.samsung.com
www.samsung.com
www.samsung.com
www.samsung.com
www.samsung.com
www.samsung.com
www.samsung.com/be (Dutch)
www.samsung.com/be_fr (French)
www.samsung.com
www.samsung.com
www.samsung.com
www.samsung.com
www.samsung.com
www.samsung.com
www.samsung.com
www.samsung.com
www.samsung.com
www.samsung.com
www.samsung.com
www.samsung.com
www.samsung.com
www.samsung.com
www.samsung.com
www.samsung.com
www.samsung.com
www.samsung.com/ch
www.samsung.com/ch_fr/(French)
www.samsung.com
www.samsung.com
www.samsung.com
www.samsung.com
www.samsung.com
www.samsung.com
www.samsung.com
www.samsung.ua
www.samsung.com/ua_ru
www.samsung.com
www.samsung.com
www.samsung.com
www.samsung.com/hk
www.samsung.com/hk_en/
www.samsung.com
www.samsung.com
www.samsung.com
www.samsung.com
www.samsung.com
www.samsung.com
www.samsung.com
www.samsung.com
www.samsung.com
www.samsung.com
www.samsung.com
www.samsung.com
www.samsung.com
RoHS compliant
Our product complies with “The Restriction Of the
use of certain Hazardous Substances in electrical
and electronic equipment”, and we do not use the
6 hazardous materials- Cadmium(Cd), Lead (Pb),
Mercury (Hg), Hexavalent Chromium (Cr +6), Poly
Brominated Biphenyls (PBBs), Poly Brominated
Diphenyl Ethers(PBDEs)- in our products.