1
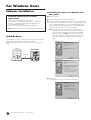
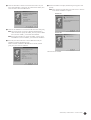
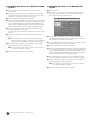
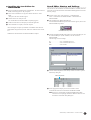
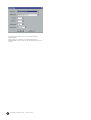
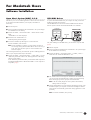
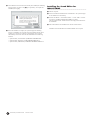
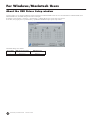
SPECIAL NOTICES
• The software and this Installation Guide are exclusive copyrights of Yamaha Corporation.
• Copying of the software or reproduction of this Installation Guide in whole or in part by any means is expressly forbidden without the written
consent of the manufacturer.
• Yamaha makes no representations or warranties with regard to the use of the software and documentation and cannot be held responsible for the
results of the use of this guide and the software.
• Copying of the commercially available music data is strictly prohibited except for your personal use.
• The screen displays as illustrated in this Installation Guide are for instructional purposes, and may appear somewhat different from the screens
which appear on your computer.
• Click on the red-colored text to jump to the related item in this Installation Guide.
• The OMS® and
mark in this Owner’s Manual are the trademarks or registered trademarks of Opcode Systems, Inc.
• The company names and product names in this Installation Guide are the trademarks or registered trademarks of their respective companies.
• Future upgrades of application and system software and any changes in specifications and functions will be announced separately.
This Installation Guide assumes that you are already familiar with basic Windows/Macintosh
operations. If you are not, please refer to the owner’s manual which came with your Windows/Mac OS
software before using Sound Editor.
For information on software and hardware requirements and the interconnection of devices that are
required to use the Sound Editor for MAGICSTOMP, please refer to the Owner’s Manual that came with
your MAGICSTOMP.
The screen illustrations in this Installation Guide are mainly taken from Windows. Differences that exist
in the Macintosh version are duly shown and explained.
©2003 Yamaha Corporation. All rights reserved.
SOFTWARE for MAGICSTOMP
Installation Guide
1
For Windows Users
Software Installation
● Installing the driver on a Windows 98/
Me system
Uninstall (removing the installed
application)
You can remove the installed application software.
Select [START] (→ [Settings]) → [Control Panel] → [Add/Remove
Programs] → [Install/Uninstall], then select the application to be
removed and click [Add/Remove...].
Follow the on-screen instructions to uninstall the application.
n
The button names or menus may differ depending on the computer OS.
1 Start the computer.
2 Insert the included CD-ROM into the CD-ROM drive.
3 Disconnect the MAGICSTOMP’s power adaptor then use the supplied USB
cable to connect the USB jack on your computer (or USB hub), to the USB
jack on the MAGICSTOMP. Next, connect the MAGICSTOMP’s power
adaptor (switches the MAGICSTOMP on), and the “Add New Hardware
Wizard” automatically appears on the computer’s display.
n
USB MIDI Driver
•••••••••••••••••••••••••••••••••••••••••••••••••••••••••••
A USB-MIDI driver properly installed in the computer is necessary in order to
transfer data between the MAGICSTOMP and the computer.
Before installing the application, verify the OS used by your computer then
install.
For Windows Me users, check the radio button to the left of
“Automatic search for a better driver (Recommended)” and click
[Next]. The system automatically starts searching and installing
the driver. Proceed to Step 8. If the system does not detect the
driver, select “Specify the location of the driver (Advanced)” and
specify the CD-ROM drive’s “USBdrv_” folder to install the
driver.
Windows 98
Computer
MAGICSTOMP
Sound Editor
for
MAGICSTOMP
USB cable
Driver
U99¤MAGICSTOMP
ó‡GAINfiMSTRáTONE
Windows Me
4 Click [Next].
The window below enables you to select the search method.
2
SOFTWARE for MAGICSTOMP
Installation Guide
5 Check the radio button to the left of “Search for the best driver for your
device. (Recommended).” Click [Next]. The window below enables you to
select a location in which to install the driver.
8 When the installation is complete, the following screen appears. Click
[Finish].
n
Some computers may take about ten seconds or more to show this
screen after the installation is complete.
Windows 98
6 Check the “CD-ROM drive” box and uncheck all other items. Click [Next].
n
The system may ask you to insert a Windows CD-ROM while it
checks for the driver. Specify the USBdrv_ directory of the CD-ROM
drive (such as D:\USBdrv_\) and continue the installation.
n
When using the Windows 98, specify the USBdrv_ directory of the
CD-ROM drive (such as D:\USBdrv_\) and continue the installation.
Windows Me
7 When the system detects the driver on the CD-ROM and is ready for
installation, it displays the following screen.
Make sure that the “YAMAHA USB MIDI Driver” is listed, and click
[Next]. The system starts the installation.
The driver has been installed.
SOFTWARE for MAGICSTOMP
Installation Guide
3
● Installing the driver on a Windows 2000
system
● Installing the driver on a Windows XP
system
1 Start the computer and use the “Administrator” account to log into
Windows 2000.
1 Start the computer.
2 Select [My Computer | Control Panel | System | Hardware | Driver Signing |
File Signature Verification], and check the radio button to the left of “Ignore Install all files, regardless of file signature” and click [OK].
3 Insert the included CD-ROM into the CD-ROM drive.
2 Select [Start] → [Control Panel]. If the control panel appears as shown
below, click “Switch to Classic View” in the upper left of the window.
All control panels and icons will be displayed.
4 Disconnect the MAGICSTOMP’s power adaptor then use the supplied USB
cable to connect the USB jack on your computer (or USB hub), to the USB
jack on the MAGICSTOMP. Next, connect the MAGICSTOMP’s power
adaptor (switches the MAGICSTOMP on), and the “Found New Hardware
Wizard” automatically appears on the computer’s display. Click [Next].
5 Check the radio button to the left of “Search for a suitable driver for my
device. (Recommended).” Click [Next].
The window that appears enables you to select a location in which to install
the driver.
6 Check the “CD-ROM drives” box and uncheck all other items. Click
[Next].
n
The system may ask you to insert a Windows CD-ROM while it
checks for the driver. Specify the “USBdrv2k_” directory of the CDROM drive (such as D:\USBdrv2k_\) and continue the installation.
7 When the installation is complete, the system displays “Completing the
Found New Hardware Wizard.” Click [Finish].
n
Some computers may take about ten seconds or more to show this
screen after the installation is complete.
8 Restart the computer. The driver has been installed.
3 Go to [System] → [Hardware] → [Driver Signing] → [File Signature
Verification], and check the radio button to the left of “Ignore -Install all
files, regardless of file signature” and click [OK].
4 Click the [OK] button to close System Properties, and then click “X” in the
upper right of the window to close the Control Panel.
5 Insert the included CD-ROM into the CD-ROM drive.
6 Disconnect the MAGICSTOMP’s power adaptor then use the supplied USB
cable to connect the USB jack on your computer (or USB hub), to the USB
jack on the MAGICSTOMP. Next, connect the MAGICSTOMP’s power
adaptor (switches the MAGICSTOMP on), and the “Found New Hardware
Wizard” automatically appears on the computer’s display.
7 Check the radio button to the left of “Search for a suitable driver for my
device. (Recommended).” Click [Next]. The system starts the installation.
8 When the installation is complete, the system displays “Completing the
Found New Hardware Wizard.” Click [Finish].
n
Some computers may take about ten seconds or more to show this
screen after the installation is complete.
9 Restart the computer. The driver has been installed.
4
SOFTWARE for MAGICSTOMP
Installation Guide
● Installing the Sound Editor for
MAGICSTOMP
1 Insert the included CD-ROM into the CD-ROM drive. The name of the CDROM (X4770A0) appears in “My Computer”.
2 Click on the CD-ROM icon to open, then double-click on the "Tools"
folder.
“Setup.exe” and some other files appear.
2
3
Double click on the “Setup.exe” file.
The “Sound Editor for MAGICSTOMP” setup dialog appears.
Follow the instructions on the display to install the application.
Sound Editor Startup and Settings
•••••••••••••••••••••••••••••••••••••••••••••••••••••••••••
After the drivers and Sound Editor for MAGICSTOMP are installed, follow the
steps below to start the Sound Editor for MAGICSTOMP application and set the
necessary settings.
1 From the “Start” menu, select “Program”→“YAMAHA SGP
Tools”→“Sound Editor for MAGICSTOMP”→“Sound Editor for
MAGICSTOMP”.
2 The Sound Editor for MAGICSTOMP starts.
After the MAGICSTOMP Setup tool bar shown below appears, click on the
MAGICSTOMP Setup button.
4 After installation is complete, restart the computer.
After restarting the computer you’ll find the “YAMAHA” folder has been
added (default: Program Files) and the “SGP Tools” folder has been created
in it.
Installation of the Sound Editor for MAGICSTOMP is complete.
MAGICSTOMP Setup button
3 Clicking the MAGICSTOMP Setup buttons opens the Setup dialog box. Set
the relevant MIDI ports (IN/OUT/THRU) to use the connected
MAGICSTOMP.
The following are normal settings.
In................................ Set to “YAMAHA ISB IN 0-1”
Out ............................. Select “YAMAHA ISB OUT 0-1”
thru ............................ Select “NONE”
4 Click the Editor Setup Button in the library window’s tool bar to open the
Editor Setup dialog box.
Editor Setup Button
5 Set the appropriate in/output ports or device number to allow
communication between the Sound Editor and MAGICSTOMP.
n
Refer to the “Sound Editor for MAGICSTOMP Manual” PDF
manual in the accompanying CD-ROM’s “Manual” folder for more
information on the Editor Setup Dialog box.
SOFTWARE for MAGICSTOMP
Installation Guide
5
Now that setup is complete, you can use the Sound Editor for
MAGICSTOMP.
These settings are saved when you quit the Sound Editor for
MAGICSTOMP so the next time you start the application setup is not
required.
6
SOFTWARE for MAGICSTOMP
Installation Guide
For Macintosh Users
Software Installation
Open Music System (OMS) 2.3.8
USB MIDI Driver
OMS allows you to use several MIDI applications on the Mac OS at the same time.
If you already have OMS installed on your computer, reinstallation is
unnecessary.
To operate the MAGICSTOMP from your computer via USB, you’ll need to
install the appropriate driver software.
The USB-MIDI driver is software that transfers MIDI data back and forth
between sequence software and the MAGICSTOMP via a USB cable.
•••••••••••••••••••••••••••••••••••••••••••••••••••••••••••
•••••••••••••••••••••••••••••••••••••••••••••••••••••••••••
1 Start the computer.
Computer
2 Insert the included CD-ROM into the CD-ROM drive. The system displays
the CD-ROM icon on the desktop.
MAGICSTOMP
Sound Editor
for
MAGICSTOMP
3 From the CD-ROM → “International” folder → double-click the “OMS”
folder.
“Install OMS 2.3.8” will be displayed.
4 Double-click on “Install OMS 2.3.8.”
OMS Setup Dialog will be displayed.
5 Execute the installation by following the on-screen directions.
After the installation, select “Restart.”
n
After the installation is complete, you may possibly encounter an
error message warning that the installer did not close. In this case, go
to the “File” menu and select “Quit” to close the installer. Then
reboot the computer.
After restarting the Macintosh, you will find the “Opcode”/“OMS Applications”
folder on your computer (Hard Disk, as the default).
6 From the CD-ROM → “International” folder → “OMS” folder → copy the
“OMS Setup for Yamaha” folder to the “OMS Applications” folder (dragand-drop it to the folder).
In the “OMS Setup for Yamaha” folder you will find the OMS setup file for
the MAGICSTOMP labeled “USB-MAGICSTOMP”. Use this setup file to
setup OMS. (page9)
OMS
USB cable
U99¤MAGICSTOMP
ó‡GAINfiMSTRáTONE
Driver
Also, after installing the USB-MIDI driver, you will need to set up the OMS
(page9).
1 Start the computer.
2 Insert the included CD-ROM into the CD-ROM drive. The system displays
the CD-ROM icon on the desktop.
3 From the CD-ROM → “International” folder → “USBdrv_” folder →
double-click the “Install USB MIDI Driver” icon.
4 The “Install Location” box displays the destination of the installation. If
you wish to change the destination disk or folder, use the [Switch Disk]
button and the pop-up menu to specify the desired destination.
n
As this box usually displays the start-up disk as the destination,
nothing needs to be changed.
5 Click the [Install] button. The system displays the following message: “This
installation requires your computer to restart after installing this software.
Click Continue to automatically quit all other running applications.” Click
[Continue].
n
To cancel the installation, click [Cancel].
SOFTWARE for MAGICSTOMP
Installation Guide
7
6 The installation starts. If the driver has already been installed, the following
message appears. To return to step 3, press [Continue]. To complete the
installation, click [Quit].
Installing the Sound Editor for
MAGICSTOMP
•••••••••••••••••••••••••••••••••••••••••••••••••••••••••••
1 Start the computer.
2 Insert the included CD-ROM into the CD-ROM drive. The system displays
the CD-ROM icon on the desktop.
3 From the CD-ROM → “International” folder → “Tools” folder → doubleclick on the “SoundEditorForMAGICSTOMPe.sea” folder.
The file expands and the “Install Location” box displays the destination of
the installation.
4 Select the destination for installation and click the “Install” button.
Installation of the Sound Editor for MAGICSTOMP is now complete.
7 When the installation is complete, the system displays the following
message: “Installation was successful. You have installed software which
requires you to restart your computer.” Click [Restart]. The computer
automatically restarts. You can locate the installed files in the following
locations:
• System Folder | Control Panels | YAMAHA USB MIDI Patch
• System Folder | Extensions | USB YAMAHA MIDI Driver
• System Folder | OMS Folder | YAMAHA USB MIDI OMS Driver
8
SOFTWARE for MAGICSTOMP
Installation Guide
Setup the Sound Editor
3 Click the [OK] button to search for ports. Port 1, Port 2 ... appears
in the dialog. Mark the appropriate checkbox of the port and click
the [OK] button to store the setting.
After installation of the drivers and Sound Editor for MAGICSTOMP is
complete, follow the steps below to start the Sound Editor and make the
appropriate settings.
Setting up OMS
•••••••••••••••••••••••••••••••••••••••••••••••••••••••••••
1 Use a USB cable to connect the USB terminal of the computer (or the USB
hub) to the USB terminal of the MAGICSTOMP and turn the
MAGICSTOMP’s power on (connect the power adaptor).
2 Start the computer.
3 Open the “Opcode” → “OMS Application” folders, then in the “OMS Setup
for Yamaha” folder double-click on the “USB-MAGICSTOMP” studio
setup file to start the OMS Setup.
n
The “USB-MAGICSTOMP” file was copied to your computer’s hard
disk in the procedure on page7. If the file has not been copied to your
computer’s hard disk, follow the step 7 described on Open Music
System (OMS) 2.3.8” on page 7. and copy the file to you hard disk.
4 After starting the OMS Setup, the Studio setup file double-clicked in step
3 opens.
Setting up the Sound Editor for
MAGICSTOMP
•••••••••••••••••••••••••••••••••••••••••••••••••••••••••••
1 Open “Chooser” from the Apple Menu, then open and disable “Apple Talk”.
n
If Apple talk is active, an alert will appear when the Sound Editor
starts. If so, select “Set to OFF”. It will take some time for Apple Talk
to be disabled.
2 In the “Sound Editor for MAGICSTOMP E” folder on your hard disk,
double-click on the “SoundEditorForMAGICSTOMP” icon.
3 The Sound Editor for MAGICSTOMP application starts up.
4 From Sound Editor for MAGICSTOMP’s “MIDI” menu, select “OMS Port
Setup”. The “OMS Port Setup” dialog box appears.
Indicates this setup is available
5 In the following example, the MAGICSTOMP is the MIDI device and its
settings are applied to OMS.
Keyboard Thru.............Set to OFF (no check)
MIDI In .........................Select “ MAGICSTOMP 1’
MIDI Out ......................Select “ MAGICSTOMP 1’
n
If “ ” is not indicated at the right of the setup file name, select
“Make Current” from the “File” menu and execute the save
operation.
The OMS studio setup has been completed.
n
After the OMS studio setup above has been completed, your
computer will recognize only the MAGICSTOMP as a MIDI
instrument. If you use another MIDI instrument in addition to the
MAGICSTOMP or you add a second MAGICSTOMP to the existing
system, you should create an original Studio Setup file. For details,
refer to the on-line manual supplied with the OMS.
n
The included OMS studio setup file may not function even if you
follow the above procedure, depending on your Macintosh/Mac OS
version. (MIDI data cannot be transmitted/received even if the setup
becomes available.)
In this situation, connect your Macintosh to the MAGICSTOMP via
the USB cable and follow the procedure below to re-create the setup
file.
6 Click “OK” to close the dialog box.
With this setup is complete and the Sound Editor for MAGICSTOMP is ready to
use. These settings are saved when you quit the Sound Editor for
MAGICSTOMP so the next time you start the application setup is not required.
1 Start OMS Setup and select “New Setup” from the “File” menu.
2 The “OMS Driver Search” dialog appears. Remove the check from
the “Modem” and “Printer” check boxes, and click [Search] to
execute the device search.
If the Search operation has been completed successfully, the [USBMIDI] device is displayed in the OMS driver setting dialog.
SOFTWARE for MAGICSTOMP
Installation Guide
9
For Windows/Macintosh Users
About the USB Driver Setup window
From this window, you can change the MIDI port number transmitted to the MAGICSTOMP from the one set in the Sound Editor for MAGICSTOMP. (In the
MAGICSTOMP’s case, the default settings do not need to be changed.)
For Windows, select [START] (→ [Settings]) → [Control Panel] → [MIDI-USB Driver] to open the driver setup window.
For the Mac, select [Apple] menu → [Control Panels] → [YAMAHA USB MIDI Patch] to open the setup window.
The default settings are as follows.
Port number
MIDI OUT terminal (Thru
Port number*)
MIDI IN terminal
(Track Port number)
1
MIDI OUT (1)
MIDI IN (1)
10
SOFTWARE for MAGICSTOMP
Installation Guide
Troubleshooting
The driver cannot be installed.
• Is the USB cable connected correctly?
→ Check the USB cable connection. (MAGICSTOMP’s Owner’s Manual)
→ Disconnect the USB cable, then connect it again.
Windows
• Is the USB function enabled on your computer?
→ When you connect the MAGICSTOMP to the computer for the first time,
if the “Add New Hardware Wizard” (page2, 4) does not appear, the USB
function on the computer may be disabled. Perform the following steps.
1 Select [Control Panel] → [System] → [Device Manager] (for Windows
98/Me), or select [Control Panel] (Windows XP: Classic View) →
[System] → [Hardware] → [Device Manager] (for Windows 2000/XP).
2 Make sure that no “!” or “x” marks appear at “Universal serial bus
controller” or “USB Root Hub.” If you see an “!” or “x” mark, the USB
controller is disabled. For more information, refer to the owner’s
manual of your computer.
• Is any unknown device registered?
→ If driver installation fails, the MAGICSTOMP will be marked as an
“Unknown device,” and you will not be able to install the driver. Delete
the “Unknown device” by following the steps below.
1 Select [Control Panel] → [System] → [Device Manager] (for Windows
98/Me), or select [Control Panel] (Windows XP: Classic View) →
[System] → [Hardware] → [Device Manager] (for Windows 2000/XP).
2 Look for “Other devises” in the menu “View devices by type.”
3 If you find “Other devices,” double-click it to extend the tree to look
for “Unknown device.” If one appears, select it and click the [Remove]
button.
4 Remove the USB cable from the MAGICSTOMP, and make the
connection again.
5 Install the driver again. (page2)
How can I delete or re-install the driver?
Windows Me/98
1 When the MAGICSTOMP is recognized correctly, double-click
“System” in the Control Panel to open the System window.
2 Double-click the “Device Manager” tab, select “YAMAHA USB
MIDI Driver” and delete it.
3 Use the MS-DOS prompt or Explorer to delete the following three
files.
n
To delete the files below using Explorer, select “Folder Options”
from the Tool (View) menu, and select “Show all files (and
folders).”
• \WINDOWS\INF\OTHER\YAMAHAUB99.INF
• \WINDOWS\SYSTEM\Xgusb.drv
• \WINDOWS\SYSTEM\Ymidusb.sys
4 Disconnect the USB cable.
5 Restart the computer.
6 Re-install the driver. (page2)
Macintosh
1 Delete the files in the following locations:
• System Folder | Control Panels | YAMAHA USB MIDI Patch
• System Folder | Extensions | USB YAMAHA MIDI Driver
• System Folder | OMS Folder | YAMAHA USB MIDI OMS Driver
2 Restart the computer.
3 Install the driver (page7) and set up OMS (page9).
When controlling the MAGICSTOMP from
your computer via USB, the MAGICSTOMP
does not operate correctly or no sound is
heard.
• Did you install the driver? (Windows: page2, Macintosh: page7)
• Is the USB cable connected correctly? (MAGICSTOMP’s Owner’s Manual)
• Is the volume turned up on the MAGICSTOMP, playback equipment, or
application?
• Is the proper port selected in the Sound Editor for MAGICSTOMP?
• Is the latest driver installed?
• Is the effect switched "OFF"? Is the MAGICSTOMP in the Tuner Mode,
Store Mode, or Name Edit Mode? Make sure the MAGICSTOMP is in its
normal operating mode (select a patch and switch the effect "ON").
Cannot suspend or resume the computer
correctly.
• If you are using Windows 2000, you may not be able to suspend/resume
normally, depending on the particular environment (USB Host Controller,
etc.). Even so, simply disconnecting and connecting the USB cable will allow
you to use the MAGICSTOMP functions again.
SOFTWARE for MAGICSTOMP
Installation Guide
11