1
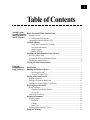
MFL QUICK START MANUAL
,,,,
,,,,
,,,,
,,,,
,,,,
,,,,
,,,,
,,,,
,,,,
,,,,
,,,,
,,,,
,,,,
,,,,
,,,,
,,,,
,,,,
,,,,
,,,,
,,,,
,,,,
MFC 1780
®
If You Need to Call Customer Service
Please complete the following information for future
reference:
Model: MFC1780
(Circle your model number)
Serial Number:*
Date of Purchase:
Place of Purchase:
*The serial number is on the back of the unit. Retain
this Quick-Start Manual with your sales receipt as a
permanent record of your purchase, in the event of
a theft, fire or warranty service.
Year 2000 Compliant
Brother is addressing the Year 2000 related issues for all
Brother fax machines and multi-function centers. Our
focus is to ensure that our bundled third party software
will continue to properly process date/time data after
January 1, 2000.
Brother fax machines and multi-function centers will
function properly after January 1, 2000, provided that all
non-Brother hardware, software and firmware used by
our customers in connection or combination with Brother
fax machines, and bundled software, accurately
exchange date data with the Brother products.
Please continue to check our Web page for updates at
http://www.brother.com. All remedies will be provided
to individual customers via software patches through
software download or from Brother Customer Service.
©1996-1999 Brother Industries, Ltd.
i
Table of Contents
1
Setting Up the
®
Brother Machine Before You Install Multi-Function Link ............................................................... 1
and Computer to
Package Contents ........................................................................................................ 1
Work Together
PC Configuration Requirements ................................................................................. 2
Connecting the Brother Machine to PC ...................................................................... 2
Available Options ......................................................................................................... 3
Install Multi-Function Link® Software ................................................................. 3
On-Line Documentation ....................................................................................... 3
Product Support .................................................................................................... 3
Brother Web Link ................................................................................................. 3
Installing the Multi-Function Link® Software ...................................................... 4
Overview of Basic Steps ............................................................................................. 4
Accessing the Software Installation Window ............................................................. 4
Installing the Brother Software ................................................................................... 4
Viewing On-Line Documentation ............................................................................ 5
2
Using the
Multi-Function
Link® Software
Introduction .................................................................................................................. 7
Running the Brother Software ................................................................................. 7
Multi-Function Link® ........................................................................................... 8
Visioneer® PaperPort® LE ..................................................................................... 8
Sending a Fax from Your PC .................................................................................... 9
Sending a Quick Fax ................................................................................................... 9
Sending a Fax from the Main Menu ......................................................................... 10
Sending a Fax from a Windows® Application ........................................................... 11
Receiving Faxes into the PC .................................................................................... 12
Before You Begin ...................................................................................................... 12
Checklist for the Brother Machine: .................................................................... 12
On your PC: ........................................................................................................ 12
Viewing Received Faxes ........................................................................................... 13
Scanning a Document ............................................................................................... 13
Scanning Options ...................................................................................................... 14
Resolution ........................................................................................................... 14
Contrast............................................................................................................... 15
Image Type ......................................................................................................... 15
Scanning into the PaperPort® Viewer ........................................................................ 15
Windows® Printing .................................................................................................... 15
ii
Using Brother Machine as a Printer .......................................................................... 15
Printing From Any Windows® Application........................................................ 15
Printing a Received Fax ..................................................................................... 16
Printing from the Log Manager ................................................................ 16
Compilation and Publication Notice ......................................................................... 16
Trademarks ............................................................................................................... 17
Notice – Disclaimer of Warranties
(For USA and Canada)
BROTHER’S LICENSOR(S), AND THEIR DIRECTORS, OFFICERS,
EMPLOYEES OR AGENTS (COLLECTIVELY BROTHER’S LICENSOR)
MAKE NO WARRANTIES, EXPRESS OR IMPLIED, INCLUDING
WITHOUT LIMITATION THE IMPLIED WARRANTIES OF
MERCHANTABILITY AND FITNESS FOR A PARTICULAR PURPOSE,
REGARDING THE SOFTWARE. BROTHER’S LICENSOR(S) DOES NOT
WARRANT, GUARANTEE OR MAKE ANY REPRESENTATIONS
REGARDING THE USE OR THE RESULTS OF THE USE OF THE
SOFTWARE IN TERMS OF ITS CORRECTNESS, ACCURACY,
RELIABILITY, CURRENTNESS OR OTHERWISE. THE ENTIRE RISK
AS TO THE RESULTS AND PERFORMANCE OF THE SOFTWARE IS
ASSUMED BY YOU. THE EXCLUSION OF IMPLIED WARRANTIES IS
NOT PERMITTED BY SOME STATES IN THE USA AND SOME
PROVINCES IN CANADA. THE ABOVE EXCLUSION MAY NOT APPLY
TO YOU.
IN NO EVENT WILL BROTHER’S LICENSOR(S) BE LIABLE TO YOU
FOR ANY CONSEQUENTIAL, INCIDENTAL OR INDIRECT DAMAGES
(INCLUDING DAMAGES FOR LOSS OF BUSINESS PROFITS,
BUSINESS INTERRUPTION, LOSS OF BUSINESS INFORMATION,
AND THE LIKE) ARISING OUT OF THE USE OR INABILITY TO USE
THE SOFTWARE EVEN IF BROTHER’S LICENSOR HAS BEEN
ADVISED OF THE POSSIBILITY OF SUCH DAMAGES. BECAUSE
SOME STATES IN THE USA AND SOME PROVINCES IN CANADA DO
NOT ALLOW THE EXCLUSION OR LIMITATION OF LIABILITY FOR
CONSEQUENTIAL OR INCIDENTAL DAMAGES, THE ABOVE
LIMITATIONS MAY NOT APPLY TO YOU. IN ANY EVENT
BROTHER’S LICENSOR’S LIABILITY TO YOU FOR ACTUAL
DAMAGES FROM ANY CAUSE WHATSOEVER, AND REGARDLESS
OF THE FORM OF THE ACTION (WHETHER IN CONTRACT, TORT
(INCLUDING NEGLIGENCE), PRODUCT LIABILITY OR
OTHERWISE), WILL BE LIMITED TO $50.
1
Setting Up the
Brother Machine
and Computer to
Work Together
Before You Install
Multi-Function Link ®
This chapter takes you through each step of the installation process. Read it
carefully to ensure a problem-free installation.
Package Contents
Before you begin the Multi-Function Link® installation, please check the
contents of your package:
■ Brother CD-ROM
■ Multi-Function Link Cable and PC I/F Box
■ Warranty, Upgrade and Licensing Materials
1
2
PC Configuration Requirements
Your PC must meet or exceed the following minimum system configuration
requirements for you to install and use Multi-Function Link®:
CPU
80486/66 or higher
RAM
8MB or greater for Windows® 3.1x
8MB or greater for Windows® 95/98 (16MB
recommended)
16MB or greater for Windows NT® Workstation
Version 4.0 (32MB recommended)
Hard Disk Drive 50MB
Operating System Windows® 3.1x, 95/98 or NT® Workstation Version 4.0
Port
Available Serial port
CD-ROM Drive
Connecting the Brother Machine to PC
Follow the instructions below to hook up the Multi-Function Link® Cable:
1 Position your Brother machine near your personal computer CPU
(maximum distance of approximately 5–6 feet (1.5–1.8 m)).
2 Make sure the power to the PC is switched off and the Brother machine
is unplugged.
3 Connect the RJ-8 connector of the Multi-Function Link® Cable to the
back of your Brother machine in the jack labeled PC I/F.
4 Connect the 25-pin female RS-232 connector of the Multi-Function
Link® Cable to your PC in the available male serial communications
port. Use the 9-pin adapter if your PC requires it. (See your PC
owner’s manual for the correct interface port for connection.) NOTE:
If your PC is an IBM Aptiva, an MWAVE card is using COM1. You
must connect the Multi-Function Link® Cable to another COM
serial port that is available.
or
3
Available Options
Install Multi-Function Link® Software
Click on Install Multi-Function Link® Software to access the Software
Installation window.
On-Line Documentation
On-Line Documentation includes all online documentation. To view the
On-Line Documentation, you must first install the Acrobat Reader software
from the CD-ROM, by clicking on the Install Acrobat Reader button.
Product Support
This is a page of all Brother support numbers.
Brother Web Link
Brother WEB Link visits the Internet Brother Home Page on the
World Wide Web. You can find more information about Brother products,
from product specifications sheets to Frequently Asked Questions (FAQ’s).
You must have service with an Internet service provider.
Click Exit to exit the CD-ROM window, or click Return to return to the
previous window.
4
Installing the Multi-Function Link ®
Software
Make sure your Brother machine is connected to your PC as described
earlier and that both machines are plugged in and switched on.
Overview of Basic Steps
1 Insert the Brother CD-ROM into your CD-ROM drive and access the
Installation Window.
2 Enter the command for your version of Windows®, if needed.
3 Select the option “Install Multi-Function Link Software”.
4 Follow the installation instructions.
Accessing the Software Installation Window
If you are using Windows® 95/98 or Windows NT® Workstation Version 4.0:
■ When you insert the CD-ROM into the PC with Windows® 95/98 or
Windows NT® Workstation Version 4.0, the screen appears
automatically.
■ You can also run: x:SETUP.EXE for Windows® 95/98 from Explorer
on the root directory of the CD-ROM.
If you are using Windows® 3.1x:
■ From the File Manager run: x:SETUP.EXE (“x” is the drive letter for
your CD-ROM drive). This will start the Software Installation program.
Installing the Brother Software
1 Insert the Brother CD-ROM into your CD-ROM drive.
2 Enter the command: x:SETUP.EXE.
The Brother LOGO will be displayed on the screen.
The Brother software will run the appropriate install program.
The Brother software will identify your Windows® Operating System
and automatically run the appropriate install program for your version
of Windows®.
5
3 Click on the “Install Multi-Function Link® Software” option.
The Software Installation window will appear.
The Software Installation screen automatically loads. Multi-Function
Link® includes Visioneer® PaperPort® applications.
4 Follow the installation instructions:
Follow the instructions on the screen. The last step will be to restart
Windows ®.
Viewing On-Line Documentation
This manual explains only Quick Start procedures. For detailed
explanations, see the Online Documentation on the CD-ROM.
Make sure you have installed the Acrobat Reader software. (Click on the
Install Acrobat Reader button and follow the instructions on the screen.)
After the Acrobat Reader is installed, click on the View
Multi-Function Link® Documentation button. When the Table of Contents
appears, select a chapter by clicking on it.
Since the Multi-Function Link® manual is in CD-ROM On-line
Documentation only, you may wish to print a copy by selecting Print from
the File pull- down menu.
6
2
Using the
Multi-Function
®
Link Software
Introduction
This chapter outlines the basics of the Brother software, so you can get
started using the Multi-Function Link® software. Detailed installation and
setup instructions are in the On-Line Documentation section of the Brother
CD-ROM that is included with your Brother machine. Be sure to check the
online ReadMe file for last-minute, important information that was not
included in the On-Line Documentation.
Running the Brother Software
The software included with your Brother machine consists of two parts, the
Multi-Function Link® and Visioneer® PaperPort® LE for Brother.
7
8
Multi-Function Link®
The Multi-Function Link® Main Menu is the application used for all fax
sending and receiving operations. It also contains an electronic Phone Book
program and a Log Manager that maintains a record of all PC fax
transactions. The Main Menu can be accessed through the Brother
Multi-Function Link® program group.
Visioneer® PaperPort® LE
Visioneer® PaperPort® LE for Brother is a document management
application. You will use PaperPort® to view incoming faxes and scanned
documents. PaperPort® has a sophisticated, yet easy to use filing system
that will help you organize your documents. It allows you to combine or
“stack” documents of different formats for printing, faxing, or filing.
PaperPort® can be accessed through the PaperPort® program group.
9
Sending a Fax from Your PC
Sending a Quick Fax
A QuickFax is a cover page only fax with a message. This option is very
useful when you want to fax a quick, short message from your PC.
1 From the Main Menu, select the QuickFax button
or select
QuickFax from the Start pull-down menu. The QuickFax screen will
appear.
2 Enter the Fax number, Name, and Company information in these fields
on the screen––OR––Select the Open Phone Book... button to choose
someone from your phone book.
3 Complete the Subject and QuickFax note fields.
4 Click the Send Fax button.
10
Sending a Fax from the Main Menu
You can send a fax from the Main Menu and attach multiple files. The
“attachments” can even be in a different formats.
1 From the Main Menu window, select the Send Fax
––OR––Select
Send Fax from the Start pull-down menu. The Send Fax window will
appear:
2 Enter the Fax number, Name, and Company information in these fields
––OR––Select the Open Phone Book button to choose someone from
your phone book.
3 Complete the Subject and Cover page note fields.
4 Click on the Attachments... button to add any file(s) you want to fax
with it.
5 Click the Send Fax button.
11
Sending a Fax from a Windows® Application
You can send a fax directly from any Windows® application using the
following steps:
1 Create the document in a Windows® application.
2 Select Brother MFL Fax as your printer.
3 Select the Print command to begin the fax transmission.
The Fax Sending dialog box will appear :
4 Enter the name and fax number of the recipient or select the Open
Phone Book... button and choose a name. Select Close to return to the
Send Fax dialog box.
5 Select the Send cover page check box to include a cover page.
6 Select the Send Fax button.
12
Receiving Faxes into the PC
See
Using the
Brother
Machine with
Your PC
To receive faxes into your PC through the Brother machine, you must first
connect your Brother machine to your computer. Then, you can load the
software.
Before You Begin
Use the following checklists for the Brother machine and PC, to make sure
you have properly set up the Brother machine and PC to work together.
Checklist for the Brother Machine:
The default setting for MF Link mode is PC PRIMARY. In this setting all
faxes will be routed into the PC unless it is not turned on. If the PC is turned
off, incoming faxes will be printed on the Brother machine.
1 To make sure the MF Link mode is set to PC PRIMARY, press
Function ,
, 8 .
2 Use or to select PC PRIMARY (or PC RECEIVE ONLY or
FAX RECEIVE ONLY) and press Set .
7
3 Press
Stop
to exit.
On your PC:
1 In the Main Menu, select the Setup pull-down menu.
2 Select Preferences...
3 Under Answer Mode, select Fax only.
4 Click the OK button.
5 Make sure the Brother machine is connected to the PC.
6 Keep the PC and the Multi-Function Link® Main Menu running at all
times.
13
Viewing Received Faxes
Faxes that are received into the PC will appear in the InBox of the Log
Manager. To access the Log Manager, from the Main Menu click the Log
Manager button
.
––OR––From the Start pull-down menu, select Mail/Log.
1 In the Log Manager, select the Fax folder.
2 Then select the InBox folder. A listing of your incoming messages will
appear on the right side of the window.
3 Double-click on the fax you wish to view.
The Visioneer® PaperPort® Viewer will run automatically and the fax
you selected from the list will be displayed.
Scanning a Document
The Brother Multi-Function Link® software includes a TWAIN compliant
scanner driver. TWAIN drivers meet the standard universal protocol for
communicating between scanners and software applications. This means
that not only can you scan images directly into the PaperPort® viewer that
Brother included with your Brother machine, but you can also scan images
directly into hundreds of other software applications that support TWAIN
scanning. These applications include popular programs like Adobe
Photoshop, Adobe Pagemaker, Corel Draw and many more.
To choose the Brother Multi-Function Link® as your scanner driver, select it
under the “Select scanner” or “Select source” option in your software.
14
Scanning Options
When you scan using the Brother Multi-Function Link® Scanner driver, a
scanning options dialog box will appear:
Brother Serial MFC
Resolution
Contrast
200 DPI STD
Light
200 DPI FINE
Auto
400 DPI S.FINE
Dark
Image Type
User Defaults
Text
Photo
Status:
Ready
Scan
Cancel
Set the following options based on each document to be scanned, then click
the SCAN button to start scanning.
Resolution
You can choose one of three resolutions, 200 DPI STD, 200 DPI FINE, or
400 DPI S.FINE. The higher the number of dpi (dots per inch), the clearer
the image will appear on your PC. However, the size of the image file
increases with the dpi. Try scanning at different resolutions to determine
the best resolution for your needs.
15
Contrast
To have the scanner adjust the contrast automatically, choose Auto. If your
original is too light, set the contrast to Light. If the original is too dark, set
the contrast to dark.
Image Type
If you are scanning text or black and white line art, choose Text as the
image type. If you’re scanning a photo or detailed picture with many
different colors, choose Photo as the image type.
Scanning into the PaperPort® Viewer
To scan into the PaperPort® viewer that was provided with your Brother
machine, run the PaperPort viewer program and then select the SCAN
button on the top of the screen
or select ACQUIRE from the File
pull-down menu.
Windows® Printing
Using Brother Machine as a Printer
Your Brother machine can be used as a printer. You can print scanned
images or received faxes after viewing them, and you can print a document
from any Windows® application such as WordPerfect, Word, Excel,
PageMaker, etc.
Your MFC 1780 model prints at 200x400 dpi class printing.
Printing From Any Windows® Application
Your Brother machine will allow you to print from any Windows®
application. Printing is conveniently done in the background, so you can
work on other tasks on your Personal Computer while the document is
printing.
• To select Brother MFL II Printer as your printer from any Windows®
application, choose Print Setup or Select Printer from the File menu of
your application.
16
Printing a Received Fax
When a fax is received into the PC, it automatically goes into the
Multi-Function Link® Log Manager. Click on the Log Manager button, in
either the Main Menu or Status Monitor window, to view the Log Manager
Receive window.
Printing from the Log Manager
1 Double-click to open the fax(es) you want to print.
2 Select Print File from the File menu to begin printing.
The Print dialog box will be displayed for you to select printing
options.
Compilation and Publication Notice
Under the supervision of Brother Industries Ltd., this manual has been
compiled and published, covering the latest product descriptions and
specifications.
The contents of this manual and the specifications of this product are
subject to change without notice.
Brother reserves the right to make changes without notice in the
specifications and materials contained herein and shall not be responsible
for any damages (including consequential) caused by reliance on the
materials presented, including but not limited to typographical and other
errors relating to the publication.
17
Trademarks
The brother logo is a registered trademark of Brother Industries, Ltd.
Brother is a registered trademark of Brother Industries, Ltd.
Mulit-Function Link is a registered trademark of Brother Industries, Ltd.
© Copyright 1999 Brother Industries, Ltd. All rights reserved.
© Copyright 1999 Smith Micro Software, Inc. All rights reserved.
© Copyright 1999 Visioneer, Inc. All rights reserved.
Windows, Windows NT, and Microsoft are registered trademarks of
Microsoft in the U.S. and other countries.
Visioneer PaperPort LE is a registered trademark of Visioneer, Inc.
TextBridge is a trademark of Xerox Imaging Systems, Inc.
Excel and Word are trademarks of Microsoft Corp.
Each company whose software title is mentioned in this manual has a
Software License Agreement specific to its proprietary programs.
IBM and IBM PC are registered trademarks of International Business
Machines Corporation.
All other brand and product names mentioned in this manual are
registered trademarks of their respective companies.
18
Brother Numbers
Fax-Back System
Brother Customer Service has installed an easy-to-use Fax-Back System, so
you can get instant answers to common technical questions and product
information for all Brother products. This system is available 24 hours a
day, 7 days a week. You can use the system to send faxes to any fax
machine, not just the one from which you are calling.
If you can’t resolve a difficulty with your Brother machine using this
manual, call our Fax-Back System, and follow the voice prompts to receive
faxed instructions about using the system and an index of Fax-Back
subjects.
USA:
From within Canada:
1-800-521-2846
1-800-681-9838
The Brother Fax-Back System number (USA only) has been preprogrammed
on One Touch key 01 .
Brother on the World Wide Web
You can find more information about Brother products, from product
specification sheets to Frequently Asked Questions (FAQs), on the World
Wide Web. Visit us at
http://www.brother.com
Brother Bulletin Board
Brother’s Bulletin Board Numbers are
USA:
1-888-298-3616
From within Canada:
1-514-685-2040
For Customer Service
USA:
From within Canada:
From within Montreal:
1-800-284-4329 (voice)
1-908-575-8790 (fax)
1-800-853-6660 (voice)
1-514-685-4898 (fax)
1-514-685-6464 (voice)
Brother International Corporation
100 Somerset Corporate Boulevard
P.O. Box 6911
Bridgewater, NJ 08807-0911 USA
Brother International Corporation (Canada) Ltd.
1 rue Hôtel de Ville,
Dollard-des-Ormeaux, QC, CANADA H9B 3H6
Visit us on the World Wide Web
http://www.brother.com
These machines are made for use in the USA or CANADA only. We can not recommend
using them overseas because it may violate the Telecommunications Regulations of that
country and the power requirements of your fax machine may not be compatible with the
power available in foreign countries. Using USA or CANADA models overseas is at your
own risk and will void your warranty.
LE0060001
Printed in Malaysia