1
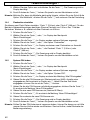
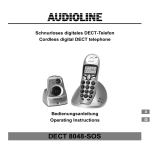
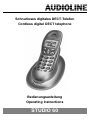
Schnurloses digitales DECT−Telefon
Cordless digital DECT telephone
Bedienungsanleitung
Operating Instructions
STUDIO 60
2
STUDIO 60
Bedienungsanleitung____3
Operating Instructions__47
2
− Inhaltsverzeichnis −
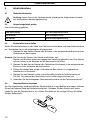
1
Allgemeine Hinweise . . . . . . . . . . . . . . . . . . . . . . . . . . . . . . . . . . . . . . . . .
6
1.1
1.2
1.3
1.4
1.5
1.6
1.7
1.8
1.9
1.10
1.11
Bestimmungsgemäße Verwendung . . . . . . . . . . . . . . . . . . . . . . . . . . . . . . . . . . . . . .
Stromausfall . . . . . . . . . . . . . . . . . . . . . . . . . . . . . . . . . . . . . . . . . . . . . . . . . . . . . . . . . .
Aufstellungsort . . . . . . . . . . . . . . . . . . . . . . . . . . . . . . . . . . . . . . . . . . . . . . . . . . . . . . .
Netzteil . . . . . . . . . . . . . . . . . . . . . . . . . . . . . . . . . . . . . . . . . . . . . . . . . . . . . . . . . . . . . .
Aufladbare Standard−Akkus . . . . . . . . . . . . . . . . . . . . . . . . . . . . . . . . . . . . . . . . . . . .
Laden des Mobilteils . . . . . . . . . . . . . . . . . . . . . . . . . . . . . . . . . . . . . . . . . . . . . . . . . .
Nebenstellenanlagen . . . . . . . . . . . . . . . . . . . . . . . . . . . . . . . . . . . . . . . . . . . . . . . . . .
Rückgabe von Altgeräten . . . . . . . . . . . . . . . . . . . . . . . . . . . . . . . . . . . . . . . . . . . . . .
Hinweis für medizinische Geräte . . . . . . . . . . . . . . . . . . . . . . . . . . . . . . . . . . . . . . . .
Temperatur und Umgebungsbedingungen . . . . . . . . . . . . . . . . . . . . . . . . . . . . . . . .
Reinigung und Pflege . . . . . . . . . . . . . . . . . . . . . . . . . . . . . . . . . . . . . . . . . . . . . . . . . .
6
6
6
6
6
7
7
7
7
7
7
2
Leistungsmerkmale . . . . . . . . . . . . . . . . . . . . . . . . . . . . . . . . . . . . . . . . . .
8
2.1
Telefon . . . . . . . . . . . . . . . . . . . . . . . . . . . . . . . . . . . . . . . . . . . . . . . . . . . . . . . . . . . . . .
8
3
Bedienelemente . . . . . . . . . . . . . . . . . . . . . . . . . . . . . . . . . . . . . . . . . . . . . .
9
3.1
3.2
Mobilteil . . . . . . . . . . . . . . . . . . . . . . . . . . . . . . . . . . . . . . . . . . . . . . . . . . . . . . . . . . . . .
Basisstation . . . . . . . . . . . . . . . . . . . . . . . . . . . . . . . . . . . . . . . . . . . . . . . . . . . . . . . . . .
9
9
4
Inbetriebnahme . . . . . . . . . . . . . . . . . . . . . . . . . . . . . . . . . . . . . . . . . . . . . .
10
4.1
4.2
4.3
4.4
4.5
4.6
Sicherheitshinweise . . . . . . . . . . . . . . . . . . . . . . . . . . . . . . . . . . . . . . . . . . . . . . . . . . .
Verpackungsinhalt prüfen . . . . . . . . . . . . . . . . . . . . . . . . . . . . . . . . . . . . . . . . . . . . . .
Basisstation anschließen . . . . . . . . . . . . . . . . . . . . . . . . . . . . . . . . . . . . . . . . . . . . . . .
Standard−Akkus einsetzen . . . . . . . . . . . . . . . . . . . . . . . . . . . . . . . . . . . . . . . . . . . . .
Aufladen der Standard−Akkus . . . . . . . . . . . . . . . . . . . . . . . . . . . . . . . . . . . . . . . . . . .
Tonwahl − MFV . . . . . . . . . . . . . . . . . . . . . . . . . . . . . . . . . . . . . . . . . . . . . . . . . . . . . . .
10
10
10
10
11
11
5
Bedienung . . . . . . . . . . . . . . . . . . . . . . . . . . . . . . . . . . . . . . . . . . . . . . . . . . .
12
5.1
5.2
5.3
5.4
5.5
5.6
5.7
5.8
5.9
5.10
5.11
5.12
5.13
5.14
5.14.1
Das Display . . . . . . . . . . . . . . . . . . . . . . . . . . . . . . . . . . . . . . . . . . . . . . . . . . . . . . . . . .
Die Navigation mit den Tasten . . . . . . . . . . . . . . . . . . . . . . . . . . . . . . . . . . . . . . . . . .
Anruf führen und beenden . . . . . . . . . . . . . . . . . . . . . . . . . . . . . . . . . . . . . . . . . . . . .
Anruf annehmen . . . . . . . . . . . . . . . . . . . . . . . . . . . . . . . . . . . . . . . . . . . . . . . . . . . . . .
Zwei externe Anrufe entgegennehmen . . . . . . . . . . . . . . . . . . . . . . . . . . . . . . . . . . .
Freisprechen . . . . . . . . . . . . . . . . . . . . . . . . . . . . . . . . . . . . . . . . . . . . . . . . . . . . . . . . .
Rufnummern aus dem Telefonbuch wählen . . . . . . . . . . . . . . . . . . . . . . . . . . . . . . .
Anzeige der Gesprächsdauer . . . . . . . . . . . . . . . . . . . . . . . . . . . . . . . . . . . . . . . . . . .
Einstellen der Hörerlautstärke . . . . . . . . . . . . . . . . . . . . . . . . . . . . . . . . . . . . . . . . . . .
Wahlwiederholung . . . . . . . . . . . . . . . . . . . . . . . . . . . . . . . . . . . . . . . . . . . . . . . . . . . .
Mobilteil stummschalten . . . . . . . . . . . . . . . . . . . . . . . . . . . . . . . . . . . . . . . . . . . . . . .
Mobilteil ein− /ausschalten . . . . . . . . . . . . . . . . . . . . . . . . . . . . . . . . . . . . . . . . . . . . . .
Mobilteil suchen (Paging) . . . . . . . . . . . . . . . . . . . . . . . . . . . . . . . . . . . . . . . . . . . . . .
Tastensperre . . . . . . . . . . . . . . . . . . . . . . . . . . . . . . . . . . . . . . . . . . . . . . . . . . . . . . . . .
Tastensperre einschalten . . . . . . . . . . . . . . . . . . . . . . . . . . . . . . . . . . . . . . . . . . . . . .
12
12
13
13
13
13
14
14
14
14
14
14
14
15
15
3
− Inhaltsverzeichnis −
5.14.2
5.15
Tastensperre ausschalten . . . . . . . . . . . . . . . . . . . . . . . . . . . . . . . . . . . . . . . . . . . . . .
Hinweise zur Reichweite . . . . . . . . . . . . . . . . . . . . . . . . . . . . . . . . . . . . . . . . . . . . . . .
15
15
6
Nebenstellenanlagen / T−Net . . . . . . . . . . . . . . . . . . . . . . . . . . . . . . . . . .
16
6.1
6.2
6.3
R−Taste an Nebenstellenanlagen . . . . . . . . . . . . . . . . . . . . . . . . . . . . . . . . . . . . . . . .
R−Taste und das T−Net der Deutschen Telekom . . . . . . . . . . . . . . . . . . . . . . . . . . .
Wahlpause . . . . . . . . . . . . . . . . . . . . . . . . . . . . . . . . . . . . . . . . . . . . . . . . . . . . . . . . . . .
16
16
16
7
8
Menüstruktur . . . . . . . . . . . . . . . . . . . . . . . . . . . . . . . . . . . . . . . . . . . . . . . .
Das Telefonbuch . . . . . . . . . . . . . . . . . . . . . . . . . . . . . . . . . . . . . . . . . . . . .
17
19
8.1
8.1.1
8.1.2
8.2
8.3
8.4
8.5
8.6
8.6.1
8.6.2
Rufnummer in das Telefonbuch eingeben . . . . . . . . . . . . . . . . . . . . . . . . . . . . . . . .
Texteingabe . . . . . . . . . . . . . . . . . . . . . . . . . . . . . . . . . . . . . . . . . . . . . . . . . . . . . . . . . .
Hinweise zum Telefonbuch . . . . . . . . . . . . . . . . . . . . . . . . . . . . . . . . . . . . . . . . . . . . .
Details des Eintrages anzeigen . . . . . . . . . . . . . . . . . . . . . . . . . . . . . . . . . . . . . . . . .
Gespeicherte Einträge im Telefonbuch ändern . . . . . . . . . . . . . . . . . . . . . . . . . . . .
Eintrag aus dem Telefonbuch löschen . . . . . . . . . . . . . . . . . . . . . . . . . . . . . . . . . . .
Alle Einträge aus dem Telefonbuch löschen . . . . . . . . . . . . . . . . . . . . . . . . . . . . . . .
VIP−Ruf (Ruftonzuordnung) . . . . . . . . . . . . . . . . . . . . . . . . . . . . . . . . . . . . . . . . . . . . .
Ruftonmelodie zuweisen . . . . . . . . . . . . . . . . . . . . . . . . . . . . . . . . . . . . . . . . . . . . . . .
Ruftonzuweisung ausschalten . . . . . . . . . . . . . . . . . . . . . . . . . . . . . . . . . . . . . . . . . .
19
19
19
20
20
20
21
21
21
21
9
SMS−Nachrichten . . . . . . . . . . . . . . . . . . . . . . . . . . . . . . . . . . . . . . . . . . . . .
22
9.1
9.1.1
9.2
9.3
9.4
9.5
9.6
9.7
9.8
9.9
9.9.1
9.9.2
9.9.3
9.9.4
9.9.5
Service Center . . . . . . . . . . . . . . . . . . . . . . . . . . . . . . . . . . . . . . . . . . . . . . . . . . . . . . .
Sende−/Empfangsnummer eingeben . . . . . . . . . . . . . . . . . . . . . . . . . . . . . . . . . . . . .
Schreiben und versenden . . . . . . . . . . . . . . . . . . . . . . . . . . . . . . . . . . . . . . . . . . . . . .
Gespeicherte SMS−Nachricht versenden . . . . . . . . . . . . . . . . . . . . . . . . . . . . . . . . .
Lesen und beantworten . . . . . . . . . . . . . . . . . . . . . . . . . . . . . . . . . . . . . . . . . . . . . . . .
Nachrichtenton Ein/Aus . . . . . . . . . . . . . . . . . . . . . . . . . . . . . . . . . . . . . . . . . . . . . . . .
Nachrichtenton einstellen (Morseton, Diskret, Polyphon) . . . . . . . . . . . . . . . . . . . .
SMS−Nachricht löschen . . . . . . . . . . . . . . . . . . . . . . . . . . . . . . . . . . . . . . . . . . . . . . . .
Alle SMS−Nachrichten löschen . . . . . . . . . . . . . . . . . . . . . . . . . . . . . . . . . . . . . . . . . .
SMS−Postfach . . . . . . . . . . . . . . . . . . . . . . . . . . . . . . . . . . . . . . . . . . . . . . . . . . . . . . . .
Postfach/Benutzer hinzufügen . . . . . . . . . . . . . . . . . . . . . . . . . . . . . . . . . . . . . . . . . .
Postfach/Benutzer−Daten anzeigen . . . . . . . . . . . . . . . . . . . . . . . . . . . . . . . . . . . . . .
SMS−Nachricht an persönliches Postfach senden . . . . . . . . . . . . . . . . . . . . . . . . . .
Postfach/Benutzer−Daten ändern . . . . . . . . . . . . . . . . . . . . . . . . . . . . . . . . . . . . . . . .
Postfach/Benutzer löschen . . . . . . . . . . . . . . . . . . . . . . . . . . . . . . . . . . . . . . . . . . . . .
22
23
23
24
24
25
25
25
26
26
26
27
27
28
28
10
Anruferlisten . . . . . . . . . . . . . . . . . . . . . . . . . . . . . . . . . . . . . . . . . . . . . . . . .
29
10.1
10.2
10.2.1
10.2.2
10.2.3
10.3
Rufnummernanzeige (Clip) . . . . . . . . . . . . . . . . . . . . . . . . . . . . . . . . . . . . . . . . . . . . .
Eingegangene Anrufe . . . . . . . . . . . . . . . . . . . . . . . . . . . . . . . . . . . . . . . . . . . . . . . . .
Anzeigen und zurückrufen . . . . . . . . . . . . . . . . . . . . . . . . . . . . . . . . . . . . . . . . . . . . .
Eintrag löschen . . . . . . . . . . . . . . . . . . . . . . . . . . . . . . . . . . . . . . . . . . . . . . . . . . . . . . .
Eintrag im Telefonbuch speichern . . . . . . . . . . . . . . . . . . . . . . . . . . . . . . . . . . . . . . .
Entgangene Anrufe . . . . . . . . . . . . . . . . . . . . . . . . . . . . . . . . . . . . . . . . . . . . . . . . . . .
29
29
29
29
30
30
4
− Inhaltsverzeichnis −
10.3.1
10.3.2
10.3.3
10.4
10.4.1
10.4.2
10.4.3
10.4.4
10.4.5
Anzeigen und zurückrufen . . . . . . . . . . . . . . . . . . . . . . . . . . . . . . . . . . . . . . . . . . . . .
Eintrag löschen . . . . . . . . . . . . . . . . . . . . . . . . . . . . . . . . . . . . . . . . . . . . . . . . . . . . . . .
Eintrag im Telefonbuch speichern . . . . . . . . . . . . . . . . . . . . . . . . . . . . . . . . . . . . . . .
Gewählte Nummern (Wahlwiederholung) . . . . . . . . . . . . . . . . . . . . . . . . . . . . . . . . .
Anzeigen und anrufen . . . . . . . . . . . . . . . . . . . . . . . . . . . . . . . . . . . . . . . . . . . . . . . . .
Eintrag löschen . . . . . . . . . . . . . . . . . . . . . . . . . . . . . . . . . . . . . . . . . . . . . . . . . . . . . . .
Eintrag im Telefonbuch speichern . . . . . . . . . . . . . . . . . . . . . . . . . . . . . . . . . . . . . . .
Eine Anruferliste löschen . . . . . . . . . . . . . . . . . . . . . . . . . . . . . . . . . . . . . . . . . . . . . . .
Alle Anruferlisten löschen . . . . . . . . . . . . . . . . . . . . . . . . . . . . . . . . . . . . . . . . . . . . . .
31
31
31
32
32
32
32
33
33
11
Mobilteil . . . . . . . . . . . . . . . . . . . . . . . . . . . . . . . . . . . . . . . . . . . . . . . . . . . . .
34
11.1
11.2
11.3
11.4
11.5
11.6
11.7
Ruftonmelodie zuweisen (interne und externe Anrufe) . . . . . . . . . . . . . . . . . . . . . .
Ruftonlautstärke einstellen . . . . . . . . . . . . . . . . . . . . . . . . . . . . . . . . . . . . . . . . . . . . .
Namen des Mobilteils eingeben/ändern . . . . . . . . . . . . . . . . . . . . . . . . . . . . . . . . . .
Sprache einstellen . . . . . . . . . . . . . . . . . . . . . . . . . . . . . . . . . . . . . . . . . . . . . . . . . . . .
Menüfarbe einstellen . . . . . . . . . . . . . . . . . . . . . . . . . . . . . . . . . . . . . . . . . . . . . . . . . .
Automatische Gespächsannahme aktivieren . . . . . . . . . . . . . . . . . . . . . . . . . . . . . .
Zugangskode (Amtskennziffer) aktivieren . . . . . . . . . . . . . . . . . . . . . . . . . . . . . . . . .
34
34
34
35
35
35
36
12
Mobilteile an− und abmelden . . . . . . . . . . . . . . . . . . . . . . . . . . . . . . . . . .
37
12.1
12.2
12.3
Mobilteil anmelden . . . . . . . . . . . . . . . . . . . . . . . . . . . . . . . . . . . . . . . . . . . . . . . . . . . .
Mobilteil abmelden . . . . . . . . . . . . . . . . . . . . . . . . . . . . . . . . . . . . . . . . . . . . . . . . . . . .
Basis auswählen . . . . . . . . . . . . . . . . . . . . . . . . . . . . . . . . . . . . . . . . . . . . . . . . . . . . . .
37
37
38
13
Mehrere Mobilteile . . . . . . . . . . . . . . . . . . . . . . . . . . . . . . . . . . . . . . . . . . . .
39
13.1
13.2
13.3
Intern telefonieren . . . . . . . . . . . . . . . . . . . . . . . . . . . . . . . . . . . . . . . . . . . . . . . . . . . . .
Externe Gespräche an ein anderes Mobilteil weiterleiten . . . . . . . . . . . . . . . . . . . .
Konferenzgespräche führen . . . . . . . . . . . . . . . . . . . . . . . . . . . . . . . . . . . . . . . . . . . .
39
40
40
14
Basis−Einstellungen . . . . . . . . . . . . . . . . . . . . . . . . . . . . . . . . . . . . . . . . . .
41
14.1
14.2
14.3
14.4
14.5
Ruftonmelodie der Basisstation zuweisen . . . . . . . . . . . . . . . . . . . . . . . . . . . . . . . .
Ruftonlautstärke der Basisstation einstellen . . . . . . . . . . . . . . . . . . . . . . . . . . . . . . .
Vorrangiges Klingeln eines Mobilteils aktivieren/deaktivieren . . . . . . . . . . . . . . . .
Flashzeiten einstellen . . . . . . . . . . . . . . . . . . . . . . . . . . . . . . . . . . . . . . . . . . . . . . . . .
System−PIN ändern . . . . . . . . . . . . . . . . . . . . . . . . . . . . . . . . . . . . . . . . . . . . . . . . . . .
41
41
41
42
42
15
Zeiteinstellung . . . . . . . . . . . . . . . . . . . . . . . . . . . . . . . . . . . . . . . . . . . . . . .
43
15.1
15.2
15.3
Zeit und Datum einstellen . . . . . . . . . . . . . . . . . . . . . . . . . . . . . . . . . . . . . . . . . . . . . .
Weckton einstellen . . . . . . . . . . . . . . . . . . . . . . . . . . . . . . . . . . . . . . . . . . . . . . . . . . . .
Weckzeit eingeben (EIN/AUS) . . . . . . . . . . . . . . . . . . . . . . . . . . . . . . . . . . . . . . . . . .
43
43
43
16
17
Fehlerbeseitigung . . . . . . . . . . . . . . . . . . . . . . . . . . . . . . . . . . . . . . . . . . . .
Wichtige Informationen . . . . . . . . . . . . . . . . . . . . . . . . . . . . . . . . . . . . . . .
44
45
17.1
17.2
17.3
Technische Daten . . . . . . . . . . . . . . . . . . . . . . . . . . . . . . . . . . . . . . . . . . . . . . . . . . . . .
Telefonkabel austauschen . . . . . . . . . . . . . . . . . . . . . . . . . . . . . . . . . . . . . . . . . . . . . .
Garantie . . . . . . . . . . . . . . . . . . . . . . . . . . . . . . . . . . . . . . . . . . . . . . . . . . . . . . . . . . . . .
45
45
46
18
Konformitätserklärung . . . . . . . . . . . . . . . . . . . . . . . . . . . . . . . . . . . . . . . .
46
5
− Allgemeine Hinweise −
1
Allgemeine Hinweise
Bitte lesen Sie diese Bedienungsanleitung sorgfältig durch.
Bei auftretenden Fragen wenden Sie sich bitte an unseren Service unter der Service−Hotline
0180 5 00 13 88 (Kosten Telekom bei Drucklegung: 12ct/min). Öffnen Sie das Gerät in keinem
Fall selbst und führen Sie keine eigenen Reparaturversuche durch. Bei
Gewährleistungsansprüchen wenden Sie sich bitte an Ihren Fachhändler.
Im Zuge von Projektverbesserungen behalten wir uns technische und optische
Veränderungen am Artikel vor.
1.1
Bestimmungsgemäße Verwendung
Dieses Telefon ist für den Betrieb an einem analogen Telefonanschluss (PSTN) innerhalb
Deutschlands entwickelt worden. Allerdings kann, wegen der Unterschiede zwischen den
verschiedenen Telekommunikations−Netzbetreibern, keine Garantie für einwandfreie Funktion
an jedem Telekommunikations−Endgeräteanschluss übernommen werden. Das Telefon kann
an einer TAE−Steckdose mit F/N−Codierung gemeinsam mit anderen Anschlussgeräten wie
Fax, Anrufbeantworter oder einem Modem benutzt werden. Schließen Sie das
Anschlusskabel des Telefons nur an eine dafür bestimmte Telefonsteckdose an. Wechseln Sie
den Stecker des Anschlusskabels nicht aus.
1.2
Stromausfall
Bei Stromausfall kann mit dem Telefon nicht telefoniert werden. Halten Sie für eventuelle
Notfälle ein schnurgebundenes Telefon bereit, welches ohne eine externe Stromversorgung
arbeitet.
1.3
Aufstellungsort
Der Aufstellungsort hat einen entscheidenden Einfluss auf einen einwandfreien Betrieb des
Telefons. Am Aufstellungsort muss sich eine 230 Volt Netzsteckdose befinden.
Stellen Sie die Basisstation nicht in die unmittelbare Umgebung von anderen elektronischen
Geräten wie z. B. Mikrowellen oder HIFI−Geräten, da es sonst zu gegenseitiger Beeinflussung
kommen kann. Halten Sie einen Abstand von mindestens einem Meter zu elektronischen
Geräten ein.
Stellen Sie die Basisstation auf eine ebene und rutschfeste Fläche. Normalerweise
hinterlassen die Füße der Basisstation keine Spuren auf der Aufstellfläche. Wegen der
Vielzahl der verwendeten Lacke und Oberflächen kann es jedoch nicht ausgeschlossen
werden, dass durch die Gerätefüße Spuren auf der Abstellfläche entstehen.
1.4
Netzteil
Verwenden Sie nur das mitgelieferte AUDIOLINE Steckernetzteil, da andere Netzteile das
Telefon zerstören können. Netzteil nicht öffnen. Es besteht Lebensgefahr, wenn das Netzteil
geöffnet wird, solange es an das Stromnetz angeschlossen ist.
1.5
Aufladbare Standard−Akkus
Verwenden Sie die mitgelieferten aufladbaren Standard−Akkus. Verwenden Sie beim
Austauschen immer nur Standard−Akkus des Typs AAA 1,2V 750 mAh. Andere
Standard−Akkus oder Akkupacks können einen Kurzschluß verursachen.
Werfen Sie Standard−Akkus nicht ins Feuer und tauchen Sie sie nicht ins Wasser.
Entsorgen Sie alte oder defekte Standard−Akkus nicht mit dem normalen Hausmüll.
Die angegebenen maximalen Standby− und Gesprächszeiten gelten für die mitgelieferten
wiederaufladbaren Standard−Akkus bei optimalen Bedingungen. Umgebungstemperatur,
6
− Allgemeine Hinweise −
Aufladezyklus und weitere äußere Einflussfaktoren, wie z. B. Funkbelastung an der
Einsatzumgebung, können die Leistungszeiten erheblich verringern. Die Ladekapazität
reduziert sich darüber hinaus technisch bedingt im Verlauf der Nutzung oder durch Lagerung
bei sehr hohen oder niedrigen Temperaturen.
1.6
Laden des Mobilteils
Das Mobilteil erwärmt sich beim Laden. Dies ist normal und ungefährlich. Laden Sie das
Mobilteil nicht mit fremden Aufladegeräten, da sonst Beschädigungen auftreten können.
1.7
Nebenstellenanlagen
Das Telefon kann auch an einer Nebenstellenanlage angeschlossen werden. Ob Ihr Telefon
an Ihrer Nebenstellenanlage einwandfrei funktioniert, erfahren Sie bei dem Händler, bei dem
die Nebenstellenanlage gekauft wurde. Es kann nicht garantiert werden, dass das Telefon an
jeder Nebenstellenanlage funktioniert.
1.8
Rückgabe von Altgeräten
Wenn Sie Ihr AUDIOLINE−Gerät entsorgen wollen, bringen Sie es bitte zur Sammelstelle Ihres
kommunalen Entsorgungsträgers (z. B. Wertstoffhof).
Das nebenstehende Symbol auf Ihrem Telefon bedeutet, dass das Altgerät
nicht im Hausmüll entsorgt werden darf.
Nach dem Elektro− und Elektronikgerätegesetz müssen alte Elektro− und Elektronikgeräte
getrennt entsorgt werden. Sie leisten einen Beitrag zum Umweltschutz, wenn Sie mithelfen
und das Altgerät nicht in den Hausmüll werfen.
1.9
Hinweis für medizinische Geräte
Das Telefon arbeitet mit einer sehr geringen Sendeleistung. Diese geringe Sendeleistung
schließt eine gesundheitliche Gefährdung nach dem derzeitigen Stand von Forschung und
Technik aus. Es hat sich aber gezeigt, dass eingeschaltete tragbare Telefone medizinische
Geräte beeinflussen können. Benutzen Sie das Telefon deshalb nicht in der Nähe von
medizinischen Geräten.
Eine Beeinflussung von Herzschrittmachern durch DECT−Telefone ist bisher nicht beobachtet
werden, kann jedoch nicht völlig ausgeschlossen werden.
DECT−Telefone können in Hörgeräten einen unangenehmen Brummton verursachen.
1.10
Temperatur und Umgebungsbedingungen
Das Telefon ist für den Betrieb in geschützten Räumen mit einem Temperaturbereich von
10 °C bis 30 °C ausgelegt. Die Basisstation darf nicht in Feuchträumen wie Bad oder
Waschküche aufgestellt werden. Vermeiden Sie die Nähe zu Wärmequellen wie Heizkörpern
und setzen Sie das Gerät keiner direkten Sonnenbestrahlung aus.
Verwenden Sie das Mobilteil nicht in explosionsgefährdeten Bereichen.
Vermeiden Sie Belastungen durch Rauch, Staub, Erschütterungen, Chemikalien, Feuchtigkeit,
Hitze oder direkte Sonneneinstrahlung.
1.11
Reinigung und Pflege
Reinigen Sie die Gehäuseoberflächen mit einem trockenen, weichen und fusselfreien Tuch.
Verwenden Sie keine Reinigungsmittel oder aggressiven Lösungsmittel. Außer einer
gelegentlichen Gehäusereinigung ist keine weitere Pflege erforderlich. Die Gummifüße der
Basisstation sind nicht gegen alle Reinigungsmittel beständig. Der Hersteller kann daher nicht
für evtl. Schäden an Möbeln o. Ä. haftbar gemacht werden.
7
− Leistungsmerkmale −
2
Leistungsmerkmale
2.1
Telefon
S
S
S
S
S
S
S
S
S
S
S
S
S
S
S
S
S
S
S
S
S
S
S
S
Digitaler DECT/GAP Standard
Bis zu 10 Stunden Dauergespräch − bis zu 85 Stunden Stand−by
SMS senden und empfangen
Sprachverschlüsselung für hohe Sicherheit
Tonwahlverfahren (MFV)
Hervorragende Darstellung durch beleuchtetes Display
Einfache Bedienung durch grafische Menüführung
Rufnummernanzeige im Display (CLIP)
Anruferliste mit 50 Speicherplätzen für erhaltene/entgangene Anrufe
Wahlwiederholung der letzten 20 Rufnummern
Telefonbuch mit 150 Speicherplätzen inklusive Namen
24−Stunden−Uhr mit Weck−/Alarmfunktion im Mobilteil integriert
Anzeige der Gesprächsdauer
Durch weitere GAP−fähige DECT−Mobilteile erweiterbar
Multilinkbetrieb mit bis zu vier weiteren Mobilteilen
Interne Gespräche zwischen zwei Mobilteilen möglich
Konferenzgespräche zwischen zwei Mobilteilen und einem externen Teilnehmer
Weiterleiten von Gesprächen zwischen den Mobilteilen
Mehrfach einstellbare Tonrufmelodie für das Mobilteil und die Basisstation
VIP−Ruf (Melodien−Zuordnung)
T−Net geeignet (Hook−Flash) − Nebenstellentauglich
Stummschaltung
Tastatursperre
Freisprechfunktion am Mobilteil
DECT: Digital European Cordless Telephone = Standard für kabellose Telefone.
GAP: Generic Access Profile = Standard für das Zusammenwirken von Mobilteilen und
Basisstationen anderer Hersteller.
8
− Bedienelemente −
3
Bedienelemente
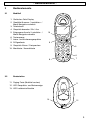
3.1
Mobilteil
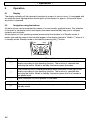
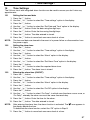
1. Grafisches Farb−Display
2. Gewählte Nummer / Lautstärke + /
Menü−Navigation aufwärts
3. Telefonbuch
4. Gespräch beenden / Ein / Aus
5. Entgangene Anrufe / Lautstärke − /
Menü−Navigation abwärts
6. Tastensperre
7. Intern− und Konferenzgespräche
8. R−Signaltaste
9. Gespräch führen / Freisprechen
10. Menütaste / Auswahltaste
1
2
3
10
4
9
DEF
MNO
GHI
5
JKL
WXYZ
PQRS
TUV
6
8
3.2
7
Basisstation
11. Paging−Taste (Mobilteil suchen)
12. LED Gesprächs− und Netzanzeige
13. LED Ladekontrollleuchte
11
13
12
9
− Inbetriebnahme −
4
Inbetriebnahme
4.1
Sicherheitshinweise
Achtung: Lesen Sie vor der Inbetriebnahme unbedingt die allgemeinen Hinweise
am Anfang dieser Bedienungsanleitung.
4.2
Verpackungsinhalt prüfen
Zum Lieferumfang gehören:
eine Basisstation
ein Telefonanschlusskabel
ein Mobilteil
zwei Standard−Akkus
ein Netzteil
eine Bedienungsanleitung
4.3
Basisstation anschließen
Stellen Sie die Basisstation in der Nähe Ihrer Telefonanschlussdose und einer Netzsteckdose
auf. Verwenden sie nur die mitgelieferten Komponenten.
1. Stecken Sie den kleinen Stecker des Netzteils in die entsprechende Buchse auf der
Unterseite der Basisstation.
Hinweis: Sie können die Stecker nicht falsch anschließen, weil
Stecker und Buchsen konstruktiv gegen eine Verpolung geschützt sind. Die Stecker
müssen hörbar in die Buchsen an der Basisstation einrasten.
2. Stecken Sie den kleinen Stecker des Telefonanschlusskabels in die entsprechende
Buchse auf der Unterseite der Basisstation.
3. Führen Sie beide Kabel auf der Unterseite der Basisstation im vorgesehenen
Kabelkanal zur Rückseite.
4. Stecken Sie das Netzteil in eine vorschriftsmäßig installierte Netzsteckdose mit
230 Volt. Das Netzteil der Basisstation muss immer angeschlossen sein.
5. Verbinden Sie das beiliegende Telefonanschlusskabel mit der Telefonsteckdose F.
4.4
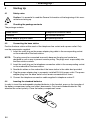
Standard−Akkus einsetzen
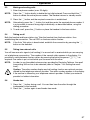
Um die mitgelieferten wiederaufladbaren Standard−Akkus in das Mobilteil einzulegen, drücken
Sie auf den oberen Rand des Batteriefachdeckels. Schieben Sie den Deckel nach unten.
Legen Sie nun die Standard−Akkus ein. Achten Sie dabei auf die richtige Polung. Schließen
Sie das Batteriefach.
+
10
−
−+
− Inbetriebnahme −
4.5
Aufladen der Standard−Akkus
Stellen Sie das Mobilteil mit dem Display nach vorne für mindestens 14 Stunden auf die
Basisstation. An der Basisstation leuchtet die Ladekontrollleuchte. Bei nicht richtig geladenen
Standard−Akkus kann es zu Fehlfunktionen des Telefons kommen.
Die wiederaufladbaren Standard−Akkus Ihres Mobilteils besitzen eine Standby−Zeit bei
Zimmertemperatur von max. 85 Stunden. Die maximale Gesprächsdauer beträgt
10 Stunden.
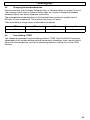
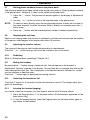
Der aktuelle Akkuladezustand wird im Display angezeigt:
4.6
Voll
Halb
Schwach
Leer
Tonwahl − MFV
Dieses Telefon benutzt das Wahlverfahren der Tonwahl − MFV (Mehrfrequenz−
wahlverfahren). Vorteile dieses modernen Wahlverfahrens sind eine kurze
Verbindungsaufbauzeit, die Fernsteuerungsmöglichkeit für Geräte wie z. B. Anrufbeantworter
sowie die Nutzung weiterer ISDN−Dienstmerkmale.
11
− Bedienung −
5
Bedienung
5.1
Das Display
Das Display zeigt Ihnen alle wichtigen Funktionen mit verschiedenen Symbolen an. Es ist mit
einer automatischen Hintergrundbeleuchtung ausgestattet, die das Display bei jedem
Tastendruck für ca. 30 Sekunden beleuchtet.
5.2
Die Navigation mit den Tasten
Alle Funktionen sind über ein sehr benutzerfreundliches, grafisches Menü zu erreichen.
Achten Sie immer auf die menübegleitenden Texte im Display, dann werden Sie sicher und
intuitiv navigieren.
Alle Beschreibungen in dieser Bedienungsanleitung gehen davon aus, dass sich das Mobilteil
im Ruhezustand befindet. Im Ruhezustand sehen Sie im Display ein Strandfoto und den
Namen des Mobilteils (Voreinstellung Studio 1"). Den Ruhezustand erreichen Sie durch
Drücken der Taste .
OK
Taste
12
Zurück
Beschreibung
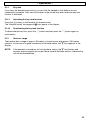
Die aktuelle Funktion wird direkt über der Taste im Display links angezeigt.
Drücken Sie diese Taste, um die Funktion auszuwählen. Im Ruhezustand
öffnet die Taste das Menü.
Die aktuelle Funktion wird direkt über der Taste im Display rechts angezeigt.
Drücken Sie diese Taste, um die Funktion auszuwählen. Im Ruhezustand
öffnet die Taste das Telefonbuch.
Drücken Sie diese Taste, um im Menü aufwärts zu blättern.
Drücken Sie diese Taste, um im Menü abwärts zu blättern.
Drücken Sie diese Taste, um an jeder Stelle im Menü den Vorgang abzubrechen. Das Mobilteil kehrt zurück in den Ruhezustand.
− Bedienung −
5.3
Anruf führen und beenden
1. Geben Sie die Rufnummer (max. 25 Stellen) ein.
Hinweis: Kurzes Drücken der Taste löscht die zuletzt eingegebene Zahl. Langes Drücken
der Taste löscht die Rufnummer komplett. Das Gerät geht in den Ruhezustand.
2. Drücken Sie die Taste und die gewünschte Verbindung wird hergestellt.
Hinweis: Sie können auch zuerst die Taste drücken und dann die Rufnummer eingeben.
Eine Korrektur einzelner Zahlen der Rufnummer, wie oben beschrieben, ist bei
dieser Form des Gesprächaufbaus nicht möglich.
3. Zum Beenden des Gespräches drücken Sie die Taste oder stellen Sie das
Mobilteil in die Basisstation.
5.4
Anruf annehmen
Ihr Mobilteil und die Basisstation klingeln. Nehmen Sie das Mobilteil von der Basisstation,
dadurch wird die Verbindung hergestellt. Die LED Gesprächsanzeige an der Basisstation
blinkt.
Hinweis: Ist die automatische Gesprächsannahme deaktiviert, stellen Sie durch Drücken der
Taste am Mobilteil die Verbindung her.
5.5
Zwei externe Anrufe entgegennehmen
Sie werden durch Signaltöne darauf hingewiesen (Anklopfen), dass während des
Telefonierens ein weiterer Anruf eingeht. Die Rufnummer des zweiten Anrufers wird im Display
angezeigt. Sie können mit der Tastenfolge zwischen beiden Teilnehmern hin− und
herwechseln. Ein Teilnehmer wird, während Sie mit dem anderen Teilnehmer sprechen,
gehalten.
Hinweis: Zur Nutzung von Mehrwertdiensten der Deutschen Telekom müssen Sie die
Flash−Zeit auf 300 ms einstellen (siehe Kapitel 14.4 Flashzeiten einstellen").
Achtung: Die Rufnummernanzeige und das Anklopfen ist ein optionaler Service
Ihres Netzbetreibers. Ihr Telefon zeigt die Rufnummern im Display an, wenn Ihr
Netzbetreiber diesen Service anbietet. Bitte fragen Sie Ihren Netzbetreiber nach
weiteren Informationen.
5.6
Freisprechen
1. Drücken Sie während eines Gesprächs erneut die Taste . Jetzt hören Sie den
Gesprächspartner über den Lautsprecher des Mobilteils.
2. Drücken Sie erneut die Taste , um das Freisprechen zu beenden.
13
− Bedienung −
5.7
Rufnummern aus dem Telefonbuch wählen
Nachdem Sie einige Rufnummern im Telefonbuch gespeichert haben (siehe Rufnummer in
das Telefonbuch eingeben" Kapitel 8.1) , können Sie diese sehr schnell und einfach abrufen.
1. Drücken Sie die Taste . Das Display zeigt nun in alphabetischer Reihenfolge die
Telefonbucheinträge.
2. Mit der Taste oder können Sie nun einen Telefonbucheintrag auswählen.
Hinweis: Um einen Eintrag direkt auszuwählen, drücken Sie die Taste, die dem
Anfangsbuchstaben des Eintrages entspricht. Um z. B. den Namen Peters" direkt
anzuwählen, drücken Sie einmal die Taste .
3. Drücken Sie nun die Taste und die gewünschte Rufnummer wird automatisch
gewählt.
5.8
Anzeige der Gesprächsdauer
Während eines Gesprächs wird nach 15 Sekunden im Display die Gesprächsdauer in Minuten
und Sekunden sowie die Rufnummer des Gesprächpartners angezeigt.
5.9
Einstellen der Hörerlautstärke
Ist Ihnen die Hörerlautstärke zu leise oder zu laut, können Sie diese Ihren Bedürfnissen
anpassen.
Drücken Sie während eines Gespräches die Taste oder , um die Lautstärke in fünf Stufen
anzupassen.
5.10
Wahlwiederholung
Siehe Gewählte Nummern (Wahlwiederholung)" Kapitel 10.4.
5.11
Mobilteil stummschalten
Wenn Sie die Taste während eines Telefongespräches drücken, schalten Sie das Mikrofon
des Mobilteils stumm. Im Display erscheint die Anzeige Stumm ein". Dadurch können Sie mit
einer dritten Person sprechen, ohne dass der Gesprächspartner Sie hört. Der Lautsprecher im
Mobilteil bleibt eingeschaltet, sodass Sie den Gesprächspartner weiterhin hören. Wenn Sie die
Taste erneut drücken, wird die Stummschaltung aufgehoben.
5.12
Mobilteil ein− /ausschalten
Zum Ein−/Ausschalten des Mobilteils drücken Sie für 2 Sek. die Taste . Das Display erlischt
bzw. schaltet sich wieder ein.
5.13
Mobilteil suchen (Paging)
Wenn Sie Ihr Mobilteil verlegt haben, können Sie es mit Hilfe der Basis suchen.
1. Drücken Sie an der Basis die Paging−Taste . Alle an der Basis angemeldeten
Mobilteile klingeln.
2. Zum Beenden der Suche drücken Sie an der Basisstation erneut die Paging−Taste
oder eine beliebige Taste am Mobilteil.
14
− Bedienung −
5.14
Tastensperre
Tragen Sie das Mobilteil bei sich, können Sie die Tastatur sperren, damit nicht ungewollt
Tasten gedrückt werden. Trotz eingeschalteter Tastensperre werden eingehende Gespräche
entgegengenommen.
5.14.1
Tastensperre einschalten
Drücken Sie am Mobilteil für drei Sekunden die Taste .
Im Display erscheint die Anzeige Tastensperre" und das Symbol .
5.14.2
Tastensperre ausschalten
Um die Tastensperre auszuschalten, drücken Sie die Taste und bestätigen Sie dies durch
nochmaliges Drücken der Taste .
5.15
Hinweise zur Reichweite
Die Reichweite des Mobilteils beträgt ca. 50 Meter in geschlossenen Räumen und ca. 300
Meter im Freien. Bei einer guten Verbindung zur Basisstation erscheint im Display das
Symbol .
Hinweis: Haben Sie sich zu weit von der Basisstation entfernt, blinkt das Symbol und Sie
hören einen Warnton. Nähern Sie sich der Basisstation, sonst wird das Gespräch
unterbrochen.
15
− Nebenstellenanlagen / T−Net −
6
Nebenstellenanlagen / T−Net
Die Taste Ihres Telefons können Sie an Nebenstellenanlagen und bei der Verwendung der
T−Net Funktionen der Deutschen Telekom nutzen.
6.1
R−Taste an Nebenstellenanlagen
Ist Ihr Telefon an einer Nebenstellenanlage angeschlossen, können Sie über die Taste alle
Möglichkeiten, wie z. B. Anrufe weiterleiten, automatischen Rückruf usw., nutzen. An einer
Nebenstellenanlage wird eine Flash−Zeit von 100 ms benötigt (Einstellung siehe Kapitel 14.4).
Ob Ihr Telefon an Ihrer Nebenstellenanlage einwandfrei funktioniert, erfahren Sie bei dem
Händler, bei dem die Anlage gekauft wurde.
6.2
R−Taste und das T−Net der Deutschen Telekom
Ihr AUDIOLINE−Telefon unterstützt die wichtigsten Mehrwertdienste der Deutschen Telekom
(z. B. Makeln, Anklopfen, Dreier−Konferenz). Das T−Net arbeitet mit einer Flash−Zeit von 300
ms (Einstellung siehe Kapitel 14.4). Zur Freischaltung der T−Net Funktionen wenden Sie sich
bitte an die Deutsche Telekom.
6.3
Wahlpause
Bei Nebenstellenanlagen ist es erforderlich, eine bestimmte Nummer zu wählen (z. B. 9"
oder 0), um ein Freizeichen für eine Amtsleitung zu bekommen. Bei wenigen älteren
Nebenstellenanlagen dauert es einige Zeit, bis das Freizeichen zu hören ist. Speziell für diese
Nebenstellenanlagen kann nach der Amtsholung eine automatische Pause eingefügt werden,
so dass Sie direkt weiter wählen können, ohne das Freizeichen abzuwarten.
Drücken Sie zwischen der Amtskennziffer und der Rufnummer einmal die Taste für
ca. 2 Sekunden. Im Display erscheint die Anzeige P". Zwischen Amtskennziffer und
Rufnummer wird eine Pause von drei Sekunden eingefügt.
Hinweis: Die Pause kann auch bei der Eingabe von Rufnummern in das Telefonbuch
eingegeben werden.
16
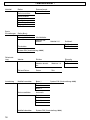
− Menüstruktur −
7
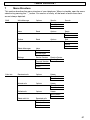
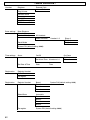
Menüstruktur
Hier finden Sie die Menüstruktur Ihres Telefons. Im Ruhezustand öffnen Sie die Menüauswahl
durch Drücken der Taste . Aus Gründen der Übersichtlichkeit sind nicht immer alle Ebenen
jedes Menüpunktes dargestellt.
SMS
Nachricht schreiben
Optionen
Senden an
Speichern
Symbol einfügen
Benutzername
Suchen
Eingang
Lesen
Optionen
Antworten
Weiterleiten
Löschen
Ausgang
Lesen
Optionen
Bearbeiten
Senden an
Löschen
Benutzername
Nachricht löschen
Eingang
Ausgang
Alle Nachrichten
Einstellungen
Service Center
Empfangs−SC
Sende−SC
Apparatnummer
Nachrichtenton
Benutzer
Anruferlisten
Eingegangene
Anrufe
Optionen
Löschen
Details anzeigen
Nr. einfügen
Entgangene
Anrufe
Optionen
Löschen
Details anzeigen
Nr. einfügen
Gewählte Nummern
Optionen
Löschen
Details anzeigen
Nr. einfügen
Anruferliste
löschen
Eingegangene
Anrufe
Entgangene Anrufe
Gewählte Nr.
Alle Anrufe
17
− Menüstruktur −
Mobilteil
Rufton
Externe Anrufe
Interne Anrufe
Ruftonlautstärke
Name Mobilteil
Sprache
Menüfarbe
Auto. Gesprächsanna
Zugangskode
Basis−
Einstellungen
Rufton Basis
Lautstärke Basis
Vorrang Mobilteil
Alle Mobilteile
Mobilteil auswählen
Mobilteil 1−5
Flashzeiten
Ruftöne 2
Ruftöne 4
Ruftöne 6
System−PIN (Voreinstellung: 0000)
Zeiteinstellung
Anmeldung
Wecker
Ein/Aus
Weckton einstellen
Weckton 1−4
Zeit und Datum
Datum
Zeit
Mobilteil anmelden
Basis 1
Basis 2
Basis 3
System−PIN (Voreinstellung: 0000)
Basis 4
Basis auswählen
Automatik
Basis 1
Basis 2
Basis 3
Basis 4
Mobilteil abmelden
18
Einmalig
Täglich
Aus
System−PIN (Voreinstellung: 0000)
− Das Telefonbuch −
8
Das Telefonbuch
Im Ruhezustand gelangen Sie durch Drücken der Taste in das Menü des Telefonbuches.
In das Telefonbuch können 150 Rufnummern mit dazugehörigen Namen gespeichert werden.
Für die Eingabe eines Namens haben Sie 16 Zeichen zur Verfügung. Die maximale Länge
einer Rufnummer beträgt 20 Zeichen.
8.1
Rufnummer in das Telefonbuch eingeben
1. Drücken Sie die Taste . Im Display wird das Telefonbuch geöffnet.
Hinweis: Wenn Sie den ersten Eintrag im Telefonbuch erstellen, fahren Sie jetzt mit Schritt 4
fort.
2.
3.
4.
5.
Drücken Sie die Taste .
Wählen Sie mit der Taste oder im Display die Option Nr. Einfügen".
Drücken Sie die Taste . Das Display zeigt die Meldung Name"
Geben Sie nun den zugehörigen Namen über das Zahlenfeld ein.
Hinweis: Texteingabe siehe 8.1.1.
6. Drücken Sie die Taste . Das Display zeigt die Meldung Nummer"
7. Geben Sie die gewünschte Rufnummer über das Zahlenfeld ein.
8. Drücken Sie die Taste . Der Eintrag wird im Display bestätigt.
9. Möchten Sie weitere Rufnummern speichern, wiederholen Sie Punkt 3 bis 9.
10. Durch Drücken der Taste kehrt das Mobilteil zurück in den Ruhezustand.
8.1.1
Texteingabe
Zur Eingabe von Text sind die Zahlentasten mit Buchstaben beschriftet. Durch mehrmaliges
Drücken der entsprechenden Taste können Buchstaben sowie Zahlen eingegeben werden.
Beispiel: Sie möchten den Namen "Peter" eingeben.
Drücken Sie: 1 x Taste , 2 x Taste , 1 x Taste , 2 x Taste , 3 x Taste S
S
Um ein Leerzeichen einzugeben, drücken Sie einmal die Taste .
Um den gleichen Buchstaben zweimal einzugeben, drücken Sie den
entsprechenden Buchstaben und warten Sie dann, bis der Cursor automatisch eine
Stelle weiter springt.
Hinweis: Falsche Eingaben können mit der Taste gelöscht werden.
Um den Cursor nach links oder rechts zu bewegen, drücken Sie
die Taste oder .
8.1.2
Hinweise zum Telefonbuch
S
S
Geben Sie bei allen Rufnummern immer die Vorwahl mit ein, damit das Telefon auch
eingehende Ortsgespräche einem Telefonbucheintrag zuordnen kann.
Ist die Speicherkapazität von 150 Rufnummern erreicht, zeigt das Display beim
nächsten Speichern eine entsprechende Meldung. Um wieder Platz zu schaffen,
müssen Sie vorhandene Einträge löschen.
19
− Das Telefonbuch −
8.2
Details des Eintrages anzeigen
1. Drücken Sie die Taste . Im Display wird das Telefonbuch geöffnet.
2. Wählen Sie mit der Taste oder im Display den gewünschten Eintrag.
Hinweis: Um einen Eintrag direkt auszuwählen, drücken Sie die Taste, die dem
Anfangsbuchstaben des Eintrages entspricht. Um z. B. den Namen Peters" direkt
anzuwählen, drücken Sie einmal die Taste .
3.
4.
5.
6.
8.3
Drücken Sie die Taste .
Wählen Sie mit der Taste oder im Display die Option Details anzeigen".
Drücken Sie die Taste . Das Display zeigt den Namen und die Rufnummer an.
Durch Drücken der Taste kehren Sie jeweils um eine Menüebene zurück.
Gespeicherte Einträge im Telefonbuch ändern
1. Drücken Sie die Taste . Im Display wird das Telefonbuch geöffnet.
2. Wählen Sie mit der Taste oder im Display den gewünschten Eintrag.
Hinweis: Um einen Eintrag direkt auszuwählen, drücken Sie die Taste, die dem
Anfangsbuchstaben des Eintrages entspricht. Um z. B. den Namen Peters" direkt
anzuwählen, drücken Sie einmal die Taste .
3. Drücken Sie die Taste .
4. Wählen Sie mit der Taste oder im Display die Option Nr. ändern".
5. Drücken Sie die Taste .
Im Display wird der Name angezeigt. Bei Bedarf ändern Sie den Namen oder fahren
Sie fort mit Schritt 6.
Hinweis: Hinweise zur Namenseingabe unter 8.1.1.
6. Drücken Sie die Taste .
Im Display wird die Nummer angezeigt. Bei Bedarf ändern Sie die Nummer oder
fahren Sie fort mit Schritt 7.
7. Drücken Sie die Taste . Die Änderung wird im Display bestätigt.
8. Durch einmaliges Drücken der Taste kehren Sie zurück zum Telefonbuch, um
weitere Einträge zu bearbeiten.
9. Durch Drücken der Taste kehren Sie jeweils um eine Menüebene zurück.
8.4
Eintrag aus dem Telefonbuch löschen
1. Drücken Sie die Taste . Im Display wird das Telefonbuch geöffnet.
2. Wählen Sie mit der Taste oder im Display den gewünschten Eintrag.
Hinweis: Um einen Eintrag direkt auszuwählen, drücken Sie die Taste, die dem
Anfangsbuchstaben des Eintrages entspricht. Um z. B. den Namen Peters" direkt
anzuwählen, drücken Sie einmal die Taste .
3. Drücken Sie die Taste .
4. Wählen Sie mit der Taste oder im Display die Option Nr. löschen".
5. Drücken Sie die Taste . Im Display erscheint die Abfrage zum Löschen des
Eintrages.
6. Drücken Sie die Taste . Das Löschen wird im Display bestätigt.
7. Durch Drücken der Taste kehrt das Mobilteil zurück in den Ruhezustand.
20
− Das Telefonbuch −
8.5
Alle Einträge aus dem Telefonbuch löschen
Drücken Sie die Taste . Im Display wird das Telefonbuch geöffnet.
Drücken Sie die Taste .
Wählen Sie mit der Taste oder im Display die Option Rubrik löschen".
Drücken Sie die Taste . Im Display erscheint die Abfrage zum Löschen aller
Einträge.
5. Drücken Sie die Taste . Das Löschen wird im Display bestätigt. Bei Bedarf
können Sie neue Einträge in das Telefonbuch eingeben.
6. Durch Drücken der Taste kehrt das Mobilteil zurück in den Ruhezustand.
1.
2.
3.
4.
8.6
VIP−Ruf (Ruftonzuordnung)
Telefonbucheinträgen von Anrufern, die Ihnen besonders wichtig sind, können Sie eine
bestimmte Ruftonmelodie zuweisen. Dadurch erkennen Sie bereits an der Ruftonmelodie, wer
Sie anruft.
8.6.1
Ruftonmelodie zuweisen
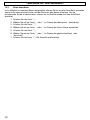
1. Drücken Sie die Taste . Im Display wird das Telefonbuch geöffnet.
2. Wählen Sie mit der Taste oder im Display den gewünschten Eintrag.
Hinweis: Um einen Eintrag direkt auszuwählen, drücken Sie die Taste, die dem
Anfangsbuchstaben des Eintrages entspricht. Um z. B. den Namen Peters" direkt
anzuwählen, drücken Sie einmal die Taste .
3.
4.
5.
6.
7.
8.
8.6.2
Drücken Sie die Taste .
Wählen Sie mit der Taste oder im Display die Option Rufton".
Drücken Sie die Taste . Im Display erscheinen mehrere Melodien zur Auswahl.
Wählen Sie mit der Taste oder im Display die gewünschte Melodie.
Drücken Sie die Taste . Die Zuweisung wird im Display bestätigt.
Durch Drücken der Taste kehren Sie jeweils um eine Menüebene zurück.
Ruftonzuweisung ausschalten
1. Drücken Sie die Taste . Im Display wird das Telefonbuch geöffnet.
2. Wählen Sie mit der Taste oder im Display den gewünschten Eintrag.
Hinweis: Um einen Eintrag direkt auszuwählen, drücken Sie die Taste, die dem
Anfangsbuchstaben des Eintrages entspricht. Um z. B. den Namen Peters" direkt
anzuwählen, drücken Sie einmal die Taste .
3. Drücken Sie die Taste . Im Display werden mehrere Optionen angezeigt.
4. Wählen Sie mit der Taste oder im Display die Option Rufton".
5. Drücken Sie die Taste . Im Display erscheinen mehrere Melodien zur Auswahl
und die Option Aus"
6. Wählen Sie mit der Taste oder im Display die Option Aus".
7. Drücken Sie die Taste . Die Zuweisung wird im Display bestätigt.
8. Durch Drücken der Taste kehren Sie jeweils um eine Menüebene zurück.
21
− SMS Nachrichten −
9
SMS−Nachrichten
Allgemeine Voraussetzungen
Die beliebte Kommunikation mit kurzen Nachrichten (SMS) ist auch im Festnetz möglich. Sie
können mit Ihrem Telefon Textmeldungen (SMS) senden und empfangen. Damit Sie
SMS−Textmeldungen senden und empfangen können, müssen einige Voraussetzungen erfüllt
sein.
S
S
S
Ihr Telefonanschluss muss über das Leistungsmerkmal CLIP (Calling Line
Identification Presentation) verfügen. Vergewissern Sie sich bei Ihrem
Telefonnetzbetreiber, dass diese Leistungsmerkmale an Ihrem Telefonanschluss
freigeschaltet sind. Dieses Leistungsmerkmal kann kostenpflichtig sein und muss
ggf. bei Ihrem Telefonnetzbetreiber (z. B. Deutsche Telekom unter der
Rufnummer 0800 33 01000) beantragt werden.
0190er Rufnummern dürfen an Ihrem Festnetzanschluss nicht gesperrt sein.
Um den SMS−Dienst zu nutzen, muss dieser ggf. bei Ihrem Telefonnetzbetreiber
aktiviert werden.
Hinweis: Bei Call−by−Call−Verbindungen ist der SMS−Versand derzeit nicht möglich.
S
S
S
Das Senden von SMS−Nachrichten ist kostenpflichtig.
Nutzt der Empfänger im Festnetz keinen SMS−Dienst oder kann sein Telefon
generell keine Textnachrichten empfangen, wird die SMS automatisch als
Sprachmeldung zugestellt, d. h. am Telefon vorgelesen.
Die Kostenberechnung erfolgt über den Telefonnetzbetreiber.
Durch die ständige Weiterentwicklung können sich die hier gemachten Angaben bereits
wieder geändert haben. Aktuelle Informationen erhalten Sie über die jeweiligen Internetseiten
oder Servicenummern der Netzbetreiber.
9.1
Service Center
Die Verteilung aller SMS−Nachrichten erfolgt über ein Service Center. Die Deutsche Telekom"
und weitere Telefonnetzbetreiber bieten diesen Service an. Ihr AUDIOLINE Telefon ist für den
Betrieb (Senden und Empfangen von SMS−Nachrichten) bei der Deutschen Telekom"
vorbereitet.
S
S
S
S
S
S
22
Service Center der Deutschen Telekom
Die Nummer des Service Center der Deutschen Telekom lautet 0193 010.
Bei Nutzung der Deutschen Telekom ist eine einfache Anmeldung nötig. Senden Sie
dazu eine erste SMS mit dem Text ANMELD" an die Rufnummer 8888".
SMS aus den Netzen Vodafone, E−Plus oder O2 können über die Deutsche
Telekom nicht empfangen werden.
Service Center von Anny Way
Die Nummer des Service Center von Anny Way lautet 0900 32 66 900.
Bei der Nutzung über Anny Way ist keine Anmeldung nötig. Senden Sie einfach
eine beliebige SMS und Sie werden automatisch bei Anny Way angemeldet.
SMS aus den Netzen D1 (T−Mobile) und E−Plus können über Anny Way nicht
empfangen werden. Die SMS werden in diesem Fall vorgelesen.
− SMS Nachrichten −
In Ihrem Mobilteil können zwei SMS−Rufnummern einprogrammiert werden: eine Rufnummer
für das Senden und eine Rufnummer für das Empfangen von SMS−Nachrichten. Wenn Sie
den Service eines anderen Anbieters nutzen möchten, müssen Sie dessen Rufnummer(n) in
das Mobilteil einprogrammieren. Dazu gehen Sie vor wie in 9.1.1 beschrieben.
Hinweis: Die Anmeldeverfahren der einzelnen Anbieter variieren. Bitte erfragen Sie beim
Anbieter Ihrer Wahl die erforderliche Rufnummer und die Vorgehensweise zur
Freischaltung des SMS−Dienstes.
9.1.1
1.
2.
3.
4.
5.
6.
7.
8.
9.
10.
11.
12.
9.2
Sende−/Empfangsnummer eingeben
Drücken Sie die Taste .
Wählen Sie mit der Taste oder im Display den Menüpunkt SMS".
Drücken Sie die Taste .
Wählen Sie mit der Taste oder im Display die Option Einstellungen".
Drücken Sie die Taste .
Wählen Sie mit der Taste oder im Display die Option Service Center".
Drücken Sie die Taste .
Wählen Sie mit der Taste oder im Display die Option Empfangs−SC". Geben
Sie die Rufnummer ein, die Ihnen der Anbieter Ihrer Wahl mitgeteilt hat.
Drücken Sie die Taste .
Wählen Sie mit der Taste oder im Display die Option Sende−SC". Geben Sie
die Rufnummer ein, die Ihnen der Anbieter Ihrer Wahl mitgeteilt hat.
Drücken Sie die Taste .
Durch Drücken der Taste kehren Sie jeweils um eine Menüebene zurück.
Schreiben und versenden
Hinweis: Das Versenden einer SMS−Nachricht von einer Nebenstellenanlage ist nicht
möglich. Zum Versenden der SMS−Nachricht muss der Zugangskode" deaktiviert
sein (siehe Kapitel 11.7).
Drücken Sie die Taste .
Wählen Sie mit der Taste oder im Display den Menüpunkt SMS".
Drücken Sie die Taste .
Wählen Sie mit der Taste oder im Display die Option Nachricht schreiben".
Drücken Sie die Taste . Geben Sie nun den Text über das Zahlenfeld ein. Es
sind bis zu 160 Zeichen möglich.
Hinweis: Texteingabe siehe 8.1.1.
1.
2.
3.
4.
5.
Hinweis: Um ein Symbol einzufügen, drücken Sie während der Texteingabe die Taste .
Wählen Sie mit der Taste oder im Display die Option Symbol einfügen".
Drücken Sie die Taste . Wählen Sie mit der Taste oder das gewünschte
Symbol. Drücken Sie die Taste . Das Display springt wieder zur Texteingabe.
Vervollständigen Sie Ihren Text.
6. Drücken Sie die Taste .
7. Wählen Sie mit der Taste oder im Display die Option Senden an".
23
− SMS Nachrichten −
Hinweis: Wenn Sie die SMS−Nachricht zu einem späteren Zeitpunkt versenden möchten,
wählen Sie unter Schritt 7 die Option Speichern". Ihre SMS−Nachricht wird in der
Liste Ausgang" gespeichert.
8. Drücken Sie die Taste .
9. Geben Sie die Rufnummer des Empfängers ein.
Ist der Empfänger in Ihrem Telefonbuch gespeichert, drücken Sie die
Taste . Wählen Sie mit der Taste oder den gewünschten Empfänger und
drücken dann die Taste . Weiter mit Schritt 10.
10. Drücken Sie die Taste . Im Display wird das Senden bestätigt.
9.3
Gespeicherte SMS−Nachricht versenden
1.
2.
3.
4.
5.
6.
7.
8.
9.4
Drücken Sie zweimal die Taste .
Wählen Sie mit der Taste oder im Display die Option Ausgang".
Drücken Sie die Taste .
Wählen Sie mit der Taste oder im Display die gewünschte SMS−Nachricht.
Drücken Sie zweimal die Taste .
Wählen Sie mit der Taste oder im Display die Option Senden an".
Drücken Sie die Taste .
Geben Sie die Rufnummer des Empfängers ein und drücken dann die Taste .
Lesen und beantworten
Sobald eine SMS−Nachricht empfangen wird, hören Sie einen Signalton und das Display zeigt
den Eingang einer neuen Nachricht an.
1. Drücken Sie die Taste . Im Display wird die Eingangsliste geöffnet.
SMS−Nachrichten, die noch nicht gelesen wurden, sind mit einem Stern
gekennzeichnet.
Hinweis: Möchten Sie eine bereits gelesene SMS−Nachricht beantworten, drücken Sie
zweimal die Taste , wählen Sie mit der Taste oder im Display die Option
Eingang" und drücken die Taste . Weiter mit Schritt 2.
Wählen Sie mit der Taste oder im Display die gewünschte SMS−Nachricht aus.
Drücken Sie die Taste . Im Display erscheint die SMS−Nachricht.
Drücken Sie die Taste .
Wählen Sie mit der Taste oder im Display die Option Antworten".
Wählen Sie die Option Weiterleiten", um die SMS−Nachricht weiterzuleiten. Zum
Weiterleiten der SMS−Nachricht fahren Sie fort mit Schritt 8.
6. Drücken Sie die Taste . Geben Sie nun den Text über das Zahlenfeld ein. Es
sind bis zu 160 Zeichen möglich.
2.
3.
4.
5.
Hinweis: Texteingabe siehe 8.1.1.
7. Drücken Sie die Taste .
8. Wählen Sie mit der Taste oder im Display die Option Senden an".
9. Drücken Sie die Taste .
24
− SMS Nachrichten −
10. Geben Sie die Rufnummer des Empfängers ein.
Ist der Empfänger in Ihrem Telefonbuch gespeichert, drücken Sie die Taste .
Wählen Sie mit der Taste oder den gewünschten Empfänger und drücken
dann die Taste .
11. Drücken Sie die Taste . Im Display wird das Senden bestätigt.
9.5
Nachrichtenton Ein/Aus
Drücken Sie die Taste .
Wählen Sie mit der Taste oder im Display den Menüpunkt SMS".
Drücken Sie die Taste .
Wählen Sie mit der Taste oder im Display die Option Einstellungen".
Drücken Sie die Taste .
Wählen Sie mit der Taste oder im Display die Option Nachrichtenton".
Drücken Sie die Taste .
Wählen Sie mit der Taste oder im Display nach Bedarf die Option Ein" oder
Aus"
9. Drücken Sie die Taste .
10. Durch Drücken der Taste kehren Sie jeweils um eine Menüebene zurück.
1.
2.
3.
4.
5.
6.
7.
8.
9.6
Nachrichtenton einstellen (Morseton, Diskret, Polyphon)
1.
2.
3.
4.
5.
6.
7.
8.
9.
10.
11.
9.7
Drücken Sie die Taste .
Wählen Sie mit der Taste oder im Display den Menüpunkt SMS".
Drücken Sie die Taste .
Wählen Sie mit der Taste oder im Display die Option Einstellungen".
Drücken Sie die Taste .
Wählen Sie mit der Taste oder im Display die Option Nachrichtenton".
Drücken Sie die Taste .
Wählen Sie mit der Taste oder im Display die Option Warnton einstellen".
Drücken Sie die Taste .
Wählen Sie mit der Taste oder im Display die gewünschte Tonart.
Drücken Sie die Taste . Die Änderung wird im Display bestätigt.
SMS−Nachricht löschen
Aus den Ordnern Eingang" und Ausgang" können einzelne SMS−Nachrichten gelöscht
werden.
1. Drücken Sie die Taste .
2. Wählen Sie mit der Taste oder im Display den Menüpunkt SMS".
3. Drücken Sie die Taste .
4. Wählen Sie mit der Taste oder im Display die Option Eingang" oder
Ausgang".
5. Drücken Sie die Taste .
6. Wählen Sie mit der Taste oder im Display die gewünschte SMS.
25
− SMS Nachrichten −
7.
8.
9.
10.
11.
9.8
Drücken Sie die Taste .
Drücken Sie die Taste und wählen Sie die Option Löschen".
Drücken Sie die Taste .
Drücken Sie die Taste um das Löschen zu bestätigen.
Durch Drücken der Taste kehren Sie jeweils um eine Menüebene zurück.
Alle SMS−Nachrichten löschen
Alle SMS−Nachrichten die sich in den Listen Eingang" und Ausgang" befinden, können
komplett gelöscht werden.
1. Drücken Sie die Taste .
2. Wählen Sie mit der Taste oder im Display den Menüpunkt SMS".
3. Drücken Sie die Taste .
4. Wählen Sie mit der Taste oder im Display die Option Nachricht löschen".
5. Drücken Sie die Taste .
6. Wählen Sie mit der Taste oder im Display die Option Alle Nachrichten.
Hinweis: Möchten Sie nur die SMS−Nachrichten im Ordner Eingang" bzw. Ausgang"
löschen, wählen Sie mit der Taste oder im Display die entsprechende Option.
7. Drücken Sie die Taste . Im Display erscheint eine Bestätigungsabfrage.
8. Drücken Sie die Taste . Im Display wird das Löschen bestätigt.
9. Durch Drücken der Taste kehren Sie jeweils um eine Menüebene zurück.
9.9
SMS−Postfach
Neben einem bereits vorhandenen, allgemeinen Postfach können Sie vier weitere Postfächer
einrichten und durch ein Passwort schützen. Jedes Postfach wird durch einen Benutzernamen
und eine Postfach−ID (Durchwahlziffer) gekennzeichnet. Durch diese Funktion ist es Ihnen
möglich, SMS−Nachrichten zu erhalten, die nur Sie lesen können.
Hinweis: SMS−Postfächer können Sie nur nutzen, wenn der Netzbetreiber dies unterstützt.
Eine Konfigurationsanleitung zur Einrichtung des Postfachbetriebes erfragen Sie
bitte bei Ihrem Netzbetreiber.
9.9.1
Postfach/Benutzer hinzufügen
Hinweis: Sie können bis zu vier Benutzer hinzufügen.
1.
2.
3.
4.
5.
6.
7.
8.
9.
26
Drücken Sie die Taste .
Wählen Sie mit der Taste oder im Display den Menüpunkt SMS".
Drücken Sie die Taste .
Wählen Sie mit der Taste oder im Display die Option Einstellungen".
Drücken Sie die Taste .
Wählen Sie mit der Taste oder im Display die Option Benutzer".
Drücken Sie die Taste .
Wählen Sie mit der Taste oder im Display die Option Benutzer hinzufügen".
Drücken Sie die Taste . Geben Sie über das Zahlenfeld den Benutzernamen ein.
− SMS Nachrichten −
10. Drücken Sie die Taste . Geben Sie über das Zahlenfeld ein Passwort mit bis zu
fünf Zeichen ein.
11. Drücken Sie die Taste . Geben Sie über das Zahlenfeld noch einmal das
Passwort ein.
12. Drücken Sie die Taste . Das Postfach ist erstellt.
13. Durch Drücken der Taste kehren Sie jeweils um eine Menüebene zurück.
9.9.2
Postfach/Benutzer−Daten anzeigen
Hinweis: Für die Konfiguration des Postfachbetriebes beim Netzbetreiber benötigen Sie die
Postfach−ID (Durchwahlziffer). Das allgemeine Postfach hat die Postfach−ID 0". Bei
der Anmeldung weiterer Benutzer wird automatisch die niedrigste freie Postfach−ID
(1−4) vergeben.
1.
2.
3.
4.
5.
6.
7.
8.
9.
10.
11.
12.
Drücken Sie die Taste .
Wählen Sie mit der Taste oder im Display den Menüpunkt SMS".
Drücken Sie die Taste .
Wählen Sie mit der Taste oder im Display die Option Einstellungen".
Drücken Sie die Taste .
Wählen Sie mit der Taste oder im Display die Option Benutzer".
Drücken Sie die Taste .
Wählen Sie mit der Taste oder im Display den gewünschten Benutzer.
Drücken Sie die Taste . Geben Sie das entsprechende Passwort ein.
Drücken Sie die Taste .
Wählen Sie mit der Taste oder im Display die Option Apparatnummer".
Drücken Sie die Taste . Es wird die Apparatnummer angezeigt.
Hinweis: Die unter Schritt 12 angezeigte Apparatnummer entspricht beim Netzbetreiber der
Postfach−ID.
13. Durch Drücken der Taste kehren Sie jeweils um eine Menüebene zurück.
9.9.3
SMS−Nachricht an persönliches Postfach senden
Hinweis: SMS−Postfächer können Sie nur nutzen, wenn der Netzbetreiber dies unterstützt.
Eine Konfigurationsanleitung zur Einrichtung des Postfachbetriebes erfragen Sie
bitte bei Ihrem Netzbetreiber.
Damit eine SMS in Ihr persönliches Postfach gelangt, muss der Absender Ihre Postfach−ID
kennen und an Ihre Nummer anhängen.
Sie können an Ihren SMS−Partner eine SMS über Ihr persönliches Postfach schicken.
Durch diese SMS erhält Ihr SMS−Partner Ihre SMS−Rufnummer mit der aktuellen Postfach−ID
und kann diese im Telefonbuch speichern. Ist die Postfach−ID ungültig, wird die SMS nicht
zugestellt.
27
− SMS Nachrichten −
9.9.4
Postfach/Benutzer−Daten ändern
Drücken Sie die Taste .
Wählen Sie mit der Taste oder im Display den Menüpunkt SMS".
Drücken Sie die Taste .
Wählen Sie mit der Taste oder im Display die Option Einstellungen".
Drücken Sie die Taste .
Wählen Sie mit der Taste oder im Display die Option Benutzer".
Drücken Sie die Taste .
Wählen Sie mit der Taste oder im Display den gewünschten Benutzer.
Drücken Sie die Taste . Geben Sie das entsprechende Passwort ein.
Drücken Sie die Taste .
Wählen Sie mit der Taste oder eine der Optionen, die Sie ändern möchten,
aus.
12. Drücken Sie die Taste . Ändern Sie die Einstellung.
13. Drücken Sie die Taste . Sie können jetzt weitere Änderungen vornehmen.
14. Durch Drücken der Taste kehren Sie jeweils um eine Menüebene zurück.
1.
2.
3.
4.
5.
6.
7.
8.
9.
10.
11.
9.9.5
Postfach/Benutzer löschen
1.
2.
3.
4.
5.
6.
7.
8.
9.
10.
11.
12.
13.
28
Drücken Sie die Taste .
Wählen Sie mit der Taste oder im Display den Menüpunkt SMS".
Drücken Sie die Taste .
Wählen Sie mit der Taste oder im Display die Option Einstellungen".
Drücken Sie die Taste .
Wählen Sie mit der Taste oder im Display die Option Benutzer".
Drücken Sie die Taste .
Wählen Sie mit der Taste oder im Display die Option Benutzer löschen".
Drücken Sie die Taste .
Wählen Sie mit der Taste oder den gewünschten Benutzer.
Drücken Sie die Taste . Geben Sie die System−PIN (Voreinstellung= 0000) ein.
Drücken Sie die Taste .
Durch Drücken der Taste kehren Sie jeweils um eine Menüebene zurück.
− Anruferlisten −
10
Anruferlisten
10.1
Rufnummernanzeige (Clip)
Mit der Rufnummernanzeige können Sie bei eingehenden Gesprächen erkennen, wer Sie
anruft. Wenn diese Funktion an Ihrer Telefonleitung zur Verfügung steht, zeigt Ihnen das
Display bereits die Rufnummer des Anrufers, wenn das Telefon klingelt. Hat der Anrufer das
Senden seiner Rufnummer gesperrt, kann die Rufnummer nicht angezeigt werden. Haben Sie
diese Rufnummer in Ihrem Telefonbuch gespeichert, wird anstatt der Rufnummer der Name
angezeigt.
Die Listen Eingegangene Anrufe" und Entgangene Anrufe" haben einen gemeinsamen
Speicherplatz für 50 Rufnummern. Sind z. B. in der Liste der Eingegangenen Anrufe" 32
Rufnummern gespeichert, stehen für die Entgangenen Anrufe" noch 18 Speicherplätze zur
Verfügung. Sobald alle 50 Speicherplätze belegt sind, wird immer der älteste Eintrag gelöscht.
Hinweis: Die Rufnummernanzeige ist ein optionaler Service Ihres Netzbetreibers. Ihr Telefon
zeigt die Rufnummern im Display, wenn Ihr Netzbetreiber diesen Service anbietet.
Die Anzeige des Datums und der Uhrzeit wird nicht von allen Netzbetreibern
übertragen. Bitte fragen Sie Ihren Netzbetreiber nach weiteren Informationen. Auch
bei manchen Nebenstellenanlagen ist eine Übertragung der Rufnummer oder auch
des Datums und der Uhrzeit nicht möglich.
10.2
Eingegangene Anrufe
In der Liste Eingegangene Anrufe" werden alle Anrufe, die Sie entgegengenommen haben
gespeichert.
10.2.1
Anzeigen und zurückrufen
Drücken Sie die Taste .
Wählen Sie mit der Taste oder im Display den Menüpunkt Anruferlisten".
Drücken Sie die Taste .
Wählen Sie mit der Taste oder im Display die Option Eingegangene Anrufe".
Drücken Sie die Taste . Im Display werden die eingegangenen Anrufe angezeigt.
Möchten sie einen eingegangenen Anruf zurückrufen, wählen Sie mit der Taste oder im Display die gewünschte Nummer aus.
7. Drücken Sie die Taste . Die Verbindung wird hergestellt.
1.
2.
3.
4.
5.
6.
10.2.2
Eintrag löschen
1.
2.
3.
4.
5.
6.
7.
8.
Drücken Sie die Taste .
Wählen Sie mit der Taste oder im Display den Menüpunkt Anruferlisten".
Drücken Sie die Taste .
Wählen Sie mit der Taste oder im Display die Option Eingegangene Anrufe".
Drücken Sie die Taste . Im Display werden die eingegangenen Anrufe angezeigt.
Wählen Sie mit der Taste oder im Display die gewünschte Nummer aus.
Drücken Sie die Taste .
Wählen Sie mit der Taste oder im Display die Option Löschen".
29
− Anruferlisten −
Hinweis: Neben der Option Löschen" steht Ihnen auch die Option Details anzeigen" zur
Verfügung.
Wählen Sie Details anzeigen" aus, zeigt das Display durch Drücken der Taste Name und Rufnummer an. Durch Drücken der Taste kehren Sie zur Anruferliste
Eingegangene Anrufe" zurück.
9.
10.
11.
12.
10.2.3
Drücken Sie die Taste . Das Löschen wird im Display bestätigt.
Das Mobilteil kehrt zurück in die Anruferliste Eingegangene Anrufe".
Möchten Sie weitere Einträge löschen, wiederholen Sie Punkt 6 bis 9.
Durch Drücken der Taste kehren Sie jeweils um eine Menüebene zurück.
Eintrag im Telefonbuch speichern
Eine in der Anruferliste Eingegangene Anrufe" gespeicherte Rufnummer kann direkt im
Telefonbuch gespeichert werden.
1. Drücken Sie die Taste .
2. Wählen Sie mit der Taste oder im Display den Menüpunkt Anruferlisten".
3. Drücken Sie die Taste .
4. Wählen Sie mit der Taste oder im Display die Option Eingegangene Anrufe".
5. Drücken Sie die Taste . Im Display werden die eingegangenen Anrufe angezeigt.
6. Wählen Sie mit der Taste oder im Display die gewünschte Nummer aus.
7. Drücken Sie die Taste .
8. Wählen Sie mit der Taste oder im Display die Option Nr. einfügen".
9. Drücken Sie die Taste .
10. Geben Sie nun den zugehörigen Namen über das Zahlenfeld ein.
11. Drücken Sie zweimal die Taste . Im Display wird der Eintrag bestätigt.
12. Durch Drücken der Taste kehren Sie jeweils um eine Menüebene zurück.
10.3
Entgangene Anrufe
In der Liste Entgangene Anrufe" werden alle nicht entgegengenommene Anrufe gespeichert,
sodass Sie auch während Ihrer Abwesenheit keinen Anruf verpassen. Sie haben drei
Möglichkeiten, in die Anruferliste Entgangene Anrufe" zu gelangen:
S
S
S
30
Drücken Sie die Taste , oder
wird im Display angezeigt, dass entgangene Anrufe gespeichert wurden, drücken
Sie die Taste , oder
wie unter 10.3.1 beschrieben.
− Anruferlisten −
10.3.1
Anzeigen und zurückrufen
1.
2.
3.
4.
5.
Drücken Sie die Taste .
Wählen Sie mit der Taste oder im Display den Menüpunkt Anruferlisten".
Drücken Sie die Taste .
Wählen Sie mit der Taste oder im Display die Option Entgegangene Anrufe".
Drücken Sie die Taste . Im Display werden die entgangenen Anrufe angezeigt.
Hinweis: Die neuen Eingänge sind mit einem Stern markiert.
6. Möchten Sie einen entgangenen Anruf zurückrufen, wählen Sie mit der Taste oder im Display die gewünschte Nummer aus.
7. Drücken Sie die Taste . Die Verbindung wird hergestellt.
10.3.2
Eintrag löschen
1.
2.
3.
4.
Drücken Sie die Taste . Im Display werden die entgangenen Anrufe angezeigt.
Wählen Sie mit der Taste oder im Display die gewünschte Nummer aus.
Drücken Sie die Taste .
Wählen Sie mit der Taste oder im Display die Option Löschen".
Hinweis: Neben der Option Löschen" steht Ihnen auch die Option Details anzeigen" zur
Verfügung.
Wählen Sie Details anzeigen" aus, zeigt das Display durch Drücken der Taste Name und Rufnummer an. Durch Drücken der Taste kehren Sie zur Anruferliste
Entgangene Anrufe" zurück.
5. Drücken Sie die Taste . Das Löschen wird im Display bestätigt.
6. Durch Drücken der Taste kehrt das Mobilteil zurück in den Ruhezustand.
10.3.3
Eintrag im Telefonbuch speichern
Eine in der Anruferliste Entgangene Anrufe" gespeicherte Rufnummer kann direkt im
Telefonbuch gespeichert werden.
1. Drücken Sie die Taste . Im Display werden die entgangenen Anrufe angezeigt.
2. Wählen Sie mit der Taste oder im Display die gewünschte Nummer aus.
3. Drücken Sie die Taste .
4. Wählen Sie mit der Taste oder im Display die Option Nr. einfügen".
5. Drücken Sie die Taste . Geben Sie über das Tastenfeld den Namen ein.
6. Drücken Sie zweimal die Taste . Im Display wird der Eintrag bestätigt.
7. Durch Drücken der Taste kehrt das Mobilteil zurück in den Ruhezustand.
Hinweis: Sobald die Rufnummer im Telefonbuch mit einem Namen gespeichert wurde,
erscheint in der Anruferliste nicht mehr die Rufnummer, sondern der eingegebene
Name.
31
− Anruferlisten −
10.4
Gewählte Nummern (Wahlwiederholung)
In der Liste Gewählte Nummern" werden alle von Ihnen gewählten Nummern gespeichert.
10.4.1
Anzeigen und anrufen
1. Drücken Sie die Taste . Im Display werden die gewählten Nummern angezeigt.
Hinweis: Ist eine Nummer im Telefonbuch gespeichert, wird zusätzlich der Name angezeigt.
2. Möchten Sie eine gewählte Nummer anrufen, wählen Sie mit der Taste oder im Display die gewünschte Nummer aus.
3. Drücken Sie die Taste . Die Verbindung wird hergestellt.
10.4.2
Eintrag löschen
1.
2.
3.
4.
Drücken Sie die Taste . Im Display werden die gewählten Nummern angezeigt.
Wählen Sie mit der Taste oder im Display die gewünschte Nummer aus.
Drücken Sie die Taste .
Wählen Sie mit der Taste oder im Display die Option Löschen".
Hinweis: Neben der Option Löschen" steht Ihnen auch die Option Details anzeigen" zur
Verfügung.
Wählen Sie Details anzeigen" aus, zeigt das Display durch Drücken der Taste Name und Rufnummer an. Durch Drücken der Taste kehren Sie zur Anruferliste
Entgangene Anrufe" zurück.
5. Drücken Sie die Taste . Das Löschen wird im Display bestätigt.
6. Durch Drücken der Taste kehren Sie jeweils um eine Menüebene zurück.
10.4.3
Eintrag im Telefonbuch speichern
Eine in der Anruferliste Gewählte Nummern" gespeicherte Rufnummer kann direkt im
Telefonbuch gespeichert werden.
1. Drücken Sie die Taste . Im Display werden die gewählten Nummern angezeigt.
2. Wählen Sie mit der Taste oder im Display die gewünschte Nummer aus.
3. Drücken Sie die Taste .
4. Wählen Sie mit der Taste oder im Display die Option Nr. einfügen".
5. Drücken Sie die Taste . Geben Sie über das Tastenfeld den Namen ein.
6. Drücken Sie zweimal die Taste . Im Display wird der Eintrag bestätigt.
7. Durch Drücken der Taste kehren Sie jeweils um eine Menüebene zurück.
Hinweis: Sobald die Rufnummer im Telefonbuch mit einem Namen gespeichert wurde,
erscheint in der Anruferliste nicht mehr die Rufnummer, sondern der eingegebene
Name.
32
− Anruferlisten −
10.4.4
Eine Anruferliste löschen
Sie haben die Möglichkeit, alle Einträge einer Anruferliste ("Eingegangene Anrufe",
Entgangene Anrufe" oder Gewählte Nummern") Ihrer Wahl zu löschen.
Hinweis: Der Ablauf ist am Beispiel der Anruferliste "Eingegangene Anrufe" beschrieben. Der
Ablauf gilt genauso für die Anruferlisten Entgangene Anrufe" und Gewählte
Nummern".
1.
2.
3.
4.
5.
6.
7.
8.
Drücken Sie die Taste .
Wählen Sie mit der Taste oder im Display den Menüpunkt Anruferlisten".
Drücken Sie die Taste .
Wählen Sie mit der Taste oder im Display die Option Anruferliste löschen".
Drücken Sie die Taste .
Wählen Sie mit der Taste oder im Display die Option Eingegangene Anrufe".
Drücken Sie die Taste .
Drücken Sie die Taste . Im Display erscheint die Abfrage zum Löschen der
Anruferliste.
Hinweis: Im nächsten Schritt werden alle Einträge in der Anruferliste "Eingegangene Anrufe"
unwiederbringlich gelöscht. Durch das Drücken der Taste wird der
Löschvorgang abgebrochen.
9. Drücken Sie die Taste . Das Löschen wird im Display bestätigt.
10. Durch Drücken der Taste kehren Sie jeweils um eine Menüebene zurück.
10.4.5
Alle Anruferlisten löschen
Sie haben die Möglichkeit, alle Einträge in den Anruferlisten ("Eingegangene Anrufe",
Entgangene Anrufe" und Gewählte Nummern") komplett zu löschen.
1. Drücken Sie die Taste .
2. Wählen Sie mit der Taste oder im Display den Menüpunkt Anruferlisten".
3. Drücken Sie die Taste .
4. Wählen Sie mit der Taste oder im Display die Option Anruferliste löschen".
5. Drücken Sie die Taste .
6. Wählen Sie mit der Taste oder im Display die Option Alle Anrufe".
7. Drücken Sie die Taste . Im Display erscheint die Abfrage zum Löschen aller
Einträge.
Hinweis: Im nächsten Schritt werden alle Einträge in den Anruferlisten ("Eingegangene
Anrufe", Entgangene Anrufe" und Gewählte Nummern") unwiederbringlich
gelöscht. Durch das Drücken der Taste wird der Löschvorgang abgebrochen.
8. Drücken Sie die Taste . Das Löschen wird im Display bestätigt.
9. Durch Drücken der Taste kehren Sie jeweils um eine Menüebene zurück.
33
− Mobilteil −
11
Mobilteil
An Ihrem Mobilteil können Sie nach Ihren Wünschen, verschiedene Einstellungen vornehmen.
11.1
Ruftonmelodie zuweisen (interne und externe Anrufe)
Sie können internen und externen Anrufen unterschiedliche Ruftonmelodien zuweisen. Die
Einstellung ist am Beispiel für externe Anrufe beschrieben.
1. Drücken Sie die Taste .
2. Wählen Sie mit der Taste oder im Display den Menüpunkt Mobilteil".
3. Drücken Sie die Taste . Im Display werden mehrere Optionen angezeigt.
4. Wählen Sie mit der Taste oder die Option Rufton".
5. Drücken Sie die Taste .
6. Wählen Sie mit der Taste oder die Option Externe Anrufe".
7. Drücken Sie die Taste . Im Display erscheinen mehrere Melodien zur Auswahl.
8. Wählen Sie mit der Taste oder die gewünschte Melodie.
9. Drücken Sie die Taste . Die Zuweisung wird im Display bestätigt.
10. Durch Drücken der Taste kehren Sie jeweils um eine Menüebene zurück.
11.2
Ruftonlautstärke einstellen
1.
2.
3.
4.
5.
6.
Drücken Sie die Taste .
Wählen Sie mit der Taste oder im Display den Menüpunkt Mobilteil".
Drücken Sie die Taste . Im Display werden mehrere Optionen angezeigt.
Wählen Sie mit der Taste oder die Option Ruftonlautstärke".
Drücken Sie die Taste .
Wählen Sie mit der Taste oder die gewünschte Ruftonlautstärke.
Hinweis: Wählen Sie die Option Lautst. aus" erscheint das Symbol im Display.
7. Drücken Sie die Taste . Die Zuweisung wird im Display bestätigt.
8. Durch Drücken der Taste kehren Sie jeweils um eine Menüebene zurück.
11.3
Namen des Mobilteils eingeben/ändern
Drücken Sie die Taste .
Wählen Sie mit der Taste oder im Display den Menüpunkt Mobilteil".
Drücken Sie die Taste . Im Display werden mehrere Optionen angezeigt.
Wählen Sie mit der Taste oder die Option Name Mobilteil".
Drücken Sie die Taste . Das Display zeigt die Meldung Name".
Geben Sie den gewünschten Namen ein (maximal 8 Zeichen). Falsche Eingaben
können Sie mit der Taste löschen. Um den Cursor nach links oder rechts zu
bewegen, drücken Sie die Taste oder .
7. Drücken Sie die Taste . Die Zuweisung wird im Display bestätigt.
8. Durch Drücken der Taste kehren Sie jeweils um eine Menüebene zurück.
1.
2.
3.
4.
5.
6.
34
− Mobilteil −
11.4
Sprache einstellen
Sie können sich die Display−Texte in verschiedenen Sprachen anzeigen lassen.
1. Drücken Sie die Taste .
2. Wählen Sie mit der Taste oder im Display den Menüpunkt Mobilteil".
3. Drücken Sie die Taste . Im Display werden mehrere Optionen angezeigt.
4. Wählen Sie mit der Taste oder die Option Sprache".
5. Drücken Sie die Taste . Im Display erscheinen mehrere Sprachen zur Auswahl.
6. Wählen Sie mit der Taste oder die gewünschte Sprache.
7. Drücken Sie die Taste . Die Zuweisung wird im Display bestätigt.
8. Durch Drücken der Taste kehren Sie jeweils um eine Menüebene zurück.
11.5
Menüfarbe einstellen
Sie können die Hintergrundfarben innerhalb der Menüpunkte einstellen.
1. Drücken Sie die Taste .
2. Wählen Sie mit der Taste oder den Menüpunkt Mobilteil".
3. Drücken Sie die Taste . Im Display werden mehrere Optionen angezeigt.
4. Wählen Sie mit der Taste oder die Option Menüfarbe".
5. Drücken Sie die Taste . Im Display erscheinen mehrere Farben zur Auswahl.
6. Wählen Sie mit der Taste oder die gewünschte Farbe.
7. Drücken Sie die Taste . Die Zuweisung wird im Display bestätigt.
8. Durch Drücken der Taste kehren Sie jeweils um eine Menüebene zurück.
11.6
Automatische Gespächsannahme aktivieren
Wenn Sie diese Funktion eingestellt haben, können Sie einen Anruf einfach durch Entnahme
des Mobilteils aus der Basisstation entgegennehmen. Sie müssen dann nicht extra die
Gesprächstaste drücken.
1. Drücken Sie die Taste .
2. Wählen Sie mit der Taste oder den Menüpunkt Mobilteil".
3. Drücken Sie die Taste . Im Display werden mehrere Optionen angezeigt.
4. Wählen Sie mit der Taste oder die Option Automatische
Gesprächsannahme".
5. Drücken Sie die Taste .
6. Wählen Sie mit der Taste oder die Option Ein".
7. Drücken Sie die Taste . Die Zuweisung wird im Display bestätigt.
8. Durch Drücken der Taste kehren Sie jeweils um eine Menüebene zurück.
35
− Mobilteil −
11.7
Zugangskode (Amtskennziffer) aktivieren
Bei einigen Nebenstellenanlagen müssen Sie erst eine bestimmte Ziffer wählen (z. B. 0" oder
9"), bevor Sie ein Freizeichen für eine Amtsleitung erhalten. Tragen Sie hier eine Ziffer ein,
wird diese Ziffer automatisch den Telefonnummern vorgewählt, die Sie aus dem Telefonbuch
oder einer Anruferliste ausgewählt haben.
1. Drücken Sie die Taste .
2. Wählen Sie mit der Taste oder den Menüpunkt Mobilteil".
3. Drücken Sie die Taste . Im Display werden mehrere Optionen angezeigt.
4. Wählen Sie mit der Taste oder die Option Zugangskode".
5. Drücken Sie die Taste .
6. Wählen Sie mit der Taste oder die Option Kode einstellen".
7. Drücken Sie die Taste . Das Display zeigt die Meldung Kode einstellen".
8. Geben Sie die benötigte Ziffer ein (maximal 4 Ziffern).
9. Drücken Sie die Taste . Die Zuweisung wird im Display bestätigt.
10. Wählen Sie nun die Option Ein".
11. Drücken Sie die Taste . Die Zuweisung wird im Display bestätigt.
12. Wollen Sie die automatische Vorwahl wieder deaktivieren, wählen Sie die
Option Aus" und drücken Sie die Taste .
13. Durch Drücken der Taste kehren Sie jeweils um eine Menüebene zurück.
36
− Mobilteile an− und abmelden −
12
Mobilteile an− und abmelden
12.1
Mobilteil anmelden
1.
2.
3.
4.
5.
6.
Drücken Sie die Taste .
Wählen Sie mit der Taste oder im Display den Menüpunkt Anmeldung".
Drücken Sie die Taste .
Wählen Sie mit der Taste oder im Display die Option Mobilteil anmelden".
Drücken Sie die Taste .
Wählen Sie mit der Taste oder im Display Basis 1 aus.
Hinweis: Möchten Sie Ihr Mobilteil an einer neuen Basis anmelden, wählen Sie eine Basis,
die nicht mit einem Stern markiert ist. Ist die Basis mit einem Stern markiert, ist der
Speicherplatz belegt.
7. Drücken Sie die Taste und geben Sie den PIN ein.
8. Drücken Sie die Taste . Im Display erscheint der Hinweis Sucht Basis".
9. Drücken Sie an der Basis die Paging−Taste so lange (ca. 5 Sek.), bis ein
Signalton ertönt. Die Anmeldung wird eingeleitet.
Hinweis: Um das DECT−GAP Mobilteil eines anderen Herstellers anzumelden, folgen Sie den
Hinweisen in der Bedienungsanleitung des Fremdherstellers und drücken dann die
Taste an der Basisstation.
10. Drücken Sie die Taste . Das Mobilteil ist jetzt angemeldet.
Das Mobilteil erhält automatisch die niedrigste freie interne Nummer (1−5).
Das erste angemeldete Mobilteil hat die interne Nummer 1. Das zweite hat die interne
Nummer 2. Im Ruhezustand wird die interne Nummer nach dem Namen des Telefons im
Display angezeigt.
12.2
Mobilteil abmelden
Hinweis: Ein Mobilteil kann nur über ein anderes, noch angemeldetes Mobilteil abgemeldet
werden. Es ist also nicht möglich, diese Abmeldung mit dem Mobilteil
durchzuführen, das abgemeldet werden soll.
1.
2.
3.
4.
5.
6.
7.
Drücken Sie die Taste .
Wählen Sie mit der Taste oder im Display den Menüpunkt Anmeldung".
Drücken Sie die Taste .
Wählen Sie mit der Taste oder im Display die Option Mobilteil abmelden".
Drücken Sie die Taste . Geben Sie die PIN−Nummer ein.
Drücken Sie die Taste . Wählen Sie das abzumeldene Mobilteil aus.
Drücken Sie zweimal die Taste . Das Mobilteil ist jetzt abgemeldet.
37
− Mobilteile an− und abmelden −
12.3
Basis auswählen
Ist Ihr Mobilteil an mehreren Basen angemeldet, können Sie es auf eine feste Basis einstellen
oder auf die automatische Suche nach der Basis mit dem besten Empfang. Um die
automatische Suche zu deaktivieren, müssen sie ihr Mobilteil wieder auf eine feste Basis
einstellen
1. Drücken Sie die Taste .
2. Wählen Sie mit der Taste oder im Display den Menüpunkt Anmeldung".
3. Drücken Sie die Taste .
4. Wählen Sie mit der Taste oder im Display die Option Basis auswählen".
5. Drücken Sie die Taste .
6. Wählen Sie mit der Taste oder im Display die gewünschte Basis, oder
Automatik".
7. Drücken Sie die Taste . Die Auswahl wird bestätigt.
38
− Mehrere Mobilteile −
13
Mehrere Mobilteile
Sie können vier weitere Mobilteile an Ihre Basisstation anmelden. Jedes Mobilteil kann immer
nur an einer Basisstation angemeldet sein. Melden Sie Ihr Mobilteil an einer neuen Basis an,
wird es automatisch an der alten abgemeldet.
Hinweis: Über den international genormten GAP Standard können AUDIOLINE−Mobilteile und
auch Mobilteile von Fremdherstellern in das Telefonsystem integriert werden.
Genauso können Sie ein AUDIOLINE Mobilteil an Basisstationen anderer Hersteller
anmelden, sofern diese Geräte nach dem GAP Standard arbeiten.
Bei der Benutzung von zwei Mobilteilen erhalten Sie folgende Möglichkeiten:
S
S
S
Interne Gespräche zwischen den Mobilteilen.
Externe Gespräche können vom Mobilteil weitergeleitet werden.
Eingehende externe Gespräche werden an allen Mobilteilen signalisiert.
Hinweis: Benutzt bereits das andere Mobilteil die externe Leitung, ist ein weiteres externes
Gespräch nicht möglich.
GAP: Generic Access Profile = Standard für das Zusammenwirken von Mobilteilen und
Basisstationen anderer Hersteller.
13.1
Intern telefonieren
Sobald Sie mehrere Mobilteile an einer Basisstation angemeldet haben, können Sie interne
Gespräche führen.
1. Drücken Sie die Taste und die interne Nummer des
Mobilteiles, z. B. 2.
2. Das Gespräch wird am gerufenen Mobilteil entgegengenommen.
Hinweis: Erreicht Sie während eines internen Gesprächs ein externer Anruf, hören Sie kurze
Signaltöne und Sie sehen die Rufnummer des Anrufers im Display, falls diese
verfügbar ist.
3. Beenden Sie das interne Gespräch mit der Taste .
4. Drücken Sie die Taste , um den externen Anruf anzunehmen.
39
− Mehrere Mobilteile −
13.2
Externe Gespräche an ein anderes Mobilteil weiterleiten
Haben Sie ein externes Gespräch an einem Mobilteil entgegengenommen, können Sie das
externe Gespräch an ein anderes Mobilteil weiterleiten.
Drücken Sie dazu die Taste und dann die interne Nummer des gewünschten Mobilteils.
Hinweis: Sollte sich das gerufene Mobilteil nicht melden, können Sie das Gespräch durch
Drücken der Taste wieder übernehmen.
Nachdem das interne Gespräch am anderen Mobilteil entgegengenommen wurde, haben Sie
folgende Möglichkeiten:
1. Rücksprache / Makeln: Sie können nun mit dem internen Teilnehmer sprechen und
durch das Drücken der Taste zum externen Gesprächspartner zurückkehren.
Sie können so beliebig oft zwischen dem externen und internen Gespräch
wechseln.
2. Gespräch übergeben: Durch das Drücken der Taste am ersten Mobilteil, wird
das externe Gespräch an das gerufene Mobilteil übergeben.
13.3
Konferenzgespräche führen
Ein externes Gespräch kann mit einem weiteren internen Teilnehmer zum Konferenzgespräch
geschaltet werden. So können zwei Mobilteile gleichzeitig mit dem externen Teilnehmer
sprechen.
1. Stellen Sie die gewünschte Verbindung zu dem externen Teilnehmer her.
2. Drücken Sie dann die Taste und die interne Nummer des gewünschten zweiten
Mobilteils.
3. Hat der zweite, interne Teilnehmer das Gespräch entgegengenommen, drücken Sie
die Taste für 2 Sekunden und alle drei Teilnehmer sind zu einer Konferenz
zusammengeschaltet.
Hinweis: Während einer Konferenz können Sie mit der Taste den externen
Gesprächspartner auf Halten setzen. Durch erneutes Drücken der Taste können
Sie dann wieder zur Konferenz zurückschalten.
4. Die Konferenz wird durch das Auflegen eines der internen Gesprächspartner
beendet.
40
− Basis−Einstellungen −
14
Basis−Einstellungen
Unter diesem Menüpunkt sind Einstellungen beschrieben, die die Basisstation betreffen,
wie z. B. Ruftonmelodie, Ruftonlautstärke und System−PIN.
14.1
14.2
Ruftonmelodie der Basisstation zuweisen
1. Drücken Sie die Taste .
2. Wählen Sie mit der Taste oder im Display den Menüpunkt
Basis−Einstellungen".
3. Drücken Sie die Taste . Im Display werden mehrere Optionen angezeigt.
4. Wählen Sie mit der Taste oder die Option Rufton Basis".
5. Drücken Sie die Taste . Im Display erscheinen mehrere Melodien zur Auswahl.
6. Wählen Sie mit der Taste oder die gewünschte Melodie.
7. Drücken Sie die Taste . Die Zuweisung wird im Display bestätigt.
8. Durch mehrmaliges Drücken der Taste kehrt das Mobilteil zurück in den
Ruhezustand.
Ruftonlautstärke der Basisstation einstellen
1. Drücken Sie die Taste .
2. Wählen Sie mit der Taste oder im Display den Menüpunkt
Basis−Einstellungen".
3. Drücken Sie die Taste . Im Display werden mehrere Optionen angezeigt.
4. Wählen Sie mit der Taste oder die Option Lautstärke Basis".
5. Drücken Sie die Taste .
6. Wählen Sie mit der Taste oder die gewünschte Ruftonlautstärke.
7. Drücken Sie die Taste . Die Zuweisung wird im Display bestätigt.
8. Durch mehrmaliges Drücken der Taste kehrt das Mobilteil zurück in den
Ruhezustand.
14.3
Vorrangiges Klingeln eines Mobilteils aktivieren/deaktivieren
Hier können Sie einstellen, ob bei einem eingehenden Anruf alle angemeldeten Mobilteile
klingeln sollen oder ob vorrangig zunächst nur ein bestimmtes Mobilteil klingeln soll.
1. Drücken Sie die Taste .
2. Wählen Sie mit der Taste oder im Display den Menüpunkt
Basis−Einstellungen".
3. Drücken Sie die Taste . Im Display werden mehrere Optionen angezeigt.
4. Wählen Sie mit der Taste oder die Option Vorrang Mobilteil".
5. Drücken Sie die Taste . Im Display werden mehrere Optionen angezeigt.
6. Wählen Sie die Option Mobilteil auswählen".
7. Drücken Sie die Taste . Wählen Sie das gewünschte Mobilteil aus.
8. Drücken Sie die Taste . Im Display werden mehrere Optionen angezeigt. Wählen
Sie z. B. die Option Ruftöne 4", so klingelt zunächst das vorrangig ausgewählte
Mobilteil viermal, bevor dann weitere Mobilteile klingeln.
41
− Basis−Einstellungen −
9. Wählen Sie eine Option aus und drücken Sie die Taste . Die Zuweisung wird im
Display bestätigt.
10. Durch Drücken der Taste kehren Sie jeweils um eine Menüebene zurück.
Hinweis: Möchten Sie, dass alle Mobilteile gleichzeitig klingeln, wählen Sie unter Schritt 6 die
Option Alle Mobilteile", drücken Sie die Taste und verlassen Sie die Einstellung.
14.4
Flashzeiten einstellen
Sie können zwei Flash−Zeiten einstellen, Flash 1" (100 ms) oder Flash 2" (300 ms). Für den
Betrieb in Nebenstellenanlagen benötigen SIe eine Flashzeit von 100 ms. Das T−Net der
Deutschen Telekom z. B. arbeitet mit einer Flashzeit von 300 ms.
1. Drücken Sie die Taste .
2. Wählen Sie mit der Taste oder im Display den Menüpunkt
Basis−Einstellungen".
3. Drücken Sie die Taste . Im Display werden mehrere Optionen angezeigt.
4. Wählen Sie mit der Taste oder die Option Flashzeiten".
5. Drücken Sie die Taste . Im Display erscheinen zwei Flashzeiten zur Auswahl.
6. Wählen Sie mit der Taste oder die Flashzeit Flash 1" (100 ms ) oder
Flash 2" (300 ms).
7. Drücken Sie die Taste . Die Zuweisung wird im Display bestätigt.
8. Durch Drücken der Taste kehren Sie jeweils um eine Menüebene zurück.
14.5
System−PIN ändern
1. Drücken Sie die Taste .
2. Wählen Sie mit der Taste oder im Display den Menüpunkt
Basis−Einstellungen".
3. Drücken Sie die Taste . Im Display werden mehrere Optionen angezeigt.
4. Wählen Sie mit der Taste oder die Option System−PIN".
5. Drücken Sie die Taste . Im Display erscheint die Meldung Alte PIN eingeben".
6. Geben Sie die alte PIN−Nummer ein (Werkseinstellung: 0000). Anstelle einer
eingegebenen Zahl erscheint im Display ein *". Haben Sie eine Zahl falsch
eingegeben, können Sie sie mit der Taste löschen.
7. Haben Sie die alte PIN−Nummer vollständig eingegeben, drücken Sie die Taste .
Es erscheint die Meldung Neue PIN eingeben".
8. Geben Sie eine neue PIN−Nummer ein (maximal 8 Ziffern).
9. Drücken Sie die Taste . Es erscheint die Meldung Neue PIN bestätigen".
10. Geben Sie nochmals die neue PIN−Nummer ein.
11. Drücken Sie die Taste . Die Zuweisung wird im Display bestätigt.
12. Durch Drücken der Taste kehren Sie jeweils um eine Menüebene zurück.
Hinweis: Sollten Sie den PIN−Kode einmal vergessen haben, können Sie diesen nur mit Hilfe
unserer Service−Hotline wieder zurücksetzen. Service−Hotline, siehe Rückseite der
Bedienungsanleitung.
42
− Zeiteinstellung −
15
Zeiteinstellung
Sie verpassen keinen Termin durch die 24−Stunden−Uhr mit integrierter Weck−/Alarmfunktion.
15.1
Zeit und Datum einstellen
1. Drücken Sie die Taste .
2. Wählen Sie mit der Taste oder im Display den Menüpunkt Zeiteinstellung".
3. Drücken Sie die Taste .
4. Wählen Sie mit der Taste oder im Display die Option Zeit und Datum ein...".
5. Drücken Sie die Taste . Geben Sie über das Zahlenfeld das Datum ein.
6. Drücken Sie die Taste . Geben Sie über das Zahlenfeld die Zeit ein.
7. Drücken Sie die Taste . Die Angaben werden gespeichert.
8. Durch Drücken der Taste kehren Sie jeweils um eine Menüebene zurück.
Hinweis: Durch Stromausfall oder durch Trennung des Netzteiles von der Steckdose gehen
Datum und Uhrzeit verloren.
15.2
Weckton einstellen
1. Drücken Sie die Taste .
2. Wählen Sie mit der Taste oder im Display den Menüpunkt Zeiteinstellung".
3. Drücken Sie die Taste .
4. Wählen Sie mit der Taste oder im Display die Option Wecker".
5. Drücken Sie die Taste .
6. Wählen Sie mit der Taste oder im Display die Option Weckton einstellen".
7. Drücken Sie die Taste .
8. Wählen Sie mit der Taste oder im Display den gewünschten Weckton.
9. Drücken Sie die Taste . Der Weckton wird gespeichert.
15.3
Weckzeit eingeben (EIN/AUS)
Drücken Sie die Taste .
Wählen Sie mit der Taste oder im Display den Menüpunkt Zeiteinstellung".
Drücken Sie die Taste .
Wählen Sie mit der Taste oder im Display die Option Wecker".
Drücken Sie die Taste .
Wählen Sie mit der Taste oder im Display die Option Ein/Aus".
Drücken Sie die Taste .
Wählen Sie mit der Taste oder im Display, ob Sie Einmalig", oder Täglich" zur
gleichen Zeit alarmiert werden möchten.
9. Drücken Sie die Taste . Geben Sie die gewünschte Zeit ein.
10. Drücken Sie die Taste . Die Angaben werden gespeichert.
1.
2.
3.
4.
5.
6.
7.
8.
Hinweis: Durch Eingeben der Weckzeit wird die Weckfunktion eingeschaltet. Im Display
erscheint neben der Zeitanzeige das Symbol .
Um die Weckfunktion wieder auszuschalten, wählen Sie bei Schritt 8 die
Option Aus".
11. Durch Drücken der Taste kehren Sie jeweils um eine Menüebene zurück.
43
− Fehlerbeseitigung −
16
Fehlerbeseitigung
Haben Sie Probleme mit Ihrem Telefon, kontrollieren Sie bitte zuerst die folgenden Hinweise.
Bei technischen Problemen können Sie sich auch an unsere Hotline unter
Tel. 0180 5 00 13 88 (Kosten Telekom bei Drucklegung: 12ct/min) wenden.
Bei Garantieansprüchen wenden Sie sich bitte an Ihren Fachhändler. Die Garantiezeit
beträgt 2 Jahre.
Fehler
Lösungen
Das Display zeigt nichts
an
−
−
Mobilteil ist nicht eingeschaltet.
Die Akkus sind leer oder defekt.
Die Nummer des Anrufers −
wird trotz CLIP nicht angezeigt.
Anrufer hat die Nummernübermittlung beim Netzanbieter
nicht freischalten lassen.
Keine Verbindung zur Basisstation möglich
−
Prüfen Sie, ob Sie sich mit der richtigen PIN Nummer an der
Basisstation angemeldet haben.
Kein Telefongespräch
möglich
−
−
−
Die Telefonleitung ist nicht korrekt angeschlossen oder gestört. Verwenden Sie nur das mitgelieferte Telefonkabel.
Testen Sie mit einem anderen Telefon, ob Ihr Telefonanschluss in Ordnung ist.
Das Netzteil ist nicht eingesteckt oder es liegt ein totaler
Stromausfall vor.
Die Akkus sind leer oder defekt.
Sie haben sich zu weit von der Basisstation entfernt.
Verbindung abgehackt,
fällt aus
−
−
Sie haben sich zu weit von der Basisstation entfernt.
Falscher Aufstellungsort der Basisstation.
Die Ladekontrollleuchte
leuchtet nicht
−
Stellen Sie das Mobilteil richtig auf die Basisstation, reinigen
Sie die Kontaktflächen am Mobilteil und an der Basisstation
mit einem weichen, trockenen Tuch.
Im Display blinkt nach ein
paar Stunden das Batterie−Symbol
−
Legen Sie das Mobilteil für 14 Stunden auf die Basisstation.
Hilft dies nicht, erneuern Sie die aufladbaren Standard−Akkus.
Display−Anzeige dunkel
−
Verursacht durch direkte Sonnenbestrahlung, Mobilteil abkühlen lassen.
Es kann keine SMS verschickt werden
−
Kontrollieren Sie die richtige Eingabe des SMS−Centers.
Fragen Sie Ihren Telefonnetzbetreiber.
Ihr Telefon ist an eine Nebenstelle angeschlossen.
Aktivieren Sie den SMS−Dienst bei Ihrem Telefonnetzbetreiber.
−
−
−
−
44
− Wichtige Informationen −
17
Wichtige Informationen
17.1
Technische Daten
Merkmal
Wert
Standard
DECT−GAP
Stromversorgung
Basisstation 220/230 V, 50 Hz
Reichweite (Außen/Innen)
300 m / 50 m
Standby
bis zu 85 h
Max. Gesprächsdauer
bis zu 10 h
Aufladbare Standard−Akkus
2 x AAA (1.2V / 750 mAh)
Wahlverfahren
Ton−Wahlverfahren (MFV)
Zulässige Umgebungstemperatur 10°C bis 30°C
Zulässige relative Luftfeuchtigkeit
20% bis 75%
Flash−Zeiten
100 ms oder 300 ms
DECT: Digital European Cordless Telephone = Standard für kabellose Telefone.
GAP: Generic Access Profile = Standard für das Zusammenwirken von Mobilteilen und
Basisstationen anderer Hersteller.
17.2
Telefonkabel austauschen
Müssen Sie Ihr Telefonkabel austauschen, kaufen Sie sich bei Ihrem Händler ein
entsprechendes Ersatzkabel mit der identischen Steckerbelegung (siehe Zeichnung).
F−Codierung − IMPORT Standard
TAE−F
4
3
5 2
6 1
1
2
3
4
5
6
Rj11 6/2
1
2
3
4
5
6
1 2 34 5 6
45
− Wichtige Informationen −
17.3
Garantie
AUDIOLINE − Geräte werden nach den modernsten Produktionsverfahren hergestellt und
geprüft. Ausgesuchte Materialien und hoch entwickelte Technologien sorgen für einwandfreie
Funktion und lange Lebensdauer. Ein Garantiefall liegt nicht vor, wenn die Ursache einer
Fehlfunktion des Gerätes bei dem Telefonnetzbetreiber oder einer eventuell
zwischengeschalteten Nebenstellenanlage liegt. Die Garantie gilt nicht für die in den
Produkten verwendeten Standard−Akkus oder Akkupacks. Die Garantiezeit beträgt 24 Monate,
gerechnet vom Tage des Kaufs.
Innerhalb der Garantiezeit werden alle Mängel, die auf Material− oder Herstellungsfehler
zurückzuführen sind, kostenlos beseitigt. Der Garantieanspruch erlischt bei Eingriffen durch
den Käufer oder durch Dritte. Schäden, die durch unsachgemäße Behandlung oder
Bedienung, durch falsches Aufstellen oder Aufbewahren, durch unsachgemäßen Anschluss
oder Installation sowie durch höhere Gewalt oder sonstige äußere Einflüsse entstehen, fallen
nicht unter die Garantieleistung. Wir behalten uns vor, bei Reklamationen die defekten Teile
auszubessern oder zu ersetzen oder das Gerät auszutauschen. Ausgetauschte Teile oder
ausgetauschte Geräte gehen in unser Eigentum über. Schadenersatzansprüche sind
ausgeschlossen, soweit sie nicht auf Vorsatz oder grober Fahrlässigkeit des Herstellers
beruhen.
Sollte Ihr Gerät dennoch einen Defekt innerhalb der Garantiezeit aufweisen, wenden Sie sich
bitte unter Vorlage Ihrer Kaufquittung ausschließlich an das Geschäft, in dem Sie Ihr
AUDIOLINE − Gerät gekauft haben. Alle Gewährleistungsansprüche nach diesen
Bestimmungen sind ausschließlich gegenüber Ihrem Fachhändler geltend zu machen. Nach
Ablauf von zwei Jahren nach Kauf und Übergabe unserer Produkte können
Gewährleistungsrechte nicht mehr geltend gemacht werden.
18
Konformitätserklärung
Dieses Gerät erfüllt die Anforderungen der EU−Richtlinie:
1999/5/EG Richtlinie über Funkanlagen und Telekommunikationsendeinrichtungen und die
gegenseitige Anerkennung ihrer Konformität. Die Konformität mit der o. a. Richtlinie wird durch
das CE−Zeichen auf dem Gerät bestätigt.
Für die komplette Konformitätserklärung nutzen Sie bitte den kostenlosen Download von
unserer Website www.audioline.de.
46
− Contents −
1
General Information . . . . . . . . . . . . . . . . . . . . . . . . . . . . . . . . . . . . . . . . . .
50
1.1
1.2
1.3
1.4
1.5
1.6
1.7
1.8
1.9
1.10
1.11
Intended use . . . . . . . . . . . . . . . . . . . . . . . . . . . . . . . . . . . . . . . . . . . . . . . . . . . . . . . . .
Power failure . . . . . . . . . . . . . . . . . . . . . . . . . . . . . . . . . . . . . . . . . . . . . . . . . . . . . . . . .
Installation location . . . . . . . . . . . . . . . . . . . . . . . . . . . . . . . . . . . . . . . . . . . . . . . . . . . .
Power supply . . . . . . . . . . . . . . . . . . . . . . . . . . . . . . . . . . . . . . . . . . . . . . . . . . . . . . . . .
Rechargeable standard batteries . . . . . . . . . . . . . . . . . . . . . . . . . . . . . . . . . . . . . . . .
Charging the handset . . . . . . . . . . . . . . . . . . . . . . . . . . . . . . . . . . . . . . . . . . . . . . . . . .
Private branch exchanges . . . . . . . . . . . . . . . . . . . . . . . . . . . . . . . . . . . . . . . . . . . . . .
Disposing of old equipment . . . . . . . . . . . . . . . . . . . . . . . . . . . . . . . . . . . . . . . . . . . . .
Notes on medical equipment . . . . . . . . . . . . . . . . . . . . . . . . . . . . . . . . . . . . . . . . . . .
Temperature and ambient conditions . . . . . . . . . . . . . . . . . . . . . . . . . . . . . . . . . . . . .
Cleaning and upkeep . . . . . . . . . . . . . . . . . . . . . . . . . . . . . . . . . . . . . . . . . . . . . . . . . .
50
50
50
50
50
51
51
51
51
51
51
2
Features . . . . . . . . . . . . . . . . . . . . . . . . . . . . . . . . . . . . . . . . . . . . . . . . . . . . .
52
2.1
Telephone . . . . . . . . . . . . . . . . . . . . . . . . . . . . . . . . . . . . . . . . . . . . . . . . . . . . . . . . . . .
52
3
Operating Elements . . . . . . . . . . . . . . . . . . . . . . . . . . . . . . . . . . . . . . . . . .
53
3.1
3.2
Handset . . . . . . . . . . . . . . . . . . . . . . . . . . . . . . . . . . . . . . . . . . . . . . . . . . . . . . . . . . . . .
Base station . . . . . . . . . . . . . . . . . . . . . . . . . . . . . . . . . . . . . . . . . . . . . . . . . . . . . . . . . .
53
53
4
Starting Up . . . . . . . . . . . . . . . . . . . . . . . . . . . . . . . . . . . . . . . . . . . . . . . . . .
54
4.1
4.2
4.3
4.4
4.5
4.6
Safety notes . . . . . . . . . . . . . . . . . . . . . . . . . . . . . . . . . . . . . . . . . . . . . . . . . . . . . . . . .
Checking the package contents . . . . . . . . . . . . . . . . . . . . . . . . . . . . . . . . . . . . . . . . .
Connecting the base station . . . . . . . . . . . . . . . . . . . . . . . . . . . . . . . . . . . . . . . . . . . .
Inserting the standard batteries . . . . . . . . . . . . . . . . . . . . . . . . . . . . . . . . . . . . . . . . .
Charging the standard batteries . . . . . . . . . . . . . . . . . . . . . . . . . . . . . . . . . . . . . . . . .
Tone dialling − DTMF . . . . . . . . . . . . . . . . . . . . . . . . . . . . . . . . . . . . . . . . . . . . . . . . . .
54
54
54
54
55
55
5
Operation . . . . . . . . . . . . . . . . . . . . . . . . . . . . . . . . . . . . . . . . . . . . . . . . . . . .
56
5.1
5.2
5.3
5.4
5.5
5.6
5.7
5.8
5.9
5.10
5.11
5.12
5.13
5.14
5.14.1
5.14.2
Display . . . . . . . . . . . . . . . . . . . . . . . . . . . . . . . . . . . . . . . . . . . . . . . . . . . . . . . . . . . . . .
Navigation using the buttons . . . . . . . . . . . . . . . . . . . . . . . . . . . . . . . . . . . . . . . . . . . .
Making and ending calls . . . . . . . . . . . . . . . . . . . . . . . . . . . . . . . . . . . . . . . . . . . . . . .
Taking a call . . . . . . . . . . . . . . . . . . . . . . . . . . . . . . . . . . . . . . . . . . . . . . . . . . . . . . . . . .
Taking two external calls . . . . . . . . . . . . . . . . . . . . . . . . . . . . . . . . . . . . . . . . . . . . . . .
Hands-free . . . . . . . . . . . . . . . . . . . . . . . . . . . . . . . . . . . . . . . . . . . . . . . . . . . . . . . . . . .
Dialling phone numbers stored in the phone book . . . . . . . . . . . . . . . . . . . . . . . . .
Displaying the call timer . . . . . . . . . . . . . . . . . . . . . . . . . . . . . . . . . . . . . . . . . . . . . . . .
Adjusting the receiver volume . . . . . . . . . . . . . . . . . . . . . . . . . . . . . . . . . . . . . . . . . . .
Redialling . . . . . . . . . . . . . . . . . . . . . . . . . . . . . . . . . . . . . . . . . . . . . . . . . . . . . . . . . . . .
Muting the handset . . . . . . . . . . . . . . . . . . . . . . . . . . . . . . . . . . . . . . . . . . . . . . . . . . . .
Switching the handset on /off . . . . . . . . . . . . . . . . . . . . . . . . . . . . . . . . . . . . . . . . . . .
Locating the handset (paging) . . . . . . . . . . . . . . . . . . . . . . . . . . . . . . . . . . . . . . . . . .
Key lock . . . . . . . . . . . . . . . . . . . . . . . . . . . . . . . . . . . . . . . . . . . . . . . . . . . . . . . . . . . . .
Activating the key lock function . . . . . . . . . . . . . . . . . . . . . . . . . . . . . . . . . . . . . . . . .
Deactivating the key lock function . . . . . . . . . . . . . . . . . . . . . . . . . . . . . . . . . . . . . . .
56
56
57
57
57
57
58
58
58
58
58
58
58
59
59
59
47
− Contents −
5.15
Notes on range . . . . . . . . . . . . . . . . . . . . . . . . . . . . . . . . . . . . . . . . . . . . . . . . . . . . . . .
59
6
Private Branch Exchanges / T−Net . . . . . . . . . . . . . . . . . . . . . . . . . . . . .
60
6.1
6.2
6.3
R button on private branch exchanges . . . . . . . . . . . . . . . . . . . . . . . . . . . . . . . . . . .
R button with T−Net provided by Deutsche Telekom . . . . . . . . . . . . . . . . . . . . . . . .
Dialling pause . . . . . . . . . . . . . . . . . . . . . . . . . . . . . . . . . . . . . . . . . . . . . . . . . . . . . . . .
60
60
60
7
8
Menu Structure . . . . . . . . . . . . . . . . . . . . . . . . . . . . . . . . . . . . . . . . . . . . . . .
Phone Book . . . . . . . . . . . . . . . . . . . . . . . . . . . . . . . . . . . . . . . . . . . . . . . . .
61
63
8.1
8.1.1
8.1.2
8.2
8.3
8.4
8.5
8.6
8.6.1
8.6.2
Entering phone numbers in the phone book . . . . . . . . . . . . . . . . . . . . . . . . . . . . . . .
Text entry . . . . . . . . . . . . . . . . . . . . . . . . . . . . . . . . . . . . . . . . . . . . . . . . . . . . . . . . . . . .
Notes on the phone book . . . . . . . . . . . . . . . . . . . . . . . . . . . . . . . . . . . . . . . . . . . . . .
Showing details of an entry . . . . . . . . . . . . . . . . . . . . . . . . . . . . . . . . . . . . . . . . . . . . .
Modifying entries in the phone book . . . . . . . . . . . . . . . . . . . . . . . . . . . . . . . . . . . . .
Deleting an entry from the phone book . . . . . . . . . . . . . . . . . . . . . . . . . . . . . . . . . . .
Deleting all entries from the phone book . . . . . . . . . . . . . . . . . . . . . . . . . . . . . . . . . .
VIP call (ring melody assignment) . . . . . . . . . . . . . . . . . . . . . . . . . . . . . . . . . . . . . . .
Assigning a ringing melody . . . . . . . . . . . . . . . . . . . . . . . . . . . . . . . . . . . . . . . . . . . . .
Deactivating a ringing melody assignment . . . . . . . . . . . . . . . . . . . . . . . . . . . . . . . .
63
63
63
64
64
64
65
65
65
65
9
SMS Text Messages . . . . . . . . . . . . . . . . . . . . . . . . . . . . . . . . . . . . . . . . . .
66
9.1
9.1.1
9.2
9.3
9.4
9.5
9.6
9.7
9.8
9.9
9.9.1
9.9.2
9.9.3
9.9.4
9.9.5
Service centres . . . . . . . . . . . . . . . . . . . . . . . . . . . . . . . . . . . . . . . . . . . . . . . . . . . . . . .
Entering the send/receive centre numbers . . . . . . . . . . . . . . . . . . . . . . . . . . . . . . . .
Writing and sending . . . . . . . . . . . . . . . . . . . . . . . . . . . . . . . . . . . . . . . . . . . . . . . . . . .
Sending saved SMS messages . . . . . . . . . . . . . . . . . . . . . . . . . . . . . . . . . . . . . . . . .
Reading and answering . . . . . . . . . . . . . . . . . . . . . . . . . . . . . . . . . . . . . . . . . . . . . . . .
SMS alert signal on/off . . . . . . . . . . . . . . . . . . . . . . . . . . . . . . . . . . . . . . . . . . . . . . . . .
Setting the SMS alert signal (Morse, Discreet, Polyphonic) . . . . . . . . . . . . . . . . . .
Delete an SMS Message . . . . . . . . . . . . . . . . . . . . . . . . . . . . . . . . . . . . . . . . . . . . . . .
Delete all SMS messages . . . . . . . . . . . . . . . . . . . . . . . . . . . . . . . . . . . . . . . . . . . . . .
SMS mailbox . . . . . . . . . . . . . . . . . . . . . . . . . . . . . . . . . . . . . . . . . . . . . . . . . . . . . . . . .
Adding a mailbox/user . . . . . . . . . . . . . . . . . . . . . . . . . . . . . . . . . . . . . . . . . . . . . . . . .
Displaying mailbox/user data . . . . . . . . . . . . . . . . . . . . . . . . . . . . . . . . . . . . . . . . . . .
Sending an SMS message to a personal mailbox . . . . . . . . . . . . . . . . . . . . . . . . . .
Changing mailbox/user data . . . . . . . . . . . . . . . . . . . . . . . . . . . . . . . . . . . . . . . . . . . .
Deleting a mailbox/user . . . . . . . . . . . . . . . . . . . . . . . . . . . . . . . . . . . . . . . . . . . . . . . .
66
67
67
68
68
69
69
69
70
70
70
71
71
72
72
10
Calls Lists . . . . . . . . . . . . . . . . . . . . . . . . . . . . . . . . . . . . . . . . . . . . . . . . . . .
73
10.1
10.2
10.2.1
10.2.2
10.2.3
10.3
10.3.1
Caller number display (CLIP function) . . . . . . . . . . . . . . . . . . . . . . . . . . . . . . . . . . . .
Received calls . . . . . . . . . . . . . . . . . . . . . . . . . . . . . . . . . . . . . . . . . . . . . . . . . . . . . . . .
Displaying and calling back . . . . . . . . . . . . . . . . . . . . . . . . . . . . . . . . . . . . . . . . . . . . .
Delete entry . . . . . . . . . . . . . . . . . . . . . . . . . . . . . . . . . . . . . . . . . . . . . . . . . . . . . . . . . .
Save entry in the phone book . . . . . . . . . . . . . . . . . . . . . . . . . . . . . . . . . . . . . . . . . . .
Missed calls . . . . . . . . . . . . . . . . . . . . . . . . . . . . . . . . . . . . . . . . . . . . . . . . . . . . . . . . . .
Displaying and calling back . . . . . . . . . . . . . . . . . . . . . . . . . . . . . . . . . . . . . . . . . . . . .
73
73
73
73
74
74
75
48
− Contents −
10.3.2
10.3.3
10.4
10.4.1
10.4.2
10.4.3
10.4.4
10.4.5
Delete entry . . . . . . . . . . . . . . . . . . . . . . . . . . . . . . . . . . . . . . . . . . . . . . . . . . . . . . . . . .
Save entry in the phone book . . . . . . . . . . . . . . . . . . . . . . . . . . . . . . . . . . . . . . . . . . .
Dialled calls (redialling) . . . . . . . . . . . . . . . . . . . . . . . . . . . . . . . . . . . . . . . . . . . . . . . .
Displaying and calling . . . . . . . . . . . . . . . . . . . . . . . . . . . . . . . . . . . . . . . . . . . . . . . . .
Delete entry . . . . . . . . . . . . . . . . . . . . . . . . . . . . . . . . . . . . . . . . . . . . . . . . . . . . . . . . . .
Save entry in the phone book . . . . . . . . . . . . . . . . . . . . . . . . . . . . . . . . . . . . . . . . . . .
Deleting a calls list . . . . . . . . . . . . . . . . . . . . . . . . . . . . . . . . . . . . . . . . . . . . . . . . . . . .
Delete all calls lists . . . . . . . . . . . . . . . . . . . . . . . . . . . . . . . . . . . . . . . . . . . . . . . . . . . .
75
75
76
76
76
76
77
77
11
Handset . . . . . . . . . . . . . . . . . . . . . . . . . . . . . . . . . . . . . . . . . . . . . . . . . . . . .
78
11.1
11.2
11.3
11.4
11.5
11.6
11.7
Assigning a ringing melody (internal and external calls) . . . . . . . . . . . . . . . . . . . . .
Setting the ring volume . . . . . . . . . . . . . . . . . . . . . . . . . . . . . . . . . . . . . . . . . . . . . . . .
Entering/Changing the name of the handset . . . . . . . . . . . . . . . . . . . . . . . . . . . . . .
Setting the language . . . . . . . . . . . . . . . . . . . . . . . . . . . . . . . . . . . . . . . . . . . . . . . . . .
Setting the menu colour . . . . . . . . . . . . . . . . . . . . . . . . . . . . . . . . . . . . . . . . . . . . . . . .
Activating the Auto Talk function . . . . . . . . . . . . . . . . . . . . . . . . . . . . . . . . . . . . . . . . .
Activating the PABX access code (outside line) . . . . . . . . . . . . . . . . . . . . . . . . . . . .
78
78
78
79
79
79
80
12
Registering and Deregistering Handsets . . . . . . . . . . . . . . . . . . . . . . .
81
12.1
12.2
12.3
Register handset . . . . . . . . . . . . . . . . . . . . . . . . . . . . . . . . . . . . . . . . . . . . . . . . . . . . .
Deregister handset . . . . . . . . . . . . . . . . . . . . . . . . . . . . . . . . . . . . . . . . . . . . . . . . . . . .
Select base station . . . . . . . . . . . . . . . . . . . . . . . . . . . . . . . . . . . . . . . . . . . . . . . . . . . .
81
81
82
13
Multiple Handsets . . . . . . . . . . . . . . . . . . . . . . . . . . . . . . . . . . . . . . . . . . . .
83
13.1
13.2
13.3
Internal calls (intercom function) . . . . . . . . . . . . . . . . . . . . . . . . . . . . . . . . . . . . . . . . .
Transferring external calls to another handset . . . . . . . . . . . . . . . . . . . . . . . . . . . . .
Conference calls . . . . . . . . . . . . . . . . . . . . . . . . . . . . . . . . . . . . . . . . . . . . . . . . . . . . . .
83
84
84
14
Base Settings . . . . . . . . . . . . . . . . . . . . . . . . . . . . . . . . . . . . . . . . . . . . . . . .
85
14.1
14.2
14.3
14.4
14.5
Assigning a ringing melody to the base station . . . . . . . . . . . . . . . . . . . . . . . . . . . .
Setting the base station ring volume . . . . . . . . . . . . . . . . . . . . . . . . . . . . . . . . . . . . .
Activating/Deactivating handset priority . . . . . . . . . . . . . . . . . . . . . . . . . . . . . . . . . . .
Setting the recall time . . . . . . . . . . . . . . . . . . . . . . . . . . . . . . . . . . . . . . . . . . . . . . . . . .
Changing the system PIN . . . . . . . . . . . . . . . . . . . . . . . . . . . . . . . . . . . . . . . . . . . . . .
85
85
85
86
86
15
Time Settings . . . . . . . . . . . . . . . . . . . . . . . . . . . . . . . . . . . . . . . . . . . . . . . .
87
15.1
15.2
15.3
Setting the time and date . . . . . . . . . . . . . . . . . . . . . . . . . . . . . . . . . . . . . . . . . . . . . . .
Setting the alarm tone . . . . . . . . . . . . . . . . . . . . . . . . . . . . . . . . . . . . . . . . . . . . . . . . .
Entering the alarm time (ON/OFF) . . . . . . . . . . . . . . . . . . . . . . . . . . . . . . . . . . . . . . .
87
87
87
16
17
Troubleshooting . . . . . . . . . . . . . . . . . . . . . . . . . . . . . . . . . . . . . . . . . . . . .
Important Information . . . . . . . . . . . . . . . . . . . . . . . . . . . . . . . . . . . . . . . .
88
89
17.1
17.2
17.3
Technical data . . . . . . . . . . . . . . . . . . . . . . . . . . . . . . . . . . . . . . . . . . . . . . . . . . . . . . . .
Replacing the telephone connection cable . . . . . . . . . . . . . . . . . . . . . . . . . . . . . . . .
Guarantee . . . . . . . . . . . . . . . . . . . . . . . . . . . . . . . . . . . . . . . . . . . . . . . . . . . . . . . . . . .
89
89
90
18
19
Declaration of Conformity . . . . . . . . . . . . . . . . . . . . . . . . . . . . . . . . . . . . .
Important Notes on the Guarantee . . . . . . . . . . . . . . . . . . . . . . . . . . . . .
90
91
49
− General Information −
1
General Information
Please read this operating instruction manual thoroughly.
In the case of any questions, please contact our Service Hotline 0180 5 00 13 88 (cost via
Telekom at time of going to print: 12 ct/min). Under no circumstances open the device or
complete any repair work yourself. In the case of claims under the terms of guarantee, contact
your sales outlet.
We reserve the right to make technical and optical modifications to the product during the
course of product improvement.
1.1
Intended use
This telephone has been developed for use in an analogue telephone network (PSTN) within
Germany. However, due to the different services offered by the various telecommunication
network providers, there is no guarantee that the equipment will function trouble−free on every
telecommunication terminal connection. The telephone is prepared for connection to a TAE
line socket with F/N coding and can be used together with other equipment such as facsimile
unit, answering machine or modem. Only plug the telephone connection cable into the
appropriate telephone line socket. Never change the plug on the connection cable.
1.2
Power failure
The telephone cannot be used to make calls in the event of a power failure. Always keep a
cord connected telephone which operates without an external power supply available in the
case of emergency situations.
1.3
Installation location
The installation location is a decisive factor to ensure trouble−free operation. The equipment
must be set up in the vicinity of a 230 Volt power outlet.
Do not place the base station in the direct vicinity of other electronic equipment, such as
microwave ovens or hi−fi systems, since they could cause mutual disturbance. Therefore,
maintain a distance of at least one meter from other electronic equipment.
Place the base station on a level, non−slip surface. Normally, the footpads on the base station
do not leave any marks on the surface where it is located. However, due the diverse types of
paints and surfaces which come into question, it cannot be fully ruled out that the footpads will
leave marks on the surface on which it is located.
1.4
Power supply
Only use the AUDIOLINE power adapter plug supplied because other power supplies could
destroy the telephone. There is a risk of fatal injury if the power adapter plug is opened and
not disconnected from the power supply.
1.5
Rechargeable standard batteries
Do not use other rechargeable standard batteries or power packs because they could cause a
short circuit. When replacing batteries, only use those of the type AAA 1.2 V 750 mAh.
Do not throw rechargeable standard batteries into a fire or immerse them in
water. Do not dispose of old or defective batteries in normal domestic waste.
The maximum standby and talk times specified apply to the rechargeable
standard batteries supplied when used under optimum conditions. Ambient temperature,
50
− General Information −
charging cycles and other external factors, such as radio loading in the area of use, can affect
operating times considerably. In addition, the charge capacity is reduced for technical reasons
during use or when stored at extremely high or low temperatures.
1.6
Charging the handset
If the handset warms up during the charging process, this is normal and does not represent a
danger. Do not charge the handset on an external charging unit as this could damage it.
1.7
Private branch exchanges
The telephone can also be connected to a private branch exchange. The dealer where you
purchased the exchange can provide information as to whether the telephone will work
properly with the exchange. Due to the wide variety of private branch exchanges available,
there is no guarantee that the telephone will function correctly on all PBXs.
1.8
Disposing of old equipment
To dispose of your AUDIOLINE equipment, bring it to the local collection point provided by the
public waste disposal authority (e.g. recycling center).
The adjacent symbol on the telephone signifies that this equipment must
not be disposed of in domestic waste.
According to electric and electronic apparatus laws, old electric and electronic equipment must
be sorted prior to disposal. You are contributing to environmental protection by adhering to
these laws and not disposing of old equipment in domestic waste.
1.9
Notes on medical equipment
The telephone operates with a very low transmitting power. The current level of knowledge
from research and technology indicates that such low transmitting power does not represent a
risk to health. It has been shown, however, that portable telephones, when switched on, can
affect medical equipment. Therefore, never use the telephone in the vicinity of medical
equipment.
There is no evidence that DECT telephones affect heart pacemakers. However, due to the
wide range of pacemakers in use, it cannot be completely ruled out.
DECT telephones can cause an unpleasant humming sound in hearing aids.
1.10
Temperature and ambient conditions
The telephone is designed for use in protected rooms with a temperature range from 10 °C to
30 °C. The base station should not be used in rooms exposed to moisture, such as bathrooms
or laundries. Do not locate the device in the vicinity of sources of heat such as radiators, and
never expose it to direct sunlight.
Do not use the handset in potentially explosive areas.
Prevent excessive exposure to smoke, dust, vibration, chemicals, humidity, heat or direct
sunlight.
1.11
Cleaning and upkeep
Clean the housing surfaces with a dry, soft, fluff−free cloth. Never use cleaning agents or
aggressive solvents. Apart from occasionally cleaning the housing, no other upkeep is
necessary. The rubber footpads on the base station are not resistant to all cleaning agents.
The manufacturer is not liable to any claims for damage to furniture or such.
51
− Features −
2
Features
2.1
Telephone
S
S
S
S
S
S
S
S
S
S
S
S
S
S
S
S
S
S
S
S
S
S
S
S
Digital DECT / GAP standard
Up to 10 hours continuous conversation − up to 85 hours standby
Send and receive SMS
Voice scrambling for high level of security
Tone dialling method (DTMF)
Excellent display legibility through illuminated display
Easy operation through graphical menu guidance
Caller number display (CLIP function)
Calls list with 50 memory segments for calls received/missed
Redialling the last 20 call numbers
Phone book with 150 memory segments, including names
24−hour clock with alarm function integrated in the handset
Display call timer
Can be extended by registering more GAP−compatible DECT handsets
Multilink operation with up to four other handsets
Internal calls possible between two handsets
Conference facility between two handsets and an external caller
Forward calls between handsets
Ringing melodies on the handsets and base station can be adjusted in many ways
VIP call (melody assignment)
Suitable for T−Net (Hook Recall) − PBX capable
Muting function
Key lock
Hands−free function on handset
DECT: Digital European Cordless Telephone = Standard for cordless telephones.
GAP: Generic Access Profile = Standard for the interoperation of handsets and base stations
from other manufacturers.
52
− Operating Elements −
3
Operating Elements
3.1
Handset
1. Graphical colour display
2. Dialled calls / Volume + /
Menu navigation upwards
3. Phone book
4. End call / On / Off
5. Missed calls / Volume − /
Menu navigation downwards
6. Key lock
7. Internal and conference calls
8. R button
9. Take call / Hands−free call
10. Menu button / Select button
1
2
3
10
4
9
DEF
MNO
GHI
5
JKL
WXYZ
PQRS
TUV
6
8
3.2
7
Base station
11. Paging button (locate handset)
12. Call and power indicator LED
13. Charge control lamp LED
11
13
12
53
− Starting Up −
4
Starting Up
4.1
Safety notes
Caution: It is essential to read the General Information at the beginning of this manual before starting up.
4.2
Checking the package contents
The package contains:
a base station
a telephone connection cable
a handset
two standard batteries
a power adapter plug with cable
an operating manual
4.3
Connecting the base station
Position the base station within reach of the telephone line socket and a power outlet. Only
use the components supplied.
1. Insert the small plug on the power adapter plug cable in the corresponding socket
on the underside of the base station.
NOTE:
The plug cannot be connected incorrectly because the plug and socket are
designed in such a way to prevent reverse poling. The plugs must snap audibly into
the base station sockets.
2. Insert the small plug on the telephone connection cable in the corresponding socket
on the underside of the base station.
3. Feed both cables on the underside of the base station in the cable duct provided.
4. Plug the power adapter plug in a properly installed 230 Volt power outlet. The power
adapter plug from the base station must remain connected at all times.
5. Connect the telephone connection cable supplied in telephone socket F.
4.4
Inserting the standard batteries
In order to insert the rechargeable standard batteries in the handset, press on the top edge of
the battery compartment cover and slide it downwards. Only insert standard batteries. Pay
attention the correct polarity. Close the battery compartment cover.
+
54
−
−+
− Starting Up −
4.5
Charging the standard batteries
Place the handset, with its display facing the front, in the base station for at least 14 hours.
The charging control lamp on the base station lights up. Failure to charge the standard
batteries properly can lead to telephone malfunction.
The rechargeable standard batteries in the handset have a maximum standby time of
85 hours at room temperature. The maximum talk time is 10 hours.
The current battery charge status is indicated in the display:
4.6
Full
Half empty
Weak
Empty
Tone dialling − DTMF
This telephone implements the tone dialling method − DTMF (Dual Tone Multi Frequency).
Advantages of this modern dialling method include short connection times, remote control
options for other equipment, such as an answering machine, and the use of other ISDN
services.
55
− Operation −
5
Operation
5.1
Display
The display indicates all the important functions by means of various icons. It is equipped with
an automatic back−lighting feature which lights up the display for approx. 30 seconds when
any button is pressed.
5.2
Navigation using the buttons
All the functions can be accessed by means of a user friendly, graphical menu. Pay attention
to the texts in the display which accompany the menu because they help you to navigate
correctly and intuitively.
All descriptions in this operating manual assume that the handset is in Standby mode. A
beach view and the name of the handset appear in the display (preset to Studio 1") when it is
in standby mode. Standby mode is activated by pressing the button.
OK
Button
56
Back
Description
The current function is displayed directly above the button in the left of the
display according to the operating function. The function is selected after
pressing the button. When in standby, the button opens the menu.
The current function is displayed directly above the button in the right of the
display according to the operating function. The function is selected after
pressing the button. When in standby, the button opens the list of names in
the phone book.
Press the button to scroll upwards in the menu.
Press the button to scroll downwards in the menu.
Press the button to close the menu at any point and reset the handset to
standby mode.
− Operation −
5.3
Making and ending calls
1. Enter the phone number (max. 25 digits).
NOTE:
Press the button briefly to delete the last digit entered. Press and hold the button to delete the entire phone number. The handset returns to standby mode.
2. Press the button and the required connection is established.
NOTE:
Alternatively, press the button first and then enter the required phone number. It
is not possible to correct wrong digits individually, as described above, using this
dialling procedure.
3. To end a call, press the button or place the handset in the base station.
5.4
Taking a call
Both the handset and base station ring. Take the handset from the base station, thus
establishing the connection. The call LED on the base station flashes.
NOTE:
If the Auto Talk option is deactivated, establish the connection by pressing the button on the handset.
5.5
Taking two external calls
You will hear acoustic signals (call waiting) if a second call is received while you are carrying
out a telephone conversation. The number of the second caller appears in the display. It is
possible to switch between the two callers by pressing the button sequence as
required. One caller is put on hold while you converse with the other.
NOTE: In order to use the added value services provided by Deutsche Telekom, the recall
time setting 300 ms has to be selected (refer to Chapter 14.4 Setting the recall
time").
Caution: The caller number display and call waiting function are optional services
offered by the telephone network provider. The caller number appears in the display
if the service is offered by your telephone network provider. Contact your network
provider for further information.
5.6
Hands-free
1. Press the button during a call. You can then hear the caller through the
loudspeaker in the handset.
2. Press the button again to end hands-free mode.
57
− Operation −
5.7
Dialling phone numbers stored in the phone book
After phone numbers have been stored in the phone book (refer to Entering phone numbers
in the phone book, Chapter 8.1), they can be called quickly and easily.
1. Press the button. The phone book entries appear in the display in alphabetical
order.
2. Use the or button to scroll to the required name in the phone book.
NOTE:
To select an entry directly, press the corresponding button to enter the first letter of
the name required. To select the name Peters" directly, for example, press the button once.
3. Press the button and the selected phone number is dialled automatically.
5.8
Displaying the call timer
When a call is being made, the call time is indicated in minutes and seconds and the number
of the person called appear in the display after about 15 seconds.
5.9
Adjusting the receiver volume
The volume of the receiver can be adjusted according to requirements.
Press the or button during a call to set the volume to one of five levels.
5.10
Redialling
Refer to Dialled numbers (redialling)", Chapter 10.4.
5.11
Muting the handset
By pressing the button during a telephone call, the microphone in the handset is
deactivated. Secrecy" appears in the display. You can then talk to someone else without the
caller being able to hear you. The loudspeaker in the handset remains switched on, so that
you can continue to hear the caller.
Press the button again to deactivate the muting function.
5.12
Switching the handset on /off
Press the button for 2 seconds to switch the handset on and off. The display lights up or
goes out accordingly.
5.13
Locating the handset (paging)
If you have mislaid your handset, you can locate it with the aid of the base station.
1. Press the Paging button on the base station. All the handsets registered on the
base station ring.
2. To stop the paging function, press the Paging button on the base station again or
any button on the handset.
58
− Operation −
5.14
Key lock
If you carry the handset around a lot, you can lock the keypad so that buttons are not
inadvertently activated. Calls can still be taken in the normal way even when the key lock
function is activated.
5.14.1
Activating the key lock function
Press the button on the handset for three seconds.
The Keypad locked" message and icon appear in the display.
5.14.2
Deactivating the key lock function
To deactivate the key lock, press the button and then press the button again as
confirmation.
5.15
Notes on range
The handset has a range of approx. 50 meters in closed rooms and approx. 300 meters
outdoors. In the case of a good connection to the base station, the icon appears in the
display.
NOTE:
If the handset is moved too far from the base station, the icon flashes and
acoustic warning signals are issued. Move towards the base station, otherwise the
call will be disconnected.
59
− Private Branch Exchanges / T−Net −
6
Private Branch Exchanges / T−Net
The button on the telephone is for use in private branch exchanges and when using T−Net
functions provided by Deutsche Telekom.
6.1
R button on private branch exchanges
If the telephone is connected to a private branch exchange, all the functions associated with
the button, such as transferring calls, automatic call back, etc., can be used. A private
branch exchange requires a recall time of 100 ms (refer to Chapter 14.4). The dealer where
you purchased the exchange can provide information as to whether the telephone will work
properly with the exchange.
6.2
R button with T−Net provided by Deutsche Telekom
Your AUDIOLINE telephone supports the most important added value services provided by
Deutsche Telekom (e.g. brokering, call waiting, three−way conferencing, etc.). T−Net operates
with a recall time of 300 ms (refer to Chapter 14.4 for settings). Please contact Deutsche
Telekom with regard to enabling the T−Net functions.
6.3
Dialling pause
In the case of private branch exchanges, it is necessary to dial a specific number (e.g. 9" or
0") in order to obtain the dialling tone for an outside line. When using some older private
branch exchanges, it takes a little time before the dialling tone becomes audible. With regard
to these private branch exchanges in particular, it is possible to insert an automatic pause after
the number for the outside line so that the number can be dialled in a continuous process
without having to wait for the dialling tone.
After entering the number for the outside line and before continuing with the actual phone
number, press the button for approx. 2 seconds. P" appears in the display. A pause of
3 seconds is inserted between the number for the outside line and the actual phone number.
NOTE:
60
The pause can also be entered with the phone numbers in the phone book.
− Menu Structure −
7
Menu Structure
This section describes the menu structure of your telephone. When in standby, open the menu
selection by pressing the button. For reasons of clarity, all the levels of each menu item
are not always depicted.
SMS
Write Message
Options
Send to
Save
Insert Symbol
User Name
Search
Inbox
Read
Options
Reply
Forward
Delete
Outbox
Read
Options
Edit
Send to
Delete
User Name
Delete Messages
Inbox
Outbox
All Messages
Settings
Service Centres
Receive Centre
Sending Centre
Terminal Number
SMS Alert
Users
Calls lists
Received calls
Options
Delete
Show Details
Save Number
Missed calls
Options
Delete
Show Details
Save Number
Dialled calls
Options
Delete
Show Details
Save Number
Delete calls list
Received calls
Missed calls
Dialled calls
All calls
61
− Menu Structure −
Handset
Ringtone
External Calls
Internal Calls
Ring Volume
Handset Name
Language
Menu Colour
Auto Talk
PABX Access Code
Base settings
Base Ringtone
Base Volume
Handset Priority
All Handsets
Select Handset
Handset 1−5
Recall Mode
Rings 2
Rings 4
Rings 6
System−PIN (default setting: 0000)
Time settings
Alarm
On/Off
Set Alarm Tone Alarmtone 1−4
Set Date & Time
Registration
Register Handset
Select Base
De−register
Registration
Register Handset
Date
Base 1
Base 2
Base 3
Time
System PIN (default setting: 0000)
Base 4
Select Base
Automatic
Base 1
Base 2
Base 3
Base 4
De−register
62
On Once
On Daily
Off
System PIN (default setting: 0000)
− Phone Book −
8
Phone Book
When in standby, press the button to open the phone book menu. The phone book can
be used to store a maximum of 150 phone numbers together with the associated names. A
name can have a maximum of 16 characters. The maximum length of a phone number is 20
digits.
8.1
Entering phone numbers in the phone book
1. Press the button. The phone book opens in the display.
NOTE:
2.
3.
4.
5.
To complete the first entry in the phone book, proceed with Step 4 at this point.
Press the button.
Use the or buttons to select the Add Entry" option in the display.
Press the button. The message Name" appears in the display.
Enter the name using the digit keys.
NOTE:
6.
7.
8.
9.
10.
Refer to 8.1.1 to enter text.
Press the button. The message Number" appears in the display.
Enter the relevant phone number using the digit keys.
Press the button. The entry is confirmed in the display.
To store more phone numbers, repeat steps 3 to 9.
Press the button to reset the handset to standby mode.
8.1.1
Text entry
The digit keys are also labelled with letters for the entry of the respective letters. Letters and
digits are entered by pressing the relevant key the respective number of times.
Example: To enter the name Peter".
Press: 1 x button , 2 x button , 1 x button , 2 x button , 3 x button S
S
NOTE:
8.1.2
To enter a space, press once.
To enter the same letter twice, press the relevant button until the letter appears then
wait till the cursor automatically skips one position forward.
Delete any incorrect entries with the button.
Press the or button to move the cursor to the left or right.
Notes on the phone book
S
S
Always enter the area access code with the phone numbers so that the telephone
can also assign incoming local calls to a phone book entry.
If the memory capacity of 150 phone numbers is reached, a corresponding
message appears when an attempt is made to store another number. In order to
create space, existing entries must be deleted.
63
− Phone Book −
8.2
Showing details of an entry
1. Press the button. The phone book opens in the display.
2. Use the or button to select the required entry in the display.
NOTE:
3.
4.
5.
6.
8.3
To select an entry directly, press the corresponding button to enter the first letter of
the name required. To select the name Peter" directly, for example, press the button once.
Press the button.
Use the or buttons to select the Show Details" option in the display.
Press the button. The name and phone number appear in the display.
Press the button to move back one menu level at a time.
Modifying entries in the phone book
1. Press the button. The phone book opens in the display.
2. Use the or button to select the required entryin the display.
NOTE:
To select an entry directly, press the corresponding button to enter the first letter of
the name required. To select the name Peter" directly, for example, press the button once.
3. Press the button.
4. Use the or buttons to select the Edit Entry" option in the display.
5. Press the button.
The name appears in the display. Alter the name, if necessary, or continue with
Step 6.
NOTE:
For information on entering names, refer to Chapter 8.1.1.
6. Press the button.
The number appears in the display. Alter the number, if necessary, or continue with
Step 7.
7. Press the button. The modification is confirmed in the display.
8. Press the button once to return to the phone book in order to edit further entries.
9. Press the button to move back one menu level at a time.
8.4
Deleting an entry from the phone book
1. Press the button. The phone book opens in the display.
2. Use the or button to select the required entry in the display.
NOTE:
To select an entry directly, press the corresponding button to enter the first letter of
the name required. To select the name Peter" directly, for example, press the button once.
3. Press the button.
4. Use the or buttons to select the Delete Entry" option in the display.
5. Press the button. A request for confirmation to delete the entry appears in the
display.
6. Press the button. Deletion is confirmed in the display.
7. Press the button to reset the handset to standby mode.
64
− Phone Book −
8.5
Deleting all entries from the phone book
Press the button. The phone book opens in the display.
Press the button.
Use the or button to select the Delete all phonebook" option in the display.
Press the button. A request for confirmation to delete the entries appears in the
display.
5. Press the button. Deletion is confirmed in the display. New entries can be made
in the phone book, if necessary.
6. Press the button to reset the handset to standby mode.
1.
2.
3.
4.
8.6
VIP call (ring melody assignment)
Phone book entries from callers who are particularly important can be assigned a specific
ringing melody. You can then recognise who is calling simply from the ringing melody.
8.6.1
Assigning a ringing melody
1. Press the button. The phone book opens in the display.
2. Use the or button to select the required entry in the display.
NOTE:
3.
4.
5.
6.
7.
8.
8.6.2
To select an entry directly, press the corresponding button to enter the first letter of
the name required. To select the name Peter" directly, for example, press the button once.
Press the button.
Use the or button to select the Ringtone" option in the display.
Press the button. Several melodies appear in the display for selection.
Use the or button to select the melody required in the display.
Press the button. The assignment is confirmed in the display.
Press the button to move back one menu level at a time.
Deactivating a ringing melody assignment
1. Press the button. The phone book opens in the display.
2. Use the or button to select the required entry in the display.
NOTE:
To select an entry directly, press the corresponding button to enter the first letter of
the name required. To select the name Peter" directly, for example, press the button once.
3. Press the button. Several options appear in the display.
4. Use the or button to select the Ringtone" option in the display.
5. Press the button. Several melody options appear in the display for selection as
well as the "Off" option.
6. Use the or button to select the Off" option in the display.
7. Press the button. The assignment is confirmed in the display.
8. Press the button to move back one menu level at a time.
65
− SMS Text Messages −
9
SMS Text Messages
General conditions
The popular method of communication using text messages (SMS) is also possible via the
conventional telephone network. The telephone can be used to send and receive text
messages (SMS). Certain conditions must be fulfilled to enable text messages to be sent and
received.
S
S
S
S
S
S
S
The telephone connection must have the CLIP function (Calling Line Identification
Presentation) available. Contact your telephone network provider to ensure that the
CLIP function has been enabled on your telephone connection. It is possible that a
fee will be charged for the function and it may be necessary to apply for it to be
activated by your telephone network provider (e.g. Deutsche Telekom, phone
number 0800 33 01000).
0190 phone numbers must not have been disabled on your conventional telephone
connection.
Sending text messages is not currently possible in the case of call−by−call
connections.
In order to use the SMS services, it may be necessary for your telephone network
provider to activate the facility.
Charges are made for sending SMS texts.
If the receiving phone in the conventional telephone network is not provided with an
SMS service or it is simply not capable of handling text messages, the SMS
message is automatically converted to a voice message, i.e. read out on the phone.
The costs accounting is completed by the telephone network provider.
NOTE:
Due the constant further developments in this field, the information provided here
may have changed in the meantime. Up−to−date information is available on the
respective Internet pages or from the telephone network provider.
9.1
Service centres
The distribution of all text messages is performed by an Service centre. The Deutsche
Telekom" and other telephone network providers offer this service. Your AUDIOLINE
telephone is set up for operation (sending and receiving text messages) via the Deutsche
Telekom".
S
S
S
S
S
S
66
SMS using Deutsche Telekom Service Center.
The number for the Deutsche Telekom message centre is 0193 010.
When using Deutsche Telekom, a simple registration is required. To do this, send
your first SMS with the text ANMELD (register) to the number 8888".
SMS from the Vodafone, E−Plus or O2 networks cannot be received by Deutsche
Telekom. In this case, the SMS will be read out.
SMS using Anny Way Service Center
The number for the Anny Way message centre is 0900 32 66 900.
No registration is necessary when using Anny Way. Simply send any SMS and you
will be automatically registered with Anny way.
SMS from the D1 (T−Mobile) and E−Plus networks cannot be received by Anny Way.
In this case, the SMS will be read out.
− SMS Text Messages −
Two call numbers for the SMS function must be programmed in the handset. One phone
number for sending and one phone number for receiving text messages. If you want to use the
services offered by another provider, the respective call number(s) must be programmed in the
handset. Proceed as described in 9.1.1.
NOTE:
The registering procedure for the various providers differs. Please contact the
provider of your choice for the necessary call numbers of the centres and the
procedure for enabling the SMS service.
9.1.1
Entering the send/receive centre numbers
1.
2.
3.
4.
5.
6.
7.
8.
9.
10.
11.
12.
Press the button.
Use the or button to select the SMS" option in the display.
Press the button.
Use the or button to select the Settings" option in the display.
Press the button.
Use the or button to select the Service Centres" option in the display.
Press the button.
Use the or button to select the "Receive Centre" option in the display. Enter the
phone number stipulated by the provider of your choice.
Press the button.
Use the or button to select the Sending Centre" option in the display. Enter
the phone number stipulated by the provider of your choice.
Press the button.
Press the button to move back one menu level at a time.
9.2
Writing and sending
NOTE:
It is not possible to send an SMS message from a PABX system. The PABX Access
Code" must be deactivated in order to send an SMS message (refer to Chapter
11.7).
1.
2.
3.
4.
5.
Press the button.
Use the or button to select the SMS" option in the display.
Press the button.
Use the or button to select the Write Message" option in the display.
Press the button. Enter the text using the digit keys. A maximum of 160
characters are possible.
NOTE:
Refer to 8.1.1 to enter text.
NOTE:
To enter a symbol, press the button while entering the text. Use the or button to select the Insert Symbol" option in the display. Press the button. Use
the or button to select the required symbol. Press the button. The text
entry display reappears. Carry on entering your text.
6. Press the button.
7. Use the or button to select the Send to" option in the display.
67
− SMS Text Messages −
NOTE:
If you want to send the text message later, select the Save" option under Step 7.
The text message is stored in the Outbox" list.
8. Press the button.
9. Enter the phone number of the receiving party.
If the receiving party is stored in the phone book, press the button. Use the or
button to select the required name and then press the button. Continue with
Step 10.
10. Press the button. Sending of the message is confirmed in the display.
9.3
1.
2.
3.
4.
5.
6.
7.
8.
Sending saved SMS messages
Press the button twice.
Use the or button to select the Outbox" option in the display.
Press the button.
Use the or button to select the required SMS message in the display.
Press the button twice.
Use the or button to select the Send to" option in the display.
Press the button.
Enter the phone number of the receiving party and then press the button.
9.4
Reading and answering
When an SMS message is received, an acoustic signal is issued and the display indicates the
receipt of a new message.
1. Press the button. The inbox list appears in the display. SMS messages which
have not been read are marked by a star.
NOTE:
If you want to reply to an SMS message which has already been read, press the button twice, use the or button to select the Inbox" option in the display and
press the button. Continue with Step 2.
Use the or button to select the required SMS message in the display.
Press the button. The SMS message appears in the display.
Press the button.
Use the or button to select the Reply" option in the display.
Select the Forward" option to forward the SMS message to another phone. To
forward the text message, proceed with Step 8.
6. Press the button. Enter the text using the digit keys. A maximum of 160
characters are possible.
2.
3.
4.
5.
NOTE:
7.
8.
9.
10.
Refer to 8.1.1 to enter text.
Press the button.
Use the or button to select the Send to" option in the display.
Press the button.
Enter the phone number of the receiving party.
If the receiving party is stored in the phone book, press the button. Use the or
button to select the required name and then press the button.
11. Press the button. Sending of the message is confirmed in the display.
68
− SMS Text Messages −
9.5
SMS alert signal on/off
1.
2.
3.
4.
5.
6.
7.
8.
9.
10.
9.6
Setting the SMS alert signal (Morse, Discreet, Polyphonic)
1.
2.
3.
4.
5.
6.
7.
8.
9.
10.
11.
9.7
Press the button.
Use the or button to select the SMS" option in the display.
Press the button.
Use the or button to select the Settings" option in the display.
Press the button.
Use the or button to select the SMS Alert" option in the display.
Press the button.
Use the or button to select the On" or Off" option in the display.
Press the button.
Press the button to move back one menu level at a time.
Press the button.
Use the or button to select the SMS" option in the display.
Press the button.
Use the or button to select the Settings" option in the display.
Press the button.
Use the or button to select the SMS Alert" option in the display.
Press the button.
Use the or button to select the Set Alert" option in the display.
Press the button.
Use the or button to select the required signal tone in the display.
Press the button. The modification is confirmed in the display.
Delete an SMS Message
Individual SMS measges can be deleted from the Inbox" and Outbox" lists.
1. Press the button.
2. Use the or button to select the SMS" option in the display.
3. Press the button.
4. Use the or button to select the Inbox" or Outbox" option in the display.
5. Press the button.
6. Use the or button to select the required SMS message from the list.
7. Press the button.
8. Press the button and select the Delete" option.
9. Use the or button to select the Delete" option in the display.
10. Press the button.
11. Press the button to confirm the function.
12. Press the button to move back one menu level at a time.
69
− SMS Text Messages −
9.8
Delete all SMS messages
All the text messages in the Inbox" and Outbox" lists can be deleted in one process.
1. Press the button.
2. Use the or button to select the SMS" option in the display.
3. Press the button.
4. Use the or button to select the Delete Messages" option in the display.
5. Press the button.
6. Use the or button to select the All Messages" option in the display.
NOTE:
If you only want to delete the messages in one of the lists, either Inbox" or Outbox",
use the or button to select the relevant option in the display.
7. Press the button. A confirmation request appears in the display.
8. Press the button. Deletion is confirmed in the display.
9. Press the button to move back one menu level at a time.
9.9
SMS mailbox
In addition to the general mailbox which already exists, it is possible to setup four further
mailboxes and protect them by means of a password. Each mailbox is identified by a user
name and a mailbox ID (extension number). This enables text messages to be received to
which only you have access.
NOTE:
SMS mailboxes can only be used if the telephone network provider offers the facility.
Please request a configuration instruction manual on setting up mailbox operation
from your telephone network provider.
9.9.1
Adding a mailbox/user
NOTE:
Up to four users can be added.
Press the button.
Use the or button to select the SMS" option in the display.
Press the button.
Use the or button to select the Settings" option in the display.
Press the button.
Use the or button to select the Users" option in the display.
Press the button.
Use the or button to select the Add User" option in the display.
Press the button. Enter the user name using the digit keys.
Press the button. Enter a password with up to five characters using the digit
keys.
11. Press the button. Enter the password again using the digit keys.
12. Press the button. The mailbox has been set up.
13. Press the button to move back one menu level at a time.
1.
2.
3.
4.
5.
6.
7.
8.
9.
10.
70
− SMS Text Messages −
9.9.2
Displaying mailbox/user data
NOTE:
In order to configure the mailbox operation with the telephone network provider, you
need the mailbox ID (extension number). The general mailbox has the mailbox ID
0". When other users are registered, the lowest mailbox ID available is
automatically assigned (1−4).
1.
2.
3.
4.
5.
6.
7.
8.
9.
10.
11.
12.
NOTE:
Press the button.
Use the or button to select the SMS" option in the display.
Press the button.
Use the or button to select the Settings" option in the display.
Press the button.
Use the or button to select the User" option in the display.
Press the button.
Use the or button to select the required user in the display.
Press the button. Enter the relevant password.
Press the button.
Use the or button to select the Terminal Number" option in the display.
Press the button. The terminal number is displayed.
The terminal number displayed under Step 12 corresponds to the mailbox ID of the
telephone network provider.
13. Press the button to move back one menu level at a time.
9.9.3
Sending an SMS message to a personal mailbox
NOTE:
SMS mailboxes can only be used if the telephone network provider offers the facility.
Please request a configuration instruction manual on setting up mailbox operation
from your telephone network provider.
In order to receive a text message in your personal mailbox, the sender must know your
mailbox ID and append it to your phone number.
You can send an SMS message to the receiving party containing information on your personal
mailbox.
This SMS provides your SMS partner with your SMS call number including the current mailbox
ID and it can be stored in the phone book. If the mailbox ID is invalid, the SMS message will
not be sent.
71
− SMS Text Messages −
9.9.4
Changing mailbox/user data
1.
2.
3.
4.
5.
6.
7.
8.
9.
10.
11.
12.
13.
14.
9.9.5
Deleting a mailbox/user
1.
2.
3.
4.
5.
6.
7.
8.
9.
10.
11.
12.
13.
72
Press the button.
Use the or button to select the SMS" option in the display.
Press the button.
Use the or button to select the Settings" option in the display.
Press the button.
Use the or button to select the Users" option in the display.
Press the button.
Use the or button to select the required user in the display.
Press the button. Enter the relevant password.
Press the button.
Use the or button to select one of the options to be changed.
Press the button. Change the setting.
Press the button. Other changes can now be made.
Press the button to move back one menu level at a time.
Press the button.
Use the or button to select the SMS" option in the display.
Press the button.
Use the or button to select the Settings" option in the display.
Press the button.
Use the or button to select the Users" option in the display.
Press the button.
Use the or button to select the Delete User" option in the display.
Press the button.
Use the or button to select the required user.
Press the button. Enter the System PIN (default setting= 0000).
Press the button.
Press the button to move back one menu level at a time.
− Calls Lists −
10
Calls Lists
10.1
Caller number display (CLIP function)
The CLIP function enables you to view the number of a caller when a call is received. If this
function is available with your telephone line, the number of the caller appears in the display
when the phone rings. If the caller has deactivated the transfer of his phone number, the
number is not displayed. If the caller’s number is stored in the phone book, the name appears
in the display instead of the phone number.
The Received calls" and Missed calls" lists have a common memory space for 50 phone
numbers. If, for example, there are 32 calls stored in the Received calls" list, 18 memory
segments remain available for Missed calls". As soon as all 50 memory segments are
occupied, the oldest entry is deleted.
NOTE:
The caller number display function is an optional service offered by telephone
network providers. The caller number appears in the display if the service is offered
by your telephone network provider. The display of the date and time is not
transferred by all telephone network providers. Contact your network provider for
further information. Transfer of the phone number or the date and time is not always
possible either in some private branch exchanges.
10.2
Received calls
The Received calls" list contains all the calls taken on the phone.
10.2.1
Displaying and calling back
Press the button.
Use the or button to select the Calls Lists" option in the display.
Press the button.
Use the or button to select the Received calls" option in the display.
Press the button. The list of calls received appears in the display.
To call back a received call, use the or buttons to select the required number
in the display.
7. Press the button. A connection is established.
1.
2.
3.
4.
5.
6.
10.2.2
Delete entry
1.
2.
3.
4.
5.
6.
7.
8.
Press the button.
Use the or button to select the Calls Lists" option in the display.
Press the button.
Use the or button to select the Received calls" option in the display.
Press the button. The list of calls received appears in the display.
Use the or button to select the number required in the display.
Press the button.
Use the or button to select the Delete" option in the display.
73
− Calls Lists −
NOTE:
9.
10.
11.
12.
10.2.3
In addition to the Delete" option, the Show Details" option is also available.
If the Show Details" option is selected, press the button to display the name and
phone number. Press the button to return to the Received calls" list.
Press the button. Deletion is confirmed in the display.
The Received calls" list reappears in the handset display.
To delete more entries, repeat steps 6 to 9.
Press the button to move back one menu level at a time.
Save entry in the phone book
A phone number stored in the Received calls" list can be transferred directly to the phone
book.
1. Press the button.
2. Use the or button to select the Calls Lists" option in the display.
3. Press the button.
4. Use the or button to select the Received calls" option in the display.
5. Press the button. The list of calls received appears in the display.
6. Use the or button to select the number required in the display.
7. Press the button.
8. Use the or buttons to select the Save Number" option in the display.
9. Press the button.
10. Enter the name using the digit keys .
11. Press the button twice. The entry is confirmed in the display.
12. Press the button to move back one menu level at a time.
10.3
Missed calls
The Missed calls" list contains all the calls not taken so that you will not miss any calls even if
your are absent. There are three ways to access the Missed calls" list:
S
S
S
74
Press the button or
If the display indicates that missed calls have been saved, press the button or
Proceed as described in 10.3.1.
− Calls Lists −
10.3.1
Displaying and calling back
1.
2.
3.
4.
5.
NOTE:
Press the button.
Use the or button to select the Calls Lists" option in the display.
Press the button.
Use the or button to select the Missed calls" option in the display.
Press the button. The list of calls missed appears in the display.
New calls are identified by a star.
6. To call back a missed call, use the or buttons to select the required number in
the display.
7. Press the button. A connection is established.
10.3.2
Delete entry
1.
2.
3.
4.
NOTE:
Press the button. The list of calls missed appears in the display.
Use the or button to select the number required in the display.
Press the button.
Use the or button to select the Delete" option in the display.
In addition to the Delete" option, the Show Details" option is also available.
If the Show Details" option is selected, press the button to display the name and
phone number. Press the button to return to the Missed calls" list.
5. Press the button. Deletion is confirmed in the display.
6. Press the button to reset the handset to standby mode.
10.3.3
Save entry in the phone book
A phone number stored in the Missed calls" list can be transferred directly to the phone book.
1. Press the button. The list of calls missed appears in the display.
2. Use the or button to select the number required in the display.
3. Press the button.
4. Use the or buttons to select the Save Number" option in the display.
5. Press the button. Enter the name using the digit keys.
6. Press the button twice. The entry is confirmed in the display.
7. Press the button to reset the handset to standby mode.
NOTE:
When the number in the phone book is stored together with a name, the number no
longer appears in the display but the name instead.
75
− Calls Lists −
10.4
Dialled calls (redialling)
The Dialled calls" list contains all the phone numbers you have dialled.
10.4.1
Displaying and calling
1. Press the button. The list of dialled numbers appears in the display.
NOTE:
If the number is stored in the phone book, the name associated with it also appears.
2. To redial a previously dialled number call, use the or buttons to select the
required number in the display.
3. Press the button. A connection is established.
10.4.2
Delete entry
1.
2.
3.
4.
NOTE:
Press the button. The list of dialled numbers appears in the display.
Use the or button to select the number required in the display.
Press the button.
Use the or button to select the Delete" option in the display.
In addition to the Delete Entry" option, the Show Details" option is also available.
If the Show Details" option is selected, press the button to display the name and
phone number. Press the button to return to the Missed calls" list.
5. Press the button. Deletion is confirmed in the display.
6. Press the button to move back one menu level at a time.
10.4.3
Save entry in the phone book
A phone number stored in the Dialled calls" list can be transferred directly to the phone book.
1. Press the button. The list of dialled numbers appears in the display.
2. Use the or button to select the number required in the display.
3. Press the button.
4. Use the or buttons to select the Save Number" option in the display.
5. Press the button. Enter the name using the digit keys.
6. Press the button twice. The entry is confirmed in the display.
7. Press the button to move back one menu level at a time.
NOTE:
76
When the number in the phone book is stored together with a name, the number no
longer appears in the display but the name instead.
− Calls Lists −
10.4.4
Deleting a calls list
It is possible to delete all the calls in one of the calls lists ("Received calls", Missed calls" or
Dialled calls") you have selected.
NOTE:
1.
2.
3.
4.
5.
6.
7.
8.
NOTE:
The procedure is described according to the example of the "Received calls" list.
The procedure is identical for the Missed calls" and Dialled calls" lists.
Press the button.
Use the or button to select the Calls Lists" option in the display.
Press the button.
Use the or button to select the Delete Calls List" option in the display.
Press the button.
Use the or button to select the Received calls" option in the display.
Press the button.
Press the button. A request for confirmation to delete the calls list appears in the
display.
In the next step, all the entries are deleted, irrevocably, from the Received calls" list.
The deletion process is cancelled by pressing the button.
9. Press the button. Deletion is confirmed in the display.
10. Press the button to move back one menu level at a time.
10.4.5
Delete all calls lists
It is possible to delete all the calls in all the calls lists ("Received calls", Missed calls" or
Dialled calls").
1. Press the button.
2. Use the or button to select the Calls Lists" option in the display.
3. Press the button.
4. Use the or button to select the Delete Calls List" option in the display.
5. Press the button.
6. Use the or button to select the All Calls" option in the display.
7. Press the button. A request for confirmation to delete the entries appears in the
display.
NOTE:
In the next step, all the entries are deleted, irrevocably, from all the calls lists
("Received calls", Missed calls" and Dialled calls"). The deletion process is
cancelled by pressing the button.
8. Press the button. Deletion is confirmed in the display.
9. Press the button to move back one menu level at a time.
77
− Handset −
11
Handset
Various settings can be defined on the handset according to individual needs.
11.1
Assigning a ringing melody (internal and external calls)
Internal and external calls can be assigned different ringing melodies. The setting procedure is
described according to the example of external calls.
1. Press the button.
2. Use the or button to select the Handset" option in the display.
3. Press the button. Several options appear in the display.
4. Use the or button to select the Ringtone" option.
5. Press the button.
6. Use the or button to select the External Calls" option.
7. Press the button. Several melodies appear in the display for selection.
8. Use the or button to select the required melody.
9. Press the button. The assignment is confirmed in the display.
10. Press the button to move back one menu level at a time.
11.2
Setting the ring volume
1.
2.
3.
4.
5.
6.
NOTE:
Press the button.
Use the or button to select the Handset" option in the display.
Press the button. Several options appear in the display.
Use the or button to select the Ring Volume" option.
Press the button.
Use the or button to select the required ring volume.
If you select the Ringer off" option, the icon appears in the display.
7. Press the button. The assignment is confirmed in the display.
8. Press the button to move back one menu level at a time.
11.3
Entering/Changing the name of the handset
Press the button.
Use the or button to select the Handset" option in the display.
Press the button. Several options appear in the display.
Use the or button to select the Handset Name" option.
Press the button. The message Name" appears in the display.
Enter the required name (max. 8 characters). Delete any incorrect entries with the
button. Press the or button to move the cursor to the left or right.
7. Press the button. The assignment is confirmed in the display.
8. Press the button to move back one menu level at a time.
1.
2.
3.
4.
5.
6.
78
− Handset −
11.4
Setting the language
Display texts and messages can appear in the display in various languages.
1. Press the button.
2. Use the or button to select the Handset" option in the display.
3. Press the button. Several options appear in the display.
4. Use the or button to select the Language" option.
5. Press the button. Several languages appear in the display for selection.
6. Use the or button to select the required language.
7. Press the button. The assignment is confirmed in the display.
8. Press the button to move back one menu level at a time.
11.5
Setting the menu colour
The background colours of the menu options can be adjusted.
1. Press the button.
2. Use the or button to select the Handset" option.
3. Press the button. Several options appear in the display.
4. Use the or button to select the Menu Colour" option.
5. Press the button. Several colours appear in the display for selection.
6. Use the or button to select the required colour.
7. Press the button. The assignment is confirmed in the display.
8. Press the button to move back one menu level at a time.
11.6
Activating the Auto Talk function
When the Auto Talk function has been activated, calls can be taken simply by removing the
handset from the base station. The Call button need not be pressed in addition.
1. Press the button.
2. Use the or button to select the Handset" option.
3. Press the button. Several options appear in the display.
4. Use the or button to select the Auto Talk" option.
5. Press the button.
6. Use the or button to select the On" option.
7. Press the button. The assignment is confirmed in the display.
8. Press the button to move back one menu level at a time.
79
− Handset −
11.7
Activating the PABX access code (outside line)
In the case of some private branch exchanges, a certain number must be dialled first (e.g. 0"
or 9") before a dialling tone for an outside line is received. The digit entered here is
automatically dialled before the actual phone number selected from the phone book or calls
list.
1. Press the button.
2. Use the or button to select the Handset" option.
3. Press the button. Several options appear in the display.
4. Use the or button to select the PABX Access Code" option.
5. Press the button.
6. Use the or button to select the Set Code" option.
7. Press the button. The message Set Code" appears in the display.
8. Enter the digit to be assigned (max. 4 different digits possible).
9. Press the button. The assignment is confirmed in the display.
10. Then select the On" option.
11. Press the button. The assignment is confirmed in the display.
12. If you want to deactivate the automatic access code, select the Off" option and
press the button.
13. Press the button to move back one menu level at a time.
80
− Registering and Deregistering Handsets −
12
Registering and Deregistering Handsets
12.1
Register handset
1.
2.
3.
4.
5.
6.
NOTE:
Press the button.
Use the or button to select the Registration" option in the display.
Press the button.
Use the or button to select the Register Handset" option in the display.
Press the button.
Use the or button to select the Base 1" option in the display.
If the you want to register the handset on a new base station, select a base not
marked by a star. If the base station is marked by a star, the memory location is
occupied.
7. Press the button and enter the PIN.
8. Press the button. The message Base Search" appears in the display.
9. Press and hold the Paging button on the base station (approx. 5 sec.) until you
hear an acoustic signal. Registration is initiated.
NOTE:
In order to register a DECT−GAP handset from another manufacturer, follow the
instructions in the operating manual provided by the original manufacturer and then
press the button on the base station.
10. Press the button. The handset is now registered.
The handset is automatically assigned the lowest free internal number (1−5).
The first handset registered has the internal number 1. The second has the internal number 2.
When in standby mode, the internal number appears in the handset display following the
handset name.
12.2
Deregister handset
NOTE:
A handset can only be deregistered by another handset still registered. This means
it is not possible to complete the deregistration using the handset which is to be
deregistered.
1.
2.
3.
4.
5.
6.
7.
Press the button.
Use the or button to select the Registration" option in the display.
Press the button.
Use the or button to select the De−register" option in the display.
Press the button. Enter the PIN.
Press the button. Select the handset to be deregistered.
Press the button twice. The handset is now deregistered.
81
− Registering and Deregistering Handsets −
12.3
Select base station
If your handset is registered on several base stations, it can be set to one specific base station
or to the automatic search for the base station with the best reception. To deactivate the
automatic search setting, the handset must be reset to a specific base station again.
1. Press the button.
2. Use the or button to select the Registration" option in the display.
3. Press the button.
4. Use the or button to select the Select Base" option in the display.
5. Press the button.
6. Use the or button to select the required base station or Automatic".
7. Press the button. The selection is confirmed.
82
− Multiple Handsets −
13
Multiple Handsets
Up to four more handsets can be registered on the base station. Each handset can only be
registered on one base station at any particular time. If you register the handset on a new
base station, it is automatically deregistered from the old one.
NOTE:
The standardised GAP Standard enables AUDIOLINE handsets and even those
from other manufacturers to be integrated in the telephone system. In the same way,
an AUDIOLINE handset can be registered on base stations from other
manufacturers as long as they comply with the GAP Standard.
The following options are available if two handsets are used:
S
S
S
NOTE:
Internal calls between the handsets (intercom),
External calls can be transferred from the handset,
Incoming external calls are received on all handsets.
If one handset is currently using the outside line, no further external call is possible.
GAP: Generic Access Profile = Standard for the interoperation of handsets and base stations
from other manufacturers.
13.1
Internal calls (intercom function)
As soon as several handsets are registered on a base station, they can be used for internal
calls.
1. Press the button and the internal number of the handset, e.g. 2.
2. The call can be taken on the handset called.
NOTE:
If an external call is received during an internal call, short acoustic signals are
issued and the caller’s number appears in the display, if available.
3. End the internal call by pressing the button.
4. Press the button to take an external call.
83
− Multiple Handsets −
13.2
Transferring external calls to another handset
If you have taken an external call on a handset, the call can be transferred to another handset.
Press the button and then the internal number of the required handset.
NOTE:
If the handset called does not answer, take the call back by pressing the button.
After the internal call has been taken by the handset called, the following options are available:
1. Consultation / Brokering: You can talk to the party using the other handset and
then return the external caller by pressing the button. You can switch between
the external and internal parties as often as necessary.
2. Transfer call: By pressing the button on the first handset, the external call is
transferred to the handset called.
13.3
Conference calls
An external call can be transferred to another internal handset for a conference call. This
enables two handset users to confer with the external caller at the same time.
1. Establish the required connection to the external caller.
2. Press the button and then the internal number of the required, second handset.
3. When the second, internal handset user has taken the call, press the button for
2 seconds and all three parties are connected in a conference call.
NOTE:
During a conference call, press the button to put the external caller on hold.
Press the button to reactivate the conference function.
4. The conference is terminated by one of the handset users ending the call.
84
− Base Station Settings −
14
Base Settings
This menu option relates to base station settings which can be changed, such as ringing
melody, ring volume and system PIN.
14.1
1.
2.
3.
4.
5.
6.
7.
8.
Assigning a ringing melody to the base station
Press the button.
Use the or button to select the Base settings" option in the display.
Press the button. Several options appear in the display.
Use the or button to select the Base Ringtone" option.
Press the button. Several melodies appear in the display for selection.
Use the or button to select the required melody.
Press the button. The assignment is confirmed in the display.
Press the button as often as necessary to reset the handset to standby mode.
1.
2.
3.
4.
5.
6.
7.
8.
Setting the base station ring volume
Press the button.
Use the or button to select the Base settings" option in the display.
Press the button. Several options appear in the display.
Use the or button to select the Base Volume" option.
Press the button.
Use the or button to select the required ring volume.
Press the button. The assignment is confirmed in the display.
Press the button as often as necessary to reset the handset to standby mode.
14.2
14.3
Activating/Deactivating handset priority
This function enables you to define whether all the registered handsets should ring in the
event of an incoming call or one specific handset with priority should initially ring.
1. Press the button.
2. Use the or button to select the Base settings" option in the display.
3. Press the button. Several options appear in the display.
4. Use the or button to select the Handset Priority" option.
5. Press the button. Several options appear in the display.
6. Select the Select Handset" option.
7. Press the button. Select the required handset.
8. Press the button. Several options appear in the display. On selecting the
Rings 4" option, for example, the handset assigned priority rings four times before
the other handsets start to ring.
9. Select an option and press the button. The assignment is confirmed in the
display.
10. Press the button to move back one menu level at a time.
NOTE:
If you want all the handsets to ring simultaneously, select the All Handsets" option in
Step 6, press the button and exit from the setting.
85
− Base Station Settings −
14.4
Setting the recall time
Two recall times are available for selection, Recall 1" (100 ms) or Recall 2" (300 ms). A recall
time of 100 ms is required for operation in private branch exchanges. The T−Net provided by
Deutsche Telekom, for example, operates with a recall time of 300 ms.
1. Press the button.
2. Use the or button to select the Base settings" option in the display.
3. Press the button. Several options appear in the display.
4. Use the or button to select the Recall Mode" option.
5. Press the button. Two recall times appear in the display for selection.
6. Use the or button to select recall time Recall 1" (100 ms ) or
Recall 2" (300 ms).
7. Press the button. The assignment is confirmed in the display.
8. Press the button to move back one menu level at a time.
14.5
Changing the system PIN
1.
2.
3.
4.
5.
6.
7.
8.
9.
10.
11.
12.
NOTE:
86
Press the button.
Use the or button to select the Base settings" option in the display.
Press the button. Several options appear in the display.
Use the or button to select the System PIN" option.
Press the button. The message Enter old PIN" appears in the display.
Enter the old PIN (default setting: 0000). A *" appears in the display instead of the
number actually entered. If you enter an incorrect digit, delete it by pressing the button.
When the old PIN has been correctly entered, press the button. The message
Enter new PIN" appears.
Enter a new PIN (max. 8 digits possible).
Press the button. The message Confirm new PIN" appears.
Enter the new PIN once again.
Press the button. The assignment is confirmed in the display.
Press the button to move back one menu level at a time.
If you forget your PIN code, it can only be reset with the aid of our Service Hotline.
For information on our Service−Hotline, please refer to the back cover of the
operating manual.
− Time Settings −
15
Time Settings
The 24−hour clock with integrated alarm function can be used to ensure you don’t miss any
appointments.
15.1
Setting the time and date
1. Press the button.
2. Use the or button to select the Time settings" option in the display.
3. Press the button.
4. Use the or button to select the Set Date and Time" option in the display.
5. Press the button. Enter the date using the digit keys.
6. Press the button. Enter the time using the digit keys.
7. Press the button. The data entered is stored.
8. Press the button to move back one menu level at a time.
NOTE:
15.2
1.
2.
3.
4.
5.
6.
7.
8.
9.
15.3
1.
2.
3.
4.
5.
6.
7.
8.
9.
10.
NOTE:
The time and date are cleared in the event of a power failure or disconnection from
the power supply.
Setting the alarm tone
Press the button.
Use the or button to select the Time settings" option in the display.
Press the button.
Use the or button to select the Alarm" option in the display.
Press the button.
Use the or button to select the Set Alarm Tone" option in the display.
Press the button.
Use the or button to select the required alarm tone.
Press the button. The alarm tone is stored.
Entering the alarm time (ON/OFF)
Press the button.
Use the or button to select the Time settings" option in the display.
Press the button.
Use the or button to select the Alarm" option in the display.
Press the button.
Use the or button to select the On/Off" option in the display.
Press the button.
Use the or button to select On Once", in which case the alarm occurs once, or
On Daily", whereby the alarm occurs at the same time each day.
Press the button. Enter the time for the alarm.
Press the button. The data entered is stored.
After entering the alarm time, the alarm function is activated. The icon appears in
the display beside the time.
To deactivate the alarm function, select the Off" option in Step 8.
11. Press the button to move back one menu level at a time.
87
− Troubleshooting −
16
Troubleshooting
Should problems arise with the telephone, refer to the following information. In the case of
technical problems, contact our Hotline, tel. 0180 5 00 13 88 (Telekom costs at time of going to
print: 12 ct/min) .
In the case of claims under the terms of guarantee, contact your sales outlet. There is a
2 year period of guarantee.
Faults
Corrective measures
Nothing appears in the
display
−
−
Handset is not switched on.
Batteries are empty or defective.
The caller’s number is not
displayed despite CLIP
function
−
Caller has not enabled the number transfer by the telephone network provider.
No connection to base
station possible
−
Check that the handset has been registered on the base
station with the correct PIN.
No telephone calls
possible
−
−
−
The telephone line is not connected properly or is defective.
Only use the telephone connection cable supplied.
Test whether the telephone connection is in order by using
another telephone.
The power adaptor plug is not plugged in or there is a complete power failure.
Batteries are empty or defective.
The handset is too far from the base station.
Connection is disturbed or
cut off
−
−
The handset is too far from the base station.
The base station is in an unsuitable location.
The charging control lamp
does not light up
−
Place the handset correctly in the base station, clean the
contact surfaces on the handset and the base station with a
soft, dry cloth.
The battery icon flashes in −
the display after a few
hours
Place the handset in the base station for 14 hours. If this
does not help, replace the rechargeable standard batteries.
Display is dark
−
Caused by direct sunlight, allow handset to cool down.
SMS message cannot be
sent
−
Check the SMS centres have been entered correctly. Ask
your telephone network provider.
Your telephone is integrated in a PABX system.
Request the telephone network provider to activate the
SMS services.
−
−
−
−
88
− Important Information −
17
Important Information
17.1
Technical data
Feature
Value
Standard
DECT−GAP
Power supply
Base station, 220/230 V, 50 Hz
Range (outdoors/indoors)
300 m / 50 m
Standby
Up to 85 h
Max. talk time
Up to 10 h
Rechargeable standard batteries
2 x AAA (1.2V / 750 mAh)
Dialling method
Tone dialling method (DTMF)
Permissible ambient temperature
10°C to 30°C
Permissible relative humidity
20% to 75%
Recall times
100 ms or 300 ms
DECT: Digital European Cordless Telephone = Standard for cordless telephones.
GAP: Generic Access Profile = Standard for the interoperation of handsets and base stations
from other manufacturers.
17.2
Replacing the telephone connection cable
If you need to replace the telephone cable, ensure to purchase a corresponding one from your
dealer which has an identical pin assignment (see below).
F−Codierung − IMPORT Standard
TAE−F
4
3
5 2
6 1
1
2
3
4
5
6
Rj11 6/2
1
2
3
4
5
6
1 2 34 5 6
89
− Important Information −
17.3
Guarantee
AUDIOLINE equipment is produced and tested according to the latest production methods.
The implementation of carefully chosen materials and highly developed technologies ensure
trouble−free functioning and a long service life. The terms of guarantee do not apply where the
cause of equipment malfunction is the fault of the telephone network operator or any
interposed private branch extension system. The terms of guarantee do not apply to the
standard batteries or power packs used in the products. The period of guarantee is 24 months
from the date of purchase.
All deficiencies resulting from material or production faults which occur during the period of
guarantee will be eliminated free of charge. Rights to claims under the terms of guarantee are
annulled following intervention by the purchaser or third parties. Damage caused as a result of
improper handling or operation, incorrect positioning or storing, improper connection or
installation, Acts of God or other external influence are not covered by the terms of guarantee.
In the case of complaints, we reserve the right to repair or replace defect parts or provide a
replacement device. Replacement parts or devices become our property. Rights to
compensation in the case of damage are excluded where there is no evidence of intent or
gross negligence by the manufacturer.
If your device shows signs of defect during the period of guarantee, please return it to the
sales outlet in which you purchased the AUDIOLINE device together with the purchase
receipt. All rights to claims under the terms of guarantee in accordance with this agreement
must be asserted exclusively with regard to your sales outlet. Two years after the purchase
and transfer of our products, claims under the terms of guarantee can no longer be asserted.
18
Declaration of Conformity
This device fulfils the requirements stipulated in the EU directive:
1999/5/EU directive on radio equipment and telecommunications terminal equipment and the
mutual recognition of their conformity. Conformity with the above mentioned directive is
confirmed by the CE symbol on the device.
To view the complete Declaration of Conformity, please refer to the free download available on
our web site www.audioline.de.
90
Important Notes on the Guarantee
19
Important Notes on the Guarantee
The period of guarantee for the AUDIOLINE product begins on the date of purchase. Rights to
claims under the terms of guarantee relate to deficiencies resulting from material or production
faults. Rights to claims under the terms of guarantee are annulled following intervention by the
purchaser or third parties. Damage caused as a result of improper handling or operation,
normal wear and tear, incorrect positioning or storing, improper connection or installation, Acts
of God or other external influence are not covered by the terms of guarantee.
CLAIMS UNDER THE TERMS OF GUARANTEE MAY ONLY BE
ASSERTED TO THE RETAILER WHERE THE EQUIPMENT WAS
PURCHASED, WHEREBY THE PURCHASE RECEIPT MUST ALSO BE
SUBMITTED.
TO PREVENT UNNECESSARY LONG DELAYS, PLEASE DO NOT
SEND EQUIPMENT UNDER COMPLAINT TO OUR OFFICE ADDRESS.
IN THE CASE OF QUESTIONS CONCERNING OPERATION OR THE
TERMS OF GUARANTEE, PLEASE REFER TO THE OPERATING
MANUAL OR CONTACT OUR HOTLINE:
0180 500 13 88 (Telekom cost at time of going to print: 12 ct/min)
AUDIOLINE GmbH
Neuss
Service Hotline 0180 500 13 88
(Telekom cost at time of going to print: 12 ct/min)
Internet: www.audioline.de − E−mail: [email protected]
91
Wichtige Garantiehinweise
Die Garantiezeit für Ihr AUDIOLINE − Produkt beginnt mit dem Kaufdatum. Ein Garantieanspruch
besteht bei Mängeln, die auf Material− oder Herstellungsfehler zurückzuführen sind. Der
Garantieanspruch erlischt bei Eingriffen durch den Käufer oder durch Dritte. Schäden, die durch
unsachgemäße Behandlung oder Bedienung, natürliche Abnutzung, durch falsches Aufstellen
oder Aufbewahren, durch unsachgemäßen Anschluss oder Installation sowie durch höhere Gewalt
oder sonstige äußere Einflüsse entstehen, fallen nicht unter die Garantieleistung.
BITTE WENDEN SIE SICH IM GARANTIEFALL AUSSCHLIESSLICH AN DEN
HÄNDLER, BEI DEM SIE DAS GERÄT GEKAUFT HABEN, UND VERGESSEN SIE
NICHT, DEN KAUFBELEG VORZULEGEN.
UM UNNÖTIG LANGE WARTEZEITEN ZU VERMEIDEN, SENDEN SIE
REKLAMATIONSGERÄTE BITTE NICHT AN UNSERE BÜROADRESSE.
BEI FRAGEN ZUR BEDIENUNG UND GARANTIELEISTUNG LESEN SIE BITTE DIE
BEDIENUNGSANLEITUNG ODER WENDEN SIE SICH AN UNSERE HOTLINE:
0180 500 13 88 (Kosten Telekom bei Drucklegung: 12ct/min)
AUDIOLINE GmbH
Neuss
Service Hotline 0180 500 13 88
(Kosten Telekom bei Drucklegung: 12ct/min)
Internet: www.audioline.de − E−mail: [email protected]
Version 1.1 − 25.05.2005