1
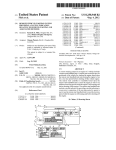
Installation and Operating Instructions
METTLER TOLEDO
AM/PM & AT/MT MiniMettler option “11132510”
for Excellence balances
ww
w.m
t.com
XS20
5 Du
al Ra
nge
F
MET
TLER
TOLE
DO
F
Contents
2
Contents
1
Introduction .................................................................................................. 3
2
Interface description and installation ........................................................... 4
2.1
Items delivered ............................................................................................................. 4
2.2
Description of the MiniMettler interface ........................................................................... 4
2.3
Installation of the MiniMettler interface ........................................................................... 5
3
Interface and Application settings ................................................................ 6
3.1
Calling up the configuration menu in Option ................................................................... 6
3.2
Configuring and activating MM connection in Host ......................................................... 7
3.2
Configuring and activating MM connection in Printer (only the data output for Dynamic
Weighing application) ................................................................................................. 8
4
The MiniMettler interface ............................................................................. 9
4.1
Differences between the original interface and the MiniMettler optional interface .................. 9
4.2
AM/PM balance supported commands ......................................................................... 10
4.3
AT/MT balance supported commands ........................................................................... 10
5
Appendix .................................................................................................... 11
5.1
Comparison between AM/PM and AM/PM optional interface commands .......................... 11
5.2
Comparison between AT/MT and AT/MT optional interface commands .............................. 12
5.3
Parameters ................................................................................................................ 14
5.4
Technical Data ........................................................................................................... 14
Section 1: Introduction
3
1
Introduction
Before we begin
Thank you for choosing the METTLER TOLEDO MiniMettler option. This interface enables a backwards
compatibility of METTLER TOLEDO Excellence balances to AM/PM and AT/MT balances, using the
MiniMettler interface and commands.
Please read these installation and operating instructions right through before you start using the MiniMettler
interface option, so you know how to operate the interface safely and correctly and can make use of all
its capabilities.
Please observe the following:
• Some of the commands had to be modified to suit the new capabilities of the balance. Other commands
have become completely ineffective. Please refer to the sections 5.1 and 5.2.
• The Excellence balance must have Software version V3.00 or higher. You can download the latest
balance Software at: www.mt.com/balance-support.
• Before you work with the MiniMettler Option you must have read through and understood these
installation and operating instructions.
• You must observe and follow these installation and operating instructions.
• It is not allowed to operate balances with the MiniMettler option in hazardous or wet environments.
• The MiniMettler Option is mounted into the balance and is powered by the balance.
• The MiniMettler option does not contain any parts which can be serviced, repaired, or replaced by the
user.
• If the MiniMettler option is not working correctly, please contact your local METTLER TOLEDO dealer.
• If you still have questions which the documentation does not answer, or only partially, please contact
your local METTLER TOLEDO dealer who will be pleased to assist you.
• MiniMettler option does not work in standalone-weighing platforms (balances without a terminal).
• The MM option is not 100% functional compatible with AM/PM & AT/MT balances. For the details of
the functional limitation, please refer 4.1 “Difference between the original interface and the MiniMettler
optional interface”
Section 2: Interface description and installation
4
2
Interface description and installation
2.1
Items delivered
The standard delivery comprises the following items:
• MiniMettler interface option
• Installation and operating instructions
Items not included in the standard delivery, but available as accessories are:
• MiniMettler – RS232 cable 9-Pin or 25-Pin for connecting the interface to a device with RS232
connection (See accessories).
• MiniMettler – CL cable 5-Pin for connecting the interface to a device with current loop connection
(See accessories).
2.2
Description of the MiniMettler interface
Interface overview
MiniMettler socket
View from
front
ReZero connector (for AT/MT only)
DATA I/O connector
Pin
Function
Pin
Function
1
2
1+2
3
4
5
10
11
14
close door IN
open door IN
open & close door alternately IN
door is open OUT
door is closed OUT
Tare command IN
not connected
GND
Transfer command CL or RS232 IN
2
3
4
7
9
10
12
13
15
11+14
DATA IN, RS232C
Handshake IN
Handshake OUT
Rx+, CL
Rx−, CL
Tx−, CL
DATA OUT, RS232C
GND
Tx+, CL
“Print/Transfer”, IN
Section 2: Interface description and installation
5
2.3
Installation of the MiniMettler interface
Before installing the MiniMettler interface, the balance must be
removed from the power, by taking the power cable out of the
AC socket (1).
P
r
e
w
o
ly
p
p
su
1
Remove the cover of the interface slot, using a screwdriver (2).
2
The MiniMettler interface can now be installed by sliding it into the
open slot (3).
Use the screws of the cover plate, to fixate the interface.
2C
23
RS
3
Connect the balance back to the power (4).
r
e
w
o
P
ly
p
p
su
4
Section 3: Interface and Application settings
6
3
Interface and Application settings
Before you can establish a connection , you must configure the MM option in the balance. The MM option
is configured using the system setting “Option” of the balance software. This section gives an overview
of all parameters. Information about each parameter is found in section 5.3.
3.1
Calling up the configuration menu in Option
D
C
Press button «D» to select the application menu or press button
«C» to select the user settings menu.
Then click on «System», to call up the system settings.
From system settings, click on «Option». Then configuration menu
(Global Settings) is displayed. It includes the following settings:
Default setting: “MM-Option”
2400 baud, 7 bit/even, Handshake None, Sendmode Stable, end
of line character <CR><LF>, Instruction Set AM/PM, Status
Message Asterisk (*)
Status Message is not relevant with Host setting, but only with
Printer setting in “Dynamic Weighing application”. (See section
3.3)
Section 3: Interface and Application settings
7
Once MM option was selected in “Host” or “Printer” in Peripherals
(see section 3.2 and 3.3), those parameters cannot be changed.
3.2
Configuring and activating MM connection in Host
Overview
The MiniMettler parameters listed are only available with Host, all other peripherals are not supported
(Except Printer in the “Dynamic Weighing Application”. See section 3.3).
D
C
Press «Host».
Select «MM Option».
Section 3: Interface and Application settings
8
3.2
Configuring and activating MM connection in Printer (only the data output
for Dynamic Weighing application)
Overview
If you need PM backward compatibility with XP/XS balance in Dynamic Weighing application, the
following configuration in Printer is necessary.
Status Message
In the Global Settings (See section 3.1), chose «Asterisk (*)» or
«Space», according to the current system requirement.
Press «Printer»
Select «MM Option».
Section 4: The MiniMettler interface
9
4
The MiniMettler interface
4.1
Differences between the original interface and the MiniMettler optional
interface
The technical differences between the orginal interface and the optional AM/PM interface for Excellence
balances are listed below. Detailed comparison can be found in sections 5.1 and 5.2.
• No galvanic isolation of the signals (applies to both current loop and RS232 signals).
• No connector for auxilliary displays or GM54 output mode.
• No status indicators (wave symbol, drop symbol) provided at the terminal.
• The Excellence terminals are not operating with the keys alone, but mainly via the touch screen.
• Processes of long duration can only be cancelled at the balance terminal.
• Commands continue to be accepted during the balance configuration and adjustment (calibration)
processes.
• The stability detector can no longer be set manually, but is automatically optimized for every weighing
process.
• Recognition of a break condition does not cause any change in the balance settings, i.e. a break does
not cause the balance to be reset into the condition it was in before it was switched on.
• The “vibration adapter” function (wave symbol) is no longer provided. Balance measurement quality
has now been defined, so that the “MI” command, which originally related to the former “vibration
adapter”, now applies to measurement quality.
• The “weighing process adapter” function (drop symbol) is no longer provided. Balance weighing mode
has now been defined, so that the “ML” command, which originally related to the former “weighing
process adapter”, now applies to weighing mode.
• DataPac-M is not supported
• GM devices are not supported
• The changes mean that the following commands now have no effect. They continue to be accepted by
the optional PC board‘s software without an error message being given, but not all of them elicit a
response (as was the case with the original interface). They are therefore not documented any further
in these instructions:
AM/PM: MA, W
AT/MT:
CFE, CFG, DFR, CFW, DST, DSX, MD, RK, RX, W, @, ‘.’
• The following commands have not been changed, and can therefore be used exactly as before:
AM/PM: M, B, MZ, S, SI, SIR, SNR, SR, T, TI
AT/MT:
CA, CFD, EC, EOL, HS, MT, S, SI, SIR, SNR, <crlf>, AD, R0, R1, B, M, MZ, T
• All other commands have been adapted as far as possible to suit the new capabilities offered by Excellence
balances. When using them, these operating instructions must be consulted to see exactly whether the
same command arguments are valid and what the significance of the balance‘s responses is:
AM/PM: CA, D, DX, DY, ID, MI, ML, MS, U
AT/MT:
CFG, CFP, D, DB, DX, DY, RG, U, US, UX, WI, MI, ML, MS, ID, IDX, ?
Section 4: The MiniMettler interface
10
4.2
AM/PM balance supported commands
B
Base
MZ
AutoZero
CA
Calibration
S
Send Stable Result
D
Display Text
SI
Send Immediate Result
DX
Control DeltaTrac Display
SIR
Send Continuously
DY
Weighing-in
SNR
Send Automatically
ID
Balance Identification
SR
Send Automatically with Threshold
M
Mode Reset
T
Tare
MA
Switching on/off weighing-in aid
TI
Immediate taring
MI
Weighing quality
U
Select Unit or Divisor
ML
Weighing Mode
W
Controlling peripherals from the balance
MS
Stability detection
4.3
AT/MT balance supported commands
AD
AutoDoor
MS
Stability Detector (ASD)
B
Base
MT
Serial Transmission Mode
CA
Calibration
MZ
AutoZero
CFD
Set Default Configuration
RG
Range Select
CFP
Print Configuration
Rn
Keyboard Control (Global)
D
Display Text
S
Send Stable Result
DB
Generate Beep Sound
SI
Send Immediate Result
DX
Control DeltaTrac Display
SIR
Send Continuously
DY
Weighing-in
SNR
Send Automatically
EC
Command Acknowledge
SR
Send Automatically with Threshold
EOL
End-of-Line Mode
T
Tare
HS
Handshake Mode
U
Select Unit or Divisor
ID
Balance Identification
US
Select Active Unit
IDX
User Identification
UX
Redefine Units
M
Mode Reset
WI
Control Draft Shield
MI
Vibration Adapter (“Wave”)
?
Help
ML
Weighing Process Adapter (“Drop”)
<crlf> Repeat Last Valid Command
Section 6: Appendix
11
5
Appendix
5.1
Comparison between AM/PM and AM/PM optional interface commands
AM/PM Command name
Calibration
Send Stable
Send Immediate
Send Immediate and repeat
Send Next and Repeat
Send and Repeat
Display Text
DeltaTrac
Weigh in with DeltaTrac
Unit
Redefine Units
Write Output
Base
Resetting to default setting
Off/on switching
of weighing-in aid
Vibration adapter
Weighing Process Adapter
ASD
Auto Zero
Tare
Immediate Taring
Identification
AM/PM remarks
CA
S
SI
SIR
SNR
SR [threshold]
D text;unit;symbol
DX p1
DX p1 p2
DX p1 p2 T
DX p1-p2
DX p1-p2 T
DX T
DX
DY
DY Nom pT mT
U
Ux
W For GM54 and LV10
B_x x = value
B
M
MA
XP/XS with MM remarks
CA
S
SI
SIR
SNR
SR [threshold]
D text no symbols or units
DX p1
DX p1 p2
DX p1 p2 T
DX p1-p2
DX p1-p2 T
XP/XS MT-SICS remarks
C3 or C2
S
SI
SIR
SNR
SR [threshold]
D “text”
P122 0 p1 p1
P122 0 p1 p2
P122 1 p1 p2
P123 0 p1 p2
P123 1 p1 p2
DX
DY
DY Nom pT mT
U
Ux
P120
P120
P121 and M21
M21
M22 and M21
B_x x = value
B
M
TA_x_g
TAC
@ only M01,M02,M03 & M29
MI back to default setting
MI 1 stable
MI 2 normal
MI 3 unstable
ML back to default setting
ML 1 dosing
ML 2 universal
ML 3 absolute
ML 4 animal weighing
MS back to default setting
MS 1 coarse
MS 2 default
MS 3 fine
MS 4 very fine
MZ back to default setting
MZ 0 off
MZ 1 on
T
TI
ID example for answer:
STANDARD V10.50.00*
TYPE: PM 4800
INR: k 24142
MI back to default setting
MI 1 stable
MI 2 normal
MI 3 unstable
ML back to default setting
ML 1 dosing
ML 2 universal
ML 3 absolute
M02
M02
M02
M02
M01
M01
M01
M01
MS back to default setting
MS 1 coarse
MS 2 default
MS 3 fine
MS 4 very fine
MZ back to default setting
MZ 0 off
MZ 1 on
T
TI
ID example for answer:
MM-Option XP/XS V3.00
TYPE: XP6002SDR
INR: 1119292911
M29 2 back to default setting
M29 0 very fast
M29 2 reliable & fast
M29 3 reliable
M29 4 very reliable
M03 1 back to default setting
M03 0 off
M03 1 on
Z Zero
ZI Immediate Zero
I4 and I11
2 back to default setting
1 stable
2 standard
3 unstable
0 back to default setting
1 dosing
0 universal
3 check weighing
The information contained in this table has been collected to the best of our knowledge and represents the latest update. In
addition, Mettler-Toledo GmbH will in no event be liable for consequences of any kind arising out of, or in connection with,
the use of the this table.
* The MM option covers only the functionality of “STANDARD V10.50.00” and has some functional limitation described in
4.1 “Difference between the original interface and the MiniMettler optional interface”
Section 6: Appendix
12
5.2
Comparison between AT/MT and AT/MT optional interface commands
AT/MT versus XP with MiniMettler Option interface commands
AT/MT Command name
AT/MT remarks
XP with MM remarks
XP/XS MT-SICS remarks
Autodoor
AD_0 off
AD_1 off
AD_? current setting
B_x x = value
B
CA start
CA_0 off
CA_1 on
CA_U external
CA_? current setting
CA_S status
CA_T test
CFD
AD_0 off
AD_1 off
AD_? current setting
B_x x = value
B
CA start
CA_0 off
CA_1 on
CA_U external
CA_? current setting
M07_0 off
M07_1 on
Base
Calibration
Configuration Default
Store configuration
Configuration access
Configuration Print
Configuration Read
Configuration Write
Display Text
Beep
Identification
Extended identification
Immediate Taring
Reset mode
CFE
CFG
CFP
CFR
CFW
D text;unit;symbol
DB
DB_1
DB_2
DB_3
DB_C
DB_E
DB <Hex7>
DB_0
DST
DSX
DX p 1
DX p 1 p2
DX p 1 p2 T
DX p 1-p2
DX p 1-p2 T
DX T
DX C
DX
DY
DY Nom p T mT
DYB
EC
EOL_CR
EOL_CRLF
EOL_? current setting
HS_hard
HS_soft
HS_Pause
HS_CL
HS_off
HS_? current setting
ID
IDX
TI
M
Readout increment
MD
Display status
Display select
DeltaTrac
Weigh in with DeltaTrac
Command Acknowledge
End of Line mode
Handshake mode
CA_T test
CFD not the same
TA_x_g
TAC
C3 start
C0_0_0 off
C0_1_0 on
C0_0_1 external
C0 current setting
TST3 test
<seeML, MI, MZ, AD, MS & CA
defaults> not the same
auto saved
always allowed (1)
CFP not the same
D text no symbols or units
DB
DB_1 not the same
DB_2 not the same
DB_3 not the same
DB_C not the same
DB_E not the same
DB <Hex7> not the same
D "text"
M12_0 not the same
M12_2 not the same
M12_0 (2x) not the same
M12_2, M12_3 not the same
M12_0 not the same
M12_0 not the same
M12_0 not the same
n/a = no icons
n/a = no icons
DX
DX
DX
DX
DX
P122
P122
P122
P123
P123
p1
p 1 p2
p 1 p2 T
p 1-p2
p 1-p2 T
DX C
DX
DY
DY Nom p T mT
DY and B 2 commands
EC
EOL_CR
EOL_CRLF
EOL_? current setting
HS_hard
HS_soft
HS_Pause
HS_CL
HS_off
HS_? current setting
ID not the same
IDX
TI 10 instead 7 characters
M
0
0
1
0
1
p1
p1
p1
p1
p1
p1
p2
p2
p2
p2
P120
P120
P120
P121 and M21
P121 and TA
I11
I10 is balance ID
ZI Immediate Zero
<see, ML,MI, MZ, MS & MT
defaults> not the same
Section 6: Appendix
13
AT/MT Command name
AT/MT remarks
MI_1 stable
MI_2 normal
MI_3 unstable
MI default
MI_? current setting
Weighing Process Adapter
ML_0 no adaption
ML_1 dosing
ML_2 universal
ML_3 absolute
ML default
MI_? current setting
ASD
MS_0 ASD off
MS_1 ASD 1
MS_2 ASD 2
MS_3 ASD 3
MS_4 ASD 4
MS_5 ASD 5
MS_6 ASD 6
MS_7 ASD 7
MS default
MS_? current setting
Transmission mode
MT_Stb
MT_all
MT_Auto
MT_Cont
MT default
MT_? current setting
Auto Zero
MZ_0 off
MZ_1 on
MZ default
MZ_? current setting
Range Select
RG_F 1d
RG_C 10d
RG toggle
RG_? current setting
Restrict Keyboard
RK_xxxxxxxx
Remote
R0/R1
Restrict external Switches
RK_xxxxxxxx
Send Stable
S
Send immediate
SI
Send immediate and repeat SIR
Send Next and repeat
SNR
Send and repeat
SR[threshold]
Tare
T
Unit
U
U<dec>
Vibration adapter
Unit switch
Redefine Units
Redefine Units
Write Output
US 1 activate unit 1
US 2 activate unit 2
US toggle
US_? current setting
UX
UX [U1][;U2] define unit1
and/or unit2
UX toggle
UX_? current setting
W For GM54 and LV10
XP with MM remarks
XP/XS MT-SICS remarks
MI_1 stable
MI_1 normal
MI_1 unstable
MI default
MI_? current setting
ML_0 no adaption
ML_1 dosing
ML_2 universal
ML_3 absolute
ML default
ML_? current setting
MS_0 ASD off
MS_1 ASD 1
MS_2 ASD 2
MS_3 ASD 3
MS_4 ASD 4
MS_5 ASD 5
MS_6 ASD 6
MS_7 ASD 7
MS default
MS_? current setting
MT_Stb
MT_all
MT_Auto
MT_Cont
MT default
MT_? current setting
MZ_0 off
MZ_1 on
MZ default
MZ_? current setting
RG_F 1d
RG_C 10d
RG toggle
RG_? current setting
M02_1 stable
M02_2 standard
M02_3 unstable
M02_2
M02 current setting
M01_2 sensor mode
M01_1 dosing
M01_0 universal
M01_3 checkweighing
M01_0
M01 current setting
M29_0 very fast
M29_0 very fast
M29_1 fast
M29_2 reliable + fast
M29_2 reliable + fast
M29_3 reliable
M29_4 very reliable
M29_4 very reliable
M29_2
M29 current setting
K, S
K, SI
K, SNR
K, SIR
K, S
R0/R1
K4/K2
S
SI
SIR
SNR
SR[threshold]
T
U
U<dec>
S
SI
SIR
SNR
SR[threshold]
Z Zero
M21
M21, M22 Important: Custom
Unit1 has to be activated
M21_1_x
M21_1_x
M21_1_x
US 1 activate unit 1
US 2 activate unit 2
US toggle
US_? current setting
UX
UX [U1][;U2] define unit1
and/or unit2
UX toggle
UX_? current setting
M03_0 off
M03_1 on
M03_1
M03 current setting
M23_0 1d
M23_110d
M23 current setting
M21
M21_1_x
M21_1_x
The MM option has some functional limitation described in 4.1 “Difference between the original interface and the MiniMettler
optional interface”
Section 6: Appendix
14
AT/MT Command name
AT/MT remarks
XP with MM remarks
XP/XS MT-SICS remarks
Draft shield,
controlling auto door
WI_0[_R/L] opens the
doors (to the
right/left)
WI_1 close the doors
WI_D
WI_DF
WI_DX
WI_E
WI_EF
WI_EX
WI toggle
WI_? current status
@
? overview of all commands
.
<crtf>
WI_0[_R/L] opens the
doors (to the
right/left)
WI_1 close the doors
WS_1 opens the doors
WI toggle
WI_? current status
WS
Break
Help
Cancel
Repeat command
WS_0
WS
? overview of all commands
<crtf>
The information contained in this table has been collected to the best of our knowledge and represents the latest update. In
addition, Mettler-Toledo GmbH will in no event be liable for consequences of any kind arising out of, or in connection with,
the use of the this table.
5.3
Parameters
MiniMettler
Baudrate
Bit/Parity
Factory setting
2400
7b-even
Handshake
None
Sendmode
End-of-Line
Instruction Set
Status Message
Stable
<CR><LF>
AM/PM
Asterisk (*)
5.4
Setting range
600, 1200, 2400, 4800, 9600
7b-even, 7b-odd,
7b-mark (no parity / 2 stopbits),
8b-space (no parity / 1 stopbit)
None (Pause = 0),
RTS/CTS (= Hardware Handshake),
Xon/Xoff (Software Handshake),
Pause 1,
CL (Syn/Ack) (Mettler Toledo Handshake)
Stable, All, Auto, Continues
<CR><LF>, <CR>
AM/PM, AT/MT
Asterisk (*), Space
Technical Data
MiniMettler interface Option 15-Pin Data I/O connector (no GM bus)
Maximum 6 updates/second of AM/PM and 4 for AT/MT commands
Universal interface Option for Excellence and Excellence Plus balances
Possible applications
Replacement of AM/PM & AT/MT balances in systems and applications,
using AM/PM & AT/MT interface commands (DataPac is not supported)
Part number
AM/PM MiniMettler Option for Excellence balances
11132510
Accessories
MiniMettler-RS232 cable, 9-Pin female, 1.5 m
210493
MiniMettler-RS232 cable, 25-Pin female, 1.5 m
210491
MiniMettler-CL cable, 9-Pin female, 1.5 m
47936
leer
To protect your METTLER TOLEDO product’s future:
METTLER TOLEDO Service assures the quality, measuring accuracy
and preservation of value of all METTLER TOLEDO products for
years to come.
Please send for full details about our attractive terms of service.
Thank you.
*P11780578*
Subject to technical changes and to changes in the
accessories supplied with the instruments.
© Mettler-Toledo GmbH 2006
11780578B Printed in Switzerland 0603/2.12
Mettler-Toledo GmbH, Laboratory & Weighing Technologies, CH-8606 Greifensee, Switzerland
Phone +41-44-944 22 11, Fax +41-44-944 30 60, Internet: http://www.mt.com