1
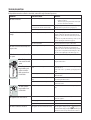
B11. HOT MILK button: to deliver a cup of milk (When in the
settings menu, press to scroll forwards)
button: to deliver steam
B12:
button: to make 2 cups of coffee with the
B13.
settings displayed
Please note:
Keep these instructions
If the appliance is passed to other persons, they must also be
provided with these instructions.
DESCRIPTION
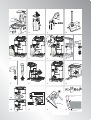
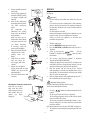
Description of the milk container
(page 3 - C )
C1. Milk container lid
C2. Froth adjustment dial
C3. CLEAN button
C4. Frothed milk spout (adjustable)
C5. Milk carafe
C6. Milk intake tube
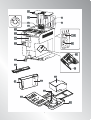
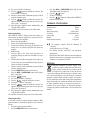
Description of the appliance
(page 3 - A )
A1. Beans container lid
A2. Top lid
A3. Grinding adjustment dial
A4. Beans container
A5. Pre-ground coffee funnel lid with pressure lock
A6. Pre-ground coffee funnel
A7. Main switch
A8. Socket for power cable connector
A9. Infuser
A10. Infuser door
A11. Cup warmer shelf
A12. Control panel
A13. Coffee spout (adjustable height)
A14. Hot water and steam nozzle
A15. Condensate tray
A16. Water tank lid
A17. Water tank
A18. Water filter
A19. Cup tray
A20. Drip tray water level indicator
A21. Drip tray
A22. Coffee grounds container
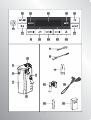
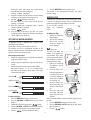
Description of the accessories
(page 2 - D )
D1. Pre-ground coffee measure
D2. Cleaning brush
A18. Water filter (certain models only)
D3. Cappuccino maker/hot water spout
D4. Power cable
D5. “Total Hardness Test” indicator paper
D6. Descaler
PRELIMINARY CHECKS
Checking the appliance
After removing the packaging, make sure the product is
complete and undamaged and that all accessories are present.
Do not use the appliance if it is visibly damaged.
Contact De’Longhi Customer Experience.
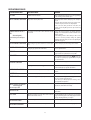
Description of the control panel
(page 2 - B )
A number of buttons on the panel have a double function. This is
indicated in brackets in the description.
button: turns the appliance on and off
B1.
button: to select the coffee quantity
B2.
B3. MENU/ESC button to access the menu or exit from the
selected function
B4. Display: guides the user in using the appliance.
B5.
button: to deliver hot water (When in the settings
menu, press to confirm the selection)
button: to make 1 cup of coffee with the settings
B6.
displayed
aroma selection button: to select the coffee
B7.
taste
B8. CAPPUCCINO button: to deliver a cappuccino
B9. LATTE button: to deliver a latte (milk & coffee) (When in
the settings menu, press to scroll backwards)
B10. FLAT WHITE button: to deliver a flat white (“latte
macchiato”)
Installing the appliance
Important!
When installing the appliance, respect the following safety
warnings:
t 5IFBQQMJBODFHJWFTPòIFBU
After positioning the appliance on the worktop, leave
a space of at least 3 cm between the surfaces of the
appliance and the side and rear walls and at least 15 cm
above the coffee maker.
t 8BUFSQFOFUSBUJOHUIFDPòFFNBLFSDPVMEDBVTFEBNBHF
Do not place the appliance near taps or sinks.
t 5IFBQQMJBODFDPVMECFEBNBHFEJGUIFXBUFSJUDPOUBJOT
freezes.
Do not install the appliance in a room where the
temperature could drop below freezing point.
t "SSBOHFUIFQPXFSDBCMFJOTVDIBXBZUIBUJUDBOOPUCF
damaged by sharp edges or contact with hot surfaces
(e.g. electric hot plates).
8