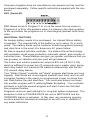
1
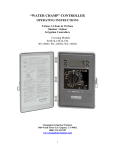
"WATER CHAMP" CONTROLLER
OPERATING INSTRUCTIONS
4 and 6 Zone Indoor & Outdoor
Irrigation Controllers
Covering Models:
R-4, R-6, R-40, R-60
WC-4IN, WC-6IN, WC-4OUT, WC-6OUT,
CHAMPION IRRIGATION PRODUCTS
1460 NAUD STREET LOS ANGELES, CA 90012
1 (800) 33-CHAMP
1
WARNING / CAUTION
1. Before installing your Outdoor Water Champ or Water Champ Professional
sprinkler controller, turn off your breaker/fuse panel to avoid unnecessary
electrical shock. If you have no experience in connecting your electrical
power to your controller, then Champion Irrigation Products strongly
recommends hiring a licensed Electrician or Landscape Contractor to
wire it for you.
2. Before digging any trenches for pipe or wiring, contact your local utility
company for the location of any underground pipes or high voltage power lines.
Failure to do this can cause serious injury and/or property damage. Be safe!
3. When connecting the voltage to our OUTDOOR model Water Champ or
Water Champ Professional controller, be sure the voltage is 110-120 Volts AC
( 220-240 Volts AC on our export model). Connecting the controller to higher
than specified voltage will cause the transformer to overload and burn. Check
your electrical voltage.
4. Champion indoor plug-in transformers cannot be exposed to moisture or
weather. They are for indoor use only. None of our controllers should be
installed under water. Doing this will result in serious electrical shock. Follow
the instructions in booklet.
5. When installing our Indoor Water Champ or Water Champ Professional
controllers, please note that indoor means exactly that, “INDOORS”. Installing
under a patio cover or awning is NOT indoors. Examples of “Indoors” are
garage, basement etc. Installing our indoor unit outdoors will damage the unit
and void the warranty. There is also a possibility of electrical shock. If you
need to install a unit in an outdoor location, then purchase an outdoor model
6. Water Champ and Water Champ Professional controllers are designed to
operate 24Volt automatic sprinkler valves. They are not designed to operate
things like fountains, landscape lighting, garage doors and other things of the
sort. Using this product for anything other than its intended use can cause
damage to the unit or property and will void the warranty.
7. Water Champ and Water Champ Professional controllers have an "Off-Rain"
setting. This setting prevents the controllers from running their program as
scheduled. The unit will not water until the dial is moved from this position.
Landscape damage may occur if the unit is left in the "Off Rain" position during
warm or hot weather or for extended periods. If you would like the controllers
to water as programmed be sure to return the dial to the "All Manual" or
12:00 position.
2
Dear Customer,
The people at Champion Irrigation Products thank you for purchasing this
product. We trust it will give you years of dependable service as it was built
to very high standards. It is technologically state-of-the-art, easy to program,
and a real value. If you should have any questions please call us at (800)
33-CHAMP [800-332-4267]. The "Water Champ" controllers are available in
4 and 6 zone indoor & outdoor models, and have 3 independent programs,
A, B, and C, of which any one can be used for the lawn, one for shrubs, and
one program for a drip system. Among the other features and benefits, the
"Water Champ" Controllers have the following:
*
*
*
*
*
*
*
*
*
*
A lifetime calendar for watering only ODD or EVEN days in the event
of a need to conform to local water restrictions.
OFF/RAIN switch position to stop watering during rainy days.
3 MANUAL RUN options - ALL MANUAL with Program A, then B,
then C; run just Program A or B or C; run an individual zone only.
4 START TIMES for each program for newly seeded lawns, new
sod, or hot weather.
WATER DAYS options allow watering specific days of the week on
SET DAYS, or water on SKIP DAYS skipping from 1 to 30 days.
Add the ODD/EVEN option to water only on odd or even calendar
days if required by local restrictions.
ZONE RUN TIME allows valve run times from 1 minute to 1 hour in
1 minute increments and 1 hour to 12 hours in ten minute incre
ments.
% watering (water budgeting) allows increased (up to 200%) or
decreased (down to 10%) valve run times without reprogramming great for water conservation.
Automatic and internal features include a factory set (default) pro
gram to water every zone daily for 10 minutes starting at 5:00 a.m.
Internal switch (SW2) will allow Program C to be run at the same
time as Programs A or B (drip system application). The RAIN termi
nal will allow a rain sensor shut-off. No fuse is required as the
controller has automatic circuit protection, skips any shorted zone,
and shows shorted zone as a 'bad' zone in the LCD display.
Pushing the s and t arrows together tests all zones for a short. An
internal lithium battery backs up the calendar and memory of your
programs for up to 7 years. The RESET switch allows resetting the
controller back to the factory set default program.
All zone run times count down during the run cycle, and skip days
count down as the day(s) pass.
Controller will operate in auto-run from any position of the rotary dial
except OFF/RAIN.
Your Champion controller provides the convenience of automatic watering
and the flexibility to make the most of our precious water resources. Your
controller was designed to be easy to program and operate. Please refer to
this guide to learn the best way to install and use your controller.
3
TABLE OF CONTENTS
INSTALLATION
Mounting Your Controller
Wiring Your Valves
Wiring Your Controller
Connecting the Transformer (Indoor Models)
Connecting the Transformer (Outdoor Models)
5
5
5
6
6
PROGRAMMING YOUR CONTROLLER
Programs A, B, and C
Setting the Current Calendar
Factory Set/Default Program
Setting a Watering Schedule
Setting Start Times
Setting Watering Days
Setting Zone Run Time
Efficient Run Times
Setting Additional Programs
Important Programming Notes
6
7
7
8
8
8
9
9
10
10
OPERATING YOUR CONTROLLER
Automatic Operation
Manual Operation
11
11
FEATURES
Off/Rain
% Watering/Water Budgeting
Zone Test
Reset Button
11
12
12
12
INTERNAL FEATURES
Rain Sensor
Program Stacking Switch (SW2)
12
13
ADDITIONAL FEATURES
13
PROGRAM MATRIX
14
TROUBLE SHOOTING TIPS
15
4
INSTALLATION
Where to Install Your Indoor Controller
Locate your controller indoors near a standard 110v AC outlet. The
outlet should not be controlled by a switch or share the same circuit
with a garage door opener, electric dryer, or other large appliance or
inductive motor. The location should be protected from moisture and
temperatures exceeding 120o Farenheit.
Mounting Your Controller
Screw one of the supplied #8 screws into a wall at eye level. Leave
1/4" of the screw head extending from the surface. Use an anchor
bolt for drywall or masonry. Slip the buttonhole opening on the back of
the box over the screw head. Open the lower door. Install two more
screws from the front, through the holes at the bottom of the box.
Wiring Your Valves (see fig.1)
Use color-coded 18 gauge (16 or 14 gauge can also be used) plastic
jacketed sprinkler wire to connect the controller to your valves. If you
plan to bury the wire, use a route that will not be disturbed later by
digging. Each valve has two wires. Use one wire for power and one
for common, it doesn't matter which one you use.
Connect the common wires from all the valves to one of the color
coded sprinkler wires (usually the white wire). Connect the other wire
from each valve to a single color coded wire. Use wire nuts or solder
to secure the connections. Protect connections with silicon sealant
or electrical tape.
Wiring Your Controller (see fig.2)
Open the lower door on your controller. Using a small screw driver,
attach the common wire to the terminal marked "COM." Attach the
wire to the left side of the screw for better holding, or wrap the wire
around the screw. Attach the wire for Zone #1 to the terminal marked
"V1". Attach the remaining wires the same way. (Attach only one
valve per terminal.)
5
(Instructions for Pump Start and Master Valve only) Attach one wire
from the pump start relay or master valve to the "MV" terminal, the other
wire to the "COM" terminal. To prevent damaging your pump in the event
the default program turns on, attach a jumper wire from any unused zone
terminal to an operating zone terminal. This way the pump will not operate
against a closed system.
Connecting the Transformer (Indoor Models)
Attach the transformer connector to the two pin circuit board connector. The
connector only fits one way. Be sure the ribs on the transformer connector fit
over the spine on the circuit board connector. DO NOT force the connectors
together. Use one transformer per controller.
Connecting the Transformer (Outdoor Models)
Note: Outdoor Models Have Internal Transformers! Turn off the circuit
breaker for the 110 volt AC circuit the controller will be tapped into. Attach
the black wire to the 110 volt hot lead. Attach the white wire to the 110 volt
neutral lead. Attach the green wire to the ground lead. Use a professional
electrician if you are not comfortable with direct wiring your controller.
UNDERGROUND SPRINKLER SYSTEMS
There are three components of an automatic sprinkler system. The controller
(brain), automatic valves (zones), and the sprinklers. The controller "tells"
the valves when and how long to supply water to the sprinklers. Each valve
controls a group of sprinklers known as a zone. Each valve is connected
to a numbered terminal in the controller marked 1, 2, 3, etc. for the zone
number. The valves operate in numerical order within each program, which
is called a cycle.
Each Program Requires three basic instructions as follows:
*
What days to water - called WATER DAYS
*
What time of day to water - called START TIMES
*
How long to water - called ZONE RUN TIME
PROGRAMMING YOUR CONTROLLER
Programs A, B, & C
Your controller allows you to set three independent programs: A, B, and C.
Each program can have its own set of start times, run times and watering
days. Use these programs to satisfy the different watering needs of your
landscape. For example, you may use program A to water the lawn in the
morning every other day for ten minutes only in each lawn zone. Use
program B for example, to water shrubs on Tuesdays and Saturdays for thirty
minutes only in each shrub zone.
6
Use program C for drip system watering for example, once a week for four
hours and thirty minutes only in each drip zone. (When setting different
programs, be careful to avoid setting a start time for one program that will
begin while another program is still watering unless using SW2 (see page 13).
Erratic operation of the controller may result from overlapping programs.)
Setting the Current Calendar Time, Month, Day, & Year
Start programming your controller by setting the CALENDAR TIME (current
time A.M. or P.M., MONTH [01 = Jan., 02 = Feb., and so on], DAY [day of the
month], and YEAR [00=2000, and so on]).
*
Turn the rotary dial counterclockwise (left) to the TIME position. The
display will read '12:00 A.M.' (for initial setting only). Set the current
time by pushing the s or t button until the correct A.M. or P.M. time
is shown in the LCD display.
*
Turn the dial to MONTH and set the current month. For example, '01'
is January, '02' is February, and '12' is December.
*
Turn the dial to DAY and set the current day of the month, one (1)
through thirty-one (31).
*
Turn the dial to YEAR and set the current year, starting at '00' is the
year 2000 and so on.
The calendar extends for 50 years, going far beyond what is needed, and is
accurate for the life of the controller (including leap years). With the internal
lithium battery, all programs and current time will be retained for up to seven
(7) years or longer even with occasional power interruptions. When the
calendar is set, the current day of the week will have a bracket around it.
[W] for example.
Factory Set/Default Program
Your "Water Champ" Controller is shipped from the factory with a permanent
program for easy programming and as a backup default program. Every
zone has ten (10) minutes run time and is assigned to Program A, scheduled
to water every day at 5:00 A.M. You can program what you want over this
factory set program, but in the event that the AC power is off and the backup
lithium battery (7 to 9 year life) is no longer functioning, this default program
would water your yard as described above once power was restored.
7
Setting a Watering Schedule
Your "Water Champ" controller has programs A, B, and C which allows you to
set three independent programs. Each program can have its' own set of start
times, run times, and watering days. The dial selects the different program
information by setting the PROGRAM switch to the desired program to be set
or altered. Use these programs to satisfy the different watering needs of your
landscape. Determine what you would like to do with Program A. If it is to water
your lawns for example, decide the number of start times needed (generally one
or two), and the duration of watering (generally fifteen minutes or less per zone
unless rotors or impacts are used). The total length of watering time will be
equal to the sum of the watering times for all the operating zones. Watering
should be done very early in the morning to assure adequate water pressure,
less wind dispersal, diminished chance of leaf burn, and reduced evaporation.
Watering at night can promote fungus growth.
Setting Start Times
NOTE: Start times are for programs A, B, & C, not individual zones.
*
Turn the rotary dial to START TIMES position 1.
*
*
Move the PROGRAM switch left to the 'A' position.
To set START TIME 1 (factory set/default is set at 5:00 AM, suggest
ed setting: between 4:00 A.M. and 6:00 A.M.) push the s (to advance)
or t (to recede) buttons to change the displayed starting time.
*
Use the same procedure to set a second start time if desired using
START TIME 2. Generally second waterings are set for the afternoon
so be sure to check that the correct A.M. or P.M. indicator is shown in
the LCD display.
*
Start Times 3 and 4 might be used for newly seeded lawns or new
sod. They are also set using the same procedure.
*
Should you no longer need a start time (i.e. newly seeded lawn
matures), push the OFF button to cancel. They are retained in the
memory. If you wish to use them again, push the ON button.
Setting Watering Days
In WATER DAYS you may use either SET DAYS (7 days of the week) or SKIP
DAYS (skip from 0 to 30 days) in any combination of Programs A, B, or C.
Programs A and B can be on SET DAYS and Program C can be on SKIP
DAYS. However, ODD/EVEN can only be set when using SKIP DAYS, not when
using SET DAYS.
To water on specific days of the week, rotate the dial to the SET DAYS position
in the WATER DAYS segment of the dial. S M T W T F S (Sunday through
Saturday) are the seven days of the week shown in the display.
8
Use the s button to advance through the days of the week (the t button will
reverse through the week). The selected day will blink. If you want that particular
day to water, push the ON button and a box (bracket) will appear around that
day. To turn off a day press the OFF button. For example, to water on Mondays,
Wednesdays, and Fridays, the display should show:
SMTWTFS
If you want a consistent number of days between watering, rotate the dial to
SKIP DAYS (do not use the SET DAYS position). With this setting you can skip
watering from one (1) to thirty (30) days or set at 0 to water everyday. If you set
SKIP 1 DAY(S) you will water every other day, if you set SKIP 2 DAY(S) you will
water every third day, and so on, up to skipping 30 days (orchards or vineyards).
(Skip 1 day will water tomorrow)
If you have restrictions from your water company and they require watering on
ODD or EVEN calendar days, set your SKIP DAYS first, then turn the dial to
ODD/EVEN and push the s or t arrow to toggle between ODD and EVEN
settings in the LCD display.
Setting Zone Run Times
Next move the rotary dial to the ZONE RUN TIME segment of the controller so
that it points to the first zone (also known as a station) that operates a valve in
the area you want watered in Program A (or whichever program you are setting).
This would usually be zone 1. Determine how long you want the sprinklers to
water depending on the type of sprinklers (impacts: 30 - 45 minutes, pop-ups:
10 - 15 minutes) and the type of vegetation (see EFFICIENT RUN TIMES in
the next section for more detail). Each zone can run from 1 to 60 minutes
in 1 minute increments, and from 1 hour to 12 hours in 10 minute increments
(generally for drip systems). Use the s (to increase) or t (to decrease) buttons
to set the run time for each zone you wish to use in the program you are setting.
(NOTE: The factory set/default program has each zone set at 10 minutes in
Program A. Make sure the run times for the zones you are not using are set to
OFF by pressing the OFF button while the rotary dial is pointing to that zone).
Each zone can ONLY be assigned to ONE program. Zone 1 for example, can
not be used in Program A and again in Program B or C. The 10 minute default
zone run times can be changed to anything from the 10 minute default setting
down to 1 minute, or up to 12 hours by using the s or t buttons, and assigned
to any program A, B, or C by moving the PROGRAM switch to the appropriate
program and moving the s or t buttons.
Efficient Run Times
An efficient run time depends upon several factors: the type of plants being
watered, temperature, humidity, soil type, slope of landscape, and type of
sprinklers. For most lawns, the amount of water needed per week ranges from
about 2" in hot climates down to 1/2" in cooler climates. Trees and shrubs have
deeper root structures and require long slow watering, which can best be applied
by shrub sprays, a bubbler, or a drip system.
9
High humidity reduces water demands. If your soil is sandy, or you are watering
on a slope, water frequently with short run times. Clay soil holds water better,
so water less often and use short run times. For more precise guidelines, check
with a local nursery or gardening service regarding your specific needs.
To learn the rate at which your sprinklers apply water, do a "Can Test". Place
several 1 lb. coffee cans or other similar size containers evenly across your
lawn. Run your sprinklers until the average water depth in the containers
reaches 1". Record the run time. Divide 60 minutes by the time you measured
to determine the average inches per hour your sprinklers distribute (e.g. with 30
min. fill time, 60 min. ÷ 30 min. = 2 inches per hour). Use this information to
plan your watering schedule.
Plants need more water during hot weather months and less during cold weather
months. Use your controller's WATER BUDGETING (%) feature to make easy,
one-step seasonal adjustments to your run times.
Setting Additional Programs
When you have finished setting the zone run times for Program A, move the
program selector switch to Program B if you desire a B program for shrubs or a
drip system. Repeat instructions for Program A to set Program B beginning with
START TIMES, then WATER DAYS, then ZONE RUN TIMES. Remember to
not overlap START TIMES by adding up the combined run times for all zones
in Program A and add that amount to Program A's START TIME to determine
the earliest START TIME for Program B. For example, if START TIME 1 for
Program A is set to 4:00 A.M. and Zone 1 runs for 10 minutes, Zone 2 for 25
minutes, Zone 3 for 30 minutes, and Zone 4 for 10 minutes (all in Program A)
then the combined total run time is 75 minutes, therefore Program B could not
start until 75 minutes or more past 4:00 A.M., so the first available START TIME
for Program B would be 5:15 A.M.
Continuing programming your WATER CHAMP controller until you have covered
all Programs A, B, and/or C START TIMES, WATER DAYS, and ZONE RUN
TIMES you wish, then return the rotary dial to the all manual position.
Important Programming Notes
The Program Switch must be in the RUN position for automatic or manual
watering, and in the A, B, or C position to set program START TIMES, WATER
DAYS, and ZONE RUN TIMES.
The start of watering is delayed on either automatic or manual runs on every
zone/valve by ten (10) seconds.
Note: the red LED in the lower left corner of the faceplate label lights at the start
of AUTO, MANUAL, or TEST functions and stays on while AC current is being
supplied to any terminal (a program is running). The advantage of this 10 second
delay is the demand for electrical current does not come on all at the same time
if 2 zones or the pump start come on simultaneously.
10
It also allows time to do a visual check of your zones to see if they are watering
properly. When the controller is watering, the display will show the active zone
number and the corresponding program the zone has been programmed into
and count down the remaining run time when running in the AUTO position. To
stop watering at any time push the OFF button.
OPERATING YOUR CONTROLLER
Automatic Operation
Whenever your controller is programmed with START TIMES, WATER DAYS,
and ZONE RUN TIMES it is ready to automatically water (so long as the rotary
dial is not pointing to the OFF/RAIN position).
Manual Operation (Turning on your sprinklers right now)
There are three ways to turn on your sprinklers manually:
1.
PRESET ALL PROGRAM WATERING: with the rotary dial at the ALL
MANUAL position, push the RUN button. Zones 1 to 4 (or 1 to 6
on six station models) will water the time you set in ZONE RUN TIME
in Program A, then B, then C. (Remember each zone can only be
assigned to one of the three programs A, B, or C).
2.
PRESET INDIVIDUAL PROGRAM WATERING: With the rotary dial
in the ALL MANUAL position, push the desired Program A, B, or C
button to water just the zones in that program the preset run times
you programmed - remember the 10 second delay before the sprin
klers start watering. (Note: % Watering changes run times in Manual
#1 & #2 above, but not #3 "Manual Watering A Single Zone")
3.
MANUAL WATERING A SINGLE ZONE: Move the rotary switch to
the zone you wish to water. If you wish to water the zone for the
same amount of time you have already programmed, push the RUN
button then move the dial back to the ALL MANUAL position. If you
wish to run the zone more or less than the programmed run time,
slide the program switch to the program that the zone is in and use
the s (to increase) or t (to decrease) buttons to enter the time you
wish to run then move the program switch back to the RUN position
and press the RUN button then move the dial back to the ALL MANU
AL position. After watering, reprogram the zone to the Program run
time you wish.
NOTE: To stop watering at any time press the OFF button with the dial in the ALL
MANUAL/RUN position.
FEATURES
OFF/RAIN
Turn the rotary dial to the OFF/RAIN position if you do not want to water due
to rain or for any other reason. The time and all programs will be retained,
but electricity will not go to the valves to turn them on. Be sure to turn the
rotary dial out of the OFF/RAIN position and back to the ALL MANUAL position
to water again.
11
% Watering/Water Budgeting
At about the one (1) o'clock position on the rotary dial between ALL MANUAL
and START TIME 1 positions is the % sign. In this position the LCD reads 100%
which means the zones water the exact time you entered into the program. With
this function, you can alter your zone run times to match the moisture demand
based on the current weather. If it is hot and dry, you can increase the run time
- cold and damp, you can decrease the programmed run time. The s (up) and
t (down) arrows control the percentage adjustment up to 200% or down to 10%
in 10% increments (steps). For any percentage other than 100%, the % sign
will remain in the LCD readout indicating a percentage run time adjustment. As
an example, if you had ten (10) minutes on zone 1 and set % watering at 50
%, zone 1 would water for five (5) minutes. All zones in all programs are in an
override with % watering. It is a beneficial tool to use for water conservation.
If you return % back to 100%, the original zone run times are still programmed.
This is the easiest way to change the length of time you water. With % watering,
zone run times can go as short as 10% of one (1) minute (equivalent to six
seconds) for nursery application or newly seeded lawns.
Zone Test
By pushing both s (up) and t (down) arrows at the same time, a zone test
starts with zone 1 to check if there is a bad zone, a short on the wires, or a
faulty solenoid. The test has a ten (10) second delay then counts down ten (10)
seconds in the LCD, then moves to zone 2 and so forth. If a short exists, a
bad zone # will be indicated on the LCD. If multiple zones are shorted, the bad
zones will be indicated in the LCD. Bad zones will be skipped in the watering
cycle and reported until fixed.
Reset Button
If you wish to reset or erase all programs you entered, be sure the rotary dial
is in the RUN/ALL MANUAL position, then push the RESET button (located just
to the left of the PROGRAM selector switch) with a pen tip. Your controller
will then contain only the factory preset program. You can then reprogram the
CALENDAR and any new schedules you wish.
INTERNAL FEATURES
The terminal strip appears as follows:
Rain Sensor
The U shaped connector wire must remain connected between the COM and
RAIN terminals when a rain sensor is not in use. Disconnect the wire and save it
before connecting a rain sensor. Connect one sensor wire to the RAIN terminal
and the other to the COM terminal.
12
Champion Irrigation does not manufacture rain sensors so they must be
purchased separately. Follow specific instructions supplied with the rain
sensor.
SW2 (Switch #2)
SW2 allows zones in Program C to run at the same time as zones in
Programs A or B for drip systems when it is placed in the down position.
In the up position the programs run in chronological (earliest clock time)
order.
ADDITIONAL FEATURES
No backup battery needs to be purchased. An internal lithium battery
is supplied. The expected life of the battery is up to seven (7) or more
years. The battery backs up the customer entered programs (memory)
and clock time in the event of a temporary AC power failure.
No fuse is required with this controller. It is state-of-the-art technology
with automatic circuit surge protection, automatic restart, and override of
a shorted zone. These features can give you greater confidence that you
can go away on vacation and your yard will get watered.
The indoor and outdoor transformer output is 800 mA (.8 A/21.2 VA)
which is sufficient to power two (2) solenoids and a master valve (pump
start relay limited to a maximum 35 watts) simultaneously with the ten
(10) second delay feature.
Your "Water Champ" controller will "stack" program start times and runs
logically. Start times are chronological (earliest clock time) and run until
a program finishes in the event you programmed longer run times than
can finish before the next start time. You could also extend run times
into another program with % watering/Water Budgeting. Your controller
will stack or hold this second program and start it when the first start
time program finishes.
Programs could run past midnight (i.e. long drip system programs). The
exception to this is if WATER DAYS are set on SKIP DAYS and the
ODD/EVEN feature is activated. In this case, any remaining program
run time would be canceled at midnight so as not to be in violation of
any water restrictions.
13
14
SOLUTIONS TO COMMON PROBLEMS
For further assistance, call Champion's Technical Support
department at: (800) 33-CHAMP Hours: 8:00 AM - 4:30 PM PST.
VOLTAGE SPECIFICATION:
Transformer Input: 110VAC 50/60 Hz
Controller Output: 26.5VAC 800mA(8A/19.2VA)
OPERATING TEMPERATURE: 32OF - 140OF
BACKUP BATTERY: Replaceable 3 volt Lithium (Panasonic CR2032)
WARRANTY: Limited 3 year
15
LIMITED WARRANTY
Champion Irrigation Products herein after called “Champion” warrants that parts manufactured by it shall be free from defects in
material and workmanship, under normal use and service, for a
period of three years (five years on domestic brass products) from
date of purchase to its trade customers. This three-year period shall
be known as the “warranty period”. Champion will furnish or repair
parts found to be defective, during the warranty period, at no charge
under our defective return procedure. Champion’s liability is solely
limited to original cost of the parts, and no payment will be made
for consequential or incidental costs or damages caused by product
failure.
Champion does not assume liability for defective products not
manufactured or supplied by us, even though such products may be
used in conjunction with our own. Champion assumes no liability for
damages sustained in the adoption or use of our engineering data.
Champion reserves the right to redesign, alter or modify its products
without incurring liability for obsolete parts, or product inventory. No
agent or representative of Champion has the authority to waive or
alter this printed warranty, or to make any representation or warranty
not contained herein or to extend this warranty to anyone other than
Champion’s trade customers. This warranty shall not be deemed a
consumer warranty and shall not extend to anyone other than those
who purchase products from Champion for resale. The foregoing
warranties are exclusive and are in lieu of all other warranties,
whether written oral or implied, including warranty of merchantability
in other respects than expressly set forth above and warranty of
fitness for a particular purpose.
16