1
INSTALLATION MANUAL
MOTOR FOR SWING LEAF GATES
SWING-3000/5000
Contents
INSTALLATION MANUAL ................................................................................................................................................................................................ 1
MOTOR FOR SWING LEAF GATES ................................................................................................................................................................................. 1
SWING-3000/5000 ................................................................................................................................................................................................................ 1
Contents ................................................................................................................................................................................................................................. 2
GENERAL SAFETY INSTRUCTIONS FOR INSTALLATION AND MAINTENANCE ................................................................................................ 3
TOOLS AND MATERIALS ................................................................................................................................................................................................. 4
WARNINGS FOR THE INSTALLER.................................................................................................................................................................................. 6
FUNCTIONS ......................................................................................................................................................................................................................... 7
TECHNICAL SPECIFICATIONS ........................................................................................................................................................................................ 8
Dimensions......................................................................................................................................................................................................................... 9
COMPONENTS SET .......................................................................................................................................................................................................... 10
ASSEMBLY ........................................................................................................................................................................................................................ 11
Preliminary checks........................................................................................................................................................................................................... 11
INSTALLATION................................................................................................................................................................................................................. 14
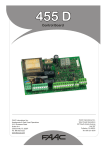
CONTROL BOARD............................................................................................................................................................................................................ 20
Technical specifications................................................................................................................................................................................................... 20
Electrical connections ...................................................................................................................................................................................................... 22
PROGRAMMING ............................................................................................................................................................................................................... 24
Radio controls encoding....................................................................................................................................................................................................... 27
START UP........................................................................................................................................................................................................................... 28
REPAIRS ............................................................................................................................................................................................................................. 28
MAINTENANCE ................................................................................................................................................................................................................ 28
TROUBLESHOOTING....................................................................................................................................................................................................... 29
NOTES................................................................................................................................................................................................................................. 30
GENERAL SAFETY INSTRUCTIONS FOR INSTALLATION AND MAINTENANCE
•
•
•
•
•
•
•
•
For an efficient and safe automated door, correctly observe the installation procedures and instructions for use.
Incorrect installation and use can cause serious damage to persons and property.
Carefully read the whole installation manual before you begin installing.
Do not make any modifications which are not mentioned in this manual.
Do not install the operator for uses other than those indicated.
To fasten, use the supplied accessories or, in any case, fastening systems (screws, expansion plugs, etc.) suitable for the type of support
and for the mechanical stresses exerted by the automated system.
Check if the gate conforms to standards EN12604 and EN 12605 (the information can be found in the documentation accompanying the
gate itself). For non-EU countries, the above mentioned standards must be observed in addition to the national standard references to
obtain a suitable safety level.
Make sure that the gate is correctly operational, and supplied with mechanical opening stops.
When installing we advise you to:
• obtain the material and tools indicated in the following paragraph “Tools and materials” and keep them near at hand.
• use a stable support for performing operations without a floor support.
• protect your face and hands adequately before making the holes with the drill.
• do not allow children to play near during installation, use and during the automated system release manoeuvre.
• remove any debris and objects which could hamper movement, before powering up the system.
• remove the gate’s closing mechanism to ensure the gate is closed by the automatism.
• stick on the warning stickers as shown in the instruction.
When you have finished installing we advise you to:
• Make sure that no part of the gate interferes with public spaces such as pavements and/or roads.
• Use the automated system observing the instructions in the “User’s guide”.
• Fill in, keep and update the maintenance register.
• The SWING automated system does not require periodic replacement of parts.
• Every month, run a functional check of the safety devices.
IMPORTANT! DANGER OF CRUSHING.
If the power cable of operator SWING is damaged, it must be replaced by qualified personnel, using a new cable of the same type. Do
not use different power cables.
TOOLS AND MATERIALS
Tools you will require to install the SWING operator:
1. Set of flat wrenches for hexagon head screws
2. Set of screwdrivers for cross-head and cut-head screws
3. Set of wall bits
4. Set of iron bits
5. Flat-nose pliers
6. Saw on metal
7. A hammer drill
8. Folding rule (2 m)
Material required for installing the SWING operator and the relevant accessories (if present):
Cable 2x0,5 mm2 (emitting photocells, pulse generators for opening movement and stop)
Cable 4x0.5 mm2 (receiver photocells)
Cable 2 x 1.5 mm2 (power)
Use cables with an adequate degree of insulation.
The electric system must conform to the prescriptions in the chapter entitled “Warnings for the installer”.
The 230 Vac power cable must be laid and connected by a qualified installation technician.
Lay the cables in the appropriate pipes and do not allow loose cables to come into contact with moving parts of the automated system and the
gate.
WARNINGS FOR THE INSTALLER
ATTENTION! To ensure the safety of people, it is important that you read all the following instructions. Incorrect installation or
incorrect use of the product could cause serious harm to people.
Carefully read the instructions before beginning to install the product.
3) Do not leave packing materials (plastic, polystyrene, etc.) within reach of children as such materials are potential sources of danger.
4) Store these instructions for future reference.
5) This product was designed and built strictly for the use indicated in this documentation. Any other use, not expressly indicated here, could
compromise the good condition/operation of the product and/or be a source of danger.
6) DOORHAN declines all liability caused by improper use or use other than that for which the automated system was intended.
7) Do not install the equipment in an explosive atmosphere: the presence of inflammable gas or fumes is a serious danger to safety.
8) The mechanical parts must conform to the provisions of Standards EN 12604 and EN 12605. For non-EU countries, to obtain an adequate
level of safety, the Standards mentioned above must be observed, in addition to national legal regulations.
9) DOORHAN is not responsible for failure to observe Good Technique in the construction of the closing elements to be motorised, or for any
deformation that may occur during use.
10) The installation must conform to Standards EN 12453 and EN 12445. For non-EU countries, to obtain an adequate level of safety, the
Standards mentioned above must be observed, in addition to national legal regulations.
11) Before attempting any job on the system, cut out electrical power.
12) The mains power supply of the automated system must be fitted with an allpole switch with contact opening distance of 3mm or greater. Use
of a 6A thermal breaker with all-pole circuit break is recommended.
13) Make sure that a differential switch with threshold of 0.03 A is fitted upstream of the system.
14) Make sure that the earthing system is perfectly constructed, and connect metal parts of the means of the closure to it.
15)The safety devices (EN 12978 standard) protect any danger areas against mechanical movement Risks, such as crushing, dragging, and
shearing.
16) Use of at least one indicator-light (e.g. LAMP ) is recommended for every system, as well as a warning sign adequately secured to the frame
structure.
17) DOORHAN declines all liability as concerns safety and efficient operation of the automated system, if system components not produced by
DOORHAN are used.
18) For maintenance, strictly use original parts by DOORHAN.
19) Do not in any way modify the components of the automated system.
20) The installer shall supply all information concerning manual operation of the system in case of an emergency, and shall hand over to the user
the warnings handbook supplied with the product.
21) Do not allow children or adults to stay near the product while it is operating.
22) Keep remote controls or other pulse generators away from children, to prevent the automated system from being activated involuntarily.
23) Transit through the leaves is allowed only when the gate is fully open.
24) The user must not attempt any kind of repair or direct action whatever and contact qualified personnel only.
25) Maintenance: check at least every 6 months the efficiency of the system, particularly the efficiency of the safety devices (including, where
foreseen, the operator thrust force) and of the release devices.
26) Anything not expressly specified in these instructions is not permitted.
FUNCTIONS
These instructions apply to the following models: Operators SWING
The SWING AUTOMATION SYSTEM for swing gates comprises two electromechanical operators which drive the gate leaves by means of a
worm screw. The system locks mechanically; therefore no electric lock is required.
To obtain anti-crushing protection, you have to use electronic control units with a torque control electronic device.
The SWING automation was designed and manufactured to control access of vehicles.
Avoid any other use whatever.
TECHNICAL SPECIFICATIONS
Model
Power supply (V ~ / 50 Hz.)
Maximum absorbed power (W)
Absorbed current
Thrust force (N)
Type of use
Courtesy light (V ~/W)
Standard speed (sm/sec)
Nut useful travel (mm)
Protection class
Operating ambient temperature (°C)
Condenser
Drive
Swing-3000
Swing -5000
230
150
150
1,2 A
3000
3000
continuous
230 / 25 max.
1,5
3000
5000
For indoor use only (IP54)
-40 / +55
10 mkF
Chain
Swing-5000
Leaf width, m
Leaf weight, kg
2.00
1000
2.50
800
Leaf width, m
Leaf weight, kg
3.00
600
2.00
800
4.00
500
2.50
600
5.00
400
3.00
400
Swing-3000
Dimensions
1.
2.
3.
4.
5.
6.
Cover
Front bracket
Rear joint
Rear bracket
Release unit
Worm gear
COMPONENTS SET
№
Component
Quantity
1
Opener
2
2
Front bracket
2
3
Rear joint
2
4
Rear bracket
2
5
Fixing set
1
6
Control board
1
7
Keyswitch
1
8
Lamp
1
9
Photocells
1
10
Manual
1
ASSEMBLY
Preliminary checks
To ensure trouble-free operation, make sure that the gate (whether existing or yet to be installed) has the following specifications:
• max. length of each gate leaf in accordance with recomendations
• strong and rigid leaf frame
• smooth gate movement, with no stiff points
• hinges in good condition
• mechanical travel limit stops
If any welding or brazing has to be done on the gate, do this before installing the automation system. The good order of the structure directly
influences the reliability and safety of the automation system.
BEFORE BEGINNING YOUR INSTALLATION OF YOUR ATI SYSTEM, CHECK THE FOLLOWING:
* YOUR GATE PIERS OR POSTS ARE SUFFICIENTLY STRONG ENOUGH TO SUPPORT THE GATES AND OPERATORS AND THE GATES SWING
FREELY AND THERE IS NO FRICTION BETWEEN THE MOVING PARTS.
* MEASUREMENT C MUST NOT BE GREATER THAN THE VALUE SHOWN BELOW. IF THIS IS THE CASE, IT IS NECESSARY TO MODIFY THE PILLAR
SO THAT THIS MEASUREMENT CORRESPONDS.
Dimension C must be no greater than 120mm for 90 opening and
no greater than 70mm for a 130 opening.
* ENSURE THAT A GATE CENTRE STOP IS SECURELY CONCRETED INTO THE GROUND AND AS A GUIDE, THE CENTRE STOP
SHOULD NOT PROTRUDE OUT OF THE GROUND NO MORE THAN 65mm, IF IT IS MUCH HIGHER IT MAY CATCH ON THE UNDERSIDE OF A CAR.
1.2 - Basic Cable Layout
THIS DIAGRAM DETAILS THE BASIC CABLE LAYOUT FOR A PAIR OF MOTORS.
THE POWER SUPPLY TO THE CONTROL PANEL SHOULD BE LIVE AND PROTECTED IN ACCORDANCE WITH THE 16TH
EDITION ELECTRICAL REGULATIONS. THE SUPPLY SHOULD BE RATED AT A MINIMUM OF 6 AMPS.
WHEN INSTALLING WIRES OUTDOORS THE CABLE APPROACH TO ALL DEVICES MUST BE FROM BELOW TO CREATE A
“DRIP-LOOP” AND THEREBY AVOID UNNECCESSARY WATER INGRESS.
WHEN INSTALLING LOW VOLTAGE CABLE AROUND THE GATEWAY IT IS ADVISED TO PUT ALL LOW VOLTAGE CABLE IN
EITHER DUCTING OR ALKATHENE PIPING. ALL CABLE JOINTING SHOULD BE CARRIED OUT ABOVE GROUND.
1.3 - Low Voltage Cable Layout
ALL CAME ACCESSORIES CAN BE WIRED 0.2m STRANDED CABLE (BUGLAR ALARM TYPE). THE TUNED ANTENNA SHOULD
BE WIRED WITH COAXIAL CABLE (RG59).
INSTALLATION
- To ensure you work in safe conditions, we advise you to install the operator while keeping the door fully closed.
- Use all the specified anchorage points.
- The fastening systems must be suitable for the type of support and sufficiently tough.
- Protect your hands and face adequately while drilling the holes.
- Read this chapter to the full before you begin installing.
1.4 - Attaching Brackets
WELD THE 9 HOLE BRACKET TO THE FIXING PLATE THEN SECURLEY ATTACH THE FIXING BRACKET TO THE PIER OR
POST, OBSERVE MEASUREMENT A AND B BETWEEN THE HINGE PIN AND THE CENTRAL HOLE IN THE BRACKET.
1.5 - Attaching the Rear Bracket
THE REAR BRACKET IS EQUIPPED WITH ADDITIONAL HOLES TO MAKE INSTALLATION OF THE GATE MOTOR EASIER, OR
TO CHANGE THE OPENING ANGLE OF THE GATE. THE REAR BRACKET CAN BE LENGHENED OR SHORTENED TO SUIT THE
INDIVIDUAL INSTALLATION SITE AND THE POSITION OF THE GATES (WITH RESPECT TO THE PILLARS).
N.B IF MEASUREMENT B IS INCREASED, THE ANGLE OF APETURE IS REDUCED. THIS THEREFORE REDUCES THE
PERIPHERAL SPEED AND INCREASES THE THRUST EXERTED BY THE MOTOR ON THE GATE. IF MEASUREMENT A IS INCREASED,
THE ANGLE OF APERTURE IS INCREASED. THIS THEREFORE INCREASES THE PERIPHERAL SPEED AND REDUCES THE THRUST
EXERTED BY THE MOTOR ON THE GATE.
WHEN THE REAR BRACKET IS SECURELY ATTACHED TO THE PIER OR POST, INSERT THE BUSH INTO THE DESIRED HOLE
AND ATTACH THE REAR JOINT ARM, LUBRICATING WITH A NEUTRAL GREASE.
1.6 - Attaching the Front Bracket
WITH THE GATE IN THE FULLY CLOSED POSITION WELD THE FRONT BRACKET TO THE FIXING PLATE THEN ATTACH IT TO
THE GATE. THE ANCHOR PLATE MUST BE HORIZONTALLY ALIGNED WITH THE REAR BRACKET MOUNTED ON THE PEIR OR
POST ENSURING DIMENSION IS OBSERVED.
N.B WHEN INSTALLING THE UNIT ON SPECIAL FRAMES, IT MAY BE NECCESSARY TO FIT ADDITIONAL SPACERS WITH A
MINIMUM THICKNESS OF 10mm IN ORDER TO PREVENT CONTACT BETWEEN THE OPERATOR AND THE GATE WING.
2.3 - Installing the Motors
WITH THE COVERS REMOVED INSTALL THE MOTOR ON THE TWO BRACKETS AND SECURE THE MOTOR WITH THE NUTS
AND BOLTS PROVIDED.
2.4 - Adjusting the Open Stop Microswitch
MANUALLY RELEASE THE REDUCTION GEAR BY INSERTING THE RELEASE KEY AND TURNING IT 180.
MOVE THE GATE TO THE DESIRED OPEN POSITION. LOOSEN THE SCREWS WHICH HOLD THE MICROSWITCH IN POSITION.
SLIDE THE MICROSWITCH ON THE SUPPORT PLATE UNTIL THE MICROSWITCH IS TRIPPED. THEN TIGHTEN THE SCREWS TO
ANCHOR THE MICROSWITCH IN POSITION.
2.5 - Wiring the Motors
ENSURE BOTH MOTORS ARE ADEQUATELY EARTHED.
Fitting the Control Panel in the Casing
Securely fasten the control panel PCB to the casing with the screws supplied.
CONTROL BOARD
Technical specifications
Power supply
Absorbed power
Motor max. load
Accessories max. load
Electric lock max. load
Operating ambient
temperature
Protection fuses
Function logics
Opening/closing time
Pause time
Closing leaf delay
Opening leaf delay
Thrust force
Terminal board inputs
Terminal board outputs
230 V~ ( +6% -10%) - 50 Hz
10 W
800 W
0,5 A
15 VA
-20 °C +55 °C
2 (see fig. 1)
Automatic / Semi-automatic / "Stepped" Safety device / Semi-automatic B/ Dead-man C
/ "Stepped" semi automatic
Programmable (from 0 to 120 s)
0, 10, 20, 30, 60, 120 s
0, 5, 10, 20 s
2 s (Can be disabled with the dip-switch)
Dip-switch adjustable on 8 levels for each motor
Open / Open free leaf / Stop / Opening safety devices / Closing safety devices / Power
supply + Earth
Flashing lamp - Motors - 24 Vdc accessories power supply - 24 Vdc
Led OP_A
Led OP_B LED:
Led STOP LED
Led FSWCL LED:
Led FSWOP LED:
DL10 LED:
J1
J2
J3
J4
J5
F1
F2
F
DS1
DS2
TOTALLY OPEN LED
LED: OPEN LEAF 1 / CLOSE
LED STOP
LED: CLOSING SAFETY DEVICES
LED: OPENING SAFETY DEVICES
LED: TIME LEARNING SIGNALLING
LOW VOLTAGE TERMINAL BOARD
CONNECTOR FOR DECODER/MINIDEC/RP
RECEIVER
230 VAC POWER SUPPLY TERMINAL
BOARD
MOTORS AND FLASHING LAMP
CONNECTION TERMINAL BOARD
INDICATOR-LIGHT AND ELECTRIC LOCK
TERMINAL BOARD
MOTORS AND TRANSFORMER PRIMARY
WINDING FUSE (F 5A)
LOW VOLTAGE AND ACCESSORIES FUSE
(T 800mA)
TIME LEARNING PUSH-BUTTON
1ST GROUP OF MICROSWITCH
PROGRAMMING
2ND GROUP OF MICROSWITCH
PROGRAMMING
Electrical connections
IMPORTANT: Before attempting any work on the board (connections, maintenance), always cut off power.
Terminal board J1 - Accessories
OPEN A - "Total Opening" command (N.O.): any pulse generator (push-button, detector, etc.) which, by closing a contact, commands opening
and/or closing of both gate leaves.
To install several full opening pulse generators, connect the N.O. contacts in parallel
OPEN B - "Partial Opening" command (N.O.) / Closing: any pulse generator (push-button, detector, etc.) which, by closing a contact, commands
opening and/or closing of the leaf driven by motor M1. In the B and C logics, it always commands closing of both leaves.
To install several partial opening pulse generators, connect the N.O. contacts in parallel
STP - STOP Contact (N.C.): any device (e.g. a pushbutton) which, by opening a contact, is able to stop gate movement.
To install several STOP devices , connect the N.C. contact s in series
If STOP devices are not connected, jumper connect the STP terminals and -.
CL FSW - Clos ing safety devices contact (N.C. ) : The purpose of the closing safety devices is to protect the leaf movement area during closing.
During closing, in the A-SP-E-EP logics, the safety devices reverse the movement of the gate leaves, or stop and reverse the movement when they are
released (see programming of microswitch DS2 - SW2). During the closing cycle in logics B and C, they interrupt movement. They never operate
during the opening cycle. If the closing safety devices operate when the gate is open, they prevent the leaf closing movement.
If no closing safety devices are connected, jumper connect terminals CL and -TX FSW
OP FSW - Opening safety devices contact (N.C. ) :the purpose of the opening safety devices is to protect the leafmovement area during opening.
During opening,in the A-SP-E-EP logics, the safety devices stop the movement of the gate leaves and reverse the movement when they are released.
During the opening cycle in logics B and C, they interrupt movement. Theynever operate during the closing cycle.
If the opening safety devices operate when the gate is closed, they prevent the leaf opening movement.
If no opening safety devices are connected, jumper connect inputs OP and -TX FSW
– - Negative for power supply to accessories
+ - 24 Vdc - Positive for power supply to accessories
Accessories max. load is 500 mA. To calculate absorption values, refer to the instructions for individual accessories.
-TX FSW - Negative for power supply to photocell transmitters If you use this terminal for connecting the negative for supplying power to the
photocell transmitters, you may, if necessary, also use the FAIL SAFE function (see programming of microswitch DS2 - SW3).
If this function is enabled, the equipment checks operation of the photocells before every opening or closing cycle.
PROGRAMMING
Leaf l and 2 force
By using microswitches SW1, SW2 and SW3, the force (and thus anticrushing safety) of the operator connected to leaf 1 can be programmed.
The same operation has to be repeated on the motor connected to leaf 2, by using microswitches SW4, SW5 and SW6.
Function logic
The automated system's function logic can be selected with microswitches SW7, SW8, SW9 and SW10. By selecting an automatic logic (A, SP),
the combination of microswitches enables selection of pause time too (waiting time, in opening position, before automatic re-closing).
The available logics - their operation is described in tables 3/a-b-cd-e-f, are as follows: A - SP (Automatic), E - EP - B (Semi-automatic), C
(Dead-man).
Closing leaf delay
Programming of microswitches SW11 and SW12 enables delay of the closing start of leaf 1 with respect to leaf 2, in order to avoid the leaves
overlapping during movement, and thus increase the safety of the system.
Opening leaf delay
Programming of microswitch SW1 enables delay of the opening start of leaf 2 with respect to leaf 1, in order to avoid the leaves obstructing each
other during the initial stage of movement.
Closing photocells logic
By using microswitch SW2, you can select the type of behaviour of the automated system if the photocells protecting the gate closing movement
are engaged. You can obtain either immediate reversing of the leaves or a stop followed by reversing when the photocells are disengaged.
Fail safe
Programming the microswitch SW3 makes it possible to activate or de-activate the photocells control test. When Fail safe is active, the
equipment checks the photocells before every opening or closing movement.
Reversing stroke
By using the microswitch SW4, you can activate the "reversing stroke". The "reversing stroke" pushes the leaves to close for a few moments
before opening the gate, thus facilitating release of the electric lock.
LEARNING OF OPERATING TIMES
! during the learning procedure, the safety devices are disabled! Therefore any transit must be avoided in the leaf movement area when this
operation is carried out.
Opening/closing time is established by a learning procedure which can be effected in two different ways depending on the type of system.
Simple learning makes it possible to effect a single rapid operation to supply work times to the board, without using deceleration. It is not
recommended if the speeds of the leaves differ considerably from each other (different operators, different opening dimensions or angles).
Complete learning makes it possible to exploit all functions of the equipment, and thus program different work times for each leaf, and also
opening and closing deceleration.
- SIMPLE LEARNING:
Check if the leaves are closed, and then press F push-button for one second: DL10 LED begins flashing and the leaves begin the opening
movement.
Wait for the leaf to reach the opening stop limit and then supply an OPEN A pulse (with the radio control or with the key controlled push-button)
to stop the movement: the leaves stop and the DL10 LED stops flashing.
The procedure has ended and the gate is ready to operate. Next pulse closes leaves and they stop on automaticaly reaching closed position.
- ADVANCED COMPLETE LEARNING:
Check if the leaves are closed, and then press F push-button for more than 3 seconds: DL10 LED begins flashing and the leaf 1 begins the
opening movement. The following functions can be commanded by the OPEN A pulses (by radio control or key controlled push-button):
1° OPEN - Deceleration at opening of leaf 1
2° OPEN - Leaf 1 stops at opening and leaf 2 begins its opening movement
3° OPEN - Deceleration at opening of leaf 2
4° OPEN - Leaf 2 stops at opening and immediately begins its closing movement
5° OPEN - Deceleration at closing of leaf 2
6° OPEN - Leaf 2 stops at closing and leaf 1 begins its closing movement
7° OPEN - Deceleration at closing of leaf 1
8° OPEN - Leaf 1 stops at closing
The DL10 LED stops flashing and the gate is ready for normal operation.
Notes: •If you wish to eliminate deceleration in certain stages, wait for the leaf to reach its stop-limit and supply 2 consecutive Open pulses (by 1
second).
•If only one leaf is present, the entire sequence must nevertheless be effected. When the leaf has finished opening, supply 5 Open pulses until the
leaf begins to close, and then resume normal operation.
•It wind effected areas it is best to allow 2 second after the leaf reaches open stop befor supplying Open A to ensure full closing.
•Use of slow-down is not recommended for condominium entries.
•If, during closing / opening, the cycle stops for more consecutive times, the leaf could not reach the limit stop with slow-down. At the first
complete cycle without interruptions, the system recognizes the limit
Radio controls encoding
Connection of DHRE-2 reciever
External receiver DHRE-2 is meant for receiving radio remote control signal with 433 MHz frequency,
decoding it and control signal actuating.
Installation
1. Connect your receiver to a power supply 12/24 V, AC/DC by using input terminals +24V and
GND.
2. Connect the operator control board N.O. operating inputs to receiver output terminals CH1 or
CH2.
Memory clearing
3. Before encoding you can clear the receiver memory from the previously stored codes (it is
recommended at the first setting). To perform it, when the power is switched on, press CODE
button for the 10 seconds (CODE1 (or SW1) - if you are using CH1, CODE2 (or SW2) - if you
are using CH2). LED1 will be flashing 10 seconds then switch off for 2 seconds and flash twice
to confirm that the memory is clear.
Encoding
4. For encoding a transmitter code to the receiver press CODE button for 3 seconds on the receiver
board (CODE2 (SW2) for the operator connected to CH1 and CODE1 (SW1) for the operator
connected to CH2) LED1 will light. After that press a button on the transmitter twice.
Attention! After this operation only 1 button of the transmitter is stored in the receiver memory.
5. For encoding another transmitters repeat the procedure.
Connection
For connection a receiver to a control board it is needed to connect the output control terminals (CH1 or CH2) and the power supply terminals (+24V,
GND) to a control board.
START UP
LED CHECK
The table below shows the status of the LEDs in relation to to the status of the inputs.
Note the following: Led lighted = closed contact
Led off = open contact
Check the state of the LEDs as per Table.
REPAIRS
For repairs, contact DOORHAN’s authorized Repair Centers
MAINTENANCE
Swing type opener is an environmentally friendly product generally requiring a minimum of maintenance in normal use.
After a period of time in use, regularly check whether the door is balanced when opening/closing, whether the spring has enough force to raise
the door.
In the case of power failure the operator can search for the program memory. When the power is restored, press the button of the transmitter once,
the door will rise.
Run a functional check of the system at least every 6 months, with special attention to the efficiency of the safety and release devices.
TROUBLESHOOTING
To avoid being electrocuted, only a professional technician is allowed to touch the wires and components on the main panel.
PROBLEM
GATE WILL NOT RESPOND WHEN
GIVEN A COMMAND
SOLUTION
1. CHECK POWER SUPPLY TO THE CONTROL PANEL.
2. CHECK CONTROL PANEL FUSES.
3. CHECK HARD WIRE LINK FITTED BETWEEN NC TERMINALS
GATES ARE OPEN BUT WILL NOT
CHECK SAFETY BEAMS ARE WIRED CORRECTLY. (IF MORE THAN ONE SET OF
CLOSE AND GREEN LED IS FLASHING
BEAMS ARE FITTED THEY MUST BE WIRED IN SERIES.)
2. CHECK THAT THERE IS POWER GOING TO THE BEAMS, IF NOT RESTORE POWER.
3. IF SAFETY BEAMS ARE NOT FITTED ENSURE THAT A HARD WIRE LINK IS FITTED
BETWEEN NC TERMINALS
4. REMOVE SAFETY BEAM WIRES FROM CONTROL PANEL AND CHECK IF YOU HAVE
A NORMALLY CLOSED CIRCUIT COMING FROM THE BEAMS.
WHEN COMMISSIONING GATE
MOTOR WIRES ARE WRONG WAY ROUND. CHECK AND PROVE MOTOR DIRECTION
AUTOMATICALLY OPENS BUT DOES
BY MOMENTORIALLY PULSING MOTOR TERMINALS
NOT AUTOMATICALLY CLOSE
THEGATE SHOULD OPEN UP.
GATES WILL NOT RESPOND TO REMOTE 1. AF FREQUENCY CARD NOT FITTED TO CONTROL PANEL.
CONTROL COMMAND
2. REMOTE CONTROL HAS NOT BEEN PROGRAMMED INTO THE CONTROL PANEL.
3. REMOTE CONTROL HAS THE WRONG CODE SETTING.
4. “OPERATOR PRESENT” HAS NOT BEEN SELECTED TO DEACTIVATE RADIO REMOTE
CONTROLS (DIPSWITCH 1).
5. WRONG FREQUENCY CARD FITTED FOR THE REMOTE CONTROL.
NOTES