1
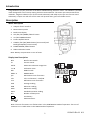
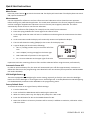
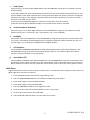
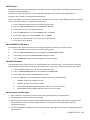
Quick Start Instructions Meter Power Press the power button to switch the meter ON. The display will switch ON. If the display does not switch ON, replace the batteries. Measurements Use the supplied film references and zero reference metal substrates to learn how the meter operates before moving to a professional application. The round metal substrate is the ferrous (magnetic) substrate and the rectangular shaped metal substrate is the non‐ferrous (non‐magnetic) substrate. The meter automatically senses ferrous or non‐ferrous substrates. 1. Place a reference film (250µm, for example) on the round, ferrous substrate. 2. Place the spring‐loaded meter sensor against the reference film. 3. In the single mode the meter will emit an audible tone indicating that the measurement has been taken. 4. In the continuous mode the display will continually measure and update the display 5. The LCD will show the reading (250µm) at the center of the display area. 6. A typical display will also show the following: NO = 1 (reading number one) on the lower left of the LCD AVG = 250µm (running average) on the lower right DIR = DIR mode of operation on the upper left Fe = Ferrous substrate on the upper right of the LCD DIR NO=1 250 Fe um AVG=250 Experiment with the remaining reference films and the substrate before using the meter professionally. Automatic Power OFF In order to conserve battery life, the meter will automatically turn off after approximately 3 minutes. To defeat this feature use the programming menu detailed in the next section (menu parameter AUTO POWER OFF under OPTIONS). LCD Backlight Button The LCD is equipped with backlighting for easier viewing, especially in dimly lit areas. Press the backlight button to turn the backlight on. Press again to turn the backlight off. To enable/disable the LCD backlighting, use the BACKLIGHT parameter under OPTIONS in the programming menu. Factory Default Reset To restore the meter to its original factory default settings: 1. Turn the meter OFF. 2. Press and hold the ZERO button while switching the meter ON. 3. When the meter powers up, the display will prompt for a YES or NO. 4. Press the SET button for YES or the CANCEL button for NO. 5. Note that all data in all memory locations will be erased, in addition to statistics, calibration values, and alarm limits. 3 CG204-EU-EN v2.2 8/13