1
INSTALLATION
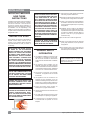
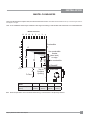
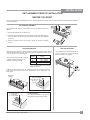
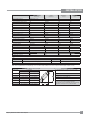
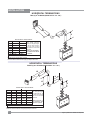
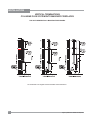
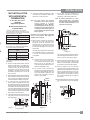
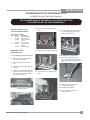
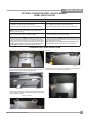
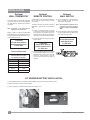
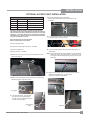
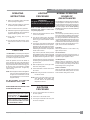
Minimum Vent Clearances
to Combustibles
* Clearances noted below must be maintained;
except when passing through a wall, ceiling or at the
termination where the use of a firestop or wall thimble
reduces clearance to 1-1/2" (38mm).
Horizontal Top
2" (51mm)
Horizontal Side
1-1/2 " (38mm)
Horizontal Bottom
1-1/2" (38mm)
Vertical Vent
1-1/2" (38mm)
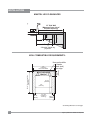
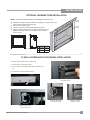
Below are the recommended framing
dimensions (inside measurements) for the
4" x 6-5/8" and 5" x 8" rigid vent terminations for use with a firestop or wall thimble.
Recommended Framed Opening
Size
Vent Size
Framing Size
5" x 8"
11" x 11"
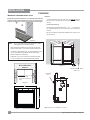
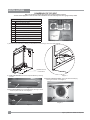
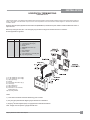
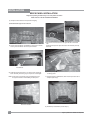
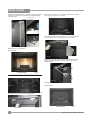
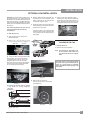
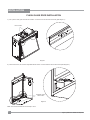
1) Locate the unit in the framing, rough in the
gas (preferably on the right side of the unit).
Locate the centerline of the termination and
mark wall accordingly. Cut an square hole in
the wall - see chart (inside dimension).
Note: If installing termination on a siding
covered wall, a vinyl siding standoff
or vinyl furring strips must be used
to ensure that the termination is not
recessed into the siding.
Horizontal sections must be supported at intervals not exceeding 3
feet (0.9 meter). (Flame picture and
performance will be affected by sags
in the liner).
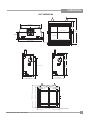
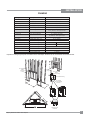
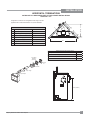
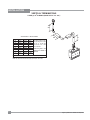
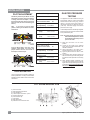
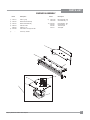
ASTROCAPXL
DIMENSIONS (946-623/P)
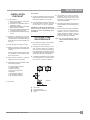
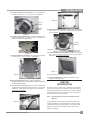
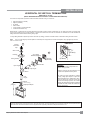
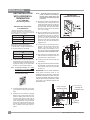
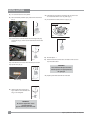
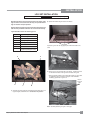
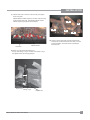
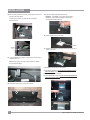
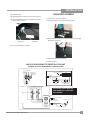
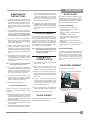
4) Separate the 2 halves of the wall thimble and
securely fasten the one with the tabs to the
outside wall making sure that the tabs are
on top and bottom. Fasten the other thimble
half to the inside wall. The thimble halves
slip inside each other and can be adjusted
for 2 x 4 or 2 x 6 walls.
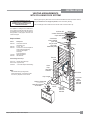
5) Slip the assembled liner and termination
assembly through the thimble making sure
the termination cap faces up (there are
markings on the cap that show which wayis
up). This will position the termination cap
with proper down slope for draining water.
Fasten the cap to the outer wall with the 4
supplied screws.
center
of hole
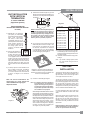
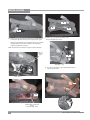
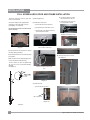
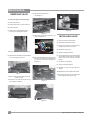
6) Pull the centre inner and outer flex liner out
enough to slip over the flue collars of the
fireplace. (You may wish to cut the liner
shorter to make it more workable.) Do not
bend liner more than 90o. The liners must
slip over the collars a minimum of 1-3/8".
CL
CL
7) Apply Mill Pac over the fireplace inner flue
collar and slip the inner flex liner down over
it and attach with 3 supplied screws.
8) Do the same with the outer flue collar and
outer flex liner.
9) Apply a bead of silicone between the thimble
and termination and around the outer edge
of the terminal at the wall in order to keep
the water out.
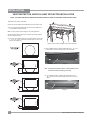
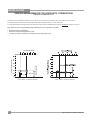
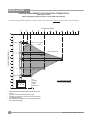
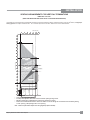
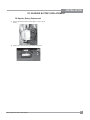
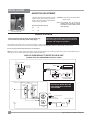
42-1/8” (1070mm)
Min. height (Flex)
5" X 8" VENTING
(Flex Vent Systems)
NOTE:
Rear Vent
26-1/2” (673mm)
UNIT INSTALLATION
WITH HORIZONTAL
TERMINATION
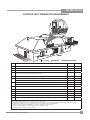
IMPORTANT: Do not locate termination
hood where excessive snow or ice
buildup may occur. Be sure to check vent
termination area after snow falls, and clear
to prevent accidental blockage of venting
system. When using snow blowers, make
sure snow is not directed towards vent
termination area.
2” x 4” or 2” x 6”
2) Level the fireplace and fasten it to the framing using nails or screws through the nailing
strips.
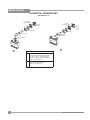
3) Assemble the vent assembly by applying
Mill Pac to the inner flue collar of the termination and slipping the inner flex liner over
it at least 1-3/8" (35mm). Fasten with the
3 screws (drilling pilot holes will make this
easier). Apply Mill Pac or high temperature
silicone to the outer flex pipe and slip it over
the outer flue collar of the vent terminal at
least 1-3/8"(35mm) and fasten with the 3
screws.
36
5” dia. flue pipe
with spring spacer
AstroCap XL
Termination Cap
8" dia.
air intake
Screws
Vinyl Siding
Screws
Wall Thimble
Regency Bellavista™ B36XT Gas Fireplace