1
TROUBLE SHOOTING
1. Opener doesn't operate from either door control or transmitter:
• Check jumper installed between 7 & 8 see page 14.
• Does the opener have electric power? Plug lamp into outlet. If it
doesn't light, check the fuse box or the circuit breaker. (Some outlets
are controlled by a wall switch.)
• Have you disengaged all door locks? Review installation instruction
warnings on page 2.
• Is there a build-up of ice or snow under door? The door may be frozen
to ground. Remove any obstruction.
• The garage door spring may be broken. Have it replaced.
2. Opener operates from transmitter but not from door control:
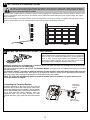
• Is door control button lit? If not, remove the bell wire from the opener
terminals. Short the red and white terminals by touching both terminals
at the same time with a piece of wire. If the opener runs, check for a
faulty wire connection at the door control, a short under the staples, or
a broken wire.
• Are wiring connections correct? Review page 14.
3. Door operates from door control but not from transmitter:
• Replace battery if necessary.
• If you have two or more transmitters and only one operates, review
Program Your Opener, Transmitter and Keyless Entry sections 27 and
28.
• Is the door control button flashing? The opener is in lock mode. If you
have a Multi-Function Door Control, push and hold the Lock button for
2 seconds. The door control button will stop flashing.
4. Transmitter has short range:
• Is battery weak, replace battery and test range.
• Change the location of the transmitter on the car.
• A metal garage door, foil-backed insulation or metal siding will reduce
the transmission range.
5. Door reverses for no apparent reason and opener light doesn't
blink:
• Is something obstructing the door? Pull manual release handle.
Operate door manually. If it is unbalanced or binding, call for
professional garage door service.
• Clear any ice or snow from garage floor area where garage
door closes.
• Repeat Setting Limits and Force, see adjustment sections 22 and 23.
Repeat safety reverse test after adjustment is complete.
6. Door reverses for no apparent reason and opener light blinks for
5 seconds after reversing:
Check The Protector System™ (if you have installed this accessory).
If the light is blinking, correct alignment.
7.Door not opening fully:
Repeat limit settings as outline in section 22 page 12, if required.
8. The garage door opens and closes by itself:
Make sure transmitter push button is not stuck "on".
9. Door stops but doesn't close completely:
Repeat Setting the Limits, see adjustment section 22.
Repeat safety reverse test after any adjustment of door arm length,
close force or down limit.
10. Door opens but won't close:
• Check The Protector System™ (if you have installed this accessory).
If the light is blinking, correct alignment.
• If opener light does not blink and it is a new installation, repeat Setting
the Limit and Force sections 22 and 23.
Repeat the safety reverse test after the adjustment is complete.
11. Opener light does not turn on:
Replace light bulb (24V/21W maximum).
12. Opener strains:
Door may be unbalanced or springs are broken. Close door and use
manual release rope and handle to disconnect trolley. Open and close
door manually. A properly balanced door will stay in any point of travel
while being supported entirely by its springs. If it does not, call for
18
professional garage door service to correct the problem.
13. Opener motor hums briefly, then won't work:
• Garage door springs are broken. SEE ABOVE.
• If problem occurs on first operation of opener, door is locked. Disable
door lock.
Repeat safety reverse test after adjustment is complete.
14. Opener won't activate due to power failure:
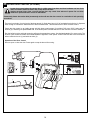
• Pull manual release rope and handle down to disconnect trolley. Door
can be opened and closed manually. When the power is restored, pull
the manual release handle back. The next time the opener is activated,
the trolley will reconnect.
• The Outside Quick Release accessory (if fitted) disconnects the trolley
from outside the garage in case of power failure.
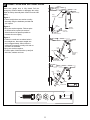
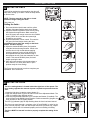
15. Setting the limits manually:
1. Press and hold the black button until the yellow indicator light starts
flashing slowly then release.
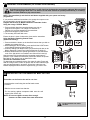
2. Push and hold the black button until the door reaches the desired UP
(open) position. Adjust the position of the door by using the black and
orange buttons. Black moves the door UP (open) and orange moves
the door DOWN (close).
Check to be sure the door opens high enough for your vehicle.
3. Push the transmitter or door control. This sets the UP (open) limit and
begins closing the door. Immediately press either the orange or
the black button. The door will stop.
Adjust the desired DOWN (closed) limit by using the orange (DOWN)
and black (UP) buttons. Check to be sure the door is fully closed
without applying excessive pressure on the rail (rail should not bow
upwards and the chain should not sag or droop below the rail). Push
the transmitter or door control. This sets the DOWN (close) limit and
begins opening the door.
NOTE: If neither the black or the orange button is pressed before the
door reaches the floor, the opener will attempt an Automated Limit
Setting, reversing the door off the floor and stopping at the set Up limit.
If the yellow indicator light does not blink 10 times, limits setting has
been successful and doesn't need to be manually done; the DOWN limit
will be set to the floor. Regardless of setting the limits automatically
or manually, the force MUST be learned in order to properly
complete the setting of limits. Refer to section 23, Setting the
Force.
4. Open and close the door with the transmitter or door control 2
or 3 times.
• If the door does not stop in the desired UP (open) position or
reverses before the door stops at the DOWN (close) position,
repeat Setting the limits manually one more time.
• If the door stops in both the desired UP (open) and DOWN (close)
positions, proceed to Test the Safety Reversal System.