1
E
ES
2. Funcionamento
2.
PR
TH
2. Operation
2. Manejo
中
For wireless remote controller
Replacing the Batteries and how to set the current time
If no signal is transmitted and the indoor unit’s lamp does not light up even if the
remote controller is operated, the batteries may have run out, so replace them with
new ones as described below.
1
2
2
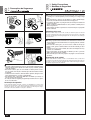
1 Remove the front lid.
2 Replace the batteries with alkali batteries (size AAA). Make sure that the batteries are installed in the correct direction. (Insert the minus pole of the batteries first.)
3 Reattach the front lid.
4 Press the RESET button using a thin stick.
3
4
5 Press the
h
min
and
button to set the current time.
6 Press the CLOCK button using a thin stick and close the front lid.
If you are not going to use the unit for a long period of time, remove the batteries to
prevent damage which may occur due to leakage of electrolyte.
MODE
FAN
AUTO STOP
VANE
AUTO START
CHECK LOUVER
TEST RUN
SET
Sustitución de las pilas y ajuste de la hora actual
Si no se transmite ninguna señal y la lámpara de la unidad interior no se enciende
cuando se acciona el mando a distancia, las baterías se habrán descargado. Coloque pilas nuevas según las instrucciones siguientes.
h
min
RESET
Para controlador remoto inalámbrico
5
CLOCK
6
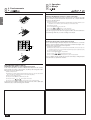
1 Extraiga la cubierta delantera
2 Extraiga las pilas gastadas e inserte pilas alcalinas (tamaño AAA). Cerciórese de que coloca las pilas en la dirección correcta. (Introduzca en primer lugar el polo negativo de la pila.)
3 Coloque nuevamente la cubierta.
4 Pulse el botón RESET utilizando una punta fina.
5 Pulse el botón
h
y
min
para ajustar la hora actual.
6 Pulse el botón CLOCK utilizando una punta fina y cierre la tapa delantera.
Si no va a utilizar el mando durante un largo período de tiempo, extraiga las pilas
para evitar daños por pérdida de electrólito.
Para controlo remoto sem fio
Substituição das pilhas e como regular a hora actual
Se não houver transmissão de sinal e a lâmpada da unidade interior não acender,
mesmo quando se acciona o controlo remoto, as pilhas podem estar gastas. Substitua-as por novas como abaixo descrito.
1 Retire a tampa da frente.
2 Substitua-as por pilhas alcalinas (tamanho AAA). Assegure-se de que elas estão instaladas na boa direcção. (Primeiro introduza o pólo negativo das pilhas.)
3 Volte a colocar a tampa da frente.
4 Carregue no botão RESET ao utilizar uma ponta fina.
5 Carregue no botão
h
e
min
para regular a hora actual.
6 Carregue no botão CLOCK ao utilizar uma ponta fina e feche a tampa da frente.
Se pensa que não vai utilizar a unidade por um longo período, retire as pilhas para
evitar danos que possam advir da fuga de electrólito.
8