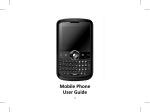
1
Companion User Guide For EVDO handset Model Name : MXE-635 Contents 1. Phone Layout ................................................................................................................................... 3 2. Specifications ................................................................................................................................... 4 3. Essential Topics ................................................................................................................................ 5 4. Getting started ................................................................................................................................. 6 5. Basic operations ............................................................................................................................... 6 6. Use the menu................................................................................................................................... 7 6.1 Contacts...................................................................................................................................... 7 6.2 Messages .................................................................................................................................... 8 6.3 Call History ............................................................................................................................... 13 6.4 Multimedia ............................................................................................................................... 13 6.5 Bluetooth.................................................................................................................................. 15 6.6 Camera ..................................................................................................................................... 15 6.7 Browser .................................................................................................................................... 16 6.8 Tools ......................................................................................................................................... 16 6.9 Settings .................................................................................................................................... 18 6.10 Profiles.................................................................................................................................... 19 6.11 Games .................................................................................................................................... 19 6.12 Downloads .............................................................................................................................. 20 1. Phone Layout 1 Side key—Volume Up 7 Side key – Speaker phone switch 2 Side key – Volume Down 8 Downloads 3 Earphone 9 Micro-USB 4 Speaker 10 Receiver 5 External Screen 11 Camera 6 Side key – Voice Commands 12 Back cover jack 1.1 Key layout End Call Cancel Action Go to Home Screen Pick up Send a call Access call History (Redial) (short key press) Left Softkey Right Softkey Navigation Key Confirm an option (press the middle of the key) Access main menu (short key press) Camera Key shortcut key text message shortcut key Back Key From main screen - Short key press: * - Press the middle of the Navigation Key then the * key: Locks the phone - Press the Left Softkey then the * key:Unlock the phone In Edit mode: - Short key press: Access the Symbols table From main screen - Short key press: # - Long key press: Activate/deactivate Vibrating Mode In Edit mode: -Short key press: Changes input methods From main screen -Short key press: 0 In Edit mode: -Space or zero 1.2 Main screen icons Signal strength received by the antenna Bluetooth active There is no service Alarm clock There is (are) unread message(s) Vibrate icon Battery level indicator (This icon indicates full battery) Ring icon Vibrate first then ring Mute Icon Keypad locked USB connected Earphone inserted Roaming Airplane Mode 2. Specifications Phone Type UMX MXE-635 RUGGED CLAMSHELL Specification Dimensions 96.5 x 48.6 x 16 .6mm Weight 120g Screen Display Resolution Main Screen: 2.2” QVGA(320 x240) External Screen: 1.2” OLED Card Type No UIM Card Applicable System CDMA 800MHz/1900MHz Bluetooth Support Recorder Support MMS/ WAP Support Contact Capacity 1000 sets in the phone SMS Capacity Up to 500 Call Records 20 each for missed, answered and dialed calls Receiving Call Vibration Support Preset Ringing Tone Type 10 ringing tones Preset SMS Tone Type 10 tones Call Time Support Speed Dial Support MP3 Support Camera Support Input Methods Support Date and Time Display Support Alarm/Calculator Support Games Support Caller Number Display Support 3. Essential Topics Box connects: 1 phone 1 battery 1 charger 1 Micro-USB data cable 1 earphone Communication Control Keys The ‘Calling’ key is used for making a call (after a number has been entered), or for viewing recent call records. The ‘End’ key is used for ending a call (during dialing and communication state), or for exiting menu under menu state to return to standby menu. Pressing and holding this key switch on or off the phone. Functional Keys and soft keys Direction keys of up, down, left and right direction key are used for browsing menus, lists, options or content complied. Under standby screen, up direction key is used for Calendar, the down direction is used for Bluetooth, left direction key is used for Multimedia, right direction key is used for Messages. Middle of the direction key is used for go to main menu screen. The left soft key is a shortcut key for accessing Contacts; the right soft key is a shortcut for accessing Recent. The functions of the two soft keys under other states are closely related to the phone’s current state. Standard Keypad From ‘0’ to ‘9’, and ‘*’, ‘#’ are used for input the number when make a dialing, inputting password, English letters, symbols etc. and inputting Spanish. Language and input methods Changes language: [Menu] > [Settings] > [Phone] > [Language] This handset provides input methods as Spanish, English, Numbers and accustomed symbols input. Under editing status, you can press the key ‘#’ to switch between input methods and press the key ‘*’ to switch to symbol. For detailed operations please refer to relevant chapters of “Operation of Input Methods”. Short message alert mode You should choose refer to the path: [Menu] > [Profiles] > [choose one mode] > [Personalize] > [Message alert tone] Call alert modes To choose a ring tone, press [Menu]> [Profiles]> [choose one mode]> [Personalize]> [Ringtone] Find Contacts You can search for a contact by entering their name. From idle mode, press the Left Softkey [Contacts], then input the name you want to find. The screen will display all matches 4. Getting started Charging your battery The battery used in the phone is rechargeable. New battery must be fully charged before it is used for the first time. Only after several times of charging and discharging can the battery’s efficiency made the best of. To ensure the battery in optimal state, we recommend you discharge the battery fully at least once every month by consuming the power until the phone is switched off automatically. During the course of charging, it is normal to find the battery and the phone slightly heat-up. The phone will automatically protect itself when battery temperature rises so as to control temperature variation. The handset will give off alert as the battery is running out. When the power has run out the handset will be switched off automatically. Note: Actual time of usage of the battery varies according to different operation modes and settings of network base station. If you use the phone when battery is rather low, the phone may switch off automatically. Please recharge in time. Procedure for battery charging Connect the charger to a main socket, and insert the charging plug into the USB of the phone and use shielded USB cable. At this time phone starts charging. The battery symbol will be gradually lengthened from left to right. You may choose to charge the battery under power-off or standby state. When the battery is fully charged, charging operation stops automatically. The battery symbol on the screen will maintain full-grid. At this time please unplug the charging plug. Note: ⅰ. For safety, neither changes the parts and fitments of the battery by yourself nor take off the battery outer case. ⅱ. Please use charger of original make. Using charger of your choice may cause your phone to damage. 5. Basic operations Switching on Pressing and holding the ‘power on/off’ key in the standby state may switch on the phone. It will automatically search the network if the phone has no password protection. Your phone remains in a searching state if it fails to find the available network system. If a password for the phone is required after it is switched on, please input the correct one Switching off To switch off the phone, please press and hold the ‘on/off’ key for 3 seconds and more in the standby state. Note: If you switch off the phone directly by taking off the battery, some information to be stored in the phone may possibly get lost, which may cause inconvenience. Making a call Under standby state, input number directly via the keypad. Then press the ‘Calling’ key to make the call. Adjusting the volume of earpiece During a conversation, you may press the up and down-direction key to adjust the volume of earpiece, or press the side volume up/down key. Answering a call When a call is incoming, the phone will prompt you according to the incoming call prompt mode you have set. To answer a call, press the ‘Call control’ key to answer the call directly or any key (If ‘Any Key Answer’ is set on) to answer. To reject a call, press the ‘on/off’ key and the other party will hear a busy tone. 6. Use the menu –Enter the menu In idle mode, press the middle of the Navigation Key to access the main menu of the phone. Under the main menu interface, press any key to access the corresponding ‘Menu option list’. The main menu includes 12 options, and all menus have the function for text prompts for the corresponding function. Menus are further divided into multi-item sub-menus. Menu functions let you set, check or change the phone’s various settings to meet your personal requirements. Use the direction keys to browse and select from menus. Press the OK key or Left Softkey to confirm or to enter the sub-menu list of the selected menu. Press the “Back” key to return to the previous menu. Press the ‘power on/off’ key to exit the menu and return to the standby screen. While editing or entering text, use the “Back” key to delete text. Press it once to delete one character and press and hold it to delete all the input characters. Under Options, ‘On’ or ‘Activate’ enables the selected function and ‘Off’ or ‘Cancel’ disables the function. –navigation the menu The standby screen menu includes four options, Calendar, Multimedia, Messages and Bluetooth. Press the Navigation Key to enter the listed menus. 6.1 Contacts Includes the options as following: Contact List Create New Contact Group Set Speed Dial Memory Info 6.1.1 Contact List To show all contact that save on the phone. Each contact display name and the basic phone number. Also you can press the left& right navigation key to show the other number of the contact. There are serials options you can choose by left key. Make a dial: Select the contact by the up/down navigation key, the contact person will been highlight, press the answer/send key. Send messages: You can send a message to a contact that you selected. Text messaging Picture messaging Edit: If you want to edit a contact, then you enter this option. A whole contact information include: name, mobile number, home number, work number, fax number, other number, email, address, ringer ID, picture and group. Create New Contact: To create a new contact. Notes: When you create a new contact, you must be sure the number is not empty when you saved to phone. Edit Before Call: you can edit the phone Number before you make the call. Share: Share to message or Bluetooth. By text message By Picture message By Bluetooth Add to Group: You can assort the contact to the different groups, such as friend, family etc. Total 10 kinds of group can be choosing. Set Speed Dial: If you set a contact to speed dial, long press the numeric keypad in standby screen; the phone will send a call auto. Delete Contact: Used for delete a contact. Select Multiple to: Used for do the follow operation with multiple, like mark. Delete Send Via Bluetooth 6.1.2 Create New Contact Allows user create new contacts in the contact book. 6.1.3 Group: Total 10 groups. The following options can be set. Group Members Rename: max 39 characters Group Ring: 10 rings, 1 default, 1 ring select from phone other files. 6.1.4 Set Speed Dial Enables the user assign speed dial keys to a phone number in the contact list. Speed dial number 1 is reserved for voice mail; 2 through 9 can be set by the user. 6.1.5 Memory Info Display the memory status of the phonebook in the phone. 6.2 Messages Messaging is a network service. You may be required to subscribe the service from your network operator prior to sending and receiving text messages. A message is sent to the messages center of the network, then to the targeted user by the network. If the targeted user’s phone is off or out of network area, the network will store the message temporarily. When the phone receives a new text message, you will be prompted according to setting and the Unread Messages icon will appear at the top of the main screen to indicate unread text message. To open and read an incoming text message in main screen 1. Select the message icon 2. Select the type of message a. Select Text Messaging (for simple text messages, up to 515 characters), then select and enter Inbox. b. Select Picture Messaging (for attached, multimedia files (photos, audio, etc)), then select and enter Inbox. 6.2.1 Text Messaging (SMS) 6.2.1.1 New Text Message Operation: [Menu] > [Messages] > [Text Messaging] > [New Text message] *key is used for shift symbol, #key used for shift input method. Numeric keypad used for input the Abc by default. When finish the message, following options by ‘More’. Send to – Save and Send Send Send to contacts Insert – Contact info: Insert contact name and number. Text Template: Insert common phrase in the text message. It provides you with 12 common phrases. Sending options – Priority: Normal/Urgent Delivery report: Off/On Delivery: Immediate/Schedule Text Entry: Shift the input method. Save to Drafts: Save the message edited to DraftBox. Cancel Message: Cancel the operation and back to information lists. 6.2.1.2 Voice Mail By selecting the Voice Mail menu, the phone will automatically access the Voice Mail service. The Voice Mail service can also be accessed by holding the “1” key in standby mode. 6.2.1.3 Inbox The Inbox is used for reading text messages received. In the Inbox, the phone can store up to 50 text messages. You may press up and down-navigation key to browse the message list. In the message Read mode, the following options are available. Following options by ‘More’. Reply: Reply to the text message you are currently reading. Reply with Content: Reply to the text message you are currently reading with the messages. Also you can edit all of the messages. Delete: Delete the text message you are currently reading. Call: Call to the contact that sends you message you are currently reading. Forward:Forward the text message you are currently reading to others. Lock: When in locked mode, message cannot be deleted. Delete Multiple: Delete multiple messages. New Text Message: Create new text message. Enter the messages, following options by ‘More’. Reply: Reply to the text message you are currently reading. Forward: Forward the text message you are currently reading. Use Number – Precise: Get the number in the message and contact number. – Imprecise Use URL – Get the URL from the message. Delete: Delete the text message that you currently reading. 6.2.1.4 Outbox This feature is used to store sent and failed messages. following options are available. Operation: [Messages] > [Text Messaging] > [Outbox] Following options by ‘More’. In the message Read mode, the Send: Send the text message again you reading currently. Forward: Forward the text message you are currently reading. Delete: Delete the text message. Delete Multiple: Delete multiple text messages. Clean Up Message: Delete all Outbox messages. New Text Message: Create new text message. Operation: [Messages] > [Text Messaging] > [Outbox] then press OK. Following options by ‘More’. Send: Send the text message. Delete: Delete the selected text message. Edit: Edit the selected text message. Forward: Forward the selected text message. Use URL: Get the URL from the message. 6.2.1.5 Sentbox The Sentbox is used for storing the text messages you have sent and selected the Save and Send option in the Send to menu. Delete: Delete the message currently being read. Delete Multiple: Delete multiple items. Clean up Message: Delete all Outbox messages. New Text Message: Create a new text message. 6.2.1.6 Draftbox After editing a new text message, choose “Save”. The message will be saved into the draft box. Delete: Delete the message currently being read. Delete Multiple: Delete multiple items. Clean up Message: Delete all Outbox messages. New Text Message: Create a new text message. 6.2.1.7 Template There are 12 common short phrases stored in the phone. You can add, then edit or delete your own common phrases. 6.2.1.8 Deferred Lists messages that have been deferred sending. 6.2.1.9 Conversation All the conversation in you text message have been send and receive. It’s display by a window that include the all communication of you and your contact‘s messages, you can relay, read and delete them. Note: When you delete the message in conversation, the messages in Inbox and Outbox will be deleted automatically. 6.2.1.10 Settings Auto Delete: On/Off Memory Status: Displays the amount of memory being used for Contacts and text messages. Signature: Set signature information. When you create a new message it will be included in the message edit interface automatically. 6.2.1.11 Delete All: Delete all of the messages stored in Inbox, Outbox, Sentbox, Drafbox, voice mail. Inbox: Delete all of the text messages stored in Inbox. Outbox: Delete all of the text messages stored in Outbox. Sentbox: Delete all of the text messages stored in Sentbox. Drafbox: Delete all of the text messages stored in Drafbox. Voice Mail: Delete all of the messages stored in voice mail in phone. 6.2.2 Picture Messaging(MMS) Your phone also support send and receive MMS. That means you can send messages than contain photos, sound, and text through a MMS service. When sending a MMS message, the receiver must be using a MMS compatible cell phone in order for them to view your message. Note: This feature can only be used with a network provider or service that supports MMS. MMS messages can only be received and viewed by devices with MMS compatibility or e-mail features. Please contact your local network operator for setting up MMS messaging. 6.2.2.1 Create Picture Message Operation: [Menu] > [Messages] > [Picture Messaging] > [Create Picture message] Select cursor to ‘To’, following options by ‘Menu’ Add – Contact: Add the contact. New slide: Add a new slide to the picture message. Subject: Add the subject to the picture message. Cc: Add the cc contact. Bcc: Add the Bcc contact. Select cursor to slide, following options by ‘Menu’ Add – New Slide: add new slide to the picture message. Subject: Add the subject to the picture message. Cc: Add the Cc contact. Bcc: Add the Bcc contact. Insert – Camera: Insert the new camera to the picture message New audio: Insert the new recorder to the picture message. Image: Insert the images to the picture message in the phone. Ringtone: Insert the ringtones to the picture message in the phone. Other: Insert other files to the picture message in the phone. Preview: Preview the picture message that you created. Slide timing: Set the slide timing. The default is 8. 6.2.2.2 Inbox Operation: [Menu] > [Messages] > [Picture Messaging] > [Inbox] Select the picture message by up/down navigation key, the selected message will be highlight. Then you can press the ‘Select’ or ‘Menu’ key. ’Select’ key is to open the message. Following options by ‘Menu’ Open: Open the picture message and play it automatically. Reply—Picture Message: replay with picture message SMS: replay with text message. Call: Call back to the contact. Forward: Forward the selected picture message. Delete: Delete the selected picture message. Delete All: Delete the entire picture message in Inbox. 6.2.2.3 Outbox The Outbox all store the send failed picture messages. You select one message by up/down navigation key. And the selected message changes to highlight. Following options by ‘Menu’ Resend: Resend the picture message to the contact. Delete: Delete the selected picture message. Delete All: Delete all of the picture messages in Outbox. Lock/Unlock: Lock or unlock the selected picture message, the locked message will not be deleted. Press ‘Select’ (middle of the navigation key) to open the message. Following options by ‘Menu’ Play again: Replay the picture message. Forward: Forward the picture message you recently reading. Delete: Delete the picture message you recently reading. Message details: The details information of the picture message that you recently reading. Extract info: To show the number of the contact. Save item: Save items (picture…) of picture message to phone. 6.2.2.4 Drafts Edited MMS messages can be stored in Templates. 6.2.2.5 Sent Store the picture message has been sent. The following operations can be performed on messages in Sent Send again: Resend the select picture message. Forward: Forward the selected picture message. Delete: Delete the selected picture message. Delete All: Delete the entire picture message. Lock/Unlock: Lock or unlock the selected picture message. When in lock mode, the picture message will not be deleting. 6.2.2.6 Templates Edited MMS messages can be stored in Templates. 6.2.2.7 Settings Send –Delivery Report On/Off Read Report On/Off Save sent items On/Off Auto-deletion (Sent) On/Off Retry times Receive – Send Delivery Report On/Off Send Read Report Never/Always/Manual Retrieval mode Auto/Manual/Reject Edit – Signature On/Off Sliding timing 2/ 5/ 8/10 Seconds View mode – Auto/Manual Memory status: To show the space used, free space, usage rates of the picture messages in the phone. Restore default: Resume default setting of picture message. Save Picture Messaging – Phone/Card Version: The version of the picture messages mode. 6.3 Call History Operation: [Menu] > [Call History] form the main menu. 6.3.1 Missed Calls You can view the missed calls with name in the ‘Missed Calls’ menu if you have missed calls. Each record includes number, call in time, call in date, and the counter. Press up/down navigation key to select the missing call. Send/Call key to dial the number selected. ‘OK’/middle of navigation key to show the details missed call information. There’s name if you has store the number to contact, otherwise no name. Following the options by ‘option’ Delete: Delete the missed call selected. Save to contacts: Save the missed call to contacts. Dial: Dial to the missed number selected. Send Message – Text Message: Send text message to the selected missed call. – Picture Message: Send picture message to the selected missed call. 6.3.2 Received Calls The phone saves the 20 most recently received calls automatically. Functional operation and display mode is the same as those of missed calls. 6.3.3 Dialed Calls The phone saves the 20 most recently dialed calls automatically. Functional operation and display mode is the same as those of missed calls. 6.3.4 Delete Log Delete Missed Calls: Delete all records of missed calls. Delete Received Calls: Delete all records of received calls. Delete Dialed Calls: Delete all dialed calls of received calls. Delete All: Delete all call history. 6.3.5 Call Time Last Call Time: The call times with last time call in or call out. Total Dialed: Total of all dialed calls time since the timer was reset last time. Total Received: Total of all received calls time since the timer was reset last time. Total Call Time: Total of the call in plus call out time since the timer was reset last time. Total Life Time Reset All Time: Reset all time to 0000:00:00. 6.4 Multimedia Operation: [Menu] > [Multimedia] 6.4.1 Audio Player The music player is provided for you to play all music file types stored on the cell phone or storage card. Supported music file formats include: MP3, MIDI, AMR, AAC, WAV, and QCP. The music player interface icons are sequentially: Previous, Pause, Play, Stop, and Next. You can move the cursor using the left and right keypad and then press the “OK” key to perform an operation. Press the left keypad to enter to options. The functions for the “Options” provided are as follows: Hide Audio Player: Return to the multimedia menu. Add to Playlist: Add the currently music to the playlist. Listen By Bluetooth: Play by Bluetooth headset if you connected with a Bluetooth headset. Send – By Bluetooth To Online Album Set to –Ringtone: Use as ringtone Manager – Delete: Delete the currently music file. File Attributes – File Detail: the currently music file’s name type, size, create time and protect feature. Play mode – Repeat All On/Off Random On/Off Note: When adding new music to the phone, select “Update Playlist” at the first “Option” screen.) When the Audio player is active, the buttons on the left side of the phone provide Rewind/Previous Selection, Pause/Play and Forward/next Selection choices. 6.4.2 Camera The camera is also accessible within this menu screen. See the section on Camera for further details. 6.4.3 Recorder This feature allows the recording of voice through the phone’s microphone. The files will be stored in the phone’s memory and the size of the file depends upon the amount of memory available. Standard functions in this feature are: Record Play Pause Stop Rewind Fast Forward Note: Please obey all applicable laws when recording conversations. 6.4.4 Gallery This phone provides memory space for use by the user. SD Micro cards (of optional capacity) are also supported. You can use these features to easily manage the directories and files of all forms stored on the cell phone or SD Micro card. Enter Gallery Go to “Phone” (or “Card” if available) Select Open: Use this function to enter the root directory of the memory. Default system directories, created data directories, and account files will be listed at the root directory (the root directory will only contain system folders the first time the phone is turned on or if the user has yet to create any directories). Or click “Options” to access the following operations: Manage: The following actions can be performed on the files listed: copy, move, delete, rename, and view properties. Add Option in the Manage menu: Mark New Directory Memory Status: Display available space and total capacity. 6.5 Bluetooth The Bluetooth features of the phone can be accessed by selecting the Bluetooth icon from the menu screen. To set up a new Bluetooth device: 1> Select Device Search option: When a Bluetooth device is enabled; all Bluetooth hands free devices and Bluetooth devices will be searched for. Bluetooth devices are then added and paired. 2> After detecting a Bluetooth hands free device, a Bluetooth password must be entered to perform the pairing. (Bluetooth passwords are set by other Bluetooth devices.) 3> Once pairing completes, it will connect the device. Options 1. Device Search – All Device: Searching for all Bluetooth, headset, Phone. Headset: Searching for the headset Bluetooth device. Phone: Searching for the phone Bluetooth device. 2. Discoverable on 60 seconds: Use this option can be discovered by other Bluetooth device. And the icon in status bar changes to red. 3. Found Devices: To view the founded devices that not paring. 4. Manage – Setup Bluetooth Turn Bluetooth On/Off: Turn On/Off Bluetooth Rename: Rename your phone’ name. My Info: View your phone’s device name and BD address. FTP Shared Device: Share the file FTP. Phone or Memory Card Save Option: Save option when receive files. Phone or Memory Card. 6.6 Camera The camera can be accessed by: By pressing the Camera shortcut key on the phone; Selecting [Menu] > [Multimedia] > [Camera]. Selecting [Menu] > [Camera]. Options of Camera: Resolution: The resolution of the photos. Self Timer: The self timer of the camera. Off/ 3 seconds/ 5 seconds/ 10 seconds Brightness: the brightness of the camera when you get some photos. White Balance: The white balance of the camera when you stay at the preview screen. Color Effects: Shutter Tone: The shutter tone when take photos. Storage: The storage of the stored picture. ‘Pictures’ key uses for view the pictures. Note: Please follow local laws and regulations when using this cell phone to take pictures. 6.7 Browser Operation: [Menu] > [Browser]. This feature allows your phone to browse the internet. Home page: A home page can be saved with each mode. When using WAP to browse, the home page for this mode will first be accessed. Enter URL: Enter the URL for the website to be connected. Search: Highlight to select a search engine to perform searches, and then enter text criteria to search on and Enter key search words. History: You can review the latest accessed web pages. Bookmarks: Multiple bookmarks can be created. Enter the Options menu and you can perform the following operations on Bookmarks: Open: Log in to the selected web address. Add Bookmarks: Add a new bookmark. Delete bookmark: Delete the selected bookmark. Delete All Bookmarks: Delete all the bookmarks. Edit bookmark: Edit the name and web address of the selected bookmark. Lock bookmark: Lock the bookmark. New directory: Create new directory to bookmark. Details: View the details on the selected bookmark. Reset: Restore to the default settings. Push Box: Store information on messages to notify the user about WAP site messages. Saved Web Pages: Use for save a page for reviewing the web page later. Advanced Options: Advanced options are primarily used for configure certain internet parameters and information. About: Display browser and platform version numbers. Exit Browser: Exit the browser and return to the menu interface. 6.8 Tools 6.8.1 Alarm Total 6 alarms can be set and use. For example Alarm 1 State – On/Off Alarm time: Set the alarm time. Repeat alarm: Once/Everyday/Custom Once means just alarm one time until the time you set. Everyday means the time you set will alarm every day. When you select Custom option, you can set the days you want to alarm. Alarm ring: Ring1~Ring5, 1 user-set. Snooze time-out: 5/ 10/ 15/ 30/ 60 minutes and Others 6.8.2 Notes Enter Notes menu, then select Create Note. 1. Enter the Note text. 2. When entering text, press the Left Softkey, to select “Advanced input” on the pop menu. In this mode, you can select other input methods, including Smart English input. 3. From the note list, select Option to access: Create Note,This Note (includes edit, delete, unmark send by Bluetooth) Mark mode and Memory status; 6.8.3 Calculator +: up of the navigation key -: down of the navigation key ×: Left of the navigation key ÷: Right of the navigation key =: middle of the navigation key . : * key +/-: # key The range of number of digits is 8, include decimal. 6.8.4 Stopwatch Two stopwatches: Common mode and Loop mode. ‘Select’ or OK (middle of navigation key) enter the stopwatch interface. ‘Begin’ to start, ‘Add’ to add a stopwatch that the time depends on times just now, ‘Pause’, ‘Continue’, ‘Restart’ to reset the stopwatch. Left/Right of navigation key is use for to look different watch’s time when you press ‘Pause’. 6.8.5 World Time To view the time in different locations of the world, scroll right/left across the map. 6.8.6 Calendar You can view the current date or scroll the calendar to view other months. Also you can view weekly or daily calendar entries, by going to: 1. Select “Option” 2. Select Week View or Day View 6.8.7 Schedule View and add schedule: Meeting, Call, Birthday, Memo, and Reminder. Just for example by Meeting. Subject: The name of the meeting. Location: the location of the meeting. Start Date: The start date of the meeting. Start Time: The start time of the meeting. End Date: The end date of the meeting. End Time: The end time of the meeting. Repeat: Never/Daily/Weekly/Monthly/Yearly Alarm Type: No alarm/Silent/With Tone Alarm Date: The ring time of the alarm. Alarm: The time of the alarm. 6.8.8 Bluetooth Same intro with 6.5 chapters. 6.8.9 Unit Converter The unit converter of currency, area, length, mass, temperature, velocity and volume. Currency: The currency of USD, EUR, GBP, HKD, AUD, SEK’s unit converter and rate of exchange. Press ‘Rates’ key to edit the rate of exchange. ’Save’ key to save you changed, ‘Reset’ key to reset the rate of exchange to default. Left/ Right direction key is used for change main currency. * Key is use for input decimal. Area: The area unit converter. The operation same with Currency, the only difference is user cannot change the rate. Length: The length unit converter. Mass: The mass unit converter. Temperature: The temperature unit converter. Velocity: The velocity unit converter. Volume: The volume unit converter. Ez Tip Calc 6.9 Settings 6.9.1 Phone Language: Choose English or Spanish. Greeting: Switch between Enable and Disable by up/down of navigation key. The greeting is shown when the phone is powered on and can be edited by highlighting the current greeting and pressing the left soft/menu. Clock Format: Set 12 hour (AM/PM) or 24 hour. Date Format: DD/MM/YYYY, MM/DD/YYYY, YYYY/MM/DD Voice Readout: Keypad Digits/Contact list Entries/Recent Call Entries USB Disk Mode: Connect with PC by USB cable. Select ‘Act’ to accept connect with personal computer. 6.9.2 Display Wallpaper: Select a picture for the background image on the phone. LCD Backlight: The backlight time can be set to turn off after 10, 20, or 30 seconds. It can also be set to always on, however the longer backlight is on the faster the battery will drain. Brightness: You can select the brightness level of the LCD backlight by pressing the Navigation Key left or right. Main Menu: You can set the main menu as Icon or List mode Themes: There are three themes can be set. 6.9.3 Call Answer Options: Select Flip Open, Any Key or Send Only to answer a call. Emergency Alert: Ring &Vibrate/ Vibrate Only Call Duration Reminder: Turn Off/ 45s/ 50s/ 55s Call Connect Notification: Disable/ Enable DTMF Tones: The key tones length when press any key of the phone. Short/ Long TTY Mode: TTY Off/ TTY Full/ TTY VCO/ TTY HCO Auto Redial: The options for missing call, auto redial or not. 6.9.4 Security To make changes in the Security menu, you must correctly input the phone password. The initial password is 0000. Phone Lock: If enabled, you will be prompted to enter the phone’s password when the phone is powered on. Keypad Lock: Turn Off/ 5s/30s /60s/ 5min can be chooses. Call History Lock: If enabled the phone will require the password to be entered each time you access the phone’s Call History. Message Lock: If enabled, the phonebook cannot be viewed until the password is entered Restrictions: To enter this option, the password is also 0000,incoming call, Outgoing Calls, Incoming Text messages, Outgoing Text Messages, Incoming Picture Messages, Outgoing Picture Messages, IP Connection. Those all have three options can be set: Allow All/ Contacts Only/ Block All. Change Password: Change the password using this option. The Old Password must be entered before a new one is accepted. Enter the same new password twice and press the left soft/ menu key to confirm. The new password will then become effective. During this course you may press the right soft key to discard the change at any time and return to higher-level menu. You can create separate passwords for the phone lock, the call history lock, the phonebook lock, and the message lock. Restore Factory Settings: This function is used for restoring to the default factory settings. 6.9.5 Phone Info Base Phone Information Base Phone Information includes Software version, hardware version, phone number, MEID HEX etc. Icon Glossary This option views the all Icon in your phone are what means. 6.10 Profiles The Profiles setting is used to customize the phone’s alerts and ringtones. Operation: [Menu] > [Profiles]. There are five predefined profile settings which can be customized: Normal, Loud, Vibrate, Silent, and Airplane Mode. Note: in Airplane Mode, please consult airline staff about the use of Airplane Mode in flight. Turn off your phone whenever instructed to do so by airline staff. Airplane Mode turns off your phone’s calling features in locations where wireless phone use is prohibited. You cannot make or receive calls in Airplane Mode, but you can use your phone’s other non-calling features Activate Set to be current active profile. Personalize You are able to customize the following settings for each of the above choices: Incoming call alert: there are Ring/Ascending/ Ring once/ Beep once/ Off alert type can be select. Voice volume: Set the speaker volume. Ringtone: Select the incoming ring tone. Ring volume: Set the ring volume for incoming calls. Vibrating alert: Select vibration on or off. Message alert tone: Select the text message alert tone. Roaming Ringtone Same with ringtone Keypad tone: Set the keypad tone. Auto Answer: Set auto answer time. Speakerphone: Select whether or not to enable the speaker. 6.11 Games This handset provides two full-graphic games: Snake and Black lack. To access Games, select [Menu] > [Games] Both games allow turning the audio On/Off and provide Help and High Scores. Please see the menu for each game for Rules and Help. 6.12 Downloads You can download brew application in here. FCC Regulations: This mobile phone complies with part 15 of the FCC Rules. Operation is subject to the following two conditions: (1) This device may not cause harmful interference, and (2) this device must accept any interference received, including interference that may cause undesired operation. Changes or modifications not expressly approved by the party responsible for compliance could void the user‘s authority to operate the equipment. This mobile phone has been tested and found to comply with the limits for a Class B digital device, pursuant to Part 15 of the FCC Rules. These limits are designed to provide reasonable protection against harmful interference in a residential installation. This equipment generates, uses and can radiated radio frequency energy and, if not installed and used in accordance with the instructions, may cause harmful interference to radio communications. However, there is no guarantee that interference will not occur in a particular installation If this equipment does cause harmful interference to radio or television reception, which can be determined by turning the equipment off and on, the user is encouraged to try to correct the interference by one or more of the following measures: -Reorient or relocate the receiving antenna. -Increase the separation between the equipment and receiver. -Connect the equipment into an outlet on a circuit different from that to which the receiver is connected. -Consult the dealer or an experienced radio/TV technician for help. Cet appareil est conforme aux dispositions de la partie 15 des règles de la FCC et des normes CNR d'Industrie Canada sur les appareils radio exempts de licence. Son utilisation est assujettie aux deux conditions suivantes : (1) Cet appareil ne doit pas causer d'interférence nuisible; et (2) cet appareil doit accepter toute interférence reçue, y compris l'interférence qui pourrait causer un fonctionnement non désiré. Cet équipement a été testé et jugé conforme aux limites d'un appareil numérique de la Classe B, en vertu de la partie 15 des règles de la FCC et de la NMB-003 canadienne. Ces limites sont conçues pour fournir une protection raisonnable contre l'interférence nuisible dans une installation résidentielle. Cet équipement génère, utilise et peut émettre de l'énergie radiofréquence et, s'il n'est pas installé et utilisé conformément aux instructions, peut causer une interférence nuisible aux communications radio. Toutefois, il n'est pas garanti que l'interférence ne se produira pas dans une installation particulière. Si cet équipement cause une interférence nuisible à la réception radio ou de programmes de télévision, laquelle peut être déterminée en éteignant et en allumant l'équipement, l'usager est encouragé à essayer de corriger l'interférence par l'une ou plusieurs des mesures suivantes : • Réorientez ou relocalisez l'antenne de réception. • Augmentez la séparation entre l'équipement et le receveur. • Connectez l'équipement à une prise sur un circuit différent de celui auquel de le receveur est connecté. • Consultez le vendeur ou un technicien radio/de télévision pour obtenir de l'aide. La FCC ou Industrie Canada peut vous obliger à arrêter d'utiliser votre appareil si une telle interférence ne peut pas être éliminée. MXE-635 n'a pas approuvé les changements ou modifications apportés à cet appareil par l'usager. Tous les changements ou modifications apportés peuvent entraîner la révocation de l'autorisation d'utilisation de l'appareil. FCC RF Exposure Information (SAR) This mobile phone meets the government’s requirements for exposure to radio waves. This phone is designed and manufactured not to exceed the emission limits for exposure to radio frequency (RF) energy set by the Federal Communications Commission of the U.S. Government. The exposure standard for wireless mobile phones employs a unit of measurement known as the Specific Absorption Rate, or SAR. The SAR limit set by the FCC is 1.6W/kg. *Tests for SAR are conducted using standard operating positions accepted by the FCC with the phone transmitting at its highest certified power level in all tested frequency bands. Although the SAR is determined at the highest certified power level, the actual SAR level of the phone while operating can be well below the maximum value. This is because the phone is designed to operate at multiple power levels so as to use only the power required to reach the network. In general, the closer you are to a wireless base station, the lower the power output. The highest SAR value for the model phone as reported to the FCC when tested for use at the ear is 0.370W/kg and when worn on the body, as described in this user guide, is 1.180W/kg (Body-worn measurements differ among phone models, depending upon available enhancements and FCC requirements.) While there may be differences between the SAR levels of various phones and at various positions, they all meet the government requirement. The FCC has granted an Equipment Authorization for this model phone with all reported SAR levels evaluated as in compliance with the FCC RF exposure guidelines. SAR information on this model phone is on file with the FCC and can be found under the Display Grant section of http://www.fcc.gov/oet/fccid after searching on FCC ID: P46-MXE635. For body worn operation, this phone has been tested and meets the FCC RF exposure guidelines for use with an accessory that contains no metal and the positions the handset a minimum of 1.5 cm from the body. other enhancements may not ensure compliance with FCC RF exposure guidelines. Use of If you do not use a body-worn accessory and are not holding the phone at the ear, position the handset a minimum of 1.5 cm from your body when the phone is switched on. http://www.fcc.gov/oet/fccid IC Notice This device complies with Industry Canada license-exempt RSS standard(s). Operation is subject to the following two conditions: (1) this device may not cause interference, and (2) this device must accept any interference, including interference that may cause undesired operation of the device. Le présent appareil est conforme aux CNR d'Industrie Canada applicables aux appareils radio exempts de licence. L'exploitation est autorisée aux deux conditions suivantes: (1) l'appareil ne doit pas produire de brouillage, et (2) l'utilisateur de l'appareil doit accepter tout brouillage radioélectrique subi, même si le brouillage est susceptible d'en This Class B digital apparatus complies with Canadian ICES-003. Cet appareil numérique de la classe B est conforme à la norme NMB-003 du Canada. IC: 10719A-MXE635 IC Radiation Exposure Statement This EUT is compliance with SAR for general population/uncontrolled exposure limits in IC RSS-102 and had been tested in accordance with the measurement methods and procedures specified in IEEE 1528 and IEC 62209. This equipment should be installed and operated with minimum distance 1.5 cm between the radiator and your body. This device and its antenna(s) must not be co-located or operating in conjunction with any other antenna or transmitter. Cet appareil est conforme aux limites d'exposition DAS incontrôlée pour la population générale de la norme CNR-102 d'Industrie Canada et a été testé en conformité avec les méthodes de mesure et procédures spécifiées dans IEEE 1528 et IEC 62209. Cet appareil doit être installé et utilisé avec une distance minimale de 1.5 cm entre l’émetteur et votre corps. Cet appareil et sa ou ses antennes ne doivent pas être co-localisés ou fonctionner en conjonction avec tout autre antenne ou transmetteur.