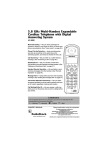
1
5.8 GHz Dual-Handset Expandable
2-Line Cordless Telephone with
Digital Answerer
43-3704
Memo Recording — lets you leave messages for
yourself or others in your home or office, or record your
phone conversations. (See “Voice memo” on page 66.)
Call Screening — lets you listen as a caller leaves a
message. (See “Screening a call” on page 62.)
Speakerphone — lets you conduct a hands-free
conversation using the handset.
Handset Remote Operation — lets you listen to your
incoming messages from the handset. (See “Remote
Operation” on page 67.)
Message Alert — beeps when you have new incoming
message. (See “Setting the message alert” on page 60.)
Convenient Extension Placement — lets you place
another handset in addition to the supplied, anywhere
you have an AC outlet, regardless of phone jack
location.
Call Waiting/Caller ID — lets you answer a call even
when you’re on the phone and see who’s calling before
you answer.
2-line operation — lets you have one handset talking
on Line 1 while another handset participate in a 3-way
conference on Line 2 (you must have a 2-line
subscription from your phone company).
!
!
IMPORTANT
If an icon appears at the end of a paragraph, go to the box on that page with the
corresponding icon for pertinent information.
o — Warning
! — Important ! — Caution Ô — Note
OWNER’S MANUAL
Please read before using this equipment.
© 2004 RadioShack Corporation.
All Rights Reserved.
RadioShack and RadioShack.com are trademarks
used by RadioShack Corporation.
ENERGYSTAR and the ENERGYSTAR certification mark
are registered US marks.
DirectLink is a registered trademark of Uniden Corporation.
CONTENTS
Introduction ................................... 3
Important Information .................... 4
FCC Statement .................................. 4
Surge Protection ................................ 5
Important Safety Instructions ........ 6
Important Caller ID Information ..... 7
Read This Before Installation ............. 7
Installation ..................................... 8
Selecting a Location .......................... 8
Connecting/Charging the Battery
Pack .............................................. 11
Installing a Beltclip ........................... 13
Using a Headset .............................. 13
Display and Icons ....................... 14
Animation Displays .......................... 14
Soft Key Function ....................... 15
Main Menu Options ..................... 16
Default Settings ............................... 16
Setting Menu Options ................. 17
Using the Interface ........................... 17
De-register the Handset ................... 30
Using Your Phone ....................... 30
Making a call ....................................
Receiving a call ................................
Hanging Up ......................................
Call Waiting ......................................
Placing a Call on Hold .....................
Redialing a Call ................................
Adjusting the Handset Earpiece and
Speaker Volume ...........................
Do Not Disturb (DND) ......................
Mute Microphone .............................
Tone Dialing Switch Over .................
Travelling Out-of-Range ...................
Privacy Mode ...................................
Conferencing ...................................
Flash and Call Waiting .....................
Find Handset ...................................
30
31
32
32
32
32
34
34
35
35
35
35
36
37
37
Phonebook .................................. 38
Storing Phone Numbers, Names,
Distinctive Rings, and Speed
Dial ................................................
Steps for Entering Names and
Special Characters .......................
Viewing the Phonebook ...................
Making Calls Using the
Phonebook ....................................
Speed Dialing ..................................
Editing or Erasing a Data .................
Copying Phonebook Locations ........
Testing Stored Emergency
Numbers .......................................
38
39
40
41
41
42
43
44
Caller ID ...................................... 45
2
Caller ID and CIDCW (Caller ID on Call
Waiting) ........................................ 45
Viewing the Caller ID List ................ 46
Deleting a Caller ID Message ......... 47
Using the Caller ID Message List .... 47
Call Waiting Deluxe Features .......... 49
Expanding Your Phone ............... 50
Register the Handset to the Base ... 50
Using the DirectLink Mode .............. 51
Intercom/Call Transfer Feature ....... 51
The Integrated Answering
Device ........................................ 54
Features ..........................................
Turning the Answering System
On/Off ...........................................
Setting up Your Answering
System .........................................
Adjusting the Speaker Volume
Level .............................................
NEW MESSAGE LED .....................
Using Your Answering System ........
Remote Operation ...........................
Troubleshooting ..........................
Care ............................................
Service and Repair .....................
Note about Handset-Base
Registration ................................
54
55
55
56
57
63
67
71
73
73
74
INTRODUCTION
Your phone operates on
standard radio
frequencies as allocated
by the FCC.
•
It is possible for other
radio units operating
nearby on similar
frequencies to
unintentionally intercept
your conversation or
cause interference. This
possible lack of privacy
can occur with any
cordless phone.
Introduction
Thank you for purchasing a RadioShack 5.8
GHz Dual Handset Expandable 2-Line
Cordless Telephone. Unlike other
conventional cordless telephones, your
telephone supports up to two handsets on a
single telephone line. You can add a
handset to any room in your home or office
that has an AC outlet. No more running to
the other end of the house to answer the
phone! You can transfer outside calls to
another handset. If you subscribe to Call
Waiting with Caller ID, the phone shows you
the incoming caller information, even when
you are already talking on the phone.
! IMPORTANT !
•
The digital answering system stores up to
12 minutes of messages (for each line) on a
computer chip and records each message’s
day and time. This gives you advanced
capabilities over tape-based answering
machines:
• You can delete individual messages
and save the rest.
• There are no tapes to bother with and
no tape mechanisms to wear out.
The remote operation feature lets you
operate your answering system from a
touch-tone phone (or from a rotary phone
with a pocket tone dialer).
Cordless phones require AC power to
operate. When the power is off, you cannot
make or receive calls by using your phone.
You should also have a phone that does not
need AC power to operate (not a cordless
phone), so you can still make and receive
calls if there is an AC power failure. !
3
IMPORTANT
INFORMATION
As an ENERGYSTAR Partner,
RadioShack Corporation has
determined that this product
meets the ENERGYSTAR
guidelines for energy
efficiency.
Important Information
Ô NOTE Ô
You must not connect your
phone to:
•
•
coin-operated systems
most electronic key
telephone systems
WARNING: To reduce the risk of
fire or shock hazard, do not expose
this product to rain or moisture.
This telephone has been tested and found
to comply with all applicable UL and FCC
standards.
FCC STATEMENT
This equipment complies with Part 68 of the
FCC rules and the requirements adopted by the
ACTA. On the base of this equipment is a label
that contains, among other information, a
product identifier in the format
US:AAAEQ##TXXXX. If requested, this number
must be provided to the telephone company.
Your phone is not intended to be used with
party-line systems. Connection to party line
service is subject to state tariffs. Contact the
state public utility commission, public service
commission, or corporation commission for
information. Ô
The REN is used to determine the number of
devices that may be connected to a telephone
line. Excessive RENs on a telephone line may
result in the devices not ringing in response to
an incoming call. In most but not all areas, the
sum of RENs should not exceed five (5.0). To
be certain of the number of devices that may be
connected to a line, as determined by the total
RENs, contact the local telephone company.
For products approved after July 23, 2001, the
REN for this product is part of the product
identifier that has the format
US:AAAEQ##TXXXX. The digits represented
by ## are the REN without a decimal point (e.g.,
03 is a REN of 0.3). For earlier products, the
REN is separately shown on the label.
If you use more than one phone or other device
on the line, add up all of the RENs. If the total is
more than five (three in rural areas), your
telephones might not ring. If ringer operation is
impaired, remove a device from the line.
CAUTION
The lightning symbol is intended to alert you to the presence of
uninsulated dangerous voltage within this product’s enclosure that
might be of sufficient magnitude to constitute a risk of electric shock.
Do not open the product’s case.
4
.
!
RISK OF ELECTRIC
SHOCK DO NOT OPEN
!
CAUTION: TO REDUCE THE RISK OF ELECTRIC
SHOCK, DO NOT REMOVE COVER OR BACK. NO USERSERVICEABLE PARTS INSIDE. REFER SERVICING TO
QUALIFIED PERSONNEL.
The exclamation symbol is intended to inform you that important operating
and maintenance instructions are included in the literature accompanying
this product.
Important Information
In the unlikely event that your phone causes
problems on the phone line, the phone company
can temporarily discontinue your service. If this
happens, the phone company attempts to notify
you in advance. If advance notice is not
practical, the phone company notifies you as
soon as possible and advises you of your right to
file a complaint with the FCC.
Also, the phone company can make changes
to its lines, equipment, operations, or
procedures that could affect the operation of
this phone. The telephone company notifies
you of these changes in advance, so you can
take the necessary steps to prevent
interruption of your telephone service.
This device complies with part 15 of the FCC
rules. Operation is subject to the following two
conditions: (1) This device may not cause
harmful interference, and (2) This device must
accept any interference received, including
interference that may cause undesired
operation. Privacy of communications, may not
be ensured when using this phone.
To insure the safety of users, the FCC has
established criteria for the amount of radio
frequency energy various products may
produce depending on their intended usage.
This product has been tested and found to
comply with the FCC’s exposure criteria. For
body worn operation, the FCC RF exposure
guidelines were also met when used with the
RadioShack accessories supplied or designed
for this product. Use of other accessories may
not ensure compliance with FCC RF exposure
guidelines and should be avoided.
SURGE PROTECTION
Your telephone has built-in protection circuits to
reduce the risk of damage from surges in
telephone line and power line current. These
protection circuits meet or exceed the FCC
requirements. However, lightning striking the
telephone or power lines can damage your
telephone.
Lightning damage is not common.
Nevertheless, if you live in an area that has
severe electrical storms, we suggest that you
unplug your phone when storms approach to
reduce the possibility of damage.
5
IMPORTANT SAFETY INSTRUCTIONS
When using your telephone equipment, basic safety precautions should
always be followed to reduce the risk of fire, electric shock and injury to
persons, including the following:
1. Do not use this product near water, for example, near a bathtub,
wash bowl, kitchen sink, or laundry tub, in a wet basement or near a
swimming pool.
2. Avoid using a telephone (other than a cordless type) during an
electrical storm. There may be a remote risk of electric shock from
lightning.
3. Do not use the telephone to report a gas leak in the vicinity of the
leak.
4. Use only the power cord and batteries indicated in this manual.
Do not dispose of batteries in a fire. They may explode. Check with
local codes for possible special disposal instructions.
SAVE THESE INSTRUCTIONS
Important Safety Instructions
6
Important Caller ID Information
IMPORTANT CALLER
ID INFORMATION
To use Caller ID and Call Waiting, you must
be in an area where those services are
available and you must subscribe to those
services through your local phone company.
Where Caller ID is offered, one or more
options are generally available:
• caller’s number only
• caller’s name only
• caller’s name and number
If you subscribe to Call Waiting ID and
Caller ID, the system can show you the
incoming caller information, even when you
are already talking on the phone.
READ THIS BEFORE
INSTALLATION
We have designed your phone to conform
to federal regulations and you can connect it
to most phone lines. However, each device
that you connect to the telephone line draws
power from the line. We refer to this power
draw as the phone’s ringer equivalence
number, or REN. The REN is on the bottom
of your phone.
7
Ô NOTE Ô
If your home has specially
wired alarm equipment
connected to the telephone
line, be sure that installing
the system does not disable
your alarm equipment.
If you have questions about
what will disable alarm
equipment, contact your
telephone company or a
qualified installer.
INSTALLATION
Before using your phone, carefully peel the
protective film off the display. The film
protects the handset window during
shipment and is not necessary for use.
SELECTING A LOCATION
You can place the phone’s base on a desk
or table, or mount it on a standard wall plate
or directly on a wall. Select a location that
is:Ô
• near an accessible AC outlet
• near a telephone line jack
• out of the way of normal activities
Installation
• away from electrical machinery,
electrical appliances, metal walls or
filing cabinets, wireless intercoms,
alarms, and room monitors
• away from other cordless phones
The base’s location affects the handset’s
range. If you have a choice of several
locations, try each to see which provides the
best performance.
The handset antenna is located on the
back, above the ringer speaker. For
maximum communication range, do not
hold the handset in such a way as to cover
the antenna by your hand. Also, place the
handset in the upright position while not in
use so the antenna can pick up the signals
from the base.
When there is obstacle such as metal or
concrete wall between the handset and the
base, the operation might be affected. Try to
keep free from obstruction.
8
Your telephone connects directly to a
modular telephone line jack. If your
telephone wiring does not have a modular
jack, you can update the wiring yourself
using jacks and adapters (available at your
local RadioShack store), or have the
telephone company update the wiring for
you. Ô
Ô NOTE Ô
The USOC number of the
jack to be installed is
RJ11C (or RJ11W for a wall
plate jack).
On a Desk Top
1. Plug one end of the supplied long
modular cord into the TEL LINE 1/2 jack
on the back of the base.
For 2 line subscriptions,
• If the two phone lines are in one
modular jack, connect using TEL
LINE 1/2 jack.
Installation
• If the two phone lines are on two
separate modular jacks, connect
using both TEL LINE 1/2 and TEL
LINE 2 jacks.
2. Plug the modular cord’s other end into
a modular phone line jack.
3. Insert the supplied AC adapter’s barrel
plug into the DC IN 9V jack on the back
of the base. !
4. Route the adapter’s cord through the
strain relief slot on the base, then plug
the adapter into a standard AC outlet.
On a Wall Plate or Wall
To mount the phone directly on a wall, you
need two screws (not supplied) with heads
that fit into the keyhole slots on the base.
Drill two holes 315/16 inches apart. Thread a
screw into each hole, letting the heads
extend about 1/8 inch.
! CAUTION !
You must use
a Class 2
power source
that supplies 9V DC and
delivers at least 400 mA.
Its center tip must be set
to positive and its plug
must fit the phone’s DC
IN 9V jack. The supplied
adapter meets these
specifications. Using an
adapter that does not
meet these
specifications could
damage the phone or
the adapter.
!
9
1. Make the AC adapter and the short
telephone line cord through the hole on
the bracket.
2. Plug one end of the modular cord into
the TEL LINE 1/2 jack on the back of the
base.
3. Insert the supplied AC adapter’s barrel
plug into the DC IN 9V jack on the back
of the base.
4. Slide the bracket into the notches on
the base.
5. Plug the adapter into a standard AC
outlet. Hook the cord on the notch of
the bracket.
6. Plug the telephone line cord into the
telephone outlet.
Installation
7. For a wall plate,
align the base’s
keyhole slots
with the wall
plate studs and
slide the base
downward to secure it.
To remove, push up
a tab on the wall
mount adapter as
shown.
10
For direct wall
mounting, align
the base’s
keyhole slots with
the mounting
screws and slide
the base downward to secure it.
CONNECTING/CHARGING THE
BATTERY PACK
The phone comes with a rechargeable
nickel-metal hydride (Ni-MH) battery pack in
the handset, but not connected. Before
using your phone, you must connect the
battery pack, then charge it for about 15–20
hours.
1. Press down and slide off the battery
compartment cover.
2. Lift the battery pack out of the
compartment.
3. Plug the battery pack’s connector into
the socket in the compartment (the
connector fits only one way), then place
the battery pack in the compartment.
4. Replace the cover.
Installation
To charge the battery pack, place the
handset on the base. The CHARGE indicator
on the base lights.
Recharge the battery pack when
Low Battery flashes on the display.
If you have trouble replacing the battery
pack, take the phone to your local
RadioShack for assistance.
Recharging the Battery Pack
• If the battery pack becomes weak
during a call, Low Battery flashes.
When this happens, you cannot make a
call until you recharge the battery
pack.!
• If the display is blank and the phone
does not work, recharge the battery
pack. (The battery power might be too
low to light the display.)
! IMPORTANT !
Be sure the battery pack is
properly connected before
you try to charge it. The
CHARGE indicator lights
when the handset is on the
base, even if the battery
pack is not connected.
• About once a month, fully discharge the
battery by keeping the handset off the
base until Low Battery flashes on
11
the display. Otherwise, the battery pack
loses its ability to fully recharge.
• Using a damp cloth, clean the charging
contacts on the handset about once a
month.
• If you are not going to use your phone
for an extended period, disconnect the
battery pack. This increases the battery
pack’s usable life.
o
WARNING
o
Dispose of the old battery
pack promptly and properly.
Do not burn or bury it.
There is a risk of explosion
if battery is replaced by an
incorrect type. Dispose of
used batteries according to
the instructions.
Installation
• The supplied battery pack should last
for about a year. If the battery pack
does not hold a charge for more than 2
hours after an overnight charge,
replace it with a new 3.6-volt, 800 mAh
battery pack with a connector that fits
the socket in the battery compartment.
You can order a replacement battery
pack through RadioShack. Install the
new battery pack and charge it for
about 15–20 hours.
o
12
INSTALLING A BELTCLIP
To attach the beltclip
Insert the beltclip into the holes on each
side of the handset. Press down until it
clicks.
To remove the beltclip
Pull either side of the beltclip to release the
tabs from the holes.
USING A HEADSET
You can make or answer calls with handsfree convenience using an optional headset
that has a 3/32-inch (2.5-mm) plug.
RadioShack has a variety of headsets
available.
Ô NOTES Ô
•
If you place the handset
on the base to recharge
it while the headset is
connected, be sure the
handset seats properly.
•
You can use a handset
holder (available from
your local RadioShack
store) to hang the
handset on your belt for
greater convenience
when using a headset.
Connecting a headset disconnects the
handset’s earpiece and microphone.
or REDIAL/P/ on the handset
also controls the headset’s volume.
CID/VOL/
With a headset connected, you can make or
answer calls as usual using the keys on the
handset.
When you finish using the headset,
disconnect it from the handset and close the
rubber cover to protect the jack.
13
Installation
To connect the headset, gently flip open the
rubber headset jack cover on the side of the
handset, then insert the headset’s plug into
the jack. Ô
DISPLAY AND ICONS
Example of the standby mode display
Ringer off icon (when the ringer is off)/ day of the week and
time / battery icon
Handset ID and Banner
Number of new Caller ID calls received (If there are no new
Caller ID messages, the Handset ID appears here.)
ICON
Appears
During
DESCRIPTION
Standby/
Talk
Battery icons indicate the handset battery status. This
icon changes depending on the battery status (empty,
low, medium and full).
Standby/
Talk
The Line icon indicates the line in use or the line received
a new Caller ID message (Line1 and/or Line2).
Standby/
Bell
The Ringer off icon indicates that ringer is turned off.
Talk
The Mute icon appears when you mute the handset.
Talk
The Speaker icon appears when the handset speaker
phone is used.
Talk
The Privacy icon appears when the Privacy Mode is
turned on.
Talk
The Recording icon appears while recording a
conversation
ANIMATION DISPLAYS
The handsets have a variety of animation displays. Below are examples
of the animation screens and what they mean:
Turning on the phone
Hanging up the phone
Confirmation (Done!)
Deleting (Deleted!)
Paging handset
Display and Icons
Also, the animation display changes depending on the ringer volume setting.
Out of Range
14
Unavailable
]
Low Battery
SOFT KEY FUNCTION
Soft Key Function
“Soft” keys are keys that change function
during the operation of the phone. There are
three soft keys on each handset. Soft Keys
allow you to:
• Access the main menu
• Store or edit phone numbers and Caller
ID message
The function of each soft key is determined
by the icon that appears directly above it.
For example, when the handset is in
standby mode, pressing soft key 1 will
activates Line1. When the handset is in talk
mode, pressing soft key 1 displays the list of
CWDX option.
Complete information on the features
controlled by the soft keys can be found
under each feature.
In standby mode
Soft key 1
Soft key 2
Soft key 3
In talk mode
Soft key 1
Soft key 2
Soft key 3
15
Ô NOTE Ô
For Global Setup, Answ.
Setup, and Deregister HS
menu options, make sure
the line is not in use and the
handsets are within range
of the base.
MAIN MENU
OPTIONS
Your phone has six main menu options:
DirectLink Mode, Room Monitor, Handset
Setup, Answ. Setup, Global Setup, and
Deregister HS. Ô
DEFAULT SETTINGS
The default settings set from the factory
match the features that most people use.
You may not need to change them.
However, there are a number of options you
must set and entries you must make in
memory to take full advantage of all the
phone features. The table below lists the
default settings.
Main Menu Options
Function
Default Settings
Set TEL-LINE
Ringer Volume
Ringer Tone
Auto
High
Line1: Flicker
Line2: Clatter
On
Off
Off
“”
English
level 5
On
On
On
80
Toll Saver
1 minute
Off
English
On
SUN 12:00 AM
CW on/CWDX off
None
Tone
Distinctive Ring
Auto Talk
Anykey Answer
Banner
Language (LCD)
Contrast
Key touch tone
Animation Screen
Room Monitor
Security code
Ring Time
Recording Time
Message alert
Language (Guidance)
Call Screen
Day & Time
CW / CWDX
Area code
Dial Mode
16
SETTING MENU
OPTIONS
USING THE INTERFACE
Below are some tips for using the software
interface on your phone.
• Press the MENU soft key to access the
main menu.
• Use CID/VOL/ or REDIAL/P/ to scroll
through options.
• Press the OK soft key to make a
selection.
• Press the BACK soft key to return to the
previous screen.
• Press END to exit the menu.
• If you do not press a key within 30
seconds, the phone will time out and
exit the menu mode. When setting Day
and Time, the time-out period is
extended to two minutes.
DirectLink Mode
Ô NOTE Ô
You must have two
handsets to use Direct Link
Mode.
Setting Menu Options
In DirectLink® mode, a pair of handsets can
function as two-way radios. DirectLink Mode
allows two handsets to communicate with
each other without the base unit or a
telephone line. Use them at sporting events
or while shopping to stay in contact with
family members or friends. You must set
both handsets to DirectLink Mode to
activate this feature. Ô
Using DirectLink Mode
1. Press the MENU soft key and select the
DirectLink Mode menu. To enter
DirectLink mode press
[ENTER] appears.
2. Press the ENTER soft key to enter
DirectLink mode. You will hear a
17
confirmation tone, and DirectLink
Mode Complete appears.
3. To return to normal mode, press the
CANCEL soft key and then the OK soft
key, or return the handset to the cradle.
Room Monitor
Ô NOTES Ô
•
You must have two
handsets to use Room
Monitor feature.
•
This feature only works
when the handset is
within the range of the
base.
This feature allows you to monitor sounds in
another room. Place the handset in the
room you wish to monitor; it will function as
a microphone. A second handset can be set
to function as a remote speaker, allowing
you to monitor sounds in the room. Ô
Using Room Monitor
1. Press the MENU soft key and select the
Room Monitor menu. Listen to;
appears.
2. Select the handset you want to monitor
by using CID/VOL/ or REDIAL/P/ .
3. Press the OK soft key.
Monitoring appears, and you hear
sounds in the room where the handset
is installed.
4. To turn off the Room Monitor, press the
END soft key, or END.
Handset Setup
Setting Menu Options
The following submenu options must be set
separately for each handset.
Selecting a Telephone Line
TEL-LINE allows you to set default
telephone line. The line you select will be
used when you make a call. If you select
Auto, the phone will default to whichever
line is currently free.
1. Press the MENU soft key. Select the
Handset Setup menu, and then the Set
TEL-LINE submenu.
18
2. Press CID/VOL/ or REDIAL/P/ to
select Auto, Line1, or Line2.
3. Press the OK soft key. You will hear a
confirmation tone.
Selecting a Ringer Volume
Ringer Volume lets you select one of three
ringer volume (Off, Low, or High).
1. Press the MENU soft key. Select the
Handset Setup menu, and then the
Ringer Volume submenu.
2. Press CID/VOL/ or REDIAL/P/ to
select Line1 or Line2, and then press
the OK soft key.
3. Press CID/VOL/ or REDIAL/P/ to
adjust the ringer settings (Ringer
Volume Off, Ringer Volume Low, or
Ringer Volume High). You will hear a
ringer or melody at the Selected
volume (if you select Ringer Volume
Off, no ringer or melody will sound).
4. Press the OK soft key. You will hear a
confirmation tone.
Selecting a Ringer Tone
Ringer Tone lets you choose from ten ringer
tones or ten melodies:
Setting Menu Options
• Ringers (Flicker, Clatter, Soft Alert,
Wake Up, Light Bug, Beep Boop, Tone
Board, Chip Chop, Party Clap,
Reminder)
• Melodies (Beethoven’s Symphony #9
[Beethoven9], For Elise [Elise], We
Wish You A Merry Christmas [MerryXmas], Home Sweet Home [Hm Swt
Hm], Lorri Song #6 [Lorri Song], When
Irish Eyes Are Smiling [Irish Eyes],
Aura Lee, Let Me Call You Sweet Heart
19
[Sweetheart], Star Spangled Banner
[Star Spngl], Old MacDonald [Old
MacDld])
You must set a separate ringer tone on
each handset.
1. Press the MENU soft key. Select the
Handset Setup menu, and then the
Ringer Tone submenu.
2. Press CID/VOL/ or REDIAL/P/ to
select Line1 or Line2, and then press
the OK soft key.
3. Press CID/VOL/ or REDIAL/P/ to
move the pointer. You will hear the
ringer or melody as you scroll through
the options.
4. When you reach the ringer tone you
want, press the OK soft key. You will
hear a confirmation tone.
Setting Menu Options
Distinctive Ringer Setup
Distinctive Ringer allows you to assign a
designated ring tone to a stored phonebook
number (100 stored locations available).
When a call is received and the Caller ID
information matches the information in one
of the phonebook memory locations, the
phone uses the distinctive ring assigned to
that particular caller. You can assign
distinctive rings to multiple phonebook
memory locations. Switching the setting to
Distinctive Off disables distinctive ringing:
all incoming calls will have a normal ring
tone. Switching to Distinctive On activates
all programmed distinctive ring memory
locations.
1. Press the MENU soft key. Select the
Handset Setup menu, and then the
Distinctive Ring submenu.
20
2. Press CID/VOL/ or REDIAL/P/
select On or Off.
to
3. Press the OK soft key. You will hear a
confirmation tone.
Setting the AutoTalk
Autotalk allows you to answer the phone
simply by removing the handset from the
cradle. You do not have to press any
buttons to answer the call.
1. Press the MENU soft key. Select the
Handset Setup menu and then the
AutoTalk submenu.
2. Press CID/VOL/ or REDIAL/P/
select On or Off.
to
3. Press the OK soft key. You will hear a
confirmation tone.
Setting the Anykey Answer
Anykey Answer allows you to answer the
phone by pressing any number key,
/TONE/<, or #/> on the handset.
1. Press the MENU soft key. Select the
Handset Setup menu, and then the
Anykey Answer submenu.
2. Press CID/VOL/ or REDIAL/P/
select On or Off.
to
3. Press the OK soft key. You will hear a
confirmation tone.
Setting Menu Options
Setting the True Banner
True Banner lets you customize the name
your handset displays.
The name will be displayed on the LCD
screen during Standby Mode, Intercom,
Intercom Hold, Room Monitor and Copy
Phonebook operation. The banner name
will be displayed on the receiving handset
as well.
21
1. Press the MENU soft key. Select the
Handset Setup menu, and then the
Banner submenu.
2. Use the number keypad (0-9),
/TONE/<, #/>, or the DELETE soft key
to enter or edit the name.
3. Press the OK soft key. You will hear a
confirmation tone.
Selecting a Language
Language selects which language the menu
display will use. Choose from English,
French, or Spanish.
1. Press the MENU soft key. Select the
Handset Setup menu, and then the
Language submenu.
2. Press CID/VOL/ or REDIAL/P/ to
choose “English”, “Français” (French),
or “Español” (Spanish).
3. Press the OK soft key. You will hear a
confirmation tone.
Adjusting the LCD Contrast
Contrast adjusts the handset LCD
brightness. Choose one of the 10 levels for
optimum viewing.
1. Press the MENU soft key. Select the
Handset Setup menu and then the
Contrast submenu.
Setting Menu Options
2. Press CID/VOL/ or REDIAL/P/ to
adjust the contrast of the LCD (10
levels.)
3. Press the OK soft key. You will hear a
confirmation tone.
Setting the Key Touch Tone
Key Touch Tone is the tone your keypad
makes when keys are pressed. You can
turn this tone on or off.
22
1. Press the MENU soft key. Select the
Handset Setup menu and then the Key
Touch Tone submenu.
2. Press CID/VOL/ or REDIAL/P/
select On or Off.
to
3. Press the OK soft key. You will hear a
confirmation tone.
Setting the Animation Screen
The Animation screen displays animation
on the handset LCD. The animations will be
displayed on the LCD screen during a call,
ringer volume setting, when you hang up,
and so on.
1. Press the MENU soft key. Select the
Handset Setup menu and then the
Animation Screen submenu.
2. Press CID/VOL/ or REDIAL/P/
select On or Off.
to
3. Press the OK soft key. You will hear a
confirmation tone.
See “Animation Displays” on page 14 for all
the available screens.
Setting Room Monitor
To prevent the monitoring of a particular
handset, simply turn off the Room Monitor
feature on that handset.
2. Press CID/VOL/
select Off.
or REDIAL/P/
Setting Menu Options
1. Press the MENU soft key. Select the
Handset Setup menu, and then the
Room Monitor submenu.
to
3. Press the OK soft key. You will hear a
confirmation tone.
23
Answering System Setup
This main menu option allows you to set up
the built in answering device.
The following submenu options must be set
separately for each line (line1 and line2).
Setting a PIN Code
Security code selects a two-digit Personal
Identification Number (PIN) code. A PIN
code is required to play your messages
from a remote location.
1. Press the MENU soft key. Select the
Answ. Setup menu.
2. Press CID/VOL/ or REDIAL/P/ to
select Line1 or Line2, and then the OK
soft key.
3. Press CID/VOL/ or REDIAL/P/ to
select Security Code submenu, and
then the OK soft key.
4. Enter a two-digit PIN code (01-99)
using the number keypad (0-9).
5. Press the OK soft key. You will hear a
confirmation tone.
Setting Menu Options
Setting the Ring Time
Ring Time allows you to set the number of
rings the caller hears before your answering
system plays the outgoing message. You
can set the ring time to answer after two,
four, or six rings. If you enable the Toll
Saver (TS), the answering system picks up
after two rings if you have new messages
and after four rings if there are none.
1. Press the MENU soft key. Select the
Answ. Setup menu.
2. Press CID/VOL/ or REDIAL/P/ to
select Line1 or Line2, and then the OK
soft key.
24
3. Press CID/VOL/ or REDIAL/P/ to
select Ring Time submenu, and then
the OK soft key.
4. Press CID/VOL/ or REDIAL/P/ to
select a Ring Time (Toll Saver, 2 Times,
4 Times, or 6 Times).
5. Press the OK soft key. You will hear a
confirmation tone.
Setting the Record Time
Record Time sets the duration for recording
the incoming messages. You have three
record time options. The options “one
minute” or “four minutes” set the duration for
recording the incoming messages.
“Announce only” answers the call but
prevents the caller from leaving a message.
1. Press the MENU soft key. Select the
Answ. Setup menu.
2. Press CID/VOL/ or REDIAL/P/ to
select Line1 or Line2, and then the OK
soft key.
3. Press CID/VOL/ or REDIAL/P/ to
select Record Time submenu, and then
the OK soft key.
Setting Menu Options
4. Press CID/VOL/ or REDIAL/P/ to
select Record Time (1 Minute, 4
Minutes, or Announce Only).
5. Press the OK soft key. You will hear a
confirmation tone.
Setting the Message Alert On or Off
Message Alert sounds an alert tone when
you have an unheard message. If you set
the Message Alert on, whenever a new
message is received, the soft alert tone will
sound every 15 seconds.
25
1. Press the MENU soft key. Select the
Answ. Setup menu.
2. Press CID/VOL/ or REDIAL/P/ to
select Line1 or Line2, and then the OK
soft key.
3. Press CID/VOL/ or REDIAL/P/ to
select Message Alert submenu, and
then the OK soft key.
4. Press CID/VOL/ or REDIAL/P/
select On or Off.
to
5. Press the OK soft key. You will hear a
confirmation tone.
Turning the message alert tone off by
pressing any key
To quickly turn off the Message Alert tone,
press any key on the base unit; the tone will
automatically deactivate.
Turning the message alert tone off from
a remote location
When all new messages are played back
using the remote playback feature (see
“Remote Operation” pages 67-70) the
Message Alert tone will automatically
deactivate. The tone will not deactivate until
all new messages are played back.
Setting Menu Options
Setting the Language of your Answering
System
Language allows you to set the language of
your answering system announcements to
English, French, or Spanish.
1. Press the MENU soft key. Select the
Answ. Setup menu option.
2. Press CID/VOL/ or REDIAL/P/ to
select Line1 or Line2, and then the OK
soft key.
3. Press CID/VOL/ or REDIAL/P/ to
select Language submenu, and then
the OK soft key.
26
4. Press CID/VOL/ or REDIAL/P/ to
choose English, Français (French), or
Español (Spanish).
5. Press the OK soft key. You will hear a
confirmation tone.
Setting the Call Screen
Without answering the call, Call Screen
allows you to listen to the incoming
message being left by the caller.
1. Press the MENU soft key. Select the
Answ. Setup menu.
2. Press CID/VOL/ or REDIAL/P/ to
select Line1 or Line2, and then the OK
soft key.
3. Press CID/VOL/ or REDIAL/P/ to
select Call Screen submenu, and then
the OK soft key.
4. Press CID/VOL/ or REDIAL/P/
select On or Off.
to
5. Press the OK soft key. You will hear a
confirmation tone.
Global Setup
Setting Day and Time
Day & Time sets the day and time of your
display.
Ô NOTE Ô
For setting the Day and
Time, the idle time-out is
extended to two minutes.
Setting Menu Options
If you change one of the global settings, you
change that setting for second handset also
(if you are using it). Only one handset can
change global settings at a time. Ô
1. Press the MENU soft key. Select the
Global Setup menu, and then the Day
& Time submenu option.
2. Press CID/VOL/ or REDIAL/P/ to
select the day of the week, and then
the
soft key.
27
3. Press CID/VOL/ or REDIAL/P/ to set
hour, and then press the
soft key.
4. Press CID/VOL/ or REDIAL/P/ to set
minute, and then press the
soft key.
5. Press CID/VOL/ or REDIAL/P/ to
choose AM or PM, and then press the
SAVE soft key. You will hear a
confirmation tone.
Setting CIDCW (Caller ID on Call
Waiting)
Caller ID on Call Waiting (CIDCW) displays
the name and number of an incoming call
while you are on the line. Call Waiting
Deluxe (CWDX) allows you to handle call
waiting calls in seven different ways.
1. Press the MENU soft key. Select the
Global Setup menu, and then the
CIDCW submenu.
2. Press CID/VOL/ or REDIAL/P/ to
select Line1 or Line2, and then press
the OK soft key.
Ô NOTES Ô
Setting Menu Options
•
If the area code has
already been stored in
memory, the stored area
code will be displayed.
To change it, use the
DELETE soft key and
number keys to enter the
new area code.
•
If your calling area
requires 10-digit dialing,
do not program this
option.
28
3. Press CID/VOL/ or REDIAL/P/ to
select CW On/CWDX On, CW On/CWDX
Off, or CW Off/CWDX Off, and then
press the OK soft key. You will hear a
confirmation tone.
Setting the Area Code
If you enter a 3-digit area code number in
the “Area Code” option, your local area
code does not appear in the Caller ID
message. For calls received from outside
your local area code, you will see a full 10digit number. Ô
1. Press the MENU soft key. Select the
Global Setup menu, and then the Area
Code submenu.
2. Press CID/VOL/ or REDIAL/P/ to
select Line1 or Line2, and then press
the OK soft key.
3. Press the number keypad (0-9) to enter
a 3-digit area code.
4. Press the OK soft key. You will hear a
confirmation tone.
Setting the Dial Mode
Sets the dial mode to tone or pulse. Most
phone systems use tone dialing; the default
setting is tone dialing. Set the dialing mode
to match the dialing system used by your
local phone service.
• If you are not sure of your dialing
system, set the unit to tone dialing.
Make a trial call. If the call connects,
leave the setting as is; otherwise set
the unit to pulse dialing.
• If your phone system requires pulse
dialing and you need to send DTMF
tones in certain situations during a call,
you may switch over to tone dialing
(refer to “Tone Dialing Switch Over” on
page 35).
1. Press the MENU soft key. Select the
Global Setup menu, and then the Dial
Mode submenu.
Setting Menu Options
2. Press CID/VOL/ or REDIAL/P/ to
select Line1 or Line2, and then press
the OK soft key.
3. Press CID/VOL/ or REDIAL/P/ to
select Tone or Pulse (the initial
setting is Tone).
4. Press the OK soft key. You will hear a
confirmation tone.
29
DE-REGISTER THE HANDSET
Using Your Phone
Deregister HS clears the handset’s ID from
the main base unit and the base ID from the
handset. You will usually only deregister the
handset if you are having a problem with
your phone.
1. In standby mode, select Deregister HS
in the menu and press the OK soft key.
Deregister HS? appears.
2. Press CID/VOL/ or REDIAL/P/ to
select Yes and then the OK soft key.
When de-registration is complete you
will hear a confirmation tone, and
Deregistration Complete
appears.
3. After de-registering the handset, place
the handset to the base to register. You
must re-register the handset before you
can use it.
Ô NOTES Ô
•
If the Line 1 is already in
use, the other handset
will display “InUse” with
corresponding line icon.
•
To have the phone
select Line1 or Line2
instead of a free line, set
the default telephone
line (see page 18).
USING YOUR PHONE
If you subscribe to two phone lines, those
lines will be completely independent on your
phone. For example, you can have one
handset talking on Line 1 while another
handset talking on Line 2. You must have a
2-line subscription from your phone
company to use the 2-line features. Ô
MAKING A CALL
From the handset
1. Remove the handset from the base.
2. Press TALK/FLASH. The phone will
automatically select a free line. To
select a particular line, press the LINE1
or LINE2 soft key.
3. Listen for the dial tone.
30
4. Dial the number.
OR
Using Your Phone
1. Remove the handset from the base.
2. Dial the number.
If pause is required, press REDIAL/P/ .
P appears in the display, which
represents a pause.
3. Press TALK/FLASH. The phone will
automatically select a free line. To
select a particular line, press the LINE1
or LINE2 soft key.
From the Handset Speakerphone
1. Remove the handset from the base.
2. Press SPEAKER.
3. Listen for the dial tone.
Ô NOTES Ô
•
To set Autotalk, see
“Setting the AutoTalk” on
page 21 or to set Anykey
Answer see “Setting the
Anykey Answer” on
page 21.
•
The handset microphone
is located at the bottom
of the handset.
•
For best performance,
use the speaker phone
in a quiet room and let
the caller finish speaking
before you speak. If you
or the other party has
difficulty hearing, adjust
the speaker volume.
•
To have the phone
select Line1 or Line2
instead of a free line, set
the default telephone
line (see page 18).
4. Dial the number.
5. When the other party answers, talk into
the microphone.
RECEIVING A CALL
1. Remove the handset from the base. (If
AutoTalk is on, the phone will
automatically answer the call when you
pick it up.)
2. Press TALK/FLASH or the
corresponding soft key (LINE1 or
LINE2).
OR
If the handset is off the base, press
TALK/FLASH or the correspond soft key
(LINE1 or LINE2). If Any Key Answer is
on, you can also press any number key.
31
HANGING UP
From the handset, press END or return the
handset to the base.
Using Your Phone
From the handset speakerphone, press
END or return the handset to the base.
Switching to the Handset
Speakerphone During a Call
To switch a normal call to the
speakerphone, press SPEAKER on the
handset. To switch from a speakerphone
call to a normal call, press SPEAKER.
CALL WAITING
Ô NOTES Ô
Call Waiting
You must subscribe through
your local telephone
company to receive Call
Waiting or Caller ID on call
waiting service.
Placing a Call on Hold
• You can place a call on
hold for 15 minutes.
When 15 minutes has
passed, the call is
disconnected, and the
phone returns to standby
mode.
•
While a call is on hold,
CIDCW can not be
received.
Redialing a Call
• If the number exceeds
32 digits, only the first 32
digits are retained in
redial memory.
•
32
If the redial memory is
empty, you will hear a
beep.
If you have Call Waiting service and a call
waiting tone sounds while you are on a call,
press TALK/FLASH on the handset to accept
the waiting call. There is a short pause, and
then you will hear the new caller. To return
to the original caller, press TALK/FLASH on
the handset again. Ô
PLACING A CALL ON HOLD
1. During a call, press INTCM/HOLD on the
handset. The line soft key (LINE1 or
LINE2) to be placed on hold will flash.
The call will be put on hold. Ô
If you leave a call on hold for more than
10 seconds, the display screen will
read Hold.
2. To talk to the caller, press TALK/FLASH
or SPEAKER, or the correspond soft key
(LINE1 or LINE2). The phone will return
back to the call.
REDIALING A CALL
The last three phone numbers dialed can be
quickly redialed from the handset. Redial
numbers stored in the handset are
independent from each other. Ô
1. With the phone in standby mode, press
the REDIAL/P/ .
Using Your Phone
2. Press CID/VOL/ or REDIAL/P/ to
scroll through the last three dialed
numbers.
3. Press TALK/FLASH or SPEAKER, or the
correspond soft key (LINE1 or LINE2).
The selected number is dialed.
4. To hang up, press END.
Deleting a Redial Record
1. With the phone in standby mode, press
REDIAL/P/ .
2. Press CID/VOL/ or REDIAL/P/
repeatedly to display the number to be
deleted.
3. Press the EDIT soft key.
4. Press CID/VOL/ or REDIAL/P/ to
choose Delete?, and then the OK soft
key.
5. Press CID/VOL/
choose Yes.
or REDIAL/P/
to
6. Press the OK soft key. The redialed
number is deleted.
Storing a Redial Record
1. With the phone in standby mode, press
REDIAL/P/ .
2. Press CID/VOL/ or REDIAL/P/
repeatedly to display the number to be
stored.
3. Press the EDIT soft key.
33
4. Press CID/VOL/ or REDIAL/P/ to
choose Store into PB?, and then
press the OK soft key.
Using Your Phone
5. To complete the setting, follow the
steps 3-8 in “Storing Phone Numbers,
Names, Distinctive Rings, and Speed
Dial” on page 38.
Ô NOTE Ô
When you press volume up
key (CID/VOL/ ) in the
maximum volume level or
volume down key (REDIAL/
P/ ) in the lowest volume
level, an error tone sounds.
ADJUSTING THE HANDSET
EARPIECE AND SPEAKER
VOLUME
You can adjust the handset earpiece and
speaker volume separately. Ô
Repeatedly pressing the volume up key or
volume down key (labelled as CID/VOL/ or
REDIAL/P/ key) during a call will change
the earpiece volume of the handset. This
setting will remain in effect after the
telephone call has ended.
DO NOT DISTURB (DND)
The do not disturb feature (DND) allows you
to mute the ringer of the base and any
registered handsets at the same time. If you
have two handsets, the ringer of both
handsets will be muted. To do this, In the
standby mode, press and hold DND on the
base. The DND LED lights. To cancel ringer
mute, press DND again. You can also mute
the ringer tone while the phone is ringing by
pressing DND on the base.
To mute the ringer tone temporarily for each
handset or the base, when the phone is
on the handset you
ringing, press MUTE
want to mute or !PLAY/"STOP on the
base.
The ringer tone will return to the previous
setting starting with the next incoming call.
34
MUTE MICROPHONE
Using Your Phone
You can temporarily mute the microphone
so that the caller cannot hear you. Press
MUTE
during talk mode (while the phone
is in use) to mute the microphone.
Mute On and
appear in the display. To
cancel muting, repeat above step again
when Mute is set to on, Mute Off appears.
TONE DIALING SWITCH OVER
Some telephone companies use equipment
that requires pulse dialing (sometimes
referred to as rotary dialing). If you need to
enter tone dialing digits, you can switchover to tone dialing during the call. This
feature is useful when you need tone dialing
to use automated systems, for example,
entering your bank account number after
you have called your bank. Ô
Initially make your call with the pulse dialing
mode. Once your call connects, press
/TONE/<. Enter the desired number. These
digits will be sent as tone dialing. Once the
call ends, the tone mode is canceled and
pulse dialing mode resumes.
TRAVELLING OUT-OF-RANGE
During a call, as you begin to move your
handset too far from your base unit, noise
may increase. If you pass the range limits of
the base unit, you will hear a beep and see
Out of Range on the display, and then
the handset returns to standby mode.
Ô NOTES Ô
•
The tone feature only
applies when the dial
mode is set to pulse.
This special number can
be stored in a memory
location.
•
This is referred to as
Chain Dialing (see
“Testing Stored
Emergency Numbers”
on page 44).
•
If another handset is in
Privacy Mode, you
cannot join the call. If
someone is using the
handset in Privacy
Mode, Unavailable
appears in the display
when you try to join the
call.
PRIVACY MODE
Privacy mode prevents interruption from
another handset. This works only when
the phone is in use.
While on a call, press the MENU soft key on
the handset. use CID/VOL/ or REDIAL/P/
to select Privacy Mode, and then the OK
soft key.
35
Privacy Mode On and
appear in the
display. To exit Privacy Mode, use the same
procedure above. Privacy Mode Off
appears.
Using Your Phone
CONFERENCING
If you have two handsets, up to four people
can participate in a conference call. A fourway conference call consists of Outside
Line1 + Outside Line 2 + Two Handsets.
Joining a Conference Call
You can easily join a call already in
progress.
1. Press corresponding soft key (LINE1 or
LINE2) on the handset to join the call.
2. To hang up, return the handset to the
cradle, or press END on the handset.
Another handset will still be connected
to the call.
Conferencing with one outside
line
To hold a conference call with one outside
line, simply have the handsets join the call.
Conferencing with 2 outside lines
Follow the steps below to allow both outside
lines to participate in a conference call:
1. During a call, press INTCM/HOLD on the
handset to put the first caller on hold.
2. Press the line soft key (LINE1 or LINE2)
for a free line to make or answer a
second call.
3. When the second call is connected,
press CONF
to initiate a conference
call.
36
Using Your Phone
4. To disconnect a single caller, press the
corresponding soft key (LINE1 or LINE2)
to place the caller you wish to keep
speaking to on hold and then press the
END soft key to hang up the other
caller. For example, to hang up Line 2
but leave Line 1 connected:
• Press the LINE2 soft key to put Line
1 on hold.
• Press the END soft key to hang up
Line2.
• Press the LINE1 soft key to take Line
1 off hold and continue the
conversation.
To hang up both lines, press END.
FLASH AND CALL WAITING
If you have Call Waiting service and a call
waiting tone sounds while you are on a call,
press TALK/FLASH to accept the waiting
call. There is a short pause, and then you
will hear the new caller. To return to the
original caller, press TALK/FLASH again.
FIND HANDSET
To locate the handset, press PAGE on the
base when the phone is in standby mode.
The handset beeps for 60 seconds (if you
have two handsets, both handsets beep),
and Paging appears on the handset display.
To cancel paging, press any key on the
handset or PAGE on the base. Ô
Ô NOTE Ô
If the battery pack is
completely drained, the
handset will not beep.
37
PHONEBOOK
The Phonebook allows you to dial a number
using just a few key presses. Your phone
stores names/numbers in the phonebook
memory location, and you can search
names in alphabetical order. You have a
total of 100 locations that can be used for
the phonebook (including the speed dials)
and Caller ID messages.
STORING PHONE NUMBERS,
NAMES, DISTINCTIVE RINGS,
AND SPEED DIAL
1. When the phone is in standby mode,
press MUTE
.
The handset displays the following
items:
Phonebook
Ô NOTE Ô
When the memory is full,
you will hear a beep and
Memory Full appears.
You cannot store names
and numbers.
(1st line) <Phonebook> title
(2nd line) The number of the
phonebook locations used
(3rd line) How to search (press the
number keypad, CID/VOL/ or REDIAL/
P/ )
(4th line) The COPY, STORE, and
DELETE soft keys.
2. Press the STORE soft key, Store/
Edit Name appears. Ô
3. Enter the name (up to 16 characters)
by using the number keypad (see
“Steps for Entering Names and Special
Characters” on page 39).
If a name is not required, go to step 4.
<No Name> will be used as the name.
4. Press the OK soft key to store the
name, Store/Edit No. appears.
38
5. Press the number keypad to enter the
phone number (up to 20 digits), press
the OK soft key to store the number. Ô
Ô NOTES Ô
•
The pause key counts as
one digit. Pressing
REDIAL/P/ more than
once increases the
length of the pause
between numbers. Each
pause represents a two
second delay.
•
If you choose not to
store a “Distinctive
Ring”, simply select the
“No Selectn” option.
•
Selecting a speed dial
location where a number
is already stored,
releases the old
number’s speed dial
setting. The new number
will be stored in the
speed dial location.
•
If you choose not to
store the name/number
as a Speed Dial, simply
select the “No Selectn”
option.
•
If the next character
uses the same number
key, you must press #/>
to move the cursor over.
Otherwise the next time
you press the number
key, it changes the
character that was
previously set.
7. Speed Dial appears. Press
CID/VOL/ or REDIAL/P/ to move the
pointer to select the Speed dial location
(ten locations: SPD1-SPD0). Ô
8. Press the OK soft key. You will hear a
confirmation tone, and Done! appears
in the display.
STEPS FOR ENTERING NAMES
AND SPECIAL CHARACTERS
Refer to the letters on the number keys to
select the desired characters. With each
press of a number key (0-9), the displayed
character appears in the following order:
upper case letters first, lower case letters
next and finally the number corresponding
to the key. Ô
39
Phonebook
6. Distinctive Ring appears. Press
CID/VOL/ or REDIAL/P/ to move the
pointer to one of the Distinctive Ring
options, and then press the OK soft key.
Ô
If you make a mistake while entering a
name
Use /TONE/< or #/> to move the cursor to
the incorrect character.
Press the DELETE soft key to erase the
wrong character, and then enter the correct
character.
To delete all characters, press and hold the
DELETE soft key.
For example, to enter Movies:
1. When the phone is in standby mode,
.
press MUTE
2. Press the STORE soft key, Store/
Edit Name appears.
3. Press 6 once, and then press #/> to
move the cursor to the right.
Phonebook
4. Press 6 six times.
5. Press 8 six times.
6. Press 4 six times.
7. Press 3 five times.
8. Press 7 eight times.
9. When finished, press the OK soft key.
To continue to store the telephone number,
proceed to step 5 on page 39.
VIEWING THE PHONEBOOK
Your phone stores names/numbers in the
phonebook memory locations, and you can
search names in alphabetical order. You
can view the phonebook even while the
phone is in use.
1. When the phone is in standby mode,
press MUTE
.
40
2. Press CID/VOL/ or REDIAL/P/ , or the
number keypad to scroll through the
phonebook locations. Phonebook
locations appear in alphabetical order
(from first to last when you press
REDIAL/P/ , from last to first when you
press CID/VOL/ ).
You can also use letters on the number
keys to select the first letter of the
desired name. Press a number key (2-9
and 0) once for the first letter, press
twice for the second letter, and so on.
The first location that begins with the
letter you entered appears.
Phonebook
For example, to search for “Movies”,
press 6 once. Press CID/VOL/ or
REDIAL/P/ , until the phonebook
location is displayed.
3. To finish the viewing operation, press
END.
MAKING CALLS USING THE
PHONEBOOK
1. When the phone is in standby mode,
view the phonebook location to dial
(see “Viewing the Phonebook” on
page 40).
2. Press TALK/FLASH or SPEAKER. The
displayed number is dialed. To select a
particular line, press the LINE1 or LINE2
soft key.
3. To hang up press END.
SPEED DIALING
If you store a phone number in a speed dial
memory location (ten locations: SPD1 SPD0), you can use the speed dialing
41
feature. When the phone is in standby
mode, press and hold a number key (0-9)
associated with the speed dial until the
phone number appears and then press
TALK/FLASH or SPEAKER. The phone will
automatically select a free line. To select a
particular line, press the LINE1 or LINE2 soft
key. The number stored in the speed dial
(SPD1 - SPD0) is dialed.
EDITING OR ERASING A DATA
1. When the phone is in standby mode,
.
press MUTE
Phonebook
To delete all phonebook locations,
press the DELETE soft key. Delete All?
appears. Use CID/VOL/ or REDIAL/P/
to select Yes, and then press the OK
soft key. You will hear a confirmation
tone.
2. Press CID/VOL/ or REDIAL/P/ , or the
number keypad to view the phonebook
locations (see “Viewing the
Phonebook” on page 40).
a. Editing the Stored Data
1. When the phonebook location to be
edited appears, press the EDIT soft key.
Press CID/VOL/ or REDIAL/P/ to
select Edit?, and then the OK soft key.
2. Follow the steps 3 to 7 under “Storing
Phone Numbers, Names, Distinctive
Rings, and Speed Dial” on page 38-39
to complete the editing operation.
3. Press the OK soft key. You will hear a
confirmation tone.
42
b. Deleting the Stored Data
1. When the phonebook location to be
deleted appears, press the EDIT soft
key.
2. Press CID/VOL/ or REDIAL/P/ to
move the pointer to Delete?, and then
the OK soft key.
3. Press CID/VOL/
choose Yes.
or REDIAL/P/
to
4. Press the OK soft key. You hear a
confirmation tone. Deleted! appears
in the display.
Copy Phonebook allows you to transfer
stored phonebook locations from handset to
handset without having to manually re-enter
names and numbers. You can transfer one
memory (phonebook location) at a time, or
all memory locations at once. Ô
1. When the phone is in standby mode,
.
press MUTE
Ô NOTE Ô
If the memory location on
the receiving handset is full,
and can not store the
phonebook locations, you
will hear a beep.
2. Press the COPY soft key.
3. Press CID/VOL/ or REDIAL/P/ , to
select the handset to which you want to
transfer the phonebook locations and
then press the OK soft key.
4. Press CID/VOL/ or REDIAL/P/ to
select One Memory or All
Memories: and then press the OK soft
key.
If you select All Memories, Are you
sure? appears on the display screen.
Press CID/VOL/ or REDIAL/P/ to
43
Phonebook
COPYING PHONEBOOK
LOCATIONS
select Yes, and then press the OK soft
key.
If you select One Memory, press CID/
VOL/ or REDIAL/P/ , or the number
key (2-9 and 0) to select the phonebook
location you want to export and then
press the COPY soft key.
5. The phonebook locations will be
transferred to the handset. Copying
and the receiving handset name
appear. When the transfer is completed
Done! appears on the handset.
TESTING STORED EMERGENCY
NUMBERS
Phonebook
If you store an emergency service’s number
(police department, fire department,
ambulance) and you choose to test the
stored number, make the test call during the
late evening or early morning hours to avoid
peak demand periods. Also, remain on the
line to explain the reason for your call.
44
CALLER ID
CALLER ID AND CIDCW
(CALLER ID ON CALL
WAITING)
Ô NOTES Ô
•
If you answer a call
before the Caller ID
message is received (for
example, before the
second ring), the Caller
ID message will not
appear.
•
When the call is received
via a telephone company
that does not offer Caller
ID service, the caller’s
phone number and
name does not appear.
(This includes some
international calls.)
•
When the call is via a
private branch exchange
(PBX), the caller's phone
number and name may
not appear.
•
Data errors appear as
“❚”.
You must subscribe to Caller ID services
through your local telephone provider to use
these features.
When the telephone rings, the Caller ID
feature allows you to view the caller’s name,
and phone number along with the date and
time of call. With CIDCW (Caller ID on Call
Waiting), you will hear a call waiting tone
while you are on a call, and the Caller ID
data is displayed. To accept the waiting call,
press TALK/FLASH (see “Flash and Call
Waiting” on page 37). Ô
Additionally, you can dial a number stored in
the Caller ID list or save data to your
Phonebook locations.
1. When the Caller ID message is
received, the display shows the caller's
phone number along with the date and
time. The incoming call information is
stored in the Caller ID record. If the
Caller ID service includes the caller's
name, the name will appear in the
display (up to 15 characters).
You may receive any one of the
following messages:
When invalid data is received
Caller ID
Incomplete Data
When a private name is received
Private Name
When a private number is received
Private Number
When a unknown name is received
Unknown Name
When a unknown number is received
Unknown Number
45
2. When you pick up the phone, the
display changes to Talk.
(AutoTalk feature is set to on).
VIEWING THE CALLER ID LIST
The Caller ID list stores information for
incoming calls - even unanswered calls.
! IMPORTANT !
Memory locations for Caller
ID messages and
Phonebook locations
(including Speed Dials) are
shared, you can only store
up to 100 in total. A Caller
ID message is not stored
when you have stored 100
phonebook locations. The
earliest Caller ID message
is overwritten when you
have stored 100 phonebook
locations and Caller ID
messages in total.
You can store 100 Caller ID messages and
Phonebook locations (including
SpeedDials) in total. You can view the
Caller ID list when the phone is in standby
mode. !
1. When the phone is in standby mode,
press CID/VOL/ .
The summary screen appears. The
screen shows the number of new
messages and total messages.
2. To view the Caller ID messages in
historical order (from new to old or from
old to new), repeatedly press
REDIAL/P/ to scroll through the
messages from the latest to the
earliest, or CID/VOL/ to scroll back
through the messages.
To view the Caller ID messages with
alphabetical search, press the number
key pad (2-9 and 0) with the letter
associated with the first letter of the
desired message.
3. To finish the viewing operation, press
END. Ô
Caller ID
Ô NOTE Ô
icon appears next to
the line icon to indicate
this is a unread
message. Once you
view the new message,
the icon will
disappear.
46
DELETING A CALLER ID
MESSAGE
Deleting Information from the
Caller ID List
1. When the phone is in standby mode,
view the Caller ID information to be
deleted (see “Viewing the Caller ID List”
on page 46). Ô
2. Press the EDIT soft key
Caller ID appears.
Ô NOTE Ô
Once the Caller ID data has
been deleted, the
information cannot be
retrieved.
3. Press CID/VOL/ or REDIAL/P/ to
choose Delete?, and the OK soft key.
4. Press CID/VOL/
choose Yes.
or REDIAL/P/
to
5. Press the OK soft key. You will hear a
confirmation tone.
Deleting all Caller ID names/
numbers
1. When the phone is in standby mode,
press CID/VOL/ .
2. Press the DELETE soft key. Delete
All? appears.
3. Press CID/VOL/
choose Yes.
or REDIAL/P/
to
4. Press the OK soft key. You will hear a
confirmation tone.
Caller ID
USING THE CALLER ID
MESSAGE LIST
Calling a party from the Caller ID
list
1. When the phone is in standby mode,
view the Caller ID message (see
47
“Viewing the Caller ID List” on
page 46).
2. Press TALK/FLASH or SPEAKER. The
phone will automatically select a free
line. To select a particular line, press
the LINE1 or LINE2 soft key. The
displayed phone number dials
automatically.
Ô NOTES Ô
•
When a long distance
call has been set, 1
appears in the display.
•
If a call comes in via a
telephone system that
does not offer Caller ID
service, no information is
stored.
•
•
Caller ID
48
If the Caller ID message
was received as a
private/unknown
number, or the message
does not have the
number, you cannot
store the message in the
Phonebook. If it was
received as private/
unknown name, the
message will be stored
as <No Name>.
Even if the 100 memory
locations are full, the
message will be stored
in the Phonebook.
However, the message
will be erased from the
Caller ID list.
Long Distance calls and Area Code
Setting/Cancellation
While the present Caller ID information is
displayed, pressing /TONE/< will place or
remove the prefix “1” in the display to set
the call for a long distance call, or pressing
#/> will set or cancel an area code (see
“Setting the Area Code” on page 28). Ô
Storing Caller ID messages in the
Phonebook
Messages shown in the Caller ID list can be
stored in the phonebook. The phone
number and name of the party on the Caller
ID list can be stored in memory. Ô
1. When the phone is in standby mode,
view the Caller ID message to be
stored.
Then press the EDIT soft key.
2. Press CID/VOL/ or REDIAL/P/ to
select Store into PB?, and the OK
soft key. If the Caller ID message is
already stored in memory, you will hear
a beep and This data is already
stored!! appears. The number will
not be stored.
3. To complete the setting, follow the
steps 3-8 in “Storing Phone Numbers,
Names, Distinctive Rings, and Speed
Dial” on page 38-39.
CALL WAITING DELUXE
FEATURES
Your phone gives you new options for call
waiting. At the touch of a button, you can
place the caller on hold, send them to your
voice mail service, or conference them into
your current call. You may be required to
subscribe to Call Waiting and Call Waiting
Deluxe to use these features. Not all features
are available in all areas. Check with your
local telephone company for details. Ô
Ô NOTES Ô
•
To activate features,
select CW On/CWDX
On in the CIDCW option.
See “Setting CIDCW
(Caller ID on Call
Waiting)” on page 28.
•
You can also answer a
waiting call immediately by
pressing TALK/FLASH,
the first caller will be
placed on hold. To return
to the original caller, press
TALK/FLASH again.
•
If you don’t press a key
within 30 seconds while
in the operation, the
phone goes back to the
original call.
1. When you receive a Call Waiting call,
press the CWDX soft key for a list of
options.
2. Press CID/VOL/ or REDIAL/P/ or the
number keypad (1-7) to select an
option.
3. Press the OK soft key. A confirmation
screen will appear, and returns back to
the call.
Caller ID
Your phone is pre-programmed with seven
call waiting options. You may select to ask
the calling party to hold, send them a busy
message, forward them to your voice mail,
or answer and drop the first caller. You may
also select to conference them into the
current call or, at any time, choose to drop
the first or drop the last caller. Check with
your local telephone company for a full list
of options.
49
EXPANDING YOUR
PHONE
Expanding Your Phone
! IMPORTANT !
If you purchase a 43-3705
extra handset, please
register the handset to the
original/main base before
use. The 43-3705 will not
operate until it is registered.
Dual Handset Expandability
Your phone supports another handset in
addition to the supplied. You can now place
a fully-featured cordless handset anywhere
AC power is available to connect the
handset charger. !
Handsets can be used in DirectLink Mode
or on an intercom call without interfering
with incoming calls. It is possible to have a
four-way conference among two handsets
and both outside lines. All of the handsets
ring when a call is received.
REGISTER THE HANDSET TO
THE BASE
Ô NOTES Ô
•
All of the handsets ring
when a call is received.
•
An extra handset can be
registered when the
main base is in standby
mode.
If you purchase an extra handset, you need
to register the handset to the base before
use. Only one handset can be registered at
a time. ! Ô
Handset supplied with the phone is
registered to the base by the factory. When
charged, pre-registered handset displays a
handset ID number. Handset that has not
been registered displays Place handset
on main base to register. When
you register an extra handset to the base,
the handset ID will be assigned.
1. Before registering the extra handset,
the battery pack MUST be charged for
15-20 hours.
2. Place the extra handset in the main
base unit to begin registration.
3. While the handset is registering,
Handset Registering will appear
in the LCD.
50
USING THE DIRECTLINK
MODE
To use this feature, you must enter the two
handsets into the DirectLink mode first. Ô
To enter the DirectLink mode, see “Using
DirectLink Mode” on page 17.
Ô NOTE Ô
Handsets can be in Direct
Link mode while another
handset is in use.To use the
43-3705, register it to the
original base.
DirectLink call
1. When the phone is in the DirectLink
standby mode, press the DirectLink soft
key.
2. Select the handset to which you wish to
DirectLink with by pressing the number
keys (1-2). Your handset will then page
the other handset.
3. On the receiving handset, press
TALK/FLASH, the ANSWER soft key or if
Anykey Answer is on, press any
number key, /TONE/< or #/>.
4. When you finish your conversation,
press END or the END soft key on either
handset. Return the handset to the
cradle, or press the CANCEL soft key
and then the OK soft key (cancelling
DirectLink mode).
Ô NOTES Ô
•
If the party is busy or out
of range, the handset
returns to standby mode.
•
If any of the following
occurs while selecting
the another handset, the
operation will be
canceled.
-Press TALK/FLASH
or SPEAKER.
INTERCOM/CALL TRANSFER
FEATURE
Intercom and Call Transfer features are
available for your phone. Ô
-Receive an outside/
intercom call or page.
•
When the party does not
answer within one
minute, the operation is
canceled.
51
Expanding Your Phone
When Registration Complete is
displayed, the handset has been
registered to the base. If
Registration Failed appears,
please try these steps again.
Intercom
1. Press INTCM/HOLD in standby mode.
Expanding Your Phone
2. Select the handset you want to talk with
from the selection list within 30
seconds. To select the handset, press
CID/VOL/ or REDIAL/P/ , and then
press the OK key. If you select All, all
handsets will be paged. An intercom
tone sounds.
To Cancel intercom press the CANCEL
soft key on the initiating handset.
3. On the receiving handset to answer the
call, press TALK/FLASH, the ANSWER
soft key or INTCM/HOLD. Or press any
number key, /TONE/< or #/> (when
Anykey Answer is on), or pick up the
handset from the cradle (when
AutoTalk is on).
4. To hang up the intercom call, press
END or the END soft key on either
handset.
Call Transfer Feature
From handset to handset
1. During a call, press INTCM/HOLD on the
handset.
The line soft key (LINE1 or LINE2) to be
placed on hold will flash. The Call will
be put on hold.
2. Select a handset to transfer the call within
ten seconds. (Refer to step 2 in the
intercom section on page 52).
The call will automatically be placed on
hold, and an intercom tone sounds.
To cancel the transfer, press
TALK/FLASH or SPEAKER on the
initiating handset.
52
Expanding Your Phone
3. On the receiving handset, to answer the
page, press TALK/FLASH, the ANSWER
soft key, or INTCM/HOLD. Or press any
number key, /TONE/< or #/> (when
Anykey Answer is on), or pick up the
handset from the cradle (When Auto
Talk is on).
4. To hang up the intercom call, press the
END soft key or END on the handset.
5. To speak to the caller, press the
corresponding soft key (LINE1 or LINE2)
on the receiving handset.
53
THE INTEGRATED
ANSWERING DEVICE
Ô NOTE Ô
If you subscribe two phone
lines, those lines will be
completely independent on
your device. You must have
a 2-line subscription from
your phone company to use
the 2-line features.
The phone has a built-in answering system
that answers and records incoming calls.
You can also use your answering system to
record a conversation, leave a voice memo
message or to announce a special outgoing
message to callers when you’re away from
your phone. Ô
FEATURES
• Digital Tapeless Recording
• Up to 12 Minutes of Recording Time for
each line
The Integrated Answering Device
• Call Screening On/Off
• Personal or Pre-recorded Outgoing
Messages
• Voice Prompts for Menu Setup
Guidance (English, Spanish, or French)
• Time and Day Announcement
• Remote Message Retrieval
• Toll Saver
• Conversation Recording
• Voice Memo
• Message Alert
Digital Tapeless Recording allows you to
quickly review, save, or delete the
messages you choose. You will never have
to worry about a tape wearing out, jamming,
or resetting improperly.
The Integrated Answering System is easy
and convenient to use, but please read
through all of the instructions carefully.
54
1. When the phone is in the standby
mode, press a corresponding L1
ANSWER or L2 ANSWER, and then ANS
ON/OFF on the base.
After the announcement “Answering
System is On,” the current greeting
message will be played and you will
hear a confirmation tone. The message
counter displays the number of
messages stored in memory and
ANSWER LED lights. If the LINE
ANSWER LED flashes, then there are
new messages waiting for you.
2. To turn the answering system Off,
repeat step 1 again. You will hear the
announcement “Answering System is
off”, and the ANSWER LED and the
message counter will go out.
SETTING UP YOUR
ANSWERING SYSTEM
Ô NOTES Ô
Turning the Answering
System On/Off
• If you subscribe two
phone lines, while one
line is answering, the
other line can not
answer a call.
•
Setting Up Your
Answering System
• If you make an outside
call, or a call is received
on the base during the
operation, the operation
is canceled.
•
Ô
Setting your outgoing message
(Greeting)
If you turn the Answering
System On for both
lines, each line name
and the number of
message will alternately
appear on the message
counter.
Position yourself as near
to the base as possible
and speak clearly when
recording your outgoing
message.
When you receive a call, the answering
system automatically plays either the prerecorded message or your own personal
message (greeting).
Pre-recorded message
The following message is pre-recorded:
“Hello, no one is available to take your call.
Please leave a message after the tone.”
Recording a personal outgoing
message (Greeting)
You can record a greeting up to 30 seconds
long (must be more than two seconds long).
55
The Integrated Answering Device
TURNING THE ANSWERING
SYSTEM ON/OFF Ô
1. When the phone is in the standby
mode, press L1 ANSWER or L2
ANSWER.
2. Press and hold OGM.
3. Start your recording after the
announcement “Record greeting”. Ô
The message counter displays “30”,
then begins to count down.
4. When you have finished recording your
greeting, press OGM, SET, or
!PLAY/"STOP.
The Integrated Answering Device
You will hear a confirmation tone and
your recorded greeting plays back for
you.
Choosing between the two
outgoing messages
When the phone is in standby mode, press
L1 ANSWER or L2 ANSWER, and then OGM.
Press OGM again when the outgoing
message is played. Each time OGM is
pressed, the outgoing message is switched
between the pre-recorded and the personal
outgoing message.
Deleting an outgoing message
To delete the personal outgoing message,
press ∅DELETE while the message is
playing. The system announces “Greeting
has been deleted”.
ADJUSTING THE SPEAKER
VOLUME LEVEL
When the base speaker is in use, press
RING/VOL/ or RING/VOL/ on the base to
adjust the volume.
Press RING/VOL/ for louder or RING/VOL/
for softer. The number 1 -1 0 appears on the
base indicating the volume levels. 1 being
the softest and 10 being the loudest.
56
NEW MESSAGE LED
The new message LED on the handset is
designed to work with your answering
system. The LED flashes when you have
new messages in your answering system.
The LED stops flashing when all new
messages are played back
Answering System Settings
Setting the Time
Follow these steps to set the clock on the
answering system to the correct time. Ô
1. Press CLOCK/MENU.
Ô NOTES Ô
Answering System
Settings
• For your convenience,
voice prompts will guide
you through the menu
setup mode.
•
A confirmation tone
sounds to indicate
standby mode.
•
You can also set these
menus from the handset.
See “Answering System
Setup” on page 24 for
instructions.
2. Press
SKIP/SELECT or
REPEAT/SELECT until the correct
day is announced and the
corresponding number (from 1 Sunday
to 7 Saturday) appears.
3. Press SET to select the day.
4. Press
SKIP/SELECT or
REPEAT/SELECT until you hear the
correct hour setting.
The numbers 1 through 12 appear on
the base as each hour is announced.
Setting the Time
Time stamp will not be
heard until you have set the
time.
5. Press SET to select the hour.
6. Press
SKIP/SELECT or
REPEAT/SELECT until you hear the
correct minute setting.
The numbers 00 through 59 appears
on the base as each minute is
announced.
7. Press SET to select the minute.
57
The Integrated Answering Device
To set the following seven functions you
must enter the menu mode. Ô
8. Press
SKIP/SELECT or
REPEAT/SELECT until you hear the
correct AM or PM setting.
The message counter displays A or P.
9. Press SET to select the AM/PM setting.
A confirmation tone sounds, the day
and time you set are announced for
your review.
Ô NOTES Ô
•
The Integrated Answering Device
•
To scroll through the
menu options,
repeatedly press
CLOCK/MENU on the
base in standby mode.
The system returns to
standby after the last
menu option.
When you have
completed the setting,
press !PLAY/"STOP
to exit the menu mode,
or CLOCK/MENU to
move to the next menu
option.
Setting a PIN code
To play your messages from a remote
location, you will need to enter a two-digit
Personal Identification Number (PIN) code.
To select a PIN code, perform the following
steps: Ô
1. Press L1 ANSWER or L2 ANSWER.
2. Press CLOCK/MENU once. The current
PIN code appears on the base and it is
announced.
SKIP/SELECT or
REPEAT/SELECT until the desired
3. Press
number appears. Press and hold
SKIP/SELECT or
REPEAT/SELECT
to quickly scroll through the numbers
on the display.
4. Press SET to select the PIN code.
A confirmation tone sounds, the system
announces the new PIN code.
Setting the ring time
The ring time setting allows you to set the
number of rings the caller hears before your
answering system plays the outgoing
message. You can set the ring time to
answer after two, four, or six rings. Setting
“TS” (Toll Saver), the answering system
picks up after two rings if you have new
messages, and after four rings if there are
none. This way, if you make a long distance
58
call to check your messages, you can hang
up after the second ring to avoid billing
charges.
1. Press L1 ANSWER or L2 ANSWER.
2. Press CLOCK/MENU twice.
The current ring time setting (2, 4, 6,
(Toll saver)) appears on the base
and it is announced.
SKIP/SELECT or
REPEAT/SELECT until the desired
3. Press
ring time appears.
The Integrated Answering Device
4. Press SET to select the new ring time.
A confirmation tone sounds, the system
announces the new ring time.
Selecting the message record
time
You have three record time options. The
options “one minute” or “four minutes” set
the duration for recording the incoming
messages. “Announce only” answers the
call with the preset greeting or your
personal greeting but prevents the caller
from leaving a message.
1. Press L1 ANSWER or L2 ANSWER.
2. Press CLOCK/MENU three times.
The current recording time (1 minute, 4
minutes, A (Announce only)) appears
on the base and it is announced.
3. Press
SKIP/SELECT or
REPEAT/SELECT until the desired
message record time appears.
4. Press SET to select the new recording
time.
A confirmation tone sounds, the system
announces the new record time.
59
Announce only feature
The Announce only feature plays a prerecorded outgoing message or your own
personal outgoing message, but it will not
allow the caller to leave a message. To set
“Announce only”, follow the steps on page
59. To choose between the pre-recorded
message or your own personal greeting,
press select L1 ANSWER or L2 ANSWER and
press, when the outgoing message is
played. Press OGM to select the greeting of
your choice.
The Integrated Answering Device
If you want to use your own greeting, you
may want to change your greeting to omit
the prompt to leave a message. Refer to
“Recording a personal outgoing message
(Greeting)” on page 55.
The following message is pre-recorded:
“Hello, no one is available to take your call.
Please call again.”
Setting the message alert
Message Alert feature lets you know when
you have a new incoming message by
sounding a short alert tone.
If you set the Message Alert On, and when
a new message is received, the alert tone
will sound every 15 seconds. Set the
Message Alert to On or Off by using
CLOCK/MENU.
1. Press L1 ANSWER or L2 ANSWER.
2. Press CLOCK/MENU four times. The
current setting (On or OF) appears on
the base and it is announced.
SKIP/SELECT or
REPEAT/SELECT to choose
3. Press
On or
OF.
4. Press SET.
A confirmation tone sounds, the system
60
announces the current setting you have
selected. When the first new message
is received, the alert tone will begin to
sound.
Turning the message alert tone Off by
pressing any key
To quickly turn Message Alert tone to Off,
press any key on the base unit and the tone
will automatically deactivate.
Turning the message alert tone Off when
you are away from your phone
The Integrated Answering Device
When new messages are played back using
the remote playback feature (see “Remote
Operation” on pages 67-70) the Message
Alert tone will automatically deactivate. The
tone will not deactivate until new messages
are played back.
Selecting the language
You can select the Language of your
answering system announcements to
English, French, or Spanish.
1. Press L1 ANSWER or L2 ANSWER.
2. Press CLOCK/MENU five times.
The current setting (“E” English, “F”
French, or “ S ” Spanish) appears on
the base, and it is announced
(“English” English, “Français” French,
or “Español” Spanish).
3. Press
SKIP/SELECT or
REPEAT/SELECT to select the
language.
4. Press SET.
A confirmation tone sounds, the system
announces the new setting in the
selected language.
61
Ô NOTE Ô
If you mute the ringer, you
can not screen the call.
Setting the call screen
You can screen calls when the Call Screen
function is set to On. Ô
1. Press L1 ANSWER or L2 ANSWER.
2. Press CLOCK/MENU six times.
The current Call Screen setting (On or
OF) appears on the base and it is
announced.
3. Press
SKIP/SELECT or
REPEAT/SELECT to choose
On or
OF.
The Integrated Answering Device
4. Press SET. A confirmation tone sounds,
and the system announces the new
setting.
Screening a call
From the base
To screen an incoming call, do the steps as
follows:
1. After the answering system answers,
the base speaker will let you hear the
calls as the machine records the
message. To adjust the volume, press
RING/VOL/ or RING/VOL/ . If you set
the answering system to Off, you
cannot screen a call.
To mute the call screen temporarily,
press ! PLAY/"STOP when the system
is answering.
To resume the call screen, press RING/
VOL/ or RING/VOL/ .
2. To answer the call, press TALK/FLASH,
SPEAKER. The answering system will
disconnect automatically.
62
From the handset
To mute the call screen, press the
MUTE soft key when the system is
answering.
2. To answer the call, press TALK/FLASH
or SPEAKER.
To cancel the call screen, press END.
USING YOUR ANSWERING
SYSTEM
The message counter displays the number of
messages stored in memory. If the LINE
ANSWER LED (L1 or L2) flashes, then there
are new messages waiting for you. The
answering system is designed to play your
new messages first. After you play all your
new messages, you can then play your old
messages.
Ô NOTES Ô
Screening a call
• If you press TALK/
FLASH, call screen will
be canceled and the
handset is put in talk
mode.
•
If you press the SCREEN
soft key while another
handset is screening a
call, you will hear a beep
and you can not screen a
call.
Playing your messages
• Time stamp will not be
heard until you have set
the time.
Playing your messages
1. When the phone is in standby mode,
press L1 ANSWER or L2 ANSWER, and
the PLAY/"STOP.
The system announces the number of
new and old messages while the
message counter displays only the
number of new messages. The time
and day that each message was
received is announced after the
message is played. The message
counter will then display the number of
current stored messages. Ô
2. When all new messages have been
played, you hear a confirmation tone
and the system announces “End of
messages.”The system returns to
63
The Integrated Answering Device
1. Press the SCREEN soft key when the
system is answering.
standby. After you have reviewed your
new messages, you can play your old
messages by selecting L1 ANSWER or
L2 ANSWER and pressing ! PLAY/
"STOP again. Once you have listened
to a new message, it then becomes an
old message. The old messages will be
played in the order in which they were
received.
Repeating a message
1. Press L1 ANSWER or L2 ANSWER.
The Integrated Answering Device
2. Press ! PLAY/"STOP to review your
messages. The number of stored
messages is announced.
3. To repeat the current message, press
REPEAT/SELECT after a few seconds
of beginning the message. To quickly
scroll backwards through a message,
REPEAT/SELECT.
press and hold
To repeat the previous message, press
REPEAT/SELECT within a few
seconds (about 4 seconds during remote
operation) after a message begins
playing. If you have several messages,
REPEAT/SELECT repeatedly
press
until you return to the message you want
to replay. If the current message is the
first new message, the system plays
back from the beginning of the current
message (it does not go back into the old
message group).
4. Press ! PLAY/"STOP at any time to
stop reviewing messages and return to
standby.
The message counter shows the
number of messages stored in memory.
64
Skipping a message
1. Press L1 ANSWER or L2 ANSWER.
2. Press ! PLAY/"STOP to review your
messages. The number of stored
messages is announced.
The Integrated Answering Device
3. Press
SKIP/SELECT at anytime to
skip to the next message.
SKIP/SELECT is pressed,
Each time
the system scans forward one
message. If you have several
SKIP/SELECT
messages, press
repeatedly to find the message you
want to play.
To quickly scroll through a message,
SKIP/SELECT. The
press and hold
system advances through the playback
at double speed.
4. Press ! PLAY/"STOP at anytime to
stop reviewing your messages and
return to standby.
The message counter shows the
number of messages stored in memory.
Deleting a message
To maintain maximum record time, delete
the old messages. Ô
1. Press L1 ANSWER or L2 ANSWER.
2. Press ! PLAY/"STOP to review your
messages.
3. Press ∅DELETE at anytime during the
message to delete the message. You
hear a confirmation tone and the
message is deleted.
4. To delete all messages, press the
corresponding L1 ANSWER or L2
ANSWER, and then ∅DELETE in
standby mode. Press ∅DELETE again
Ô NOTE Ô
When the answering
system is full, FL appears
on the base. You should
delete some messages so
that the system can record
new messages.
! IMPORTANT !
When you press ∅DELETE,
you are permanently
deleting the message. Once
deleted, the message
cannot be replayed or
retrieved.
65
after the announcement “To delete all
messages, press delete again.” !
Ô NOTES Ô
Voice memo
• The voice memo
messages are recorded
as an incoming
messages.
•
The Integrated Answering Device
•
When the answering
system is full, FL
appears on the display
and recording is
terminated.
If an outside call is
received during the
operation, the operation
is canceled.
Recording a conversation
• Every state has different
regulations governing
the recording of
conversations over the
telephone. Make sure to
check your local, state
and federal laws before
using this product to
record any telephone
conversation in order to
determine that your use
is in compliance with
such laws or guidelines.
•
66
When the answering
system becomes full, FL
appears on the display
and recording is
terminated.
When you try to delete all messages without
first listening to your new messages, you
hear several short beeps followed by an
announcement “Please playback all
messages”.
This protects you from accidentally erasing
messages you have not yet reviewed.
Voice memo
The voice memo function allows the user to
record messages (more than two seconds
and within four minutes). Ô
1. Press L1 ANSWER or L2 ANSWER.
2. Press and hold MEMO/REC. You hear a
beep.
3. Start your recording after the
announcement “Record Memo
Message” and a confirmation tone. The
message counter displays “- -”.
4. When you have finished, press
MEMO/REC, !PLAY/"STOP, or SET to
stop recording.
The system returns to standby.
Recording a conversation
You can record a conversation from the
handset or the base (more than two
seconds and within ten minutes). Ô
1. During a conversation, press
the MENU soft key on the handset.
2. Press CID/VOL/ or REDIAL/P/ to
select Call Record, and then press
the OK soft key.
Recording a Call appears on the
handset, and “- -” flashes on the base.
A confirmation tone, that can be heard
by both parties, sounds during
recording.
REMOTE OPERATION
You can check, play, or delete messages,
even record a new greeting message from a
remote location (when you are away from
home, or from another room using a
handset). Additionally, you can turn On or
Off your answering system remotely. Ô
Remote access away from home
You can operate your answering system
from a remote location using any
touch-tone telephone. Ô
1. Call your telephone number and wait
for the system to answer. If the
answering system is off, it will answer
after about ten rings and sounds a
series of beeps.
2. During the greeting message (or a
series of beeps when the answering
system is off), press 0 and enter your
PIN code within two seconds (see
“Setting a PIN Code” on page 24 or 58).
Ô NOTES Ô
Remote Operation
Time stamp will not be
heard until you have set the
time. See “Setting the Time”
on page 57.
Remote access away
from home
• The system will only
playback messages for
four minutes and then it
returns to the command
waiting mode. To
continue playing your
messages, press 0 then
2 again within 15
seconds.
•
If you enter an incorrect
PIN code three times,
you will hear a beep and
the system will return to
standby.
•
During the remote
operation,
“Lr” appears on the
base.
•
If the answering system
is recording an incoming
message, the recording
operation is canceled
when you start remote
operation.
3. The answering system announces the
current time and the number of
messages stored in memory. You hear
“To play incoming messages, press
zero-two. For help, press one-zero”.
You will hear a beep.
67
The Integrated Answering Device
3. To stop recording, press the MENU soft
key and CID/VOL/ or REDIAL/P/ to
select Call Record, and then press
the OK soft key. You will hear a
confirmation tone.
Ô NOTES Ô
•
•
For Repeat a Message
function, press 0 then 1
within about four
seconds to repeat the
previous message, or
press 0 then 1 after
about four seconds to
repeat the current
message.
The Integrated Answering Device
For Memo Record and
Greeting Message
Record function, the first
time you enter the
corresponding
command, it starts the
Recording function. If
you want to stop the
recording, press 0 then 7
or 8, or 0 then 5.
4. Enter a command within 15 seconds,
each command there after must be
entered within two seconds. You may
select a command from the following
chart:
Command
Function
0 then 1
Repeat a Message Ô
0 then 2
Playing incoming Messages
0 then 3
Skipping a Message
0 then 4
Deleting a Message
0 then 5
Stop Operation Ô
0 then 6
Answering System On
0 then 7
Memo Record/Stop Ô
0 then 8
Greeting Message Record/Stop
Ô
0 then 9
Answer System Off
1 then 0
Help Guidance
5. After the command has finished, you
hear intermittent beeps indicating that
the system is in the command waiting
mode. You may enter another
command at this time from the chart
above.
6. When you are finished, hang up to exit
the system. The answering system
automatically returns to standby.
68
Remote access with the handset
1. Press the CONF
soft key on the
handset. If you have a new message,
corresponding line icon (L1 or L2)
appears on the handset.
Ô NOTES Ô
•
If you press END before
the answering system
answers, the phone will
return to standby.
•
When the answering
system does not answer
within 6 seconds, you
hear a beep and the
phone will return to
standby.
•
When you receive a call,
the remote operation is
canceled.
•
You can change the
handset volume during a
remote operation.
•
During the remote
operation -- appears on
the base.
•
If you have new
messages and old
messages, only the new
messages will be played.
After you have reviewed
your new messages, you
can play your old
messages by again
pressing !/2.
2. Press the LINE1 or LINE2 soft key.
Remote Answering Machine
operation appears on the handset
display.
The answering system announces the
current time and the number of
messages stored in the memory.
3. You hear “To play incoming messages,
press two. For help, press zero”.
You will hear a beep.
4. Enter a command within 30 seconds.
You may select a command from the
following chart:
69
The Integrated Answering Device
You can operate your answering system
from another room using a handset. Ô
Ô NOTES Ô
•
•
For Repeat a Message
function, press
/1
within about four
seconds to repeat the
previous message, or
press
/1 after about
four seconds to repeat
the current message.
The Integrated Answering Device
For Memo Record and
Greeting Message
Record function, the first
time you enter the
corresponding
command, it starts the
Recording function. If
you want to stop the
recording, press 7
or 8, or 5.
Remote Key Function
/1
Repeat a Message Ô
/2
Playing incoming Messages
/3
Skipping a Message
∅/4
Deleting a Message
/5
Stop Operation Ô
6
Answering System On
7
Memo Record/Stop Ô
8
Greeting Message Record/Stop
Ô
9
Answer System Off
0
Help Guidance
5. After the command has finished, you
hear intermittent beeps indicating that
the system is in the command waiting
mode. You may enter another
command at this time from the chart
above.
6. When you are finished, press END to
exit the system. The answering system
automatically returns to standby.
70
TROUBLESHOOTING
If your phone is not performing to your expectations, please try these
simple steps first
Symptom
Suggestion
• Make sure the AC adapter is plugged into the
base and wall outlet.
The CHARGE LED won’t
• Make sure the handset is properly seated in the
illuminate when the handset
cradle.
is placed in the cradle.
• Make sure the charging contacts on the handset
are clean.
The audio sounds weak.
• Move the handset and/or base to a different
location away from and/or scratchy metal
objects or appliances and try again.
• Make sure that you are not too far from the
base.
• Charge the batteries in the handset for 15-20
hours by placing the handset on the base or
charging cradle.
• The handset may be too far away from the base
unit.
The handset doesn’t ring or
• Place the base unit away from appliances or
receive a page.
metal objects.
• De-register the handset (see “De-register the
Handset” on page 30) and register the handset
(see “Register the Handset to the Base” on
page 50).
Unavailable appears in • Make sure that another handset is not in use,
the display.
and try the phone again.
71
Troubleshooting
• Check both ends of the base telephone line
cord.
• Make sure the AC adapter is plugged into the
base and wall outlet.
• Disconnect the AC adapter for a few minutes,
and then reconnect it.
• De-register the handset (see “De-register the
Can’t make or receive calls.
Handset” on page 30) and register the handset
(see “Register the Handset to the Base” on
page 50).
• Make sure that you are not too far from the
base.
• If an outside call is already established, you
cannot make another outside call.
Symptom
Suggestion
Severe noise interference.
• Keep the handset away from microwave ovens,
computers, remote control toys, wireless
microphones, alarm systems, intercoms, room
monitors, fluorescent lights, and electrical
appliances.
• Move to another location or turn off the source
of interference.
The Caller ID does not
display.
• The handset was picked up before the second
ring.
• The call was placed through a switchboard.
• Call your local telephone company to verify your
Caller ID service is current.
You cannot register the
handset at the base.
• Charge the battery pack for 15-20 hours.
• De-register the handset (see “De-register the
Handset” on page 30) and register the handset
(see “Register the Handset to the Base” on
page 50).
The handset doesn’t
communicate with
another handset.
• De-register the handset (see “De-register the
Handset” on page 30) and register the handset
(see “Register the Handset to the Base” on
page 50).
• Make sure that you have registered both
handsets.
The handset can’t join the
conversation
• Make sure there are not two handsets already
using the three-way conference feature.
• Make sure that another handset is not in privacy
mode.
Room Monitor feature does
not work.
• Make sure both handsets (or the handset and
the base) are set to Room Monitor mode and
that both are turned on.
• Make sure to place the handset(s) within the
range of the base.
Troubleshooting
• Make sure the base unit is plugged in.
• Make sure that the answering system is turned
The answering system does on.
• Make sure that the message record time is not
not work.
set to Announce only (see “Announce only
feature” on page 60).
Messages are incomplete.
72
• The incoming messages may be too long.
Remind callers to leave a brief message.
• The memory may be full. Delete some or all of
the saved messages.
Symptom
Suggestion
• Record your greeting again. The default
message should remain.
No sound on the base unit
speaker during call
monitoring or message
playback.
• Adjust the speaker volume on the base unit.
• Make sure the call screen feature is set to On.
Cannot access remote callin features from another
touch-tone phone.
• Make sure you are using the correct PIN
number.
• Make sure that the touch-tone phone you're
using can transmit the tone for at least two
seconds. If it cannot, you may have to use
another phone to access your phone.
Time stamp cannot be
heard.
• Make sure you have set the time (see “Setting
Day and Time” on page 27 or “Setting the Time”
on page 57).
Care
After a power failure, the
outgoing message is
deleted.
If you still have problems, disconnect the phone. If other phones on the
same line work properly, the fault is in this phone or its installation. If you
cannot find the problem, take the phone to your local RadioShack store
for assistance.
CARE
Keep the phone dry; if it gets wet, wipe it dry immediately. Use and store
the phone only in normal temperature environments. Handle the phone
carefully; do not drop it. Keep the phone away from dust and dirt, and
wipe it with a damp cloth occasionally to keep it looking new.
SERVICE AND REPAIR
If your phone is not performing as it should, take it to your local
RadioShack store for assistance. To locate your nearest RadioShack,
use the store locator feature on RadioShack’s website
(www.radioshack.com), or call 1-800-The Shack (843-7422) and follow
the menu options. Modifying or tampering with the phone’s internal
components can cause a malfunction and might invalidate its warranty
and void your FCC authorization to operate it.
73
NOTE ABOUT HANDSET-BASE
REGISTRATION
When you register the handset with the base, unique data is written on
both the base and the handset. The handset registered to one base unit
cannot be used with other base unit unless the registration data is “deregistered” with the original base unit. This means the handset must be
within the range of the original base unit to de-register. If for any reason
the original base unit is not within the range (or the registration data in
the original base unit is erased), “Out of Range” error takes place and
you cannot de-register the handset.
Should you encounter this trouble, follow these steps to individually deregister the handset and the base.
Note about Handset-Base Registration
1. Remove the handset if it sits on the base.
2. On the handset, press and hold END and # at the same time until you
hear beep.
3. Disconnect the AC adapter.
4. While holding PAGE, connect the AC adapter. Keep pressing PAGE
until the CHARGE LED starts to blink.
5. Place the handset on the base and wait until the CHARGE LED
stops flashing.
This erases all the handset registration data on the base, not limited to
the handset you placed at Step 5 above. You need to register other
handset(s) also if you have more than one. First de-register the handset
as in Step 1 above, and then place it on the base.
If you have trouble in de-registration, take your base and handset
(including extra handset(s) if you have) to your local RadioShack or call
1-800-The Shack (843-7422) for assistance.
Also, when you request repair or service, please be sure to bring in the
entire system (including extra handset if used) so we can keep your
registration data intact.
74
MEMO
75
Limited One-Year Warranty
This product is warranted by RadioShack against manufacturing defects in material and
workmanship under normal use for one (1) year from the date of purchase from RadioShack
company-owned stores and authorized RadioShack franchisees and dealers. EXCEPT AS
PROVIDED HEREIN, RadioShack MAKES NO EXPRESS WARRANTIES AND ANY IMPLIED WARRANTIES, INCLUDING THOSE OF MERCHANTABILITY AND FITNESS FOR
A PARTICULAR PURPOSE, ARE LIMITED IN DURATION TO THE DURATION OF THE
WRITTEN LIMITED WARRANTIES CONTAINED HEREIN. EXCEPT AS PROVIDED
HEREIN, RadioShack SHALL HAVE NO LIABILITY OR RESPONSIBILITY TO CUSTOMER
OR ANY OTHER PERSON OR ENTITY WITH RESPECT TO ANY LIABILITY, LOSS OR
DAMAGE CAUSED DIRECTLY OR INDIRECTLY BY USE OR PERFORMANCE OF THE
PRODUCT OR ARISING OUT OF ANY BREACH OF THIS WARRANTY, INCLUDING, BUT
NOT LIMITED TO, ANY DAMAGES RESULTING FROM INCONVENIENCE, LOSS OF
TIME, DATA, PROPERTY, REVENUE, OR PROFIT OR ANY INDIRECT, SPECIAL, INCIDENTAL, OR CONSEQUENTIAL DAMAGES, EVEN IF RadioShack HAS BEEN ADVISED
OF THE POSSIBILITY OF SUCH DAMAGES.
Some states do not allow limitations on how long an implied warranty lasts or the exclusion
or limitation of incidental or consequential damages, so the above limitations or exclusions
may not apply to you.
In the event of a product defect during the warranty period, take the product and the RadioShack sales receipt as proof of purchase date to any RadioShack store. RadioShack will,
at its option, unless otherwise provided by law: (a) correct the defect by product repair without charge for parts and labor; (b) replace the product with one of the same or similar design;
or (c) refund the purchase price. All replaced parts and products, and products on which a refund is made, become the property of RadioShack. New or reconditioned parts and products
may be used in the performance of warranty service. Repaired or replaced parts and products are warranted for the remainder of the original warranty period. You will be charged for
repair or replacement of the product made after the expiration of the warranty period.
This warranty does not cover: (a) damage or failure caused by or attributable to acts of God,
abuse, accident, misuse, improper or abnormal usage, failure to follow instructions, improper
installation or maintenance, alteration, lightning or other incidence of excess voltage or current; (b) any repairs other than those provided by a RadioShack Authorized Service Facility;
(c) consumables such as fuses or batteries; (d) cosmetic damage; (e) transportation, shipping or insurance costs; or (f) costs of product removal, installation, set-up service adjustment or reinstallation.
This warranty gives you specific legal rights, and you may also have other rights which vary
from state to state.
RadioShack Customer Relations, 200 Taylor Street, 6th Floor, Fort Worth, TX 76102
12/99
RadioShack Corporation
Fort Worth, Texas 76102
43-3704
UPZZ01727BZ
06A04
Printed in China