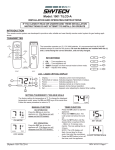
1
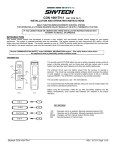
Replace batteries once a year in the transmitter and
receiver for optimal performance.
If you have a Skytech remote that is not listed below,
you can call Skytech Systems at 1-888-672-8929 for
technical support between 8 AM and 5 PM (EST)
Monday thru Friday.
Remote Trouble Shooting for:
1001-A Series Remotes
3002 & 3002P Remotes
5001 & 5301 Remotes
RCAF-LMF/V Remotes
SKY-MRCK & MRCKTH Remotes
SKY-CON & SKY-CONTH Remotes
Remote Control Power Settings
TROUBLE SHOOTING FOR 1001-A SERIES REMOTES
1. Make sure new or good batteries are installed properly in the transmitter and receiver. Make sure that transmitter
is within the 20’ – 25’ range of the receiver.
1001-A
Transmitter Battery location
1001T/LCD-A &1001TH-A
Transmitter Battery location
1001-A Series
Receiver Battery location
2. As a test, slide the button switch to the “ON” position of the receiver. (The burner should ignite.)
Does light:
• Move receiver switch back to the “REMOTE” position. Go to Step 3.
Doesn’t light:
• Check to see if the main gas supply is in “ON”,
• Is the Pilot lit?
• Valve knob in “ON” position,
• Check and make sure rocker switch ON FIREPLACE is in “REMOTE” or “OFF” position,
• If burner still doesn’t light go to Step 4.
3. Push the “ON” button on the transmitter, (you should hear a “BEEP” coming from the receiver) and the burner
should ignite.
If the burner doesn’t ignite:
• If no “BEEP” is heard push and hold “LEARN” button for 10 seconds on the face of the
receiver. Release, you should hear 3 “BEEPS”.
• Then press and release the “LEARN” button, you should hear a “BEEP”.
• Then push the “ON” button on the transmitter within 5 seconds; you should hear several
“BEEPS”.
4. If steps 2 and 3 do not work, then please call Skytech Systems, Inc @ 888.672.8929 for tech support.
Rev. 8/2007 Page 1
Back to first page
TROUBLE SHOOTING FOR 3002 & 3002P REMOTES
1. Make sure new or good batteries are installed properly in the transmitter and receiver. Make sure that transmitter
is within 20’ – 25’ range of receiver
3002 Series
Transmitter Battery location
3002 Series
Receiver Battery location
2. As a test, slide the button switch to the “ON” position of the receiver. (The burner should ignite.)
Does light:
• Move receiver switch back to the “REMOTE” position. Go to step 3.
Doesn’t light:
• Check to see if the main gas supply is in “ON”.
• Is the Pilot lit?
• Valve knob in “ON” position.
• Check and make sure rocker switch ON FIREPLACE is in “REMOTE” or “OFF” position.
• If burner still doesn’t light go to step 5.
3. Push the “ON” button on the transmitter, (you should hear a “BEEP” coming from the receiver) and the burner
should ignite.
If the burner doesn’t ignite:
• If no “BEEP” is heard push and hold “LEARN” button for 10 seconds on the face of the
receiver. Release, you should hear 3 “BEEPS”.
• Then press and release the “LEARN” button, you should hear a “BEEP”.
• Then push the “ON” button on the transmitter within 5 seconds; you should hear several
“BEEPS”.
4. If steps 2 and 3 do not work, then please call Skytech System, Inc. @ 888.672.8929 for tech support.
Back to first page
REV. 5/2010 Page 1
TROUBLE SHOOTING FOR 5001 & 5301 REMOTES
1. Make sure new or good batteries are installed properly in the transmitter and receiver. Make sure that transmitter
is within 20’ – 25’ range of the receiver.
2. As a test, slide the button switch to the “ON” position of the receiver. (The burner should ignite.)
Does light:
• Move receiver switch back to the “REMOTE” position. Go to Step 3.
Doesn’t light:
• Check to see if the main gas supply is in “ON”,
• Is the Pilot lit?
• Valve knob in “ON” position,
• Check and make sure rocker switch ON FIREPLACE is in “REMOTE” or “OFF” position,
• If burner still doesn’t light go to Step 4.
3. Push the “MODE” button on the transmitter, (you should hear a “BEEP” coming from the receiver) and the
burner should ignite.
If the burner doesn’t ignite:
• If no “BEEP” is heard press and release the “LEARN” button on the face of the receiver.
• Then push the “MODE” button on the transmitter within 5 seconds; you should hear several
“BEEPS”.
4. If steps 2 and 3 do not work, then please call Skytech Systems, Inc @ 888.672.8929 for tech support.
Back to first page
Rev. 4/2008 Page 1
TROUBLE SHOOTING FOR RCAF-LMF/V
1. Make sure new or good batteries are installed properly in the transmitter and receiver. Make sure that transmitter
is within the 20’ – 25’ range of the receiver.
RCAF-LMF/V
Transmitter Battery Compartment
2. Check to make sure the transmitter is communicating with the receiver.
• If the receiver beeps when the “ON/HI” or “OFF or LO” buttons are depressed on the transmitter then
the transmitter is talking to the receiver.
• If the receiver does not beep when the “ON/HI” or “OFF/LO” buttons are depressed on the
transmitter, you will need to “LEARN” the transmitter and receiver.
“LEARN”:
• Press and release the “LEARN” button, you should hear a “BEEP”.
• Then push the “ON/OFF” button within 5 seconds; you should hear several “BEEPS”.
3. To check this unit for proper operation, check the following:
• To check the receiver use a multmeter and set it to DC volts, connect the leads to the outlet block on
the receiver, when you depress the “ON” or “OFF” buttons you should read about 6.4 DC volts Max.
If the voltage is less than 4.0 volts you should replace the receiver batteries.
4. Make sure that the receiver is not installed in or behind an enclosed metal chamber or door, or in an area that
exceeds 130 degrees F.
• This condition can cause the RF signal to get lost and not communicate with the receiver.
• This condition will also cause the working distance to be shorter than normal.
• Areas that exceed 130 degrees F will cause the battery life to be short and the heat will damage the
receiver. This is not a warranty condition.
5. If the valve isn’t opening or closing, check to see if you can open or close it with a 9-volt battery.
• Take the receiver wires off of the motor drive.
• Take your 9-volt battery and put your positive (+) to one terminal and your negative (-) to the other,
this should drive your motor HI or LOW. To go the other way, turn the battery the other way.
6. Contact Skytech Systems, Inc. customer service at 888.672.8929 if you need additional information.
Rev. 4/2011 Page 1
Back to first page
TROUBLE SHOOTING A SKY-MRCK & SKY-MRCKTH REMOTES
FOR OPERATING HI/LO SERVO MOTOR
1.
Make sure batteries are installed properly in the transmitter and receiver. Make sure that transmitter is within 20’
– 25’ range of receiver.
2. Check to make sure the transmitter is communicating with the receiver.
• If the receiver beeps when the “ON/HI” or “OFF/LO” buttons are depressed on the transmitter then the
transmitter is talking to the receiver.
• If the receiver does not beep when the “ON/HI” or “OFF/LO” buttons are depressed on the transmitter,
you will need to “LEARN” the transmitter and receiver.
“LEARN”:
• Press and release the “LEARN” button, you should hear a “BEEP”.
• Then push the “ON/OFF” button within 5 seconds; you should hear several “BEEPS”.
3. To check this unit for proper operation, check the following.
• To check the receiver use a multmeter and set it to DC volts, connect the leads to the outlet block on the
receiver, when you depress the “ON/HI” or “OFF/LO” buttons you should read about 6.4 DC volts Max.
If the voltage is less then 4.0 volts you should replace the receiver batteries.
• If the transmitter is sending a good signal the LED will have a flicker. (Heart Beat) If the LED signal is
steady there is a problem with the transmitter.
4. Make sure that the receiver is not installed in or behind and enclosed metal chamber or door, or in an area that
exceeds 130 degrees F.
• This condition can cause the RF signal to get lost and not communicate with the receiver.
• The condition will also cause the working distance to be shorter than normal.
• Areas that exceed 130 degrees F will cause the battery life to be very short and the heat will damage the
receiver. This is not a warranty condition.
5. If the servomotor is not adjusting from HI/LOW check to see if you can move it with a 9-volt battery.
• Take the receiver wires out of the receiver.
• Take your 9-volt battery and put your positive (+) to one terminal and your negative (-) to the other, this
should drive your motor HI or LOW. To go the other way, turn the battery the other way.
6. Contact Skytech Systems, Inc. customer service at 888.672.8929 if you need additional information.
Rev. 8/2007 Page 1
Back to first page
Remote Control Power Settings
(SKY-MRCK, SKY-MRCK-TH, SKY-CON, & SKY-CON-TH)
The electronics in this remote control system have the capability of powering two (2) different types of DC powered
components, they are as follows.
On the SKY-MRCK & SKY-MRCK-TH receivers come from the factory programmed to provide continuous DC voltage
(4.5 VDC to 6.0 VDC) to a gas valve with a servomotor when the OFF/Low or On/Hi buttons on the transmitter are
depressed. (This is referred to as the 1001SR Setting in the Power Setting section of the remote control section of the
installation instructions)
On the SKY-CON & SKY-CON-TH receivers come from the factory programmed to provide a pulse DC voltage (4.5
DCV to 6.0 DCV) to a gas valve that uses a latching relay or solenoids when the OFF or On buttons on the transmitter are
depressed. (This is referred to as the 1001P Setting in the Power Setting section of the remote control section of the
installation instructions)
If the receiver on the SKY-MRCK or SKY-MRCK-TH is set incorrectly set to the 1001P setting this will cause the
servomotor to only operate each time the transmitter button is depressed. (STOP/START/STOP/START)
If the receiver on the SKY-CON or SKY-CON-TH is set incorrectly set to the 1001SR setting this will cause the latching
relay-solenoid not to operate when the transmitter button is depressed.
POWER SETTING
To change the factory “power setting”, from the 1001SR to the 1001P setting, first load the RECEIVER with 4-AA
batteries as instructed in the REMOTE RECEIVER SECTION; that follows.
1. Slide the slide switch on receiver to the REMOTE position.
2. Push and hold in the LEARNING BUTTON on the front of the receiver. You will hear a continuous “beep
sound” for about three seconds. Continue to hold in the LEARN button, the “beep sound” will stop for about four
seconds and then a second “beep sound”, of a different pitch, will be heard. The conversion from the 1001SR
setting to1001P setting is complete.
3. To reprogram RECEIVER to the 1001SR setting, repeat process and receiver will reset to 1001SR setting.
4. The LEARN button is used to set the unique security code for your remote control system. The SECURITY
CODE is reset during the “power setting” process.
1
BackRev.
to8/2007
first Page
page
TROUBLE SHOOTING A SKY-CON & SKY-CONTH REMOTES
FOR OPERATING VALVES WITH ON/OFF LATCHING SOLENOIDS
1. Make sure batteries are installed properly in the transmitter and receiver. Make sure that the transmitter is within
the 20’ – 25’ range of the receiver.
2. Check to make sure the transmitter is communicating with the receiver.
• If the receiver beeps when the “ON/HI” or “OFF/LO” buttons are depressed on the transmitter then
the transmitter is talking to the receiver.
• If the receiver does not beep when the “ON/HI” or “OFF/LO” buttons are depressed on the
transmitter, you will need to “LEARN” the transmitter and receiver.
“LEARN”:
• Press and release the “LEARN” button, you should hear a “BEEP”.
• Then push the “ON/OFF” button within 5 seconds; you should hear several “BEEPS”.
2. To check this unit for proper operation, check the following:
• To check the receiver use a multmeter and set it to DC volts, connect the leads to the outlet block on
the receiver, when you depress the “ON/HI” or “OFF/LO” buttons you should read about 6.4 DC
volts Max. If the voltage is less than 4.0 volts you should replace the receiver batteries.
• If the transmitter is sending a good signal the LED will have a flicker. (Heart Beat) If the LED signal
is steady there is a problem with the transmitter.
3. Make sure that the receiver is not installed in or behind an enclosed metal chamber or door, or in an area that
exceeds 130 degrees F.
• This condition can cause the RF signal to get lost and not communicate with the receiver.
• This condition will also cause the working distance to be shorter than normal.
• Areas that exceed 130 degrees F will cause the battery life to be short and the heat will damage the
receiver. This is not a warranty condition.
4. If the valve isn’t opening or closing, check to see if you can open or close it with a 9-volt battery.
• Take the receiver wires off of the valve.
• Take your 9-volt battery and put your positive (+) to one terminal and your negative (-) to the other,
this should drive your motor HI or LOW. To go the other way, turn the battery the other way.
5. Contact Skytech Systems, Inc. customer service at 888.672.8929 if you need additional information.
Rev 8/2007 Page 1
Back to first page