1
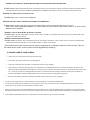
12. CHANGING LENSES - This is a standard K-mount lens
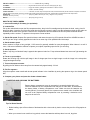
To mount the lens on the camera:
Mount the lens by lining up the red dot on the lens mount with the
matching dot on the camera mount. Grasp the lens firmly around
the lens barrel and turn it clockwise until it clicks into place.
To remove the lens from the camera:
Grasp the lens firmly around the lens barrel in one hand. With
the other hand, hold the camera body and press lens release
lever and turn the lens counterclockwise until it stops. The lens
now can be removed.
NOTE:
A wide range of Sears interchangeable lenses including extremely wide angle lenses, telephoto lenses and zoom lenses are available to
enable you to expand the pleasure of your picture-taking. Since the camera is designed to accept any lens with the "K" type bayonet
mount, your KS 1000 affords you the opportunity to select any interchangeable lens or accessory of the "K" type bayonet mount available
on the market.
13. USING SELF-TIMER
Your KS 1000 has a built-in self-timer which delays the shutter release a maximum of 10 seconds. This enables you to include
yourself in your own pictures and is also of benefit in taking closeups or photomicrographs where camera movement must be
avoided.
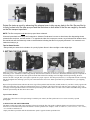
First, advance film advance lever. Then move self-timer lever counterclockwise. According to the degree you have moved it,
you can adjust the operating time. For the maximum delay, move it until it stops. Press shutter release button to start the selftimer moving.
14. USING AUTO WINDER
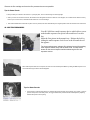
The Sears KS Autowinder can be used with the KS-1000 and KS Auto cameras. By operating the shutter release button on,
the winder, it can be used for rapid sequence photography at approximate 2 frames per second (at shutter speed 1/125 sec.).
By first setting the selection switch you may choose frame-by-frame shots or rapid sequence shots according to your needs.
You can for instance capture the rapid movement in sports, or the fleeting facial expressions that make your picture-taking a
more enjoyable experience
15. UNLOADING FILM
After the last picture on the roll of film has been taken, rewind the film and unload your camera
as follows:
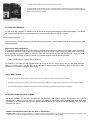
Press film rewind release button.
Lift up film rewind crank and turn it clockwise until film rewind release button stops revolving
and you feel the film tension released. This indicates that the film has been completely rewound
into the cartridge.
Open back cover by pulling up film rewind knob.