1
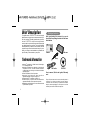
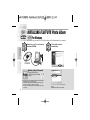
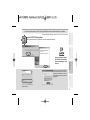
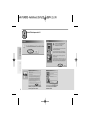
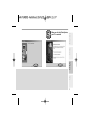
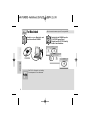
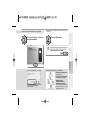
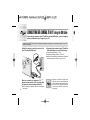
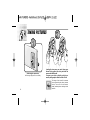
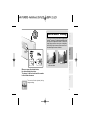
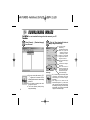
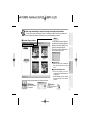
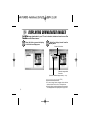
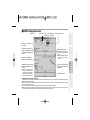
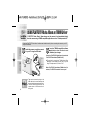
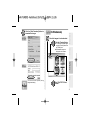
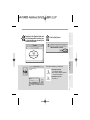
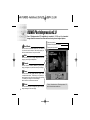
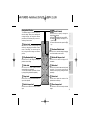
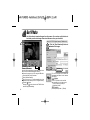
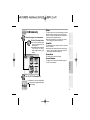
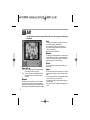
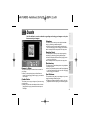
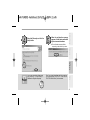
Battery Charge
www.radioshack.com
Camera
Software
Data
Owner's Manual
B- 020405
E
Brief Description
The digital camera “FLATFOTO” is a slim and compact
digital camera no bigger than a business card and only 6
mm thick, making it incredibly portable and convenient.
And the FLATFOTO’s simple and straightforward
controls make it easy to take pictures and then download
your digital images to a computer. The bundled “ArcSoft
PhotoImpression3.0” software on the enclosed CD-ROM
provides a range of functions that make it easy for you to
modify your images, create calendars or postcards and
print out what you have created on your printer.
Trademark Information
h AutobriteTM is trademark of SMaL Camera Technologies,
Inc., Cambridge, MA, USA.
h Microsoft and Windows are trademarks of the Microsoft
Corporation of the U.S. and other countries. Windows is
an abbreviated term referring to the Microsoft Windows
Operating System.
h Pentium is trademark of Intel Corporation.
h Macintosh, Power Macintosh, iMac, Mac OS are
registered trademarks of Apple Computer, Inc.
h PhotoImpressionTM is trademark of ArcSoft, Inc.
h All other company or product names are trademarks or
registered trademarks of the respective companies.
h RadioShack and RadioShack.com are trademarks used
by RadioShack Corporation.
2
Package Contents
After purchasing this product, be sure to
check that the package contains all the items
listed below.
Camera
Soft case
Strap
USB cable
CD-ROM
User’s manual, Quick start guide, Warranty
card
Every effort has been made to ensure that this product is
complete. If any items are missing from the package,
contact the store from which you purchased the camera.
Keep the camera packaging in a safe place as it will be
needed if you return the camera for repairs, etc.
z Battery Charge
TAKING PICTURES ........................................... 22
About the Autobrite™ Technology ................... 23
Data
Data
Camera
Software
USING FLATFOTO Photo Album ....................... 27
DOWNLOADING IMAGES ............................... 28
DISPLAYING DOWNLOADED IMAGES .......... 30
MODIFYING CAMERA SETTINGS,
DELETING ALL IMAGES, FORMATTING,
AND RESETTING THE FILE COUNTER ......... 32
USING FLATFOTO Photo Album as TWAIN Driver ... 34
USING PhotoImpression3.0 ............................... 36
INSTALLING PhotoImpression3.0 ................... 36
USING PhotoImpression3.0 ............................. 38
Get Photo ....................................................... 40
Edit ................................................................. 42
Create ............................................................ 43
UNINSTALLING THE SOFTWARE .................... 44
For Windows ............................................. 44
For Macintosh ........................................... 46
Software
INSTALLING THE SOFTWARE ......................... 12
Guide to Software ............................................. 13
INSTALLING FLATFOTO Photo Album ........... 14
For Windows .......................................... 14
For Macintosh ........................................ 18
CONNECTING THE CAMERA TO A PC
<Using the USB Cable> ...................................... 20
CHARGING THE BATTERY ............................... 21
About the Battery Life ....................................... 21
A SELECTING THE IMAGE SIZE .................... 24
e DELETING IMAGES ...................................... 25
l SETTING THE BEEP TONE ......................... 26
Camera
Brief Description ................................................... 2
Package Contents .............................................. 2
Safety Notes ......................................................... 4
Notes on Using Your Camera Correctly ............... 5
Notes on the Battery ............................................. 6
Nomenclature ....................................................... 8
Switching On and Off ......................................... 8
Auto Power Off Function .................................. 8
Attaching the Strap ............................................. 9
Liquid Crystal Display (LCD) ............................ 10
GUIDE TO CAMERA OPERATIONS ................. 11
Battery Charge
Contents
TROUBLESHOOTING ........................................ 47
Specifications ...................................................... 49
System Requirements ........................................ 50
©2002 RadioShack Corporation. All Rights Reserved.
RadioShack and RadioShack.com are trademarks used by RadioShack Corporation.
3
Safety Notes
To ensure that you use your camera correctly, read these
Safety Notes and your User’s manual carefully beforehand.
The warning given here provide important safety information
and should be observed at all times.
■ The icon shown below is used in this document to indicate
the severity of the injury or damage that can result if the
information indicated by the icon is ignored and the product
is used incorrectly as a result.
Z WARNING
Safety Notes
This icon indicates that death or serious
injury can result if the information is
ignored.
Be sure to read these Safety Notes before using the products.
Z WARNING
4
h The enclosed disk is a computer CD-ROM. Never attempt
to play this disk on an ordinary music CD player as it may
produce extremely high noise levels that could damage
your hearing or your audio equipment.
h The camera is precision instrument. Never attempt to take
this part apart. There is a serious danger of a powerful
electric shock.
h Do not drape the connection cord around your neck or
otherwise treat the cable carelessly as this could result in
suffocation.
h Do not look through the viewfinder at the sun or other
strong light. This could damage your eyesight.
h Do not leave the camera in locations exposed to direct
sunlight as this could cause a fire due to the action of the
lens.
h Do not bring the camera close to a flame or throw it into
the fire.
h Do not drop the camera or otherwise subject it to strong
impact.
h Do not immerse the camera in water.
hGeneral Information
h Do not use the camera while you are walking, running,
driving or operating machinery. This can result in a
serious accident.
h Request regular internal testing and cleaning for your
camera. Build-ups of dust in your camera can cause fire
or shock.
h Do not use this device in aircraft or hospitals. The use of
this device in an aircraft or hospital can cause
malfunctions in the control devices used in aircraft
hospitals.
hTest Shots Prior to Photography
hNotes on Copyright
hLiquid Crystal
This camera contains precision electronic components. To
ensure that images are recorded correctly, do not subject
the camera to impact or shock while an image is being
recorded.
hPlaces to Avoid
Do not use or store the camera in the following type of
locations:
h In the rain or in very humid, dirty or dusty places.
h Places subject to extreme temperature rises, such as in
direct sunlight or closed car in summer.
h Extremely cold places.
h Places subject to strong vibration.
h Places affected by smoke or steam.
h Places subject to strong magnetic fields (such as near
motors, transformers or magnets).
h In contact with chemicals such as pesticides or next to
rubber or vinyl products for long periods of time.
h Sandy places such as beaches or deserts, or places
where there is wind borne sand.
hNotes on Condensation
If the camera is carried suddenly from a cold location into a
warm place, water droplets may form on the inside of the
camera or on the lens (condensation). When this occurs,
switch the camera off and wait an hour before using the
camera.
Data
If the LCD is damaged, take particular care with the liquid
crystal in the panel. If any of the following situations arise,
take the urgent action indicated.
h If liquid crystal comes in contact your skin:
Wipe the area with a cloth and then wash thoroughly with
soap and running water.
h If liquid crystal gets into your eye:
Flush the affected eye with clean water for at least 15
minutes and then seek medical assistance.
h If liquid crystal is swallowed:
Flash your mouth thoroughly with water. Drink large
hHandling Your Digital Camera
Software
Image recorded using your digital camera system cannot be
used in ways that infringe copyright laws without the
consent of the owner, unless intended only for personal
use. Note that some restrictions apply to the photographing
of stage performances, entertainments and exhibits, even
when intended purely for personal use. Users are also
asked to note that the transfer of memory containing
images or data protected under copyright laws is only
permissible within the restrictions imposed by those
copyright laws.
quantities of water and induce vomiting. Then seek
medical assistance.
Camera
For particularly important photographs (such as weddings
and overseas trips), always take a test photograph and view
the image to make sure that the camera is functioning
normally.
✽ RadioShack Corporation assumes no responsibility for
any incidental losses (such as the costs of photography
or the loss of income from photography) incurred as a
result of faults with this products.
Battery Charge
Notes on Using Your Camera Correctly
hCleaning Your Camera
h Use blower brush to remove dust from the lens, LCD or
5
Notes on the Battery
viewfinder as these surfaces, and then wipe lightly with a
soft, dry cloth.
Leaving the lens extended for long periods can allow dust
to enter the camera’s viewfinder. However, this does not
affect the image.
h Do not scratch hard objects against the lens, LCD or
viewfinder as these surface are easily damaged.
h Clean the body of the camera with a soft, dry, cloth. Do
not use volatile substances such as thinners, benzine or
insecticide, as these may react with camera body and
cause deformation or remove the coating.
hUsing the Camera Overseas
When traveling overseas, do not place your camera in the
check-in baggage. Baggage handling at airports may
subject baggage to violent shocks, and the camera may be
damaged internally even when no external damage is
visible.
hOthers
h To view the images you have shot, you will need a PC
that conforms to the hardware and software requirements
given in the table on P.12.
h You will need a printer to print out the images you have
shot.
h RadioShack Corporation assumes no responsibility
whatsoever for any damages or loss of revenue incurred
as a result of the deleting of data stored in the computer
memory due to a fault or any other cause.
6
✽ This camera has a built-in lithium-ion battery. Always observe
the precautions given below.
h The built-in lithium-ion battery is not fully charged at
shipment and must be charged up before being used
(/P.21).
hLithium-Ion Battery Features
h Lithium-ion battery loses its charge even when not used.
Charge the battery just before taking pictures (1 to 2 days
beforehand).
h To ensure that your lithium-ion battery lasts as long as
possible, push the lens back in and switch the camera off
promptly when you are not using the camera.
h The number of available shots will be lower in cold
locations or at low temperatures. You can increase the
amount of power produced by putting the camera in your
pocket or another warm place to heat it just before taking
pictures. If you are using a heating pad, take care not to
place the camera directly against the pad.
hCharging the Battery
h This camera can be charged at ambient temperatures
between 0°C – +40°C and it takes approximately 2 hours
to charge a fully depleted the battery.
h The lithium-ion battery does not need to be fully
discharged or exhausted flat before being charged.
hBattery Life
At normal temperatures, the battery can be used at least
500 times.
If the time for which the battery provides power shortens
markedly, this indicates that the battery has reached the
end of its effective life. Please contact the store from which
you purchased the camera.
Battery Charge
To prevent fire or shock hazard, do not expose the unit to rain or moisture.
Camera
of This Product
When disposing of this product, do so in accordance with your local waste disposal regulations.
Software
hDisposing
Data
7
Nomenclature
Switching On
Press the lens pop-up button.
8
Switching Off
Push the lens back in.
Auto Power Off Function
The Auto Power Off function automatically switches the
camera off to avoid wasting battery power when the
camera is left unused for 30 seconds while switched on.
✽ The Auto Power Off function does not operate when a
USB connection is being used.
h To take pictures after the camera has automatically
switched off (Auto Power Off), push the lens back in and
then pop it up again.
h If you intend to leave the camera unused for a long period,
push the lens back in and completely switch the camera off.
Battery Charge
Camera
Software
Attaching the Strap
Data
Attach the enclosed strap. When using a
commercial strap, check the strength and
other properties of strap.
9
Liquid Crystal Display (LCD)
LCD
0
Description
Number of Available Shots (1-101), etc.
See page
P.23
Battery Status
z: The battery has ample charge.
x: The battery is approximately half
charged.
c: The battery charge is low. Recharge
the battery as it will run out shortly.
z
P.21
(Flashes 5 times and the camera
switches off.)
: The battery is exhausted. Recharge
the battery immediately.
✽ Avoid switching the camera on and off
repeatedly when the battery is low on
charge.
A
e
S
D
10
Image Size B: 640 × 480 pixels
C: 320 × 240 pixels
P.24
Delete Mode
P.25
S: Deletes the last image shot
D : Deletes all the images
P.25
Beep Tone on
P.26
INSTRUMENTS
Camera
Switching on and off
P.8
Taking pictures
Camera
Taking pictures
P.22
Connecting the
camera to a PC
Camera and PC
Connecting the camera to a ✽ Install the “FLATFOTO Photo Album” software
beforehand (/P.12).
PC
P.20
Downloading
(Saving) images
Camera and PC Downloading images
[Camera] / [Download images]
P.28
Downloading images
[Camera] / [Download images]
P.28
Checking camera
images
Camera and PC
Camera
Camera and PC
Displaying downloaded images [View] / [List] [Thumbnails] [Slideshow]
Deleting images
To delete the last image you shot: S
To delete all the images: D
See page
P.30
P.25
Deleting all images
[Camera] / [Configuration] / [Delete All Images]
P.32
Formatting
[Camera] / [Configuration] / [Format]
P.32
Charging the camera battery Camera and PC Charging the battery
P.21
Liquid crystal display
P.10
z Checking
the battery status
Camera
Camera and PC Modifying camera settings
Camera and PC Modifying camera settings
l Setting the
beep tone
Camera and PC Modifying camera settings
Camera
[Camera] / [Configuration] / Battery Status
P.32
[Camera] / [Configuration] / Resolution
P.32
[Camera] / [Configuration] / Beep
P.32
Selecting the image size
P.24
Setting the beep tone
Data
Camera
A Selecting the
image size
Software
e Deleting images
HEADING, ETC.
Camera
PURPOSE
Switch on and off
Battery Charge
GUIDE TO CAMERA OPERATIONS
P.26
✽ Camera: Use the digital camera “FLATFOTO” only.
Camera and PC: Connect the camera to your PC with the USB cable, and launch “FLATFOTO Photo Album”.
11
INSTALLING THE SOFTWARE
Because this camera uses USB bus power to charge the battery, the software must
be installed beforehand.
■Pre-installation Checklist
Windows
Windows
Macintosh
h Compatible PCs: IBM PC/AT or compatible (models
with USB support as standard)
h Operating system: Windows 98 (including the second
edition), Windows Millennium
Edition (Windows Me), Windows
2000 Professional✽, Windows XP
Professional✽, Windows XP Home
Edition✽
h CPU: 200 MHz Pentium or better
h RAM: 32MB minimum
h Hard disk space: 200MB minimum
h Other: A CD-ROM for driver and software installation
✽ Users of Windows 2000 Professional, Windows XP
Professional, Windows XP Home Edition should log on
under an Administrator account (e.g. “Administrator”).
12
Macintosh
h Compatible Macs: Power Macintosh G3 200 MHz
minimum (models with USB
support as standard)
h Operating system: Mac OS 8.6-9.0, 9.1, 9.2
h RAM: 32MB minimum
h Hard disk space: 200MB minimum
h Other: A CD-ROM for driver and software installation
The enclosed CD-ROM contains the software shown below.
h FLATFOTO Photo Album
h PhotoImpression3.0
Page 16
Page 18
Page 36
Page 27
✽ This software is TWAIN-compatible.
USB cable
Data
✽ This software is needed to connect the camera to your
PC using the USB cable.
Software to make it easy for you to download camera
images and modify them, create calendars or postcards.
Software
Software for tasks such as downloading images you
have shot on the camera, checking and deleting the
downloaded images, and modifying the camera
settings. This software is also used when a TWAINcompatible application downloads images directly from
the camera.
h When you install “FLATFOTO Photo Album”, the
camera driver and TWAIN driver are also installed
automatically.
Page 38
Camera
Page 14
Battery Charge
Guide to Software
13
INSTALLING FLATFOTO Photo Album
For Windows
✽ In Windows, you can install “FLATFOTO Photo Album” and “PhotoImpression3.0” in succession.
Windows
Switch on your PC and load the
enclosed CD-ROM.
The installer starts up
automatically.
Macintosh
CD-ROM
■Starting up the installer manually
Double-click [SETUP] or
[SETUP.exe] in the CD-ROM
window.
✽ The way file names are displayed differs as described below
depending on your computer settings.
h File extensions (3-letter suffers indicating the file type) may
be shown or hidden (e.g. Setup.exe or Setup)
h Text may be shown normally or all in uppercase (e.g. Setup
or SETUP).
14
You can select the softwares you want to
install.
✽ Deselected software is not installed.
Do not connect the camera to your PC using the USB cable until the software installation is completed.
✽ The camera driver and TWAIN driver are also installed automatically.
Battery Charge
✽ The actual screens may differ from the screens shown in the explanation.
Install FLATFOTO Photo Album.
Camera
Data
The screen on the left appears in Windows
2000 and Windows XP, but it has been
confirmed that installation can continue
without problems. Just click the [Continue
Anyway] button.
Software
If you are finished to install,
[FLATFOTO Photo Album]’s
short cut is displayed on the
desk top.
You can change the installation
destination folder.
15
Install PhotoImpression3.0.
Windows
Macintosh
16
Click the [Yes] button in the “Software
License Agreement” window.
You can change the installation
destination folder.
Battery Charge
When you click the [Finish] button,
your PC is restarted.
Camera
Software
Data
17
For Macintosh
Switch on your Macintosh and
load the enclosed CD-ROM.
Windows
CD-ROM
Macintosh
18
See P.36 for information on installing
“PhotoImpression3.0” on a Macintosh.
Do not connect the camera to your PC using the USB
Double-click the CD-ROM icon, the
[FLATFOTO Camera Driver],
[English] and [FLATFOTO Installer]
folder to start installation.
cable until the software installation is completed.
Click the [Quit] button.
Battery Charge
Click the [Continue...] button to
start the installation.
✽ The actual screens may differ from the screens shown in the
explanation.
Camera
Software
These files are installed on your Macintosh.
h [FLATFOTO Photo Album]’s alias:
On the desk top
You can change the installation
destination folder.
h [AXIADeviceDriver]
[TWAIN Data Sources]
[TWAIN Source Manager]
In the [Extensions] folder inside
the [System] folder on your
Macintosh’s hard disk
Data
h [FLATFOTO Photo Album] folder:
In your Macintosh’s hard disk
19
CONNECTING THE CAMERA TO A PC <Using the USB Cable>
Connecting the camera to your PC with the enclosed USB cable, you can charge the
battery and download your images to your PC.
Check that “FLATFOTO Photo Album” software was installed correctly before connecting the camera to your PC
using the USB cable.
Switch the camera on and then connect it to
your PC using the USB cable.
● Connecting the camera to your PC with the
USB cable allows you to do the following:
h Charge the camera battery (/P.21)
h Download and display images (/P.28, 34)
h Modify the camera settings, delete images, format the
camera memory and reset the counter (/P.32)
When you connect the camera to a PC, “6”
appears on the camera’s LCD to indicate that
the camera is communicating with the PC.
20
✽ The PC switches to standby mode until it recognizes
the camera.
h Take care to connect the plugs on the
USB cable into the correct sockets, and
ensure that the plugs are inserted firmly.
h The Auto Power Off function does not
operate when a USB connection is
being used.
z
This camera uses USB bus power to charge the battery. Before attempting to charge
the battery, install the software (/P.12) and then use the USB cable to connect the
camera to your PC.
Check that “FLATFOTO Photo Album” software was installed correctly before connecting the camera to your PC
using the USB cable.
Camera
Charging starts automatically
when you connect the camera
to your PC with the USB cable.
Battery Charge
z CHARGING THE BATTERY
Software
About the Battery Life
✽ This figure is an approximate guide to the number
of continuous shots that can be taken at room
temperature. The number of available shots will
be lower in cold locations or at low temperatures.
Data
h It takes approximately 2 hours to charge
a fully depleted the battery.
h Number of available shots: Approx. 500
shots (when fully charged)
At normal temperatures, the battery can be used at
least 500 times.
✽ If the time for which the battery provides power shortens
markedly, this indicates that the battery has reached the
end of its effective life. Please contact the store from
which you purchased the camera. Battery must be
replaced at the customer's expense.
21
TAKING PICTURES
Switching the camera on.
h Focal range: Approx. 60 cm to infinity.
22
Loading the strap over your wrist, brace your
elbows firmly against your body and hold the
camera with both hands.
Compose your shot so that the subject you
want to photograph is within the field of view.
The image will be blurred if the camera
moves when taking the picture (camera
shake). Take care to avoid camera
shake, particularly when shooting in dark
locations.
Data
When you press the shutter button,
the camera taking the picture.
The image is then recorded and the number
in the counter decreases.
FLATFOTO
Software
Digital cameras
in the same class
Camera
The FLATFOTO uses a CMOS sensor equipped with
AutobriteTM technology. This feature automatically adjusts
the exposure and captures the details in scenes with
bright lighting conditions, such as glare or backlighting.
Most existing digital cameras produce washed out or
silhouetted images under such conditions.
Battery Charge
About the AutobriteTM Technology
The counter flashes (rotates) during
image recording.
23
A SELECTING THE IMAGE SIZE
You can select the appropriate image size for your shots. The number of available shots varies
depending on the selected image size setting, and the number of available shots shown by the
counter increases or decreases accordingly.
About the Image Size
Select “B” for better image quality and “C” to increase
the number of available shots.
LCD
File size
Number of
available shots
B
640 × 480 pixels
26 shots
C
320 × 240 pixels
101 shots
Try using the guidelines below to select
the appropriate setting for your shot.
h B(640 × 480 pixels):
For images to be used in business
documents (printed relatively small).
For images to be used in files used for
presentations (displayed on a PC screen).
h C(320 × 240 pixels):
For images to be used via the Internet
as an e-mail attachment, etc.
24
You cannot check images as you delete them, but you can use S to delete the last image
you shot, or D to delete all the images.
Battery Charge
e DELETING IMAGES
Camera
h When you select “S ”, the newest
frame (frame 5 if you have taken 5 shots)
is deleted. Pressing the shutter button
again deletes frame 4, then frame 3, etc.
h You can delete all the frames at once by
selecting “D”.
h If you leave the camera in e delete mode for
3 seconds without using the camera at all, it
automatically reverts to photography mode. 25
Data
Press the e button again to select D
(delete all frames).
Each time you press the
shutter button, images are deleted
sequentially from the newest image.
Software
Holding down the e button
for roughly 1 second sets the delete
mode to S/Delete frame.
l SETTING THE BEEP TONE
You can select whether or not the beep tone sounds.
When you take pictures, connect
the camera to your PC with the
USB cable and download your
images to check them.
You can turn the beep tone on and off by
pressing the l button.
✽ When “l” is displayed, the beep tone sounds.
26
You can use “FLATFOTO Photo Album” software to download images in the camera to your
PC’s hard disk, check and delete the downloaded images, and modify the camera settings.
✽ This description shows the Windows screens, but the procedure is the same for Macintosh computers.
✽ Charging starts automatically when you
connect the camera to your PC with the
USB cable (/P.21).
The main window opens.
Menu
Double-click the [FLATFOTO
Photo Album] to launch
“FLATFOTO Photo Album”.
Data
You can change the
“FLATFOTO Photo Album”
settings in [Options].
Software
Folder tree
display area
Camera
Switch the camera on and then
connect it to your PC using the USB
cable (/P.20).
Battery Charge
USING FLATFOTO Photo Album
You can switch the settings
language between English
and Japanese.
You can change the save
destination folder for the
images.
27
DOWNLOADING IMAGES
You can download the images from the camera to your PC.
Select [Camera] / [Download images]
from the menu.
Click the [Start download] button to
begin image downloading.
Progress of image
downloading
Overall download progress
✽ When the progress bar
reaches the right-hand end,
downloading is completed.
Number of downloaded
images/Total number of
images in the camera
Time until downloading is
complete.
Start to download
the image
h When you connect the camera to a PC,
“6” appears on the camera’s LCD to
indicate that the camera is communicating
with the PC.
✽ The PC switches to standby mode until it
recognizes the camera.
28
h The counter flashes (rotates) during
image downloading.
Total number of images in
the camera
When this checkbox is
selected, the images in the
camera are deleted when
downloaded is complete.
Cancels downloading.
h If you cancel image downloading before
completion, downloading stops after
downloading of the current image is
completed.
h The images in the camera are all
downloaded together. If you take more
shots and then download them without
first deleting the images you have already
downloaded, the previously downloaded
images are downloaded again.
When image downloading is complete, the images are displayed as thumbnails.
Menu
■Thumbnail display window
■ Delete the files
h Select the file you want to delete and
then select [Delete] from the [File]
menu.
■ Rename the file/folder name
Windows:
[FLATFOTO] folder on
the local disk
Macintosh:
[FLATFOTO] folder on
the desk top
Data
Images are downloaded to the locations given below.
h Select the file/folder you want to
rename and then select [Rename] from
the [File] menu.
h Click the file/folder you want to rename
and then click again in the file/folder
name box.
Software
Folder tree
display area
Camera
You can select functions such as [Save
As], [Delete (Delete the files)], [Rename
(Change the file name)], [Rotate], [View
(Change the display format)] and
[Configuration (Camera Configuration)],
etc. from the pull-down menu.
Battery Charge
☞ A folder named “(year)-(month)-(day)-(number)” is automatically created in the folder tree display area.
✽ If you download more images on the same day, the number automatically increments.
29
DISPLAYING DOWNLOADED IMAGES
Images downloaded to your PC can be checked, rotated and saved as new files
under different names.
Select the folder you want to display
in the folder tree display area.
Select the display format from the
[View] menu.
Shows the file number.
Shows the image and the
file number.
Opens the slideshow display window (/P.31).
Displaying a frame enlarged (/P.31)
30
h To view an image frame enlarged, select and then
double-click the file in the List or Thumbnail view.
h Select the frame containing the image file you want to
view enlarged and select [View] from the [File] menu.
■Slideshow/Single-frame enlarged display window
Displays the next image
Rewinds to the first image
in the photo album
Fast forwards to the last image
Starts the slideshow
✽ During a slideshow, this button changes to
.
Click this button to stop the slideshow.
✽ The slideshow plays continuously until it is stopped.
Camera
Sets the
display time
for each
image frame.
Battery Charge
Displays the previous image
Software
Data
Saves the currently displayed
image as a new file with a different
name.
Rotates the image left (counterclockwise)
Closes the window
in 90° increments.
Rotates the image right (clockwise) in 90°
increments.
✽ The modified image is saved immediately.
✽ The modified image is saved immediately.
31
MODIFYING CAMERA SETTINGS, DELETING ALL IMAGES,
FORMATTING, AND RESETTING THE FILE COUNTER
Camera settings can be checked and modified from your PC. You can also delete all
the image files, format the camera memory and reset the file counter (file number).
Check that the camera is connected to a PC with the USB cable (/P.20).
Select [Camera] / [Configuration] from the
menu.
The “FLATFOTO Config” screen opens and
you can perform tasks such as modifying the
camera settings and deleting all the data in
the camera’s memory.
When the camera settings are modified
in the “FLATFOTO Config” screen, the
settings on the camera are also switched
automatically.
32
■FLATFOTO configuration screen
Image size VGA : 640 × 480 pixels
QVGA: 320 × 240 pixels
Battery charge level
Deletes all the images on
the camera.
Resets the file counter.
Updates the screen to show
the latest information on the
camera.
Current file counter setting
(the file number of the next
image shot)
Closes the window
h About the file counter (file numbers)
File numbers (No. 0001 to 9999) are automatically assigned to images when they are shot. The assigned file numbers are then saved
with the images during downloading.
✽ Because the file numbers are assigned when shots are taken and stored on the camera, the file numbers of images do not change
while they remain on the camera.
✽ If you delete an image on the camera after shooting it, the file number of the deleted file is skipped.
✽ When you reset the file counter, the file numbers for the next images shot begin again from “0001”. However, the file counter can only
be reset when [Delete All Images] or [Format] is selected in the “FLATFOTO Config” screen.
Data
✽ Clicking the [Update] button
when you connect another
camera to the PC updates the
screen to show the information
for the new connected camera.
Software
Number of images shot/
Number of available shots
✽ The file numbers for the next
images shot begin again from
“0001”.
✽ Only available when [Delete
All Images] or [Format] is
selected.
Camera
Deletes all the data in the
camera’s internal memory
and formats (initializes) the
memory.
Battery Charge
Beep tone
33
USING FLATFOTO Photo Album as TWAIN Driver
“FLATFOTO Photo Album” allows images on the camera to be downloaded directly
from the camera using a TWAIN-compatible application such as “PhotoImpression3.0”.
Check that “FLATFOTO Photo Album” software was installed correctly before connecting the camera to your PC
using the USB cable.
Windows
Switch the camera on and then connect
it to your PC using the USB cable.
Choose the [FLATFOTO Digital Camera] to select the
“FLATFOTO Photo Album (TWAIN Driver)”.
✽ The method for selecting the TWAIN driver differs
depending on the software you are using. If you are
using “PhotoImpression3.0”, refer to P.40.
Macintosh
34
Launch a TWAIN-compatible software
application, select the device and
download your images.
When “FLATFOTO Photo Album (TWAIN driver)” is
selected, “FLATFOTO Download” screen opens.
h Take care to connect the plugs on the
USB cable into the correct sockets, and
ensure that the plugs are inserted firmly.
h The Auto Power Off function does not
operate when a USB connection is
being used.
For Windows only
Select the images to be downloaded.
Click the [Transfer] button.
Camera
✽ You can also download images
using the [Transfer] button from
the [Twain] menu.
✽ Downloaded images are
displayed in the software.
Battery Charge
Click the [Start Download] button to
download the images.
Software
Data
The counter flashes (rotates) during
image downloading.
Quit “FLATFOTO Photo
Album”.
35
USING PhotoImpression3.0
This is a software to make it easy for you to download the images and modify them,
create calendars or postcards.
INSTALLING PhotoImpression3.0
Windows
For Windows
When you install “FLATFOTO Photo Album”,
“PhotoImpression3.0” is installed immediately
afterwards (/P.14).
Macintosh
36
If “PhotoImpression3.0” was not installed
during “FLATFOTO Photo Album”
installation (/P.14), load the enclosed
CD-ROM into your PC and install
“PhotoImpression3.0” manually.
For Macintosh
Double-click the CD-ROM icon and
the [ArcSoft PhotoImpression] folder
to start installation.
Click the [Quit] button.
Battery Charge
Double-click the [English] folder and
the [PhotoImpression Installer] icon
to start installation as directed by the
on-screen instructions.
Camera
h [PhotoImpression] folder
In your Macintosh’s hard disk
✽ If you change the installation destination
folder, the file is installed in it.
Data
h [PhotoImpression]'s alias
On the desk top
Software
These files are installed on your Macintosh.
You can change the installation destination
folder.
37
USING PhotoImpression3.0
Once “PhotoImpression3.0” installation is completed (/P.36), use it to download
images from the camera or from files and then create your own original photos.
Quits the application.
Minimizes the application window.
Get Photo
Use this button to download images from your camera.
You can also use this button to load other images you
like from stored albums or from your hard disk.
Displays the help window.
Edit
Use this button to perform image editing tasks such as
cropping, retouching and adjustment.
Create
Use this button to create a calendar or greeting card
using your images or to put a frame around your images.
Save
Use this button to save images with the original name
or under another name. This allows you to upload your
saved images to the online photo sharing site (optional)
or to attach your images to e-mail messages.
✽ You must have a valid Internet connection.
Print
38
Use this button to print one image per page or multiple
images arranged on the same page.
Further information about “PhotoImpression 3.0”
can be found at www.arcsoft.com.
Navigation Window
Resize tool
Flip Horizontally tool
Undo tool
Use this tool to cancel (undo) the last
unsaved action you performed.
You can undo an action any number of times
by simply clicking this button repeatedly.
Delete Layer tool
Use this tool to delete the currently selected
layer.
Redo tool
Use this tool to redo the last cancelled (undo)
operation. You can redo an action any
number of times by simply clicking this button
repeatedly.
Paste tool
Use this tool to paste the contents of the
clipboard onto a new layer.
Data
Copy tool
Use this tool to copy the selected area or
layer to the clipboard.
Rotate All Layers tool
Use this tool to rotate the image in 90°
increments.
Software
Use this tool to flip the image horizontally to
produce a mirror image.
Freehand Rotate tool
Use this tool to rotate the image by dragging
one of the handles on each corner.
Camera
Use this tool to make an image larger or
smaller by dragging the handles on each
corner of the image. You can also use this
tool to drag the entire image to a different
position.
Scale Control
Use this button to specify enlarged or
reduced image display.
h Clicking [
] displays the image at 100%.
h Clicking [
] displays the image in fullscreen mode.
h To cancel full-screen mode, press the [Esc]
key.
Battery Charge
This window displays a reduced version of
the entire image. When you are working with
enlarged images, the navigation window
provides a quick and easy way to move to a
location you want to view.
Close Image tool
Use this tool to close the currently selected
image.
39
Get Photo
Use this button to download images from the camera. You can also use this button to
load other your favorite images from stored albums or from your hard disk.
Using “FLATFOTO Digital Camera (TWAIN driver)”
Click the [Start Download] button to
download the images.
Camera/Scanner
A
Use the following procedure to download images from a
device such as a TWAIN-compatible camera.
✽ Connect the camera to your PC using the USB cable.
Check that [Get Photo] is selected.
Select [Camera/Scanner].
Select the source. A list of compatible devices
appears and then select [FLATFOTO Digital Camera].
Click the [ ] button.
Pressing the [ ] button launches the TWAIN driver
used for image downloading.
40
First, all the images in the camera are
downloaded and saved in the locations
given below.
Windows:
[FLATFOTO] folder on the local disk
✽ As described on P.29, a folder named
“(year)-(month)-(day)-(number)” is
automatically created.
Macintosh:
[PhotoImpression] folder / [Photos]
Select the images to be downloaded.
Click the [Transfer] button.
This allows you to store your favorite images in albums.
Note that an album is simply a way of recording the
locations in which image files are stored and does not
contain the actual images themselves.
✽ Store the actual images on your hard disk. You can also
view the images in an album as a slide show.
From File
This allows you to open image files saved on your hard
disk or a CD-ROM.
✽ The Quick Access function lists the most recently opened
images. To open an image not shown on the list, click the
[Browse] button and select the desired file.
Create New
Camera
✽ You can also download images
using the [Transfer] button from
the [Twain] menu.
✽ Downloaded images are displayed
in the software. The image is
saved onto [My Document] / [My
Pictures].
Album
Battery Charge
For Windows only
This allows you to create a new image.
Screen Capture
Data
Quit “FLATFOTO Photo Album”.
Software
This allows you to capture and download a image of
your PC’s current desktop.
On a Macintosh, once image downloading
( ) is completed, the images are displayed
in A in the software.
41
Edit
Use this button to perform image editing tasks such as cropping, retouching and
adjustment.
Text
This allows you to add text to an image. A new layer is
automatically created for the added text.
h You can specify the font, style, size and color.
h You can also add a shadow to text and adjust the
density of the shadow.
✽ Created text can be modified later.
Enhance
This allows you to make adjustments to the entire image.
You can adjust the color tones, the brightness and the
contrast. You can also soften, sharpen, or equalize the
image and convert it to a negative image.
Effects
Select & Crop
Select: This tool lets you specify whether the selected
area is square, circular or polygonal.
Crop: This tool crops around the area specified with
the selection so that only the selected area is
displayed.
Retouch
This allows you use the brush tool or pen tool to draw on
the image. There are also tools for correcting red-eye, for
partial blurring or sharpening, for filling in selected areas
and for filling in areas with patterns or gradations of shade.
42
This option allows you to apply special effects to the
entire image.
Layers
This provide an easy way to edit images. You can drag
and drop layers to change the layer sequence (overlay
order).
h The currently selected layer is displayed with a yellow
border. Click the layer you want to edit.
h Click the green button to toggle between hiding and
showing a layer.
h You can use the slider to adjust the transparency of a
layer.
Use this button to create a calendar or greeting card using your images or to put a
frame around your images.
Calendars
✽ You can adjust the size and position of the image later.
Greeting Cards
This allows you to create your own original greeting
card simply by selecting a greeting card template.
h Select the template and then click the [Apply] button
to apply your selections.
Camera
This allows you to create your own original calendar
simply by selecting a calendar template.
h Select the year, the months and the template and
then click the [Apply] button to apply your selections.
Battery Charge
Create
✽ You can adjust the size and position of the image later.
Frames & Edges
Cookie Cutter
This allows you to crop your image as if you were using
a cookie cutter.
h Select your preferred cutter shape and then click the
[Apply] button to apply the selected cutter shape to
the image.
Cool Software
This provides an easy way to open images in your own
image processing software program.
h To add your software application to the list, click the
[Add] button and then specify your software program.
Data
This option allows you to create a frame or border for
your image.
h When you have selected your preferred frame or
border, click the [Apply] button to apply your selection
to the image.
This allows you to create fantasy shots using templates
in a range of genres.
h Select your preferred template, make fine adjustments
to the scale and position, and then click the [Apply]
button to apply your selections.
Software
Photofantasy
43
UNINSTALLING THE SOFTWARE
Only perform this operation when you no longer require the installed software.
For Windows
Windows
Macintosh
44
Check that the camera is not connected
to your PC and then start up your PC.
Exit all application and programs.
Select the program you want to
delete from [Programs] in the [Start]
menu and then select [UnInstall].
When the confirmation message
appears, click the button as directed
by the on-screen instructions.
✽ The confirmation message differs
depending on the software you select.
Battery Charge
Select the [Remove] and click the
[Next] button.
Camera
Software
Even if you uninstall the software, the folder containing
your saved images (“FLATFOTO” in the case of
“FLATFOTO Photo Album”) is left untouched.
Data
You can also uninstall the software using
[My Computer] / [Control Panel] /
[Add/Remove Programs Properties].
45
For Macintosh
Drag all the following installed
files to the [Trash].
Windows
h The installed files for “FLATFOTO Photo Album”
(/P.19)
Macintosh
h The installed files for
“PhotoImpression3.0” (/P.37)
46
Restart your Macintosh.
Select [Empty Trash] in the [Special]
menu.
Problem
Cause
Remedy
No power.
h The battery is exhausted.
The battery runs out
quickly.
h You are using the camera in extremely h Put the camera in your pocket or another
cold condition.
warm place to heat it.
h Recharge the battery.
h The camera or subject was moving when h Hold the camera firmly.
the shot was taken.
h You are too close to the subject (outside h Take the shot from a distance within the
the photography range) when you take
photography range (approx. 60 cm to
the shot.
infinity).
h The pop-up lens is skewed.
h Take care to pop the lens up correctly
so that it is not skewed.
Nothing happens when
you use the camera
buttons and switch.
h Camera malfunctions.
h The battery is exhausted.
h Switch the camera off and then on
again.
h Recharge the battery.
Software
The image is blurred.
Camera
No photograph is taken h The Auto Power Off function has switched h Switch the camera on.
when the shutter button
the camera off.
is pressed.
h The memory is fully recorded.
h Download the images to the PC, and
delete some unwanted images.
Battery Charge
TROUBLESHOOTING
Data
47
Problem
The PC does not
recognize the camera.
Cause
Everything on the LCD h Camera firmware defect.
flashes and “7” or “8”
is displayed.
48
Remedy
h Connect the camera to the PC with the h Connect the camera to the PC with the
USB cable before installing the software.
USB cable and select [My Computer] /
[Control Panel] / [System] / [Device
Manager]. In the [Devise Manager]
window, delete [Compose USB device]
or [Unknown device] in [Other devices].
Then disconnect the camera and install
the software before reconnecting the
camera to the PC.
h Connect the camera directly to the PC
using the USB cable, not via a USB hub.
h Disconnect the other USB devices
connected to the PC.
h If the “Camera firmware is out of sync.
Update recommended. Update firmware?”
message appears when you connect the
camera to your PC with the USB cable,
click the [Yes] button and update your
firmware.
h Focus
Focus free
h CCD image sensor
CMOS image sensor with AutobriteTM technology
h Digital output
USB (mini-B)
h Storage media
8MB internal flash memory
h Number of available shots
VGA (640 × 480 pixels): 26 shots
QVGA (320 × 240 pixels): 101 shots
h File format
JPEG (Converted when images are downloaded using
the enclosed software.)
h Power supply
Lithium-ion battery (rechargeable, non-removal)
h Camera dimensions
3.4" × 2.1" × 0.2" (W/H/D)
(not including accessories and attachments)
h Sensitivity
Equivalent to ISO100
h Camera mass(weight)
Approx. 1.2 oz. (35 g)
(including battery, not including accessories)
h Lens
F=3.8, f=6.87 mm
(Equivalent 47 mm on a 35 mm camera)
Data
h Finder
Optical
h Condition for use
Temperature: +32F to +104F (0°C to +40°C)
Humidity: 80% or less (no condensation)
h White balance
Automatic
h Focal range
60cm - ∞
h Shutter speed
Automatic (1/30 - 1/15000 sec.)
Software
h Image file size
VGA: 640 × 480 pixels
QVGA: 320 × 240 pixels
Camera
h Actual number of pixels
0.31 million pixels
Battery Charge
Specifications
✽ Specifications are typical; individual units might vary.
Specifications are subject to change and improvement
without notice.
49
System Requirements
■ For Windows
h Compatible PCs: IBM PC/AT or compatible (models with USB support as standard)
h Operating system: Windows 98 (including the second edition), Windows Millenium Edition (Windows Me),
Windows 2000 Professional, Windows XP Professional, Windows XP Home Edition
h CPU: 200 MHz Pentium or better
h RAM: 32MB minimum
h Hard disk space: 200MB minimum
h Other: A CD-ROM for driver and software installation
■ For Macintosh
h Compatible Macs: Power Macintosh G3 200 MHz minimum (models with USB support as standard)
h Operating system: Mac OS 8.6-9.0, 9.1, 9.2
h RAM: 32MB minimum
h Hard disk space: 200MB minimum
h Other: A CD-ROM for driver and software installation
50
CARE
FCC Declaration of Conformity
Product: FlatFoto
Model: 16-3620
Responsible RadioShack
Party: 100 Throckmorton
Fort Worth, TX 76102
Camera
This device complies with Part 15 of the FCC Rules. Operation is
subject to the following two conditions: (1) this device may not cause
harmful interference, and (2) this device must accept any interference
received, including interference that may cause undesired operation.
Battery Charge
Keep the camera dry; if it gets wet, wipe it dry immediately. Use and store the camera only in normal temperature
environments. Handle the camera carefully; do not drop it. Keep the camera away from dust and dirt, and wipe it with
a damp cloth occasionally to keep it looking new.
If your camera is not performing as it should, take it to your local RadioShack store for assistance. Modifying or
tampering with the camera's internal components can cause a malfunction and might invalidate its warranty and void
your FCC authorization to operate it.
Phone: 817-415-3200
Software
The FCC Wants You to Know
Data
This equipment has been tested and found to comply with the limits for a Class B digital device, pursuant to Part 15
of the FCC Rules. These limits are designed to provide reasonable protection against harmful interference in a
residential installation. This equipment generates, uses and can radiate radio frequency energy and, if not installed
and used in accordance with the instructions, may cause harmful interference to radio communications.
However, there is no guarantee that interference will not occur in a particular installation. If this equipment does
cause harmful interference to radio or television reception, which can be determined by turning the equipment off and
on, the user is encouraged to try to correct the interference by one or more of the following measures:
• Reorient or relocate the receiving antenna.
• Increase the separation between the equipment and receiver.
• Connect the equipment into an outlet on a circuit different from that to which the receiver is connected.
• Consult your local RadioShack store or an experienced radio/TV technician for help.
If you cannot eliminate the interference, the FCC requires that you stop using your camera.
Changes or modifications not expressly approved by RadioShack may cause interference and void the user's
authority to operate the equipment.
51
Limited Ninety-Day Warranty
This product is warranted by RadioShack against manufacturing defects in material and workmanship under normal use for
ninety (90) days from the date of purchase from RadioShack company-owned stores and authorized RadioShack franchisees
and dealers. EXCEPT AS PROVIDED HEREIN, RadioShack MAKES NO EXPRESS WARRANTIES AND ANY IMPLIED
WARRANTIES, INCLUDING THOSE OF MERCHANTABILITY AND FITNESS FOR A PARTICULAR PURPOSE, ARE LIMITED
IN DURATION TO THE DURATION OF THE WRITTEN LIMITED WARRANTIES CONTAINED HEREIN. EXCEPT AS
PROVIDED HEREIN, RadioShack SHALL HAVE NO LIABILITY OR RESPONSIBILITY TO CUSTOMER OR ANY OTHER
PERSON OR ENTITY WITH RESPECT TO ANY LIABILITY, LOSS OR DAMAGE CAUSED DIRECTLY OR INDIRECTLY BY
USE OR PERFORMANCE OF THE PRODUCT OR ARISING OUT OF ANY BREACH OF THIS WARRANTY, INCLUDING,
BUT NOT LIMITED TO, ANY DAMAGES RESULTING FROM INCONVENIENCE, LOSS OF TIME, DATA, PROPERTY,
REVENUE, OR PROFIT OR ANY INDIRECT, SPECIAL, INCIDENTAL, OR CONSEQUENTIAL DAMAGES, EVEN IF
RadioShack HAS BEEN ADVISED OF THE POSSIBILITY OF SUCH DAMAGES.
Some states do not allow limitations on how long an implied warranty lasts or the exclusion or limitation of incidental or
consequential damages, so the above limitations or exclusions may not apply to you.
In the event of a product defect during the warranty period, take the product and the RadioShack sales receipt as proof of
purchase date to any RadioShack store. RadioShack will, at its option, unless otherwise provided by law: (a) correct the defect
by product repair without charge for parts and labor; (b) replace the product with one of the same or similar design; or (c) refund
the purchase price. All replaced parts and products, and products on which a refund is made, become the property of
RadioShack. New or reconditioned parts and products may be used in the performance of warranty service. Repaired or
replaced parts and products are warranted for the remainder of the original warranty period. You will be charged for repair or
replacement of the product made after the expiration of the warranty period.
This warranty does not cover: (a) damage or failure caused by or attributable to acts of God, abuse, accident, misuse, improper
or abnormal usage, failure to follow instructions, improper installation or maintenance, alteration, lightning or other incidence of
excess voltage or current; (b) any repairs other than those provided by a RadioShack Authorized Service Facility; (c)
consumables such as fuses or batteries; (d) cosmetic damage; (e) transportation, shipping or insurance costs; or (f) costs of
product removal, installation, set-up service adjustment or reinstallation.
This warranty gives you specific legal rights, and you may also have other rights which vary from state to state.
RadioShack Customer Relations, 200 Taylor Street, 6th Floor, Fort Worth, TX 76102
12/99
RadioShack Corporation
Fort Worth, Texas 76102
16-3620
06A02
Printed in China