1
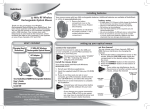
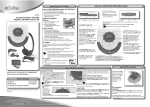
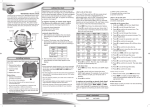
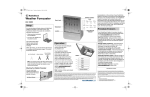
FlatFOTO 2.0 Digital Camera User Manual 1 2 3 4 5 6 7. 8 9 Brief Description............................................................................................................... 2 Before Using Your Camera .............................................................................................. 2 z How to Hold the Camera Correctly ..................................................................... 2 z Test Photos........................................................................................................... 2 z Identifying the Parts............................................................................................. 3 Using the FlatFOTO 2.0 Digital Camera.......................................................................... 4 z Charging the Battery ............................................................................................ 4 z Lithium-Polymer Battery Tips:............................................................................ 4 z Turning on the Camera ........................................................................................ 4 z Turning on the LCD……………………………………………………………..5 z Mode Selection………………………..…….……..……………………………5 z Picture-Taking Mode……………………………………………………………5 z Picture-Taking Mode Menus……………………………………………………6 z Playback Mode…………………………………………………… …………..7 z USB Mode……………………………………………………………………....8 z Using Secure Digital (SD) Memory Cards… …………………………………8 z Changing Resolution............................................................................................ 9 z Turning On/Off Sound ......................................................................................... 9 z Taking Pictures .................................................................................................... 9 z About Autobrite® Technology .......................................................................... 10 z Deleting an Image .............................................................................................. 10 z Formatting Internal Flash Memory or SD Card…………………..……………10 z FCC Declaration of Conformity……………………………………………….11 Installing Software .......................................................................................................... 12 z System Requirements......................................................................................... 12 z Installing Windows/PC software ……………………………….…..…………13 z PhotoImpression 4.0 Installation………………………………………………14 z PhotoBase 4.0 Installation……………………………………………………..15 z Installing Mac OS X Software …………………..…………………………….16 Connecting the Camera to your PC or Mac .................................................................... 20 z Downloading Images from the Camera ............................................................. 21 Troubleshooting (Digital Camera).................................................................................. 25 Specifications……………………...……………………………………………………26 Safety Notes .................................................................................................................... 27 Trademarks ..................................................................................................................... 30 FlatFOTO 2.0 Digital Camera with Color LCD 1 Brief Description Your FlatFOTO 2.0 Digital Camera with color LCD display is roughly the size of a credit card - only 13 mm thick. The camera’s portability and convenience are enabled by its “worry free” rechargeable battery, simple user interface, and easy image download when you connect the camera to a PC or Mac with the supplied USB cable. Package Contents Be sure to check that the package contains all the items listed below: Camera USB cable Docking Station Hand Strap CD-ROM Quick Operation Guide If any items are missing, please contact the store where you purchased the camera. Keep the camera packaging in a safe place as it will be needed if you return the camera for repairs, etc. 2 Before Using Your Camera To ensure that you use your camera correctly, read the Safety Notes in section 8 and the rest of this user’s manual carefully. Holding the camera correctly Due to the extremely compact size and light weight of the camera, it is critical that you hold the camera securely in order to avoid “camera shake”. The camera is particularly sensitive to “shake” in low light environments. Taking a picture in low light requires a longer exposure time for the image to be captured and any movement during this time might cause a blurred image. When taking a photo in low light the flash may trigger. Before this happens, try to avoid gripping the camera with your fingers placed on the front face of the camera. Instead, hold the camera on its edges so that the light of the flash does not reflect off your finger(s) and cause lens flare. Test photos Before you capture your first images, we recommend you take some test photos to make sure that the camera is working properly. This will also help you become comfortable holding the camera in order to capture satisfactory images. 2 Identifying the parts Front View Red LED Flash Strobe Picture-Taking Mode / Playback Mode Lens SD Card slot Back View Viewfinder Green LED Power On/Off LCD On/Off Up Select Down Menu Liquid Crystal Display (LCD) 3 3 Using Your FlatFOTO 2.0 Digital Camera Charging the battery Long battery life is one of the key benefits of this camera compared to other digital cameras. On a full charge, the camera will take hundreds of images with the flash or over one thousand images without the flash. Your camera battery has already been charged prior to shipment. So, you should be able to take pictures without recharging it. However, just to be safe, you may want to follow the instructions below to make sure that your camera is fully charged before leaving home The lithium-polymer battery used in the camera recharges automatically when the camera is plugged into a PC or Mac via the USB cable. In order to charge the battery the first time, first install the included software (see Installing the Software in section 4) and then plug the camera into your computer using the provided USB cable. When the battery is charging, the green LED will blink. When charging is complete, the green LED will be steady on. Lithium-polymer battery tips: Safety note: Always observe the precautions described in Section 8. It takes approximately 3 hours to fully charge a depleted battery. The camera can be charged at ambient temperatures between 0°C and +40°C. The battery does not need to be fully discharged or exhausted before being recharged. o Lithium-polymer batteries lose their charge even when not used. So, be sure to charge the battery before taking pictures. o To ensure that your battery lasts as long as possible, switch the camera off when you are not using it. o The number of available shots will be lower at low temperatures. You can increase the amount of power produced by putting the camera in your pocket or another warm place to heat it just before taking pictures. If you are using a heating pad, take care not to place the camera directly against the pad. o o o o Turning on the camera Press the Power button once to turn on the camera. Press it again to turn the camera off. • Note: The camera has an automatic time-out feature to conserve battery life. After one minute (or 2 minutes) the camera will time-out (turn off). When timed out, the 4 • camera will not take a photo when you push the shutter button. Press the Power button once to turn on the camera again. If power is low, the red LED blinks 5 times and then the camera turns off. Recharge the battery immediately. Turning on the LCD The LCD screen comes on automatically in preview mode when the power is turned on. Press the LCD button once more to switch to preview mode with icons visible. Press the LCD button again to turn off the LCD. Understanding LCD icons LCD Description Picture Counter. Shows remaining number of shots. Indicates Battery Charge State : The battery has ample charge. : The battery is approximately half-charged. Suggest charging it before next use. : The battery has no charge. Please recharge immediately. Secure Digital card indicator Strobe indicator. Flashes on and off while charging. Steady on when flash is set to Automatic. Mode selection Your camera has three modes of operation: • Picture-taking (for capturing images) • Playback (for reviewing and deleting images) • USB mode (for downloading images to a computer and charging the battery) When the USB cable is connected to the camera and a computer, the camera automatically goes to USB mode. Picture-taking mode The green LED will be solid when the camera is ready to take pictures. If the green LED is blinking, the camera is not ready. It may blink for 1 second while storing an image and for 5 seconds while recharging the flash. 5 z • • • • Picture-taking mode menus Press the Menu button to access the menus. Use the Up and Down arrow buttons to make selections. Press the Select button to cycle through the available options. Press the Menu button to save your selections. Function Menu FLASH TIMER Setting Description AUTO OFF ON OFF 10 S Flash functions automatically in the dim condition Flash is disabled Force flash to function under any lighting condition Self-timer is off Captures an image 10 seconds after pressing the shutter button Note: After taking the picture, self-timer function turns off. Captures an image 2 seconds after pressing the shutter button. Takes 2048 x 1536 pixels image Takes 1600 x 1200 pixels image Takes 800 x 600 pixels image Turns audio beeps on Turns audio beeps off Displays English menu Displays French menu Displays Italian menu Displays Deutsch menu Displays Spanish menu Displays Japanese menu 2S SIZE LARGE MEDIUM SMALL SOUND ON OFF LANGUAGE ENG FRA ITA DEU ESP ZOOM TIMEOUT DISPLAY COUNTER 1x 2x 1 MIN 2 MIN HIGH LOW RESET Takes/Displays picture in normal size Takes/Displays picture in double size Turns camera off automatically after 1 minute of inactivity Turns camera off automatically after 2 minutes of inactivity Sets high brightness LCD Sets low brightness LCD Resets the picture counter to zero 6 Typical picture-taking mode menu displays Picture-taking mode with timer on 10 Note the timer icon in the center of the display. When the timer is on, and set to 10 seconds (for example), the front red LED begins blinking when the shutter button is pressed. It begins counting down with 8 seconds of slow blinking (with audio beeps if the sound is on) and 2 seconds of fast blinking (with audio beeps). After the picture is taken there is a 1 second audio beep and the red LED goes steady. Playback mode Use the Playback mode to review images you have captured and to review images in order to delete them. Select Playback mode by sliding the mode switch to the right. The last picture taken is displayed first. If the camera is empty, the display will say “No pictures on camera.” Only the active media (SD card or internal memory) is displayed. In order to review pictures in internal memory, the SD card must be removed. After a picture has been deleted, the camera will return to Playback mode. 7 Playback mode menus Menu Delete Delete All Format Media Selection Confirm delete of current image Confirm delete of all images Formats the SD memory card Description Select Yes or No Select Yes or No Select Yes or No USB mode Use the USB mode to download images to your computer and to recharge the camera’s battery. The mode selection switch can be in either position (Picture-taking or Playback). Connect the mini USB plug to the mini USB socket on the camera and connect the larger size USB plug to the USB socket on your computer. You will hear a low-high beep when connecting and a high-low beep when disconnecting. All camera buttons are inactive during USB mode. USB mode activity Activity Blinking green LED Solid green LED Medium blinking red LED Solid red LED Fast blinking red LED What’s Happening Charging Fully-charged USB waiting for enumeration USB connected and transfer data When connecting camera to PC before driver is installed. Please install driver. Note: See Section 5 on how to download images to your computer. Using Secure Digital (SD) memory cards Your camera is capable of storing images on Secure Digital (SD) memory cards. To use an SD card, insert the card into the SD slot in your camera. The LCD will show the SD card indicator when an SD card is in the slot. To retreat the SD card, use your finger nail to push the card in so it pops out slightly. Grasp the card and pull it out. Insert SD Card in the card slot SD card icon is displayed when card is inserted 8 It may be necessary to format the SD card if the card has been used in devices other than your camera. To format, see Formatting Flash Memory or SD Card on Page 10. “0” displays at lower right of the LCD display when the SD card is full, or the SD card is write-protected, or there is an error writing to the card. You cannot take picture. To take picture, download the pictures to your computer, or delete some unimportant pictures from the SD card (refer to page 10), or use a writable SD card. Changing resolution Your 2MP Digital Camera offers three choices in resolution: Large, Medium and Small. Large resolution is 2048 x 1536 pixels, Medium resolution is 1600 x1200 pixels, and Small resolution is 800 x 600 pixels. The higher resolution setting allows for an image to be printed as large as 8 x 10 inches, but requires more memory to store. The lower resolution setting will allow for more images to be stored on the camera, but does not ensure print-quality detail. It is best suited for images to be e-mailed or posted on a Web site. Size Resolution Size # of Available Shots (16MB internal memory) Large Medium Small 2048x 1536 pixels 1600 x 1200 pixels 800 x 600 pixels 14 14 28 To change the resolution: • • Turn the camera on and move the mode button to the left to Picture-taking. Select Size and then select LARGE, MEDIUM or SMALL. Turning on/off sound • • Turn the camera on and move the mode button to the left to Picture-taking. Select Sound and then select ON or OFF. Taking pictures To take pictures using your 2MP Digital Camera: • Turn the camera on. • In low light conditions, check to make sure the flash is ready. Be sure the Flash is set to AUTO. • Use the aiming mark in the viewfinder to center the image you want to capture. 9 • • • Alternatively, use the color LCD display to view the image you want to capture. The color LCD comes on automatically in preview mode when the camera is turned on. Press the LCD button again to view preview mode with icons. Hold the camera still and press the shutter button. The LCD will indicate when the picture has been successfully taken by cycling through the number display. If the sound feature is turned on, one short beep will also indicate that a picture has been taken. Note: Safety while taking pictures Do not use the camera while you are walking, running, driving or operating machinery. Doing so can result in a serious accident. About Autobrite® technology The camera offers the benefits of a technology known as Autobrite. This technology automatically adjusts the exposure and captures crisp details in scenes where both dim and bright lighting conditions are present, such as glare or backlighting. Most existing digital cameras produce washed out or silhouetted images under such conditions. We suggest you try to avoid taking pictures pointing directly at bright objects (such as the sun), due to the potential impact of extremely bright lighting on image quality and lens flare. Autobrite is proprietary to SMaL Camera Technologies, Inc. of Cambridge, Massachusetts, USA. Deleting an image To delete the most recent image: • Turn the camera on and switch the Picture-Taking Mode/ Playback Mode to playback. • Press the Menu button and select Delete. • Use the up/down arrow buttons to select Yes to delete the image or No to save the image. • Press the Select button to confirm your selection. Two audio beeps will confirm your selection. • Repeat the process again to delete the next most recent image. • To resume taking pictures move the mode selection switch to the left to Picturetaking mode. To delete all the images on the camera: • Turn the camera on and switch the Picture-Taking Mode/ playback Mode to Playback. • Press the Menu button and select Delete All. • Use the up/down arrow buttons to select Yes to delete all the images or No to save all the images. • Press the Select button to confirm your selection. Two audio beeps will confirm your selection. • To resume taking pictures move the mode selection switch to the left to Picturetaking mode. 10 Formatting Internal Flash Memory or SD Card To format internal flash memory or SD card Warning: Formatting an SD card or flash memory will delete all information. • If formatting an SD card, insert the card into the camera. Remove the SD card if you are formatting the internal flash memory. • Turn the camera on and switch the Picture-Taking Mode/ Playback Mode to playback. • Press the Menu button and use the up/down arrow buttons to Select Format. • Press the Select button to confirm your selection. • Use the up/down arrow buttons to select Yes/No. • Press the select button to confirm your selection. • To resume taking pictures, switch the mode selection switch to Picture-Taking mode. FCC DECLARATION OF CONFORMITY This device complies with Part 15 of the FCC rules. Operation is subject to the following two conditions: (1) this device may not cause harmful interference, and (2) this device must accept any interference received, including interference that may cause undesired operation. Product: FlatFOTO 2.0 Digital Camera Model: 16-3831 Responsible Party: RadioShack 100 Throckmorton Fort Worth, TX 76102 Phone: 817-415-3200 The FCC Wants You to Know This equipment has been tested and found to comply with the limits for a Class B digital device, pursuant to Part 15 of the FCC Rules. These limits are designed to provide reasonable protection against harmful interference in a residential installation. This equipment generates, uses and can radiate radio frequency energy and, if not installed and used in accordance with the instructions, may cause harmful interference to radio communications. However, there is no guarantee that interference will not occur in a particular installation. If this equipment does cause harmful interference to radio or television reception, which can be determined by turning the equipment off and on, the user is encouraged to try to correct the interference by one or more of the following measures: • Reorient or relocate the receiving antenna. • Increase separation between the equipment and receiver. • Connect the equipment into an outlet on a circuit different from that to which the receiver is connected. • Consult your local RadioShack store or an experienced radio/TV technician for help. 11 If you cannot eliminate the interference, the FCC requires that you stop using your camera. Changes or modifications not expressly approved by RadioShack may cause interference and void the user’s authority to operate the equipment. 4 Installing Software Important for PC/Windows users: It is necessary to install the included software before connecting your camera to the computer. System requirements Windows • Windows 98 (including SE), ME, 2000, or XP • 200 MHz Pentium or better • 32MB RAM • 200MB available Hard Drive space • CD-ROM Mac • Power Macintosh G3 200 MHz minimum • Mac OS X • 32MB RAM • 200MB available Hard Drive space • CD-ROM 12 Installing Windows/PC software Important: Do not connect your camera to your PC using the USB cable until software has been installed. Installing the software also installs the necessary drivers for the camera to be able to communicate with your computer. 1. Insert the installation CD into the CD-ROM drive 2. Introduction screen will appear automatically 3. Select “Driver” 6. Click “Next”. 4. Select “English” 7. Click “Next”. 5. Click “Next”. 8. Click “Finish”. 13 Photo Impression 4.0 Installation 1. Insert installation CD into your PC’s CD-ROM 2. Introduction screen will appear automatically. 3. Click “ArcSoft Photo Impression 4.0” 4. Click “Yes” 5. Click “Next” 6. Click “Next” 7. Click “Finish” 8. Re-starting your computer is recommended. Note: To find out more about Photo Impression 4.0 or how to use it, consult online help by clicking “?” icon or “help” on the pull-down menu. 14 Photo Base 4.0 Installation 1. Insert installation CD into your PC’s CD-ROM 2. Introduction screen will appear automatically. 3. Click “ArcSoft Photo Base 4.0” 6. Click “Next” 4. Click “Yes” 7. Click “Finish” 5. Click “Next” 8. Re-starting your computer is recommended. Note: To find out more about Photo Base4.0 or how to use it, consult online help by clicking “?” icon or “help” on the pull-down menu. 15 Installing Mac OS X software 1 Insert the installation CD into the CD-ROM drive. 2. Click on CD-ROM icon 3. Click “Mac Driver” 4. Select the file “DigitalCam_3_0_5_1_OSX.pkg”. 5. The Installation program will open. 16 6. Enter administrator name and password. Click OK. 7. The Welcome screen will be displayed. Click Continue. 17 8. Select the destination for the program files to be installed to and click Continue. 9. Click Install. 18 • You will see this message telling you to restart your computer after installation. Save and close all running programs and click Continue Installation. • The computer needs to be restarted after installation is completed. Click Restart 19 5 Connecting the Camera to Your PC or Mac After the software has been installed on your computer, plug the camera into an available USB port using the provided USB cable. The Windows operating system requires that you install drivers for the camera so that the camera and computer can communicate properly. To do this: Connect your camera to an available USB Port. When connected to your PC the computer will recognize the new device and display a “Found New Hardware” message. 20 Downloading images from the camera Note: Because the files stored in your camera are specially compressed to increase storage capacity, images must be downloaded using Photo Album before the images are converted into JPEG format images for use with other programs or computers. Note: Images taken by this camera may not be compatible with applications that are not included on the camera CD. Note for Mac OS X users: The software that is installed enables iPhoto to process the images from the digital camera. When you connect the camera to your PC (see instructions for doing so above, if needed), “Getting image progress bar” displays on the PC, and it might take up to one hour if the SD card is stored with many images. After image transmission completes, the auto-launch of the Photo Viewer automatically displays on the PC screen. 21 You will be prompted to enter a destination directory. This is the directory where all of the images downloaded from the camera will be stored. Click Yes, unless you want to specify a different destination directory. • • As the images are downloaded they will be displayed as thumbnails in the main window of Photo Album. If you want all the selected images deleted after downloading to your PC, click OK. But if you want the selected images to remain stored on your camera after download to your PC, un-check the box that says, “Delete selected after download” and then click. 22 The photos are copied from the camera to the specified folder. This may take a few moments. 23 Click OK. 24 6. Troubleshooting Problem No power Picture-taking Symptom Camera will not turn on Image appears blurred or dark Likely Cause Battery power has been depleted The camera or subject was moving when the shot was taken The subject is too close The lens is dirty Flash does not go off as expected Flash has not finished charging The flash has been turned off Camera will not focus Subject is not in the center of the lens viewfinder or LCD (preview) Camera is not turned on No space on the SD card / internal memory Cannot take pictures when the shutter button is pressed PC Connection PC does not recognize the camera The camera has timed out Check the USB cable connection Interference from other USB devices Solution Recharge the internal battery (section 8) Hold the camera firmly Move away from the subject Clean the lens with a soft cloth Wait until the green LED is steady Make sure the flash is set to AUTOmatic or ON Move the subject to the center of the lens viewfinder or LCD (preview) Turn on the camera Delete unwanted files (section 8) or insert a new SD card (section 8) Turn the camera on Make sure both ends of the USB cable are connected Disconnected other USB devices 25 7 Specifications (FlatFOTO 2.0 Digital Camera) Imager Imager Resolution Dynamic Range Exposure Control Sensitivity Exposure time Exposure-to-exposure time Lens Lens focus Viewfinder Display Controls Strobe Strobe activation Strobe distance Image resolution settings White Balance Built-in storage Expansion slot Computer/host interface System requirements Dimensions Weight Battery specification Operation environment 1/3-inch SMaL UXGA-format CMOS imager with Autobrite* 1600 x 1200 active pixels 55 dB linear / up to 85 dB with Autobrite* Automatic with Autobrite and low-lightlevel strobe activation Equivalent to ISO 100 1/15 second to 1/10,000 second <4 seconds Glass, F.L. = 8.6mm, F/3.0 (equivalent to 49 mm lens on a 35 mm camera) Fixed, 1.5 m (4.9 ft) to infinity Reverse-Galilean optical viewfinder Color TFT (1.5” or 1.8”) Power on-off, mode selection, shutter button, LCD on-off, menu, select, arrow up, arrow down Xenon flash lamp, guide number = 4.5 Automatic (low-light detection) Approx. 0.8m ~ 2m Hi-resolution (2048x1536)pixels Medium (1600x1200)pixels Low-resolution (800x600)pixels Autobrite* 16MB flash memory holds 14 images (Large-resolution); 14 images (Mediumresolution);28 images (Small-resolution) SD card USB 1.1 233 MHz Pentium 2 or greater with MS Windows 98SE, ME, 2000, or XP; Apple Macintosh G3 with OS 9 or above 87.88 mm x 55.88 mm x 13mm (3.46” x 2.20” x .044”)(not including protruding lens) Approx. 46 grams Lithium-polymer battery (rechargeable, non-removable) Temperature: Approx. 0°C ~ 40°C (32°F ~ 104°F) Humidity: 80% or less (no condensation) *Autobrite is a registered trademark of SMaL Camera Technologies, Inc. of Cambridge, MA, USA. 26 8 Safety Notes We strongly recommend that you read these Safety Notes (and associated materials) before using your camera. WARNING • The enclosed disk is a computer CD-ROM. Never attempt to play this disk on an ordinary music CD player as it may produce extremely high noise levels that could damage your hearing or your audio equipment. • The camera is a precision instrument. Never attempt to dismantle this device. There is a serious danger of a powerful electric shock. • Do not drape the connection cord around your neck or otherwise treat the cable carelessly, as this could result in suffocation or injury. • Do not look through the viewfinder at the sun or other strong light. Doing so could damage your eyesight. • Do not leave the camera in locations exposed to direct sunlight, as this could cause a fire due to magnification by the lens. • Do not bring the camera close to a flame or throw it into a fire. • Do not drop the camera or otherwise subject it to strong impact. • Do not immerse the camera in water. Notes on Copyright Images recorded using your digital camera system cannot be used in ways that infringe copyright laws without the consent of the owner, unless intended only for personal use. Note that some restrictions apply to the photographing of stage performances, entertainments and exhibits, even when intended purely for personal use. Users are also asked to note that the transfer of memory containing images or data protected under copyright laws is only permissible within the restrictions imposed by those copyright laws. Liquid Crystal If the liquid crystal display (LCD) is damaged, take particular care with the liquid crystal inside the panel. If any of the following situations arise, take the urgent action indicated: • If liquid crystal comes in contact your skin: Wipe the area with a cloth and then wash thoroughly with soap and running water. • If liquid crystal gets into your eye: Flush the affected eye with clean water for at least 15 minutes and then seek medical assistance. • If liquid crystal is swallowed: Flush your mouth thoroughly with water. Drink large quantities of water and induce vomiting. Then seek medical assistance. Handling Your Digital Camera Safely This camera contains precision electronic components. To ensure that images are recorded correctly, do not subject the camera to impact or shock while an image is being recorded. Places to Avoid Do not use or store the camera in the following types of locations: 27 • • • • • • • In the rain or in very humid, dirty or dusty places. Places subject to extreme temperature rises, such as in direct sunlight or a closed car in summer. Extremely cold places. Places subject to strong vibration. Places affected by smoke or steam. Places subject to strong magnetic fields (such as near motors, transformers or magnets). In contact with chemicals such as pesticides or next to rubber or vinyl products for long periods of time. Sandy places such as beaches or deserts, or places where there is wind-borne sand. Note on Condensation If the camera is carried suddenly from a cold location into a warm location, water droplets may form on the inside of the camera or on the lens (condensation). When this occurs, switch the camera off and wait an hour before using the camera. Cleaning Your Camera • Use a blower brush to remove dust from the lens, LCD or viewfinder, and then wipe lightly with a soft, dry cloth. Leaving the lens extended for long periods can allow dust to enter the camera’s viewfinder. However, this does not affect the image. • Do not scratch hard objects against the lens, LCD or viewfinder as these surfaces are easily damaged. • Clean the body of the camera with a soft, dry, cloth. Do not use volatile substances such as thinners, benzine or insecticide, as these may react with the camera body finish and cause deformation or remove the coating. Checked Baggage When traveling by air, do not place your camera in the check-in baggage. Baggage handling at airports may subject baggage to violent shocks, and the camera may be damaged internally even when no external damage is visible. To prevent fire or shock hazard, do not expose the camera to rain or moisture. CAUTION: TO REDUCE THE RISK OF ELECTRIC SHOCK, DO NOT REMOVE COVER (OR BACK). NO USER-SERVICEABLE PARTS INSIDE. REFER SERVICING TO QUALIFIED SERVICE PERSONNEL. Disposing of This Product When disposing of this product, do so in accordance with your local waste disposal regulations. 28 9 • • • • • Trademarks Autobrite is a registered trademark of SMaL Camera Technologies, Inc. of Cambridge, Massachusetts, USA. Microsoft and Windows are trademarks of the Microsoft Corporation of the U.S. and other countries. Windows is an abbreviated term referring to the Microsoft Windows Operating System. Pentium is trademark of Intel Corporation. Macintosh, Power Macintosh, iMac, Mac OS are registered trademarks of Apple Computer, Inc All other company or product names are trademarks or registered trademarks of the respective companies. limited 90-day warranty This product is warranted by RadioShack against manufacturing defects in material and workmanship under normal use for ninety (90) days from the date of purchase from RadioShack company-owned stores and authorized RadioShack franchisees and dealers. For complete warranty details and exclusions, check with your local RadioShack store. RadioShack Customer Relations 200 Taylor Street, 6th Floor, Fort Worth, TX 76102 08/04 16-3831 08A04 29