1
Dishwasher
ZBD6800
ZBD6880
ZBD6890
ZBD0700
ZBD0710
monogram.com
Consumer
Information
Dishwasher
Introduction
Your new Honogram dishwasher makes an eloquent statement of style, convenience and kitchen
planning flexibility. Whether you chose it for its purity of design, practical features or assiduous
attention to detail-or
for all of these reasons-you'll
find that your Honogram dishwasher's
superior
blend of form and function will delight you for gears to come.
The information
on the following
If you have any other questions,
Contents
pages will help you operate and maintain
visit our Website
Appliance Registration ................
3, 23, 24
Care and Cleaning .........................
15
Consumer Services ......................
3, 20
Hodel and Serial Number Location ...........
Operating Instructions ...................
Control Panel and Operation ............
3
6-14
6-8
Lighting Features .........................
9
Water Temperature ......................
Rinse Agent ..............................
9
9
Dish Preparation Prior to Loading .........
Detergents .............................
Dishwasher Racks ...................
10
10
11-14
your dishwasher
properly.
at: monogram.corn
Problem Solver .........................
Safety Instructions ........................
U.S.A.Warranty
Canada Warranty
...........................
.........................
16-19
4, 5
21
22
Consumer
Information
Dishwasher
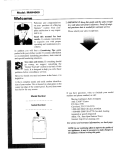
Before
using
your
dishwasher
Read this manual carefully. It is intended to help
you operate and maintain your new dishwasher
properly.
Keep it handy for answers to your questions.
If you don't understand something or need more
help, there is a list of toll-free consumer service
numbers included on the Consumer Services
page in the back section of this manual.
OR
Visit our Website
Write
down the
model &
serial
numbers
You can locate your model and serial numbers
on the tub wall just inside the doon
at: monogram.cam
Before sending in the card, please write these
numbers here:
Model Number
Serial Number
Use these numbers in any correspondence or
service calls concerning your dishwasher.
If blou received
a damaged
dishwasher
Immediately contact the dealer (or builder) that
sold you the dishwasher.
Save time
& money
Before you request service, check the Problem
Solver in the back of this manual.
It lists causes of minor operating aroblems that
you can correct yourself.
If btou
need service
To obtain
For customers
service, see the Consumer
Services
page in the back of this manual.
We're proud of our service and want you to be
pleased. If for some reason you are not happy
with the service you receive, here are steps to
follow for further help.
For customers
in the USA:
FIRST,contact the people who serviced your
appliance. Explain why you are not pleased.
In most cases, this will solve the problem.
NEXT,if you are still not pleased, contact us on
our website, write all the details-including your
phone number-or write to:
Manager, Customer Relations
GEAppliances
Appliance Park
Louisville, KY 40225
in Canada:
FIRST,contact the people who serviced your
appliance. Explain why you are not pleased.
In most cases, this will solve the problem.
NEXT,if you are still not pleased, write all the
details-including your phone number-to:
Manager, Consumer Relations
Mabe Canada Inc.
1 Factory Lane, Suite BlO
Moncton, N.B. EIC 9M3
IMPORTANT SAFETY INSTRUCTIONS
READ ALL INSTRUCTIONS BEFORE USE
SAVE THESE INSTRUCTIONS
ik WARNING!
For gour safetg, the information in this manual must be followed to minimize the risk of fire
or explosion, electric shock, and to prevent propertg damage, personal injurg, or death.
II, WARNING!
WATER HEATER SAFETY
Under certain conditions, hydrogen gas may be
produced in a water heater that has not been
used for two weeks or more. HYDROGEN GAS
IS EXPLOSIVE,
If the hot water has not been used for two weeks or
more, prevent the possibility of damage or injury by
turning on all hot water faucets and allow them to
run for several minutes. Do this before using any
electrical appliance which is connected to the hot
water system. This simple procedure will allow any
built-up hydrogen gas to escape.Sincethe gas is
flammable, do not smoke or use an open flame or
appliance during this process.
• , PROPER INSTALLATION AND MAINTENANCE
This dishwasher must be properly installed and located in accordance with the Insto!!ation
Instructions before it is used. !f you did not receive on Insto!!otion Instructions sheet with
gout dishwasher, you can receive one bg visiting our website at monogram.com.
• Connect to a grounded metal, permanent wiring
system; or run an equipment-grounding conductor
with the circuit conductors and connect to the
equipment-grounding terminal or lead of the
appliance.
• Improper connection of the equipment-grounding
conductor can result in a risk of electric shock.
Check with a qualified electrician or service
representative if you are in doubt whether the
appliance is properly grounded,
• Dispose of discarded appliances and shipping
or packing material properly.
CAUTION:
To prevent
minor injury
or property
damage
• Contents washed in Anti-bacterial mode, if
available, may be hot to the touch. Use care
before handling.
• Using a detergent that is
not specifically designed
for dishwashers will
cause the dishwasher
to fill with suds.
• If your dishwasher is connected to a
wall switch, ensure that the switch is
on prior to use.
• On dishwashers with electronic controls,
if you choose to turn the wall switch off
between wash cycles, allow 5-10
seconds after turning the switch on
before touching START/RESET
to allow
the control to initialize.
• Do not attempt to repair or replace any part
of your dishwasher unless it is specifically
recommended in this manual. All other servicing
should be referred to a qualified technician.
• To minimize the possibility of electric shock,
disconnect this appliance from the power supply
before attempting any maintenance.
NOTE:Turning the dishwasher off does not
disconnect the appliance from the power supply,
We recommend having a qualified technician
serviceyour appliance.
• Non-Dishware Items: Do not wash items such
as electronic air cleaner filters, furnace filters and
paint brushes in your dishwashen Damage to
dishwasher and discoloration or staining of
dishwasher may result.
• Closesupervision is necessary if this appliance
is used by or near children.
• Load light, plastic items so they will not
become dislodged and drop to the bottom
of the dishwasher-they might come into
contact with the heating element and be
damaged.
IMPORTANT SAFETY INSTRUCTIONS
READ ALL INSTRUCTIONS BEFORE USE
SAVE THESE INSTRUCTIONS
WARNING! RISK OF CHILD ENTRAPMENT
PROPER DISPOSAL OF THE DISHWASHER
Junked or abandoned dishwashers are
dangerous_.even if theg will sit for "just a
few days." If you are getting rid of your old
dishwasher, please follow the instructions below
to help prevent accidents.
Before You Throw Away
Your Old Dishwasher:
Door
• Take off the door of the washing compartment
or remove the door latch keeper (as shown).
WARNING!
keeper
When using your dishwasher,
including the following:
follow basic precautions,
•
Use this appliance only for its intended purpose
as described in this Owner's Manual.
• Do not operate your dishwasher unless all
enclosure panels are properly in place.
•
Use only powder, tabs, liquid detergents or rinse
agents recommended for use in a dishwasher and
keep them out of the reach of children. Cascade¢,
Cascade ® Complete and Electrasol ® Automatic
Dishwashing Detergents, and Jet-Dry ® and
Cascade Crystal Clear _ rinse agents have been
approved for use in all GE dishwashers,
• Do not tamper with controls.
• Locate sharp items so that theg are not likely
to damage the door seal.
• Load sharp knives with the handles up to reduce
the risk of cut-tgpe injuries.
• Do not wash plastic items unless marked
dishwasher safe or the equivalent. For plastic
items not so marked, check the manufacturer's
recommendations,
• Do not abuse, sit on or stand on the door or dish
rack of the dishwashec
• Do not allow children to play around dishwasher
when opening or closing door due to the possibility
of small fingers being pinched in dooc
• Do not discard a dishwasher without first removing
the door or the door latch keeper of the washing
compartment.
• Do not store or use combustible materials, gasoline
or other flammable vapors and liquids in the vicinity
of this or any other appliance.
• Do not allow children to play with, on or inside this
appliance or any discarded appliance.
• Do not touch the heating element during or
immediately after use.
READAND FOLLOWTHISSAFETYINFORMATION
CAREFULLY.
SAVETHESEINSTRUCTIONS
Control Panel
Dishwasher
You can locate
ZBD6800
_lour model
number on the
• ANT
gA_ERIAL
• CHINA
CRY_AL
• COOl(WARE WASHC_L_
• RINSEON_
• NORMAL
tub wall just
inside the door.
Throughout
this
manual,
features and
D
and ZBD6880
s),,,®
.........®
D 71 I-qi-q %
N
E]
ZBD0710
appearance
may vary from
£our model.
f
w,_,c,_,,,
A '1
,°8
....
....,.......
,AL.c,,..,,,.A_
_ @ _ _)_, .o,.,,o,,_,@
D
7171E]l-qi-q D
71
= COOKWARE
• RINSEO_LY
DELAY
PRE
DRY
ZBD6890
71
_s_c
• CLEAN
71
and ZBD0700
STATUS
• ANTI-BACTERIAL • SPEEDCYCLE
• pLASTIcs CYCLE
• C001eNAR_
• CHINACItYSTAL • P,INSEONLY
,:@
_,_o.,,.,.o
.....o .:,@
7171 %7171
% 71
OELAy
A
El3
_
%
Control
Settings
D
HOtD_S_C
•
ADO-A-DISH
•
SANITIZED
•
WASHING
•
CLEAN
z_
[]
WashCycles
Usethearrow pads ,=to scrollthroughthe wash cycles.Thelightaboveor next to the
selectedpad will beONto indicatewhich WASHCYCLE
hasbeenselected.
NOTE:Thisdishwasherisequippedwith on ExtroClean Sensorwith automatictemperature
control;therefore,cycletime and total water consumptionmay vary dependingon soil(heavy,
medium,light)andtemperatureconditions.
TM
ANTI
BACTERIAL
Heavy9.1gallons,95 minutes
Medium7.8gallons,95 minutes
Light 6.5gallons,90 minutes
Thiscycleraisesthewater temperaturein the final rinseto sanitizeyour dishwore.
Thecyclelengthwill vary dependingon the temperatureof yourinletwate_
NOTE:TheAnti-Bacterialcycleismonitoredfor sanitizotionrequirements.If the cycleis interrupted
duringor after the mainwash portionor if the incomingwater temperatureisso lowthat adequate
water heatingcannotbe achieved,the sanitizingconditionsmugnot be met. Inthesecases,the
sanitizedlightwillnot illuminateat the endof the cycle.
NSF INTERNATIONAL
Meets NSF Standard 184 Sanitization and Cleaning
performance of household spray-type dishwashers.
NOTE:NSFcertifiedresidentialdishwashersore not intendedfor licensedfood establishments.
COOKWARE
Heavy10.4gallons,80 minutes
Medium9.1gallons,90 minutes
Light 7.8gallons,100minutes
Thiscycleis meantfor heavilysoileddishesor cookwarewith dried-onor baked-onsoils.Thiscycle
may not removeburned-onfoods.Evergdogdishesare safeto be usedin this cycle.
NORMAL
Heavy8.75gallons,70 minutes
Medium6.25gallons,60 minutes
Light 5 gallons,55 minutes
Thiscycleisfor medium/heavilysoileddishesand glassware.
SPEED
CYCLE
7.8gallons,37 minutes
(onsomemodels) Thiscycleisfor everydaydishesand glassware.
Control Panel/Operation
Dishwasher
CHINA
CRYSTAL
7.8 gallons, 50 minutes
This cycle is for lightly soiled chino and crystal.
GLASSES
Heavy
(on some models)
This cycle is specifically
7.8 gallons, S0 minutes
PLASTICS
CYCLE
(on some models)
Heavy 7.8 gallons, 70 minutes
Medium 6.5 gallons, 60 minutes
Light 5.2 gallons, 55 minutes
designed
for glosses.
This cycle is specifically designed to reduce the risk of melting
improve plastic drying for dishwasher safe plastic items.
RINSE ONLY
plastic items and
Heavy 2.6 gallons, 10 minutes
Light 1.3 gallons, 5 minutes
For rinsing partial loads that will be washed later. Do not use detergent with
this cycle.
[]
DELAY START--
This option will allow you to delay the start time of any wash cycle for up to 8
or 24 hours (depending on model).
, Select the delay start time you want by pressing the DELAYSTARTpod.
Multiple or continuous pressing will increment the delay hours. Select the
number of hours you want to delay the start of the cycle. Then press
START/RESET.
. After closing the door, the machine will count down and automatically start
at the correct time.
NOTE:To cancel the DELAYSTARTselection before the cycle begins, press the
DELAYSTARTpad until the display is blank. Pressing START/RESET
will not cancel
delay hours.
[_]ADDEDHEAT--
When selected, the cycle will run longer with the heating element on to improve
both wash and dry performance.
NOTE: Cannot
[]
PREWASHFor use with heavily soiled and/or dried-on, baked-on soils. This option
(on some models) MUST be selected PRIORto starting the cycle. This option adds 16 minutes
to the cycle time.
NOTE: Cannot
[]
HEATED-DRY
LOCK &--
be selected with RINSE ONLY cycle.
When selected, turns the drying heater and fan on for fast drying. This option
will extend the cycle time by 30 minutes for the ANTI-BACTERIALcycle,
38 minutes for the NORMALcycle and COOKWAREcycle, 8 minutes for the
SPEEDcycle, 15 minutes for the PLASTICScycle and 30 minutes for all other
cycles. When this is NOT selected, the fan will turn on for 4 hours to dry your
dishes without added heat-and energy is saved.
NOTE: Cannot
[]
be selected with RINSE ONLY cycle.
be selected with RINSE ONLY cgcle.
You can lock the controls to prevent any selections from being made. Or you
con lock the controls after you have started a cycle.
Children cannot accidentallg start the dishwasher bg touching pads with
this option selected.
To lock the dishwasher controls, press and hold the HEATEDDRY pad for
3 seconds. The LOCKlight will turn on. To unlock the dishwasher controls, press
and hold the HEATEDDRYpad for 3 seconds. The LOCKlight will turn off.
Control Panel/Operation
Dishwasher
[]
Status Indicator Lights (indicatorsvary by model)
The Status display tells you what is happening while the dishwasher is in operation.
The lights will come ON, indicating the sequence of the dishwasher operation.
SENSING
Displayed while the ExtraClean'" Sensor is measuring the amount of soil and
temperature of water. The dishwasher will adjust the selected cycle to achieve
optimal performance.
ADD-A-DISH
Displayed during prewash, indicating that dishes added now will still be cleaned.
WASHING
Displayed during prewash, main wash and rinse periods.
DRYING
Displaged during HEATEDDRY.
SANITIZED
Displayed when cgcle has met sanitization conditions.
CLEAN
Displaged when a wash cgcle and enhancements are complete.
[81Time Remaining Displag (on some models)
During operation, the displag shows the minutes remaining until the cgcle is complete. The display
may adjust the remaining time while the Sensing light is on. The time displayed at the start of
each cgcle mag change from the factory setting as the unit customizes itself to actual home
usage. During a delag start, the display will show hours of time remaining until the cgcle starts.
[] START/RESET
START--
After selecting the cycle and desired enhancements, press the START/RESET
pad
one time to ready the dishwasher to begin the cycle. Close the door to start the
cycle or begin the DELAYSTARTcountdown. When the cgcle starts, the water fill
begins and approximately 60 seconds later the wash action begins.
The dishwasher will always display your last selection and enhancements. If you
don't want to change the settings, simply press the START/RESETpad one time
to ready the dishwasher and close the door to begin the cycle.
NOTE: If the START/RESET
light is flashing, the cgcle has been interrupted.
Light will stop flashing after the dishwasher automatically pumps out the water.
Close the door to allow the water to pump out (this takes approximately
70 seconds). When the light stops flashing, the dishwasher can be
reprogrammed and restarted.
Also, if a power failure occurs, NORMAL and HEATEDDRYwill automatically be
programmed. Make any new selections and press the START/RESET
pad to begin
the new cycle.
[]
RESET--
Open the door slowly to prevent splash-out. Press the START/RESET
pad
to cancel the cgcle. Close the door. The dishwasher will pump out and turn off
after 70 seconds.
Clean--
The CLEANlight is illuminated and a double beep will sound when the selected
cycle and enhancements are complete. You may remove the dishes at any
time. Note the high-efficiency fan will run quietly for 30 minutes to 4 hours
(depending on selected cycle) after the CLEAN light is illuminated to continue
drying the dishes. This can be stopped by opening the door and pressing
any kegpad.
NOTE:To turn off the double beep indicator (or re-activate it if it was previously
disengaged}, press the HEATEDDRYpad 5 times within 3 seconds. A triple beep
will sound to indicate the end-of-cycle beep option has been toggled.
Using the dishwasher
Dishwasher
Lighting
Features
(on some
models)
Interior
Lights (on some models}
The interior Xenon lights provide better visibility
for loading and unloading. They turn on when the
door is opened and turn off when the door is
latched. The lights will turn off after 15 minutes
if the door remains unlatched. To turn the lights
back on, latch and open the dooE
Do not attempt to replace the bulbs. If light bulb
replacement is necessary, please contact the
GE Answer Center for service bg calling
1.800.626.2000.
End-of-Cgcle Indicator Light (on some models}
The end-of-cgcle indicator light is located on the
right side of the dishwasher, above the handle.
This light comes on when the selected cgcle is
complete. The light will stag on until the door is
opened. The dishes mag be removed at ang time.
Note that the high-efficiencg fan will run quietlg
for BOminutes to 4 hours {depending on the
selected cgcle) after the end-of-cgcle indicator
light is illuminated to continue drging the dishes.
Opening the door and pressing ang kegpad will
stop the fan.
Water
Temperature
The entering water must be at least 120°F (49°C)
and not more than 150°F(66°C),for effective
cleaning and to prevent dish damage.
Check the water temperature with a candg or
meat thermometer. Turn on the hot water faucet
nearest the dishwasher, place the thermometer in
a glass and let the water run continuouslg into the
glass until the temperature stops rising.
Use
A rinse agent improves drg performance,
reduces spots and prevents new film buildup
on gour dishes, glasses, flatware, cookware
and plastic. Jet-Drg ® and Cascade Crgstal
Clear ® are recommended rinse agents for
Monogram Dishwashers.
Rotate the dispenser cap counterclockwise and
lift it out. Add rinse agent until the indicator
window shows full.
a
Rinse
Agent
The rinse agent dispenser holds 3.5 oz. of rinse
agent. Under normal conditions, this will last
approximatelg one month. Trg to keep it full,
but do not overfill.
To fill the rinse agent dispenser, make sure the
dishwasher door is fullg open.
Indicator
window
Clean up ang spilled rinse agent with a damp
cloth. Replace the dispenser cap.
The amount of rinse agent released into the final
wash can be adjusted. The factorg setting is at
the midpoint. If there are rings of calcium (hard
water) spots on dishes, trg a higher setting. If
there is foaming, use a lower setting.
To adjust the setting, remove the dispenser cap;
then turn the adjuster counterclockwise to
increase the amount of rinse agent or clockwise
to decrease the amount of rinse agent dispensed.
Rinse agent
adjuster
Using the dishwasher
Dishwasher
Dish
Preparation
Prior to
Loading
• Noprerinsingof normalfood soilisrequired.
Forget
to Add
a Dish?
A forgottendishcan beaddedany time beforethe
mainwash.
Detergents
Useonly detergentspecificallymadefor usein
dishwashers.
Cascade®,CascadeComplete®and
Electrasol®AutomaticDishwashingDetergentshave
beenapprovedfor usein all MonogramDishwashers.
Keepyour powdereddetergentfresh and dry. Don'tput
detergentintothe dispenseruntilyou'rereadyto wash
dishes.
• Scrapeoff hardsoils,bones,toothpicks,skinsand seeds.
• Removelargequantitiesof any remainingfood.
3. Addforgottendishes.
4. Closethe doon
1. Openthe door slightly.
2. Wait untilthewater spray actionstops.Steammay
riseout of the dishwasher.
All washcyclesexceptRINSE
ONLYrequiredetergent.
Theamountof detergentto usedependson whether
yourwater is hardor soft.
Protectyour dishesand dishwasherby contactingyour
water departmentand askinghowhard your water is.
Twelveor moregrainsisextremelyhardwatenA water
softeneris recommended.Withoutit, limecan build
up in the water valve,which couldstickwhileopenand
causeflooding.Toomuchdetergentwith softwater
cancausea permanentcloudinessof glassware,
calledetching.
Thedetergentcuphasindicatorlinesto help you.
Usethe right amountof detergent.Asa guide:
ForSoftwater (waterhardnesslessthan 4 GrainsPer
Gallon[GPG]),
fillcup to the firstline.
ForMediumsoftwater (4-8 GPG),
fillcupto thesecondline.
ForMediumhardwater (8-12GPG),
fill cup.
ForExtremelyhardwater(morethan 12GPG),
fillbothcups.
Soft
Medium
soft
X.,X \
f
Medium
hard
Extremel9
hard
,t
PRE
MAINWASH WASH
If the amountof food soilis high,usea bit moredetergent.
If water temperatureis greaterthan 140%,usea bit less
detergent.
Closecoverand be sureit islatchedafter fillingdispenser
with detergent.
!0
• Removeleafy vegetables,meattrimmingsand
excessiveamountsof greaseor oil.
Cover....
_
Main wash
"__ction
latch
Pre-wash
section
L_"_
__
Do not use hand dish detergent.
=_
that is not specifically designed
for dishwashers will cause the
dishwasher
with suds.
NOTE:Usingtoa fill
detergent
During operation, these suds will
spill out of the dishwasher vents,
covering the kitchen floor and making the floor wet.
Because so many detergent containers look alike,
store the dishwasher detergent in a separate space
from all other cleaners. Show anyone who may use the
dishwasher the correct detergent and where it is stored.
While there will be no lasting damage to the dishwasher,
your dishes will not get clean using a dishwashing
detergent that is not formulated to work with dishwashers.
Drying Fen
optionisselected,
the dryingfan willrun
duringthe
drying
If the HeatedDry
portionof the cycle
_-:_
/
i!l_
__
I
and upto 2 hours
6_
after the CLEANlight
turns on,dependingon the selectedwash cycle.Ifthe
HeatedDry optionisnot used,the CLEANlightwillcome
on at theend of the finalrinseand the fan willrun upto
4 hours,dependingon the selectedwashcycle.
Ifthe RinseOnlywash cycleisselected,the HeatedDry
optionisautomaticallyturnedoff and the dryingfan will
run for 4 hours.
If thedryingfan isrunningandthe CLEANlightison,the
dryingfan can be turnedoff by openingthe door and
pressingany keyon the keypad.
Loading the Racks
Dishwasher
Upper Rack
Features and appearance of racks and
silverware basket may vary from your model.
Although the upper rack is for glasses, cups and
saucers, pots and pans can be placed in this
rack for effective cleaning. Cups and glasses fit
best along the sides and should be placed openend down. This is also a secure place for
dishwasher plastics.
The utility shelf (on some models) may be placed
in the up or down position to add flexibility.
The upper rack is good for all kinds of
odd-shaped utensils. Saucepans, mixing bowls
and other items should be placed face down.
Fold-down tines (on some models) provide
flexibility for extra-large and hard-to-fit items.
Secure larger dishwasher-safe plastics over
2 tines when possible.
Make sure small plastic items are secure so they
can't fall onto the heater.
Be sure that items do not protrude through the
bottom of the rack and block rotation of the
middle spray arm. This will result in poor wash
performance for items in the upper rack.
Check to make sure that no items in the lower
rack will block rotation of the wash arm mounted
under the upper rack.
A wine glass holder (on some models) secures
wine glasses for best washability. Because wine
glasses come in various sizes, after loading,
slowly push in the rack to make sure they will
clear the top of the dishwashec
!!
Loading the Racks
Dishwasher
Adjustatle
Upper Rack
(OF} some
models)
The standard position of your adjustable rack
is "up", which allows for maximum clearance for
your taller items in the lower rack. If you have
taller wine glasses, tumblers or other items to
place in the upper rack, you may want to adjust
the rack to the lower position.
To lower the rack, support the weight of the rack
with your hands as shown, and press both finger
pads about 1/4" toward the inside of the rack
as indicated, guiding the rack down to its lower
position.
rlIIIll
II
I II II II il
il
1F
li
IF
iF
1F
|_
IJ II II il
To raise the rack to the "up" position, pull up on
the center of the rack side frame until the rack
locks into place.
Silverware
Basket
Tgpe A
Tgpe B
To load flatware, simply push the adjustable
handle to either side (on some models).
A variety of options are available regarding the
three-piece silverware basket (on some models)
in your dishwashe[ The complete basket is
designed to fit on the right side of the lower rack.
Additionally, each end of the basket is removable
to add loading flexibility to accommodate
flatware and lower rack capacity needs.
Put flatware in the removable basket with fork
and knife handles up to protect your hands.
Place spoons in the basket with handles down.
Mix knives, forks and spoons so theg don't nest
together. Distribute evenly. Small plastic items,
such as measuring spoons and lids from small
containers should go in the bottom of the
silverware basket with the silverware on top.
This could block the wash arm and cause poor
washing results.
item extend
through bottom.
Don't let anU
1
Three-piece basket (on some models)
The one-piece silverware basket can be placed
in the front, right side or back of the lower rack.
The lids of both end and middle baskets can be
opened and closed to contain small items. Long
items can be placed on the utility shelf in the
upper rack.
One-piece basket (on some models)
To remove end baskets, grasp the basket
at opposite corners and slide apart.
12
Loading the Racks
Dishwasher
Lower Rack
The lower rack is best used for plates, saucers and
cookware. Large items such as broiler pans and
baking racks should go along the left-hand side.
Load platters, pots and bowls along the sides,in
corners or in the back. The soiled side of items
should face the center of the rack, or they can be
placed soil side down. If necessary, oversized
glassesand mugs can be placed in the lower rack
to maximize loading flexibility.
Also, be careful not to let a portion of an item such
as a pot or dish handle extend through the bottom
rack. This could block the wash arm and cause poor
washing results.
Fold-down tines (on some models) provide flexibility
for extra-large and hard-to-fit items. The tines may
be left in the up position or folded down to customize
the lower rack.
Be sure tall tines in the lower rack do not block the
spray arm above them. Checkfor this by spinning
the arm when both racks are pushed all the way in.
Remove
Upper
the
Rack
You can remove the upper rack to allow space for
large items in the lower rack.
To remove the upper rack, push thumb tab out and
remove the front end caps on each side of the rail.
Replacethe end caps, then push the rails all the
way back into the dishwasher Slide the shower
nozzle attachment over the spout.
Shower nozzle
attachment
_J___...........................
Pushthumb tab/_
Removeend cap --
Pull the rack straight out and off the rails.
Then fill the lower rack and begin your cycle.
NOTE:Nozzle must be in place with upper rack
removed. If not installed properly, poor wash
performance and noise will result.
NOTE:Don't forget to remove the shower nozzle
attachment before you replace the upper rack.
Extra Rack
Features
(on some
models)
Cutlery Tray
The cutlery tray holds up to 4 large knivessuch as
a carver, chef's knives, bread knife, etc., that are too
tall to fit in the silverware basket.
Hook the tray onto the rear of the upper rack.
Lay the knives between the guides (asshown).
Bowl Tines
The special large-bowl tines in the lower rack add
flexibility to your loading pattem. They are useful
for serving bowls or other large bowls.
To usethe bowl tines, fold down the 2 rows of flex
tines in front of the bowl tines and load bowls just
as you would in the upper rack.
These tines fold down
Large-bowl
tines
!3
Loading the Racks
Dishwasher
Follow
these
Features and appearance of racks and silverware baskets may vary from your model.
guidelines
for loading
10 and
12 place
settings
Upper Rack--lO place settings
.........
v_
Rack--lO
place settings
Lower
Rack--12
place settings
_r .......
Upper Rack--12 place settings
14
Lower
Care and Cleaning
Dishwasher
Exterior
To clean the control panel, use a lightly dampened cloth, then dry thoroughly. To clean the exterior
painted panels, use a good appliance polish wax. See the note below about wax on stainless steel
panels.
Never use sharp objects, scouring pads or harsh cleaners on any part of the dishwasher.
The stainless steel panels can be cleaned with CERAMABRVTE® Stainless Steel Appliance Cleaner
or a similar product using a clean, soft cloth. You can order CERAMABRVTE® Stainless Steel Appliance
Cleaner through GE Parts by calling 800.626.2002 (for U.S.only). In Canada, call !.888.880.3030.
NOTE:Avoid streaks on stainless steel panels. Do not use wax on stainless steel panels.
Interior
The stainless steel used to make the dishwasher tub and inner door provides the highest reliability
available in a GE dishwasher If the dishwasher tub or inner door should be scratched or dented
during normal use, they will not rust or corrode. These surface blemishes will not affect their function
or durability.
Protect
Against
Freezing
If your dishwasher is left in an unheated place during the winter, ask a service technician to:
1. Turn off electrical power to the dishwasher. Remove fuses or trip circuit breaker
2. Turn off the water supply and disconnect the water inlet line from the water valve.
3. Drain water from the water inlet line and water valve (use a pan to catch the water).
4. Reconnect the water inlet line to the water valve.
The Air
Gap
An air gap protects your dishwasher against water
backing up into it if a drain clogs. The air gap is not
a part of the dishwasher. It is not covered by your
warranty. Not all plumbing codes require air gaps,
so you may not have one.
A plugged or dirty air gap will prevent the
dishwasher from draining properly. Clean it out
if the dishwasher is not draining properly.
The air gap is easy to clean.
1. Turn off the dishwasher and lift off the chrome
cover
Check the air gap any time your
dishwasher isn't draining well.
2. Unscrew or unsnap the plastic cap (depending
on model) and clean with a toothpick.
15
Before You Call For Service
Dishwasher
Questions?
Use this
problem
solver
PROBLEM
POSSIBLE CAUSE
WHAT TO DO
Control panel lights go
off when you're setting
controls
Time too long between
touching of selected pads
• Each pad must be touched within 30
seconds of the others. To relight, touch any
pad again, or unlatch and relatch doon
Noise
Detergent cup opening
• This is normal.
The motor stopping during
the drying period
Water draining out of the
tub immediately after you
touch the START/RESETpad
Drging fan running for 2-4
hours after CLEAN light is
illuminated (Top Control
Panel models only)
Utensils
are notsecure
inthe rackor something
smallhas dropped into
the rack
• Hake sure everything
dishwashen
Motor hums
is secured in
Dishwasher has not been used on a regular
basis. If you do not use your dishwasher
often, run a RINSEONLYcycle once every
week. This will help keepthe seal moist.
Detergent left in
dispenser cups
Dishes are blocking the
detergent cups
Water standing in the
bottom of the tub
This is normal
• Repositionthe dishes.
A small amount of cleon water around the
outlet on the tub bottom at the back of the
tub keeps the water seal lubricated.
Water won't pump out
of the tub
Drain is clogged
• If you hove an air gap, cleon it.
• Check to see if your kitchen sink is
draining well. If not, you may need a plumben
• If the dishwasher drains into a disposer,
run disposer cleon
Suds
Correct detergent
__
• Use only automatic dishwasher detergents
to avoid sudsing. Cascade ® ,Cascade
Complete ® and Electmsol ® dishwasher
detergents
have been approved for use
inallMonogram dishwashers.
wasn't used
II
To remove suds from thetub,open the
dishwasherand letsudsdissipate.
Touch START.
Letrunfor30 seconds.Touch START again.
Dishwasher will
pump outin70 seconds.
Repeat ifnecessary.
Rinse agent was spilled
• Always wipe up rinseagent spills
immediately.
Stained dishwasher
Some tomato-based
parts
can cause pink or orange
stains
• Use ofthe RINSE ONLY cycleafteradding
thedishto the loadcan decreasethe level
foods
of staining.
• GE also recommends
Booster
!6
TM
Cascade ® Plastic
to help remove these types of stains.
Before You Call For Service
Dishwasher
Questions?
Use this
problem
solver
PROBLEM
POSSIBLE CAUSE
Dishes and flatware
not clean
Low inlet water
temperature
WHAT TO DO
o
o
Make sure inlet water temperature is at least
120°F(49°C)(seeUsing the Dishwasher section).
Runwater at the nearest faucet prior to
starting the dishwasher to insure optimal water
temperature.
Water pressure is
temporarilg low
Turn on a faucet. Is water coming out
more slowlg than usual? If so, wait until
pressure is normal before using gour
dishwasheE
Air gap is clogged
Clean air gap.
Improper rack loading
Make sure large dishware does not block the
detergent dispenser or the wash arms.
• Glassesand dishes must face the sprag arms.
Spots and filming on
glasses and flatware
Extremelg hard water
Low inlet water temperature
Overloading the dishwasher
Improper loading
Old or damp powder
detergent
• Use Jet Drg® or Cascade Crgstal Clea_ rinse
agents to remove spots and prevent new film
buildup.
• Make sure water temperature is at least 120°R
• Load dishwasher as shown in the Loading
Place Settings section.
• Make sure detergent is fresh.
Rinse agent dispenser emptg
• If water is extremelg hard, a softener mag
Too little detergent
be required.
Cloudiness on glassware
Black or grog marks on
dishes
Combination of soft water
and too much detergent
• This is called etching and is permanent.
To prevent this from happening, use less
detergent if gou have soft waten Wash
glassware in the shortest cgcle that will get
it clean. See page 10.
Water temperature
entering the dishwasher
exceeds 150°F(66°C)
• Lower the water heater temperature.
Aluminum utensils have
rubbed against dishes
• Remove marks with a mild, abrasive
cleane[
17
Before You Call For Service
Dishwasher
Questions?
Use this
problem
solver
PROBLEM
POSSIBLE CAUSE
Yellow or brown film
on inside surfaces
Tea or coffee stains
WHAT TO DO
• Removethe stain by hand, using a solution
of 1/2 cup bleach and 3 cups warm wateE
CAUTION:Before
cleaning
interior, wait at least 20 minutes after a
cycle for the heating element to cool
down. Failureto do so can result in bums.
White film on inside
surfaces
An overall yellow or brown
film can be caused by iron
deposits in water
A special filter in the water supply line is
the only way to correct this problem.
Contact your GE dealer or a water softener
company
Hard water minerals
GE recommends Jet-Dry ® or Cascade
Crystal Clear® to help prevent hard water
mineral deposits from forming.
Run dishwasher with citric acid to remove
mineral deposits. Citric acid (Part number:
WD35X151) can be ordered through GE
Parts. See the Consumer Services page
for ordering information.
CAUTION:Before
cleaning
interior, wait at least 20 minutes after a cycle
for the heating element to cool down. Failure
to do so can result in burns.
Dishes don't dry
Low inlet water
• Select HEATEDDRY.
temperature
• Hake sure inlet water temperature is at least
!20°F (49°C)(seeUsing the Dishwasher section).
Select ADDEDHEAT.
Use a longer cycle, such as Antibacterial.
Rinse agent dispenser
is
Check and refill the rinse agent dispenseE
empty
Dishwasher
won't
run
Door not latched
• Hake sure door is fully closed and latched.
Wall switch
• Check for a wall switch that the dishwasher
(some installations)is
might be connected to. A wall switch is
required by electrical codes in some
localities. Turn the switch "on" if it is "off;'
Fuse is blown, or the
circuit breaker tripped
Replace fuse or reset circuit breakeE Remove
any other appliances from the circuit.
Dishwasher control
is inoperative
Steam
18
in
the "off" position
This is normal
• Turn off power at the circuit breaker
for 30 seconds, then reset poweE
• Warm moisture comes through the vent
on the bottom of the door during drying
and when water is being pumped out.
Before You Call For Service
Dishwasher
Questions?
Use this
problem
solver
PROBLEM
Sanitized
illuminete
POSSIBLE CAUSE
light does not
at the end of
the cycle {Anti-Bacteria
cycle only)
The door was opened and
the cycle was interrupted
during or after the main
wash portion
• Do not interrupt the cycle any time during
or after main wash,
Low inlet water
• Raise the water heater temperature
at least 120°F (4g°c).
temperature
Interior lights not
working
WHAT TO DO
to
Door was open for more
than !B minutes
• Latch the door and reopen.
Bulbs are burned out
• Call for service to replace bulbs.
End-of-cycle indicator
light does not illuminate
Dishwasher has not
completed cgcle
• Open the door and check the status
indicator lights on control panel to
determine if cgcle is complete.
Beeps every 30 seconds
Door was opened
during the cycle
• Close the door to complete the cgcle.
START/RESETlight blinks
START/RESETpad was
pressed during the cgcle
Dishwasher will pump out for approximately
70 seconds and blinking light will turn off,
Power failure during
the cycle
Dishwasher will pump out for approximately
70 seconds and blinking light will turn off,
Dishwasher will automatically restart using
NORMALWASH and HEATEDDRY.
19
Consumer
Services
Dishwasher
monogram.cam
With the purchase of your new Monogram appliance, receive
the assurance that if gou ever need information
or assistance
from GE, we'll be there. All gou have to do is call--tollfree!
GE Answer
Center ®
Whatever your question about any Monogram major appliance, GE Answer CenteP information
service is available to help. Your call-and
your question-will
be answered promptly and
courteously. And you can call any time.
In the USA:
800.626.2000
OR
Visit our Website at: monogram.cam
In Canada, call 1.888.880.3030.
Monogram
Preferred Service
In the USA:
800.444.1845
AGE consumer service professional will provide expert repair service, scheduled at a time that's
convenient for you. Hang GE Consumer Service company-operated locations offer you service
today or tomorrow, or at your convenience (8:00 a.m. to 8:00 p.m. weekdags, 9:00 a.m. to 4:00
p.m. Saturdags). Our factory-trained technicians know your appliance inside and out-so most
repairs can be handled in just one visit.
In Canada:
1.888.880.3030
For Customers
GE offers Braille controls for a variety of GE appliances, and a brochure
to assist in planning a barrier-free kitchen for persons with limited mobility.
With Special
Needs...
Consumers with impaired hearing or speech who have access to a
TDD or a conventional teletypewriter may call 800.TDD.GEAC
(800.833.4322) to request information or service.
In the USA:
800.626.2000
SECTION
Service Contracts
In the USA:
800.626.2224
You can have the secure feeling that GE Consumer Service will still be there after your warranty
expires. Purchase a GE contract while your warranty is still in effect and you'll receive a substantial
discount. With a multiple-year
contract, you're assured of future service at todag's prices.
In Canada:
1.888.880.3030
Parts and
Accessories
Individuals qualified to service their own appliances can have parts or accessories sent directly
to their home. The GE parts system provides access to over 47,000 parts._and all GE Genuine
Renewal Parts are fully warranted.
In the USA:
800.626.2002
User maintenance
instructions
contained in this manual cover procedures intended to be
performed
bg ang user. Other servicing generallg should be referred to qualified service
personnel. Caution must be exercised, since improper servicing mag cause unsafe operation.
In Canada:
1.888.880.3030
2O
Warrantg for customers in the USA
Dishwasher
YOUR
MONOGRAM
DISHWASHER
WARRANTY
Staple
sales
slip or cancelled
check here.
purchase
date is needed
to obtain
service
WHAT IS
COVERED
From the Date
of the Original
Purchase
Proof of original
under warrantg.
ONE-YEAR
Ang part of the dishwasher which fails due to a defect in materials or workmanship. During this
limited one-gear warrantg, GE will also provide, free of charge, all labor and in-home service to
replace the defective part.
Five Years
The dishwasher rack and/or the electronic control module, if these should fail due to a defect in
materials or workmanship. During this five-gear limited warrantg, gou will be responsible for any
labor or in-home service costs.
Lifetime
The stainless steel tub or door liner, if it fails to contain water due to a defect in materials or
workmanship.
During this limited lifetime warrantg,
GE will also provide, free of charge, all labor
and in-home service to replace the defective part.
•
00QOOOOOOOOOOOOOOOOOOOQOOO®OOOOOQOOOOQOOOOQOOOOOQOOOQ0000000@0000@000@
Q
This warranty is extended to the original purchaser and any succeeding owner for the products
purchased for ordinary home use in the/48 mainland states, Hawaii or Washington, D.C. If the product
is located in an area where service by a GE Authorized Servicer is not available, you may be
responsible for a trip charge or you may be required to bring the product to an Authorized GE Service
location for service. In Alaska the warranty is the same except that it is LIMITED because you must pag
to ship the product to the service shop or for the service technician's travel cost to your home.
All warranty service will be provided by our Factory Service Centers or by our authorized Customer
Care®servicers during normal working hours.
Should your appliance need service, during warranty period or begond, call 800./4/4/4.!8/45.
Please have serial number and model number available when calling for service.
WHAT IS NOT
COVERED
• Service trips to gout home to teach
how to use the product.
• Improper installation,
maintenance.
deliverg
gou
or
• Replacement of house fuses or resetting
of circuit breakers.
• Failure of the product if it is abused, misused,
or used for other than the intended purpose
or used commerciallg.
• Damage
to the product caused
fire, floods or acts of God.
* Incidental or consequential damage caused
bg possible defects with this appliance.
, Cleaning or servicing of the air gap device
in the drain line.
* Damage caused after deliverg, including
damage from items dropped on the door.
* Product not accessible to provide required
service.
bg accident,
this Limited Warrantg. Ang implied warranties,
including the implied warranties
of merchuntabilitg
I EXCLUSION
fitness for a OF
particular
IMPLIED purpose,
WARRANTIES--Your
are limited to
sole
oneand
gear
exclusive
or the shortest
remedg period
is product
allowed
repair bguslaw.
provided
or
in
Some states do not allow the exclusion or limitation of incidental or consequential
damages, so the above
limitation or exclusion mag not applg to gou. This warrantg gives gou specific legal rights, and you may also
have other rights which vary from state to state. To know what your legal rights are in gour state, consult gour
local or state consumer affairs office or your state's Attorney General.
Warrantor:
General Electric Compang,
Louisville, KY 40225
0
GE Consumer
& Industrial
Appliances
General Electric Company
Louisville, KY 6,0225
ge.com
2!
Warranty for customers in Canada
Dishwasher
YOUR
MONOGRAM
DISHWASHER
WARRANTY
Staple
sales
slip or cancelled
check here.
purchase
date is needed
to obtain
service
WHAT
IS
COVERED
From the Date
of the Original
Purchase
Proof of original
under warranty.
ONE-YEAR
Any part of the dishwasher which fails due to a defect in materials or workmanship. During this
limited one-gear warranty, GE will also provide, free of charge, all labor and in-home service to
replace the defective part.
FiveYears
The dishwasher rack, if it should rust, orthe electronic control module, if it should fail due to a
defect in materials or workmanship. During this five-gear limited warranty, you will be responsible
for any labor or in-home service costs.
Lifetime
The stainless steel tub or door liner, if it fails to contain water due to a defect in materials or
workmanship.
During this limited lifetime warranty,
GE will also provide, free of charge, all labor
and in-home service to replace the defective part.
OlD
00001D
00001110000
_
000_111000_
0000_
00Q000000_
0000S
0000000000000000000S
0
OQOS
This warranty is extended to the original purchaser and any succeeding owner for products
purchased for ordinary home use in Canada. In-home warranty service will be provided in areas
where it is available and deemed reasonable by Mabe to provide. Proof of original purchase date is
needed to obtain service under the warranty.
All warranty service will be provided by our Factory Service Centers or by our authorized Customer
Care®servicers during normal working hours.
Should your appliance need service, during warranty period or beyond, call 1.888.880.3030.
Please have serial number and model number available when calling for service.
WHAT IS NOT
COVERED
o Service trips to your home
how to use the product.
to teach
you
o Improper installation,
delivery or maintenance.
o Replacement
of house fuses or resetting
of circuit breakers.
o Failure of the product if it is abused, misused,
or used for other than the intended purpose
or used commerciallyo
o Damage to the product caused
fire, floods or acts of God.
. Incidental or consequential
damage caused
bg possible defects with this appliance.
o Cleaning or servicing
in the drain line.
of the air gap device
o Damage caused after delivery, including
damage from items dropped on the door.
o Product not accessible to provide required
service.
bg accident,
this Limited Wurrontg. Ang implied warranties,
including the implied warranties
of merchantability
I EXCLUSION
IMPLIED purpose,
WARRANTIES--Your
sole
exclusive
remedy is
product
repair byuslow.
provided
fitness for o OF
particular
ore limited to
oneand
gear
or the shortest
period
allowed
or
in
Some provinces do not allow the exclusion or limitation of incidental or consequential damages, so the
above limitation or exclusion may not apply to you. This warranty gives you specific legal rights, and you
may also have other rights which vary from province to province. To know what your legal rights are in
your province, consult your local or provincial consumer affairs office.
Warrantor:
22
Habe Canada Inc., 1 Factorg Lane, Suite 310, Moncton,
N.B. EIC 9H3.
O
GE Consumer
& Industrial
Appliances
General Electric Company
Louisville, KY 40225
ge.com
e
fiopol l!OH:[UD:[JOdLUJ
UOp,DJ3,S!fa_Id!NSJaUMO
_onpoJd JouJnsu03
saouo!lddV 39
0
IIIII
Ploce
1st Closs
Letter
Stomp
Here
General Electric Compang
Warrantg Registration Department
P.O.Box 34980
Louisville, KY 40232-2150
.....................................................................................................................
J
23
Consumer Product Ownership Registration
Dear Customer:
Thank you for purchasing our product and thank you for placing your confidence in us. We are proud to have you
as a customer!
Follow these three
steps
to protect
your
Complete and mail
your Consumer
Product Ownership
Registration
today.
Have the peace of mind
of knowing we con
contact you in the
unlikely event of a
safety modification.
new appliance
investment:
Read your "Owner's
Hanual" carefully. It will
help you operate your new
appliance properly.
After completing
this
registration,
write your
model and serial numbers
in this manual and store this
document in a safe place.
You will need this information
should you require service.
The service number in the
USA: 800.444.1845. In Canada:
1.888.880.3030.
Important: If you did not get a registration card with your product, detach and return the form
ensure that your product is registered, or register online at monogram.com.
below to
FOLD HERE
Consumer Product Ownership Registration
Product
Dishwasher
Hr. []
First
I
Hs. []
Serial Number
Model Number
,
Hrs. []
,
,
,
,
,
,
,
,
,
,
,
,
I
I
I
I
I
I
Hiss []
I
I
I
I
I
I
I
I
ILastI
Name
I
I
I
I
I
I
I
I
I
I
I
I
I
I
I
Street
I
I
I
I
I
I
I
I
I
I
I
I
I
I
I
I
I
I
I
I
I
I
I
I
I
I
Apt. # J
I
I
I
I
I
I
I
J
I
i
i
i
i
i
i
i
i
i
I
Code
I
I
I
I
I
i
I-I,,,
Name
Address
City
I
I
I
E-mail Address*
i
i
i
i
i
i
i
'
,zipI
State _
Date PlacedIn
usel i
Honth
_
Day
I,
I
_earl, I
Ph°nel,,
Number
I-I
i
I
* Pleaseprovideyoure-mailaddressto receive,viae-mail,discounts,specialoffersandother important
Appliances
General Electric Company
GE
Louisville,
Consumer
KY 40225
& Industrial
ge.com
g
L ........................................................
Checkhereif you do notwant to receivecommunicationsfrom GEA'scarefullyselectedpartners.
FAILURETOCOHPLETEANDRETURN
THISCARDDOES
NOTDIHINISHYOURWARRANTYRIGHTS.
ForinformationaboutGEA's
communications
from GE Appliances(GEA).
privacyanddata usagepolicy,goto monogramearnand dickon "PrivacyPolicy"
or eal1800.6262224
_
TAPE CLOSED
GE Consumer
165D4700P344
& Industrial
49-55024
Appliances
General Electric Company
Louisville, KY 40225
08-06 JR
ge.com
Printed in the United States