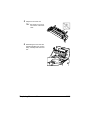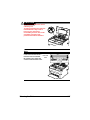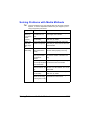
1
magicolor 1600W User’s Guide A034-9561-02A Thank You Thank you for purchasing a magicolor 1600W. You have made an excellent choice. Your magicolor 1600W is specially designed for optimal performance in Windows environments. Trademarks KONICA MINOLTA and the KONICA MINOLTA logo are trademarks or registered trademarks of KONICA MINOLTA HOLDINGS, INC. magicolor is a trademark or registered trademark of KONICA MINOLTA BUSINESS TECHNOLOGIES, INC. All other trademarks and registered trademarks are the property of their respective owners. Copyright Notice Copyright © 2008 KONICA MINOLTA BUSINESS TECHNOLOGIES, INC., Marunouchi Center Building, 1-6-1 Marunouchi, Chiyoda-ku, Tokyo, 100-0005, Japan. All Rights Reserved. This document may not be copied, in whole or part, nor transferred to any other media or language, without written permission of KONICA MINOLTA BUSINESS TECHNOLOGIES, INC. Notice KONICA MINOLTA BUSINESS TECHNOLOGIES, INC. reserves the right to make changes to this guide and to the equipment described herein without notice. Considerable effort has been made to ensure that this guide is free of inaccuracies and omissions. However, KONICA MINOLTA BUSINESS TECHNOLOGIES, INC. makes no warranty of any kind including, but not limited to, any implied warranties of merchantability and fitness for a particular purpose with regard to this guide. KONICA MINOLTA BUSINESS TECHNOLOGIES, INC. assumes no responsibility for, or liability for, errors contained in this guide or for incidental, special, or consequential damages arising out of the furnishing of this guide, or the use of this guide in operating the equipment, or in connection with the performance of the equipment when so operated. x-1 SOFTWARE LICENSE AGREEMENT This package contains the following materials provided by KONICA MINOLTA BUSINESS TECHNOLOGIES, INC. (KMBT): software included as part of the printing system (“Printing Software”) , the digitally-encoded machine-readable outline data encoded in the special format and in the encrypted form (“Font Programs”), other software which runs on a computer system for use in conjunction with the Printing Software (“Host Software”), and related explanatory written materials (“Documentation”). The term “Software” shall be used to describe Printing Software, Font Programs and/or Host Software and also include any upgrades, modified versions, additions, and copies of the Software. The Software is being licensed to you under the terms of this Agreement. KMBT grants to you a non-exclusive sublicense to use the Software and Documentation, provided that you agree to the following: 1. You may use the Software and accompanying Font Programs for imaging to the licensed output device(s), solely for your own internal business purposes. 2. In addition to the license for Font Programs set forth in Section 1 above, you may use Roman Font Programs to reproduce weights, styles, and versions of letters, numerals, characters and symbols (“Typefaces”) on the display or monitor for your own internal business purposes. 3. You may make one backup copy of the Host Software, provided your backup copy is not installed or used on any computer. Notwithstanding the above restrictions, you may install the Host Software on any number of computers solely for use with one or more printing systems running the Printing Software. 4. You may assign its rights under this Agreement to an assignee of all of Licensee’s right and interest to such Software and Documentation (“Assignee”) provided you transfer to Assignee all copies of such Software and Documentation Assignee agrees to be bound by all of the terms and conditions of this Agreement. 5. You agree not to modify, adapt or translate the Software and Documentation. 6. You agree that you will not attempt to alter, disassemble, decrypt, reverse engineer or decompile the Software. 7. Title to and ownership of the Software and Documentation and any reproductions thereof shall remain with KMBT and its licensor. 8. Trademarks shall be used in accordance with accepted trademark practice, including identification of the trademark owner’s name. Trademarks can only be used to identify printed output produced by the Software. Such use of any trademark does not give you any rights of ownership in that trademark. 9. You may not rent, lease, sublicense, lend or transfer versions or copies of the Software Licensee does not use, or Software contained on any unused media, except as part of the permanent transfer of all Software and Documentation as described above. 10. IN NO EVENT WILL KMBT OR ITS LICENSOR BE LIABLE TO YOU FOR ANY CONSEQUENTIAL, INCIDENTAL INDIRECT, PUNITIVE OR SPECIAL DAMAGES, INCLUDING ANY LOST PROFITS OR LOST SAVING, EVEN IF KMBT HAS BEEN ADVISED OF THE POSSIBILITY OF SUCH DAMAGES, OR FOR ANY CLAIM BY ANY THIRD PARTY. KMBT OR ITS LICENSOR DISCLAIMS ALL WARRANTIES WITH REGARD TO THE SOFTWARE, EXPRESS OR IMPLIED, INCLUDING, WITHOUT LIMITATION IMPLIED WARRANTIES OF MERCHANTABILITY, FITNESS FOR A PARTICULAR PURPOSE, TITLE AND NON-INFRINGEMENT OF THIRD PARTY RIGHTS. SOME STATES OR JURISDICTIONS DO NOT ALLOW THE EXCLUSION OR LIMITATION OF INCIDENTAL, CONSEQUENTIAL OR SPECIAL DAMAGES, SO THE ABOVE LIMITATIONS MAY NOT APPLY TO YOU. x-2 11. Notice to Government End Users: The Software is a “commercial item,” as that term is defined at 48 C.F.R.2.101, consisting of “commercial computer software” and “commercial computer software documentation,” as such terms are used in 48 C.F.R. 12.212. Consistent with 48 C.F.R. 12.212 and 48 C.F.R. 227.7202-1 through 227.7202-4, all U.S. Government End Users acquire the Software with only those rights set forth herein. 12. You agree that you will not export the Software in any form in violation of any applicable laws and regulations regarding export control of any countries. x-3 For EU member states only This symbol means: Do not dispose of this product together with your household waste! Please contact the Local Authority for appropriate disposal instructions. In the case of a new device being purchased, the used one can also be given to our dealer for appropriate disposal. Recycling of this product will help to conserve natural resources and prevent potential negative consequences for the environment and human health caused by inappropriate waste handling. This product complies with RoHS (2002/95/EC) directive. x-4 Contents 1 Introduction .................................................................................................... 1-1 Getting Acquainted with Your Printer .......................................................... 1-2 Space Requirements................................................................................... 1-2 Printer Parts ................................................................................................ 1-3 Front View............................................................................................. 1-3 Rear View ............................................................................................. 1-4 Front View with Option.......................................................................... 1-4 About the Control Panel ................................................................................ 1-5 About the Indicators .................................................................................... 1-5 About the Rotate Toner KEY....................................................................... 1-6 When replacing a toner cartridge.......................................................... 1-6 When cleaning the print head window .................................................. 1-7 When removing all toner cartridges ...................................................... 1-7 About the Clear KEY ................................................................................... 1-7 Continuing a Print Job after an Error Message..................................... 1-7 Cancelling a Print Job ........................................................................... 1-8 About the Printer Driver and Utility CD/DVD ............................................... 1-9 System Requirements ................................................................................. 1-10 Contents x-5 2 Using the Printer Driver ................................................................................ 2-1 Selecting Printer Driver Defaults .................................................................. 2-2 Uninstalling the Printer Driver ...................................................................... 2-3 Windows Vista/XP/Server 2003/2000 ................................................... 2-3 Displaying Printer Driver Settings ............................................................... 2-3 Windows Vista ...................................................................................... 2-3 Windows XP/Server 2003 ..................................................................... 2-3 Windows 2000 ...................................................................................... 2-4 Printer Driver Settings ................................................................................... 2-5 Common Buttons ........................................................................................ 2-5 Basic Tab .................................................................................................... 2-6 Layout Tab .................................................................................................. 2-6 Overlay Tab................................................................................................. 2-7 Watermark Tab ........................................................................................... 2-7 Quality Tab.................................................................................................. 2-7 Version Tab................................................................................................. 2-7 3 Remote Panel Utility ...................................................................................... 3-1 Working with the Remote Panel Utility ........................................................ 3-2 Introduction ................................................................................................. 3-2 Opening the Remote Panel Utility ............................................................... 3-2 Using the Remote Panel Utility ................................................................... 3-2 Panel Tab.............................................................................................. 3-2 User Service Tab .................................................................................. 3-4 Closing the Remote Panel Utility ................................................................. 3-5 Uninstalling the Remote Panel Utility .......................................................... 3-6 4 Media Handling .............................................................................................. 4-1 Print Media ..................................................................................................... 4-2 Specifications .............................................................................................. 4-2 Types .............................................................................................................. 4-3 Plain Paper (Recycled Paper)..................................................................... 4-3 Thick Stock.................................................................................................. 4-4 Envelope ..................................................................................................... 4-5 Label ........................................................................................................... 4-6 Letterhead ................................................................................................... 4-7 Postcard ...................................................................................................... 4-7 Printable Area ................................................................................................ 4-8 Envelopes ................................................................................................... 4-9 Page Margins .............................................................................................. 4-9 Loading Media .............................................................................................. 4-10 Tray 1 (Multipurpose Tray)........................................................................ 4-10 Loading Plain Paper............................................................................ 4-10 Other Media ........................................................................................ 4-12 Loading Envelopes ............................................................................. 4-12 Loading Label Sheets/Letterheads/Postcards/Thick Stock................. 4-14 x-6 Contents Output Tray .................................................................................................. 4-16 Media Storage .............................................................................................. 4-16 5 Replacing Consumables ............................................................................... 5-1 Replacing Consumables ............................................................................... 5-2 About Toner Cartridges............................................................................... 5-2 Replacing a Toner Cartridge................................................................. 5-5 Removing All Toner Cartridges ................................................................. 5-11 Replacing the Imaging Cartridge............................................................... 5-14 Replacing the Fuser Unit........................................................................... 5-17 6 Maintenance ................................................................................................... 6-1 Maintaining the Printer .................................................................................. 6-2 Cleaning the Printer ....................................................................................... 6-4 Exterior........................................................................................................ 6-4 Interior ......................................................................................................... 6-5 Cleaning the Media Feed Roller ........................................................... 6-5 Cleaning the Print Head Window .......................................................... 6-8 7 Troubleshooting ............................................................................................ 7-1 Introduction .................................................................................................... 7-2 Preventing Media Misfeeds ........................................................................... 7-3 Understanding the Media Path ..................................................................... 7-4 Indicator Messages ....................................................................................... 7-5 Status Messages (Ready Indicator, Error Indicator) ................................... 7-5 Warning Messages ..................................................................................... 7-5 Error Messages........................................................................................... 7-8 Service Message....................................................................................... 7-10 Clearing Media Misfeeds ............................................................................ 7-11 Clearing Procedures ................................................................................. 7-12 Solving Problems with Media Misfeeds ..................................................... 7-19 Solving Other Problems .............................................................................. 7-21 Solving Problems with Printing Quality .................................................... 7-24 8 Installing Accessories ................................................................................... 8-1 Dust Cover ...................................................................................................... 8-2 Installing the Dust Cover ............................................................................. 8-2 A Appendix ........................................................................................................A-1 Technical Specifications ...............................................................................A-2 Printer..........................................................................................................A-2 Consumable Life Expectancy Chart............................................................A-3 User-Replaceable .................................................................................A-3 Service-Replaceable ..................................................................................A-4 Contents x-7 x-8 Contents Introduction Getting Acquainted with Your Printer Space Requirements To ensure easy operation, consumable replacement and maintenance, adhere to the recommended space requirements detailed below. 496 mm (19.5") 396 mm (15.6") 100 mm (3.9") 127 mm (5.0") 520 mm (20.5") 275 mm (10.8") 245 mm (9.6") Front View 380 mm (14.9") 100 mm (3.9") 100 mm (3.9") 707 mm (27.8") Side View 1-2 Getting Acquainted with Your Printer Printer Parts The following drawings illustrate the parts of your printer referred to throughout this guide, so please take some time to become familiar with them. Front View 1 1—Output tray 2—Control panel 5 3—Front cover 4—Tray 1 (Multipurpose tray) 5—Top cover 2 6—Fuser unit 7—Fuser separator levers 8—Fuser cover lever 9—Imaging cartridge 3 10—Toner cartridge 4 6 7 8 7 6 9 9 10 10 Getting Acquainted with Your Printer 1-3 Rear View 1—Power switch 2—Power connection 3—USB port 1 2 3 Front View with Option 1—Dust cover 1 1-4 Getting Acquainted with Your Printer About the Control Panel 1—Ready indicator 2—Error indicator 3—Rotate Toner key Rotate Toner 4—Toner indicators Ready 1 Error 2 Clear Y M C K 5—Clear key 3 4 5 About the Indicators The indicators use five types of signals: Off On Slow blinking—1 blink every 2 seconds Blinking—1 blink per second Rapid blinking—2 blinks per second Each of the indicators has the following basic meaning. Ready indicator When lit, printing can be performed. Error indicator When lit or blinking, an error has occurred or there is a warning. Toner indicators When blinking, the toner for the corresponding color is about to run out. When lit, the toner in the corresponding color is empty. In addition, printer warnings and errors may be indicated by combinations of the various types of signals used by the indicators in the control panel (indicator messages). For details on these indicator messages, refer to “Indicator Messages” on page 7-5. The Remote Panel Utility can also be used to check the printer status. For details, refer to “Working with the Remote Panel Utility” on page 3-2. About the Control Panel 1-5 About the Rotate Toner KEY The Rotate Toner key allows you to switch the printer from normal operation mode to Change Toner mode, Eject All Toner mode or Print Head Cleanup mode. The mode that the printer enters depends on how long the Rotate Toner key is held down. Length of time that the Rotate Toner key is held down Mode that the printer enters Indicators on the control panel Less than 5 seconds Change Toner mode - 5 to 9 seconds Print Head Cleanup mode All indicators blink once after the key has been held down for 5 seconds. More than 10 seconds Eject All Toner mode All indicators flash once after the key has been held down for 10 seconds. " When the printer is switched to any of these operation modes, the magenta toner indicator lights up. The Rotate Toner key is used in the following situations. When replacing a toner cartridge When removing all toner cartridges When cleaning the print head window When replacing a toner cartridge Press the Rotate Toner key. The printer enters Change Toner mode. " " 1-6 For details on replacing a toner cartridge, refer to “Replacing a Toner Cartridge” on page 5-5. To return to normal operation mode from Change Toner mode, press the Clear key. About the Control Panel When cleaning the print head window Hold down the Rotate Toner key for 5 seconds to 9 seconds. The printer enters Print Head Cleanup mode. " " " For details on cleaning the print head window, refer to “Cleaning the Print Head Window” on page 6-8. To return to normal operation mode from Print Head Cleanup mode, refer to “Cleaning the Print Head Window” on page 6-8. Print Head Cleanup mode is a mode that allows the user to clean the print head window more easily. The print head window is not cleaned automatically. When removing all toner cartridges Hold down the Rotate Toner key more than 10 seconds. The printer enters Eject All Toner mode. " " For details on removing all toner cartridges, refer to “Removing All Toner Cartridges” on page 5-11. To return to normal operation mode from Eject All Toner mode, press the Clear key. About the Clear KEY The Clear key allows you to: Continue a print job after addressing an error message Cancel a print job Reset the printer after a toner cartridge is replaced " For details on resetting the printer after replacing a toner cartridge, refer to “Replacing a Toner Cartridge” on page 5-5. Continuing a Print Job after an Error Message You can continue a print job after correcting the following types of errors: No more media in the tray Media other than that set in the printer driver was fed into the printer " For details on the error messages, refer to “Indicator Messages” on page 7-5. About the Control Panel 1-7 If any of the errors listed above occur, press the Clear key to continue the print job. Cancelling a Print Job You can cancel a print job that is currently being processed. While data is being processed or printed (the green Ready indicator is blinking), hold down the Clear key for more than 5 seconds to cancel the print job. Both the Ready and Error indicators blink when the print job is cancelled. 1-8 About the Control Panel About the Printer Driver and Utility CD/DVD Drivers Use/Benefit Windows Vista/XP/Server 2003/ 2000 These drivers give you access to all of the printer features. For details, refer to“Displaying Printer Driver Settings” on page 2-3. Windows Vista/XP/Server 2003 for 64bit " For details on the installation of the drivers, refer to the Installation Guide. Utilities Use/Benefit Remote Panel Utility From the Remote Panel Utility, the current status of this printer can be checked. For details, refer to “Working with the Remote Panel Utility” on page 3-2. Documentation Use/Benefit Installation Guide This manual provides details on the initial operations that must be performed in order to use this printer, such as setting up the printer and installing the drivers. User’s Guide (this manual) This manual provides details on general daily operations, such as using the drivers and control panel and replacing consumables. Service & Support Guide The Need Assistance sheet provides information on product support and servicing. About the Printer Driver and Utility CD/DVD 1-9 System Requirements Personal computer Pentium II: 400MHz or higher Operating System Microsoft Windows Vista Home Basic/Home Premium/Ultimate/Business/ Enterprise, Windows Vista Home Basic/Home Premium/ Ultimate/Business/Enterprise x64 Edition, Windows XP Home Edition/Professional (Service Pack 2 or later), Windows XP Professional x64 Edition, Windows Server 2003, Windows Server 2003 x64 Edition, Windows 2000 (Service Pack 4 or later) Free hard disk space 256 MB or more RAM 128 MB or more CD/DVD drive I/O interface USB 2.0 High-Speed compliant port " " 1-10 The USB cable is not included with the machine. This printer cannot be used as a shared printer. System Requirements Using the Printer Driver Selecting Printer Driver Defaults Before you start working with your Printer, you are advised to verify and change the default printer driver settings if necessary. 1 Choose the driver’s properties as follows: – (Windows Vista) From the Start menu, select Control Panel, and then click Hardware and Sound to select Printers. Right-click the KONICA MINOLTA magicolor 1600W printer icon, and then select Printing Preferences. – (Windows XP/Server 2003) From the start menu, select Printers and Faxes to display the Printers and Faxes directory. Right-click the KONICA MINOLTA magicolor 1600W printer icon and select Printing Preferences. – (Windows 2000) 2 3 4 2-2 From the Start menu, select Settings and then Printers to display the Printers directory. Right-click the KONICA MINOLTA magicolor 1600W printer icon and select Printing Preferences. Select the Basic tab. Select the default settings for your printer, such as the default media format you use. Click Apply. Click OK to exit from the Printing Preferences dialog box. Selecting Printer Driver Defaults Uninstalling the Printer Driver This section describes how to uninstall the printer driver if necessary. " " You must have administrator privileges in order to uninstall the printer drive. If the User Account Control window appears when uninstalling on Windows Vista, click the Allow button or the Continue button. Windows Vista/XP/Server 2003/2000 1 2 Close all applications. Choose Uninstall Program as follows: – (Windows Vista/XP/Server 2003) From the Start menu, choose All programs, KONICA MINOLTA, magicolor 1600W, Printer, and then Uninstall. – (Windows 2000) 3 4 From the Start menu, choose Program, KONICA MINOLTA, magicolor 1600W, Printer, and then Uninstall. When the Uninstall dialog box appears, select the printer to be deleted, and then click Uninstall button. The printer driver will be uninstalled from your computer. Displaying Printer Driver Settings Windows Vista 1 2 From the Start menu, select Control Panel, and then click Hardware and Sound to select Printers. Right-click the KONICA MINOLTA magicolor 1600W printer icon then select Printing Preferences. Windows XP/Server 2003 1 2 From the start menu, select Printers and Faxes to display the Printers and Faxes directory. Right-click the KONICA MINOLTA magicolor 1600W printer icon and select Printing Preferences. Uninstalling the Printer Driver 2-3 Windows 2000 1 2 2-4 From the Start menu, select Settings, and then click Printers to display the Printers directory. Right-click the KONICA MINOLTA magicolor 1600W printer icon and select Printing Preferences. Displaying Printer Driver Settings Printer Driver Settings Common Buttons The buttons described below appear on each tab. OK Click to exit the Properties dialog box, saving any changes made. Cancel Click to exit the Properties dialog box without saving any changes made. Apply Click to save all changes without exiting the Properties dialog box. Help Click to view the help. Easy Set Click Save to save the current settings. Specify a Name and Comment to access the settings for use again later. Name: Type in the name of the settings to be saved. Comment: Add a simple comment to the settings to be saved. Afterward, the saved settings can be selected from the drop-down list. To change the registered settings, click Edit. Select Default from the drop-down list to reset the functions in all tabs to their default values. Printer View Click the button to display an image of the printer in the figure area. When this button is clicked, it changes to the Paper View button (when a tab other than the Watermark tab or Quality tab is selected), the Watermark View button (when the Watermark tab is selected), or the Quality View button (when the Quality tab is selected). " This button does not appear on the Version tab. Paper View Click the button to display a sample of the page layout in the figure area. When this button is clicked, it changes to the Printer View button. " This button does not appear on the Watermark, Quality and Version tabs. Watermark View Click the button to display a preview of the watermark. Printer Driver Settings 2-5 When this button is clicked, it changes to the Printer View button. " This button appears only when the Watermark tab is selected. Quality View Click the button to display a sample of the settings selected in the Quality tab. When this button is clicked, it changes to the Printer View button. " This button appears only when the Quality tab is selected. Default Click the button to reset the settings to their defaults. " " This button does not appear on the Version tab. When this button is clicked, the settings in the displayed dialog box are reset to their defaults. The settings on other tabs are not changed. Basic Tab The Basic Tab allows you to Specify the orientation of the media Specify the size of the original document Select the output media size Register/edit custom paper sizes Zoom (expand/reduce) documents Specify the number of copies Turn on/off job collation Specify the paper source Specify the type of media Select the paper used for the front page Layout Tab The Layout Tab allows you to Print several pages of a document on the same page (N-up printing) Print a single copy for enlargement and print several pages Rotate the print image 180 degrees Specify image shift settings " 2-6 Double-Sided printing is not available with this printer. Printer Driver Settings Overlay Tab " Be sure to use overlays with print jobs with a media size and orientation that matches the overlay form. In addition, if settings have been specified for “N-up” in the printer driver, the overlay form cannot be adjusted to match the specified settings. The Overlay Tab allows you to Select the form Overlay to use Add, edit or delete overlay files Print the form on all pages or only the first page Watermark Tab The Watermark Tab allows you to Select the watermark to be used Add, edit or delete watermarks Print the watermark on the background Print the watermark on only the first page Print multiple copies of the selected watermark on a single page Quality Tab The Quality Tab allows you to Specify whether to print in color or black and white Specify the color matching for printing documents Specify the resolution for the printout Select whether or not economy print is used Adjust the contrast (Contrast) Control the darkness of an image (Brightness) Adjust the saturation of printed image (Saturation) Adjust the sharpness of the printed image (Sharpness) Version Tab The Version Tab allows you to view information about the printer driver. Printer Driver Settings 2-7 2-8 Printer Driver Settings Remote Panel Utility Working with the Remote Panel Utility Introduction The Remote Panel Utility shows information about the current status of the printer and allows you to specify various settings such as the time until the printer enters Energy Save mode. " In order to use the Remote Panel Utility, install it after installing the printer driver. Opening the Remote Panel Utility Follow the procedure described below to start up the Remote Panel Utility. 1 2 Double-click the file Remote_Panel.exe, which is either on the desktop or any other location on the computer. (The Remote_Panel.exe is saved at the location specified when the Remote Panel Utility was installed.) The Remote Panel Utility icon appears in the Windows notification area (right end of the taskbar). Double-click the Remote Panel Utility icon that appears in the notification area. " When starting Remote Panel Utility again after it has been exited, double-click the file Remote_Panel.exe. Using the Remote Panel Utility The following functions are available from the Remote Panel Utility. Panel Tab Remote Panel Status—Allows the current status of the printer to be checked. " Since the status is not automatically detected with this utility, click the Status button to view the most recent printer status. Display Configuration Page—Displays the configuration page. In addition, the contents of the configuration page can be saved as an INI file. Rotate Toner—Click the button to switch the printer to the selected operation mode. The following two modes are available. 3-2 Working with the Remote Panel Utility z Change Toner: Used when replacing a toner cartridge. Select this mode, and then click the Rotate Toner button to switch the printer to the Change Toner mode. (Refer to “Replacing a Toner Cartridge” on page 5-5.) z Eject All Toner: Used when removing all toner cartridges. Select this mode, and then click the Rotate Toner button to switch the printer to the Eject All Toner mode. (Refer to “Removing All Toner Cartridges” on page 5-11.) P/H Clean Up—Click the button to switch the printer to the P/H Clean Up mode. Print Head Cleanup mode is a mode that allows the user to clean the print head window more easily. The print head window is not cleaned automatically. (Refer to “Cleaning the Print Head Window” on page 6-8.) " The printer can also be switched to any of these operation modes by pressing the Rotate Toner key on the printer. Refer to “About the Rotate Toner KEY” on page 1-6. Set Default " When the Remote Panel Utility is started up again after it has been exited using the icon in the Windows notification area (right end of the taskbar), the default settings will be displayed. To view the actual settings, click the Display Configuration Page button. Apply—Click to send the settings specified for “Toner Low Message”, “Toner Out Stop”, “Energy Save Time” and “Auto Continue” to the printer. Toner Low Message—Specifies whether a printer indicator blinks or a warning message appears in the status display box of the Remote Panel Utility when toner is about to run out. If Off is selected, neither of these notifications appear when the toner is about to run out. Toner Out Stop—Specifies whether or not printing stops when the toner becomes empty. If Off is selected, printing can continue even if toner has run out. However, the printing results are not guaranteed. If printing is continued, the Error indicator (orange) lights up and printing stops. Energy Save Time—Set time to enter Energy Save mode when no operation is performed. Working with the Remote Panel Utility 3-3 Auto Continue—If Off is selected, the next print job will not be performed if a paper size error occurred in the printer, unless the Clear key is pressed to cancel the error. If On is selected, the next print job is sent if a paper size error occurred in the printer, the error is automatically cancelled, and the next print job is performed. Calibration Start—Performs the calibration operation. " The calibration function consumes toner. User Service Tab " When the Remote Panel Utility is started up again after is has been exited using the icon in the Windows notification area (right end of the taskbar), the default settings will be displayed. Click the Display Configuration Page button to view the actual settings, or click the Download button to download the settings from the printer. Top Adjustment—Allows the vertical print position to be finely adjusted. " Adjusting the position a single increment moves it 0.0079 inch (0.2 mm). Left Adjustment—Allows the horizontal printer position to be finely adjusted. " Adjusting the position a single increment moves it 0.0079 inch (0.2 mm). Transfer Power—Adjust the 2nd transfer voltage for each media type. If there are cracks in solid parts of the image, move the setting in the + direction. If small white dots appear in halftones, move the setting in the - direction. Service's Choice GDI Timeout—Specifies the amount of time until communication with the printer times out. Energy Save—Specifies whether or not the Energy Save mode is enabled. The length of time until the machine enters Energy Save mode can be specified from the Panel tab. " This menu is displayed only on the Americas model. Flicker—Select a mode for preventing flickering of the fluorescent lamp, depending on the power source. 0: Prevents flickering automatically 1: Normally prevents flickering 2: Does not prevent flickering 3-4 Working with the Remote Panel Utility Image Adj Param—Use when print quality is reduced in environments such as high altitudes. 0: Used at standard elevations 1: Used at medium-high elevations 2: Used at high elevations (about 2,000 m) 3: Used at extremely high elevations Image Refresh—Use when thin white horizontal lines appear at intervals on images. " The Image Refresh function consumes toner. Print Pattern 1, Print Pattern 2—Prints a test pattern so the print result can be checked. A black-and-white test pattern can be printed with “Print Pattern 1”, and a color test pattern can be printed with “Print Pattern 2”. Download—Downloads the current printer settings and displays them in the utility. Upload—Sends the current utility settings to the printer. Closing the Remote Panel Utility To close the Remote Panel Utility, right-click the Remote Panel Utility icon in the Windows notification area (right end of the taskbar), and then choose Exit. " " When the Close button in the lower-right corner of the Remote Panel Utility window is clicked, the window is closed, and the utility remains miniaturized as an icon in the notification area. (The utility is not closed.) Double-click the icon to open the Remote Panel Utility window again. Wait at least 5 seconds before opening the Remote Panel Utility again after it has been closed. Closing the Remote Panel Utility 3-5 Uninstalling the Remote Panel Utility " " " You must have administrator privileges in order to uninstall the Remote Panel Utility. If the User Account Control window appears when uninstalling on Windows Vista, click the Allow button or the Continue button. Before uninstalling, exit the Remote Panel Utility with the icon in the Windows notification area (right end of taskbar). The Remote Panel Utility can be uninstalled using either of the following two methods. - From Control Panel, use “Add or Remove Programs” (“Programs” with Windows Vista, “Add/Remove Programs” with Windows 2000) - Using setup.exe in the Panel Utility folder of the Printer Driver and Utility CD/DVD again 3-6 Uninstalling the Remote Panel Utility Media Handling Print Media Specifications Media Media Size Inch Millimeter 8.2 x 11.7 210.0 x 297.0 B5 (JIS) 7.2 x 10.1 182.0 x 257.0 A5 5.9 x 8.3 148.0 x 210.0 Legal 8.5 x 14.0 215.9 x 355.6 Letter 8.5 x 11.0 215.9 x 279.4 Statement 5.5 x 8.5 139.7 x 215.9 Executive 7.25 x 10.5 184.2 x 266.7 A4 Folio 8.25 x 13.0 210.0 x 330.0 Letter Plus 8.5 x 12.69 215.9 x 322.3 UK Quarto 8.0 x 10.0 203.2 x 254.0 Foolscap 8.0 x 13.0 203.2 x 330.2 Government Legal 8.5 x 13.0 215.9 x 330.2 B5 (ISO) 6.9 x 9.8 176.0 x 250.0 Envelope DL 8.7 x 4.3 220.0 x 110.0 Envelope C6 6.4 x 4.5 162.0 x 114.0 J-Postcard 3.9 x 5.8 100.0 x 148.0 Kai 16 7.3 x 10.2 185.0 x 260.0 Kai 32 5.1 x 7.3 130.0 x 185.0 Government Letter 8.0 x 10.5 203.2 x 266.7 16K 7.7 x 10.6 195.0 x 270.0 Oficio Mexico 8.5 x 13.5 215.9 x 342.9 Custom, Minimum* 3.6 x 7.7 92.0 x 195.0 Custom, Maximum* 8.5 x 14.0 216.0 x 356.0 Notes: 4-2 * With thick stock The minimum size is 3.6 x 7.25 inch (92.0 x 184.0 mm). The maximum size is 8.5 x 11.7 inch (216.0 x 297.0 mm). Print Media Types Before purchasing a large quantity of special media, do a trial printing with the same media and check the print quality. Keep media on a flat, level surface in its original wrapper until it is time to load it. For a list of approved media, refer to printer.konicaminolta.com. Plain Paper (Recycled Paper) Capacity Tray 1 Up to 200 sheets, depending on the paper weight Orientation Face up Driver Plain Paper Media Type Weight 60 to 90 g/m² (16 to 24 lb bond) Use plain paper that is Suitable for plain paper laser printers, such as standard or recycled office paper. Note Do not use the media types listed below. These could cause poor print quality, media misfeeds, or damage to the printer. DO NOT use plain paper that are Coated with a processed surface (such as carbon paper, and colored paper that has been treated) Carbon backed Unapproved iron-on transfer media (such as heat-sensitive paper, heat-pressure paper, and heat-press transfer paper) Cold-water-transfer paper Pressure sensitive Designed specifically for inkjet printers (such as superfine paper, glossy film, and postcards) Already been printed on by another printer, copier, or fax machine Dusty Wet (or damp) " Types Keep media between 15% and 85% relative humidity. Toner does not adhere well to moist or wet paper. 4-3 Layered Adhesive Folded, creased, curled, embossed, warped, or wrinkled Perforated, three-hole punched, or torn Too slick, too coarse, or too textured Different in texture (roughness) on the front and back Too thin or too thick Stuck together with static electricity Composed of foil or gilt; too luminous Heat sensitive or cannot withstand the fusing temperature (180°C [356°F]) Irregularly shaped (not rectangular or not cut at right angles) Attached with glue, tape, paper clips, staples, ribbons, hooks, or buttons Acidic Any other media that is not approved Thick Stock Paper thicker than 90 g/m2 (24 lb bond) is referred to as thick stock. Test all thick stock to ensure acceptable performance and to ensure that the image does not shift. You can print continuously with thick stock. However, this could affect the media feed, depending on the media quality and printing environment. If problems occur, stop the continuous printing and print one sheet at a time. Capacity Tray 1 Orientation Driver Media Type Weight Face up Thick Stock 1 Thick Stock 2 Up to 50 thick stock sheets, depending on their thickness Thick Stock 1: 91 to 163 g/m2 (25 to 43.5 lb bond) Thick Stock 2: 164 to 209 g/m2 (43.6 to 55.6 lb bond) DO NOT use thick stock that is Mixed with any other media in the trays (as this will cause printer misfeeding) 4-4 Types Envelope Print on the front (address) side only. Some parts of the envelope consist of three layers of paper—the front, back, and flap. Anything printed in these layered regions may be lost or faded. You can print continuously with envelope. However, this could affect the media feed, depending on the media quality and printing environment. If problems occur, stop the continuous printing and print one sheet at a time. Capacity Tray 1 Up to 10 envelopes, depending on their thickness Orientation Face up Driver Envelope Media Type Use envelopes that are Envelope C6 or Envelope DL size (Other envelope sizes are not supported.) Common office envelopes approved for laser printing with diagonal joints, sharp folds and edges, and ordinary gummed flaps " Because the envelopes pass through heated rollers, the gummed area on the flaps may seal. Using envelopes with emulsion-based glue avoids this problem. Approved for laser printing Dry DO NOT use envelopes that have Sticky flaps Tape seals, metal clasps, paper clips, fasteners, or peel-off strips for sealing Transparent windows Too rough of a surface Material that will melt, vaporize, offset, discolor, or emit dangerous fumes Been presealed Types 4-5 Label A sheet of labels consists of a face sheet (the printing surface), adhesive, and a carrier sheet: The face sheet must follow the plain paper specification. The face sheet surface must cover the entire carrier sheet, and no adhesive should come through on the surface. You can print continuously with label sheets. However, this could affect the media feed, depending on the media quality and printing environment. If problems occur, stop the continuous printing and print one sheet at a time. Try printing your data on a sheet of plain paper first to check placement. Check your application documentation for more information on printing labels. Capacity Tray 1 Up to 50 label sheets, depending on their thickness Orientation Face up Driver Labels Media Type Use label sheets that are Approved for laser printers DO NOT use label sheets that Have labels that easily peel off or have parts of the label already removed Have backing sheets that have peeled away or have exposed adhesive " Labels may stick to the fuser, causing them to peel off and media misfeeds to occur. Are precut or perforated Do not use Shiny backed paper 4-6 OK to use Full-page labels (uncut) Types Letterhead You can print continuously with letterhead. However, this could affect the media feed, depending on the media quality and printing environment. If problems occur, stop the continuous printing and print one sheet at a time. Try printing your data on a sheet of plain paper first to check placement. Capacity Tray 1 Up to 50 sheets, depending on their size and thickness Orientation Face up Driver Letterhead Media Type Postcard You can print continuously with postcard. However, this could affect the media feed, depending on the media quality and printing environment. If problems occur, stop the continuous printing and print one sheet at a time. Try printing your data on a sheet of plain paper first to check placement. Capacity Tray 1 Up to 50 postcards, depending on their thickness Orientation Face up Driver Postcard Media Type Use postcards that are Approved for laser printers DO NOT use postcards that are Coated Designed for inkjet printers Precut or perforated Preprinted or multicolored Folded or wrinkled " Types If the postcard is warped, press on the warped area before putting it in Tray 1. 4-7 Printable Area The printable area on all media sizes is up to 4.0 mm (0.157") from the edges of the media. Each media size has a specific printable area (the maximum area on which the machine can print clearly and without distortion). a a a Printable Area This area is subject to both hardware a limits (the physical media size and the margins required by the machine) and a=4.0 mm (0.157") software constraints (the amount of memory available for the full-page frame buffer). The printable area for all media sizes is the page size minus 4.0 mm (0.157") from all edges of the media. " 4-8 When printing in color on legal-size media, the bottom margin is 16.0 mm (0.63"). Printable Area Envelopes Envelopes can only be printed on their front sides (side where the recipient’s address is written). In addition, printing on the front side in the area overlapping the back flap cannot be guaranteed. The location of this area differs depending on the envelope type. Non-printable area Non-guaranteed printable area a a Guaranteed printable area a a Front side (can be printed) Back side (cannot be printed) a=4.0 mm (0.157") " " The envelope print orientation is determined by your application. With the Envelope DL size (long edge feeding), the nonprintable areas on the left and right sides are 6 mm. Page Margins Margins are set through your application. Some applications allow you to set custom page sizes and margins while others have only standard page sizes and margins from which to choose. If you choose a standard format, you may lose part of your image (due to printable area constraints). If you can custom-size your page in your application, use those sizes given for the printable area for optimum results. Printable Area 4-9 Loading Media How do I load media? Take off the top and bottom sheets of a ream of paper. Holding a stack of approximately 200 sheets at a time, fan the stack to prevent static buildup before inserting it in a tray. Note Although this printer was designed for printing on a wide range of media types, it is not intended to print exclusively on a single media type except plain paper. Continuous printing on media other than plain paper (such as envelopes, labels, or thick stock) may adversely affect print quality or reduce engine life. When refilling media, first remove any media remaining in the tray. Stack it with the new media, even the edges, then reload it. Do not mix media of different types and sizes, as this will cause media misfeeds. Tray 1 (Multipurpose Tray) For details on the types and sizes of media that can be printed from Tray 1, refer to “Print Media” on page 4-2. Loading Plain Paper 1 Open Tray 1. " 4-10 If media has been loaded into Tray 1, remove all media from the tray. Loading Media 2 3 Slide the media guides to provide more space between them. Load the paper face up in the tray. " Do not load paper above the M mark. Up to 200 sheets (80 g/m2 [21 lb]) of plain paper can be loaded into the tray at one time. Loading Media 4-11 4 Slide the media guides against the edges of the paper. Other Media When loading media other than plain paper, set the media mode (Envelope, Labels, Letterhead, Postcard, Thick Stock 1, or Thick Stock 2) in the driver for optimum print quality. Loading Envelopes 1 Open Tray 1. " 4-12 If media has been loaded into Tray 1, remove all media from the tray. Loading Media 2 3 Slide the media guides to provide more space between them. Load the envelopes flap side down in the tray. " " " 4 Before loading envelopes, press them down to make sure that all air is removed, and make sure that the folds of the flaps are firmly pressed, otherwise the envelopes may become wrinkled or a media misfeed may occur. Up to 10 envelopes can be loaded into the tray at one time. For envelopes with the flap (Envelope C6 or Envelope DL), load the envelopes with the flap side inserted first. Slide the media guides against the edges of the envelopes. Loading Media 4-13 Loading Label Sheets/Letterheads/Postcards/Thick Stock 1 Open Tray 1. " 2 3 If media has been loaded into Tray 1, remove all media from the tray. Slide the media guides to provide more space between them. Load the media face up in the tray. " 4-14 Up to 50 sheets can be loaded into the tray at one time. Loading Media 4 Slide the media guides against the edges of the media. Loading Media 4-15 Output Tray All media is fed out facing down into the output tray on top of the printer. This tray has a capacity of approximately 100 sheets (A4/Letter) of 80 g/m2 (21 lb) paper. " If the media is stacked too high in the output tray, your printer may experience media misfeeds, excessive media curl, or static buildup. Media Storage Keep media on a flat, level surface in its original wrapper until it is time to load it. Media that has been stored for a long time out of its packaging may dry up too much and cause misfeeding. If media has been removed from its wrapper, place it in its original packaging and store in a cool, dark place on a level surface. Avoid moisture, excessive humidity, direct sunlight, excessive heat (above 35°C [95°F]), and dust. Avoid leaning against other objects or placing it in an upright position. Before using stored media, do a trial printing and check print quality. 4-16 Output Tray Replacing Consumables Replacing Consumables Note Failure to follow instructions as outlined in this manual could result in voiding your warranty. About Toner Cartridges Your printer uses four toner cartridges: black, yellow, magenta, and cyan. Handle the toner cartridges carefully to avoid spilling toner inside the printer or on yourself. " " Install only new toner cartridges in your printer. If a used toner cartridge is installed, then toner remaining amount may not be accurate. The toner is nontoxic. If you get toner on your skin, wash it off with cool water and a mild soap. If you get toner on your clothes, lightly dust them off as best as you can. If some toner remains on your clothes, use cool, not hot water, to rinse the toner off. CAUTION If you get toner in your eyes, wash it out immediately with cool water and consult a doctor. " Refer to the following URL for recycling information. US: printer.konicaminolta.com/products/recycle/index.asp Europe: cleanplanet-printer.konicaminoltaeurope.com/cleanplanet/ choose.php Other regions: printer.konicaminolta.com Note Do not use refilled toner cartridges or unapproved toner cartridges. Any damage to the printer or quality problems caused by a refilled toner cartridge or an unapproved toner cartridge will void your warranty. No technical support is provided to recover from these problems. 5-2 Replacing Consumables When replacing a toner cartridge, refer to the following table. For optimum print quality and performance, use only approved KONICA MINOLTA toner cartridges for your specific printer type, as listed in the table below. You can find your machine type and the toner cartridge part numbers on the consumables reorder label inside the top cover your machine. Printer Type Printer Part Number Toner Cartridge Type Toner Cartridge Part Number Standard-Capacity Toner Cartridge -Yellow (Y) A0V3 05F Standard-Capacity Toner Cartridge -Magenta (M) A0V3 0AF AM A034 011 Standard-Capacity Toner Cartridge -Cyan (C) A0V3 0GF High-Capacity Toner Cartridge - Black (K) A0V3 01F High-Capacity Toner Cartridge - Yellow (Y) A0V3 06F High-Capacity Toner Cartridge - Magenta (M) A0V3 0CF High-Capacity Toner Cartridge - Cyan (C) A0V3 0HF Standard-Capacity Toner Cartridge -Yellow (Y) A0V3 05H Standard-Capacity Toner Cartridge -Magenta (M) A0V3 0AH EU A034 021 Standard-Capacity Toner Cartridge -Cyan (C) A0V3 0GH High-Capacity Toner Cartridge - Black (K) A0V3 01H High-Capacity Toner Cartridge - Yellow (Y) A0V3 06H High-Capacity Toner Cartridge - Magenta (M) A0V3 0CH High-Capacity Toner Cartridge - Cyan (C) A0V3 0HH Standard-Capacity Toner Cartridge -Yellow (Y) A0V3 05K Standard-Capacity Toner Cartridge -Magenta (M) A0V3 0AK AP A034 041 Standard-Capacity Toner Cartridge -Cyan (C) A0V3 0GK High-Capacity Toner Cartridge - Black (K) A0V3 01K High-Capacity Toner Cartridge - Yellow (Y) A0V3 06K High-Capacity Toner Cartridge - Magenta (M) A0V3 0CK High-Capacity Toner Cartridge - Cyan (C) A0V3 0HK Standard-Capacity Toner Cartridge -Yellow (Y) A0V3 05N Standard-Capacity Toner Cartridge -Magenta (M) A0V3 0AN GC " A034 081 Standard-Capacity Toner Cartridge -Cyan (C) A0V3 0GN High-Capacity Toner Cartridge - Black (K) A0V3 01N High-Capacity Toner Cartridge - Yellow (Y) A0V3 06N High-Capacity Toner Cartridge - Magenta (M) A0V3 0CN High-Capacity Toner Cartridge - Cyan (C) A0V3 0HN For optimum print quality and performance, use only the corresponded TYPE genuine KONICA MINOLTA toner cartridges. Replacing Consumables 5-3 Keep toner cartridges: In their packaging until you’re ready to install them. In a cool, dry location away from sunlight (due to heat). The maximum storage temperature is 35° C (95° F) and the maximum storage humidity is 85% (noncondensing). If the toner cartridge is moved from a cold place to a warm, humid place, condensation may occur, degrading print quality. Allow the toner to adapt to the environment for about one hour before use. Level during handling and storage. Do not hold, stand or store cartridges on their ends or turn them upside down; the toner inside the cartridges may become caked or unequally distributed. Away from salty air and corrosive gases such as aerosols. 5-4 Replacing Consumables Replacing a Toner Cartridge Note Be careful not to spill toner while replacing a toner cartridge. If toner spills, immediately wipe it off with a soft, dry cloth. When the toner is empty, the toner indicator lights up. Follow the procedure described below to replace the toner cartridge. " 1 If Toner Out Stop on the Panel tab of the Remote Panel Utility is set to Off, printing can continue even after the message "TONER OUT X" has appeared in the status display box; however, the printing quality cannot be guaranteed. If printing is continued and the toner becomes empty, the message "TONER LIFE END" appears and printing stops. For details on the settings, refer to “Using the Remote Panel Utility” on page 3-2. Check the control panel to see which color of toner is empty. " If the toner becomes empty, the toner indicator lights up and the empty toner cartridge is automatically moved so that it can be replaced. If you wish to change the toner cartridge, use either operation described below to switch the printer to Change Toner mode. z Press the Rotate Toner key. z On the Panel tab of the Remote Panel Utility, select Change Toner, and then click the Rotate Toner button. " " " The printer enters Change Toner mode, and the magenta toner indicator lights up. With each additional press of the Rotate Toner key, the cyan, black, then yellow toner cartridge moves so that they can be replaced. The indicator for the toner cartridge that was moved so that it can be replaced lights up. To exit Change Toner mode, press the Clear key. Replacing Consumables 5-5 2 Open the front cover. " 3 Check that the toner cartridge to be replaced has been moved to the front. " 4 You can identify the toner cartridge by the color of the handle. Pull down the handle on the toner cartridge until the toner cartridge is unlocked and moves out slightly toward you. Remove the toner cartridge. " 5-6 Before opening the front cover, open Tray 1 if it is not already open. Do not manually rotate the toner cartridge carousel. In addition, do not rotate the carousel with force, otherwise it may be damaged. Replacing Consumables Note Do not touch the contact indicated in the illustration. Note Dispose of the empty toner cartridge according to your local regulations. Do not burn the toner cartridge. For details, refer to “About Toner Cartridges” on page 5-2. 5 6 Prepare a new toner cartridge. Shake the cartridge a few times to distribute the toner. " Make sure that the toner roller cover is securely attached before shaking the toner cartridge. Replacing Consumables 5-7 7 Remove the cover from the toner roller. " 8 Align the shaft on each end of the toner cartridge with its holders, and then insert the cartridge. " 5-8 Do not touch or scratch the toner roller. Before inserting the toner cartridge, make sure that the color of the toner cartridge to be installed is the same as the label on the toner cartridge carousel. Replacing Consumables Note Do not touch the contact indicated in the illustration. 9 10 Press in the toner cartridge until it locks into place. Close the front cover. " To replace the toner cartridge for another color, after the front cover has been closed, check that the indicator for the toner to be replaced is lit (if necessary, press the Rotate Toner key), and then replace the toner cartridge as described in steps 2 through 10. Replacing Consumables 5-9 11 Press the Clear key to reset the printer and clear the indicator message. " 5-10 The printer must complete a calibration cycle after a toner cartridge has been replaced. If you open the top or front cover before the printer is reset, the calibration stops, then starts over again after the cover is closed. Replacing Consumables Removing All Toner Cartridges Note Be careful not to spill toner while replacing a toner cartridge. If toner spills, immediately wipe it off with a soft, dry cloth. By using the Eject All Toner mode, all toner cartridges can be removed. Follow the procedure described below to use the Eject All Toner mode. 1 Use either operation described below to switch the printer to Eject All Toner mode. z Hold down the Rotate Toner key for more than 10 seconds. z On the Panel tab of the Remote Panel Utility, select Eject All Toner, and then click the Rotate Toner button. " 2 " The printer enters Eject All Toner mode, and the magenta toner indicator lights up. To exit Eject All Toner mode, press the Clear key. Open the front cover. " Before opening the front cover, open Tray 1 if it is not already open. Replacing Consumables 5-11 3 Pull down the handle on the toner cartridge until the toner cartridge is unlocked and moves out slightly toward you. Remove the toner cartridge. " Do not manually rotate the toner cartridge carousel. In addition, do not rotate the carousel with force, otherwise it may be damaged. Note Do not touch the contact indicated in the illustration. 4 5-12 Close the front cover. Replacing Consumables 5 6 Follow the same procedure to replace the cartridges for the cyan, black, then yellow toners. Press the Clear key. Replacing Consumables 5-13 Replacing the Imaging Cartridge When replacing an imaging cartridge, refer to the following table. For optimum print quality and performance, use only approved KONICA MINOLTA imaging cartridge for your specific printer type, as listed in the table below. You can find your machine type and the imaging cartridge part numbers on the consumables reorder label inside the top cover your machine. Printer Type Printer Part Number Part Name Imaging Cartridge Part Number AM A034 011 Imaging Cartridge A0VU 011 EU A034 021 A0VU 0Y1 AP A034 041 A0VU 0Y1 GC A034 081 A0VU 0Y1 " 1 For optimum print quality and performance, use only the corresponded TYPE genuine KONICA MINOLTA imaging cartridge. Open the top cover. " 2 5-14 If there is paper in the output tray, remove it, and then fold up the output tray before opening the top cover. Grab the handle and lift it up slightly to the back, and then slowly pull the imaging cartridge out vertically. Replacing Consumables Note Dispose of the used imaging cartridge according to your local regulations. Do not burn the imaging cartridge. 3 Prepare the new imaging cartridge. Note Do not touch the PC drum and the transfer belt on the imaging cartridge. 4 Slowly insert the new imaging cartridge vertically, and then push it slightly down toward you to finish installing the imaging cartridge. Replacing Consumables 5-15 5 Carefully close the top cover. " 5-16 The printer must complete a calibration cycle after the imaging cartridge has been replaced. If you open the top or front cover before the printer is reset, the calibration stops, then starts over again after the cover is closed. Replacing Consumables Replacing the Fuser Unit For optimum print quality and performance, use only approved KONICA MINOLTA fuser unit for your specific printer type. 1 Turn off the machine and disconnect the power cord. Note There are extremely hot parts within the machine. Before replacing the fuser unit, wait about 20 minutes after turning off the machine, and then check that the fusing section has reached room temperature, otherwise, you may get burnt. 2 Open the top cover. " If there is paper in the output tray, remove it, and then fold up the output tray before opening the top cover. Replacing Consumables 5-17 3 4 Push the blue handles back as far as possible. Grab the blue handles and lift the fuser unit to remove it. Note Do not touch the matching connectors of the fuser unit and the machine. 5-18 Replacing Consumables 5 Prepare a new fuser unit. " 6 Be careful not to touch the surface of the fuser roller. While lifting the fuser unit with the blue handles (one on each side), vertically insert the fuser unit. Replacing Consumables 5-19 Note Do not touch the paper exit sensor on the fuser unit. M Note Do not touch the matching connectors of the fuser unit and the machine. 5-20 Replacing Consumables 7 8 9 After the fuser unit is firmly installed, flip the blue handles down toward you. Carefully close the top cover. Reconnect the power cord, and turn on the machine. Replacing Consumables 5-21 5-22 Replacing Consumables Maintenance Maintaining the Printer CAUTION Read all caution and warning labels carefully, making sure to follow any instructions contained in them. These labels are located on the inside of the printer’s covers and the interior of the printer body. Handle the printer with care to preserve its life. Abuse handling may cause damage and void your warranty. If dust and paper scraps remain on the inside or outside of the printer, printer performance and print quality will suffer, so the printer should be cleaned periodically. Keep the following guidelines in mind. WARNING! Turn off the printer, unplug the power cord, and disconnect all interface cables before cleaning. Do not spill water or detergent into the printer; otherwise the printer will be damaged and an electric shock may occur. CAUTION The fuser unit is hot. When the top cover is opened, the fuser unit temperature drops gradually (one hour wait time). Be careful when cleaning the inside of the printer or removing media misfeeds, as the fuser unit and other internal parts may be very hot. Do not place anything on top of the printer. Use a soft cloth to clean the printer. Never spray cleaning solution directly on the printer’s surface; the spray could penetrate through the air vents of the printer and damage the internal circuits. Avoid using abrasive or corrosive solutions or solutions that contain solvents (such as alcohol and benzene) to clean the printer. Always test any cleaning solution (such as mild detergent) on a small inconspicuous area of your printer to check the solution’s performance. Never use sharp or rough implements, such as wire or plastic cleaning pads. Always close the printer’s covers gently. Never subject the printer to vibration. Do not cover the printer immediately after using it. Turn it off and wait until it cools down. 6-2 Maintaining the Printer Do not leave the printer’s covers open for any length of time, especially in well-lit places; light may damage the imaging cartridge. Do not open the printer during printing. Do not tap media stacks on the printer. Do not lubricate or disassemble the printer. Do not tilt the printer. Do not touch the electrical contacts, gears, or laser devices. Doing so may damage the printer and cause the print quality to deteriorate. Keep media in the output tray at a minimum level. If the media is stocked too high, your printer may experience media misfeeds and excessive media curl. Keep the printer level to avoid toner spillage. When lifting the printer, grasp the areas shown in the figure. 14.4 kg 31.7 lbs If you get toner on your skin, wash it off with cool water and a mild soap. CAUTION If you get toner in your eyes, wash it out immediately with cool water and consult a doctor. Make sure any parts removed during cleaning are replaced before you plug in the printer. Maintaining the Printer 6-3 Cleaning the Printer CAUTION Be sure to turn off the printer and unplug the power cord before cleaning. However, be sure to turn on the printer when cleaning the print head window. Exterior Control Panel Ventilation Grille Ready Error Rotate Toner Clear Y M C K Printer Exterior 6-4 Cleaning the Printer Interior Cleaning the Media Feed Roller 1 Open the top cover. " 2 If there is paper in the output tray, remove it, and then fold up the output tray before opening the top cover. Grab the handle and lift it up slightly to the back, and then slowly pull the imaging cartridge out vertically. Cleaning the Printer 6-5 Note Do not touch the PC drum on the imaging cartridge. Position the removed imaging cartridge horizontally as shows in the illustration at the right. Be sure to keep the imaging cartridge horizontal and place it where it will not become dirty. Do not leave the imaging cartridge removed for more than 15 minutes, and do not place the removed imaging cartridge in a location where it would be exposed to direct light (such as sunlight). 3 Clean the media feed rollers by wiping them with a soft, dry cloth. BOTTOM VIEW 6-6 Cleaning the Printer CAUTION The area around the fuser unit is extremely hot. Touching anything other than the indicated levers may result in burns. If you get burned, immediately cool the skin under cold water, and then seek professional medical attention. Note Decreased print quality may result if the surface of the BOTTOM transfer roller is touched. VIEW Be careful not to touch the surface of the transfer roller. Cleaning the Printer 6-7 4 5 Slowly insert the imaging cartridge vertically, and then push it slightly down toward you to finish reinstalling the imaging cartridge. Carefully close the top cover. Cleaning the Print Head Window 1 Use either operation described below to switch the printer to Print Head Cleanup mode. z Hold down the Rotate Toner key for 5 to 9 seconds. z On the Panel tab of the Remote Panel Utility, click the P/H Clean Up button. " " 6-8 The printer enters Print Head Cleanup mode, and the magenta toner indicator lights up. It is not possible to exit Print Head Cleanup mode before the operation is finished (even if the Clear key is pressed). If the printer has incorrectly been switched to Print Head Cleanup mode, perform steps 2 through 4, then steps 10 through 14 (skipping steps 5 through 9) to exit Print Head Cleanup mode. Cleaning the Printer 2 Open the front cover. " 3 Before opening the front cover, open Tray 1 if it is not already open. The magenta toner cartridge has been moved to the position from where it can be replaced. Pull down the handle on the toner cartridge until the toner cartridge is unlocked and moves out slightly toward you. Remove the toner cartridge. " When the magenta toner cartridge is removed, a gap is created within the printer so that the print head window can easily be cleaned. Cleaning the Printer 6-9 Note Do not touch the contact indicated in the illustration. 4 Close the front cover. " 5 6-10 The toner cartridge rotate within the printer. After the toner cartridges have finished rotating and all indicators on the control panel begin blinking, open the top cover. Cleaning the Printer 6 Grab the handle and lift it up slightly to the back, and then slowly pull the imaging cartridge out vertically. Note Do not touch the PC drum on the imaging cartridge. Position the removed imaging cartridge horizontally as shows in the illustration at the right. Be sure to keep the imaging cartridge horizontal and place it where it will not become dirty. Do not leave the imaging cartridge removed for more than 15 minutes, and do not place the removed imaging cartridge in a location where it would be exposed to direct light (such as sunlight). Cleaning the Printer 6-11 7 Clean the print head window by wiping it with a soft, dry cloth. BOTTOM VIEW CAUTION The area around the fuser unit is extremely hot. Touching anything other than the indicated levers may result in burns. If you get burned, immediately cool the skin under cold water, and then seek professional medical attention. 6-12 Cleaning the Printer Note Decreased print quality may result if the surface of the transfer roller is touched. Be careful not to touch the surface of the transfer roller. 8 BOTTOM VIEW Slowly insert the imaging cartridge vertically, and then push it slightly down toward you to finish reinstalling the imaging cartridge. Cleaning the Printer 6-13 9 Close the top cover. 10 Press the Clear key. " 11 6-14 The blinking of all indicators stop, and the magenta toner indicator lights up. The toner cartridges rotate within the printer. After the toner cartridges have finished rotating, open the front cover. Cleaning the Printer 12 Align the shaft on each end of the toner cartridge with its holders, and then insert the cartridge. Note Do not touch the contact indicated in the illustration. Cleaning the Printer 6-15 13 14 6-16 Press in the magenta toner cartridge until it locks into place. Close the front cover. Cleaning the Printer Troubleshooting Introduction This chapter provides information to aid you in resolving printer problems you may encounter, or at least guide you to the proper sources for help. 7-2 Preventing Media Misfeeds page 7-3 Understanding the Media Path page 7-4 Indicator Messages page 7-5 Clearing Media Misfeeds page 7-11 Solving Problems with Media Misfeeds page 7-19 Solving Other Problems page 7-21 Solving Problems with Printing Quality page 7-24 Introduction Preventing Media Misfeeds Make sure that... Media matches the printer specifications. Media is flat, especially on the leading edge. The printer is on a hard, flat, level surface. You store media in a dry location away from moisture and humidity. You always adjust the media guides in Tray 1 after inserting the media (a guide that is not properly adjusted can cause poor print quality, media misfeeds, and printer damage). You load the media printing-side up in the tray (many manufacturers place an arrow on the end of the wrapper to indicate the printing side). Avoid... Media that is folded, wrinkled, or excessively curled. Double feeding (remove the media and fan the sheets—they may be sticking together). Loading more than one type/size/weight of media in a tray at the same time. Overfilling the trays. Allowing the output tray to overfill (the output tray has a 100-sheet capacity— misfeeding may occur if you allow media to accumulate more than 100 sheets at one time). Preventing Media Misfeeds 7-3 Understanding the Media Path Understanding the printer’s media path will help you locate media misfeeds. 1 Output tray 2 Imaging cartridge 3 Toner cartridge carousel 4 Tray 1 5 Fuser unit 1 2 5 3 4 7-4 Understanding the Media Path Indicator Messages The indicators on the control panel provide information about your printer and help you locate each problem. Status Messages (Ready Indicator, Error Indicator) Status messages indicate the current condition of the printer. The printer status also can be checked on the Remote Panel Utility. (Refer to “Working with the Remote Panel Utility” on page 3-2.) Ready indicator (green) Error indicator (orange) Off Off Slow blinking Off On Blinking On On Condition Display of Remote Panel Utility - Action Power off None Energy Save Energy save mode None Off READY Ready to print None Off Receiving Processing data None Printing Printing - Initializing (power on) - Canceling a print job None Warning Messages These messages indicate that a warning condition has occurred on the printer. Condition Action Slow blink- TONER ing LOW X (YMCK) Toner near empty Prepare the new toner cartridge. Blinking An unapproved toner cartridge is installed. Install a correct KONICA MINOLTA toner cartridge. Ready indicator (green) Error indicator (orange) Toner indicator (orange) On Off On Off Indicator Messages Display of Remote Panel Utility WRONG TONER X (YMCK) 7-5 Ready indicator (green) Error indicator (orange) Toner indicator (orange) Display of Remote Panel Utility Condition Action On Off Rapid blinking INCORRECT TONER X (YMCK) The installed toner cartridge is of an unapproved type. Install a KONICAMINOLTA toner cartridge of the appropriate type (AM, EU, AP or GC). See page 5-3. On Off On TONER OUT X (YMCK) Toner out " This Replace the toner cartridge. message appears when the Toner Out Stop in the Remote Panel Utility is set to Off. 7-6 " Printing can continue, however, the printing results are not guaranteed. If printing is continued, the Error indicator (orange) lights up and printing stops. Indicator Messages Display of Remote Panel Utility Condition Action I/C LOW Imaging cartridge near end Prepare the new imaging cartridge. * T/C MEMORY ERROR Toner cartridge memory error Re-install the specified toner cartridge. * VIDEO I/F ERROR Video interface error Turn off the printer. After a few seconds, turn on the printer. * PROCESS CAUTION -IDC Process caution I/C END Imaging cartridge end Toner indicator (orange) Ready indicator (green) Error indicator (orange) On Slow blink- * ing Off Slow blink- * ing Open and close the printer’s covers. If the error is not corrected, turn off the printer. After a few seconds, turn on the printer. Replace the imaging cartridge. " Printing can continue, however, the printing results are not guaranteed. If printing is continued, the Error indicator (orange) lights up and printing stops. * Differs depending on the toner status. Indicator Messages 7-7 Error Messages These messages indicate errors which you must correct before a print job can continue or the printer status return to “Ready”. Condition Action Ready indicator (green) Error indicator (orange) Toner indicator (orange) Diplay of Remote Panel Utility Off Rapid blinking On Toner out TONER Replace the toner OUT / cartridge. CHANGE X This (YMCK) message If Toner Out TONER appears Stop in the when the Remote Toner Out Panel Utility Stop in the is set to Off, Remote printing can Panel Utility continue. is set to On. However, the printing results are not guaranteed. Off On " On Slow blink- Slow blink- * ing ing 7-8 " The toner cartridge NOT INSTALLED is not installed. TONER / CHECK X (YMCK) TONER Install the all toner cartridges. TONER LIFE END Toner empty Replace the toner cartridge. CHECK TRAY PAPER / LOAD PAPER (XX) Media empty Load media into Tray 1. Indicator Messages Ready indicator (green) Toner indicator (orange) Diplay of Remote Panel Utility Condition Action * PAPER SIZE ERROR / RESET PAPER (XX) Media size error Press the Clear key to cancel the error. Slow blink- * ing MEMORY FULL Memory full Blinking TOP COVER OPEN / CLOSE TOP COVER Front cover or top cover is open. Close the front cover and top cover. The imaging cartridge is not installed. Install the imaging cartridge. Error indicator (orange) Slow blinking alternately Off Off * Indicator Messages The size of paper being printed on is different from the size of paper specified in the printer driver. To print on paper of the size specified in the printer driver, load paper of the correct size into Tray 1, and then try performing the print job again. Press the Clear key. If the error is not corrected, turn off the printer. After a few seconds, turn on the printer. 7-9 Condition Ready indicator (green) Error indicator (orange) Toner indicator (orange) Diplay of Remote Panel Utility Off Rapid blinking * Media jam TRANSFER JAM, FUSER JAM, OUTPUT JAM / OPEN TOP COVER PROCESS ERROR -BELT, PROCESS ERRORIDC Off On All blinking I/C LIFE END Action Clear the jam, close the covers, and then continue with the print job. Process error Open and close the printer’s covers. If the error is not corrected, turn off the printer. After a few seconds, turn on the printer. Imaging cartridge end Replace the imaging cartridge. * Differs depending on the toner status. Service Message This message indicates a more serious fault that can only be corrected by a customer service engineer. Display of Remote Panel Utility Ready indicator (green) Error indicator (orange) Toner indicator (orange) Rapid blinking Rapid blinking All blinking SERVICE CALL (XXXX) Condition Action Fatal error Turn off the printer. After a few seconds, turn on the printer. If the problem persists, contact your vendor or authorized service provider. 7-10 Indicator Messages Clearing Media Misfeeds To avoid damage, always remove misfed media gently, without tearing it. Any pieces of media left in the printer, whether large or small, can obstruct the media path and cause further misfeeds. Do not reload media that has misfed. Note The image is not fixed on the media before the fusing process. If you touch the printed surface, the toner may stick to your hands, so be careful not to touch the print face when removing the misfed media. Make sure not to spill any toner inside the printer. CAUTION Unfused toner can mess your hands, clothes, or anything else it gets on. If you accidentally get toner on your clothes, lightly dust them off as best as you can. If some toner remains on your clothes, use cool, not hot water, to rinse the toner off. If toner gets on your skin, wash it off with cool water and a mild soap. CAUTION If you get toner in your eyes, wash it out immediately with cool water and consult a doctor. If, after clearing the media misfeed, the misfeed message in the control panel persists, open and close the printer’s covers. This should clear the misfeed message. Clearing Media Misfeeds 7-11 Clearing Procedures 1 Open the top cover. " 2 7-12 If there is paper in the output tray, remove it, and then fold up the output tray before opening the top cover. Grab the handle and lift it up slightly to the back, and then slowly pull the imaging cartridge out vertically. Clearing Media Misfeeds Note Do not touch the PC drum on the imaging cartridge. Position the removed imaging cartridge horizontally as shows in the illustration at the right. Be sure to keep the imaging cartridge horizontal and place it where it will not become dirty. Do not leave the imaging cartridge removed for more than 15 minutes, and do not place the removed imaging cartridge in a location where it would be exposed to direct light (such as sunlight). Clearing Media Misfeeds 7-13 3 Push the fuser separator levers back as far as possible. CAUTION The area around the fuser unit is extremely hot. Touching anything other than the indicated levers may result in burns. If you get burned, immediately cool the skin under cold water, and then seek professional medical attention. 7-14 Clearing Media Misfeeds 4 Remove any misfed media. M " Raise the fuser unit cover and remove the media. M Clearing Media Misfeeds 7-15 Note Do not touch the paper exit sensor on the fuser unit. M Note Decreased print quality may result if the surface of the transfer roller is touched. Be careful not to touch the surface of the transfer roller. 7-16 BOTTOM VIEW Clearing Media Misfeeds 5 Return the fuser separator levers to their original positions. M 6 Slowly insert the imaging cartridge vertically, and then push it slightly down toward you to finish reinstalling the imaging cartridge. Clearing Media Misfeeds 7-17 7 7-18 Carefully close the top cover. Clearing Media Misfeeds Solving Problems with Media Misfeeds " Frequent misfeeds in any area indicate that area should be checked, repaired, or cleaned. Repeated misfeeds may also happen if you’re using unsupported print media. Symptom Cause Solution Several sheets go through the printer together. The front edges of the media are not even. Remove the media and even up the front edges, then reload it. The media is moist from humidity. Remove the moist media and replace it with new, dry media. Media misfeed message stays on. Some media remains Recheck the media path and make misfed in the printer. sure that you have removed all of the misfed media. Media is misfeeding. The media is not cor- Remove the misfed media and reposirectly positioned in tion the media properly in the tray. the tray. The number of sheets Remove the excess media and reload in the tray exceeds the correct number of sheets in the the maximum tray. allowed. The media guides are Adjust the media guides in the Tray 1 not correctly adjusted to match the size of the media. to the media size. Warped or wrinkled Remove the media, smooth it out, and media is loaded in the reload it. If it still misfeeds, do not use tray. that media. The media is moist from humidity. Remove the moist media and replace it with new, dry media. The recommended Load the label sheets according to the label sheet is facing manufacturer’s instructions. the wrong way in Tray 1. Solving Problems with Media Misfeeds 7-19 Symptom Cause Solution Media is misfeeding. Envelopes are facing Load the envelopes in Tray 1 so the the wrong way in Tray flaps are facing down. 1. If the flaps are on the long edge (Envelope C6 and Envelope DL), load the envelopes with the flap edge toward the machine and the flap side facing down. Unsupported media (wrong size, thickness, type, etc.) is being used. Use KONICA MINOLTA-approved media. See “Print Media” on page 4-2. Also, refer to http://printer.konicaminolta.com for a complete list of currently approved media. The media feed roller Clean the media feed roller. is dirty. For more details, refer to “Interior” on page 6-5. 7-20 Solving Problems with Media Misfeeds Solving Other Problems " To order KONICA MINOLTA consumables, go to www.q-shop.com. Symptom Cause Solution Printer The power cord is not Turn off the printer, confirm that the power is not correctly plugged into power cord is correctly plugged into the on. the outlet. outlet, and then turn on the printer. Something is wrong Plug another electrical appliance into with the outlet conthe outlet and see whether it operates nected to the printer. properly. The power switch is not correctly turned on (I position). Turn the power switch off (O position), then turn it back to the on (I position). The printer is conUse a power source with the specificanected to an outlet tions listed in appendix A, “Technical with a voltage or fre- Specifications.” quency that does not match the printer specifications. Printing takes too much time. The printer is set to a slow printing mode (for example, thick stock). It takes more time to print with special media. When using regular paper, make sure that the media type is set properly in the driver. The printer is set to power saving mode. It takes time for printing to start in power saving mode. The job is very complex. Wait. No action needed. A toner cartridge for a Install a KONICA MINOLTA toner different region or an cartridge approved for your specific unapproved toner printer. cartridge is installed. Blank pages One or more of the are printed. toner cartridges are defective or empty. Check the toner cartridges. The image will not print correctly or not at all, if the cartridges are empty. The wrong media is being used. Check that the media type set in the driver matches the media loaded in the printer. Solving Other Problems 7-21 Symptom Cause Not all pages The Clear key was print. pressed. The tray is empty. Solution Make sure no one pressed the Clear key while your job was printing. Check that the trays are loaded with media, in place, and secure. A document is printed Print the overlay file using a suitable with an overlay file printer driver. which has been created by an unsuitable printer driver. Printer resets or turns off frequently. The power cord is not Turn off the printer, confirm that the correctly plugged into power cord is correctly plugged into the the outlet. outlet, and then turn on the printer. A system error occurred. Contact Technical Support with the error information. With N-up on Both the driver and For N-up on multiple prints, choose the application have Collate only in the driver’s Basic Tab. multiple been set for collation. Do not set collation in the application. prints, the output is incorrect. You hear unusual noises. The printer is not level. Put the printer on a flat, hard, level surface. There is a foreign object stuck inside the printer. Turn off the printer and remove the object. If you cannot remove it, contact Technical Support. Media is wrinkled. The media is moist Remove the moist media and replace it from humidity or hav- with new, dry media. ing water spilled on it. The media feed roller Check them for damage. If necessary, or fuser unit is defec- contact Technical Support with the tive. error information. Unsupported media (wrong size, thickness, type, etc.) is being used. 7-22 Use KONICA MINOLTA-approved media. See “Print Media” on page 4-2. Also, refer to http://printer.konicaminolta.com for a complete list of currently approved media. Solving Other Problems Symptom Cause Solution You do not know the procedure for returning the settings on the Panel tab of the Remote Panel Utility to their defaults. Exit the Remote Panel Utility with the icon in the Windows notification area (right end of taskbar), and then start up the utility again. You do not know the procedure for returning the settings on the User Service tab of the Remote Panel Utility to their defaults. Exit the Remote Panel Utility with the icon in the Windows notification area (right end of taskbar), and then start up the utility again. Solving Other Problems Since the default settings appear when the utility is started up again, click the Apply button. For details on exiting the Remote Panel Utility, refer to “Closing the Remote Panel Utility” on page 3-5. Since the default settings appear when the utility is started up again, click the Upload button. For details on exiting the Remote Panel Utility, refer to “Closing the Remote Panel Utility” on page 3-5. 7-23 Solving Problems with Printing Quality Symptom Cause Nothing is printed, or there are blank spots on the printed page. One or more of the Remove the toner cartridges and toner cartridges may check if any is damaged. be defective. Solution The imaging cartridge Remove the imaging cartridge and may be defective. check for damage. If it is damaged, replace it. The media is moist from humidity. Adjust the humidity for media storage. Remove the moist media and replace it with new, dry media. The media set in the printer driver mismatches the media loaded in the printer. Load the correct media in the printer. The power source Use a power source with the proper does not match the specifications. printer specifications. Remove the media from the tray and Several sheets are being fed at the same check for static electricity. Fan plain time. paper or other media, and replace it in the tray. Media is not set prop- Remove the media, tap it to straighten erly in the tray. it out, return it to the tray, and realign the media guides. Entire sheet is printed in black or color. 7-24 One or more of the Remove the toner cartridges and toner cartridges may check for damage. If it is damaged, be defective. replace it. The imaging cartridge Remove the imaging cartridge and may be defective. check for damage. If it is damaged, replace it. Solving Problems with Printing Quality Symptom Cause Solution Image is too light; there is low image density. The print head window is dirty. Clean the print head window. The media is moist from humidity. Remove the moist media and replace with new, dry media. There is not much toner left in the cartridge. Replace the toner cartridge. One or more of the Remove the toner cartridges and toner cartridges may check for damage. If it is damaged, be defective. replace it. Media type is set incorrectly. When printing envelopes, labels, postcards, thick stock, or letterheads, specify the appropriate media type in the printer driver. Image is too One or more of the Remove the toner cartridges and dark. toner cartridges may check for damage. If it is damaged, be defective. replace it. The imaging cartridge Remove the imaging cartridge and may be defective. check for damage. If it is damaged, replace it. Image is blurred; background is lightly stained; there is insufficient gloss of the printed image. Remove the toner cartridges and One or more of the toner cartridges may check for damage. If it is damaged, be defective. replace it. The imaging cartridge Remove the imaging cartridge and may be defective. check for damage. If it is damaged, replace it. Solving Problems with Printing Quality 7-25 Symptom Cause Solution The print or One or more of the Remove the toner cartridges and color density toner cartridges may check for damage. If it is damaged, is uneven. be defective or low. replace it. The imaging cartridge Remove the imaging cartridge and is defective. check for damage. If it is damaged, replace it. The printer is not level. Irregular The media is moist print or mot- from humidity. tled image appears. Unsupported media (wrong size, thickness, type, etc.) is being used. Place the printer on a flat, hard, level surface. Adjust the humidity in the media storage area. Remove the moist media and replace it with new, dry media. Use KONICA MINOLTA-approved media. See “Print Media” on page 4-2. Also, refer to http://printer. konicaminolta.com for a complete list of currently approved media. One or more of the Remove the toner cartridges and toner cartridges may check for damage. If it is damaged, be defective. replace it. The imaging cartridge Remove the imaging cartridge and is defective. check for damage. If it is damaged, replace it. There is insufficient fusing or the image comes off when rubbed. 7-26 The media is moist from humidity. Remove the moist media and replace it with new, dry media. Unsupported media (wrong size, thickness, type, etc.) is being used. Use KONICA MINOLTA-approved media. See “Print Media” on page 4-2. Media type is set incorrectly. When printing envelopes, labels, postcards, thick stock, or letterheads, specify the appropriate media type in the printer driver. Also, refer to http://printer. konicaminolta.com for a complete list of currently approved media. Solving Problems with Printing Quality Symptom Cause Solution There are toner smudges or residual images. One or more of the Remove the toner cartridges and toner cartridges are check for damage. If it is damaged, defective or installed replace it. incorrectly. There are toner smudges on the back side of the page (whether or not it has been duplexed). The media path is dirty with toner. Print several blank sheets and the excess toner should disappear. One or more of the toner cartridges are defective. Remove the toner cartridges and check for damage. If it is damaged, replace it. Abnormal areas (white, black, or color) appear in a regular pattern. The print head window is dirty. The imaging cartridge Remove the imaging cartridge and is defective. check for damage. If it is damaged, replace it. Clean the print head window. A toner cartridge may Remove the toner cartridges with the be defective. color causing the abnormal image. Replace it with a new toner cartridge. The imaging cartridge Remove the imaging cartridge and is defective. check for damage. If it is damaged, replace it. Solving Problems with Printing Quality 7-27 Symptom Cause Solution Image defects. The print head window is dirty. Clean the print head window. A toner cartridge may Remove the toner cartridges and be leaking. check for damage. If it is damaged, replace it. A toner cartridge may Remove the toner cartridge with the be defective. color causing the abnormal image. Replace it with a new toner cartridge. The imaging cartridge Remove the imaging cartridge and is defective. check for damage. If it is damaged, replace it. Lateral lines or bands appear on image. The printer is not level. Place the printer on a flat, hard, level surface. The media path is dirty with toner. Print several sheets and the excess toner should disappear. One or more of the Remove the toner cartridges and toner cartridges may check for damage. If it is damaged, be defective. replace it. The imaging cartridge Remove the imaging cartridge and is defective. check for damage. If it is damaged, replace it. 7-28 Thin white Toner is not evenly horizontal adhering to the lines appear media. at intervals on images. Use the “Image Refresh” function located under the User Service tab in the Remote Panel Utility. See “User Service Tab” on page 3-4. Colors look drastically wrong. Remove the toner cartridges and verify that the toner is distributed evenly on each cartridge roller, and reinstall the toner cartridges. One or more of the toner cartridges are defective. If the problem persists, contact your vendor or authorized service provider. Solving Problems with Printing Quality Symptom Cause Solution Colors are not registering properly; colors are mixed or have pageto-page variation. The imaging cartridge Remove the imaging cartridge and is not correctly reinstall it. seated. One or more of the Remove the toner cartridges and toner cartridges may check for damage. If it is damaged, be defective. replace it. The media is moist from humidity. Remove the moist media and replace it with new, dry media. The color The imaging cartridge Remove the imaging cartridge and has a poor is defective. check for damage. If it is damaged, reproduction replace it. or has poor color density. If the problem is not resolved, even after all of the above have been performed, contact Technical Support with the error information. For contact information, refer to the Need Assistance Sheet. Solving Problems with Printing Quality 7-29 7-30 Solving Problems with Printing Quality Installing Accessories Dust Cover The dust cover is an optional accessory. Contact your vendor or go to printer.konicaminolta.com for purchase information. When the dust cover is attached to Tray 1, the media is protected from dust, and operating noises from printing are reduced. We recommend that the dust cover remain attached when this printer is used. Installing the Dust Cover 8-2 1 Open Tray 1. 2 Install the dust cover. Dust Cover Appendix Technical Specifications Printer A-2 Type Desktop full color laser beam printer Printing system Dual laser diode with polygon mirror Developing system Mono component development system Fusing system Heat roller system Resolution 1200 dpi × 600 dpi or 600 dpi × 600 dpi First print Monochrome: 13 seconds for A4, Letter (plain paper) Full color: 22 seconds for A4, Letter (plain paper) Print speed Monochrome: 20 pages per minute for A4, Letter (plain paper) Full color: 5 pages per minute for A4, Letter (plain paper) Warm-up time Avg. 35 seconds (time required to start printing after the printer is turned on) Media sizes Paper width: 92 to 216 mm (3.6 to 8.5") Paper length: Plain paper: 195 to 356 mm (7.7 to 14.0") Thick stock 1/2: 184 to 297 mm (7.25 to 11.7") Paper/Media Plain paper (60 to 90 g/m2) Letterhead Envelopes Labels Thick stock 1 (91 to 163 g/m2) Thick stock 2 (164 to 209 g/m2) Postcard Input capacity Plain paper: 200 sheets Envelope: 10 envelopes Labels/Letterhead/Postcard/Thick Stock: 50 sheets Output capacity Output tray: 100 sheets (A4, Letter) Operating temperature 10 to 35°C (50 to 95°F) Operating humidity 15 to 85% Technical Specifications Power supply 120 V, 50 to 60 Hz 220 to 240 V, 50 to 60 Hz Power consumption 120 V: 970 W or less 220 to 240 V: 1020 W or less Energy Saver Mode: 14 W or less Amperage 120 V: 8.2 A or less 220 to 240 V: 4.4 A or less Acoustic Noise Printing: 51 dB or less (monochrome) 49 dB or less (color) Standby: 29 dB or less External dimensions Height: 275 mm (10.8") Width: 396 mm (15.6") Depth: 380 mm (14.9") Weight 11.2 kg (without consumables) 14.4 kg (with consumables) Interface USB 2.0 High-Speed compliant Standard memory 16 MB Consumable Life Expectancy Chart User-Replaceable Item Average Life Expectancy Toner cartridge Starter Cartridge = 500 pages (Y, M, C, K) Replacement Cartridge = Standard-capacity: 1,500 pages (Y, M, C) High-capacity: 2,500 pages (Y, M, C, K) Imaging cartridge Monochrome: 45,000 pages (Continuous) 10,000 pages (1 page per job) Full color: 11,250 pages (Continuous) 7,500 pages (1 page per job) Fuser unit 50,000 pages Technical Specifications A-3 " The values shown for the toner cartridge and imaging cartridge indicate the number of pages for simplex printing using A4/Letter-size media with 5% coverage. The actual life may differ (be shorter) depending on the printing conditions (coverage, paper size, etc.), differences in the printing method, such as continuous printing or intermittent printing (when print jobs of one page are often printed), or the type of paper used, for example, thick paper. In addition, the life will be affected by the temperature and humidity of the operating environment. Service-Replaceable A-4 Item Average Life Expectancy Transfer roller 50,000 pages Technical Specifications Index A E Accessory Dust cover ...................................8-2 Envelope ....................................... 4-5 B Basic tab .......................................2-6 C Consumables Fuser unit ..................................5-17 Imaging cartridge ......................5-14 Toner cartridge ...........................5-2 Control panel ................................1-5 D Dust cover .....................................8-2 I Indicator Messages Error messages .......................... 7-8 Service message ...................... 7-10 Status messages ........................ 7-5 Warning Messages .................... 7-5 L Labels ........................................... 4-6 Layout tab ..................................... 2-6 Letterhead .................................... 4-7 Loading media ........................... 4-10 M Maintenance ................................. 6-2 Index A-5 Media Clearing misfeeds .....................7-11 Loading .....................................4-10 Path ............................................7-4 Preventing misfeeds ...................7-3 Media path .....................................7-4 Media type Envelope .....................................4-5 Labels .........................................4-6 Letterhead ...................................4-7 Plain paper ..................................4-3 Postcard ......................................4-7 Thick stock ..................................4-4 Misfeed problems .......................7-19 Clearing ....................................7-11 Media path ..................................7-4 Preventing ...................................7-3 T Thick stock ................................... 4-4 Troubleshooting .......................... 7-1 V Version tab ................................... 2-7 W Watermark tab .............................. 2-7 O Output tray ..................................4-16 Overlay tab ....................................2-7 P Page margins ................................4-9 Plain paper ....................................4-3 Postcard ........................................4-7 Preventing media misfeeds .........7-3 Print quality .................................7-24 Printable Area ...............................4-8 Printer Parts ...........................................1-3 Printer driver Displaying ...................................2-3 Setting .........................................2-5 Uninstalling .................................2-3 Q Quality tab .....................................2-7 R Remote Panel Utility Closing ........................................3-5 Opening ......................................3-2 Using ...........................................3-2 A-6 Index