1
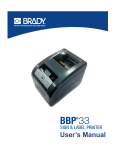
User’s Manual
This page is intentionally left blank.
Copyright and Trademarks
Trademarks
Copyright and Trademarks
Disclaimer
This manual is proprietary to Brady Worldwide, Inc. (hereafter "Brady"), and may
be revised from time to time without notice. Brady disclaims any understanding to
provide you with such revisions, if any.
This manual is copyrighted with all rights reserved. No portion of this manual may
be copied or reproduced by any means without the prior written consent of Brady.
While every precaution has been taken in the preparation of this document, Brady
assumes no liability to any party for any loss or damage caused by errors or
omissions or by statements resulting from negligence, accident, or any other
cause. Brady further assumes no liability arising out of the application or use of
any product or system described, herein; nor any liability for incidental or
consequential damages arising from the use of this document. Brady disclaims all
warranties of merchantability of fitness for a particular purpose.
Brady reserves the right to make changes without further notice to any product or
system described herein to improve reliability, function, or design.
Trademarks
BBP®33 is a registered trademark of Brady Worldwide, Inc.
Microsoft, Windows, Excel, Access and SQL Server are registered trademarks of
Microsoft Corporation.
Lotus 1-2-3 is a registered trademark of Lotus Development Corporation.
All brand or product names referenced in this manual are trademarks (™) or
registered trademarks (®) of their respective companies or organizations.
© 2012 Brady Corporation. All Rights Reserved.
Y1422731
Revision C
Brady Corporation
6555 West Good Hope Road
P.O. Box 2131
Milwaukee, WI 53201-2131
www.bradycorp.com
Sales/Customer Support: (800) 537-8791
BBP®33 Sign & Label Printer User’s Manual
iii
Brady Warranty
Trademarks
Brady Warranty
Our products are sold with the understanding that the buyer will test them in actual
use and determine for him or herself their adaptability to his/her intended uses.
Brady warrants to the buyer that its products are free from defects in material and
workmanship, but limits its obligation under this warranty to replacement of the
product shown to Brady’s satisfaction to have been defective at the time Brady
sold it. This warranty does not extend to any persons obtaining the product from
the buyer.
THIS WARRANTY IS IN LIEU OF ANY OTHER WARRANTY, EXPRESS OR
IMPLIED, INCLUDING, BUT NOT LIMITED TO, ANY IMPLIED WARRANTY OF
MERCHANTABILITY OR FITNESS FOR A PARTICULAR PURPOSE, AND OF
ANY OTHER OBLIGATIONS OR LIABILITY ON BRADY’S PART. UNDER NO
CIRCUMSTANCES WILL BRADY BE LIABLE FOR ANY LOSS, DAMAGE,
EXPENSE OR CONSEQUENTIAL DAMAGES OF ANY KIND ARISING IN
CONNECTION WITH THE USE, OR INABILITY TO USE, BRADY’S PRODUCTS.
iv
BBP®33 Sign & Label Printer User’s Manual
BBP®33 Agency Compliance and Approvals
Europe
BBP®33 Agency Compliance and Approvals
United States
FCC Notice-US Only
Warning: This equipment generates, uses and can radiate radio frequency
energy. If not installed and used in accordance with the manufacturer’s
instructions, it may cause interference to radio communications. It has been
tested and found to comply with the limits for a Class A computing device
pursuant to Subpart B of Part 15 of the FCC rules, which are designed to provide
reasonable protection against interference when operating in a commercial
environment. Operation of this equipment in a residential area is likely to cause
interference, in which case required corrective measures will be at the owner’s
expense. The user is cautioned that any changes or modifications not expressly
approved by Brady Worldwide, Inc. could void the user’s authority to use the
equipment.
Canada
ICES-003 Class A Notice, Classe A
This Class A digital apparatus meets all requirements of the Canadian
Interference-Causing Equipment Regulations.
Cet appareil numerique de la classe A respecte toutes les exigences du
Reglement sur le material broilleur du Canada.
Europe
Warning – This is a Class A product. In a domestic environment this product may
cause radio interference, in which case the user may be required to take
adequate measures.
RoHS Directive 2002/95/EC
This statement clarifies Brady’s product compliance with the European Union’s
Directive 2002/95/EC, Restriction of Hazardous Substances.
BBP®33 Sign & Label Printer User’s Manual
v
Safety and Environment
Precautions
Safety and Environment
Please read and understand this manual before using the BBP®33 Sign & Label
Printer for the first time. This manual describes all of the main functions of the
printer.
Precautions
Before using the printer, please note the following precautions:
vi
•
Read all instructions carefully before operating the printer and prior to
performing any procedure.
•
Do not place the unit on an unstable surface or stand.
•
Do not place anything on top of the unit.
•
Keep the top clear of obstructions.
•
Always use the printer in a well ventilated area. Do not block the slots and
opening on the unit, which are provided for ventilation.
•
Only use the power source indicated on the rating label.
•
Use only the power cord that comes with the unit.
•
Do not place anything on the power cord.
BBP®33 Sign & Label Printer User’s Manual
Technical Support and Registration
Repair and Return
Technical Support and Registration
Contact Information
For repair or technical assistance, locate your regional Brady Technical Support
office by going to:
•
United States: www.bradyid.com
•
Europe: www.bradyeurope.com
•
Asia Pacific: www.bradycorp.com
•
Australia: www.bradyaust.com.au
•
Canada: www.bradycanada.ca
•
Latin American: www.bradylatinamerica.com
Registration Information
To register your printer, go to:
•
www.bradycorp.com/register
•
www.bradyaust.com.au/register (Australia)
Repair and Return
If for any reason you need to return the BBP®33 printer for repair, please contact
Brady Technical Support for repair and replacement information.
BBP®33 Sign & Label Printer User’s Manual
vii
Overview
Keypad and Button Actions
Overview
About this Document
The purpose of this guide is to provide information and instructions on using the
BBP®33 Sign & Label Printer.
Conventions
When using this document, it is important that you understand the conventions
used throughout the manual.
•
All User actions are indicated by Bold text.
•
References to menus, dialog boxes, button and screens are indicated by Italics
text.
•
See “Keypad and Menu Functions” on page 1-3 for a description of the
menus and controls.
•
Graphic callouts are numbered with the procedure "step number" to which they
refer (i.e., if Step 3 refers to a callout in the graphic, the step text will
indicate [3] and the callout will indicate 3). Otherwise, callouts are numbered
in the order in which they are referenced in the text,
Keypad and Button Actions
Press the following to use the keypad and user interface buttons (for more detail,
see “Keypad and Menu Functions” on page 1-3):
Icon
Description
Scroll through menus.
Select options or go to a submenu.
Power button.
Feed media.
Select from menu options.
viii
BBP®33 Sign & Label Printer User’s Manual
Contents
Copyright and Trademarks ......................................................................................iii
Brady Warranty ..........................................................................................................iv
BBP®33 Agency Compliance and Approvals...........................................................v
Safety and Environment............................................................................................vi
Technical Support and Registration .......................................................................vii
Overview ...................................................................................................................viii
1 - Introduction
Features and Functions ......................................................................................... 1-1
Compatible Applications........................................................................................ 1-2
System Specifications............................................................................................ 1-2
Keypad and Menu Functions ................................................................................. 1-3
User Interface .................................................................................................... 1-3
Display Screen .................................................................................................. 1-4
Ready Mode ................................................................................................ 1-4
Menu Selection Mode ................................................................................. 1-5
User Interface Menu Structure .......................................................................1-6
2 - Printer Set Up
Unpack and Set up Printer ..................................................................................... 2-1
What’s in the Box .............................................................................................. 2-1
System Components ......................................................................................... 2-2
Set up the Printer .............................................................................................. 2-3
Connect Printer Power ................................................................................ 2-3
Install or Change Supplies .......................................................................... 2-4
Feeding and Cutting Label Stock ...................................................................... 2-8
Print Two-sided Sleeve Material ............................................................................ 2-9
System Power ....................................................................................................... 2-11
Starting Printer ................................................................................................ 2-11
Powering Off the Printer .................................................................................. 2-11
Rebooting the Printer ...................................................................................... 2-11
Connect Printer to a PC via USB ......................................................................... 2-12
BBP®33 Sign & Label Printer User’s Manual
ix
Brady Network Cards............................................................................................ 2-13
LED Light ......................................................................................................... 2-13
Supported Networks ........................................................................................ 2-13
Installing a Brady Network Card ...................................................................... 2-14
Install Ethernet (first time).......................................................................... 2-15
Install Additional PC’s using Brady Network Card Utility ........................... 2-24
Install USB Driver (only) ............................................................................ 2-29
Troubleshooting Brady Network Card ............................................................. 2-34
Ethernet Connection Failed ....................................................................... 2-34
USB Connection Failed ............................................................................. 2-35
Using Brady Network Card Configuration Utility .............................................. 2-36
General Settings........................................................................................ 2-36
Network Settings ....................................................................................... 2-37
Firmware Upgrade/Factory Reset ............................................................. 2-38
Upgrade Firmware .............................................................................. 2-38
Factory Reset ..................................................................................... 2-41
3 - User Interface Menu
Print Energy ............................................................................................................. 3-3
Print Speed .............................................................................................................. 3-4
Cut Settings ............................................................................................................. 3-4
Mirror Print Settings................................................................................................ 3-5
Offset........................................................................................................................ 3-5
Language ................................................................................................................. 3-6
Units ......................................................................................................................... 3-6
Contrast ................................................................................................................... 3-7
Standby Interval ...................................................................................................... 3-7
Date & Time ............................................................................................................. 3-8
Connection .............................................................................................................. 3-8
Restore Defaults...................................................................................................... 3-9
Import ..................................................................................................................... 3-10
Graphics .......................................................................................................... 3-10
Fonts ............................................................................................................... 3-11
Delete ..................................................................................................................... 3-12
Delete Graphics ............................................................................................... 3-12
Delete Fonts .................................................................................................... 3-12
Password Protection ............................................................................................ 3-13
Enable Protection ............................................................................................ 3-13
Change Password ........................................................................................... 3-14
Upgrade from PC................................................................................................... 3-15
Upgrade from USB Flash Drive............................................................................ 3-16
x
BBP®33 Sign & Label Printer User’s Manual
Diagnostics............................................................................................................ 3-17
Enter Diagnostic Mode .................................................................................... 3-17
Sensors ........................................................................................................... 3-17
Print Engine Base (PEB) Settings ............................................................. 3-17
Sensor Conditions ..................................................................................... 3-18
Analog Readings ....................................................................................... 3-19
Copy Error Logs .............................................................................................. 3-20
Printer Error Log........................................................................................ 3-20
Script Error Log ......................................................................................... 3-20
USB Test ......................................................................................................... 3-21
USB Flash Drive Test................................................................................ 3-21
USB Type-B Cable Test ............................................................................ 3-21
Keyboard Setup .............................................................................................. 3-22
Info .................................................................................................................. 3-22
Advanced Diagnostics ......................................................................................... 3-22
4 - Maintenance
Printer Maintenance................................................................................................ 4-1
Removing Power and Media from Printer ......................................................... 4-1
Cleaning the Printer .......................................................................................... 4-3
Remove Dust .............................................................................................. 4-3
Clean Printer and Keypad Residue ............................................................. 4-4
Clean LCD Screen ...................................................................................... 4-4
Clean Auto-Cutter Blade ............................................................................. 4-5
Clean Sensors............................................................................................. 4-7
Clean Tape Entrance .................................................................................. 4-8
Cleaning the Cutter Blade Exit Area ........................................................... 4-9
Clean Printhead ........................................................................................ 4-10
Replacing the Media Wiper ............................................................................. 4-11
Clearing Jams ................................................................................................. 4-12
Replacing/Adjust Media End Caps .................................................................. 4-12
5 - Troubleshooting
Messages................................................................................................................. 5-1
Printing Errors ................................................................................................... 5-1
Hardware Errors ................................................................................................ 5-2
Media Errors ...................................................................................................... 5-3
Ribbon Errors .................................................................................................... 5-3
A - Supported Scripting Languages
ZPL Supported Commands....................................................................................A-1
jScript Supported Commands ...............................................................................A-5
DPL Supported Commands ...................................................................................A-7
BBP®33 Sign & Label Printer User’s Manual
xi
1
Introduction
Thank you for purchasing the BBP®33 Sign & Label Printer 4" mono-color peripheral
printer. This compact, easy-to-operate thermal transfer printer is a stand-alone that easily
connects to your computer for printing labels that you produce using LABELMARK™,
labeling software. Media and ribbons from Brady Corporation are programmed to work
specifically with the printer.
Features and Functions
The following are just some of the features that make this system so easy to use and
ready to meet your label-printing requirements:
•
Small, lightweight (approximately 11 lbs [4.9 kg]) unit, ready for your desktop.
•
A variety of media colors, styles and materials and a wide range of single-color
ribbons.
•
Smart-cell technology that works intelligently with Brady consumables.
•
Easy loading media and ribbon supplies.
•
Continuous and die-cut media in a variety of high-performance materials.
•
Maximum print speed of 4 ips.
•
300 dpi (11.8 dot/mm) print resolution.
•
USB device ports.
•
Optional Wireless capability.
•
Ability to print from LABELMARK™ Label Design Software and MARKWARE™
Tape and Label Software.
•
Scalable True Type Fonts.
•
Built-in autocutter.
•
LED display screen to view system status and set printer defaults and options.
BBP®33 Sign & Label Printer User’s Manual
1-1
Compatible Applications
Compatible Applications
The BBP®33 Sign & Label Printer is compatible with the following software
applications:
•
LABELMARK™ Label Design Software
•
MARKWARE™ Tape and Label Software
When used with one of these software packages, the printer will automatically
recognize all enabled and compatible media.
Note: Only BBP®33 supplies will work with this printer.
System Specifications
1-2
•
Weight: 11 lbs (4.9 kg)
•
Dimensions (stored): 8.9 in. x 12.0 in. x 9.5 in. (22.6 cm x 30.5 cm x 24.1 cm)
•
Operating Temperature: 50 to 104°F (10-40°C)
•
Relative Humidity: 10% to 80% RH non-condensing
•
Storage: -4 to 122°F (-20 to 50°C) at 15% to 90% RH non-condensing
•
Voltage: 90 to 264 VAC, 47 to 63 Hz
•
Print Resolution: 300 dpi, 11.8 dot/mm
•
Output media size: up to 4 in. (101.6 mm) wide
BBP®33 Sign & Label Printer User’s Manual
Keypad and Menu Functions
User Interface
Keypad and Menu Functions
The following describes the keys, buttons and display screen that are used to
navigate through and use the BBP®33 Sign & Label Printer system.
User Interface
The user interface (UI) contains the keypad and buttons for using the printer. The
main functions are as follows:
Item #
Icon
Description
1
Feed: Feeds the labels through the printer to the next notch
on the liner. Feeds a full label for die cut; 0.5-inch (12.7 mm)
for continuous.
2
Keypad:
• Press Tor S to move through primary menu.
• Press W to exit or move up a menu.
• Press X for menu support functions.
• Press
to accept a selection or move through
submenus.
3
--
Display Screen: See “Display Screen” on page 1-4 for
details.
4
Power Button: Turns the printer on and off.
5
Menu: The display screen.
3
4
2
5
1
BBP®33 Sign & Label Printer User’s Manual
1-3
Keypad and Menu Functions
Display Screen
Display Screen
The display screen has two modes:
•
Ready Mode: Indicates printer status and displays estimated remaining media
and estimated remaining ribbon. Also indicates the media and ribbon installed.
•
Menu Selection Mode: Lets you configure system defaults, view and set
printer information, perform input and output operations and perform
diagnostics.
Ready Mode
The printer has three ready modes (see “Connection” on page 3-8 for more detail):
•
Initializing
•
Ready
•
Ready - USB Only
The table describes the display screen when in idle (Ready) mode.
Item #
Condition
Description
1
Printer Status
Displays the online printer status.
2
Media Status
Displays media part number and estimated amount of
remaining media.
3
Ribbon Status
Displays ribbon part number and estimated amount of
remaining ribbon.
1
2
3
1-4
BBP®33 Sign & Label Printer User’s Manual
Keypad and Menu Functions
Display Screen
Menu Selection Mode
The table describes the main options of the display screen when in menu
selection mode. See “User Interface Menu Structure” on page 1-6 for a list of all
the menu options.
Menu Item
Description
Cut Media
Used to automatically cut the media.
Status Info
Options to display or print status and configuration
information, font list and/or graphic list.
Output Settings
Indicates print energy, print speed, cut status and mirror print
settings.
Printer Settings
Options to set up printer defaults for language, units,
contrast, standby interval, date and time (clock) and restore
defaults.
Tools
Options to import or delete graphics and fonts, upgrade from
a PC or USB device, perform diagnostics, enable password
protection or change a password.
USB Flash Drive Accesses label script files.
BBP®33 Sign & Label Printer User’s Manual
1-5
Keypad and Menu Functions
Display Screen
User Interface Menu Structure
1-6
BBP®33 Sign & Label Printer User’s Manual
2
Printer Set Up
Unpack and Set up Printer
Carefully unpack and inspect the printer surfaces (interior and exterior) and the labeling
system for possible damage during shipping.
Note: Be sure to remove any transportation protection from around the printhead and
inside the enclosure cover.
What’s in the Box
•
BBP®33 Sign & Label Printer
•
Power Cord
•
USB Type B Cable
•
Printed Quick Start Guide
•
Product CD including: electronic Quick Start Guide, electronic User’s Manual, BPL
Programmer’s Manual and web links
•
Windows Printer Driver CD
•
Cleaning Kit (Cat # B31-CCT), not available in all regions - includes foam swabs, adhesive
scraping tool, plastic bottle
Note: Please keep the original packaging, including the box, in case the printer must be
returned.
BBP®33 Sign & Label Printer User’s Manual
2-1
Unpack and Set up Printer
System Components
System Components
1
12
11
2
10
9
4
5
3
7
13
8
6
Figure 2-1. Printer Components
1
3
5
7
9
11
13
Enclosure Cover
Media Guides
Ribbon Cartridge
Ribbon Cartridge Latch
Expansion Ports
Power Button
Ribbon Cover Latch
2
4
6
8
10
12
Label Exit/Auto Cutter*
Media
Ribbon Cover
Brady Network Card
Media Wiper
Media Bridge*
*See User’s Manual for component descriptions.
2-2
BBP®33 Sign & Label Printer User’s Manual
Unpack and Set up Printer
Set up the Printer
Set up the Printer
Connect Printer Power
To setup the printer:
1. Plug the power cord [1] into the printer at the location shown.
2. Plug the other end of the power cord into an AC power outlet. The printer
automatically turns on and displays the printer status and the size and color of
the currently installed media.
1
BBP®33 Sign & Label Printer User’s Manual
2-3
Unpack and Set up Printer
Set up the Printer
Install or Change Supplies
The media and ribbon supply cartridges use a “smart cell” to define and track the
supply information. The system automatically recognizes the supply information
for the installed media and ribbon.
Note: The printer can be either on or off when changing supplies.
To install or change ribbon:
1. To remove ribbon, open the enclosure cover.
2. Release the latch on the ribbon cover [2] and swing open.
3. Release the ribbon cartridge latch [3] and lift the ribbon cartridge up and out.
2
3
2-4
BBP®33 Sign & Label Printer User’s Manual
Unpack and Set up Printer
Set up the Printer
4. Place ribbon cartridge with ribbon over print head [4] and the product label
toward machine, then snap into place.
4
5. Close and latch the ribbon cover.
6. Close the enclosure cover.
7. If printer was off, press
. The system detects the media and ribbon colors
and sets the amount of remaining supplies.
BBP®33 Sign & Label Printer User’s Manual
2-5
Unpack and Set up Printer
Set up the Printer
To install or change media:
1. Open the enclosure cover.
2. Release the latch on the ribbon cover [2] and swing open.
2
2-6
BBP®33 Sign & Label Printer User’s Manual
Unpack and Set up Printer
Set up the Printer
3. If engaged, swing yellow media wiper [3] to the back.
4. Slide yellow media guides [4] to full-open.
5. Remove existing media, if installed, by pulling cartridge from printer.
6. Insert media cartridge until spindle ends rest in slots of media holder [6].
Media unwinds from the top of the roll and the smart cell should be on the left
side of the spindle.
7. Feed media from top of roll until it sits just past the black rubber roller.
8. Close media guides until they touch edge of media liner with media under the
guides.
9. Move media wiper into position so it rests on media.
Note: Not all media requires the use of the media wiper. Engage the media
wiper only if continuous media is installed.
10. Close and latch ribbon cover.
3
6
4
7
11. Close the enclosure cover.
12. If printer was off, press
. The system detects the installed supplies and
indicates the amount of remaining supplies on the display screen.
BBP®33 Sign & Label Printer User’s Manual
2-7
Unpack and Set up Printer
Feeding and Cutting Label Stock
Feeding and Cutting Label Stock
Use this procedure to advance the media to the cut position, and (optionally) cut
the media.
Note: For die-cut media, the media is advanced to the cut position which is the
next die-cut label. For continuous media, the media advances until you release
the Feed button.
To feed and cut the label stock:
1. With printer power on, press and hold Feed
you want exits the printer.
until the length of media
2. To cut the media:
a. Press
to go to the navigation menu.
b. Press S or T to scroll to Cut Media, then press
2-8
. The media is cut.
BBP®33 Sign & Label Printer User’s Manual
Print Two-sided Sleeve Material
Feeding and Cutting Label Stock
Print Two-sided Sleeve Material
When printing two-sided sleeve material, side one is loaded and printed directly
from the roll. To print side two, the material is cut at the end of the job, then loaded
from the back of the printer.
A media bridge holds the two-sided material above the the tape roll. The twosided material lays across the bridge to enter the tape entrance ramp. When
done, the bridge is raised and snaps into the enclosure cover.
To setup the media bridge:
1. Print side one of the two-sided markers.
2. When the job is done, cut the printed markers.
Note: Use scissors or auto-cutter to cut the markers.
3. Open the enclosure cover and ribbon cover.
4. Disengage the yellow wiper arm.
5. Back the media out of the printer but do not remove the media roll.
Note: The media roll must remain in the media slot or the printer will indicate
a tape out condition.
6. Flip the media bridge down so it lays over the roll of tape [6].
6
BBP®33 Sign & Label Printer User’s Manual
2-9
Print Two-sided Sleeve Material
Feeding and Cutting Label Stock
Note: Make sure you place the edge for the starting (1st) label into the printer
first.
7. From the back of the printer, feed the edge of the marker through the slot
between the enclosure cover and the printer as follows:
•
Starting marker (1st printed label) through slot first
•
Printed side down
8. Lay the markers over the media bridge and feed the markers to the top of the
black roller ~.25 in. (6.35 mm) from the exit.
9. Close the ribbon and enclosure covers and print side two of the markers.
10. When the job is complete, open the enclosure and ribbon covers.
11. Lift the media bridge [11] up and snap into place on the enclosure cover.
12. Close the enclosure cover.
11
2-10
BBP®33 Sign & Label Printer User’s Manual
System Power
Rebooting the Printer
System Power
These procedures describe how to power-up the printer when starting from a nonpowered state (i.e., printer has been unplugged) and how to remove power from
the printer.
Note: With power removed (i.e., printer disconnected from power source), the
system clock retains its settings for about 30 days.
Starting Printer
•
To start printer from a cold state: Plug the printer into a power source. The
system automatically recognizes the supply information for the installed media and
ribbon and the display panel indicates Ready.
Note: The backlight for the display panel turns off after a pre-defined period of
time.
•
To turn on the backlight: Press any button.
Powering Off the Printer
When the system is shut down, the display turns off.
To completely remove printer power:
1. Disconnect the power cord from the printer.
To perform a soft power down:
1. Press and release
. The screen goes blank and the backlight goes off.
Rebooting the Printer
Use this procedure to reboot the printer (e.g., if the screen freezes).
To reset the printer:
1. Press and hold
for at least 5 seconds. The system performs the
initialization process and restarts the printer.
2. When the Ready displays, you can continue printing your labels.
BBP®33 Sign & Label Printer User’s Manual
2-11
Connect Printer to a PC via USB
Rebooting the Printer
Connect Printer to a PC via USB
To use your PC with the BBP®33 Sign & Label Printer, you must have the USB
device driver installed on your PC.
Note: See “Compatible Applications” on page 1-2 for a list of software applications
that are compatible with the BBP®33. Refer to your labeling software
documentation for instructions about installing and using the software.
To install the USB device driver:
1. Go to “Install USB Driver (only)” on page 2-29.
2-12
BBP®33 Sign & Label Printer User’s Manual
Brady Network Cards
Supported Networks
Brady Network Cards
Supported
Networks
LED Light
LED Light
The changing colors of the LED light on the Brady Network Card signifies the
following:
Color
Solid Green
Blinking Orange
Blinking Green
Solid Red
Blinking Red
Status
Card is functioning normally, status is OK.
The firmware is corrupted and it needs to be upgraded. Use the
Brady Network Card Configuration Utility to upgrade the firmware
(see “Firmware Upgrade/Factory Reset” on page 2-38 for
information on downloading new firmware.)
Firmware upgrade is in progress.
Card failure. There is no communication between the Brady
Network Card and the printer. Contact your system administrator.
An error is detected in the current operation of the Brady Network
Card. Check the current operation.
Supported Networks
The name on the barcode label of your network card indicates which networks the
specific card supports.
Name
Networks Supported
NET-BT-WIFI-LAN
NET-WIFI
Bluetooth, WiFi, and Ethernet
WiFi and Bluetooth ONLY
NET-BT
NET-LAN
Bluetooth ONLY
Ethernet ONLY
BBP®33 Sign & Label Printer User’s Manual
2-13
Brady Network Cards
Installing a Brady Network Card
Installing a Brady Network Card
If your Brady printer is equipped with a Brady Network Card (Ethernet), you can
configure the printer to run as a local printer (physically attached to your PC via a
USB cable) and as a network (shared) printer through Ethernet.
To establish the printer as a network printer, you must configure the Brady
Network Card to recognize and work with your networks. The Brady Printer
Drivers CD contains the installation wizards for the Brady printer drivers and also
the Brady Network Card configuration. The printer drivers and Brady Network
Card drivers can also be downloaded from the Brady website at
www.bradyid.com.
The network card installation and configuration wizard identifies the following
installation scenarios:
2-14
•
Ethernet (first time)
•
Additional PC’s
•
USB Driver
BBP®33 Sign & Label Printer User’s Manual
Brady Network Cards
Installing a Brady Network Card
Install Ethernet (first time)
Use this installation process:
•
if you have just purchased the printer and are setting it up for the first time.
•
if you intend to send print jobs to the printer from a PC using Ethernet or over
a LAN network.
To activate the Ethernet connection:
1. Make sure your printer and your PC are not connected with a USB cable.
2. Insert the Brady Printer Drivers CD into your computer CD drive. The
installation wizard launches automatically.
3. Turn the printer on.
4. Click printer model you are installing, then click Next.
BBP®33 Sign & Label Printer User’s Manual
2-15
Brady Network Cards
Installing a Brady Network Card
5. If your printer and PC are still connected with a USB cable, disconnect it now,
then click Next.
6. Click First time install for network driver (default), then click Next.
2-16
BBP®33 Sign & Label Printer User’s Manual
Brady Network Cards
Installing a Brady Network Card
7. Verify that your printer printer is powered on and the Brady Network Card LED
is solid green.
8. Connect the printer to your PC with a USB cable.
9. If the Found New Hardware Wizard displays, continue with the next step,
otherwise skip to Step 16.
10. Click Yes, now and every time I connect a device radio button, then click
Next.
BBP®33 Sign & Label Printer User’s Manual
2-17
Brady Network Cards
Installing a Brady Network Card
11. Click the radio button Install software automatically (Recommended), then
click Next.
12. When the installation is complete, click Finish to close the wizard, then click
Next.
2-18
BBP®33 Sign & Label Printer User’s Manual
Brady Network Cards
Installing a Brady Network Card
13. Click the radio button for Ethernet, then click Next.
14. In the Printer Description field, enter an easy-to-identify name/description for
this network connection. You can use any alphanumeric characters.
15. In the Network Address Type field, choose the default DHCP protocol.
Note: If you choose Static, you must enter the IP Address, Subnet Mask and
Default Gateway fields.
16. Click Next.
BBP®33 Sign & Label Printer User’s Manual
2-19
Brady Network Cards
Installing a Brady Network Card
17. Verify that your printer and PC are connected to the same network, then click
Next.
Note: To verify that your printer and PC are on the same network, see the
connection guidelines shown below.
Figure 3. Network Connections
2-20
BBP®33 Sign & Label Printer User’s Manual
Brady Network Cards
Installing a Brady Network Card
18. When the Ethernet connection is successful, the Bonjour Printer Wizard
launches automatically. Click Next.
Note: The Bonjour program is designed to establish and monitor network
printers. The Bonjour Printer Wizard establishes your Brady printer as a
network printer.
19. Read the Apple End User License Agreement, then click I accept the terms
in the license agreement and click Next to continue.
BBP®33 Sign & Label Printer User’s Manual
2-21
Brady Network Cards
Installing a Brady Network Card
20. Click the assigned network printer name, then click Next.
Note: For easier identification, the name or description you assigned in Step
14. displays in the lower left corner of the screen.
21. In the Manufacturer field, click Brady (the manufacturers are listed in
alphabetical order).
22. In the Model field, click the printer to install, then click Next.
2-22
BBP®33 Sign & Label Printer User’s Manual
Brady Network Cards
Installing a Brady Network Card
23. When the Bonjour Printer wizard completes, click Finish.
24. When the Brady Printer Installation is completed click Finish to exit the
wizard.
BBP®33 Sign & Label Printer User’s Manual
2-23
Brady Network Cards
Installing a Brady Network Card
Install Additional PC’s using Brady Network Card Utility
Use this installation process if your printer has been configured previously but you
now want to use another PC to send print jobs to the printer.
Note: Your additional PC must be on the same network as the printer. If not, it will
not be detected during installation.
Once the Brady Network Card has been configured for Ethernet, you can install
those network drivers on additional PC’s.
1. Insert the Brady Universal Printer Driver CD into your computer CD drive. The
installation wizard launches automatically.
2. Click the printer model you are installing, then click Next.
3. Click Install network driver for additional PC’s, then click Next.
2-24
BBP®33 Sign & Label Printer User’s Manual
Brady Network Cards
Installing a Brady Network Card
4. Verify that the printer is powered on and the Brady Network Card is
functioning properly (green light is on), then click Next. The Bonjour wizard
lauches automatically.
Note: The Bonjour program is designed to establish and monitor network
printers. The Bonjour Printer Wizard establishes your Brady printer as a
network printer.
5. Click Next.
BBP®33 Sign & Label Printer User’s Manual
2-25
Brady Network Cards
Installing a Brady Network Card
6. Read the Apple End User License Agreement, then click I accept the terms
in the license agreement.
7. Click Next to continue.
8. Click the assigned network printer name.
Note: For easier identification, the name or description you assigned
previously displays in the lower left corner of the screen.
9. Click Next.
2-26
BBP®33 Sign & Label Printer User’s Manual
Brady Network Cards
Installing a Brady Network Card
10. In the Manufacturer field, click Brady (the manufacturers are listed in
alphabetical order).
11. In the Model field, click the printer to install, then click Next.
12. If Brady cannot be found in the Manufacturer field, click Have Disk.
BBP®33 Sign & Label Printer User’s Manual
2-27
Brady Network Cards
Installing a Brady Network Card
13. Browse the supplied CD and locate the .INF file for your printer model. The
example screen shows the .inf file for installing a BBP33 printer.
Example
14. When the Bonjour Printer wizard completes, click Finish.
15. When the Brady Printer Installation is completed, click Finish to exit the
wizard.
2-28
BBP®33 Sign & Label Printer User’s Manual
Brady Network Cards
Installing a Brady Network Card
Install USB Driver (only)
Use this installation process if you intend to send print jobs to the printer from a
PC using USB cable only.
This procedure installs the printer driver for your Brady printer and installs the
Brady Network Card (BNC) configuration utility.
To install the printer driver and the BNC Configuration Utility:
1. Make sure your printer and your PC are not connected with a USB cable.
2. Insert the Brady Printer Drivers CD into your computer CD drive. The
installation wizard launches automatically.
3. Turn the printer on.
4. Click the printer model you are installing, then click Next.
BBP®33 Sign & Label Printer User’s Manual
2-29
Brady Network Cards
Installing a Brady Network Card
5. If your printer and PC are still connected with a USB cable, disconnect it now,
then click Next.
6. Click the radio button to Install USB Driver Only, then click Next.
2-30
BBP®33 Sign & Label Printer User’s Manual
Brady Network Cards
Installing a Brady Network Card
7. Connect the printer to your PC with a USB cable.
8. If the Found New Hardware Wizard displays, continue with the next step,
otherwise skip to Step 10.
9. Click the radio button Yes, now and every time I connect a device, then
click Next.
BBP®33 Sign & Label Printer User’s Manual
2-31
Brady Network Cards
Installing a Brady Network Card
10. Click the radio button Install software automatically (Recommended), then
click Next.
11. When the install is complete, click Finish to close the wizard, then click Next.
2-32
BBP®33 Sign & Label Printer User’s Manual
Brady Network Cards
Installing a Brady Network Card
12. When the Brady Network Card Configuration Utility and USB Driver are
successfully installed, click Finish.
BBP®33 Sign & Label Printer User’s Manual
2-33
Brady Network Cards
Troubleshooting Brady Network Card
Troubleshooting Brady Network Card
Ethernet Connection Failed
If Ethernet connection fails, an error message displays. The Ethernet connection
can fail if the PC and printer are not on the same network.
1. Click Back.
2. Verify that your printer and PC are connected to the same network (see the
connection diagram in Figure 3 on page 20).
3. Click Next to continue with installation.
Note: If the same network has been selected and the connection still fails, your
PC and printer may be on different subnets, or a firewall is blocking the
connection. In this case, contact your network administrator.
2-34
BBP®33 Sign & Label Printer User’s Manual
Brady Network Cards
Troubleshooting Brady Network Card
USB Connection Failed
The USB connection could fail for two reasons:
•
The printer is powered OFF.
•
The USB cable is not connected.
If the connection fails:
1. Click Back.
2. Power ON the printer and connect the USB cable.
3. Click Next to try again.
BBP®33 Sign & Label Printer User’s Manual
2-35
Brady Network Cards
Using Brady Network Card Configuration Utility
Using Brady Network Card Configuration Utility
When the network drivers are installed, a configuration utility is also installed and
is automatically placed in Programs under the Start button of your Windows
program. Use the configuration utility to adjust or change the configuration you
initially installed.
To access the utility:
1. Choose Start>Programs>Brady>Brady Network Card>Brady Network
Card Configuration Utility. One dialog box iswith multiple tabs is displayed.
General Settings
On the General Settings tab, the model number of the Brady Network Card is
identified and the previously defined connections listed.
To change the status of each supported configuration:
1. Click the Enabled/Disabled button to change the current state of the
connection.
2. Click OK to accept changes and exit the dialog box.
2-36
BBP®33 Sign & Label Printer User’s Manual
Brady Network Cards
Using Brady Network Card Configuration Utility
Network Settings
The Network Settings tab displays the unique name you gave to the printer and
the Address Type used by it. DHCP is the recommended setting.
Note: If Static is selected, you must enter the IP Address, Subnet Mask, and
Default Gateway.
BBP®33 Sign & Label Printer User’s Manual
2-37
Brady Network Cards
Using Brady Network Card Configuration Utility
Firmware Upgrade/Factory Reset
You can upgrade your Brady Network Card through the Firmware Upgrade/
Factory Reset tab of the Configuration Utility.
Upgrade Firmware
To upgrade firmware:
1. Access the Brady website at www.bradyid.com.
2. Click Customer & Tech Support
3. Under Product & Software Downloads, click the the Brady Network Card
firmware upgrade.
4. In the list presented, select the upgrade you want to download, then click
BEGIN DOWNLOAD.
2-38
BBP®33 Sign & Label Printer User’s Manual
Brady Network Cards
Using Brady Network Card Configuration Utility
5. On the File Download screen, click Save.
6. Using standard Windows procedures, determine the directory where you want
to save the download data.
BBP®33 Sign & Label Printer User’s Manual
2-39
Brady Network Cards
Using Brady Network Card Configuration Utility
7. On the Firmware Upgrade tab of the Configuration Utility screen, click
Browse.
8. Find the directory in which you saved the download ZIP file, then click Open.
9. On the Firmware Upgrade/Factory Reset tab, click Upgrade. The upgrade
program information is automatically installed on your system.
10. Click OK to accept changes and exit the dialog box.
2-40
BBP®33 Sign & Label Printer User’s Manual
Brady Network Cards
Using Brady Network Card Configuration Utility
Factory Reset
To return all settings to the original Factory settings (defaults):
1. On the Firmware Upgrade/Factory Reset tab of the Configuration Utility, click
Reset to Factory Defaults. A warning message displays indicating all
previous defined settings will be removed.
2. Click OK on the warning message.
3. Click OK on the dialog box to accept the changes and exit the dialog box. The
previous settings are removed.
4. You can now reconfigure the network and card configurations.
BBP®33 Sign & Label Printer User’s Manual
2-41
3
User Interface Menu
The User Interface (UI) menu provides feedback and also allows you to access and
change printer settings, printer status and tools. A 5-way navigation keypad lets you
navigate through the menu structure to choose the option(s) you want.
In Ready mode, the UI menu indicates printer status and displays estimated remaining
material and ribbon. In Menu Selection mode, the display changes to a navigation-type
menu. Navigation is divided into 6 major functions:
•
Cut Media
•
Status Info
•
Output Settings
•
Printer Settings
•
Tools
•
USB Flash Drive
Cut Media
Selecting Cut Media from the menu sends a signal to the printer telling it to cut the media.
To set the cut option:
1. Press
to go to the navigation menu. Cut Media is the first option.
2. When you are ready to cut, press
media.
. The printer cuts at the current position of the
Note: The menu stays on Cut Media until you exit the menu.
3. When done, press W to exit to the main menu.
BBP®33 Sign & Label Printer User’s Manual
3-1
Status Info
Status Info
Status Info includes information about the printer configuration and fonts. From
this menu, you can also print a configuration label, font list or graphics list.
To view system information:
Note: Press W to exit a menu at any time.
1. Press
to go to the navigation menu.
2. Press S or T to scroll to Status Info, then press
.
3. Press S or T and choose from one of the following options, then press
:
Note: For print options, use continuous media to get the best results.
•
Info: Displays the current application and firmware version.
•
Print Configuration: Prints current printer configuration.
•
Show Font List: Displays list of available fonts. The list is not
displayed in individual font styles.
•
Print Font List: Prints list of available fonts in their own font style.
•
Show Graphics List: Displays list of imported graphics.
•
Print Graphics List: Prints list of imported graphics. Does not print a
picture of the actual graphic.
4. When done, press W twice to exit to the main menu.
3-2
BBP®33 Sign & Label Printer User’s Manual
Output Settings
Print Energy
Output Settings
Output Settings let you set the print energy and print speed. You can also set
when you want to cut the label, set mirror printing on or off and change the
horizontal and vertical offset.
Note: If password protection has been implemented, you will need to enter the
password to have access to these functions.
Print Energy
Optional print energy settings are set automatically by the smart cell for the
installed media and should only be changed if you are experiencing problems. For
example, if your printing is spotty, you may want to increase the print energy to
make sure more of the ribbon ink transfers to the label. However, if your ribbon is
sticking or tearing during printing, the heat energy may be too high and should be
reduced.
CAUTION!
Constantly printing at high energy levels may cause printer jams or other printing
errors and may reduce the overall life of your printhead.
To adjust the print energy:
1. Press
to go to the navigation menu.
2. Press S or T to scroll to Output Settings.
3. Press
to go to the submenu.
4. Press T to scroll to Print Energy, then press
.
5. Press S or T to increase or decrease the print energy setting.
6. When done, press W twice to exit to the main menu.
Note: The selected print energy setting will stay in effect for all subsequent print
jobs with the currently installed media. When new media is installed, the print
energy level is reset to the default setting. The print energy level is also reset by
rebooting the system.
BBP®33 Sign & Label Printer User’s Manual
3-3
Output Settings
Cut Settings
Print Speed
Print speed lets you adjust the speed setting from 1 to 4 inches per second (ips).
Optimal print speed settings are set automatically by the smart cell for the installed
media and should only be changed if you are experiencing problems. For
example, you can change print speed if you want to print graphics or other densely
populated labels more slowly to ensure complete coverage.
To set the print speed:
1. Press
to go to the navigation menu.
2. Press S or T to scroll to Output Settings, then press
3. Press T to go to Print Speed, then press
.
.
4. Press S or T to select the print speed you want (choose between
1- and 4-ips).
5. Press
to accept the change and return to the submenu.
6. When done, press W twice to exit to the main menu.
Cut Settings
These settings define when the printer expects to cut labels in a print job.
Depending on the selected cut settings, the printer advances the label to cut
between labels, at the end of the job, or never.
To set the cut option:
1. Press
to go to the navigation menu.
2. Press S or T to scroll to Output Settings, then press
3. Press T to scroll to Cut, then press
.
.
4. Press S or T to select the cut option you want:
•
Label = between labels
•
Job = end of job
•
Never = do not cut
Note: The media advances to the selected position and is automatically cut
and ejected.
5. Press
to accept the change and return to the submenu
6. When done, press W twice to exit to the main menu.
3-4
BBP®33 Sign & Label Printer User’s Manual
Output Settings
Offset
Mirror Print Settings
Use this procedure to print labels suitable for reading in a mirror or through the
back of the label.
To set the mirror-image option:
Note: Mirror print settings are in effect only during the current print job. When
the print job is complete, the printer returns to the default setting.
1. Press
to go to the navigation menu.
2. Press S or T to scroll to Output Settings, then press
3. Press T to scroll to Mirror Print, then press
.
.
4. Press S or T to select On or Off.
5. Press
to accept the change.
6. When done, press W twice to exit to the main menu.
Offset
Offset is a value that will move the image from its "nominal" position on the label
slightly in one direction or another. Adjusting the offset is typically used to do a
fine adjustment of the printed image on a die-cut label, or to move the image
slightly closer or further from the edge of a continuous supply.
To set the offset:
1. Press
to go to the navigation menu.
2. Press S or T to scroll to Output Settings, then press
3. Press T to scroll to Offset, then press
.
.
4. Press S or T to select Horizontal or Vertical, then press
.
5. Press S or T to adjust the offset:
•
Horizontal: shifts the image (printed portion of the label) to the right or left
(values ± 0.01 – 0.10).
•
Vertical: shifts the image (printed portion of the label) up or down
(values ± 0.01 – 0.10).
6. Press
to accept the change.
7. When done, press W twice to exit to the main menu.
BBP®33 Sign & Label Printer User’s Manual
3-5
Printer Settings
Units
Printer Settings
The Printer Settings menu lets you set the default values for the printer. Defaults
are common settings that are pre-assigned to make the system usable as soon as
power is applied (e.g., set date and time to your local date and time). By changing
the defaults, you can set the printer to your specific requirements.
Any defaults set here will stay in effect even when power is removed from the
printer, and also during upgrades.
Note: If password protection has been implemented, you will need to enter a
password to have access to these functions.
Language
To change language setting:
1. Press
to go to the navigation menu.
2. Press S or T to scroll to Printer Settings, then press
3. Press T to scroll to Language, then press
.
.
4. Press S or T to scroll to the language you want.
5. Press
to accept the change. It takes a few moments for the settings to
take effect.
6. When done, press W twice to exit to the main menu.
Units
To change unit setting:
1. Press
to go to the navigation menu.
2. Press S or T to scroll to Printer Settings, then press
3. Press T to scroll to Units, then press
.
.
4. Press S or T to select Inches or Millimeters.
5. Press
to accept the change.
6. When done, press W twice to exit to the main menu.
3-6
BBP®33 Sign & Label Printer User’s Manual
Printer Settings
Standby Interval
Contrast
To set the contrast:
1. Press
to go to the navigation menu.
2. Press S or T to scroll to Printer Settings, then press
3. Press T to scroll to Contrast, then press
.
.
4. Press S or T to increase or decrease the contrast setting. Contrast values
are between 1 and 20.
5. Press
to accept the change.
6. When done, press W twice to exit to the main menu.
Standby Interval
The standby interval time determines when the navigation menu will go into
standby mode after a period of inactivity. The standby interval turns off the
backlight on the display.
To set the standby interval:
1. Press
to go to the navigation menu.
2. Press S or T to scroll to Printer Settings, then press
3. Press T to scroll to Standby Interval, then press
.
.
4. Press S or T to choose between 1 to 4 minutes.
5. Press
to accept the change.
6. When done, press W twice to exit to the main menu.
BBP®33 Sign & Label Printer User’s Manual
3-7
Printer Settings
Connection
Date & Time
The Date & Time menu lets you change the date and time format
(i.e., 12-hour or 24-hour clock). Use the same steps to change any of the submenu
options.
To change date & time options:
1. Press
to go to the navigation menu.
2. Press S or T to scroll to Printer Settings, then press
3. Press T to scroll to Date & Time, then press
.
.
4. Press S or T to choose the option you want to change (i.e., Date, Time or
Format), then press
.
5. Use the S or T arrows to select and change the selection, then press
.
6. Continue to select options you want to change, using the arrow keys and
pressing
to accept the changes.
7. When done, press W repeatedly to exit to the main menu.
Connection
The printer has three ready modes:
•
Initializing: The printer is ready, but the connection to the Brady Network Card
(BNC) module has not yet been established.
•
Ready: The printer is fully functional, the BNC module has responded and the
printer is ready to print.
•
Ready - USB Only: The printer cannot make a connection to the BNC
module. All other functions are ready and the printer can be used. If the BNC
module does not respond before the time-out, the following message will
display: Brady Network Card is not responding. USB printing is still
available. See User's Manual for details.
Note: To view the status of the BNC card and possible corrective actions, see
“Troubleshooting Brady Network Card” on page 2-34.
3-8
BBP®33 Sign & Label Printer User’s Manual
Printer Settings
Restore Defaults
Restore Defaults
Restore Defaults resets the printer to its factory settings. Once selected, it may
take a few moments to restore the defaults.
1. Press
to go to the navigation menu.
2. Press S or T to scroll to Printer Settings, then press
.
3. Press T to scroll to Restore Defaults.
4. Press
to accept.
5. When done, press W twice to exit to the main menu.
BBP®33 Sign & Label Printer User’s Manual
3-9
Tools
Import
Tools
Import
Import lets you add your own graphics or fonts for use on the printer.
Graphics
Use this procedure to add your own graphics for use in labels that you create on
the printer.
Imported graphics must be in one of the following supported format(s) and
imported from a USB flash drive.
• Bitmap (.bmp)
• Graphics Interchange Format (.gif)
• Joint Photographic Experts Group (.jpg)
• Portable Network Graphics (.png)
Note: This is a monochrome printer. Imported graphics should be black and white.
Bitmap files (e.g., *.bmp, .jpg, etc.) are composed of pixels which may appear fuzzy
and become distorted when they are resized.
To import a graphic:
1. Copy the desired graphic(s) to the root directory of your USB flash drive (not in
a folder).
2. Connect the USB flash drive to any available USB port on the printer.
3. Press
to go to the navigation menu.
4. Press S or T to scroll to Tools, then press
5. Press T to scroll to Import, then press
.
.
6. Press T to scroll to Import Graphics, then press
.
7. Press T to scroll to the desired USB flash drive, then press
.
8. Press S or T to scroll through the list of graphics on your USB flash drive,
then press
to accept. The graphic will be imported to your printer.
Note: Only one graphic can be imported at a time.
9. When done, press W repeatedly to exit to the main menu.
3-10
BBP®33 Sign & Label Printer User’s Manual
Tools
Import
Fonts
Use this procedure to add your own fonts for use in your labels. Only True-Type
fonts can be imported.
The following True-Type fonts are resident on the printer:
• Arial (Normal, Bold, Italic)
• Courier New (Normal, Bold, Italic)
• Tahoma (Normal, Bold)
• Times New Roman (Normal, Bold, Italic)
• Trebuchet MS (Normal, Bold, Italic)
•
Verdana (Normal, Bold, Italic)
To import a font:
1. Copy the font(s) you want into the root directory of your USB flash drive.
2. Connect the USB flash drive to any available USB port on the printer.
3. Press
to go to the navigation menu.
4. Press S or T to scroll to Tools, then press
5. Press T to scroll to Import, then press
.
.
6. Press T to scroll to Import Fonts, then press
..
7. Press T to scroll to the desired USB flash drive, then press
.
8. Press S or T to scroll through the list of fonts on your USB flash drive, then
press
to accept. The font will be imported to your printer.
9. When done, press W repeatedly to exit to the main menu.
Note: If there is not enough space available to store the imported font(s), you
will have to clear some space on the system before importing any new fonts.
You can clear space by deleting saved graphics or fonts.
BBP®33 Sign & Label Printer User’s Manual
3-11
Tools
Delete
Delete
Use these procedures to delete any of your own graphics or fonts that you
previously imported.
Note: You cannot delete any of the fonts that come with the printer.
Delete Graphics
To delete a graphic:
1. Press
to go to the navigation menu.
2. Press S or T to scroll to Tools, then press
3. Press T to scroll to Delete, then press
.
.
4. Press S or T to select Delete Graphics, then press
.
5. Press S or T to scroll through the list of imported graphics.
6. When the graphic you want to delete is highlighted, press
.
7. Repeat steps 5 and 7 to delete any additional graphics.
8. When done, press W repeatedly to exit to the main menu.
Delete Fonts
To delete a font:
1. Press
to go to the navigation menu.
2. Press S or T to scroll to Tools, then press
3. Press T to scroll to Delete, the press
.
.
4. Press S or T to select Delete Fonts, then press
.
5. Press S or T to scroll through the list of imported fonts.
6. When the font you want to delete is highlighted, press
.
7. Repeat steps 5 and 6 to delete any additional fonts.
8. When done, press W repeatedly to exit to the main menu.
3-12
BBP®33 Sign & Label Printer User’s Manual
Tools
Password Protection
Password Protection
Use this procedure to enable password protection or to change a password.
Passwords can be enabled for the Output Settings or Printer Settings menus.
Enable Protection
To enable password protection:
1. Press
to go to the navigation menu.
2. Press S or T to scroll to Tools, then press
3. Press T to scroll to Password, then press
.
.
4. At the prompt, enter the password by using a combination of arrow keys and
buttons, then press
.
Note: The default password is DULR (down, up, left right).
5. Press
to accept Enable Protection.
6. Press S or T to select either Off or On, then press
.
7. When done, press W repeatedly to exit to the main menu.
BBP®33 Sign & Label Printer User’s Manual
3-13
Tools
Password Protection
Change Password
When changing the password, be sure to write down the new key combination so
that you don’t forget it.
To change the password:
1. Press
to go to the navigation menu.
2. Press S or T to scroll to Tools, then press
3. Press T to scroll to Password, then press
.
.
4. At the prompt, enter the password by using a combination of arrow keys and
buttons, then press
.
5. Press T to select Change Password, then press
6. At the prompt, enter a new password, then press
7. At the prompt, confirm the new password, then press
.
.
.
Note: Once the new password is confirmed, it becomes the password for
accessing the Output Settings and Printer Settings menus if protection is "on."
It is also the password required to access the Password Protect option.
8. Press W repeatedly to exit to the main menu.
3-14
BBP®33 Sign & Label Printer User’s Manual
Tools
Upgrade from PC
Upgrade from PC
Use this procedure to upgrade your printer to a new software or firmware version
from a PC connected to the printer.
CAUTION!
Do not interrupt power on either the printer or PC during the upgrade process.
To upgrade:
1. Before installing, verify the following:
•
Upgrade Utility is available on your PC or via the Brady website (see
Technical Support and Registration in this manual for more information).
•
USB cable is connected from your BBP®33 to your PC.
•
Printer is ON.
Note: If the printer driver has not been installed on your PC, you will be
prompted to install the printer driver before continuing.
2. On the PC, launch the upgrade utility.
3. In the Welcome dialog, select Next.
4. In the Select your printer dialog, select your BBP®33.
5. In the Version Confirmation dialog, click Start Upgrade.
Note: The printer restarts automatically after the upgrade is complete.
6. In the Upgrade Complete dialog, click Finish.
BBP®33 Sign & Label Printer User’s Manual
3-15
Tools
Upgrade from USB Flash Drive
Upgrade from USB Flash Drive
Use this procedure to upgrade the firmware or software from a USB flash drive
that contains the upgrade. The system will support only one USB device at a time.
To upgrade software from a USB flash drive:
CAUTION!
Do not interrupt power during an upgrade from a USB flash drive.
1. Copy the upgrade files to the root directory of your USB flash drive.
2. Connect the USB flash drive to any available USB port on the printer.
3. Press
to go to the navigation menu.
4. Press S or T to scroll to Tools, then press
.
5. Press T to scroll to Upgrade from USB, then press
. The printer
automatically downloads and installs the firmware/software from the root
directory of the USB flash drive.
Note: During the upgrade, the screen goes blank. It may take a few moments
for the upgrade to complete. When done, the printer returns to the Ready
menu.
3-16
BBP®33 Sign & Label Printer User’s Manual
Tools
Diagnostics
Diagnostics
Some diagnostics are not available for users. Advanced diagnostics are password
protected and to be used only with Brady Technical Support. The password is
assigned by Brady.
Enter Diagnostic Mode
Use this procedure to access any of the diagnostics menus.
To enter diagnostics mode:
Note: A password is required to access the Advanced Diagnostics menus.
1. Press
to go to the navigation menu.
2. Press S or T to scroll to Tools, the press
3. Press T to scroll to Diagnostics, then press
4. When done, press
to go to the submenu.
to go to the diagnostics list.
to exit the test.
Sensors
Print Engine Base (PEB) Settings
This procedure displays the PEB settings on the printer.
To view the PEB settings:
1. Access Diagnostic mode (see “Enter Diagnostic Mode” on page 3-17).
2. Press
to select Sensors.
3. Press
to select PEB Settings. The PEB settings display results for the
following:
CutLine - Lead.
Leading - Print
Print - Diecut
Diecut - Tapeout
Rocker Steps
Print - Center
xxxx
xxxx
xxxx
xxxx
xxxx
xxxx
4. Press W repeatedly to exit to the main menu or
Settings menu.
BBP®33 Sign & Label Printer User’s Manual
to return to the PEB
3-17
Tools
Diagnostics
Sensor Conditions
This diagnostic detects the sensor conditions for ribbon motion, door, cutter,
leading (edge), diecut, tapeout, wiper, and center.
Conditions are:
•
BL (blocked)
•
Clos (closed) or Open
•
Hom (home position)
•
Eng (engaged)
•
UnB (unblocked)
To view the PEB settings:
1. Access Diagnostic mode (see “Enter Diagnostic Mode” on page 3-17).
2. Press T to scroll to Sensor Conditions, then press
display results for the following:
RibbonMotion
Door
Cutter
Leading
Diecut
TapeOut
Wiper
Center
BL
Clos/Open
Hom
BL
BL
BL
Eng
BL
3. Press W repeatedly to exit to the main menu or
Conditions menu.
3-18
. The sensor settings
to return to the Sensor
BBP®33 Sign & Label Printer User’s Manual
Tools
Diagnostics
Analog Readings
This diagnostic detects the analog readings for the diecut analog/digital converter,
head voltage and thermistor temperature.
To view the analog readings:
1. Access Diagnostic mode (see “Enter Diagnostic Mode” on page 3-17).
2. Press T to scroll to Analog Readings, then press
for the following:
Diecut A/D
Head Voltage
Thermistor
xxxx
xxxx
xxxx
3. Press W repeatedly to exit to the main menu or
Readings menu.
BBP®33 Sign & Label Printer User’s Manual
. The readings display
to return to the Analog
3-19
Tools
Diagnostics
Copy Error Logs
Printer Error Log
1. Insert a USB drive into any available port on the printer.
2. Access Diagnostic mode (see “Enter Diagnostic Mode” on page 3-17).
3. Press T to go to Copy Error Logs, then press
.
4. Press
to select Printer Error Log, then press
. The error log is
written to the USB drive and the message Successfully Copied Error Log
displays.
Note: A message will display if no USB device is detected.
5. Press W repeatedly to exit to the main menu.
6. To view the error log:
a. Remove the USB drive from the printer and insert into your PC.
b. In Windows Explorer, navigate to the USB drive and open the folder
BBP33 Error Logs.
c.
Double-click the file PRINTER_ERROR_LOG.txt to view the log.
Script Error Log
1. Access Diagnostic mode (see “Enter Diagnostic Mode” on page 3-17).
2. Press T to go to Copy Error Logs, then press
.
3. Press T to go to Script Error Log.
4. Press
. The error log is written to the USB drive and the message
Successfully Copied BPL Error Log and Successfully Copied SM Error Log
displays.
Note: A message will display if no USB device is detected.
5. Press W repeatedly to exit to the main menu.
6. To view the error log:
a. Remove the USB drive from the printer and insert into your PC.
b. In Windows Explorer, navigate to the USB drive and open the folder
BBP33 Error Logs.
c.
3-20
Double-click either of the following files to view the logs:
•
BPL_ERROR_LOG.txt
•
SCRIPT_ERROR_LOG.txt
BBP®33 Sign & Label Printer User’s Manual
Tools
Diagnostics
USB Test
The USB test verifies that the USB ports are active. The tests can be performed
with a flash drive or a type-B cable.
USB Flash Drive Test
To perform a USB test:
1. Access Diagnostic mode (see “Enter Diagnostic Mode” on page 3-17).
2. Press S or T to go to USB Test, then press
3. Press
to select the test.
to start the test.
4. Insert a USB flash drive into the Lower USB port. The display indicates
DSK2: attached.
5. Remove the USB flash drive. The display indicates DSK2: removed.
6. Repeat steps 4 and 5 for the Upper USB port.
7. When done, press
to exit the test.
USB Type-B Cable Test
To perform a USB test with a type-B cable:
1. Access Diagnostic mode (see “Enter Diagnostic Mode” on page 3-17).
2. Press S or T to go to USB Test, then press
Test Status screen displays.
to select the test. The USB
3. Insert a USB type-B cable from the Lower Host port to the Function port.
The display indicates LPT1: attached.
4. Remove the USB type-B cable. The display indicates LPT1: removed.
5. Repeat Steps 3 and 4 for the Upper Host port.
6. When done, press
BBP®33 Sign & Label Printer User’s Manual
to exit the test.
3-21
Tools
Advanced Diagnostics
Keyboard Setup
This procedure configures the printer to use the selected regional USB keyboard.
To configure a keyboard:
1. Access Diagnostic mode (see “Enter Diagnostic Mode” on page 3-17).
2. Press S or T to go to Keyboard Setup, then press
options displays.
. The list of keyboard
3. Press S or T to select the regional configuration you want, then press
The printer is configured for use with the selected keyboard.
.
4. Press W repeatedly to exit to the main menu.
Info
Lists the length of label media printed, number of cuts made and the last errors
displayed.
To view printer information:
1. Access Diagnostic mode (see “Enter Diagnostic Mode” on page 3-17).
2. Press S or T to go to Info, then press
.
3. Press S or T to select the information you want displayed:
•
Printed: Displays the number of ft (mm) of media printed to date.
•
Cuts: Displays the total number of cuts made to date. (Note: The number
actually reflects the number of times the printer has retracted the material
for a new print.)
•
Last Errors: Displays the last 15 printer error message numbers.
Press
to display the error messages.
Note: The errors displayed are for actual messages received. So, if you get the
same error multiple times, the screen will display that error once for each
occurrence (up to 15).
4. Press W repeatedly to exit to the main menu.
Advanced Diagnostics
A password is required to enter the advanced diagnostic procedures. Contact your
Brady Technical Support contact for help with these diagnostics.
3-22
BBP®33 Sign & Label Printer User’s Manual
USB Flash Drive
Advanced Diagnostics
USB Flash Drive
Use this procedure to download and print label scripts from a USB device. Label
scripts can be created in any of the following programming languages:
•
BPL (xml)
•
ZPL
•
jScript
•
DPL
To download a label script:
1. Insert the USB flash drive into any available USB slot on the printer.
2. Press
to go to the navigation menu.
3. Press T to scroll to USB Flash Drive, then press
4. Press
.
to select the USB drive shown.
5. Press S or T to scroll through the list of available scripts.
6. Press
to accept. The script will be loaded and printed. The menu returns
to the list of available scripts when the label is printed.
7. When done printing, press W repeatedly to exit to the main menu.
BBP®33 Sign & Label Printer User’s Manual
3-23
4
Maintenance
Printer Maintenance
Removing Power and Media from Printer
Before performing any maintenance procedure that involves opening the enclosure cover,
you should remove the power and media from the printer.
To remove printer power and media:
1. Remove the power plug [1] from the printer.
1
2. Open the enclosure cover.
BBP®33 Sign & Label Printer User’s Manual
4-1
Printer Maintenance
Removing Power and Media from Printer
3. Release the latch on the ribbon cover [3] and swing open.
4. Release the ribbon cartridge latch [4] and lift the ribbon cartridge up and out.
3
4
5. Move yellow media wiper [5] to the back.
6. Move yellow media guides [6] to full-open.
7. Remove media cartridge from the slots of media holder [7].
5
7
6
4-2
BBP®33 Sign & Label Printer User’s Manual
Printer Maintenance
Cleaning the Printer
Cleaning the Printer
Remove Dust
Dust generated by media cuts can accumulate in the unit. If a significant amount
of dust is built up, clean the unit using this procedure.
Materials Required
•
Isopropyl Alcohol
•
Compressed Air Bottle, purchased locally (e.g., HOSA AIR-464 Gear Duster)
To clean dust from the printer:
CAUTION!
Always wear safety glasses when using compressed air.
1. Remove power and media from the printer (see “Removing Power and Media
from Printer” on page 4-1).
2. Using compressed air, spray all visible areas inside the printer to remove
accumulated dust.
3. Using a cloth moistened with isopropyl alcohol, wipe any remaining dust from
inside the printer.
4. Wipe exterior cover and frame of printer for dirt and residue.
BBP®33 Sign & Label Printer User’s Manual
4-3
Printer Maintenance
Cleaning the Printer
Clean Printer and Keypad Residue
Whenever performing any maintenance on the printer, you should also clean any
residue caused by the media.
Materials Required
•
Compressed Air Bottle, purchased locally (e.g., HOSA AIR-464 Gear Duster)
•
Lint-free Cloth
•
Isopropyl Alcohol
•
Safety Glasses
To clean residue from the printer:
CAUTION!
Always wear safety glasses when using compressed air.
1. Remove power and media from the printer (see “Removing Power and Media
from Printer” on page 4-1).
2. With safety glasses on, spray compressed air on any parts of the printer that
have built-up residue.
Note: If compressed air is not available, use a lint-free cloth lightly moistened
with isopropyl alcohol and wipe off residue.
3. If necessary, use a moistened, lint-free cloth to clean the keypad.
4. Replace the ribbon and tape.
5. Close all covers and plug in the power cord.
Clean LCD Screen
Materials Required
•
Lint-free Cloth, non-abrasive
•
Isopropyl Alcohol
- or -
•
Pre-moistened Cloth (appropriate for cleaning PC screens)
To clean the LCD screen:
Note: Normal cleaners with ammonia, soaps, or any acids can damage the screen.
Use only a lint-free cloth dampened with isopropyl alchohol.
1. Lightly moisten a lint-free cloth with isopropyl alcohol, or use a pre-moistened
cloth suitable for cleaning a PC screen.
2. Gently rub the damp cloth across the screen until all of the residue is
removed.
4-4
BBP®33 Sign & Label Printer User’s Manual
Printer Maintenance
Cleaning the Printer
Clean Auto-Cutter Blade
Note: When cleaning the cutter, you should also clean the media and cutter
sensors (see “Clean Sensors” on page 4-7).
Materials Required
•
Isopropyl Alcohol
•
Cleaning Kit (Cat # B31-CCT), includes foam swabs, adhesive scraping tool,
plastic bottle (not available in all regions)
To clean the cutter:
1. Remove power and media from the printer.
2. Squeeze the two yellow cutter tabs [2a] to release the cutter. The cutter
mechanism and exit chute [2b] will slide down behind the ribbon cover.
2a
2b
3. Fill the plastic bottle from the cleaning kit with isopropyl alcohol.
BBP®33 Sign & Label Printer User’s Manual
4-5
Printer Maintenance
Cleaning the Printer
4. Clean metal cutting blade [4]:
a. If the cutting blade shows significant residue, use the adhesive scraping
tool from the cleaning kit, or other flat-edged tool, to gently scrape the
reside off the cutting blade.
b. Moisten one of the foam swabs from the cleaning kit with the alcohol. Do
not allow the alcohol to drip from the swab.
c.
Clean cutting blade with moistened swab until all residue is removed.
4
5. Close the cutting blade by pushing up on the exit chute until the cutter tabs
snap into place.
Note: You may need to hold ribbon cover up slightly to access the exit chute.
6. Replace the ribbon and tape.
7. Close all covers and plug in the power cord.
4-6
BBP®33 Sign & Label Printer User’s Manual
Printer Maintenance
Cleaning the Printer
Clean Sensors
The sensors are located inside the printer and may be covered with dust that
results from cutting the media. The media sensor is located under the yellow
media guide.
Materials Required
•
Cleaning Kit (Cat # B31-CCT), includes foam swabs, adhesive scraping tool,
plastic bottle (not available in all regions)
•
Isopropyl Alcohol
To clean the sensors:
1. If necessary, remove power and media from the printer (see “Removing
Power and Media from Printer” on page 4-1).
2. With the ribbon cover open, use a pre-moistened swab and thoroughly clean
the surface of the sensors at the locations shown:
CAUTION!
Do not allow the alcohol to drip from the swab.
a. Center die-cut sensor [2a]
b. Tape out/die-cut sensors [2b]
(Note: Sensor is located under the yellow media guide.)
2a
2b
BBP®33 Sign & Label Printer User’s Manual
4-7
Printer Maintenance
Cleaning the Printer
Clean Tape Entrance
This procedure cleans the tape entrance, exit area and exit chute. The tape
entrance can become sticky because of adhesive buildup
Note: Clean the exit area after cleaning the sensors (see “Clean Sensors” on
page 4-7). The cleaning swab may be damaged when cleaning the exit area.
Materials Required
•
Cleaning Kit (Cat # B31-CCT), includes foam swabs, adhesive scraping tool, plastic
bottle (not available in all regions)
•
Kimwipes® or other non-abrasive cloth
•
Isopropyl Alcohol
•
Compressed Air Bottle, purchased locally (e.g., HOSA AIR-464 Gear Duster)
CAUTION!
Always wear safety glasses when using compressed air.
To clean the tape entrance:
1. Lightly moisten a lint-free cloth with isopropyl alcohol.
CAUTION!
Do not use isopropyl alcohol on the print head! Isopropyl alcohol may
permanently damage the print head.
2. At the top of the tape entrance, rub along entire length of the tape entrance to
remove the adhesive residue [2]. If necessary, use the adhesive scraping tool
or other flat-edged tool, covered with the Kimwipe, to push against the tape
entrance to clean all of the residue from the entrance.
3. Wet a cotton swab with isopropyl alcohol and thoroughly clean along the entire
media entrance area.
[2]
Platen
Roller
CAUTION!
When cleaning, don’t pinch or gouge the platen roller. Use only compressed air .
4. Use compressed air to clean off dust on the entire printer, including the platen
roller.
4-8
BBP®33 Sign & Label Printer User’s Manual
Printer Maintenance
Cleaning the Printer
Clean the Cutter Blade Exit Area
This procedure cleans the cutter blade exit area and the exit chute.
Note: You should clean the exit area after cleaning the cutter blade and sensors.
The cleaning swab may be damaged when cleaning the exit area.
Materials Required
•
Cleaning Kit (Cat # B31-CCT), includes foam swabs, adhesive scraping tool,
plastic bottle (not available in all regions)
•
Isopropyl Alcohol
To clean the exit chute:
1. If necessary, remove power and media from the printer (see “Removing
Power and Media from Printer” on page 4-1).
2. Close the ribbon cover. It does not need to snap into place.
3. Using a swab pre-moistened with alcohol, clean the exit chute entrance [3a]
and exit chute ramp [3b].
Note: To reach all areas of the exit chute, you can close the enclosure cover
and tilt the printer up.
3a
3b
4. Replace the ribbon and tape.
5. Close covers and plug in the power cord.
BBP®33 Sign & Label Printer User’s Manual
4-9
Printer Maintenance
Cleaning the Printer
Clean Printhead
Materials Required
•
Cleaning Kit (Cat # B31-CCT), includes foam swabs, adhesive scraping tool,
plastic bottle (not available in all regions)
•
Isopropyl Alcohol
CAUTION!
Use only the materials supplied in the cleaning kit. Using other materials may
permanently damage the printhead.
To clean the printhead:
1. Remove power and media from the printer (see “Removing Power and Media
from Printer” on page 4-1).
2. Fill the plastic bottle from the cleaning kit with isopropyl alcohol.
CAUTION!
Do not rub the swab over the bronze-colored area of the printhead. This may
permanently damage the printhead.
3. Moisten one of the foam swabs from the cleaning kit with the alcohol and
gently rub across the green and black area only of the printhead [3].
3
4. Replace the ribbon and tape.
5. Close all covers and plug in the power cord.
4-10
BBP®33 Sign & Label Printer User’s Manual
Printer Maintenance
Replacing the Media Wiper
Replacing the Media Wiper
Materials Required
•
Media Wiper (5 pack) Kit, Cat #B31-WIPER (sold separately)
To replace the media wiper:
1. Remove power and media from the printer (see “Removing Power and Media
from Printer” on page 4-1).
2. LIft and hold the wiper arm while grasping the tab of the wiper insert [2].
3. Pull the tab slightly forward and then slide the wiper insert out of the wiper
arm.
4. To replace the wiper, insert the lip of the wiper insert into the slot [4] of the
wiper arm and slide in until the tab snaps into place.
2
4
5. Replace the ribbon and tape.
6. Close all covers and plug in the power cord.
BBP®33 Sign & Label Printer User’s Manual
4-11
Printer Maintenance
Replacing/Adjust Media End Caps
Clearing Jams
To clear jams from the printer:
1. Remove all damaged ribbon and/or media from the printer.
2. Check that there is no damage to the print head, sensors, or any other parts.
3. Check whether any cleaning is needed. If cleaning is required, see “Cleaning
the Printer” on page 4-3 for details.
4. Reload ribbon and media and clear all error messages.
Replacing/Adjust Media End Caps
In the unlikely even that your tape roll comes apart, contact Tech Support for
assistance in replacing or adjusting the end caps. See “Technical Support and
Registration” on page vii for details.
4-12
BBP®33 Sign & Label Printer User’s Manual
5
Troubleshooting
Messages
The BBP®33 Sign & Label Printer contains error messages that describe what action you
should take to resolve any messages or errors.
Messages indicate the problem for the task being performed and also provide a possible
corrective action.
Printing Errors
Problem
Printer not ready.
Error: 15
Printer Error.
Error: 16
Printer Error
Error: 21
Printer Error
Error: 22
Poor print quality.
Cause
Corrective Action
The ribbon cover is open or the
cutter is not in operating position.
Close and latch ribbon cover or move
cutter to operational position.
Ribbon cover was opened during
printing.
Close ribbon cover.
Media wiper is not engaged.
Engage media wiper arm.
Media wiper is engaged but should
not be used on this media.
Disengage the media wiper arm.
Printhead needs cleaning.
Clean printhead with isopropyl alcohol
and swab.
Error: 1024
BBP®33 Sign & Label Printer User’s Manual
5-1
Messages
Hardware Errors
Hardware Errors
Problem
Printer too warm. Print job
canceled.
Error: 18
Printer too cold. Print job
canceled.
Error: 20
Media jam. Print job canceled.
Errors: 45, 80, 85, 87
Cut quality poor.
Error: 1025
Residue on labels.
Error: 1027
Poor media detection on the
printer, or print registration
problems.
Check Printer.
5-2
Cause
The printhead is too hot.
The printhead has not reached
operating temperature.
Corrective Action
The printhead has reached maximum
operating temperature. Allow printer to
cool down approximately 10 minutes,
then re-initiate the print job.
Normal operating range is between
50-104°F (10-40°C). Allow printer to
warm up to operating temperature before
printing.
Clear media path and reinstall media,
then re-initiate the print job.
Media is jammed in the printer
[45]; Media is in the media
guides, but not detected by the
cutter home sensor [80]; Media is If error persists, contact Technical
in the home position but not
Support.
detected by the media out notch
sensor [85]; Media is in the printer
but not detected by the leading
edge sensor [87].
Cutter needs cleaning because of • Unlatch cutter and push down away
from roller.
adhesive build up on the cutter.
• Remove residue from blades with flatedged tool, then clean with isopropyl
alcohol.
• Close cutter and printer.
• From exit chute, swab back of blades
with isopropyl alcohol.
•
Swing media wiper arm to upright
Media wiper needs to be
position.
replaced.
•
Slide wiper out of wiper arm toward
left side of the printer.
•
Slide replacement wiper into slot on
wiper arm.
Media end cap not centered on
Adjust the center position of the media
spindle.
roll.
BNC module is not responding.
USB printing is still available.
Check the status of the BNC module or
use the printer without a BNC connection.
BBP®33 Sign & Label Printer User’s Manual
Messages
Ribbon Errors
Media Errors
Problem
Cause
Error reading media memory
cell. Reload or replace media.
Printer cannot read the media
memory cell: media validation failed
[48]; cannot read media cell [49];
cannot read memory CRC [50]; cell
is wrong version [51]; media counter
shows no media remaining [52].
Media sensor shows end of media.
Print job canceled.
Replace media. If problem persists,
contact Technical support.
Media is not loaded correctly.
Reload media:
1. Insert media.
2. Feed media between guides to
middle of black roller.
3. Verify guides are positioned to media
edge.
Errors: 48, 49, 50, 51, 52
Media out.
Error: 53
Media is jammed.
Error: 54
Media not detected.
Corrective Action
Verify media guides are positioned
correctly at the edge of the media or
replace roll if empty.
Media is jammed somewhere in the Clear the media path and re-initiate the
printer. Print job canceled.
print job.
Error: 55
Ribbon Errors
Problem
Ribbon Out.
Error: 58
Ribbon too narrow.
Cause
The ribbon ran out or broke during
the print job.
The installed ribbon is narrower than Replace the ribbon cartridge with wider
the installed media.
ribbon.
Error: 62
Error reading ribbon memory
cell.
Errors: 64, 65, 66, 67, 68
Media mismatch.
Error: 69
Corrective Action
Replace ribbon and close inside printer
cover. Re-initiate the print job.
- or -
The printer cannot read the ribbon
memory cell: memory cell code
incorrect [64], cannot read cell [65],
data in cell is corrupted [66], cell is
wrong version [67], ribbon counter
shows no ribbon remaining [68].
The installed ribbon is not
recommended for use with the
current media.
Replace the media with a width that
matches the ribbon.
Replace the ribbon. If problem persists,
contact Technical Support.
Replace the ribbon with a type that is
compatible with the media.
- or -
Replace the media with a type that is
compatible with the ribbon.
BBP®33 Sign & Label Printer User’s Manual
5-3
A
Supported Scripting Languages
The following tables describe the ZPL, jScript and DPL commands that are supported by
the BBP®33 Sign & Label Printer.
Note: For Brady Print Language (BPL) commands, see the BPL Programmer’s Guide
that is included on your Product CD.
ZPL Supported Commands
Job Control
Job Control Descriptions
Command Character 1
Command Character 2
Comment Line
Power On Reset
Label Home
Label Length
Set Unit of Measurement
Mirror Image
Print Orientation (degrees) [Label Rotation]
Print Quantity
Print Rate
Print Start
Print Width
Serialization Data
Set Date and Time
Print Config Label
Start Job
End Job
BBP®33 Sign & Label Printer User’s Manual
ZPL®
^
~
^FX
~JR
^LH
^LL
^MU
^PM
^PO
^PQ
^PR
~PS
^PW
^SN
^ST
~WC
^XA
^XZ
A-1
ZPL Supported Commands
Objects
Objects
Drawing Objects
Drawing Objects Descriptions
Rectangle
Circle
Diagonal Line
Ellipse
ZPL® Command
^GB
^GC
^GD
^GE
Download graphic file to printer
^GF
Text Commands
Text Description
Set Text Font (A-Z, 0-9)
Set Default Font
Assign Character Identifier to Built-in Font
A-2
ZPL® Command
^A
^CF
^CW
BBP®33 Sign & Label Printer User’s Manual
ZPL Supported Commands
Objects
Barcodes
Barcode Descriptions
ANSI Codabar
Aztec 1
Aztec 2
Codablock
Code 11
Code 39
Code 49
Code 93
Code 128
Data Matrix
EAN/JAN-8
EAN/JAN-13
EAN/UPC Extension
Field Default
Industrial 2 of 5
Interleaved 2 of 5
Logmars
Micro-PDF417
MSI
PDF417
Planet Code
Plessey
UPC-A
UPC-E
UPS MaxiCode
QR Code
RSS
Standard 2 of 5
TLC39
POSTNET
BBP®33 Sign & Label Printer User’s Manual
ZPL® Command
^BK
^B0
^BO
^BB
^B1
^B3
^B4
^BA
^BC
^BX
^B8
^BE
^BS
^BY
^BI
^B2
^BL
^BF
^BM
^B7
^B5
^BP
^BU
^B9
^BD
^BQ
^BR
^BJ
^BT
^BZ
A-3
ZPL Supported Commands
Field Data
Field Data
ZPL® Command
Field Data Descriptions
Field Data
Origin (set upper left corner relative to label home)
Field Parameter (set vertical/reverse for font field)
Field Reverse Print (white over black or black over white)
Field Separator (end of field definition)
Field Typeset (sets field position, relative to home)
Set field orientation
A-4
^FD
^FO
^FP
^FR
^FS
^FT
^FW
BBP®33 Sign & Label Printer User’s Manual
jScript Supported Commands
Objects
jScript Supported Commands
Job Control
Job Control Descriptions
Start Job
End Job (see Number of Labels)
Set Label Size (width and length)
Measuring Unit (mm, inches, dots)
Printer Orientation (degrees) [Label Rotation]
Reverse Print
Mirror Image
Cut
Number of Labels / End Job
jScript
J
-S
m
O
R
M
C
A
Objects
Drawing Objects
Drawing Objects Descriptions
Draw Object
Rectangle
Line
Circle
Ellipse
jScript
G
R
L
C
C
Text
Text Description
Start text object
Select internal Font by number
BBP®33 Sign & Label Printer User’s Manual
jScript
T
F
A-5
jScript Supported Commands
Printer Status
Barcodes
Barcode Descriptions
Bar Code
Aztec
Codabar A / F
Codablock F
Code 128 A / B / C
Code 39
Code 93
Data Matrix
EAN-8
EAN-13
EAN-128
FIM
HIBC
Interleaved 2 of 5
JAN 8
JAN 13
Micro-PDF417
MSI Plessey
PDF417
POSTNET
QR Code
UPC-A
UPC-E
UPS MaxiCode
jScript
B
AZTEC
CODABAR
CODEABLOCKF
CODE128
CODE39
CODE93
DATAMATRIX
EAN8
EAN13
EAN128
FIM
HIBC
2OF5INTERLEAVED
JAN8
JAN13
MICRO
MSI
PDF417
POSTNET
QRCODE
UPCA
UPCE
UPS MAXICODE
Field Data
Setting Field Data Descriptions
Global Object Offset (move all objects x,y distance)
Comments (not sent to printer)
jScript
D
;
Printer Status
Printer Status Descriptions
Heat/Speed Settings
Retrieve and Print Image
A-6
jScript
H
I
BBP®33 Sign & Label Printer User’s Manual
DPL Supported Commands
Commands
DPL Supported Commands
Note: These commands conform Revision D, 2001 Datamax Programmer’s
Manual
Commands
Commands Descriptions
DPL
Set Cut Amount By
(Command must be issued and a cut will not occur until
job is done.)
Set Continuous paper Length
Input Image Data
(Only value "B" is supported for "f" parameter.)
:
Enter Label-Formating Command
Set Printer Metric
Set Printer Inches
Print Time and Date
Set Format Attribute
(Only 2, "Transparent Mode" parameter is supported.)
Set Column Offset Amount
(The maximum BMP33 offset is .1", if a value larger is
entered, it will be set to .1")
Set Cut by amount
(See ":" command)
Terminate Label formatting Mode and Print Label
Heat Setting
Select Mirror Mode
Set Metric Mode
Set Inches Mode
Set Print Speed
(Only values A,C,E,G, 1 - w ips respectively are
supported. If an unSupported value is entered, it will
default to 2 ips.)
Set Quantity of Labels to Print
Set Row Offset Amount
(See "C" command)
BBP®33 Sign & Label Printer User’s Manual
<STX>c
<STX>I
<STX>L
<STX>m
<STX>n
<STX>T
Label Format Mode
A
C
c
E
H
M
m
n
P
Q
R
A-7
DPL Supported Commands
Barcodes
Barcodes
Barcode Descriptions
Barcode Command Structure
Code 3 of 9
UPC-A
Interleaved 2 of 5
Code 128
EAN-13
EAN-8
HBIC
Codabar
Interleaved 2 of 5
with Modulo 10 Checksum
Plessey
Code 93
Postnet
UCC/EAN Code 128
UPS MaxiCode
PDF-417
DataMatrix
A-8
DPL
b [bb] c d eee ffff gggg jj...j
where:
a = Rotation (1, 2, 3, 4)
b [bb] = Barcode
c = Wide Bar, (always fixed value of 1)*
d = Narrow Bar (1-9)*
eee = Symbol Height (001 - 999)
ffff = Row (0000 - 9999)
gggg = Column
jj...j = Data (valid 255-character ASCII string plus termination)
* The combination of c and d = 2:1, 3:1, 4:1.
A
B
D
E
F
G
H
I
J
K
O
P
Q
U
z
W1C
BBP®33 Sign & Label Printer User’s Manual
DPL Supported Commands
Objects
Objects
Object Descriptions
Draw Box
(Parameters bbbb and ssss indicate line thickness of
box and must be the same.)
Draw Box
(Parameters bbbb and ssss indicate line thickness of
box and must be the same.)
Draw Line
BBP®33 Sign & Label Printer User’s Manual
DPL
1X1100000970013b0093004200020002
where:
1=
x=
1 = Fixed Value
1 = Fixed Value
eee = Fixed Value
ffff = Row
gggg = Column
b = Box
hhhh = Box Horizontal Width
vvvv = Box Vertical Height
bbbb = Box Bottom & Top Thickness
ssss = Box Side Thickness
1X1100000970013B093042002002
where:
1=
x=
1 = Fixed Value
1 = Fixed Value
eee = Fixed Value
ffff = Row
gggg = Column
B = Box
hhhh = Box Horizontal Width
vvvv = Box Vertical Height
bbbb = Box Bottom & Top Thickness
ssss = Box Side Thickness
1X1100000970013l00930042
where:
1=
x=
1 = Fixed Value
1 = Fixed Value
eee = Fixed Value
ffff = Row
gggg = Column
I = Line Drawing
hhhh = Horizontal Width of Line
vvvv = Vertical Height of Line
A-9
DPL Supported Commands
Objects
Object Descriptions
Draw Line
DPL
1X1100000970013L093042
where:
1=
x=
1 = Fixed Value
1 = Fixed Value
eee = Fixed Value
ffff = Row
gggg = Column
L = Line Drawing
hhhh = Horizontal Width of Line
vvvv = Vertical Height of Line
Text (font)
Only some True Type fonts are supported. All bitmap
and scalable fonts will default to Arial so there will be
output on the label (exception is CG Times Family font,
which will be mapped to Times New Roman). An entry
will be made into the error log.
The CG Times Family font is specified by the sA0-sAz
Parameter in the label definition command.
Circle
A circle is created by defining by its center point and
radius.
A-10
1 X 11 ppp rrrr cccc C ppp bbbb rrrr <CR>
where:
1 = Rotation (must be 1)
X = Graphic Field
1 = Multiplier (must be 1)
ppp = fill pattern (none, solid)
rrrr = Row of Center Point
cccc = Column of Center Point
C = Circle ID (fixed value)
ppp = Fixed Value
bbbb = Fixed Value
rrrr = Radius of Circle
<>CR> = Termination Character
BBP®33 Sign & Label Printer User’s Manual
DPL Supported Commands
Objects
Object Descriptions
Polygon
Polygons are created by defining the positions of
corners, specifying a number of data points that
represent the vertices of the object, which can range
from a simple line (two points), or a triangle (three
points), to any free-form outline.
BBP®33 Sign & Label Printer User’s Manual
DPL
1 X 11 ppp rrrr cccc P ppp bbbb rrrr cccc rrrr
cccc ... <CR>
where:
1 = Rotation (must be 1)
001 = Fixed Value
X = Graphic field ID
0001 = Fixed Value
1 = Multiplier (must be 1)
rrrr = Row of Point 2
1 = Multiplier (must be 1)
cccc = Column of Point 2
ppp = Fill Pattern #
rrrr = Row of Point 3
rrrr = Row of Point 1
cccc = Column of Point 3
cccc = Column of Point 1
… = Additional Points
P = Polygon ID (Fixed Value)
<CR> = Termination Character
A-11
©
2012 Brady Worldwide, Inc. All Rights Reserved.