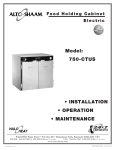
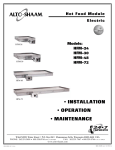
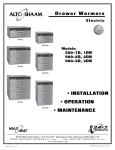
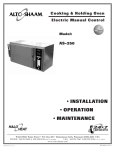
1
Mobile Refrigerated Cart
Model: 1000-MR2-1
• Installation
• Operation
• Maintenance
W164 n9221 Water Street • P.o. Box 450 • menomonee Falls, Wisconsin 53052-0450 USA
PHONE: 262.251.3800 • 800.558.8744 USA / CANADA
FAX: 262.251.7067 • 800.329.8744 U . S . A . ONLY
www.alto-shaam.com
printed in u.s.a.
MN-36246 (Rev. 0) • 07/14
Delivery . . . . . . . . . . . . . . . . . . . . . . . . . . . . . . . . . . . . . . 1
Unpacking . . . . . . . . . . . . . . . . . . . . . . . . . . . . . . . . . . . . 1
Safety Procedures and Precautions. . . . . . . . . . . . . . . . . 2
Installation
Site Installation. . . . . . . . . . . . . . . . . . . . . . .
Clearance Requirements. . . . . . . . . . . . . . . .
Installation Requirements . . . . . . . . . . . . . . .
Dimension Drawings, Weights & Capacities .
Options and Accessories. . . . . . . . . . . . . . .
Electrical. . . . . . . . . . . . . . . . . . . . . . . . . . . .
Operation
Operating Instructions. . . . .
User Information. . . . . . . . .
Food Handling Guidelines. .
Portion and Pan Sizes. . . . .
.
.
.
.
.
.
.
.
.
.
.
.
.
.
.
.
.
.
.
.
.
.
.
.
.
.
.
.
.
.
.
.
.
.
.
.
.
.
.
.
.
.
.
.
.
.
.
.
.
.
.
.
.
.
.
.
.
.
.
.
.
.
.
.
.
.
.
.
.
.
.
.
.
.
.
.
.
.
.
.
.
.
.
.
.
.
.
.
.
.
.
.
.
.
.
.
.
.
.
.
.
.
.
.
.
.
.
.
.
.
.
.
.
.
.
.
.
.
.
.
.
.
3
3
3
4
4
5
6
7
8
9
Care and Cleaning
Sanitation . . . . . . . . . . . . . . . . . . . . . . . .
Cleaning and Preventative Maintenance .
Protecting Stainless Steel Surfaces. . . . .
Cleaning Agents . . . . . . . . . . . . . . . . . . .
Cleaning Materials. . . . . . . . . . . . . . . . . .
Interior Cleaning . . . . . . . . . . . . . . . . . . .
Exterior Cleaning. . . . . . . . . . . . . . . . . . .
Condenser Cleaning . . . . . . . . . . . . . . . .
Gasket Replacement. . . . . . . . . . . . . . . .
.
.
.
.
.
.
.
.
.
.
.
.
.
.
.
.
.
.
.
.
.
.
.
.
.
.
.
.
.
.
.
.
.
.
.
.
.
.
.
.
.
.
.
.
.
.
.
.
.
.
.
.
.
.
.
.
.
.
.
.
.
.
.
.
.
.
.
.
.
.
.
.
.
.
.
.
.
.
.
.
.
10
11
11
11
11
12
12
12
12
Service
Troubleshooting . . . . . . . . . . . . . . . . . . . . . . . . . . . . 13
Alarms. . . . . . . . . . . . . . . . . . . . . . . . . . . . . . . . . . . . 13
Service views . . . . . . . . . . . . . . . . . . . . . . . . . . . 14-15
Wire Diagrams
Always refer to the wire diagram(s) included with the
unit for most current version.
Warranty
Transportation Damage and Claims . . . . . . Back Cover
Limited Warranty. . . . . . . . . . . . . . . . . . . . . Back Cover
deLIveRy
UNpAcKINg
This Alto-Shaam appliance has been
thoroughly tested and inspected to ensure only
the highest quality unit is provided. Upon
receipt, check for any possible shipping damage
and report it at once to the delivering carrier.
See Transportation Damage and Claims section
located in this manual.
This appliance, complete with unattached
items and accessories, may have been delivered
in one or more packages. Check to ensure that all
standard items and options have been received
with each model as ordered.
Save all the information and instructions
packed with the appliance. Complete and return
the warranty card to the factory as soon as
possible to ensure prompt service in the event of a
warranty parts and labor claim.
This manual must be read and understood
by all people using or installing the equipment
model. Contact the Alto-Shaam Tech Team Service
Department if you have any questions concerning
installation, operation, or maintenance.
1. Carefully remove the
appliance from the
carton or crate.
NOTe:
All claims for warranty must include the
full model number and serial number of
the unit.
®
®
NOTe: Do not discard the
carton and other
packaging material
until you have
inspected the unit
for hidden damage
and tested it for
proper operation.
2. Read all instructions in this manual carefully
before initiating the installation of this appliance.
DO NOT DISCARD THIS MANUAL.
This manual is considered to be part of the
appliance and is to be provided to the owner
or manager of the business or to the person
responsible for training operators. Additional
manuals are available from the Alto-Shaam
Tech Team Service Department.
3. Remove all protective plastic film, packaging
materials, and accessories from the appliance
before connecting electrical power. Store any
accessories in a convenient place for future use.
MR2-1 • MN-36246 (REV. 0) • INSTALLATION/OPERATION/SERVICE MANUAL • 1.
SAfeTy pROcedUReS
ANd pRecAUTIONS
Knowledge of proper procedures is essential to the
safe operation of electrically and/or gas energized
equipment. In accordance with generally accepted
product safety labeling guidelines for potential
hazards, the following signal words and symbols
may be used throughout this manual.
dANgeR
Used to indicate the presence of
a hazard that WILL cause severe
personal injury, death, or substantial
property damage if the warning
included with this symbol is ignored.
wARNINg
Used to indicate the presence of
a hazard that CAN cause personal
injury, possible death, or major
property damage if the warning
included with this symbol is ignored.
cAUTION
Used to indicate the presence of a
hazard that can or will cause minor or
moderate personal injury or property
damage if the warning included with
this symbol is ignored.
cAUTION
Used to indicate the presence of a hazard that
can or will cause minor personal injury, property
damage, or a potential unsafe practice if the
warning included with this symbol is ignored.
1. This appliance is intended to chill or freeze
foods for the purpose of human consumption.
No other use for this appliance is authorized
or recommended.
2. This appliance is intended for use in commercial
establishments where all operators are
familiar with the purpose, limitations, and
associated hazards of this appliance. Operating
instructions and warnings must be read and
understood by all operators and users.
3. Any troubleshooting guides, component views,
and parts lists included in this manual are for
general reference only and are intended for use
by qualified technical personnel.
4. This manual should be considered a permanent
part of this appliance. This manual and all
supplied instructions, diagrams, schematics,
parts lists, notices, and labels must remain with
the appliance if the item is sold or moved to
another location.
NOTe
For equipment delivered for use
in any location regulated by the
following directive:
DO NOT DISPOSE OF ELECTRICAL
OR ELECTRONIC EQUIPMENT WITH
OTHER MUNICIPAL WASTE.
Used to indicate that referral to
operating instructions is a mandatory
action. If not followed the operator or
patient could suffer personal injury.
N O T e : Used to notify personnel of
installation, operation, or
maintenance information that is
important but not hazard related.
Used to indicate that referral to
operating instructions is recommended
to understand operation of equipment.
MR2-1 • MN-36246 (REV. 0) • INSTALLATION/OPERATION/SERVICE MANUAL • 2.
installation
dANgeR
IMPROPER INSTALLATION,
ALTERATION, ADJUSTMENT,
SERVICE, OR MAINTENANCE COULD
RESULT IN SEVERE INJURY, DEATH,
OR CAUSE PROPERTY DAMAGE.
cAUTION
TO PREVENT PERSONAL INJURY,
USE CAUTION WHEN MOVING OR
LEVELING THIS APPLIANCE.
READ THE INSTALLATION,
OPERATING AND MAINTENANCE
INSTRUCTIONS THOROUGHLY
BEFORE INSTALLING OR SERVICING
THIS EQUIPMENT.
sit e installation
Position the refrigerated cart to allow sufficient air
ventilation through the condensing unit(s).
void installing the chiller immediately adjacent
A
to fryers, charbroilers, or any other equipment
producing grease laden air; heat producing
equipment such as ovens and ranges; and steam
discharging equipment such as steamer ovens
and kettles. Do not locate the refrigerated cart in
direct sunlight.
INS T A L L A T I O N
Prior to moving the refrigerated cart to the installation
site, check the dimensions of doors, passageways, and
ceiling heights in the areas through which the cabinet
must be moved. Also check the turning radius if the
cabinet must be moved around an existing structure.
The use of a fork lift or pallet lift truck is required for
moving and leveling most refrigerated cart models.
cLEA R A NCE R EQ UIR EM ENTS
Full perimeter bumper accommodates all
clearance requirements.
Unit should not be tipped on its side.
If tipped, unit must stand in the
upright position for a minimum of 12
hours before operating. Tipping will
cause damage to the unit and void the
warranty if not allowed to "rest" .
If unit must be tipped, use extreme care.
Block casters to prevent unit from rolling
while lowering or lifting.
Note: In certain instances, it may be necessary
to remove doors and door hardware to
negotiate tight spaces.
This unit must be placed on a level floor to ensure
the automatic door closing and correct draining
of condensate.
MR2-1 • MN-36246 (REV. 0) • INSTALLATION/OPERATION/SERVICE MANUAL • 3.
installation
titl e
su be titl
sit
installation
e
1450mm
915mm
720mm
805mm
weig ht
net :
product\pan capacity
130 kg
carton
1740mm
1740mm
840mm
ship :
dimensions : ( l
131 kg
155 kg
x w x h)
940 mm x 860 mm x 1860 mm
refri g e ration
maximum
volume maximum :
gastronorm
228
liters
1/1:
Twenty-four (24) 530 mm x 325 mm x 65 mm
drainage
270g R134a refrigerant
Refrigeration duty of 1584 Btu/h
Evaporator Pan: No installation required
Heat of rejection 2060btu/h
MR2-1 • MN-36246 (REV. 0) • INSTALLATION/OPERATION/SERVICE MANUAL • 4.
installation
titl e
su
e
le
bctitl
tri ceal
This product is supplied with a moulded 13 Amp plug
which needs a suitable socket. This cabinet should
not be used outside and should be used in a dry
environment. The plug needs to be accessible once the
equipment is placed in its final position. Should the
plug need changing, this must be done by a qualified
person.
ELEC T R I C AL
voltage phase cycle / hz amps kW
220
1
50/60
2.5
.43
cord included
dANgeR
To avoid electrical shock, this
appliance MUST be adequately
grounded in accordance with local
electrical codes or, in the absence of
local codes, with the current edition
of the National Electrical Code ANSI/
NFPA No. 70. In Canada, all electrical
connections are to be made in
accordance with CSA C22.1, Canadian
Electrical Code Part 1 or local codes.
(3.5 M)
dANgeR
ELECTRICAL CONNECTIONS MUST
BE MADE BY A QUALIFIED SERVICE
TECHNICIAN IN ACCORDANCE WITH
APPLICABLE ELECTRICAL CODES.
dANgeR
ENSURE POWER SOURCE
MATCHES VOLTAGE IDENTIFIED
ON APPLIANCE RATING TAG.
MR2-1 • MN-36246 (REV. 0) • INSTALLATION/OPERATION/SERVICE MANUAL • 5.
Ope
titl
ration
e
O p eratin g instructions
Chill
Alarm
Fan
Defrost
Display
Info
Decrease
Temperature/
Manual Defrost
Increase
Temperature
On/Off
pow er
Plug refrigerated cart into power supply.
Press
to start the unit. (Cabinet air temperature will show on Display)
To turn off the unit when running, press and hold the
button for 3 seconds.
to chang e T emperature S e tting
MR2-1 is designed to operate between -2°C and 4°C. The control is preset at the factory for this temperature
and should require no readjustment. The temperature setting can be checked by pressing and holding the
button. This setting can then be changed to better meet site conditions by pressing the
and
buttons.
(Refrigerators have a maximum setting of 10°C and a minimum of -2°C.) The temperature set is the cut out
(stopping) temperature, the cut in (starting) temperature is determined by the differential.
De f rost
Defrost is automatic every 8 hours with the standard factory setting. The internal temperature may increase
slightly during the defrost cycle but this will not affect the product stored inside.
alarm
See Troubleshooting section of this manual. Press any key to silence alarm.
MR2-1 • MN-36246 (REV. 0) • INSTALLATION/OPERATION/SERVICE MANUAL • 6.
Ope
titl
ration
e
user information
Time & Temperature Guidelines
To assure quality and safety in chilled processed
food handling, it is important to observe the
following guidelines.
1. All foods should be covered prior to chill or
freeze processing.
2. The temperature of foods should be rapidly
reduced from 140°F to 40°F (60°C to 4°C)
within a period of 4 hours.
3. Foods can be safely removed from the chiller
cabinet at a product temperature of 40°F (4°C)
or lower.
4. Chilled foods should be stored under
refrigeration designed to hold products at
34° to 38°F (1° to 3°C) for a maximum of 5 days
or less. A 5-day shelf life includes the day of
production and the day of consumption.
5. All potentially hazardous cooked foods that have
been chilled followed by reheating and hot food
holding must be reheated to a minimum core
temperature of 165°F (74°C) for 15 seconds prior
to serving. Refer to local food codes for possible
exceptions.
6. Always reference and adhere to local food
codes and HACCP guidelines with regard to time
and temperature for chilling or frozen
food processing.
cAUTION
NEVER STACK PANS DIRECTLY
ON TOP OF EACH OTHER.
STACKED PANS WILL RESTRICT
AIR FLOW AND INCREASE CHILL
PROCESSING TIME.
cAUTION
ADEQUATE SPACING MUST
BE ALLOWED BETWEEN PANS
FOR PROPER AIR CIRCULATION
FOR BOTH PROCESSING AND
SUBSEQUENT HOLDING.
cAUTION
TO MAINTAIN SANITATION
CONTROL, ALL FOODS FOR
QUICK-CHILL OR QUICK-FREEZE
PROCESSING MUST BE AT A
TEMPERATURE ABOVE 140°F (60°C)
AND MUST BE TIGHTLY COVERED.
A llow a minimum
o f 3 0 minutes
o f precHILL
time b efor e
pro cessin g.
MR2-1 • MN-36246 (REV. 0) • INSTALLATION/OPERATION/SERVICE MANUAL • 7.
Ope
titl
ration
e
su
F
OO
b Dtitl
HAN
e D L I N G G U I DE L I N E S
Pro d u ct c overing
PORTI ONI NG & PACKAGI N G
To maintain sanitation control when loading
the refrigerated cart, foods should be above
140°F (60°C) and should be tightly covered.
A tight cover is an important part of proper
chilling methods and must be used to prevent
the possibility of accidental contamination by
airborne bacteria.
1. During portioning and packaging operations,
all foods should be maintained at or above
140°F (60°C), or below 40°F (4°C).
Stainless steel pan covers may be used.
Stainless steel covered pans must include a label
indicating pan contents and use-by date. A cover
of clear plastic wrap is also acceptable.
When using plastic wrap as a food covering,
make certain the wrap comes in direct contact
with the surface of the product and extends
around and down each side of the pan. This is an
important step to ensure proper chilling times.
Spacing left between the plastic wrap and the
surface of the food creates an insulating air gap
resulting in more product heat retention and a
slower chilling rate.
Meat roasts and other larger, dense products
should be no larger than a weight of 8 to 10
pounds (4 to 5 kg) per item. Because of the density
of these products, chilling could take up to 4
hours. Due to longer chilling time required, it is
also suggested these items be chilled at the end of
the day with the chiller set in the automatic chill/
hold mode. This method provides the operator
with fully chilled product holding at a refrigerated
temperature on the following day.
Prior to chilling, roasts must be wrapped in
clear plastic and placed in the chiller. Do not slice
roasted meats until the day of service.
Portioned meat products such as pork chops
or meat patties should be chilled directly on the
sheet pans on which they were cooked. Cover the
sheet pans with clear plastic wrap for chilling.
After chilling, this type of product can be placed
in steam table pans for refrigerated storage.
2. If cooked foods exceed the processing capacity
of the refrigerated cart, place hot product in an
appropriate back-up hot holding device. Hold
hot foods at a temperature above 140°F (60°C).
If a hot food holding cabinet is not available,
place hot foods in short-term refrigerated
storage until these products can be loaded
into the refrigerated cart for the next available
processing cycle. Production of cooked foods
should not exceed the processing capabilities
of the chiller, therefore, do not adopt shortterm refrigeration as a routine practice but use
only in an emergency situation.
3. Fill containers to a 12 pound (5kg) limit or
maximum depth of 2" (51mm) of product.
Do not use plastic or Lexan ® containers.
4. For faster cooling, place lids and over-wrap
materials directly on the surface of foods. As
previously indicated, air trapped between the
lid and food surface acts as an insulator and
will increase chill time.
5. For faster chilling times, place low profile
foods such as chicken quarters, fish fillets,
or ribs in low depth containers such as
1-1/2" (38mm) deep sheet pans.
6. Large cuts of meat and poultry that weigh
a maximum of 8 to 10 pounds (4 to 5 kg)
maximum should be individually wrapped
with tight fitting film and placed on sheet pans
in the chill cabinet.
MR2-1 • MN-36246 (REV. 0) • INSTALLATION/OPERATION/SERVICE MANUAL • 8.
Ope
titl
ration
e
the follo wing chart of portion sizes and SERVING capacitY
PER PAN IS PROVIDED as a general reference ONLY.
P O R T I O N S I ZE S a n d P A N C A P A C I T I E S
PAN SIZE ›
F OO D C a t e g o r y
325 x 530 x 65mm
S e r v i n g size
Servings
pe r pa n
113 gm
48
Brea kfast Items:
Griddle Cakes, Waffles, French Toast (2 to 3 each )
57 to 113 gm
96 to 48
Breakfast Meats
Eggs
57 gm
96
Cooked Cereals or Grains
113 gm
48
Fruit Compote
113 gm
48
Meat, Poultry, Fish, Seafood
113 gm
48
170 to 227 gm
32 to 24
113 gms
48
Potato, Rice, Pasta, Stuffings, Beans
113 gm
48
Gravies and Au Jus
57 gm
96
Sauces
113 gm
48
113 to 170 gm
48 to 32
113 gm
48
Casseroles and Extended Dishes
Vegetables
Starches:
Protein and Starch-Based Salads
Desserts:
Pudding, Custard, Mousse, Jello
MR2-1 • MN-36246 (REV. 0) • INSTALLATION/OPERATION/SERVICE MANUAL • 9.
sanitation
Food flavor and aroma are usually so closely related
that it is difficult, if not impossible, to separate them.
There is also an important, inseparable relationship
between cleanliness and food flavor. Cleanliness, top
operating efficiency, and appearance of equipment
contribute considerably to savory, appetizing foods. Good
equipment that is kept clean, works better and lasts longer.
Most food imparts its own particular aroma and many
foods also absorb existing odors. Unfortunately, during
this absorption there is not distinction between GOOD
and BAD odors. The majority of objectionable flavors
and odors troubling food service operations are caused by
bacteria growth. Sourness, rancidity, mustiness, stale or
other OFF flavors are usually the result of germ activity.
The easiest way to insure full, natural food flavor is
through comprehensive cleanliness. This means good
control of both visible soil (dirt) and invisible soil
(germs). A through approach to sanitation will provide
essential cleanliness. It will assure an attractive
appearance of equipment, along with maximum efficiency
and utility. More importantly, a good sanitation program
provides one of the key elements in the prevention of
food-borne illnesses.
A controlled holding environment for prepared foods is
just one of the important factors involved in the prevention
of food-borne illnesses. Temperature monitoring and
control during receiving, storage, preparation, and the
service of foods are of equal importance.
The most accurate method of measuring safe temperatures
of both hot and cold foods is by internal product
temperature. A quality thermometer is an effective tool for
this purpose, and should be routinely used on all products
that require holding at a specific temperature.
A comprehensive sanitation program should focus on
the training of staff in basic sanitation procedures. This
includes personal hygiene, proper handling of raw foods,
cooking to a safe internal product temperature, and
the routine monitoring of internal temperatures from
receiving through service.
Most food-borne illnesses can be prevented through
proper temperature control and a comprehensive
program of sanitation. Both these factors are important
to build quality service as the foundation of customer
satisfaction. Safe food handling practices to prevent foodborne illness is of critical importance to the health and
safety of your customers.
HACCP, an acronym for Hazard Analysis (at) Critical
Control Points, is a quality control program of operating
procedures to assure food integrity, quality, and safety.
Taking steps necessary to augment food safety practices
is both cost effective and relatively simple. While HACCP
guidelines go far beyond the scope of this manual,
additional information is available by contacting:
CENTER FOR FOOD SAFETY AND APPLIED
NUTRITION FOOD AND DRUG ADMINISTRATION
1-888-SAFEFOOD
INTERNAL FOOD PRODUCT TEMPERATURES
H OT FOOD S
DANGER ZONE
40° TO 140°F
(4° TO 60°C)
CRITICAL ZONE
70° TO 120°F
(21° TO 49°C)
SAFE ZONE
140° TO 165°F
(60° TO 74°C)
COLD FOOD S
DANGER ZONE
ABOVE 40°F
(ABOVE 4°C)
SAFE ZONE
36° TO 40°F
(2° TO 4°C)
FROZ E N FOOD S
DANGER ZONE
ABOVE 32°F
(ABOVE 0°C)
CRITICAL ZONE
0° TO 32°F
(-18° TO 0°C)
SAFE ZONE
0°F or below
(-18°C or below)
MR2-1 • MN-36246 (REV. 0) • INSTALLATION/OPERATION/SERVICE MANUAL • 10.
c ar e an
titl
d ce
l e anin g
cLeANINg ANd pReveNTATIve MAINTeNANce
pROTecTINg STAINLeSS STeeL SURfAceS
It is important to guard against corrosion
in the care of stainless steel
surfaces. Harsh, corrosive,
cLeANINg AgeNTS
Use non-abrasive cleaning products designed for
use on stainless steel surfaces. Cleaning agents
must be chloride-free compounds and must not
or inappropriate chemicals
can completely destroy the
contain quaternary salts. Never use hydrochloric
acid (muriatic acid) on stainless steel surfaces.
protective surface layer
Always use the proper cleaning agent at the
of stainless steel. Abrasive
pads, steel wool, or metal implements will abrade
manufacturer's recommended strength.
Contact your local cleaning supplier for
surfaces causing damage to this protective coating
product recommendations.
and will eventually result in areas of corrosion.
Even water, particularly hard water that contains
cLeANINg MATeRIALS
high to moderate concentrations of chloride, will
cause oxidation and pitting that result in rust
and corrosion. In addition, many acidic foods
spilled and left to remain on metal surfaces are
contributing factors that will corrode surfaces.
Proper cleaning agents, materials, and
methods are vital to maintaining the appearance
and life of this appliance. Spilled foods should be
The cleaning function can usually be accomplished
with the proper cleaning agent and a soft, clean
cloth. When more aggressive methods must be
employed, use a non-abrasive scouring pad on
difficult areas and make certain to scrub with the
visible grain of surface metal to avoid surface
scratches. Never use wire brushes, metal scouring
pads, or scrapers to remove food residue.
removed and the area wiped as soon as possible
but at the very least, a minimum of once a day.
Always thoroughly rinse surfaces after using a
cleaning agent and wipe standing water as quickly
as possible after rinsing.
cAUTION
BRU
S
S
NO
IR E
HE
W
ST
E EL P A
DS
NO
RA PE
RS
NO
SC
TO PROTECT STAINLESS STEEL
SURFACES, COMPLETELY AVOID
THE USE OF ABRASIVE CLEANING
COMPOUNDS, CHLORIDE BASED
CLEANERS, OR CLEANERS
CONTAINING QUATERNARY SALTS.
NEVER USE HYDROCHLORIC ACID
(MURIATIC ACID) ON STAINLESS
STEEL. NEVER USE WIRE
BRUSHES, METAL SCOURING
PADS OR SCRAPERS.
MR2-1 • MN-36246 (REV. 0) • INSTALLATION/OPERATION/SERVICE MANUAL • 11.
c ar e an
titl
d ce
l e anin g
Interior Cleaning
Condenser Cleaning
Open the refrigerated cart door to warm the
interior of the cabinet.
All the heat removed from the cabinet is
discharged into the room via the condenser which
is similar to a car radiator. This must be kept
clean so that the air can pass through it to remove
the heat, if it becomes choked with dust the unit
will over heat and this can lead to a burnt out
compressor. The condenser should be brushed
with a soft brush to remove any dust deposited
on the alloy fins. The frequency of this cleaning
is determined by the amount of dust in the
surrounding area but should be cleaned at least 4
times a year.
1. Remove any loose food debris with a cleaning
cloth or small hand broom.
2. Use a mild, non-abrasive detergent and warm
water. Wipe-down the interior of the cabinet,
removing all food residue. This includes the
ceiling, floor, and walls.
Wipe-down the interior door panel and clean
the vinyl gaskets. Make certain to clean under
the gaskets to remove any mildew accumulation
or food residue.
3. Rinse all interior surfaces including the cabinet
door and gasket with clean water and a cloth.
Remove all rinse water.
4. Wipe interior surfaces with a clean cloth and
sanitizing solution for use on metal and vinyl
food contact surfaces. This is an important step
to control the build-up of unwanted mildew
and mold in the refrigeration system.
Gasket Replacement
Damaged gaskets can easily be replaced. Remove
the old gasket by gently pulling it out of the gasket
retainer and simply push in the new gasket leaving
the corners to last.
5. Allow interior to air dry with door open.
Exterior Cleaning
1. Wipe all exterior surfaces
including the control panel,
door frame, latches, and hinges
with a damp cloth containing
a mild, non-abrasive, nonchloride detergent solution.
2. Rinse detergent solution with a cloth and
warm water. Allow exterior to air dry.
3. Polish with any standard stainless steel polish
designed for use on food service equipment.
When cleaning the exterior of the cabinet,
always wipe with the grain of the stainless steel
to avoid scratching or marring the finish.
DO NOT USE ABRASIVE CLEANING
COM POUNDS OR IMPLEMENTS.
dANgeR
dIScONNecT UNIT fROM
pOweR SOURce befORe
cLeANINg OR SeRvIcINg.
dANgeR
AT NO TIME SHOULD THE INTERIOR
OR EXTERIOR BE STEAM CLEANED,
HOSED DOWN, OR FLOODED WITH
WATER OR LIQUID SOLUTION OF
ANY KIND. DO NOT USE WATER JET
TO CLEAN.
SeveRe dAMAge OR
eLecTRIcAL hAzARd
cOULd ReSULT.
WARRANTY BECOMES VOID IF
APPLIANCE IS FLOODED
MR2-1 • MN-36246 (REV. 0) • INSTALLATION/OPERATION/SERVICE MANUAL • 12.
trou b l
titl
e s heootin g
Troubleshooting
Before looking any further, please check the power supply to the unit and controller temperature setting.
Alarms
The controller is equipped with internal visual and audio alarms:
Press any button on the controller to silence an alarm. Verify that the
indicator is lit. If lit, verify that the door
is closed and the gasket is sealing correctly. Also, check that the condenser is not choked and that the condenser and
evaporator fans are running. If the evaporator is iced up, press and hold the
button to start a manual defrost cycle.
If this doesn’t solve the problem, please call a qualified technician.
Alarm Displayed
*
*
Description
Action Required
Door Open Alarm
Close door
Condenser High Temperature Alarm
Check for blockage / clean
High Temperature Safety Stat
Repair / replace relay
High Temperature Alarm
Press a button to cancel / check
Low Temperature Alarm
Press a button to cancel / check
Probe T1 Failure
Replace Probe
Probe T2 Failure
Replace Probe
Probe T3 Failure
Replace Probe
dANgeR
dIScONNecT UNIT fROM
pOweR SOURce befORe
cLeANINg OR SeRvIcINg.
**
MR2-1 • MN-36246 (REV. 0) • INSTALLATION/OPERATION/SERVICE MANUAL • 13.
Service
FRONT VIEW WITH UNIT COVER REMOVED
Unit Cover Support
Door Switch w/ Magnet
CN: SW-36296
DE: SW-36297
Hinge Pin
CN: PI-36264
DE: PI-36265
Door Lock
INTERIOR VIEW WITH FAN GUARD REMOVED
Probe
CN: PR-36260
DE: PR-36261
Evaporator Fan
CN: FA-36291
DE: FA-36290
Evaporator
CN: RE-36309
DE: RE-36310
Vap Tray & Discharge
CN: TY-36313
DE: TY-36314
Fan Guard
CN: GD-36305
DE: GD-36304
Copper Vaporizer
CN: RE-36311
DE: RE-36312
Ladder Racking
Duct
FRONT VIEW WITH UNIT COVER REMOVED
Electrical Connections
Condenser
CN: RE-36733
DE: RE-36308
Unit Cover Support
Mains Lead
Bumper
CN: BM-36282
DE: BM-36283
MR2-1 • MN-36246 (REV. 0) • INSTALLATION/OPERATION/SERVICE MANUAL • 14.
Caster, w/ Brake
CN: CS-36274
DE: CS-36275
Caster, w/o Brake
CN: CS-36272
DE: CS-36273
Service
BACK VIEW WITH BACKCLAD REMOVED
Drain
Compressor
CN: PR-36284
DE: PR-36285
Vap Tray & Discharge
CN: TY-36313
DE: TY-36314
Copper Vaporizer
CN: RE-36311
DE: RE-36312
Solenoid Coil
CN: Not needed
DE: VA-36302
Fan Blade
CN: WN-36286
DE: WN-36287
Fan Motor
CN: MO-36288
DE: MO-36289
Capilliary
CN: TU-36306
DE: TU-36307
Controller Assy./
Electrical Connections
CN: CC-36256
DE: CC-36257
Drier
CN: RE-36293
DE: RE-36292
MR2-1 • MN-36246 (REV. 0) • INSTALLATION/OPERATION/SERVICE MANUAL • 15.
TRANSPORTATION DAMAGE and CLAIMS
1.
2.
3.
4.
5.
6.
7.
8.
All Alto-Shaam equipment is sold F.O.B. shipping point, and when accepted by the carrier, such shipments
become the property of the consignee.
Should damage occur in shipment, it is a matter between the carrier and the consignee. In such cases,
the carrier is assumed to be responsible for the safe delivery of the merchandise, unless negligence can be
established on the part of the shipper.
Make an immediate inspection while the equipment is still in the truck or immediately after it is moved to the receiving area.
Do not wait until after the material is moved to a storage area.
Do not sign a delivery receipt or a freight bill until you have made a proper count and inspection of all merchandise received.
Note all damage to packages directly on the carrier’s delivery receipt.
Make certain the driver signs this receipt. If he refuses to sign, make a notation of this refusal on the receipt.
If the driver refuses to allow inspection, write the following on the delivery receipt:
Driver refuses to allow inspection of containers for visible damage.
Telephone the carrier’s office immediately upon finding damage, and request an inspection. Mail a written confirmation of the
time, date, and the person called.
Save any packages and packing material for further inspection by the carrier.
Promptly file a written claim with the carrier and attach copies of all supporting paperwork.
We will continue our policy of assisting our customers in collecting claims which have been properly filed and actively pursued.
We cannot, however, file any damage claims for you, assume the responsibility of any claims, or accept deductions in payment
for such claims.
LIMITED WARRANTY
Alto-Shaam, Inc. warrants to the original purchaser only that any original part that is found to be defective in material or workmanship will, at
Alto-Shaam's option, subject to provisions hereinafter stated, be replaced with a new or rebuilt part.
the original parts warranty period is as follows:
For the refrigeration compressor on Alto-Shaam Quickchillers™, five (5) years from the date of installation of appliance.
For the heating element on Halo Heat® cooking and holding ovens, as long as the original purchaser owns the oven. This
excludes holding only equipment.
For all other original parts, one (1) year from the date of installation of appliance or fifteen (15) months from the shipping date, whichever
occurs first.
The labor warranty period is one (1) year from the date of installation or fifteen (15) months from the shipping date, whichever occurs first.
Alto-Shaam will bear normal labor charges performed during standard business hours, excluding overtime, holiday rates or any
additional fees.
To be valid, a warranty claim must be asserted during the applicable warranty period. This warranty is not transferable.
thIS WArrAnty DoES not APPLy to:
1. Calibration.
2. Replacement of light bulbs, door gaskets, and/or the replacement of glass due to damage of any kind.
3. Equipment damage caused by accident, shipping, improper installation or alteration.
4. Equipment used under conditions of abuse, misuse, carelessness or abnormal conditions, including but not limited to, equipment
subjected to harsh or inappropriate chemicals, including but not limited to, compounds containing chloride or quaternary salts, poor water
quality, or equipment with missing or altered serial numbers.
5. Damage incurred as a direct result of poor water quality, inadequate maintenance of steam generators and/or surfaces affected by water
quality. Water quality and required maintenance of steam generating equipment is the responsibility of the owner/operator.
6. Damage caused by use of any cleaning agent other than Alto-Shaam's Combitherm® Cleaner, including but not limited to damage due to
chlorine or other harmful chemicals. Use of Alto-Shaam's Combitherm® Cleaner on Combitherm® ovens is highly recommended.
7. Any losses or damage resulting from malfunction, including loss of product, food product, revenue, or consequential or incidental
damages of any kind.
8. Equipment modified in any manner from original model, substitution of parts other than factory authorized parts, removal of any parts
including legs, or addition of any parts.
This warranty is exclusive and is in lieu of all other warranties, express or implied, including the implied
warranties of merchantability and fitness for a particular purpose. In no event shall Alto-Shaam be liable for
loss of use, loss of revenue or profit, or loss of product, or for any indirect, special, incidental, or consequential
damages. No person except an officer of Alto-Shaam, Inc. is authorized to modify this warranty or to incur on
behalf of Alto-Shaam any other obligation or liability in connection with Alto-Shaam equipment.
Effective november 1, 2012
RECORD THE MODEL AND SERIAL NUMBER OF THE APPLIANCE FOR EASY REFERENCE.
ALWAYS REFER TO BOTH MODEL AND SERIAL NUMBER IN ANY CONTACT WITH ALTO-SHAAM REGARDING THIS APPLIANCE.
Model: ______________________________________________ Date Installed: ______________________________________________________
Voltage: ______________________________________________ Purchased From: ___________________________________________
Serial Number: _____________________________________________________________________________________________________________
W164 N9221 Water Street
PHONE:
●
P.O. Box 450
●
Menomonee Falls, Wisconsin 53052-0450
●
U.S.A.
262.251.3800 • 800.558-8744 USA/CANADA
FAX: 262.251.7067 • 800.329.8744 U.S.A. ONLY
www.alto-shaam.com
PRINTED IN U.S.A.