1
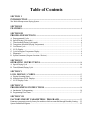
AQUATEX
WET WASH
USER’S MANUAL
American Dryer Corporation
88 Currant Road
Fall River, MA 02720-4781
Telephone: (508) 678-9000 / Fax: (508) 678-9447
e-mail: [email protected]
010298BS/tf
ADC Part No. 112196
Retain This Manual In A Safe Place For Future Reference
American Dryer Corporation products embody advanced concepts in engineering, design, and safety. If this product is
properly maintained, it will provide many years of safe, efficient, and trouble-free operation.
ONLY qualified technicians should service this equipment.
OBSERVE ALL SAFETY PRECAUTIONS displayed on the equipment or specified in the installation/operator's manual
included with the dryer.
The following “FOR YOUR SAFETY” caution must be posted near the dryer in a prominent location.
FOR YOUR SAFETY
POUR VOTRE SÉCURITÉ
Do not store or use gasoline or
other flammable vapors or liquids
in the vicinity of this or any other
appliance.
Ne pas entreposer ni utiliser d’essence
ni d’autres vapeurs ou liquides
inflammables dans le voisinage de cet
appareil ou de yout autre appareil.
We have tried to make this manual as complete as possible and hope you will find it useful. ADC reserves the right to make
changes from time to time, without notice or obligation, in prices, specifications, colors, and material, and to change or
discontinue models.
Important
For your convenience, log the following information:
DATE OF PURCHASE
MODEL NO.
DISTRIBUTORS NAME
Serial Number(s)
Replacement parts can be obtained from your distributor or the ADC factory. When ordering replacement parts from the
factory, you can FAX your order to ADC at (508) 678-9447 or telephone your orders directly to the ADC Parts Department at
(508) 678-9000. Please specify the dryer model number and serial number in addition to the description and part number, so
that your order is processed accurately and promptly.
“IMPORTANT NOTE TO PURCHASER”
Information must be obtained from your local gas supplier on the instructions
to be followed if the user smells gas. These instructions must be posted in a
prominent location near the dryer.
IMPORTANT
YOU MUST DISCONNECT and LOCKOUT THE ELECTRIC SUPPLY and THE GAS
SUPPLY or THE STEAM SUPPLY BEFORE ANY COVERS or GUARDS ARE
REMOVED FROM THE MACHINE TO ALLOW ACCESS FOR CLEANING, ADJUSTING, INSTALLATION, or TESTING OF ANY EQUIPMENT per OSHA (Occupational
Safety and Health Administration) STANDARDS.
“Caution: Label all wires prior to
disconnection when servicing controls. Wiring
errors can cause improper operation.”
«Attention: Lor des opérations d’entretien
des commandes étiqueter tous fils avant
de les déconnecter. Toute erreur de
câblage peut étre une source de danger et
de panne.»
CAUTION
DRYERS SHOULD NEVER BE LEFT UNATTENDED WHILE IN OPERATION.
WARNING
CHILDREN SHOULD NOT BE ALLOWED TO PLAY ON OR NEAR THE DRYER(S).
CHILDREN SHOULD BE SUPERVISED IF NEAR DRYERS IN OPERATION.
FOR YOUR SAFETY
DO NOT DRY MOP HEADS IN THE DRYER.
DO NOT USE DRYER IN THE PRESENCE OF DRY CLEANING FUMES.
WARNING
UNDER NO CIRCUMSTANCES should the door switch or the heat circuit devices
ever be disabled.
WARNING
The dryer must never be operated with any of the back guards, outer tops, or service
panels removed. PERSONAL INJURY or FIRE COULD RESULT.
WARNING
DRYER MUST NEVER BE OPERATED WITHOUT THE LINT FILTER/SCREEN IN
PLACE, EVEN IF AN EXTERNAL LINT COLLECTION SYSTEM IS USED.
IMPORTANT
PLEASE OBSERVE ALL SAFETY PRECAUTIONS displayed on the equipment and/or
specified in the installation and operator's manual included with the dryer.
Dryers must not be installed or stored in an area where it will be exposed to water or weather.
The wiring diagram for the dryer is located in the front electrical control box area.
Table of Contents
SECTION I
INTRODUCTION ................................................................................................ 3
Wet Wash Microprocessor Drying System .............................................................................................. 3
SECTION II
FEATURES .......................................................................................................... 4
SECTION III
PROGRAM SELECTIONS ................................................................................ 5
A.
B.
C.
D.
E.
F.
G.
J.
K.
Preprogrammed Cycles .................................................................................................................... 5
Special Drying Cycle (mode) ............................................................................................................ 6
Timed (manual) Drying Cycle (mode) ................................................................................................ 6
Temperature Selections (Drying Temperatures) .................................................................................. 7
Cool Down Cycle:............................................................................................................................ 7
L.E.D. Display.................................................................................................................................. 7
Cycle In Progress Temperature Display............................................................................................. 8
Diagnostics ....................................................................................................................................... 9
System Parameters (Program Locations / Review)............................................................................. 9
SECTION IV
OPERATING INSTRUCTIONS ........................................................................ 10
A. Special Drying Cycle ...................................................................................................................... 10
B. Timed (Manual) Drying Cycle ..........................................................................................................11
SECTION V
L.E.D. DISPLAY / CODES ................................................................................. 13
A. Display Operating Status ................................................................................................................. 13
B. Microprocessor L.E.D. Displays ..................................................................................................... 14
C. L.E.D. Display Codes ..................................................................................................................... 15
SECTION VI
PROGRAMMING INSTRUCTIONS ................................................................ 16
A. Introduction To Programming .......................................................................................................... 16
B. Programming Flow Charts .............................................................................................................. 17
SECTION VII
FACTORY PRESET PARAMETERS / PROGRAMS ..................................... 25
Parameters (programs) preset by factory for machines which are controlled through Humidity Sensing. ... 25
System Parameters/Programs ................................................................................................................ 25
SECTION VIII
PROGRAMMING LIMITS ................................................................................ 26
A. Preprogrammed Cycles .................................................................................................................. 26
B. System Parameters (Program Locations) ......................................................................................... 26
SECTION IX
SYSTEM DIAGNOSTICS .................................................................................. 27
A. Diagnostics (L.E.D. Display) Failure Codes..................................................................................... 27
B. L.E.D. Display Indicators................................................................................................................ 27
C. Microprocessor Control Relay Output L.E.D. Indicators ................................................................. 28
SECTION I
INTRODUCTION
Wet Wash Microprocessor Drying System
The Wet Wash (OPL) Drying System has been designed with super performance in mind to provide for better
temperature regulation, efficiency, performance, and consistency, and faster drying times.
Specifically, Wet Wash Drying System’s higher performance emanates from the following enhancements:
1. The ability to better control the temperature inside the basket (tumbler) throughout the various cycles.
2. The Wet Wash Dryer’s microprocessor controller (computer) responds immediately to any temperature
variations from temperature. The narrower temperature control band greatly increases system efficiency.
3. The Wet Wash Dryer utilizes two (2) Humidity Transmitters. This enables the microprocessor controller to
monitor the relative humidity in both the inlet air stream as well as the exhaust air system of the machine.
Among its many amenities, Wet Wash Drying System has a true Automatic Drying Cycle. The Wet Wash
Drying System (Patent No. 5,649,372) operates the machine at specific programmable dry temperatures while
simultaneously monitoring the humidity in both the inlet and outlet air streams. The dryer will operate at specific
temperature until a Predetermined Differential Humidity Measurement has been reached. The dryer then will
proceed to a second predetermined temperature until that Predetermined Differential Humidity has been reached.
This process is repeated one (1) final time prior to ending the cycle. These RH set points will differ based on the
material type and load size selected.
Utilizing this microprocessor technology, the user simply has to place the load in the dryer and push one single
button to start the drying cycle. The microprocessor controller (computer) will directly monitor the moisture
content in the load and stop the drying cycle automatically. This response is based on the load size and material
type selected.
The Wet Wash Drying System (Patent No. 5,649,372) virtually eliminates all guess work. The microprocessor
controller (computer) compensates for various types of fabrics and load sizes, thus, avoiding damage to fabrics by
overdrying, as well as avoiding wasted time and energy for any given load. Once the microprocessor controller
(computer) determines the load is dry, the microprocessor controller will go into the cool down cycle until the
preprogrammed time, and then shuts the dryer off automatically.
3
SECTION II
FEATURES
A. Dependable Microprocessor solid state integrated circuitry. To eliminate as many moving parts as
possible.
B. Program changes are easily made at the keyboard - actual programs are viewed at the L.E.D. display
for verification.
C. Special Drying Cycle - computerized monitoring of load dryness for precise, fast, and efficient drying.
D. Timed (manual) Drying Cycle - for special loads, programming allows for a specific amount of time
in minutes for both drying and cool down cycles.
E. Preprogrammed Cycles - The Microprocessor controller can store in its memory six (6) preprogrammed
cycles in either the Special Drying mode or Manual Drying mode.
F. Variable (Programmable) Fabric/Temperature Selections- accommodates the type of fabric to be dried.
G. Controlled Cool Down program - helps eliminate wrinkled loads
H. L.E.D. Display - informs user of cycle status, programs and displays important diagnostic and fault
codes.
I.
Anti-Wrinkle Program - helps keep items wrinkle - free when they are not removed from the dryer
promptly at the end of the drying and cooling cycles.
J. Diagnostics - major circuits, including the door switch, microprocessor temperature sensor, as well as
the inlet and outlet relative humidity transmitters.
K. Temperature Conversion Status - temperature related programs can be set in either Fahrenheit or
Celsius. ALL temperatures will automatically convert to the corresponding valves (± 1°F) when
changes are made.
L. Over-Temperature protection if the microprocessor controller senses that the temperature basket
(tumbler) has reached, it will shut the dryer down completely, and a default an overheating problem.
M. Cycle Preview - entire dryer parameters (programs) or the preprogrammed cycles are displayed
for verification upon a coded entry to the keypad.
4
SECTION III
PROGRAM SELECTIONS
A. Preprogrammed Cycles
The microprocessor controller can store in its memory six (6) preprogrammed cycles (keys “A” through °F”
on the keyboard). This allows the user to have the six (6) most completely used cycles, requiring only the
push of a single keyboard entry to start the dryer.
These preprogrammed cycles can be set either the “Special” Drying Cycles (mode) where the fabric
selection must be chosen or in the timed (manual) drying cycle (mode) where the dryer will operate for the
specific drying time preprogrammed. These cycles can be preprogrammed in any combination.
Once the drying cycle is completed, the microprocessor controller then goes into the cool down cycle, where
the articles are tumbled in room temperature air. Once the preprogrammed cool down cycle is completed,
the dryer will shut off automatically.
With the Anti-wrinkle Program active, when the cooling cycle is completed and the dryer has shut off,
if the main door is not opened, the load will be tumbled without heat (I.E., for twenty (20) seconds
every (2) two minutes. This process is repeated until either the main door is opened or twenty (20)
minutes has elapsed, which ever comes first.
Programmed Cycle Selections :
1. Special Drying Cycle (mode)
A. For optional fabric selections, the microprocessor controller can be preprogrammed to dry the
specific material being put into the dryer.
B. Anti-Wrinkle Program - active or non-active
C. “T - Hi” Drying Temperature - programmable from 100° to 200° F in one degree increments or from 37° to
93° C in one degree increments.
D. “T-Set” Drying Temperature - preprogrammable from 100° to 199° F in one degree increments or from 37°
to 92° C in one degree increments.
E. “T-Lo” Drying temperature - preprogrammable from 100° to 198° F in one degree increments or
from 37° to 91° C in one degree increments.
F. Cool Down Time - Programmable from 0 to 10 minutes in one-minute increments.
2. Timed (manual) Drying Cycle (mode)
A. Anti-wrinkle Program - active or non-active
B. Drying Time - programmable from 0 - 99 minutes in one minute increments.
5
C. Drying Temperature - programmable from 100° to 215° F in one degree increment or from 37° to
102° C in one degree increments.
D. Cool Down Time - programmable from 0 to 15 minutes in one degree increments.
All six (6) preprogrammed cycles have been programmed by the factory as outlined on pages
However, even though these are the most common cycles used, they should be reviewed to ensure
they the location application or needs. Should changes be found necessary, refer to the programming
section of this manual.
B. Special Drying Cycle (mode)
In this mode, the microprocessor controller determines how much drying time is needed. This is done
because each fabric has its own drying characteristics and the microprocessor drys each fabric
selection at a certain temperature to a specific humidity level. In this mode the load size is important.
At the end of this drying cycle the microprocessor will go into cool down.
Special Drying Cycle (mode) Selections :
1. Fabric Selection - Synt, Suit, Def, Acry, Uool, Coat, Ryan, Nitt, Silc.
2. “T Hi” Drying Temperature - programmable from 100 ° to 200° F in one degree increments or from
37° to 92° in one degree increments
3. “T Set” Drying Temperature - programmable from 100 ° to 199° F in one degree increments or form
37° to 92° in one degree increments.
4. “T Lo” Drying Temperature - programmable from 100° to 198° F in one degree increments or from
37° to 91° C in one degree increments.
5. Cool Down Time - programmable from 0-10 minutes in one degree increments.
6. System Parameter program location - Key # 2
C. Timed (manual) Drying Cycle (mode)
This drying cycle is intended for special loads where a specific amount of drying time and cooling
time is needed.
1. Drying Time - programmable from 0-99 minutes in one - minute increments.
2. Dry Temperature - programmable from 100° to 215° F or from 37° to 102° C in one degree increments.
3. Cool down Time - programmable from 0 -15 minutes in one minute increments.
6
D. Temperature Selections (Drying Temperatures)
Operating Temperature Selections :
1. Special Drying Cycle (mode) programmable from 100° to 200° F or from 37° to 93° C in one degree
increments.
2. Timed (manual Drying Cycle (mode) programmable from 100° to 215° F or from 37° C to 102° C in
one degree increments.
E. Cool Down Cycle:
1. Special Drying Cycle (mode)
a. Cool Down Time - 0-10 minutes in one minute increments.
2. Timed (manual) Drying Cycle (mode)
a. Cool Down Time - 0-15 minutes in one minute increments
F. L.E.D. Display
The L.E.D. display informs the cycle status, program verification, and displays important diagnostic
and fault codes. A complete listing of the various display codes and their meanings are shown on
page 14 of this manual.
Display Selections :
1. Display Status - while the dryer cycle is in progress, programming allows the display to read only the
cycle in progress or only the basket (tumbler) temperature.
2. Cycle in Progress Display Status.
a. Special Drying Cycle (mode) the L.E.D. display reads time in minutes counting from zero (0) up.
When the computer reaches its specific humidity level it will then go into cool down in minutes.
b. Timed (manual) Cycle (mode) - L.E.D. Display reads drying time and / or cool down time counting
upward as time elapses.
3. Indicator Dots on the Display - dots are an indicator as to the various microprocessor controller output
functions. Additionally, there are also indicators on the back side of the microprocessor controller to
verify the outputs of the relay.
a. Motor Indicator On (Active)
b. Heat On (Active)
c. Cycle in Progress Indicator
7
G. Cycle In Progress Temperature Display
While the dryer cycle is in progress, the displayed by pressing the “Enter/Start” Key. The temperature
will be displayed in either Fahrenheit or Celsius, depending on how the temperature conversion status
program is set.
X.
X.
Cycle in process - Inlet Plt Display (START/ENTER twice)
Cycle in process - Outlet Plt Display (START/ENTER 3 times)
H. Temperature Conversion Status
1. Temperature Display Status
2. Temperature Selections (drying temperatures).
IMPORTANT: When changing the temperature conversion status from Fahrenheit to Celsius or
vice versa, all the temperature selections and cool down temperatures will be
changed accordingly. The microprocesor controller automatically calculates and
converts the temperatures in these programs to the previous set value. For
example, when changing from °F to °C, if the preprogrammed cycle “A” drying
temperature was set for 160° F, the microprocessor controller will change to 71° C
(± 1 (one) degree Celsius).
I. Anti-Wrinkle Program
This program helps keep items wrinkle-free when they are not removed from the dryer promptly at the
end of the drying and cooling cycles.
When this program is active (on) and the dryer and cooling cycles are completed, the dryer will shut off, then
the tone will sound and the display will read “done”. If the door is not opened, the microprocessor will
wait until the Guard Delay Time “Gdly” has expired at which time the basket (tumbler) will rotate
(without heat) for the programmed Guard On Time “Gon-tine”. The microprocessor controller will repeat this
process until the programmed Maximum Guard Time “MGrd” has expired or until the door is opened,
whichever comes first.
Anti-Wrinkle Program Selections :
1. Active (on) or non-active
2. Guard Delay Time - programmable from 10 to 254 second in one second increments.
3. Guard On Time - programmable from 10 to 60 seconds in one second increments.
4. Maximum Guard Time - programmable from 1 - 99 minutes in one minute increments.
8
J. Diagnostics
1. Four (4) major circuits of the microprocessor controller are monitored.
A. Microprocessor heat sensor circuit fault will shut the dryer cycle off, and the L.E.D. display will read
“dSFL”.
B. If there is a fault in the door switch circuit the L.E.D. display will read “door”. The “door” display
code will also appear if, while a cycle in progress , the main door was opened and not closed, and a
keyboard entry was made.
C. “In RH Fail”
D. “Out RH Fail”
2. High - Temperature Protection - If the microprocessor controller senses that the temperature in the
basket (tumbler) has exceeded 220° F (104° C), it will shut the dryer down completely, and the default
code “dSFL” will appear in the L.E.D. display, indicating that there is an over-heating problem. The
“DSFL“ default code will be displayed until the temperature has dropped down to 220° F (104° C) or
lower, and then the “Clear/Stop” key must be pressed, at which time the L.E.D. display will return to
“Fill”.
K. System Parameters (Program Locations / Review)
The system parameters are the programs which, once set by the factory, rarely need to be changed in the field.
These system parameters (programs) are stored in the memory and cataloged as programs locations (key “2”)
All of the parameters affect the preprogrammed cycles. The programming limits of each program location are
shown on page 26. In addition, the parameters preset by the factory are shown on page 25.
1. Program Location 2 (Key “2”)
A. Guard On Time
B. Guard Delay Time
C. Total Guard Time
9
SECTION IV
OPERATING INSTRUCTIONS
When computer system allows the operator to choose from six (6) preprogrammed cycles (keys “A” through
“F”) which unless otherwise specified at the time of ordering the dryer, has been preprogrammed by the factory
with the parameter shown on page 25.
NOTE: Refer to Section III of this manual for a complete explanation of the various program
cycles / selections available.
After the load is put into the basket (tumbler) and the main door is closed, determine which cycle will suit the
application (type of load). We recommend using the special drying cycle for most loads. This cycle provides for
the best drying in the shortest time, all automatically.
NOTE: After choosing the cycle desired the display will flash the load size programmed in that
cycle. If a change is necessary while the display is flashing press the “O” key until the
desired load size is reached.
1. Preprogrammed Cycles
A. Special Drying Cycle
1. Display reads “Fill” (no cycle in progress).
2. Press the letter on the keyboard corresponding to the cycle desired (I.E., Key “A”)
a. The dryer will then start (rotate)
3. Display will now show the cycle in progress and cycle status (I.E, “drOO”) meaning that the
dryer is in the Drying Cycle. During the Cycle the microprocessor counts up, displaying
the time in minutes. During this cycle the microprocessor is monitoring the amount of moisture
in the load.
NOTE: To stop the dryer at any time, open the main door, to continue the cycle, close the main
door and press the “enter/start” key. The dryer will now continue from where it left off; or
the dryer may also be stopped by pressing the “clear/stop” key. However the cycle that
was in progress will be cancelled if the “clear/stop” key is pressed twice and the L.E.D.
display will return to the Fill (no cycle in progress) mode.
NOTE: After choosing the cycle desired the display will flash the load size programmed in that
cycle. If a change is necessary while the display is flashing press the “O” key until the
desired load size is reached.
10
4. Once the microprocessor senses that a specific amount of moisture, for the preprogrammed fabric, has
been reached, the drying cycle will end. The display will then read “CLOO” meaning that the dryer is
now in the cool down cycle (mode). The display will count from 0 minutes up until the preprogrammed
selection is reached.
5. Once the cool down cycle is completed. The dryer will shut off, and the display will read “donE”.
The display will read “donE” until the main door is opened.
6. If the Anti-Wrinkle program is active, once the drying and cooling cycles are completed and the
display reads “donE”, the microprocessor controller will then proceed into the Anti-Wrinkle program.
If the main door is not opened within the Anti-wrinkle Delay time (i.e., 90 seconds), the basket
(tumbler) will rotate without heat for the programmed Ant-Wrinkle on time (i.e., 20 minutes) or until
the main door is opened, whichever comes first. The display will continue to read “donE” until either
the main door is opened or the maximum Anti-Wrinkle on time has expired, at which time, the display
will read “FILL” (no cycle in progress).
B. Timed (Manual) Drying Cycle
1. Display reads “FILL” (no cycle in progress).
2. Press the letter on the keyboard corresponding to the desired cycle desired (i.e., Key “D”)
3. The dryer will then start (rotate)
4. L.E.D. display will now show Cycle In Progress and Cycle status (i.e., “droo”, meaning that the dryer
is in the Drying Cycle (Mode). During the drying cycle, the cycle status time will count upward until
the drying time programmed has expired.
NOTE: To stop the dryer at any time, open the main door. To continue the cycle, close the main
door and press the “Enter/Start” key. The dryer will now continue from where it left off.
If the cycle must be changed press “Clear/Stop” twice and then press the next selection
key (A-F). Or.... The dryer may also be stopped by pressing the “Clear/Stop” key.
However, the cycle that was in progress will be cancelled, and the L.E.D. display will
return to the “FILL” (no cycle in progress) mode.
5. When the programmed drying time has expired, the microprocessor controller will proceed into the
Cool Down Cycle (Mode), and the Cycle In Progress portion of the L.E.D. display will read “CL”. The
Cycle Status portion of the L.E.D. display will read “CLOO” and count upward until the programmed
time has expired.
6. Once the cool down cycle is completed, the dryer will shut off, and the L.E.D. display will read
“donE” until the main door is opened.
11
7. If the Anti-Wrinkle program is active, once the drying and cooling are completed and the display
reads “donE”, the microprocessor controller will proceed into the Anti-Wrinkle program. If the main
door is not opened within the Anti-Wrinkle Delay Time.
(i.e., 90 seconds) the basket (tumbler) will rotate (without heat) for the programmed Anti-Wrinkle on
time (i.e., 20 seconds). The microprocessor controller will repeat this process until the programmed
Maximum Anti-Wrinkle time has expired (i.e., 10 minutes) or until the main door is opened, which
ever comes first. L.E.D. display will continue to read “donE” until either the main door is opened or
the Maximum Anti-Wrinkle time has expired, at which time, the L.E.D. display will read “FILL” (no
cycle in progress).
12
SECTION V
L.E.D. DISPLAY / CODES
The L.E.D. display informs the user of cycle status, program verification, and displays important diagnostics
and fault codes.
A. Display Operating Status
1. Cycle in progress - while the dryer is operating. The display will read which cycle is in progress.
For example, in the drying Cycle (mode) the display will read “dr”, and in the cool down cycle
(mode), the display will read “CL”.
2. Cycle Status - While a cycle is in progress the display will show the progress of the cycle (load) that is
being processed.
a. Special Drying Cycle - cycle status portion of the display will show the number of minutes that the
machine has been running for.
b. Timed (manual) Drying Cycle - cycle status portion of the display will show the drying or cool
down time and will count upward until the programmed time has expired.
3. Indicator Dots - located at the bottom of the display is a series of dots which indicate the various
microprocessor controller output functions while cycle is in progress.
a. Item No. 3 -On Indicator - This indicator dot is on whenever a cycle is in progress. Additionally,
when the Ant-Wrinkle program is active, this indicator dot will be on whenever the microprocessor
controller is the guard on time program.
b. Item No. 4 - Heat Indicator - This indicator door is on whenever the microprocessor controller is
calling for the heating unit to be active (on).
c. Item No. 5 - Air Jet Indicator - This indicator dot is on when the display reads done. This dot will
stay on for approximately thirty (30) seconds after the display reads done.
d. Item No. 6 - Motor Indicator - This indicator dot is on whenever the dryer is in the running mode.
13
B. Microprocessor L.E.D. Displays
1. Cycle in Progress
a. dr - Drying cycle
b. CL - Cool down cycle
2. Cycle Status
a. Special Mode Drying Time or Cool Down Time
b. Manual Mode Displays Drying Time or Cool Down Time
3. On Indicator, dryer is in the operating mode.
4. Heat On Indicator - On when the dryer is calling for heat
5. Air Jet Indicator Dot - On for 5 seconds when the dryer says done.
6. Motor Indicator Dot - On when the dryer is in the running mode.
14
C. L.E.D. Display Codes
Prog
CyA
CyB
CyC
CyD
CyE
CyF
Purg
door
donE
dSFL
in rH FAiL
out fH FAiL
Hter
Err
CALC
dr
CL
PuSH
FiLL
tine
SPEC
Grd
nGrd
UooL
COAT
rAYn
Nitt
SiLC
Syny
dEF
RCry
LOAd SiSE Lg
LOAd SiSE nEd
LOAd SiSE Sn
t Hi
t SEt
t Lo
CooL
tEnP
Gon
GdLy
tGrd
°FAHr
*CEL
byE
Program Mode
Preprogrammed Cycle A
Preprogrammed Cycle B
Preprogrammed Cycle C
Preprogrammed Cycle D
Preprogrammed Cycle E
Preprogrammed Cycle F
When a cycle is interrupted and the restarted
Door circuit is open or fault in the A.C.
Drying and Cooling Cycles Complete
or
Dryer is in Anti-Wrinkle Cycle
Dryer sensor circuit failure
Inlet humidity sensor failure
Exhaust humidity sensor failure
Indicates that the dryer has experienced an overheating condition
A value was entered that is not acceptable
Drying cycle in progress
Cool down cycle in progress
“Enter/Start” must be pressed to restart dryer
No cycle in progress
Time
Special Drying Cycle
Anti-Wrinkle program active
Anti-Wrinkle guard not active
Hi Temperature Setting
Medium Temperature Setting
Low Temperature Setting
Dryer is in Cool Down
Temperature
Anti-Wrinkle on time
Anti-Wrinkle delay time
Total Anti-Wrinkle time
Degree in Fahrenheit
Degree in Celsius
Exiting the program
15
SECTION VI
PROGRAMMING INSTRUCTIONS
A. Introduction To Programming
The various program selections are stored in the microprocessor controller and are broken down into
two (2) categories:
1. Preprogrammed Cycles (Keys “A” through “F”), which allow the user to have the six (6) most
commonly used cycle selections awaiting the push of a single keyboard entry to start the dryer.
2. System Parameters, which are the programs set by the factory and rarely need to be changed in the
field. These system parameters (programs) are stored in the memory as programmed locations
(key “2”).
Both the preprogrammed cycles and the system parameters have been preprogrammed by the factory with
the parameters shown on page 25 of this manual. The various program selections for the preprogrammed
cycles and system parameters are outlined in Section III of this manual.
All the program changes for the preprogrammed cycles and system parameters are done through the
keyboard selection keys on the front of the control panel. To change programs, an access code must
be entered. The procedure for entering this access code is as follows:
First, make sure that no cycle is in progress and that the display reads “FILL”. Then press the “Enter/
Start” key once and the “0” key three (3) times. The “0” key must be pressed three (3) times within
two (2) seconds after pressing the “Enter/Start” Key. If this sequence is not entered correctly, the
microprocessor controller will deny access in to the Program Mode. If the access code is entered
correctly, the L.E.D. display will read “ProG”. From this point, any of the preprogrammed cycles or
system parameters can be accessed.
To alter the programming, the user will locate the parameter that is to be changed. If the change is a
numerical one (i.e., time and / or temperature), the user will simply enter the numerical value desired.
If an error is made, press the “Clear/Stop” key ONCE and the incorrect entry that was made will be
cancelled. Once the entry is made, or the parameter set does not need to be changed, press the “Enter/
Start” key, and the microprocessor controller will advance to the next program selected.
If the parameter change is a status change, such as changing the temperature conversion from °F
(degree Fahrenheit) to °C (degree Celsius) or from “Spec” (Special Drying Cycle) to “Time” (Timed
Manual Drying Cycle), the user will press the “0” key ONCE. The “0” key acts as a flip-flop switch to
change the programming of a parameter. Once the entry is made, or if the parameter set does not need
to be changed, press the “Enter/Start” key, and the microprocessor controller will advance to the next
program selection.
When making numerical changes, please keep in mind to stay within the programming limits shown
on page 26. If an erroneous entry is made, the microprocessor controller will ignore the entry made
when the “Enter/Start” key is pressed and will return to the default numerical value previously set.
16
The microprocessor controller walks the user through the various parameters and advances each time
the “Enter/Start” key is pressed. Once all the steps in the particular preprogrammed cycle or program
location (system parameters) are set, the L.E.D. display will read “ProG.”. At this point, the user can
go to the next preprogrammed cycle or program location (system parameter) to be changed. If no
other programs need to be changed, the user can get out of the program mode by pressing the “Clear/
Stop” key. The microprocessor controller will now return to the operating mode, and the L.E.D.
display will read “FILL”.
B. Programming Flow Charts
The following section explains the programming of the preprogrammed cycles and programs
locations (system parameters) through the use of flow charts. A flow chart is nothing more than a
diagram of the programming process.
Two different symbols will be used in the flow charts:
a rectangle
a square
Each rectangle will represent a readout on the computer L.E.D. display, and each square will represent a key
pressed. For example:
1. If the flow chart shows the symbol FILL , the computer L.E.D. display will read the same.
2. If the flow chart shows
3
, you will press that specific key on the keyboard label.
Additionally, the flow chart arrows (i.e.,
) represent the program path.
On the sides of the flow charts are explanations of the flow chart procedure, and in some cases the
programming limits.
17
Special Cycle
FILL
0
0
0
ENTER
START
PROG
To enter program mode, press “Enter/Start”
key once, and immediately press the “0” key
three (3) times within two (2) seconds.
(Program Mode)
Select preprogrammed cycle to be changed (i.e., A).
A
CY A
TIME
Display will read “CY A” for 1 second., and then
“Spec” or “Time”. Cycle between “Spec” and
“Time” by pressing “0” key. If no
changes is required press “Enter/Start” key.
SPEC
0
0
SPEC
TIME
ENTER
START
Grd
nGrd
0
0
nGrd
Grd
Display will read “Grd
or “nGrd”. Cycle between
“Grd” and “nGrd” by
pressing “0” key. If no
change is required press
“Enter/Start” key.
ENTER
START
If the “Time” cycle was chosen
above then refer to page
CONTINUE
18
If the “Spec” cycle was chosen above continue
CONTINUED
The Display will read 1 of 9
material selections. Cycle
between each selection by
pressing the “0” key. When
you’ve reached the desired
selection press the “Enter/Start”
key.
SUIT
0
SYNT
0
DEF
0
ACRY
0
UOOL
0
COAT
0
rAYN
0
Nitt
0
ENTER
Silc
START
CONTINUED
19
CONTINUED
The Display will read 1 of 3
load sizes. Cycle between each
load size by pressing the “0” key
when the desired selection is
achieved press the “Enter/Start”
key.
LOAD
SIZE LG
0
LOAD
SIZE NEO
0
LOAD
SIZE SN
ENTER
START
Repeat for each
temperature
The Display will now flash the
“T Hi 175°”. If change is necessary, enter temperature change
(100° to 200° F in increments of
1° F), i.e., for 182° F press key
“1”, key “8”, key “2” and then
press “Enter/Start” key
THI
ENTER
START
T SET
ENTER
START
The Display will now flash the “T Lo 160°”.
If change is necessary, enter temperature
change (100° to 198° F in increments of 1°
F), i.e., for 190° F press key “1”, key “9”,
key “0” and then press “Enter/Start” key
T LO
ENTER
START
COOL
The Display will now flash “Cool 2” meaning cool down time is 2 minutes. If change is
necessary, enter time change (0-10 minutes)
then press “Enter/Start” key
ENTER
START
PROG
To stay in the program mode select next
cycle to be programmed. To exit program
mode hit “Enter/Start”
ENTER
START
BYE
20
The Display will now flash the
“T Set 165°”. If change is necessary, enter temperature change
(100° to 199° F in increments of
1° F), i.e., for 150° F press key
“1”, key “5”, key “0” and then
press “Enter/Start” key
Summary
“T Hi” Hi temperature is programmable from a minimum of 100° F to a maximum of 200° F in 1° F increments
or from a minimum of 38° C to a maximum of 93° C in 1° C increments.
“T Set” temperature is programmable from a minimum of 100° F to a maximum of 199° F in 1° F increments or
from a minimum of 38° C to a maximum of 93° C in 1° C increments.
“T Lo” Lo temperature is programmable from a minimum of 100° F to a maximum of 198° F. In 1° F increments
or from a minimum of 38° C to a maximum of 92° C in 1° C increments.
Cool down is programmable from a minimum of 0 minutes to a maximum of 10 minutes.
NOTE: Once “T Hi” temperature is entered the microprocessor should then automatically default the
“T Set” value 10 degrees below the “T Hi” value. Also, once “T Set” is entered the “T Lo”
will default to 5 degrees below entered “T Set” value.
21
Program Location 2
(No Cycle in Progress)
FILL
0
0
0
Enter
Start
To enter program mode, press
“Enter/Start” once and immediately
press the “0” key three (3) times within
two (2) seconds.
Prog
The display will now flash “g ON 20”
meaning guard on for 20 seconds. If
change is necessary, enter time change
(10-60 seconds in increments of 1 seconds)
For 30 seconds press key #3, Key “0”
then press “Enter/Start”
2
g ON
20
10-60
Enter
Start
gdly
120
Enter
Start
The display will now flash “T grd 20”
meaning total guard time. If change is
necessary, enter time change (1-99 minutes
in increments of 1 minute) For 30 minute
press key #3, Key “0” then press “Enter/
Start”
T grd
20
10-254 The display will now flash “gdly”
meaning guard delay. If change is
necessary, enter time change (10-254
seconds in increments of 1 seconds)
For 200 seconds press key #2, Key
“0”, key “0” then press “Enter/Start”
(1-99)
Enter
Start
°FAR
°CEL
0
0
°CEL
°FAR
Enter
Start
22
The display will read
“FAHR” or “CEL”. The
“0” key will toggle
between Fahrenheit and
Celsius. If no change ,
press “Enter/Start” key.
FILL
0
0
0
ENTER
START
PROG
A
CY A
TIME
To enter program mode, press “Enter/Start”
key once, and immediately press the “0” key
three (3) times within two (2) seconds.
(Program Mode)
Display will read “CY A” for 1 second., and then
“Spec” or “Time”. Cycle between “Spec” and
“Time” by pressing “0” key. If no
changes is required press “Enter/Start” k
SPEC
0
0
SPEC
TIME
ENTER
START
Grd
nGrd
0
0
nGrd
Grd
Display will read “Grd
or “nGrd”. Cycle between
“Grd” and “nGrd” by
pressing “0” key. If no
change is required press
“Enter/Start” key.
ENTER
START
If the “Time” cycle was chosen
above then refer to page
CONTINUE
23
If the “Spec” cycle was chosen above continue
Display will now flash “Time 20”.
If no change is required press
“Enter/Start” key. If change is
necessary, enter time change
(0-99 minutes in increments of
1 minute) for 30 minutes
press key #3, key “0” then
press “Enter/Start.
Display will now flash “Temp 160”.
If no change is required press
“Enter/Start” key. If change is
necessary, enter temperature change
(100°¨F - 215°F minutes in increments
of 1 minute) then press “Enter/Start.
Dry Time
20
0-99 minutes
ENTER
START
DryTemp
160
100-215°
ENTER
START
Cool
Time 0
ENTER
START
24
0-15 minutes
Display will now flash “Cool 0”.
If no change is required press
“Enter/Start” key. If change is
necessary, enter time change
(0-15 minutes in increments of
1 minute) then press “Enter/Start.
SECTION VII
FACTORY PRESET PARAMETERS / PROGRAMS
Parameters (programs) preset by factory for machines which are controlled through Humidity Sensing.
Cycle A:
“Spec” mode, anti-wrinkle guard active, fabric selection “SUIT”, load size large, “T
Hi 175°F, “T Set” 165°F, “T Lo” 160°F, cool down time is 2 minutes.
Cycle B:
“Spec” mode, anti-wrinkle guard active, fabric selection “UOOL”, load size large,
“T Hi 175°F, “T Set” 165°F, “T Lo” 160°F, cool down time is 2 minutes.
Cycle C:
“Spec” mode, anti-wrinkle guard active, fabric selection “SiLc”, load size large, “T
Hi 170°F, “T Set” 160°F, “T Lo” 155°F, cool down time is 2 minutes.
Cycle D:
“Spec” mode, anti-wrinkle guard active, fabric selection “rayn”, load size large, “T
Hi 180°F, “T Set” 170°F, “T Lo” 165°F, cool down time is 2 minutes.
Cycle E:
“Spec” mode, anti-wrinkle guard active, fabric selection “Nitt”, load size large, “T
Hi 165°F, “T Set” 160°F, “T Lo” 155°F, cool down time is 2 minutes.
Cycle F:
“Time” mode, anti-wrinkle guard active, dry time 20 minutes, dry temp 160°F, cool
time 2 minutes.
System Parameters/Programs
Key “2” - Anti-Wrinkle guard on for 20 seconds anti-wrinkle guard delay for 2 minutes, antiwrinkle guard total time 20 minutes, temperature set in Fahrenheit.
25
SECTION VIII
PROGRAMMING LIMITS
A. Preprogrammed Cycles
1. Special Cycle (mode)
a. Hi Temperature (“T Hi”) from 100° F to 200° F in one degree increments
b. Medium temperature (T Set”) from 100° F to 199° F in one degree increments
c. Lo temperature (T Lo”) from 100° F to 198° F in one degree increments
d. Cool Down Time (“Cool”) from 0 to 10 minutes in one minute increments
2. Time Drying Cycle (mode)
a. Drying temperature (“Temp”) from 100° F to 215° F in one degree increments
b. Drying time (“Time”) from 0 to 99 minutes in one minute increments
c. Cool down time (“Cool”) from 0 to 15 minutes
B. System Parameters (Program Locations)
1. Guard On Time (“g on”) from 10 to 60 seconds in one second increments.
2. Guard Delay Time (“gdly”) from 10 to 254 seconds in one second increments.
3. Total Guard Time (“T grd”) from 1 to 99 minutes in one degree increments.
26
SECTION IX
SYSTEM DIAGNOSTICS
All major circuits, including door, microprocessor temperature sensor, inlet and outlet RH Transmitters.
The microprocessor controller will inform the user, via the L.E.D. display, of certain failure codes, along with
indicators both in the L.E.D. display and at the outputs of each relay the easily identify failures.
A. Diagnostics (L.E.D. Display) Failure Codes
1. “door” indicates door switch circuit is open
a.There is a fault in the door switch circuit (external of the microprocessor controller)
2. “dsfl” indicates a fault in the microprocessor temperature circuit.
a.If a fault is detected in the microprocessor heat sensor circuit , the L.E.D. display will read “dsfl” until....
1. The problem is corrected and “Clear/Stop” is pressed, or,
2. The power to the dryer is discontinued (and the problem corrected)
3. “HTer” “DSFL” indicates a possible overheating condition. The microprocessor controller monitors the
temperature in the dryer at all times. If the computer detects that the temperature in the dryer has
exceeded 220° F (104° C) it will disable all outputs (shut the dryer down), and the display will flash
“H Ter” and then go “Dsfl”. The L.E.D. display will continue to read “DSFL” until the temperature
sensed has dropped to 220° F or lower and the microprocessor controller is manually reset by pressing the
“Clear/Stop” key.
4. “Purg” indicates that the sensors (humidity & temperature) are resetting or recalculating to start up again.
This occurs when the door is opened in the middle of a cycle and then the machine is restarted.
B. L.E.D. Display Indicators
The L.E.D. indicator dots located on the bottom portion of the display indicate the various microprocessor
controller output functions while a cycle is in progress. These indicator dots (as shown in illustration below) do not
necessarily mean that the outputs are functioning. They are only indicating that the function (output) should be
active (on).
27
1. L.E.D. Display Indicator Number 1
a. Blower motor circuit indicator:
1) This indicator dot is on whenever a cycle is in progress
2. L.E.D. Display Indicator Number 2
a. Air Jet Circuit Indicator
1) When the display reads “done” the air jet indicator will come on for seconds
3. L.E.D. Display Indicator Number 3
a. Heat Circuit Indicator:
1) This indicator dot is on whenever the microprocessor controller is calling for the
heating circuit to be active (on).
4. L.E.D. Display Indicator Number 4
a. Cycle Status Indicator:
1) This indicator dot is on whenever a cycle is in progress. This dot will stay on even
though the motor dot will drop out. This dot will drop out either at the end of the
cycle or if the “Clear/Stop” button is pressed twice.
C. Microprocessor Control Relay Output L.E.D. Indicators
There are a series of four L.E.D. indicators (red light) located at the lower left side area on the back of the
board. The L.E.D.’s indicate that the outputs of the microprocessor controller, are functioning.
28
1. “Air Jet” output L.E.D. indicator
a. If the dryer reads done (for the first 15 seconds) there is no air jet action and the indicator dot for the
air jet is on, but the L.E.D. indicator is off; then the fault is in the microprocessor itself.
1) If both the display indicator dot and the air jet output L.E.D. are on; then the problem (fault) is
elsewhere external of the microprocessor controller.
2. “MTR” output L.E.D. Indicators:
a. If the dryer is started and the blower motor is not operating, yet both the microprocessor controller
display blower motor indicator dot and “Door” input L.E.D. indicator is off: then the fault is the
microprocessor controller itself.
3. “Heat” output L.E.D. Indicator:
a. If the dryer is started and there is no “Heat”, yet the microprocessor controller display heat circuit
indicator dot is on, but the heat output L.E.D. indicator is off. Then the fault is in the microprocessor
itself.
1) If both the display indicator dot and the heat output L.E.D. are on; then the problem (fault) is
elsewhere (i.e., external of the microprocessor controller).
29
ADC 112196
1- 01/07/98-25
2- 03/23/99-5
3- 11/01/99-10