1
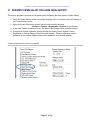
System Galaxy Quick Guide CONFIGURATION AND OPERATION BOSCH GV4 Alarm Panel SG 10.2 (or later) NOV 2012 Galaxy Interface Manual for Bosch G-series Alarm Panels This is a Galaxy Product Interface Guide. Information in this document is subject to change without notice. No part of this document may be reproduced, copied, adapted, or transmitted, in any form or by any means, electronic or mechanical, for any purpose, without the express written consent of Galaxy Control Systems. Copyright protection claims include all forms and matters of copyrighted material and information, including but not limited to, material generated from the software programs, which are displayed on the screen such as icons, look and feel, etc. Copyright © 2012 Galaxy Control Systems All rights reserved REVISION HISTORY REV. # DATE REVISION 1.6 11/06/2012 Covers enhancements in SG v10.2 to support new GV4 Bosch Alarm Panel SG 10.2 supports existing GV2 panels that use the 4020 Ethernet Module provided the Lantronix ‘Serial Settings’ are modified to create single-packet messaging (see the section in this manual about editing the 4020 Ethernet Module for details). SG 10.2 supports the Gv3 and new Gv4 Bosh panels which include supporting up to 32 Alarm Areas and Authorization Levels for User Codes. SG 10.2 initiates communication with the Bosh GV4 and dynamically manages the poll rate. SG 10.2 controls message handling through user defined status requests. SUPPORTING DOCUMENTATION: Galaxy documentation is available on the Galaxy Software DVD and the Galaxy website. SG-10 System Galaxy User Guide The main Software Manual describes the System Galaxy Software and GCS Services in full. 600-635 Galaxy Hardware Install Guide The main Hardware Manual describes general information and instructions that pertain to installation, specifications, and programming of the hardware. SG System Requirements Guide This is a quick reference document for the general system recommendations for SG. Galaxy Control Systems email: [email protected] website: www.galaxysys.com Page 2 of 39 Galaxy Interface Manual for Bosch G-series Alarm Panels Table of Contents 1 Introduction .................................................................................. 5 1.1 SCOPE OF DOCUMENT.........................................................................................5 1.1.1 OUTLINE OF THIS GUIDE.................................................................................................................. 5 1.2 OVERVIEW OF THE ALARM PANEL INTERFACE ...............................................6 1.2.1 FEATURES & CAPABILITIES.............................................................................................................. 6 1.3 How System Galaxy communicates with the Alarm Panel.................................7 1.3.2 SYSTEM REQUIREMENTS .................................................................................................................. 8 1.3.3 BOSH GV4 NETWORK REQUIREMENTS....................................................................................... 9 1.3.4 BOSH GV2 NETWORK REQUIREMENTS.................................................................................... 10 2 QUICK STEPS: Configuring System Galaxy ............................. 11 2.1 REGISTER SYSTEM GALAXY FOR ALARM PANEL SUPPORT .......................12 2.2 Setting the path to the Alarm Icons....................................................................13 2.3 Setting the Alarm Options...................................................................................14 2.4 Adding an Alarm Panel........................................................................................15 2.5 Adding an Alarm Panel Area...............................................................................16 2.6 Add an Alarm Panel Point ...................................................................................17 2.6.1 2.6.2 2.6.3 2.6.4 3 Alarm Alarm Alarm Alarm Point Graphic Symbols Programming....................................................................... 19 Point DVR Camera Settings ........................................................................................... 20 Panel CCTV Events Settings .......................................................................................... 21 Panel Audio Settings ........................................................................................................ 22 Managing GCS Alarm Panel Service......................................... 23 3.1 Starting the Alarm Panel Service........................................................................24 3.1.1 Start the Services (do each part as needed) ........................................................................ 24 3.2 Setting the Alarm Panel Service to start automatically ....................................25 3.2.1 3.2.2 3.2.3 3.2.4 3.2.5 3.2.6 3.2.7 3.2.8 Set the Services to start automatically (do each part as needed) ............................. 25 Troubleshooting the GCS Alarm Panel Service Connection.......................................... 26 GCS Alarm Panel Service system requirements ................................................................. 27 How to open or close the Alarm Panel Service (in XP).................................................... 27 Force connect to the Alarm Panel – Windows XP .............................................................. 28 Managing Properties of the Alarm Panel Connection ..................................................... 29 How to see and manage the IP connections between services .................................. 30 Log File for GCS Alarm Panel Service ..................................................................................... 31 Page 3 of 39 Galaxy Interface Manual for Bosch G-series Alarm Panels 4 Monitoring Events from the Alarm Panel ................................... 32 4.1 Command Menus for the Alarm Panel ...............................................................33 5 Device Status for Alarm Panel................................................... 34 6 Adding Icons for the Graphics screen........................................ 35 6.1 Placing Alarm Points on the Graphics screen ..................................................36 6.1.1 How to get the graphic icon on the Graphics screen:..................................................... 36 7 Crystal Reports for Alarm Panel Events .................................... 37 8 Managing User Codes for Alarm Panels ................................... 38 8.1 Managing Alarm Panel User Codes....................................................................38 8.2 Assigning Alarm Panel User Codes to Cardholders.........................................39 Page 4 of 39 Galaxy Interface Manual for Bosch G-series Alarm Panels 1 Introduction 1.1 SCOPE OF DOCUMENT System Galaxy v10.2 (or later) supports the new GV4 Bosch alarm panel as well as older GV2 and GV3 models. In addition to adding support for the GV4 panel, Galaxy has also redesigned the message handling for Bosch alarm panels. In SG 10.2, Galaxy takes advantage of precision communication techniques, which provide even greater control of event data and results in fast and efficient processing of point status and alarm events. 1.1.1 OUTLINE OF THIS GUIDE CHAPTER 1 » Features and capabilities of the System Galaxy alarm panel interface. » SG system requirements for interfacing with the Bosch G-series alarm panels. » Communication overview and description of the alarm panel event/communication service. CHAPTER 2 » Ethernet settings for the Alarm Panel communication module. » Registration and configuration of the SG software for alarm panel support. » System Operator filtering related to alarm panel features. » Managing user codes and retrieving point text. » Setting points/zones to trigger Galaxy alarms and activate DVR cameras or CCTV Systems. CHAPTER 3 » How to send SG operator commands to the alarm panel points/zones. » Monitoring incoming events and alarms from the alarm panel within System Galaxy. » System Reports for online Alarm Panel events and operator commands. NOTE: This Galaxy Interface Guide does not replace or supersede the Bosch installation and user guides. Installers must refer to the manufacturer’s instructions for complete information pertaining to the alarm panel/alarm system (i.e. installation, wiring, operation, etc.). Page 5 of 39 Galaxy Interface Manual for Bosch G-series Alarm Panels 1.2 OVERVIEW OF THE ALARM PANEL INTERFACE In System Galaxy 10.2 (or later), the GCS Alarm Panel Service will initiate connections to each alarm panel once the alarm panel’s network connection settings have been properly added to the SG software. The GCS Alarm Panel Service alternates specific status requests and controls the rate and precision with which data is retrieved from the alarm panel(s). This greatly improves processing time, accuracy of point status and detection of unacknowledged alarm conditions in the panel. 1.2.1 FEATURES & CAPABILITIES SG supports real-time status of alarm points and importing “point text” from the alarm panel Ability to monitor alarm panel events, alarm conditions, and device graphics Panel-level events (i.e. low-battery, offline, etc.) Linking point activity to trigger SG alarms and activate surveillance cameras Always Armed 1 (24-Hour Point) and Bypass Allowed2 features are supported SG operator command3 of panels and points (i.e. Arm/Disarm, Bypass/Un-Bypass, etc.) Adding user passcodes and retrieving unused user IDs from the SG software Assigning user codes to SG cardholders 1.2.1.1 ALARM PANEL INTERFACE DIAGRAM Page 6 of 39 Galaxy Interface Manual for Bosch G-series Alarm Panels 1.3 How System Galaxy communicates with the Alarm Panel System Galaxy uses GCS Services to communicate with the Alarm Panel. • Go to the next section for an overview of the GCS Services; SG monitors the condition of the alarm points (alarm conditions): 1. SG10.2 (or later) requests the real-time status updates from the Bosch Panel 1-2 seconds. In older versions of SG, the Bosch panel sent the status updates at the rate set in the panel. 2. The real-time updates include the following: the status of all alarm points (secure/on or unsecure/off) the status of all areas (arm/disarm) panel-level alarms such as low battery and AC failure 3. Alarm panel status messages are logged at the SG Alarm Panel Event Screen, the SG Alarm screen if configured to do so, the device status screen and the graphics/floor plan. 4. The Alarm History Report is available in SG for logging of “online” status messages. “Online” status messages are defined as the alarm panel events that occur while the panel was connected and communicating with System Galaxy. 5. The Bosch panel does not send “off-line” status messages to SG upon reconnect. Offline messages are defined as alarm panel events that occurred while the panel was disconnected from System Galaxy. SG Operators have the ability to send commands to the alarm panel: 1. arm and disarm entire panel 2. arm and disarm individual areas 3. bypass or un-bypass individual alarm points (enable/disable the point) SG allows you to configure “user codes” and download them to the panel. The user code includes the passcode and authority levels for all areas. 1.3.1.1 ALARM PANEL INTERFACE DIAGRAM Page 7 of 39 Galaxy Interface Manual for Bosch G-series Alarm Panels 1.3.2 SYSTEM REQUIREMENTS INSTALLATION & REGISTRATION System Galaxy 10.2 (or higher) supports GV4 model panels, as well as older GV2 and GV2. The alarm panel must be installed and configured before configuring SG; meaning you must program network settings, points, point‐text, areas, into the alarm panel before adding panel programming to System Galaxy. Panel, Points and Areas must match exactly. System Galaxy must be registered for Alarm Panel Support before panels can be added to SG. CONNECTIVITY & COMMUNICATION: The SG Communication server and necessary GCS services must be running and able to connect with the alarm panel(s) – (DBWriter, Client Gateway, Comm. Service, and the Alarm Panel Service. The Alarm Panel Service must be configured to run/start automatically. See Section in this guide about Managing the Alarm Panel Service. See Section 1.2.3 for Ethernet settings in the B420 module (GV4 and GV3v 8.11 or later). See Section 1.2.4 for Ethernet settings in the 4020 module (GV2 and GV3 prior to v8.11). SYSTEM GALAXY SOFTWARE CONFIGURATION: SG supports up to 32 areas per panel (the number of areas is based on the panel model). System Galaxy software allows you to program the user passcode, name & area authority levels. An authority level must be assigned a valid value (0 to 15) for every area in the user passcode screen. The authority level determines if the user has access to each area and which functions are allowed on for each area of the alarm panel. Each individual user can be linked to multiple cardholders after it is added to the SG software. MANAGING ALARM PANEL USERS: GV4 models support up to 1000 users (passcodes) per panel (determined by the panel, not by SG). User pass‐codes (PIN codes) must be at least 3 digits (maximum 6 digits; numeric). With GV4 models /GV3 v8.11 and later, each user is individually loaded to the panel memory when you apply/save the programming in the SG User Programming screen. Managing Users: You must decide where users will be managed BEFORE you add them. Users can be managed strictly at the alarm panel or strictly at SG. Mixing programming is not recommended. Bosh GV4 panels reserve User ID ‘0’ and ‘1’ as Installer Service Codes. If you will be managing users from the SG software, you must match the programming of the reserved users (ID#, passcode, auth levels) in SG in order to preserve their position in the panel. NOTE: The SG software will sequentially prompt the SG System Administrator to add these reserved passcodes when adding a new user. If you want to preserve the reserved passcodes, you must add them to SG and recreate the passcode and authority levels to exactly match the way they are in the panel. You can decline to add user 0 & 1 to the SG database when prompted. See the ADDING USERS SECTION in this guide before adding users from the SG software! Page 8 of 39 Galaxy Interface Manual for Bosch G-series Alarm Panels 1.3.3 BOSH GV4 NETWORK REQUIREMENTS BOSH B420 ETHERNET MODULE SETTINGS: Use these known Ethernet and communication settings for the B420 module (GV4) when interfacing with System Galaxy. 1. The B420 Module default port # is 7700. Galaxy does not recommend changing this value. 2. The Bosch requires a dedicated B420 Module for each comm channel. Therefore a dedicated B420 module is required for System Galaxy. 3. The B420 Module must have ‘Automation’ enabled. This is done by setting the B420’s Rotary Switch to a unique and valid value (1, 2, or 3). See the chart on the B420 Install Guide (PN: FOU1O215236/7). 4. You can use the BOSCH RPS software to set up the Ethernet / communication settings. » The RPG Software requires its USB dongle to be installed in the PC in order to operate. 5. (GV4) You must configure the Packet Control settings of the B420 to communicate with System Galaxy. This is done via the B420 Web Configuration Page. » To access the web page, you must set the B420 Rotary Switch to ‘0’ and then power‐fail the B420 (to initialize the ‘0’ address). You must also know the unit’s IP address in order to open the web page in a browser. Under Channel 1 > Serial Settings: Enable Packing must be ‘checked’ Idle Gap Time must be “12 msec” Flush Mode Input & Output Buffers must all be set to YES 6. You must return the Rotary Switch to a setting value for automation after configuring the Packet Control settings. Again you must power‐fail the B420 to reinitialize the address to the correct value. Page 9 of 39 Galaxy Interface Manual for Bosch G-series Alarm Panels 1.3.4 BOSH GV2 NETWORK REQUIREMENTS BOSH GV2 ETHERNET MODULE SETTINGS: This information applies to Bosch 9000/7000 Series panels GV2 and GV3 V8.11 OR OLDER. Panels connect to Galaxy by three possible methods; (a) Ethernet, (b) RS232 direct connect, or by (c) Lantronix IP/Serial. a) (CHOICE A) Ethernet Device (most common) DX4020 Module: Bosch installer must set up the module including the following known requirements: Follow wiring instructions from the Bosch install documentation. DIP switch settings : 1 thru 6 and 8 = down/off and 7 = up/on a. Flow control = none b. UDP datagram = disable ( to use TCPIP) c. telnet port = 9999 d. Set connect mode to “C0” (C, zero) instead of “CC”; Supports encryption ‐ special configuration info in the Bosch manuals. This is set at the module via telnet and must be set on the System Galaxy end in the Alarm Panel Service screen. Whatever is set at DX2040 module must match the setting in the Alarm Panel Service. See Section 8 for how to configure encryption at the Alarm Panel Service. key length = 128 (default) ; must be zero if not used. Must specify a key value: the key value is a 16 digit hex code; must be blank if not used. Example: ‘’01020304050607080910111213141516’ is an example of a 16 digit hex code, which is actually 32 characters long; a hex digit is made of 2 characters. Valid hex characters are: 0, 1, 2, 3, 4, 5, 6, 7, 8, 9, A, B, C, D, E, F. Therefore a hex value of ‘01’ = 1 and ‘0A’ = 10 when converted to decimal value. b) (CHOICE B) Direct connect using RS 232 Connection Module such as the Model DX 4010i: the RS‐ 232 module provides serial connection to System Galaxy Communication Server (PC). The Communication Server is defined as the PC where the main GCS Services reside. Wiring info is in the Bosch Install documentation for com to panel DIP Switch settings are 1,2,3,4 = UP and 5,6,7,8 = DOWN 9600 Baud, no parity, 8 bit, 1 stop bit Uses DB9 RS232 cable to connect to PC com port Pin Out for RS‐232 Cable DB9 female 2 3 5 DB9 female 3 2 5 c) (CHOICE C) Lantronix IP/Serial Direct Connect: using serial (as above) and IP on the SG comm side. Configure Lantronix device the same as with Network Bridge for a Remote Primary 508 panel. See the Lantronix manual for configuration information. Page 10 of 39 Galaxy Interface Manual for Bosch G-series Alarm Panels 2 QUICK STEPS: Configuring System Galaxy QUICK STEPS to properly setup System Galaxy to interface with the alarm panel. Step Action Reference 1 All installation, wiring and programming of the Alarm Panel should be completed before configuring System Galaxy. The Alarm Panel should be installed and fully configured before configuring System Galaxy. Manufacturer’s documentation 2 Configure the Ethernet module to communicate with the Galaxy event server. Or appropriate form of connection. See Sect 1.3.3 (GV4) for details pertinent to SG. 3 Register for Alarm Panel Support in System Galaxy Section 2.1 4 Setup Workstation Options as needed: A – specify the Graphics path for Alarm Icons (section 2.2) B – set the Alarm Options for the Workstation (section 2.3) Section 2.2 & 2.3 5 Add (setup) the Alarm Panel and network setting in System Galaxy to match the setup of the Bosch Alarm Panel. Section 2.4 6 Add (setup) the Alarm Areas to match the actual setup of the Bosch Alarm Panel. Section 2.5 7 Add (setup) the Alarm Points to match the actual setup of the Bosch Alarm Panel. Section 2.6 8 Setup and Start the Alarm Panel Service – this service is installed to run automatically by default and should be running. Section 3 3.1 – starting the service Note that additional information for managing the service is provided in Section 3, however the service should install to the proper default settings. The additional information is included to explain settings and operation default settings are to be altered. 3.2 – setting service to start automatically At this point System Galaxy should begin receiving events from the Alarm Panel. The remaining sections cover operating the System Galaxy Alarm Panel features. Monitoring Events from the Alarm Panel Section 4 Command Menus for the Alarm Panel Section 4.1 Device Status screen for the Alarm Panel Section 5 Adding Icons for the Graphics Screen Section 6 Placing Alarm Points on the Graphics screen Section 6.1 Crystal Reports Section 7 Managing Alarm Panel User Codes from System Galaxy Section 8 Page 11 of 39 Galaxy Interface Manual for Bosch G-series Alarm Panels 2.1 REGISTER SYSTEM GALAXY FOR ALARM PANEL SUPPORT This section provides instructions for Registering and Configuring the alarm panel in System Galaxy. 1. Open the System Galaxy software by double-clicking the SG icon located on the PC desktop of the Communication Server. 2. Open the System Registration screen from the main menu by selecting Configure > Options > Registration > System (or use Wizard) 3. In the main System Registration screen, the Alarm Panel Support option must be checked 4. Complete the normal registration process through the Galaxy Control System’s Online Registration or through Galaxy Control Customer Support. (Product registration must be performed by the certified Galaxy Dealer and is dependent on purchased options). System Registration screen (cropped) Page 12 of 39 Galaxy Interface Manual for Bosch G-series Alarm Panels 2.2 Setting the path to the Alarm Icons This section describes setting up Workstation Options that are related to alarm features. The settings for alarm options and the path to the alarm icons are set in the Workstation Options screen. The multi-media path to the alarm icons must be set to the correct directory for the system to find the correct graphics used in mapping and displaying status of alarms (see section 4.1). 1. Check the Workstation Options related to Alarm Panel interface: 2. Open Workstation Options screen from SG menu: Configure > Options > System Settings. 3. Select the Multi-Media tab and verify that the path for the graphic icons is set as needed: The default path is set to “C:\Program Files\System Galaxy\Icons”. Note: If a different directory (shared directory) is used, then browse to that location. You may need to copy the alarm panel icon-graphics to that location if they have not already been moved. Also: if the path to the System Galaxy folder has been installed in a different location than the default installation path, user must browse to the path. 4. Click APPLY and OK to save changes <OR click APPLY and go to next section to set up alarm options>. Workstation Options screen – Multi-Media tab (cropped) Page 13 of 39 Galaxy Interface Manual for Bosch G-series Alarm Panels 2.3 Setting the Alarm Options Workstat0ion alarm options determine how the Workstation behaves when SG Alarm Events occur for acknowledgeable alarms. An acknowledgeable alarm is defined as a detected event from an Alarm Panel point that is armed and active and also has been configured to require acknowledgement. An Alarm Panel point is configured to require acknowledgement by enabling the acknowledge option in the SG point programming screen. 1. Click/select the Alarm Options tab in the System Settings screen and set/verify each option is set as needed. The table below is an abbreviated list of the pertinent workstation alarm options. The remaining alarm options are discussed in full in the main SG7 Software Manual - Chapter 15. 2. Click OK and APPLY to save changes. You will need to restart the software to initialize changes. Option Description Pop up on Alarm (default to checked/on) When checked, System Galaxy pops the SG Alarm Event screen to the front when an acknowledgeable event is detected. (default to checked/on) – allows DVR Viewer to start when alarm event occurs. When checked, System Galaxy starts the GCS DVR Viewer window if a dvr/camera is linked to the alarm point. The DVR Viewer shows live video for the camera that is linked to the activated alarm panel point. (default to checked/on) When checked, operator is unable to close the System Galaxy when a “pending” (unacknowledged) alarm is active in SG Alarm Event screen. Automatically call up DVR Video Prevent Appl. Shutdown w/ Pending Alarms Allow Acknowledge all alarms Acknowledge alarm priority range Force response above (default to checked/on) – acknowledge all command clears the alarm events. When checked, the operator can select the ‘acknowledge all’ option from the command menu (shortcut menu) in the SG Alarm Event screen. (Defaults to 0 -9999) - allows client to set the range for acknowledgeable alarm events on a per workstation basis. (acknowledgeable = alarm point set to ‘ack’) Acknowledgeable alarms outside of the specified range will not trigger an SG Alarm Event at the local workstation. Acknowledgeable alarms inside the range will display on the SG Alarm Event screen for the local workstation. (Defaults to 0) - allows client to define the threshold for alarm response based on priority. (acknowledgeable = alarm point set to ‘ack’) Acknowledgeable alarms with priorities below this value will not force a response from the operator. Acknowledgeable alarms above this value will require a response from the operator before alarm event will be cleared from the screen. NOTE: the Alarm Panel Point must be set to require acknowledgement (checked) in the Point Property screen. Also the alarm priority set in the Alarm Point Property screen must be within the acknowledgeable alarm priority range defined in the Workstation/Alarm Options screen. Workstation Options screen – Alarm Options tab (cropped) Page 14 of 39 Galaxy Interface Manual for Bosch G-series Alarm Panels 2.4 Adding an Alarm Panel The alarm panel must be added in the System Galaxy software before the GCS Alarm Panel Service will connect to the panel. The programming must match the Alarm Panel configuration. After Panel, Areas and Points are added, System Galaxy can begin receiving status events from the alarm panel. The alarm panel events are displayed in the Alarm Panel Event screen. 1. open the Alarm Panel Property screen (Configure > Hardware > Alarms > Alarm Panels) 2. click the Add button and set the following fields as needed: Name field: type a descriptive name ID number: (must be unique) Panel Type: pick ‘BOSCH D9000/D7000 Series from the droplist Connection Method: choose appropriate connection type a) On Board Ethernet: if connecting to the Bosch DX4020 Ethernet module b) Serial Comm. Port: if connecting to the Bosch DX4010i module c) Lantronix with TCP/IP: if connecting to the panel via Lantronix device IP Address: enter the IP Address depending on the Connection Method chosen: a) IP Address of the DX4020 Ethernet module if On-board Ethernet option is chosen b) (not used) if Serial Com Port option for 4010i is chosen c) IP Address of the Lantronix device if using Lantronix with TCP/IP option is chosen Port Number: enter the port number if an IP Address is used: a) 3001 (Lantronix) b) blank if direct connect (serial com port connection to 4010i) c) 7700 (Ethernet 4020 Module or B420 Module) Com Port (if using Serial Comm. Port): pick the com port being used at the PC Baud Rate(if using Serial Comm. Port): set to 9600 Passcode: blank/not used Communication Server: Enter Name of PC that will run the GCS Alarm Panel Service. 3. click the Apply button to save the settings. Alarm Panel Property screen (cropped) Page 15 of 39 Galaxy Interface Manual for Bosch G-series Alarm Panels 2.5 Adding an Alarm Panel Area The Alarm Panel Area should be added in the System Galaxy software. The programming must match the Alarm Panel Area configuration. An alarm panel area consists of 1 or more points After Panel, Areas and Points are added, System Galaxy can begin receiving status events from the alarm panel. (Note the alarm panel connection must be maintained). The alarm panel events are displayed in the Alarm Panel Event screen. 1. open the Alarm Panel Areas Property screen (Configure>Hardware>Alarms>Alarm Panel Areas) 2. pick the desired alarm panel name from the Select Alarm Panel droplist 3. click the Add New button and set the following fields as needed: Name field: type a descriptive name (preferably that matches the panel) Area Number: enter the area number that matches the area in the alarm panel (1-8) Show in Tree: the show in tree checkbox allows Alarm Panel Area Icon to display in the System Galaxy Hardware Tree. 4. click the Apply button to save changes NOTE: The SG Hardware Tree may need to be refreshed to pick up the Area Icon. To refresh the hardware tree, simply close the tree’s window pane by clicking the [x] button at the top and reopen it from the SG View menu (select View>Hardware Tree). NOTE: The Alarm Panel Area Icon will display under the specific Alarm Panel Icon to which it is assigned. Expand the Alarm Panels Icon, and then expend the Alarm Panel Icon to see the Alarm Panel Area Icon. Alarm Panel Area Property screen (cropped) Page 16 of 39 Galaxy Interface Manual for Bosch G-series Alarm Panels 2.6 Add an Alarm Panel Point The alarm panel point must be added in the System Galaxy software. The programming must match the Alarm Point configuration at the Alarm Panel. After Panel, Areas and Points are added, System Galaxy can begin receiving status events from the alarm panel. The alarm panel events are displayed in the Alarm Panel Event screen. 1. open the Alarm Panel Point Property screen (Configure>Hardware>Alarms>Alarm Panel Points) 2. pick the desired Alarm Panel from the Select Alarm Panel droplist 3. click the Add button and set the following fields as needed: Point #: (1-8) set the point number to match the Alarm Panel input terminal Name field: either type a descriptive name ~or~ use the [Get Point Text From Panel] button to get the actual point name from the alarm panel Select Area: pick an area name (must match area number set at Panel) Acknowledge checkbox: sets the alarm point to require acknowledgement a) When checked, an armed not normal (trouble) event will be logged to the System Galaxy Alarm Event screen and focus will be swapped to the SG Alarm window. b) When unchecked, an armed not normal (trouble) event will only be logged to the Alarm Panel screen (i.e. focus will not swap to the SG Alarm Event screen and Auto-activate DVR will not occur). Priority: sets the alarm priority for this alarm point (0-9999 valid) NOTE: The priority number in this field must be within the priority range in the Workstation Options/Alarm Options screen for an event to log in the Alarm Event screen at the local workstation (see Priority Range option in sect 4.2 of this manual). The SG Alarm Event screen will pop to the front window if the ‘pop on alarm’ option is check in Workstation Options (see Pop on alarm option in section 4.2 of this manual). Show in Tree checkbox: when checked, allows Alarm Panel Point Icon to show in the System Galaxy Hardware Tree. Always Armed (24 hour point): set this to “checked” only if the alarm point is a 24 hr armed at the Bosch Alarm Panel. NOTE: the Bypass option on the operator command menu will be disabled if the point is configured to be a 24‐hr point. Bypass Allowed: when checked, the operator can bypass/unbypass a point from command options on SG shortcut menus. When unchecked, the bypass options are not available on the command menus. (Commands are found by right-clicking the point’s icon, graphic or event messages in the System Galaxy screens.) Operator Response Instructions: type operator instructions to be displayed in the SG Alarm Event screen if an armed-not normal (trouble) from this Alarm Point will need an operator response (used when triggering SG Alarm Events in the software for incoming alarms). Continue on the next page… Page 17 of 39 Galaxy Interface Manual for Bosch G-series Alarm Panels Alarm Panel Point Property screen (cropped) The fields on tabbed panels are described in the following sections Page 18 of 39 Galaxy Interface Manual for Bosch G-series Alarm Panels 2.6.1 Alarm Point Graphic Symbols Programming Allows operator to configure which icons represent each Alarm Panel status condition. User can choose the condition from the drop list and select an available graphic from the default directory or browse to a directory where graphics are stored. Select status condition: pick the condition to match with a graphic icon Choose a graphic condition: pick an icon to match to the selected condition Use the […] button to browse to a different directory if desired Use the [Copy Symbols from another Point] to copy the icon configuration from a previously programmed alarm point. This is a quick way to reproduce the icon mapping for multiple points that use the same symbols. Note that changes are saved when the [Apply] button is selected Graphics Symbols tab (cropped) Note: it is a good idea to establish a standard color pattern. Consistency avoids confusion. For example a pattern of color use could be as follows: red icons (doors, dots, etc.) used for ‘armed – not normal’ conditions green icons for ‘armed – normal’ conditions yellow icons for ‘unarmed – not normal’ conditions blue icons for ‘unarmed – normal’ conditions gray icons for ‘bypassed’ conditions Note that changes are saved when the [Apply] button is selected Page 19 of 39 Galaxy Interface Manual for Bosch G-series Alarm Panels 2.6.2 Alarm Point DVR Camera Settings Allows operator to link status events from this alarm Point to a DVR unit and camera. When this option is configured, the system associate a camera with the designated alarm point. When programmed, the operator will be able to initiate DVR Viewing within system galaxy for the alarm point. • Video can be manually started by the operator by right-clicking the Alarm Point Icon in the hardware tree and then picking the ‘View Live Video’ option from the shortcut command menu. The view live video option is available from graphics screen, device status screen, alarm panel event messages. See the GCS DVR Interface Manual for your type of DVR to find more information on DVR Interface features. • The software will also automatically pop open the DVR Viewer if the point is set to require acknowledgement of the armed-not normal/trouble. See Section 4.2; Part-3 for Alarm Options related to popping alarms and automatically starting the Viewer. Select a DVR Name: the DVR must already be registered and configured – Refer to the GCS DVR Interface Manual for your DVR for setup and operation instructions. Choose a Camera: the camera(s) must already be configured DVR Settings tab (cropped) Note that changes are saved when the [Apply] button is selected Page 20 of 39 Galaxy Interface Manual for Bosch G-series Alarm Panels 2.6.3 Alarm Panel CCTV Events Settings Allows operator to set CCTV parameters to be sent to CCTV system. Alarm number = must be greater than zero; allows user to set the number to send to the CCTV service/system. Zero means no alarm message is sent to CCTV system. Camera, Monitor, Position, fields allow SG to send commands to CCTV system. Manual command = if programmed, the user can send commands from the short menu in the hardware tree. URL = if programmed, can invoke commands at the web site CCTV Events tab (cropped) Note that changes are saved when the [Apply] button is selected Page 21 of 39 Galaxy Interface Manual for Bosch G-series Alarm Panels 2.6.4 Alarm Panel Audio Settings Allows user to set audio indicators for alarm and trouble conditions. Click the Alarm Audio / […] button to browse to the desired audio file to be sounded for an alarm condition. Click the Trouble Audio / […] button to browse to the desired audio file to be sounded for a trouble condition. Audio Settings tab (cropped) Note that changes are saved when the [Apply] button is selected Once the Alarm Panel is configured and the necessary GCS Services are running, System Galaxy can begin receiving alarm panel status messages. Page 22 of 39 Galaxy Interface Manual for Bosch G-series Alarm Panels 3 Managing GCS Alarm Panel Service GCS Alarm Panel Service runs as a true background service and should be set up to start automatically when the PC starts. The AP Service icon displays a gray alarm panel icon in the system tray. IMPORTANT: the AP Service has a dependency to the DBWriter service and drops its connection to the alarm panel if the DBWriter is offline. The DBWriter Service must be running to receive events. The following GCS Services must be running for alarm panel events to display at System Galaxy and be recorded in the database (i.e. available in history reports). The GCS DBWriter Service must be running for messages to log to the database and for the Alarm Panel Service to connect to the database. The GCS Alarm Panel Service must be running and connected and to the panel. The GCS ClientGW Service must be running for the status events to display in SG Each of these services maintains one ODBC connection to the database. For more information on GCS Services see the System Galaxy Software User Guide. Diagram of Services Page 23 of 39 Galaxy Interface Manual for Bosch G-series Alarm Panels 3.1 Starting the Alarm Panel Service The Alarm Panel Service must be configured to start up automatically when the PC starts up and also to automatically connect to the alarm panel. 3.1.1 Start the Services (do each part as needed) » Windows XP: Verify that the Alarm Panel Icon is displayed on the system tray of the SG communication server » . Windows-7: the Alarm Panel Icon will not be displayed on the Windows-7 task bar. You must open the Services window in Control Panel to see the service running. 1. To Start the Alarm Panel Service, open the Services window: note also start any other GCS services as necessary (ref Part 1-c and d). See screenshot on the next page for an example. a) Windows-7 or XP > click the PC Start button, select Settings>Control Panel on the menu and open the Administrator Tools folder, then open the Services window. Scroll down to find the GCS Alarm Panel Service in the list. 2. Right-mouse-click on the GCS Alarm Panel service and choose to START the Alarm Panel Service. IMPORTANT: Stopping or restarting services temporarily interrupts communications between System Galaxy and the Alarm Panel. The panels will operate offline from System Galaxy, but will not transmit any offline events upon reconnect. STARTING SERVICES from the PC Services window RIGHT-CLICK THE SERVICE TO GET THE SHORT MENU. THEN, CLICK THE ‘START’ OPTION TO START THE SERVICE. SELECT PROPERTIES OPTION TO CONFIGURE THE SERVICE TO START AUTOMATICALLY WHEN PC IS RESTARTED Page 24 of 39 Galaxy Interface Manual for Bosch G-series Alarm Panels 3.2 Setting the Alarm Panel Service to start automatically The Alarm Panel service should install to ‘automatically start’ when PC boots up. If this option has been disabled, do the following: 3.2.1 Set the Services to start automatically (do each part as needed) 1) To set the Alarm Panel Service to start automatically do the following To open the Services window, user can do one of the following: a. EITHER > Right-click the My Computer icon on the desktop and select the Manage option then find and open the Services window under the Services and Applications branch in the Computer Management window. b. OR > click the PC Start button, select Settings>Control Panel on the menu and open the Administrator Tools folder, then open the Services window. Scroll down to find the GCS Alarm Panel Service in the list. Scroll down to find the GCS Alarm Panel Service in the list. Right-click the name of the GCS Alarm Panel Service to show the shortcut menu Pick the ‘Properties’ option on the short menu in the [Start Type] field, select the ‘Automatic’ option Windows XP Note that the Interact with desktop option is also found in this window on the Logon tab. This must be checked in order for the service to display on the system tray. Click on [OK] button to save settings – the service will start automatically the next time the PC is rebooted/restarted CONFIGURING SERVICE to Start Automatically SELECT PROPERTIES OPTION TO CONFIGURE THE SERVICE TO START AUTOMATICALLY WHEN PC IS RESTARTED Page 25 of 39 Galaxy Interface Manual for Bosch G-series Alarm Panels 3.2.2 Troubleshooting the GCS Alarm Panel Service Connection The GCS Alarm Panel service automatically connects to an alarm panel if the alarm panel is properly installed, registered, and configured in System Galaxy. Registration and setup are described in the following sections. This section includes pertinent notes about how the GCS Alarm Panel service works. The Alarm Panel Service listens on port 4004 Client Server Relationships: Server relationship to GCS ClientGW Service (client gateway) Client relationship to the GCS DBWriter Service Functionality: - Makes/Manages connections to Alarm Panels when the GCSDBWriter is up/running. - Provides communication between GCSClientGW Server, GCSDBWriter and alarm panels. - Maintains ODBC connection to SysGal DB. Troubleshooting TIPS: a) Stopping the GCS Alarm Panel service will interrupt alarm panel statuses to the System Galaxy Application(s) and to the System Galaxy Database. The alarm panel does not retransmit offline status messages to SG or SG database after reconnection. b) If only the Client Gateway service is stopped, the alarm statuses may still be available in the database through system reports after the GCS ClientGW service is restarted. c) If only the SG application is stopped, the alarm statuses may still be available in the database through system reports after the GCS ClientGW service is restarted. d) If the DBWriter service is stopped, the Alarm Panels service will drop the connection to the panel and begin the reconnect retry cycle until connection is re-established with the DBWriter. e) The Alarm Panel service will not connect to panels unless it is connection to the DBWriter first. f) The Alarm Panel service will drop connections to panels if it looses connection to the DBWriter. IMPORTANT: If the GCS DBWriter Service is stopped, the Alarm Panel service will automatically disconnect from the Alarm Panel. The Alarm Panel service is dependent on the DBWriter service to be running in order to connect to alarm panels. Page 26 of 39 Galaxy Interface Manual for Bosch G-series Alarm Panels 3.2.3 GCS Alarm Panel Service system requirements The following information should be considered in addition to the General System Requirements to run System Galaxy with services. See the System Recommendations for SG-7 document for general system requirements. 1 ODBC connection to the System Galaxy database (database server) 1 outgoing IP connection to DBWriter (database server) 1 incoming IP connection to Client Gateway (communication server) 1 connection (IP or 232) to each panel 3.2.4 How to open or close the Alarm Panel Service (in XP) To open the AP Service window, operator must double-click the Alarm Panel Service Icon on the PC system tray. The system tray shows icons of services in the lower right-hand corner of the computer screen. Slowly hovering your mouse pointer over the icons will cause the service name to display. A GCS Service window is opened by double-clicking the ICON on the Window® XP system tray. The blow-up shows the icons for GCS Client Gateway, GCS DBWriter, and GCS Alarm Panel. Close Service Confirmation Dialog box – Windows XP Click the [X] button on the AP Server window and choose one of the following options. NOTE on Windows-7 Select the Hide GUI, Keep Service Running to close the window and keep the service running minimized on the system tray. Select Exit, Terminate Service close the window and stop the service. Select Cancel to keep the window open. The services do not show on the system tray and must be verified in the services screen under the control panel. Page 27 of 39 Galaxy Interface Manual for Bosch G-series Alarm Panels 3.2.5 Force connect to the Alarm Panel – Windows XP The GCS Alarm Panel Service reads the alarm panel configuration from the SG database and begins making attempts to auto-connect to the panel at least 60 seconds after the configuration is saved. Connect to the Alarm Panel manually as well as view/edit connection properties: The Alarm Panel Connections tab shows an IP connection for each alarm panel that has been configured in System Galaxy. The status (connected or disconnected) is displayed (see fig. 11a). a) Auto-Connect: the Alarm Panel service should automatically connect to the panel once the configuration is saved in the SG Database. The auto-connect option defaults to “on” and can be edited for each individual panel connection from the Service Configuration window ( b) The ability to connect to a panel depends on several things: The alarm panel must be properly connection to the SG Communication Server (PC). The Alarm Panel must be registered and correctly configured in System Galaxy. Both the DBWriter Service and Alarm Panel Service must be running. c) User can manually connect and disconnect from the alarm panel by right-clicking the connection status and getting a shortcut menu. NOTE: The short menu also allows user to open the Connection Properties where the settings to automatically connect to panel can be enabled or disabled. User can also edit the Connection Settings and configure Encryption from the Connection Properties screen. . Alarm Panel Service screen/Connecting to the Alarm Panel (cropped) Right-click the panel status and Select the desired command Connect/Disconnect - user can manually connect/disconnect the selected panel. Ping/Telnet – opens a DOS window and executes a ping/telnet command to the IP Address of the selected panel. (Only for panels using TCP/IP connections) Properties – opens the Connection Properties screen, allowing user to change the connection settings for the selected panel. See the following section on Managing Connection Properties for details on the properties fields and Setting Encryption. In Windows-7 uses the GCS Service Monitor. – SG initiates the connection to panel automatically in SG V10.2 or later. If you wish to perform manual operations or change the settings of the service, you must stop the service and browse to the System Galaxy folder and run the Alarm Panel service manually. Page 28 of 39 Galaxy Interface Manual for Bosch G-series Alarm Panels 3.2.6 Managing Properties of the Alarm Panel Connection User can edit the IP parameters and connection settings from the Connection Properties window. User can also configure the encryption settings from this window. In Windows-7 uses the GCS Service Monitor. –If you wish to change the settings of the service, you must stop the service and browse to the System Galaxy folder and run the Alarm Panel service manually (right click the program file and choose run as Administrator). Connection Properties screen The parameters in this screen are originally programmed in the Alarm Panel Properties screen and saved in the SG database (Refer to Section 5). NOTE: Two important check boxes appear at the bottom of the Connection Properties screen: The “Auto-Connect when service starts” option: When checked the selected alarm panel will be automatically connected whenever the Alarm Panel Service starts. The “Auto-reconnect” option: When checked the Alarm Panel Service will automatically attempt reconnect to the selected panel when the panel becomes disconnected. Also user can access the Encryption Settings from this screen by pressing the [Encryption Settings] button. When the [Encryption Settings] button is pressed this dialog box opens. a. key length = 128 (default) ; must be zero if not used. b. must specify a key value: the key value is a 16 digit hex code; must be blank if not used. Page 29 of 39 Galaxy Interface Manual for Bosch G-series Alarm Panels 3.2.7 How to see and manage the IP connections between services The TCP/IP Connections tab shows the incoming and outgoing IP connections between GCS Services. The ClientGW Service and the DBWriter Service should each show a connection in this screen. There should only be one Client Gateway connection even if the system has more than one client. Alarm Panel Service screen/Connecting to the DBWriter (cropped) Right-click the panel status and Select the desired command User can manually connect and disconnect from the services by right-clicking the TCP/IP Service Connections screen and getting a shortcut menu. Force Disconnect option: allows operator to manually disconnect the selected service. The incoming (ClientGW) service should reconnect automatically within 30 to 60 seconds provided it is up and running. The outgoing connection to DB Writer Service can be forced to reconnect using the ‘Connect to Server’ option on the shortcut menu. Connect To Server option: allows the user to manually connect to the downstream service (in this case the DBWriter). To reconnect manually, you must know the IP address and port number of the downstream service. DBWriter listens on port 4001. Use the NIC card loop-back address (127.0.0.1) if the DBWriter and Alarm Panel service are both running on the same computer (which should be the case). 4001 Page 30 of 39 Galaxy Interface Manual for Bosch G-series Alarm Panels 3.2.8 Log File for GCS Alarm Panel Service The AP Service creates a log file of connection status messages. This is log of connection attempts between the Service and the Alarm Panel as well as other messages. This text file is stored in the System Galaxy\Log Files folder. The buffer of recent entries is viewable in the GCS Alarm Panel screen on the Status Messages tab. Alarm Panel Service screen/Connect to Panel statuses (cropped) NOTE: the de bugging option should not be on unless recommended specifically by System Galaxy Technical Support. Page 31 of 39 Galaxy Interface Manual for Bosch G-series Alarm Panels 4 Monitoring Events from the Alarm Panel System Galaxy displays alarm panel status messages in the Alarm Panel Event screen. If the system is registered for the alarm panel then the Alarm Panel Event screen will open when the software opens. When all the necessary GCS Services are running and the alarm panel is connected to the Alarm Panel service, then System Galaxy can start receiving live events from the alarm panel. In the picture below, the operator sees: Alarm Panel Event screen, which displays events from the alarm panel, alarm area(s) and alarm point(s). Alarm Panel branch in the hardware tree. Right-clicking an alarm event opens the command menu. Operator can send commands to the alarm panel from a command menu. Command menus are also available when user right-clicks icons in the hardware tree. IMPORTANT: to reopen the alarm panel event window without restarting System Galaxy – go to the main menu, select View>Alarm Panel Events. If this option is grayed out your event window is already open. Alarm Panel Event screen with command menus Right-click the event message or the icon in the hardware tree to get the command menu Page 32 of 39 Galaxy Interface Manual for Bosch G-series Alarm Panels 4.1 Command Menus for the Alarm Panel Shortcut command menus are available when user right-mouse-clicks the icons from the hardware tree. The alarm panels will be displayed as a branch in the hardware tree. From the Alarm Panel Icon, the operator can expand and see the Alarm Panel and its Areas and Points. NOTE: Alarm Panel commands are also available from the Graphics Screen, Device Status screen and the Alarm Panel Event screen. To get the command menu in the Alarm Panel Event screen, operator must right-click the event message. Command Menu options for Panels allows operator to invoke commands panel-wide (areas and points) and the report includes the panel-level messages. Disarm all areas Master arm instant Master arm delay Perimeter instant Perimeter delay Panel history report (crystal report of Panel level events stored in SG database). Note that only live events are recorded in the database. Command Menu options for Areas allows operator to arm and disarm an area. The options Master arm and Perimeter arm allow user to perform an INSTANT or DELAYED command. Ex: Instant will arm instantly; delay will arm after a specified amount of time that is set at the panel Disarm area Master arm instant Master arm delay Perimeter instant Perimeter delay Area history report (crystal report of Area arm and disarm events Command Menu options for Points allows operator to invoke commands to points. Bypass/un-bypass (the selected point) available based on Bypass Allowed checkbox in the Point Property screen View Camera (if a DVR and camera are associated with the point View Web come (if programmed) Report include the status messages from the selected point stored in SG database. Note that only live events are recorded in the database. Page 33 of 39 Galaxy Interface Manual for Bosch G-series Alarm Panels 5 Device Status for Alarm Panel System Galaxy supports device status, which includes command menus. • open the Device Status screen from the main menu: select View > Device Status • click the [Add New] button and type a descriptive name • click the Alarm Panel Points tab • pick the points you wish to create a view for and move them to the INCLUDE list • click [Apply] and [OK] Once you have created the view, the Device Status screen will open. Not normal /arm alarm = red dot Normal / arm = green dot Not Normal/Disarm = yellow Normal / Disarm = gray dot Bypass Point = gray with red-X Unknown = gray with question mark Device Status screen (cropped) Page 34 of 39 Galaxy Interface Manual for Bosch G-series Alarm Panels 6 Adding Icons for the Graphics screen NEW FEATURE – System Galaxy provides a standard set of icons, and allows the user the ability to import additional icons. These icons are mapped to each of the status conditions in the Alarm Point programming screen. After mapping the status conditions to the desired graphic symbols, the symbols can be dropped onto the Graphics screen. NOTE: Bitmap (.bmp) icons of any size can be imported. However, these icons are displayed as 32x32 bit icons when they are dropped onto the Graphics screen. To add new graphics do the following: Copy new bitmap file(s) into the icon directory (verify and use the path that is set in Multimedia tab in the Workstation Options screen – the path is set in the ‘Specify location for the graphic icon/bitmap files’ ) From the main menu pick the Configure>Hardware>Graphic Symbol option. Click the [Add New] button and type a Name Or click [Edit] and select an existing name if you wish to change an existing icon Select a bitmap file or browse to a file (must be a bitmap file) Select the [Apply] button to save changes Graphics Symbols screen Page 35 of 39 Galaxy Interface Manual for Bosch G-series Alarm Panels 6.1 Placing Alarm Points on the Graphics screen The System Galaxy Graphics screen is typically opened to a floor plan image and icons are dropped onto the Graphics screen (i.e. floor plan) in the locations that represent the actual alarm points. Once the icons are placed on the Graphic screen, the color graphic they are mapped to will be displayed when the state/condition of the alarm point changes. The process for setting up icons is outlined below: 1. A graphic icon is mapped to each status condition for every alarm point in the Alarm Point Property screen - Graphics Symbols tab. See instructions for mapping icons in the Adding an Alarm Panel Point section. 2. The graphic icons are dropped onto the floor plan in the Graphics screen. See this section on Placing Icons in the Graphic Screen for details. The state of the graphic follows the status/condition of the alarm point (based on mapping of symbols in the Alarm Point Property screen). 6.1.1 How to get the graphic icon on the Graphics screen: Open the Graphic screen by selecting the View>Graphic option from the main SG menu; then select and open the desired floor plan or blueprint image – the graphic will open in the Graphic screen. Expand the Alarm Panel branch in the Hardware Tree until you can see the points Left-click the alarm point and hold the left-mouse button down while dragging it over to the floor plan. Release the mouse button on the desired location of the floor plan - you should see a shortcut menu with the option ‘Drop Here’. click the ‘Drop Here’ option to place the icon on the floor plan; the icon will display a checked border to allow you to move and resize the icon as needed. right-click the icon and deselect the move option once the size and location are correct. Now the icon will display the color graphic that you assigned for the current status condition. If the icon does not show the current status condition, refresh the graphic screen by closing and reopening it. System Galaxy Graphic screen with icons Page 36 of 39 Galaxy Interface Manual for Bosch G-series Alarm Panels 7 Crystal Reports for Alarm Panel Events Crystal Reports are available in System Galaxy for the Alarm Panel. The report content depends on which report is chosen. NOTE THAT THE ALARM PANEL DOES NOT RETRANSMIT OFFLINE EVENTS TO THE SG DATABASE. Therefore, the reports only include the “live” status conditions received by System Galaxy when the Alarm Panel is properly connected. To get the Alarm Acknowledgements report, select the View>Reports>Crystal Reports>Alarm Acknowledgements from the SG main menu. Reports are available for the Alarm Panel, Alarm Areas and Alarm Points. These reports can be opened from the operator command menu. Command menus are available from the following screens or places: status event message for the panel/area/point in the Alarm Panel Event screen alarm panel/area/point icon in the Hardware Tree alarm point icons in the Graphics Alarm screen alarm points in the Device Status screen The SG Operator can open the report by right-clicking a status icon, an event message, or graphic icon that is associated with an alarm panel , area, or point in order to display the command menu for that device. Selecting the Status Report option from the command menu will open the report for the selected area or point. NOTE: All crystal reports open to a separate window. SG Operator can view or print the report from the crystal report window. IMPORTANT: if the report looks too small (like a badge), reset your default printer back to a regular line printer instead of a badging printer. To reset the default printer, click the Windows® [Start] button and select the Settings>Printers (or Settings>Control Panel and open the Printers window). Once the Printers window is open, user can right-click the desired printer icon and choose the ‘Set as default printer’ option. A black dot with a checkmark will appear on the printer icon that is set for the default printer. Return to System Galaxy and re-open the report. Page 37 of 39 Galaxy Interface Manual for Bosch G-series Alarm Panels 8 Managing User Codes for Alarm Panels System Galaxy allows operator to set up and manage user codes for the alarm panel. Operator can also assign these user codes to cardholders in System Galaxy. IMPORTANT: it is always important to understand whether user passcodes are managed strictly from the alarm panel or if they are managed strictly from SG. It is NOT advisable to manage them from both places. Doing so will cause you to overwrite the passcodes. 8.1 Managing Alarm Panel User Codes 1. Open the Alarm Panel User Codes screen from the main menu: » select Configure > Hardware > Alarm Panels > Alarm Panel User Codes 2. Select an Alarm Panel and click the [Add New] button 3. Click the [Get Available User ID] button 4. Type in a user code (6 digits max) 5. Set the authority level for every area – (0-15) 6. Click the [Apply] button to save and send the current user to the alarm panel. 7. Clicking the [Load Users] button will load all users to the alarm panel from the SG database. WARNING: if operator chooses an ID that is already in use at the alarm panel, it will be overwritten at the alarm panel. It is always recommended to use the [Get Available User ID] button to retrieve an unused ID from the alarm panel. IMPORTANT: SG does not delete any user from the alarm panel. If you want to delete a user from the alarm panel, you must delete it from the alarm panel manually. Alarm Panel User Code configuration screen Page 38 of 39 Galaxy Interface Manual for Bosch G-series Alarm Panels 8.2 Assigning Alarm Panel User Codes to Cardholders System Galaxy allows the operator to manage user codes for the Cardholder. This is an administrative feature and only one code per cardholder can be configured. To set the user codes see section 15.1. The Alarm Panel User Codes tab in Cardholder screen allows user to associate an alarm panel user code with the cardholder. The user codes are added to the System Galaxy database in the Alarm Panel User Codes Property screen. Once the user code is set up in the SG database it can be picked from the User ID droplist in the Cardholder screen. 1. Open the Cardholder screen (Configure>Cards>Cardholders) » or click the Cardholder button on the toolbar 2. Choose the desired Cardholder from the droplist 3. Click the [Edit] button 4. Select the Alarm Panel User tab 5. Choose the desired alarm panel from the droplist 6. Pick the desired passcode from the droplist IMPORTANT: You should take precautions to hide the user screen from SG Operators that should not have the level of access to see the passcode. Cardholder programming screen – Alarm Panel User Codes tab Page 39 of 39