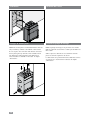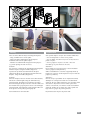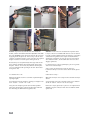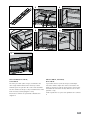
1
21-85SF
Installation [en] & [fr]
Stûv America thanks you for choosing a Stûv fireplace
for your home. Your fireplace was designed to provide
years of enjoyment, comfort, and safety. It was built and
assembled with the greatest care. If, for any reason, you
are dissatisfied with your fireplace, please contact your
retailer.
Summary
TECHNICAL SPECIFICATIONS
INSTALLATION
2
Vous avez choisi un foyer Stûv ; Stûv America vous en
remercie. Il a été conçu pour vous offrir un maximum de
plaisir, de confort et de sécurité.
Le plus grand soin a été apporté à sa fabrication.
Si malgré cela vous constatiez une anomalie, contactez
votre revendeur.
Sommaire
3 - 17
18 - 40
CARACTERISTIQUES TECHNIQUES
INSTALLATION
3 - 17
18 - 40
Standards & certifications
Normes & agréations
The Stûv 21 has been tested and certified by Intertek
Les Stûv 21 ont été testés et certifiés par Intertek Testing
Testing Services NA Ltd based on the following standards:
services AN Ltée selon ces normes :
UL 127
UL 127
ULC S-610-M93
ULC S-610-M93
EPA Exempt
Exemption EPA
Safety instructions
Before installing your Stûv fireplace, please contact the
local building authorities to obtain the necessary permits
andinformation about applicable regulations.
The installation of your fireplace should be entrusted to a
skilled professional. Failure to install the fireplace correctly
can cause a fire.
Do not install the fireplace in a mobile home.
Do not connect the fireplace to an air distribution duct or
system.
The instructions for the installation of your fireplace comply
with the above standards. Please follow the instructions
closely to avoid any potential problems.
Please read this manual carefully before installing or using
your fireplace. Incorrect installation may result in fire. To
reduce the risk of fire, follow the installation instructions.
Failure to do so may result in property damage, bodily
injury, or even death.
Keep this manual handy so you can refer to it whenever
necessary.
Instructions de sécurité
Avant d’installer votre Stûv, contactez les autorités locales
pour obtenir un permis de construction ainsi que prendre
connaissance de toutes les exigences réglementaires en
vigueur.
L’installation de votre Stûv doit être confiée à un
professionnel qualifié.
Si votre Stûv n’est pas installé de façon adéquate, un
incendie pourrait s’ensuivre.
Ne pas installer le foyer dans une maison mobile.
Ne pas connecter le foyer à un système de distribution d’air
chaud.
Les instructions concernant l’installation de votre foyer à
bois sont conformes aux normes citées précédemment.
Vous devez les suivre rigoureusement afin d’éliminer tout
risque d’ennuis majeurs.
Veuillez lire attentivement ce manuel avant d’installer
ou d’utiliser votre foyer. Si votre foyer est mal installé,
il peut en résulter un incendie détruisant votre maison.
Pour réduire les risques d’incendie, suivez les instructions
d’installation. Le fait de ne pas respecter les instructions
peut occasionner des dommages à la propriété, des lésions
corporelles et même la mort.
Gardez ce manuel pour consultation ultérieure.
3
Note:
We stronglydes
recommend
that our products
the
Association
Professionnels
du Chauffage
be installed
andWood
servicedEnergy
by professionals
certified
or by
Technology
Training
Quebec
by the Association des Professionnels du Chauffage
r the rest of Canada, or by the National Fireplace
in Quebec or by Wood Energy Technology Training
stitute
in the U.S.
for the rest of Canada, or by the National Fireplace
Institute in the U.S.
Technical specifications
Caractéristiques techniques
principales des appareils
Caractéristiques techniques
Type de combustible
pour tous les foyers:
principales
des appareils
Technical specifications
el type for all fireplaces:
od logs
bûches de bois
Fuel type for all fireplaces: wood logs
Stûv 21/85 SF
Minimum power
Puissance minimal
Note :professionnels
Nous recommandons
fortement par
que nosl’Associatio
certifiés
produits
soient installés du
et entretenus
par des
Chauffage
au Québec
Professionnels
professionnels certifiés par l’Association des
Wood Energy Technical Training pour le r
Professionnels du Chauffage au Québec ou par
Canada, et par la National Fireplace Institu
Wood Energy Technical Training pour le reste du
États-Unis.
Canada, et par la National Fireplace Institute aux
États-Unis.
Type de combustible pour tous les foyers: bûches de bois
Maximum power
Puissance maximal
Door frame
dimension:
30-7/
Stûv 21/65H
SF
15 000 8”
BTUL x 23-3/
38 4”
000 H
BTU
Maximum power: 48,000 BTU
Stûv 21/75 SF
15 000 BTU
38 000 BTU
Efficiency : 77 % (European data)
Stûv 21/85 SF
15 000 BTU
imney type: 8” UL-103HT, ULC-S62948 000 BTU
Stûv 21/95
SF lbs
15 000 BTU
55 000 BTU
Unit weight:
550
Wood consumed per hour: 12 - 14 lbs / hour
Efficiency
Efficacité
73%
73%
77%
<70%
Stûv 21/105 SF
15 000 BTU
48 000 BTU
77%
Stûv 21/125 SF
15 000 BTU
60 000 BTU
<70%
SFweight
Chimney Stûv
type 21/85 Unit
Type de cheminée
Poids de l'unité
Wood consumed per hour
Consommation de bois/h
Dimension
du
8'' UL-103HT,
ULC-S629
cadre
L x lbs
23-3/4” H
433 lbs : 30-7/8”11-13
Puissancemaximal : 48 000 BTU
8'' UL-103HT, ULC-S629 400 lbs
11-13 lbs
Efficacité : 77% (données européennes)
8'' UL-103HT, ULC-S629 514 lbs
12-14 lbs
Type de cheminée : 8” UL- 103HT,
ULC-S629
10'' UL-103HT,
ULClbs Lbs
13-15 lbs
Poids de
l’unité 642
: 550
S629*
Consommation bois/h : 12 - 14 Lbs / heure
8'' UL-103HT, ULC-S629
492 lbs
12-14 lbs
10'' UL-103HT, ULCS629*
671 lbs
13-15 lbs
CERTIFIED AND CONFORMS TO :
Clearance to combustible materials /
LISTED FACTORY BUILT FIREPLACE
BACK WALL / MUR ARRIÈRE: 92mm ( 3 5/8" )
FOYER HOMOLOGUÉ CONSTRUIT EN USINE
Le dégagement aux matériaux combustibles des murs est composé d'une
Use only a 8 inch chimney listed per
SUIVRE LES INSTRUCTIONS D'INSTALLATION DU MANUEL DE
L'UTILISATEUR POUR LES DÉTAILS.
MODEL/MODELE:
STÛV
Dégagement
Stûv 21/135
SF
15 000
BTU 2185SF 57 000
BTU
<70%
10'' UL-103HT,
ULC- aux matériaux
629 lbs combustibles:
13-15 lbs
CERTIFIÉ
CONFORMÉMENT
SELON
:
MANUFACTURED BY / FABRIQUÉ PAR:
SIDE WALL / PAROIS LATÉRALES: 92mm ( 3 5/8" )
S629*
UL-127, ULC S-610-M93, EPA EXEMPT
CONCEPT ET FORME S.A.
rue Jules
Stûv 21/75
DF Borbouse 4 15 000 BTU
CEILING
38 000
BTU
71% HOME INSTALLATION.
10'' UL-103HT,
ULC- / PLAFOND:
411 lbs1,98m ( 78" ) 13-15 lbs
NOT
SUITABLE FOR MOBILE
Certified for use in Canada and United-States.
S629*
Couvrir le plancher avec 2 épaisseurs de panneaux de fibro-ciment 1/2" (1").
LABEL
Stûv 21/85
DF NO. / NO. D'ÉTIQUETTE:
15 000 BTU
NE PAS INSTALLER DANS UNE MAISON MOBILE.
ossature
de 2X4
laine Roxul
48 000
BTU
72%
10'' UL-103HT,
ULC-métallique519
lbs(3 5/8") isolée de13-15
lbs Safe & Sound 3".
Usage homologué au Canada et aux États-Unis.
Le dessus du caisson est isolé de laine Roxul Safe & Sound 6" (2 X 3").
S629*
CHIMNEY TYPE
B-5170 Bois-de-Villers, Belgium [ www.stuv.be ]
STÛV 2185SF _ 000 001
Stûv 21/95 DF
Stûv 21/125 DF
15 000 BTU
15 000 BTU
55 000
BTU
<70%
ULC
S-629 ou UL-103HT.
12'' UL-103HT, ULC653 lbs
13-15 lbs
Cover floor using 2 layers of 1/2" fibro-cement board(1").
S629*
Clearance to side combustible materials is made from a composition of 2X4
60 000 BTU
12'' UL-103HT,
682
lbs using 2 layers13-15
lbs Safe & Sound wool.
TheULCtop of the unit is
insulated
of 3" Roxul
FOLLOW THE INSTALLATION INSTRUCTIONS IN THE
S629*
TYPE DE CHEMINÉE
Utiliser uniquement une cheminée de 8 pouces
répertoriée selon la norme ULC S-629 ou UL-103HT.
<70%
metal studs (3 5/8") insulated with 3" Roxul Safe & Sound wool.
MADE IN BELGIUM / FABRIQUÉ EN BELGIQUE
DO NOT REMOVE THIS LABEL
NE PAS RETIRER CETTE ÉTIQUETTE
OWNER'S MANUAL FOR DETAILS.
*ICC-RIS only in Canada / seuleument au Canada
- Fuel: Wood Only.
- Floor must be protected as specified in the manual. For safe
operation, install in accordance with the manufacturer's instructions.
- Replace glass only with Stûv's ceramic glass 5mm thick.
- Do not operate unit with door open exept by using a screen.
- Components used with fireplace must be listed. See manual.
- Contact your local building or fire officials about restrictions
and installation inspections in your area.
- Unit must be connected to a minimum of 2 ambiant-air inlet
and 2 hot-air outlet using 6" flexible insulated system (Stûv).
- Do not obstruct air inlet and outlet in any case.
- Refer to manual for optional components.
- Do not connect this unit to a chimney flue serving another appliance.- Inspect and clean chimney frequently - Under certain conditions of
use, creosote buildup may occur rapidly. Do not overfire unit.
- CAUTION: When a fire is burning in the fireplace, fresh air must be supplied to the room where the fireplace is located. Failure to
provide this may starve other fuel burning appliance from an
adequate air supply.
Combustible : Bois seulement.
Le plancher doit être protégé tel que spécifié dans le manuel. Pour un
fonctionnement sécuritaire, installez conformément aux directives du fabricant.
Remplacez le verre uniquement par un verre de céramique Stûv 5mm d'épais.
Ne pas utiliser l'appareil la porte ouverte sauf utilisant un pare-étincelle.
Les composantes utilisées dans l'appareil doivent être répertoriées. Voir manuel.
Communiquez avec les autorités locales en matière de construction ou d'incendie
pour connaître les restrictions et inspections d'installation dans votre région.
Cet appareil doit être raccordé à un minimum de 2 entrées d'air ambient et 2
sorties d'air chaud avec des conduits flexible 6" isolés (Stûv).
Ne pas obstruer les entrées et sorties d'air en aucun cas.
Ne reliez pas cet appareil à un conduit de cheminée servant un autre appareil.
Inspectez et nettoyez la cheminée fréquemment - Dans certaines conditions
d'utilisation, l’accumulation de créosote peut se faire rapidement.
Ne pas surchauffer l'appareil.
ATTENTION: Lorsque le foyer brûle, un apport d'air supplémentaire doit être
prévu dans la pièce. Un manque d'air d'appoint pourrait priver les autres
appareils de combustion d'une alimentation d'air adéquate.
5
4
5
Certified for use in Canada and United-States.
FOYER HOMOLOGUÉ CONSTRUIT EN USINE
NE PAS INSTALLER DANS UNE MAISON MOBILE.
Usage homologué au Canada et aux États-Unis.
LABEL NO. / NO. D'ÉTIQUETTE:
LABEL NO. / NO. D'ÉTIQUETTE:
W/N 20957
000 001
LABEL NO. / NO. D'ÉTIQUETTE:
MANUFACTURED BY / FABRIQUÉ PAR:
STÛV S.A.
rue Jules Borbouse 4
B-5170 Bois-de-Villers, Belgium [ www.stuv.be ]
MODELS/MODELES: STÛV
2195DF, 21125DF
W/N 20956
000 001
LABEL NO. / NO. D'ÉTIQUETTE:
MANUFACTURED BY / FABRIQUÉ PAR:
STÛV S.A.
rue Jules Borbouse 4
B-5170 Bois-de-Villers, Belgium [ www.stuv.be ]
MODELS/MODELES: STÛV
2175DF, 2185DF
W/N 20954
000 001
MADE IN BELGIUM / FABRIQUÉ EN BELGIQUE
CHIMNEY TYPE
Use only a 12 inch chimney listed per
ULC S-629 ou UL-103HT.
TYPE DE CHEMINÉE
Utiliser uniquement une cheminée de 12 pouces
répertoriée selon la norme ULC S-629 ou UL-103HT.
Certified for use in Canada and United-States.
FOYER HOMOLOGUÉ CONSTRUIT EN USINE
NE PAS INSTALLER DANS UNE MAISON MOBILE.
Usage homologué au Canada et aux États-Unis.
DO NOT REMOVE THIS LABEL
NE PAS RETIRER CETTE ÉTIQUETTE
Cover floor using 2 layers of 1/2" fibro-cement board.
FOLLOW THE INSTALLATION INSTRUCTIONS IN THE
OWNER'S MANUAL FOR DETAILS.
Couvrir le plancher de 2 épaisseurs de panneaux de fibro-ciment 1/2".
D'INS
SUIVRE LES INSTRUCTIONS D'INSTALLATION
DU MANUEL DE
L'UTILISATEUR POUR LES DÉTAILS.
Clearance to combustible materials using the Stûv insulated shell /
Dégagement aux matériaux combustibles utilisant le caisson isolé Stûv:
DO NOT REMOVE THIS LABEL
NE PAS RETIRER CETTE ÉTIQUETTE
Cover floor using 2 layers of 1/2" fibro-cement board.
FOLLOW THE INSTALLATION INSTRUCTIONS IN THE
OWNER'S MANUAL FOR DETAILS.
Couvrir le plancher de 2 épaisseurs de panneaux de fibro-ciment 1/2".
D'INS
SUIVRE LES INSTRUCTIONS D'INSTALLATION
DU MANUEL DE
L'UTILISATEUR POUR LES DÉTAILS.
SIDE WALL / PAROIS LATÉRALES: 0mm ( 0" )
BACK WALL / MUR ARRIÈRE: 0mm ( 0" )
LISTED FACTORY BUILT FIREPLACE
CEILING / PLAFOND: 1,98m ( 78" )
NOT SUITABLE FOR MOBILE HOME INSTALLATION.
CERTIFIED AND CONFORMS TO :
CERTIFIÉ CONFORMÉMENT SELON :
ULC S-610-M93, UL-127, EPA EXEMPT
MADE IN BELGIUM / FABRIQUÉ EN BELGIQUE
CHIMNEY TYPE
Use only a 10 inch chimney listed per
ULC S-629 ou UL-103HT.
TYPE DE CHEMINÉE
Utiliser uniquement une cheminée de 10 pouces
répertoriée selon la norme ULC S-629 ou UL-103HT.
Certified for use in Canada and United-States.
FOYER HOMOLOGUÉ CONSTRUIT EN USINE
NE PAS INSTALLER DANS UNE MAISON MOBILE.
Usage homologué au Canada et aux États-Unis.
Clearance to combustible materials using the Stûv insulated shell /
Dégagement aux matériaux combustibles utilisant le caisson isolé Stûv:
DO NOT REMOVE THIS LABEL
NE PAS RETIRER CETTE ÉTIQUETTE
Cover floor using 2 layers of 1/2" fibro-cement board.
FOLLOW THE INSTALLATION INSTRUCTIONS IN THE
OWNER'S MANUAL FOR DETAILS.
Couvrir le plancher de 2 épaisseurs de panneaux de fibro-ciment 1/2".
SUIVRE LES INSTRUCTIONS D'INSTALLATION
DU MANUEL DE
D'INS
L'UTILISATEUR POUR LES DÉTAILS.
SIDE WALL / PAROIS LATÉRALES: 0mm ( 0" )
BACK WALL / MUR ARRIÈRE: 0mm ( 0" )
LISTED FACTORY BUILT FIREPLACE
CEILING / PLAFOND: 1,98m ( 78" )
NOT SUITABLE FOR MOBILE HOME INSTALLATION.
CERTIFIED AND CONFORMS TO :
CERTIFIÉ CONFORMÉMENT SELON :
ULC S-610-M93, UL-127, EPA EXEMPT
MADE IN BELGIUM / FABRIQUÉ EN BELGIQUE
CHIMNEY TYPE
Use only a 8 inch chimney listed per
ULC S-629 ou UL-103HT.
TYPE DE CHEMINÉE
Utiliser uniquement une cheminée de 8 pouces
répertoriée selon la norme ULC S-629 ou UL-103HT.
Certified for use in Canada and United-States.
FOYER HOMOLOGUÉ CONSTRUIT EN USINE
NE PAS INSTALLER DANS UNE MAISON MOBILE.
Usage homologué au Canada et aux États-Unis.
MANUFACTURED BY / FABRIQUÉ PAR:
STÛV S.A.
rue Jules Borbouse 4
B-5170 Bois-de-Villers, Belgium [ www.stuv.be ]
CERTIFIED AND CONFORMS TO :
CERTIFIÉ CONFORMÉMENT SELON :
ULC S-610-M93, UL-127, EPA EXEMPT
Clearance to combustible materials using the Stûv insulated shell /
Dégagement aux matériaux combustibles utilisant le caisson isolé Stûv:
DO NOT REMOVE THIS LABEL
NE PAS RETIRER CETTE ÉTIQUETTE
Cover floor using 2 layers of 1/2" fibro-cement board.
FOLLOW THE INSTALLATION INSTRUCTIONS IN THE
OWNER'S MANUAL FOR DETAILS.
Couvrir le plancher de 2 épaisseurs de panneaux de fibro-ciment 1/2".
SUIVRE LES INSTRUCTIONS D'INSTALLATION
DU MANUEL DE
D'INS
L'UTILISATEUR POUR LES DÉTAILS.
SIDE WALL / PAROIS LATÉRALES: 0mm ( 0" )
BACK WALL / MUR ARRIÈRE: 0mm ( 0" )
LISTED FACTORY BUILT FIREPLACE
CEILING / PLAFOND: 1,98m ( 78" )
NOT SUITABLE FOR MOBILE HOME INSTALLATION.
MADE IN BELGIUM / FABRIQUÉ EN BELGIQUE
CHIMNEY TYPE
Use only a 8 inch chimney listed per
ULC S-629 ou UL-103HT.
TYPE DE CHEMINÉE
Utiliser uniquement une cheminée de 8 pouces
répertoriée selon la norme ULC S-629 ou UL-103HT.
Certified for use in Canada and United-States.
FOYER HOMOLOGUÉ CONSTRUIT EN USINE
NE PAS INSTALLER DANS UNE MAISON MOBILE.
Usage homologué au Canada et aux États-Unis.
Clearance to combustible materials using the Stûv insulated shell /
Dégagement aux matériaux combustibles utilisant le caisson isolé Stûv:
DO NOT REMOVE THIS LABEL
NE PAS RETIRER CETTE ÉTIQUETTE
Cover floor using 2 layers of 1/2" fibro-cement board.
FOLLOW THE INSTALLATION INSTRUCTIONS IN THE
OWNER'S MANUAL FOR DETAILS.
Couvrir le plancher de 2 épaisseurs de panneaux de fibro-ciment 1/2".
D'INS
SUIVRE LES INSTRUCTIONS D'INSTALLATION
DU MANUEL DE
L'UTILISATEUR POUR LES DÉTAILS.
SIDE WALL / PAROIS LATÉRALES: 0mm ( 0" )
BACK WALL / MUR ARRIÈRE: 0mm ( 0" )
LISTED FACTORY BUILT FIREPLACE
CEILING / PLAFOND: 1,98m ( 78" )
NOT SUITABLE FOR MOBILE HOME INSTALLATION.
CERTIFIED AND CONFORMS TO :
CERTIFIÉ CONFORMÉMENT SELON :
ULC S-610-M93, UL-127, EPA EXEMPT
MADE IN BELGIUM / FABRIQUÉ EN BELGIQUE
CHIMNEY TYPE
Use only a 8 inch chimney listed per
ULC S-629 ou UL-103HT.
TYPE DE CHEMINÉE
Utiliser uniquement une cheminée de 8 pouces
répertoriée selon la norme ULC S-629 ou UL-103HT.
MODELS/MODELES: STÛV
2165HSF, 2175SF, 2185SF, 21105SF
W/N 20955
000 001
LABEL NO. / NO. D'ÉTIQUETTE:
MANUFACTURED BY / FABRIQUÉ PAR:
STÛV S.A.
rue Jules Borbouse 4
B-5170 Bois-de-Villers, Belgium [ www.stuv.be ]
MODELS/MODELES: STÛV
2145SF, 2165CSF
W/N 20954
000 001
MANUFACTURED BY / FABRIQUÉ PAR:
STÛV S.A.
rue Jules Borbouse 4
B-5170 Bois-de-Villers, Belgium [ www.stuv.be ]
Clearance to combustible materials using the Stûv insulated shell /
Dégagement aux matériaux combustibles utilisant le caisson isolé Stûv:
SIDE WALL / PAROIS LATÉRALES: 0mm ( 0" )
BACK WALL / MUR ARRIÈRE: 0mm ( 0" )
LISTED FACTORY BUILT FIREPLACE
CEILING / PLAFOND: 1,98m ( 78" )
NOT SUITABLE FOR MOBILE HOME INSTALLATION.
CERTIFIED AND CONFORMS TO :
CERTIFIÉ CONFORMÉMENT SELON :
ULC S-610-M93, UL-127, EPA EXEMPT
MODELS/MODELES: STÛV
2165HSF, 2175SF, 2185SF, 21105SF
- Fuel: Wood Only.
- Floor must be protected as specified in the manual. For safe
operation, install in accordance with the manufacturer's instructions.
- Replace glass only with Stûv's ceramic glass 5mm thick.
- Do not operate unit with door open exept by using a screen.
- Components used with fireplace must be listed. See manual.
officials about restrictions
- Contact your local building or fire o
and installation inspections in your area.
- Unit must be connected to a minimum of 2 ambiant-air inlet
and 2 hot-air outlet using 6" flexible insulated system (Stûv).
- Do not obstruct air inlet and outlet in any case.
- Refer to manual for optional components.
- Do not connect this unit to a chimney flue serving another appliance.- Inspect and clean chimney frequently - Under certain conditions of
use, creosote buildup may occur rapidly. Do not overfire unit.
- CAUTION: When a fire is burning in the fireplace, fresh air must be supplied to the room where the fireplace is located. Failure to
provide this may starve other fuel burning appliance from an
adequate air supply.
Combustible : Bois seulement.
Le plancher doit être protégé tel que spécifié dans le manuel. Pour un
fonctionnement sécuritaire, installez conformément aux directives du fabricant.
Remplacez le verre uniquement par un verre de céramique Stûv 5mm d'épais.
Ne pas utiliser l'appareil la porte ouverte sauf utilisant un pare-étincelle.
Les composantes utilisées dans l'appareil doivent être répertoriées. Voir manuel.
Communiquez avec les autorités locales en matière de construction ou d'incendie
pour connaître les restrictions et inspections d'installation dans votre région.
Cet appareil doit être raccordé à un minimum de 2 entrées d'air ambient et 2
sorties d'air chaud avec des conduits flexible 6" isolés (Stûv).
Ne pas obstruer les entrées et sorties d'air en aucun cas.
Ne reliez pas cet appareil à un conduit de cheminée servant un autre appareil.
Inspectez et nettoyez la cheminée fréquemment - Dans certaines conditions
d'utilisation, l’accumulation de créosote peut se faire rapidement.
Ne pas surchauffer l'appareil.
ATTENTION: Lorsque le foyer brûle, un apport d'air supplémentaire doit être
prévu dans la pièce. Un manque d'air d'appoint pourrait priver les autres
appareils de combustion d'une alimentation d'air adéquate.
- Fuel: Wood Only.
- Floor must be protected as specified in the manual. For safe
operation, install in accordance with the manufacturer's instructions.
- Replace glass only with Stûv's ceramic glass 5mm thick.
- Do not operate unit with door open exept by using a screen.
- Components used with fireplace must be listed. See manual.
- Contact your local building or fire o
officials about restrictions
and installation inspections in your area.
- Unit must be connected to a minimum of 2 ambiant-air inlet
and 2 hot-air outlet using 6" flexible insulated system (Stûv).
- Do not obstruct air inlet and outlet in any case.
- Refer to manual for optional components.
- Do not connect this unit to a chimney flue serving another appliance.- Inspect and clean chimney frequently - Under certain conditions of
use, creosote buildup may occur rapidly. Do not overfire unit.
- CAUTION: When a fire is burning in the fireplace, fresh air must be supplied to the room where the fireplace is located. Failure to
provide this may starve other fuel burning appliance from an
adequate air supply.
- Fuel: Wood Only.
- Floor must be protected as specified in the manual. For safe
operation, install in accordance with the manufacturer's instructions.
- Replace glass only with Stûv's ceramic glass 5mm thick.
- Do not operate unit with door open exept by using a screen.
- Components used with fireplace must be listed. See manual.
officials about restrictions
- Contact your local building or fire o
and installation inspections in your area.
- Unit must be connected to a minimum of 2 ambiant-air inlet
and 2 hot-air outlet using 6" flexible insulated system (Stûv).
- Do not obstruct air inlet and outlet in any case.
- Refer to manual for optional components.
- Do not connect this unit to a chimney flue serving another appliance.- Inspect and clean chimney frequently - Under certain conditions of
use, creosote buildup may occur rapidly. Do not overfire unit.
- CAUTION: When a fire is burning in the fireplace, fresh air must be supplied to the room where the fireplace is located. Failure to
provide this may starve other fuel burning appliance from an
adequate air supply.
SF Dimensions
Dimensions SF
D
E
F
G
B
A
H
C
L
P
Q
R
Départ cheminée
Chimney connection
(anchor plate)
2 5/8"
I
J
S
2 1/4"
K
N
M
4 5/8"
T
U
O
Ø6”
Ø4”
6 1/4"
4 3/8"
V
W
5 7/8"
Y
X
= boite d'air extérieur
= air inlet box
6
SF Dimensions
Dimensions SF
A
B
C
D
E
F
G
H
I
J
Stûv 21/65H SF
23 1/2"
6 9/16"
6 5/8"
31 7/8"
15 7/8"
7 1/4"
18 1/8"
10 3/4"
63 1/4"
56 1/4"
Stûv 21/75 SF
23 1/2"
6 9/16"
6 5/8"
35 3/4"
17 7/8"
7 1/4"
22"
10 3/4"
54 7/8"
47 5/8"
Stûv 21/85 SF
25 1/2"
7 1/16"
7"
39 3/4"
19 7/8"
7 1/4"
25 1/8"
10 1/2"
59 1/8"
51 3/4"
Stûv 21/95 SF
27 1/2"
8 1/4"
7"
43 5/8"
21 7/8"
7 1/4"
30"
11 3/4"
63 1/2"
56 1/4"
Stûv 21/105 SF
24"
6 1/2"
6 3/4"
47 5/8"
23 3/4"
8"
31 1/2"
11"
56 1/8"
48 7/8"
Stûv 21/125 SF
26 3/4"
7 7/8"
7 7/8"
55 1/2"
27 3/4"
8"
39 3/8"
11 3/4"
59"
51 7/8"
11 1/8"
56 1/8"
48 7/8"
Stûv 21/135 SF
24"
6 3/8"
6 3/4"
59 3/8"
29 3/4"
43 3/8"
8"
K
L
M
N
O
P
Q
R
Stûv 21/65H SF
27 1/4"
23"
24 3/8"
18 1/2"
15 3/4"
13 9/16"
12 1/4"
9 11/16"
36 1/2"
6"
Stûv 21/75 SF
21"
27"
18"
22 1/2"
19 11/16"
13 9/16"
14 1/4"
10 7/8"
27 7/8"
6"
Stûv 21/85 SF
24 1/4"
30 3/4"
21 1/4"
26 1/2"
23 3/4"
14"
16 1/4"
11 7/8"
32 1/8"
6"
Stûv 21/95 SF
24 3/4"
34 7/8"
24 3/8"
30 3/8"
27 9/16"
14 7/8"
18 1/4"
12 7/8"
36 5/8"
6"
Stûv 21/105 SF
18 7/8"
38 3/4"
14 7/8"
34 1/4"
29 5/8"
13 3/8"
20 1/8"
13 9/16"
29 1/4"
6"
Stûv 21/125 SF
24 1/4"
46 1/2"
21 1/4"
42 1/8"
-
14 1/2"
24"
15 3/4"
32 3/8"
6"
Stûv 21/135 SF
18 7/8"
51 1/8"
15 7/8"
46 5/8"
-
12 1/8"
26"
16 1/2"
29 1/4"
6"
U
V
W
X
Y
Stûv 21/65H SF
1 7/8"
10 13/16"
11 5/8"
9 1/2"
6 3/4"
Stûv 21/75 SF
1 7/8"
10 13/16"
11 5/8"
11 3/4"
6 3/4"
Stûv 21/85 SF
1 7/8"
12 7/8"
13 5/8"
16 1/2"
6 3/4"
Stûv 21/95 SF
1 7/8"
15 1/2"
15 5/8"
15 5/8"
6 3/4"
Stûv 21/105 SF
1 7/8"
8"
11 7/8"
17 5/16"
6 3/4"
Stûv 21/125 SF
1 7/8"
11 7/8"
14 5/8"
21 1/4"
6 3/4"
Stûv 21/135 SF
1 7/8"
11"
12 1/8"
23 1/4"
6 3/4"
S
T
7
DF Dimensions
Dimensions DF
A
B
C
D
F
E
G
H
Départ cheminée
Chimney connection
(anchor plate)
M
L
I
P
N
O
J
K
A
B
C
D
E
F
G
H
I
J
K
Stûv 21/75 DF
35 3/4"
17 7/8"
7 1/4"
22"
29 5/8"
9 3/4"
6 7/8"
13 1/4"
27 7/8"
5 7/8"
1 5/8"
Stûv 21/85 DF
39 3/4"
19 7/8"
7 1/4"
25 1/8"
29 5/8"
9 3/4"
6 7/8"
13 1/4"
32 1/8"
5 7/8"
1 5/8"
Stûv 21/95 DF
43 5/8"
21 7/8"
7 1/4"
30"
29 5/8"
9 3/4"
6 7/8"
13 1/4"
36 5/8"
5 7/8"
1 5/8"
Stûv 21/125 DF
55 1/2"
27 6/8"
8"
39 3/8"
29 5/8"
9 3/4"
7 7/8"
13 1/4"
32 3/8"
5 7/8"
1 5/8"
L
M
N
O
P
Stûv 21/75 DF
47 5/8"
54 7/8"
21"
22 1/2"
18"
Stûv 21/85 DF
51 3/4"
59 1/8"
24 1/8"
26 1/2"
21 1/4"
Stûv 21/95 DF
56 1/4"
63 1/2"
24 3/4"
30 3/8"
24 3/8"
Stûv 21/125 DF
51 7/8"
59"
24 1/4"
42 1/8"
21 1/4"
8
Exploded view
Vue explosée
provided by Stûv
fourni par Stûv
not provided by Stûv
non fourni par Stûv
Option
9
Dimensions to combustible materials
Dimensions pour matériel combustibles
Note: The installation of two layers of 1/2" cement board
under the unit is MANDATORY. The supporting structure
can be made of wood, providing it is strong enough to
support the weight of the fireplace and the chimney.
Min
78"
Note: L’installation de deux panneaux de fibro-ciment
de 1/2" est OBLIGATOIRE sous l’unité. La structure qui
supporte l’unité peut être faite de bois, en autant qu’elle
soit assez solide pour supporter le poids de l’unité et de la
cheminée.
Min
17"
A
C
B
A
32 1/8"
23 1/8"
Stûv 21/75 SF
36"
23 1/8"
Stûv 21/85 SF
40"
25 1/8"
Stûv 21/95 SF
43 7/8"
27 1/8"
Stûv 21/105 SF
47 7/8"
23 5/8"
Stûv 21/125 SF
55 3/4"
26 3/8"
Stûv 21/135 SF
59 5/8"
Stûv 21/75 DF
36"
29 3/4"
Stûv 21/85 DF
40"
29 3/4"
Stûv 21/95 DF
43 7/8"
29 3/4"
Stûv 21/125 DF
55 3/4"
29 3/4"
Stûv 21/65H SF
10
B
23 5/8
C = B + Wall thickness
C = B + épaisseur du mur
Placement
Insertion de l’unité
ok
11
Placement
Insertion de l’unité
Flanges & anchor plate
Buselot et plaque d’ancrage
NOTE The anchor plate is not included with the unit. Use
only an chimney certified as UL 103HT or ULC S-629.
Be sure to place the convection and exhaust connectors
before placing the top elements of the insulation shell.
The dimensions and positioning of the different air
inlet and outlet are available in the table in chapter
"dimensions".
12
NOTE: La plaque d’ancrage n’est pas incluse avec l’unité.
Utilisez seulement une cheminée certifiée par UL 103HT ou
ULC S-629.
Veillez à placer les éléments de raccordement avant de
placer les éléments supérieurs du caisson.
Les dimensions et le positionnement des différentes entrées
et sorties d’air se trouvent dans le tableau du chapitre
«dimensions»
Installation
The finishing trims screwed on the prefabricated shell
enable the fixing of the cement board on it.
The cement board finishes the hearth opening.
Installation
Les cornières placées en partie avant servent à la fixation
du panneau ciment qui viendra finir l'ouverture de l'âtre
[P.15]
13
Minimum non-combustible wall section
Section minimale de mur non-combustible
Note: Use 1/2" cement board to finish the hearth opening
(not included with the prefabricated insulation shell). Other
noncombustible materials can be used. The dimensions
shown below will vary when using a Stûv supplied facing
or frame.
Note: Utilisez un panneau de ciment de 1/2" pour finir
l’ouverture de l’âtre (non inclus avec le caisson d’isolation
préfabriqué). D’autres matériaux non combustibles peuvent
être utilisés. Les dimensions indiquées ci-dessous vont
varier avec l’utilisation d’une façade ou d’un cadre Stûv.
Please contact our customer service department for details.
Communiquer avec le service à la clientèle pour plus de
détails.
A
(min.)
S21/65H
E
B
(min.)
D
C
14
A
B
C
D
E
28 7/8"
63 1/4"
6 1/2"
27"
23"
S21/75
32 3/4"
54 7/8"
6 1/2"
20 5/8"
27"
S21/85
36 3/4" 59 1/8"
6 1/2"
24 7/8"
31"
S21/95
40 5/8"
63 1/2"
6 1/2"
27"
34 7/8"
S21/105
44 5/8"
56 1/8"
6 1/2"
18 1/2"
38 3/4"
S21/125
52 1/2"
59"
S21/135
56 3/8"
6 1/2"
23 7/8"
46 1/2"
6 1/2"
18 4/8"
51 1/8"
Convection
Convection
Convection air inlets are through single wall flexible ducts.
Outlets must necessarily be through insulated double wall
ducts.
Les entrées d’air de convection se font au travers de
flexibles simple paroi. Les sorties doivent obligatoirement
se faire au travers de flexibles double paroi.
It is important that the air flow is continuous. It is therefore
forbidden to remove the air from a room and send it to
another airtight room.
Il est important que le flux d’air soit continu. Il est donc
interdit de prélever l’air dans une pièce et de le rejeter dans
un autre local qui serait étanche.
min 12"
Warm air convection
outlet
Sortie de convection
chaude
Room air convection
inlet
Entrée de convection
ambiante
min 60"
Max12"
∞
Max 10"
15
Convection grills
Grilles de convection
Note : La distance entre le plafond et le centre de la grille
de convection chaude doit être d’au moins 12’’. Il n’est pas
permis de raccorder 2 tuyaux ensemble, pour une distance
horizontale maximale de 10’. Il n’y a cependant pas de
limite en distance verticale.
Note: The distance between the ceiling and the center
of the hot convection grill must be at least 12». It is not
permitted to join 2 connect 2 flexible ducts as 10 feet is the
maximum horizontal length allowed. No length limit for
vertical length.
Hearth extension
3 3/4"
Extension de l’âtre
Glass / Vitre
A
B
S21/65H
S21/75
S21/85
S21/95
S21/105
S21/125
S21/135
16
A
min 18"
min 18"
min 18"
min 18"
min 18"
min 18"
min 18"
B
31 7/8"
35 3/4"
39 3/4"
43 5/8"
47 5/8"
51 1/2"
55 1/2"
Combustible shelf
Tablette en matériau combustible
A
min 39"
min 32 3/4"
min 35 1/2"
min 39"
min 30 1/2"
min 35 1/2"
min 30 1/2"
S21/65H
S21/75
S21/85
S21/95
S21/105
S21/125
S21/135
A
17
21
18
We strongly recommend reading this manual before
proceeding with the installation. Some configurations may
affect the sequence of operations.
Summary
Nous vous conseillons de lire cette notice avant de
procéder à l’installation. Certaines configurations peuvent
faire varier quelque peu l’ordre des opérations à effectuer.
Sommaire
Recommendation
Recommandations
20
When you receive your fireplace
à la réception du matériel
20
Checking the contents
Vérification du contenu du foyer
21
Claims
Réclamation
22
Tools needed
Outil à prévoir
22
Unpacking
Déballage
22
Moving
Déplacement
23
Fresh air intake
Admission d’air frais
23
Combustion air inlet
Arrivée d'air pour la combustion
24
Connection to the flue
Raccordement du foyer au conduit de fumée
25
Standard inside diameter of the CHIMNEY
Diamètre intérieur de la CHEMINÉE
25
Masonry chimney
Cheminée de maçonnerie
28
Using an existing masonry chimney
Utilisation d’une cheminée de maçonnerie existante
29
Connecting the hot-air outlets
Placement des sorties d’air chaud
30
Inserting the fireplace
Placement du foyer
30
Hot air circulation
Circulation d’air chaud
32
Natural convection
Convection naturelle
33
Lining the combustion chamber
Garnissage de la chambre de combustion
34
Installing baffles
Placement des chicanes
38
Installing the applied ornamental frame (optional)
Montage du cadre de finition appliqué (option)
39
19
2
Recommendations
Recommendations
3
Recommandations
Recommandations
We strongly recommend that you entrust the installation
strongly
recommend
thatprofessional
you entrust the
installation
ofWe
your
fireplace
to a skilled
to ensure
thatof
the
your fireplace to a skilled professional to ensure that the
characteristics of the flue are compatible with the fireplace
characteristics of the flue are compatible with the fireplace
installed.
installed.
Nous vous recommandons instamment de confier
Nous vous
recommandons
instamment qualifié
de confier
l’installation
de votre
Stûv à un professionnel
qui
l'installation de votre Stûv à un professionnel qualifié qui
pourra notamment vérifier que les caractéristiques du
pourra notamment vérifier que les caractéristiques du
conduit
dede
fumées
installé.
conduit
fuméescorrespondent
correspondent au
au foyer
foyer installé.
The unit must be installed in compliance with all local and
The unit must be installed in compliance with all local and
national regulations.
L'installation
l'appareil
conforme
à tous
L’installation
de de
l’appareil
doitdoit
êtreêtre
conforme
à tous
les les
règlements locaux et nationaux.
règlements locaux et nationaux.
Some parts of the fireplace can become very hot when
Some parts
of rated
the fireplace
operating
at its
power. can become very hot when
son utilisation
puissance
nominale.
Certaines
partiesàdu
foyer peuvent
être très chaudes lors de
rayonnement
de la vitre
peut être important. Veiller à ce
sonLeutilisation
à puissance
nominale.
The glass door may radiate significant heat. Please make
The that
glassmaterials
door may
radiate
significant
Please
makeare
sure
used
in the
proximityheat.
of the
fireplace
sure that
materials
used away
in the to
proximity
of the
fireplace
are
located
a safe
distance
avoid any
possible
damage.
suffisamment dedistants
pourêtre important.
éviter
tout
risque
Le rayonnement
la vitre peut
Veiller
à ced'endommagement.
que les matériaux situés à proximité du foyer
Toute
modificationdistants
apportée
à éviter
l'appareil
soient
suffisamment
pour
toutpeut
risquecréer un
danger. En outre, l'appareil ne sera plus couvert par la
d’endommagement.
national regulations.
operating at its rated power.
located a safe distance away to avoid any possible damage.
Modification of the unit can be dangerous.
Modification
of thewill
unit
caninvalidate
be dangerous.
Any
modification
also
the warranty.
Any modification will also invalidate the warranty.
Certaines parties du foyer peuvent être très chaudes lors de
que les matériaux situés à proximité du foyer soient
garantie.
Toute modification apportée à l’appareil peut créer un
danger. En outre, l’appareil ne sera plus couvert par la
garantie.
When you receive your fireplace
When you receive your fireplace
When the fireplace has been installed, please give this
manualthe
tofireplace
the userhas
andbeen
recommend
theygive
return
When
installed,that
please
thisthe
completed
Warranty
certificate
to Stûvthat
America
end
of
manual
to the
user and
recommend
they (see
return
the
manual).
completed Warranty certificate to Stûv America (see end of
manual).
Caution!
Remove the cardboard covering the opening of the
Caution!
fireplace and make sure the glass door has not been
Remove
cardboard
of the
damagedthe
during
deliverycovering
(photo 2 the
andopening
3).
fireplace and make sure the glass door has not been
damaged during delivery (photo 2 and 3).
The warranty covers transport damages providing you
The
warranty
covers48transport
damages providing you
contact
Stûv within
hours of delivery.
À la réception du foyer
À la réception du foyer
Une fois le foyer installé, remettez cette notice à l'utilisateur
recommandez-lui
de remettez
renvoyer cette
le certificat
Uneetfois
le foyer installé,
noticede
à garantie à
Stûv America (voir fin de notice).
l’utilisateur et recommandez-lui de renvoyer le certificat de
garantie à Stûv America (voir fin de notice).
Attention
Attention
! !
Retirer
le carton
cache
l'ouverture
foyer
vérifier
Retirer
le carton
quiqui
cache
l’ouverture
dudu
foyer
et et
vérifier
que la vitre ne s'est pas brisée au cours de la livraison
que la vitre ne s’est pas brisée au cours de la livraison
(photos 2 et 3).
(photos 2 et 3).
La garantie ne couvre les détériorations dues au transport
couvre les
détériorations
dues
queLasi garantie
elles sontnesignalées
dans
les 48 heures
deau
la transport
livraison.
que si elles sont signalées dans les 48 heures de la livraison.
contact Stûv within 48 hours of delivery.
23
20
Checking
contents
Checking the contents
Vérification
Vérificationduducontenu
contenudu
dufoyer
foyer
1 &12&).2 ).
thecombustion
combustion chamber
(photos
InInthe
chamberyou
youwill
willfind…
find…
(photos
la chambre
combustion,vous
voustrouverez...(photos
trouverez...(photos 1
Dans
Dans
la chambre
dede
combustion,
1 etet2)2)
Touch-up
spray can
Touch-up spray can
Bombe
de
Bombe depeinture
peinturepour
pour retouches
retouches
1
Installation and User Manual
Notice
d’installation
mode d’emploi
Installation
and UseretManual
1
Notice d’installation et mode d’emploi
Fire bricks
Pierres réfractaires
Fire bricks
Pierres réfractaires
18
Cold handgrip to operate door and damper
Poignée « main froide » pour manipuler la porte et le registre
Cold handgrip to operate door and damper
1
Poignée
« main
» pour–manipuler
Locking
pieces
forfroide
fire bricks
photo 2Ala porte et le registre
Pièces de blocage des réfractaires – photo 2A
Locking pieces for fire bricks – photo 2A
0
Pièces de
blocage
Stainless
steel
itemsdes réfractaires – photo 2A
Pièces inox
items baffle kit
Stainless steel
Vermiculite
for lower
Pièces inox
Vermiculites pour kit chicanes inférieures
3
Vermiculite for lower baffle kit
Vermiculites pour kit chicanes inférieures
2
We suggest removing all elements that are inside the
combustion chamber so as to make the fireplace lighter to
We
suggest
removing all elements that are inside the
move
around.
Nous vous conseillons de retirer tous les éléments qui se
trouvent dans la chambre de combustion pour alléger le
foyer
et le
déplacer plus
facilement.
Nous
vous
conseillons
de retirer
tous les éléments qui se
combustion chamber so as to make the fireplace lighter to
move around.
trouvent dans la chambre de combustion pour alléger le
foyer et le déplacer plus facilement.
24
21
Recommendations
Claims
For
Forwarranty
warrantycoverage,
coverage, please
please provide
provide the
the manufacturer’s
manufacturer’s
serial
on the
theupper-right
upper-rightsection
section
serialnumber,
number, which
which is
is visible
visible on
ofof
the
4).
theopening
opening (photo
(photo 4).
Tools (Pic. 5)
Tools (Pic. 5)
- crowbar
Recommandations
Réclamation
En En
cascas
de de
réclamation,
le n°
n° de
desérie
réclamation,communiquez
communiquez toujours
toujours le
série
foyervisible
visible sur
sur la
la la
dudufoyer
la partie
partiesupérieure
supérieuredroite
droitedede
devanture,
dans
leleretour
devanture,
dans
retour(photo
(photo 4).
4).
Outils à prévoir (photo 5)
Outils à prévoir (photo 5)
– un pied de biche
- -Crowbar
level
- -Level
hammer
screw gun (10 mm socket and Philips bits)
- -Hammer
standard
- -Screw
gunscrewdriver
(10 mm socket and Philips bits)
Phillips screwdriver
- -Standard
screwdriver
- 3 and 5 mm Allen keys
- -Phillips
screwdriver
pliers
- 3 and 5 mm Allen keys
- Pliers
Unpacking
- Torx screwdrivers kit
Note :
– Un
pied
de biche
– un
niveau
– Un
niveau
– un
marteau
– une
visseuse (douille de 10 mm et embouts cruciformes)
– Un
marteau
– unvisseuse
tournevis(douille
plat de 10 mm et embouts cruciformes)
– Une
– un
tournevisplat
cruciforme
– Un
tournevis
– une clé Allen de 3 mm et de 5 mm
– Un
tournevis cruciforme
– une pince
– Une clé Allen de 3 mm et de 5 mm
– Une pince
Déballage
– Ensemble de tournevis Torx
Remarque :
- For transport, the window is secured in its intermediate
position.
-Unpacking
The paint is not oven-baked and is therefore relatively
fragile, but it will harden when heated. Care should be
taken: when handling the unit during installation.
Note
- Remove protective strip from window (photograph 6).
- -For
transport,
thefront
window
is secured
its intermediate
Remove
vertical
slats with
crowbarin(photo
7).
position.
- Remove top section of packing (photo 8).
– Pour le transport, la vitre est immobilisée en position
intermédiaire.
Déballage
– La peinture n'est pas cuite au four ; elle est donc
relativement fragile mais elle durcira lors des premières
chauffes : ; par conséquent, manipuler l'appareil avec
Remarque
précaution lors de son installation.
– Pour
le transport,
est immobilisée
en position
– Retirer
la bande la
devitre
protection
de la vitre (photo
6).
intermédiaire.
– À l’aide du pied de biche, retirer les lattes verticales avant
(photo 7).
– La– Retirer
peinture
n’est pas
cuite au
; elle est
donc8).
la coiffe
supérieure
de four
l’emballage
(photo
- The paint is not oven-baked and is therefore relatively
fragile, but it will harden when heated. Care should be
taken when handling the unit during installation.
- Remove protective strip from window (photograph 6).
- Remove vertical front slats with crowbar (photo 7).
- Remove top section of packing (photo 8).
relativement fragile mais elle durcira lors des premières
25chauffes ; par conséquent, manipuler l’appareil avec
précaution lors de son installation.
– Retirer la bande de protection de la vitre (photo 6).
– À l’aide du pied de biche, retirer les lattes verticales avant
(photo 7).
– Retirer la coiffe supérieure de l’emballage (photo 8).
22
1
2
3
4
5
6
Moving
Moving
Déplacement
Déplacement
There are three different ways of moving the fireplace:
-There
usingare
a forklift:
leave itways
on the
pallet the fireplace:
three different
of moving
usingaatwo-wheel
forklift: leave
it ontrolley:
the pallet
--with
hand
tilt the fireplace
- with a two-wheel
hand
the fireplace backwards
backwards
and leave
thetrolley:
pallet tilt
in place
and
leave
the
pallet
in
place
- with the reversible handles designed for this purpose:
- with the reversible handles designed for this purpose: (e.g.
(e.g. when placing the unit on a base).
Vous pouvez déplacer le foyer de 3 manières différentes :
– avec
transpalette
lefoyer
laisserdesur
sa palette.
Vousun
pouvez
déplacer: le
3 manières
différentes :
– avec
transpalette
: le le
laisser
sursur
sa son
palette.
– avec
unun
diable
: basculer
foyer
dos, laisser la
– avecsur
unplace.
diable : basculer le foyer sur son dos, laisser la
palette
palette
sur
place. conçues à cet effet : elles sont
– avec les poignées
– avec les poignées conçues à cet effet : elles sont
réversibles (p.ex. placement sur un socle).
Caution!
Caution!
Do
not move or transport the prefabricated shell together
Once the fireplace has been moved near its final location,
with the fireplace using the handles (diagram 1).
unlock the counterweights using the 3mm Allen key
Separate
the prefacbricated
the this
fireplace
(photograph
1). Remembershell
to from
perform
operation
(diagram
2). Move
prefabricated
shell and Make
then the
before inserting
the the
fireplace
into the enclosure.
sure
fireplace
using
the handles
the window
moves
properly,(diagram
then raise3).
it to its full height
Attention !
! le foyer ainsi que le caisson d'isolation
NeAttention
pas déplacer
Une
fois
le
foyer
à proximité
de son emplacement final,
avec les poignées
Stûv
[schéma 1].
débloquer les contrepoids à l’aide de la clé Allen 3mm
Veillez à désolidariser le caisson de l'appareil[schéma 2].
(photo 1). Ne pas oublier d'effectuer cette opération avant
Déplacer
le caisson
ensuite
déplacer le foyer à l'aide des
d’encastrer
le foyeretdans
la niche.
poignées
[schéma
3].
Vérifier que la vitre coulisse correctement ; la remonter
when placing the unit on a base).
(photograph 2). Check that the counterweight cables run in
réversibles (p.ex. placement sur un socle).
ensuite au maximum (photo 2).
Caution!
the grooves of the pulleys (photograph 13).
Once the fireplace has been moved near its final location,
unlock
thethe
counterweights
Never tilt
door more thanusing
90°. the 3mm Allen key
(photograph 4). Remember to perform this operation
before inserting the fireplace into the enclosure. Make sure
Fresh-air
inlet properly, then raise it to its full height
the
window moves
(photograph 5). Check that the counterweight cables run
operatingofwith
open (photograph
fire, the Stûv 6).
21 consumes a
inWhen
the grooves
the an
pulleys
Attention !
Vérifier que les câbles des contres-poids sont logés dans les
Une
fois ledes
foyer
à proximité
gorges
poulies
(photo 3).de son emplacement final,
débloquer
contrepoids
à l’aide
clé Allen 3mm
Ne jamaislesbasculer
la porte
de plusde
dela90°.
(photo 4). Ne pas oublier d’effectuer cette opération avant
d’encastrer le foyer dans la niche. Vérifier que la vitre
coulisse
correctement
la remonter ensuite au maximum
Admission
d’air ;frais
(photo 5). Vérifier que les câbles des contres-poids sont
En dans
fonctionnement
à feu
ouvert,
le Stûv
logés
les gorges des
poulies
(photo
6). 21 consomme
Never
tiltairthe
door(fig.
more
90°. this is not mandatory.
external
supply
3),than
although
Nede
jamais
basculer
la porte
de plus
de 90°. de l’extérieur
prévoir
une arrivée
d’air
qui proviendra
large amount of air. Therefore, we recommend providing an
beaucoup d’air. Il est donc préférable, mais non obligatoire,
The air intake, which varies depending on the model,
should ideally be located beneath the front of the unit and
incorporate a shut-off register (fig. 4 A #12001002).
(fig. 3).
L’alimentation d’air, qui varie selon le modèle, débouchera
idéalement sous le foyer, vers l’avant du foyer, et sera
équipée d’un registre de fermeture (figure 4 A
#12001002).
DO NOT CONNECT THIS AIR INLET TO THE STOVE.
NE PAS RACCORDER CETTE ALIMENTATION AU FOYER.
model
Stûv 21/85 SF
modèle
Stûv 21/85 SF
minimum diameter
4" Ø
section minimale
4" Ø
Remarque : Tout extracteur (hotte, air-conditionné…) situé
dans le même espace ou dans une pièce contigüe peut
perturber le bon fonctionnement de votre Stûv (risque de
23
refoulement).
Cette étape est cruciale pour les maisons à haut rendement
énergétique.
Note: Any extractor (kitchen hood, air-conditioning)
operating in the same room or in an adjacent room can
adversely affect your Stûv's operation (back-draughts).
This step is crucial for homes that are highly energy
efficient.
26
Fresh-air inlet
Admission d’air frais
When operating with an open fire, the Stûv 21 consumes
a large amount of air. Therefore, we recommend providing
an external air supply (fig. 3), although this is not
mandatory.
En fonctionnement à feu ouvert, le Stûv 21 consomme
beaucoup d’air. Il est donc préférable, mais non obligatoire,
de prévoir une arrivée d’air qui proviendra de l’extérieur
(fig. 3).
The air intake, which varies depending on the model,
should ideally be located beneath the front of the unit and
incorporate a shut-off register (fig. 4 A #12001002).
L’alimentation d’air, qui varie selon le modèle, débouchera
idéalement sous le foyer, vers l’avant du foyer, et
sera équipée d’un registre de fermeture (figure 4 A
#12001002).
DO NOT CONNECT THIS AIR INLET TO THE STOVE
EXCEPT IF YOU HAVE THE AIRBOX AND OUTSIDE
CONNECT SET.
NE RACCORDER CETTE ALIMENTATION AU FOYER QUE
SI VOUS POSSEDEZ LE SET CAISSON AIR EXTERIEUR.
model
minimum diameter
modèle
section minimale
Stûv 21/65HSF Stûv 21/75 SF Stûv 21/75DF Stûv 21/85 SF Stûv 21/85 DF Stûv 21/95 SF Stûv 21/95 DF Stûv 21/105 SF Stûv 21/125 SF Stûv 21/125 DF
4" Ø
4" Ø
4" Ø
4" Ø
4" Ø
4" Ø
4" Ø
4" Ø
6" Ø
6" Ø
Stûv 21/65HSF Stûv 21/75 SF Stûv 21/75DF Stûv 21/85 SF Stûv 21/85 DF Stûv 21/95 SF Stûv 21/95 DF Stûv 21/105 SF Stûv 21/125 SF Stûv 21/125 DF
4-6" Ø
4-6" Ø
6" Ø
4-6" Ø
6" Ø
6" Ø
6" Ø
4-6" Ø
6" Ø
6" Ø
Note: Any extractor (kitchen hood, air-conditioning)
operating in the same room or in an adjacent room can
adversely affect your Stûv’s operation (back-draughts).
This step is crucial for homes that are highly
energy efficient.
24
Remarque : Tout extracteur (hotte, air-conditionné…) situé
dans le même espace ou dans une pièce contigüe peut
perturber le bon fonctionnement de votre Stûv (risque de
refoulement).
Cette étape est cruciale pour les maisons à haut
rendement énergétique.
1
2
3
combustion air
air de combustion
4
convection air
air de convection
6
5
7
option
Combustion air inlet
The stove requires air for combustion.
Combustion air is complementary to the fuel (wood logs).
Both air and fire are necessary to obtain combustion.
A sufficient air inlet (see table) should ideally be created
under the stove, at the front (diagram 2). Wheter the
fireplace is tightly connected or not to combustion air inlet,
the base of the fire (dark grey zone) must be supplied with
fresh air (coming from outside the room).
The air enters the combustion chamber and feed the
fire, the result is the smoke that escapes the combustion
chamber through the chimney.
In opposition, the convection air never comes into contact
with the fire. The convection is an independant air channel
: the air circulates around the combustion chamber, gets
hot and goes out through convection grates in the same
room or in other rooms.
This air inlet comes from a ventilated empty space, a
ventilated room or from outside (mandatory regulation in
some countries) [diagrams 6 & 7].
Arrivée d'air pour la combustion
Le foyer a besoin d'air pour la combustion.
L'air est un comburant, il est complémentaire au
combustible (bûche de bois).
Ces deux éléments sont nécessaires pour obtenir une
combustion.
Une arrivée d'air suffisante doit idéalement déboucher
sous le foyer, vers l'avant [schéma 2]. Que le foyer soit
directement relié à l'arrivée d'air extérieur ou non, une
source d'air doit être assurée dans la zone indiquée en gris
foncé.
L'air va pénétrer dans la chambre de combustion, alimenter
le feu et la fumée issue de cette réaction va être aspirée
dans le conduit de fumée.
Par opposition, l'air de convection n'est jamais en contact
avec le feu. La convection est un circuit d'air chaud qui
circule autour de la chambre de combustion, se réchauffe
et est distribué dans la ou les pièce(s) avoisinant(s) le foyer.
Cette arrivée d’air proviendra d’un vide ventilé, de la pièce,
d’un local ventilé ou de l’extérieur (disposition obligatoire
dans certains pays) [schémas 6 et 7].
25
8
9
Ø6”
Ø4”
11
Ø6”
Ø6”
Ø4”
12
The duct carrying this air...
... will be protected on the outside by a grill the free
passage section of which is at least equivalent to the
section of the air inlet. Please note that the infiltration of
water and the effect of the wind can damage the system.
... will be as short as possible to prevent pressure loss and
to prevent making the house cold.
... will ideally be fitted with a closure valve [photo 8] to
prevent the room from becoming cold when the stove is
not in use. It should ideally be located as close as possible
to the outside wall. It can be controlled from inside if it is
not too far away from the stove (cable length = 47").
If it is not possible to bring in outside air near the
stove (most unfavourable case)...
the necessary air for combustion will be taken from the
room. In that case make sure the air renewal is sufficient
when the fireplace is in function.
Please note
Be careful with air extraction systems (kitchen hoods, air
conditioning, mechanically-controlled ventilation, other
stoves) in operation in the same space or in an adjacent
room. They also use lots of air and can cause a depression
in the room and prevent the stove from operating correctly
(risk of draughtback). They can affect the operation of the
stove even if it is connected to an outside air inlet.
26
10
Le conduit qui amène cet air...
... sera protégé à l'extérieur par une grille dont la section
de passage libre est au moins équivalente à la section
d'arrivée d'air. Attention aux infiltrations d'eau et à
l'influence des vents qui peuvent annihiler le système.
... sera le plus court possible pour éviter des pertes de
charges et pour ne pas refroidir la maison.
... sera idéalement équipé d'un clapet de fermeture [figure
8] pour éviter de refroidir la pièce quand le foyer n'est
pas en fonctionnement. Celui-ci sera placé idéalement au
plus près du mur extérieur. Il pourra être commandé de
l'intérieur s'il n'est pas trop éloigné du foyer (longueur du
câble = 47").
S'il n'est pas possible d'amener de l'air extérieur à
proximité du foyer (cas le plus défavorable)...
... il faut puiser l'air dans la pièce où est installé le foyer
[schéma 10 & 12]. Dans ce cas, il faut s'assurer que le
renouvellement d’air dans la pièce sera toujours suffisant
quand le foyer est en fonctionnement.
Note
Attention aux systèmes d’extraction actifs d’air (hotte de
cuisine, air-conditionné, ventilation mécanique contrôlée,
autre foyer…) situés dans le même espace ou dans une
pièce contigüe. Ils consomment eux aussi beaucoup d'air,
pourraient créer une dépression dans le local et perturber
le bon fonctionnement du foyer (risque de refoulement).
1
2
3
Locating the external air intake option
Placement de l'option arrivée d'air extérieur
Locating the box :
Placement de la boite :
Screw the box to the stove using two M5x8 torx screws.
Visser la boite sous le foyer à l'aide des deux vis torx M5x8
Warning!
Attention !
The box cannot bear the weight of the stove. Take care not
to damage the box or the stove when standing the device
up.
La boite ne peut supporter le poids du foyer. Prendre
garde de ne pas endommager ni la boite ni le foyer lors du
redressement de l'appareil.
1
2
Ø4"
Ø 100 mm
External air intake connection
Connection arrivée d'air extérieur
Fix a baffle as well as a 4" diameter hose to the external air
intake box.
Fixer un buselot ainsi qu'un flexible diamètre 4" à la boite
d'arrivée d'air extérieur.
It is possible to connect this to the back (2 positions) or the
side of the box (2 positions).
Il est possible de se raccorder à l'arrière (2 positions) ou sur
le côté de la boite (2 positions).
Break out the pre-cutout(s) using a hammer.
Casser la ou les prédécoupe(s) à l'aide d'un marteau.
27
Connection to the chimney
Caution :
Care must be taken during installation. Shortcuts or
compromises may result in safety hazards or even fire.
Do not connect the unit to a chimney used for another
appliance.
Do not cut rafters or ceiling joints without first consulting
a building official to ensure that structural integrity is not
compromised.
Use only a chimney that complies with UL-103HT or
ULCS629 (2100°), depending on the applicable standards
in your area.
A chimney serving as an outlet for a fireplace cannot be
used for any other appliance.
Caution: The illustrations on page 30 show different
chimney configurations. Please refer to the chimney
manufacturer’s instruction manual for appropriate and safe
installation details.
Before connecting the chimney, make sure the fireplace is
in its final position and that it is level.
Standard inside diameter of the CHIMNEY
Raccordement au conduit de fumée
Attention :
N’employez pas de moyens de fortune pendant
l’installation: ils pourraient devenir dangereux et entraîner
un incendie.
Ne reliez pas cet appareil à une cheminée qui dessert un
autre appareil de chauffage. Ne coupez ni chevrons ni
solives de plafond sans consulter au préalable un agent
du service du bâtiment pour éviter de compromettre
l’intégralité structurale.
Utiliser uniquement une cheminée répertoriée selon la
norme UL-103HT ou ULC-S629 (2100°), selon les normes
d’installations en vigueur dans votre localité.
Une cheminée servant d’évacuation à un foyer ne doit
servir pour aucun autre appareil.
Attention : les schémas en page 30 illustrent les diverses
configurations possibles d’installations de cheminées. Vous
devez toutefois vous référer au manuel d’instructions du
manufacturier de cheminée pour les détails d’installation
appropriés.
Avant d’effectuer le raccordement, vérifier que le foyer se
trouve à sa place définitive et qu’il est de niveau.
Diamètre intérieur de la CHEMINÉE
Standard inside diameter of outlet:
Diamètre intérieur standard de la sortie :
Stûv 21/65HSF - 8"
Stûv 21/75SF - 8"
Stûv 21/75DF - 10" *
Stûv 21/85SF - 8"
Stûv 21/85DF - 10" *
Stûv 21/95SF - 10" *
Stûv 21/95DF - 12" *
Stûv 21/105SF - 8"
Stûv 21/125SF - 10" *
Stûv 21/135SF - 10" *
Stûv 21/125DF - 12" *
Stûv 21/65HSF - 8"
Stûv 21/75SF - 8"
Stûv 21/75DF - 10" *
Stûv 21/85SF - 8"
Stûv 21/85DF - 10" *
Stûv 21/95SF - 10" *
Stûv 21/95DF - 12" *
Stûv 21/105SF - 8"
Stûv 21/125SF - 10" *
Stûv 21/135SF - 10" *
Stûv 21/125DF - 12" *
Ideal chimney heights from below the unit to the rain cap:
Hauteurs de cheminée idéales de dessous l’appareil au
chapeau de pluie :
Minimum 15’
Maximum 45’
It is recommended, but not mandatory, that a straight
chimney section be installed between the unit and an
offset.
*Note : For installation in Canada, use only ICC-RIS chimney model
for size 10” & 12” as the fireplaces have been certified as a system
using this brand only.
28
minimum 15’
maximum 45’
Il est préférable mais pas obligatoire d’installer une
première section de cheminée droite entre l’appareil et une
déviation.
*Note : Pour les installations au Canada, utilisez uniquement une
cheminée ICC-RIS pour les diamètres 10” & 12” car les foyers ont été
testés en tant que système avec cette marque seuleument.
If several existing flues are available (fig.1a and 1b):
several
available
-Ifuse
onlyexisting
one of flues
themare
(fig.
1b) (fig.1a and 1b):
use
only
one
of
them
(fig.
1b)
- seal the unused flues at the top and bottom and, in
- seal the unused flues at the top and bottom and, in
general, make sure that the enclosure in which the fireplace
general, make sure that the enclosure in which the fireplace
isis located
to prevent
prevent outside
outsidecold
coldairairfrom
fromcooling
cooling
located is
is sealed
sealed to
the
(Fig. 1b).
1b).
the house
house (Fig.
Any unused flue (fig. 1a) or vented cavity in the walls is
Any unused flue (fig. 1a) or vented cavity in the walls is
liable
unwantedback-draughts.
back-draughts.
liable to
to generate
generate unwanted
This should be avoided.
This should be avoided.
Si plusieurs conduits sont disponibles (fig. 1a & 1b) :
Si plusieurs
sont(fig.
disponibles
(fig. 1a & 1b) :
– n’en
utiliser conduits
qu’un seul
1b).
–
n’en
utiliser
qu’un
seul
(fig.
1b).
– boucher en haut et en bas les conduits non utilisés et
– boucher en haut et en bas les conduits non utilisés et
d’une manière générale, veiller à ce que le plafond de la
d’une manière générale, veiller à ce que le plafond de la
niche
dans
laquelle
estest
enfermé
foyer
soit
bien
niche
dans
laquelle
enferméle le
foyer
soit
bienétanche
étanche
pour
éviter
queque
de de
l’airl’air
froid
en en
provenance
dede
l’extérieur
pour
éviter
froid
provenance
l’extérieur
ne ne
vienne
refroidir
l’intérieur
de de
la maison
(fig.(fig.
1b).1b).
Un Un
vienne
refroidir
l’intérieur
la maison
conduit
non
utilisé
(fig.
vide-ventiléentre
entremurs
murs
conduit
non
utilisé
(fig.
1a)1a)
ouou
unun
vide-ventilé
peuvent
provoquerun
uncontre-tirage
contre-tirage très
très préjudiciable.
peuvent
provoquer
préjudiciable.
À proscrire
! !
À proscrire
28
29
Connection to the chimney
Raccordement au conduit de fumée
Rain Cap
Chapeau de pluie
Vented flashing
Solin ventilé
Attic radiation shield
coupe feu radiant avec
collet de solin
Ceiling radiation shield
Coupe feu radiant
Offset support
Support de déviation
Offset 15°-30°-45°
Déviation 15°-30°-45°
Fireplace
Foyer
30
Masonry chimney
Installing your Stûv fireplace with a masonry chimney
requires use of the ICC-RIS chimney from the top of the
fireplace to the wall where it will connect to an approved
rigid duct that will run inside the masonry chimney (see
figure on next page).
The rigid stainless steel liner should be inserted inside the
clay liner within the masonry chimney. It is not meant to
replace the clay liner. You can use any approved liner that
complies with ULC-S635, ULC-S640, or UL-1777. Special
care should be taken to make sure that you have a solid
connection between the ICC-RIS chimney section and the
liner. A masonry adaptor (FO-FDM7) has been designed
specifically for this purpose and is available from your ICC
dealer. It attaches to the liner with 3 stainless steel rivets
(provided) and to the ICC-RIS chimney with 3 screws
(provided).
After cementing, the connection between the ICC-RIS
chimney and the liner should not be visible in order to
insulate the heat released through the liner from the
fireplace enclosure. As shown in the illustration on the
next page, you must install at least one 18’’ length of
ICC-RIS chimney after the ICC-RIS chimney elbow. The
uppermost part of the ICC-RIS chimney - where it enters
the masonry chimney - must be a minimum of 12’’ from
any combustible materials in the ceiling.
Notes:
If the ceiling is high enough, you can install one or more
ICC-RIS chimney lengths directly on the fireplace before
the elbow. If you use a flexible liner, care must be exercised
when cleaning to ensure that the flexible stainless steel
liner is not dislodged in any way.
Cheminée de maçonnerie
L’installation de votre foyer Stûv avec une cheminée de
maçonnerie nécessite quand même l’installation d’une
section de cheminée ICC-RIS au-dessus du foyer jusqu’à la
connexion avec la gaine rigide homologuée qui doublera
l’intérieur de la cheminée de maçonnerie (voir figure page
ci-contre).
Une gaine rigide d’acier inoxydable doit être installée
à l’intérieur de la gaine d’argile cuite à l’intérieur de la
cheminée de maçonnerie. La gaine rigide ne remplace
d’aucune façon la gaine d’argile cuite. Vous pouvez utiliser
toute gaine homologuée selon les normes ULC-S635,
ULCS640 ou UL-1777.
Vous devez vous assurez d’avoir une bonne connexion
solide entre la section de cheminée ICC-RIS et la gaine
rigide. Un adaptateur de maçonnerie (FO-FDM7) a été
conçu spécifiquement pour cet usage et est disponible
chez un détaillant ICC. Cet adaptateur s’attache avec 3
rivets (fournis) à la gaine rigide et avec 3 vis (fournies) à
la cheminée ICC-RIS. Une fois le mortier en place, le joint
entre la cheminée ICC-RIS et la gaine rigide ne devrait
pas être visible afin d’isoler la chaleur dégagée à travers la
gaine de l’enclos du foyer. Tel qu’il est montré sur la figure
de la page ci-contre, vous devez installer au minimum une
longueur de 46 cm de cheminée ICC-RIS après le coude de
cheminée ICC-RIS.
Le point le plus élevé de la cheminée ICC-RIS – là où la
cheminée entre dans la cheminée de maçonnerie – ne doit
pas être à moins de 31 cm des matériaux combustibles du
plafond.
Remarque :
Si la hauteur du plafond le permet, vous pouvez installer
une des longueurs de cheminée ICC-RIS directement sur le
foyer, avant le coude. Si vous utilisez une gaine flexible, le
nettoyage devra être effectué délicatement afin de ne pas
risquer de déplacer celle-ci.
Listed liner to ULC-S635, ULC-S640 or UL-1777
Gaine homologuée selon ULC-S635, ULC-S640 ou
UL-1777
Mortar
Mortier
Min 18"EXCEL or RIS chimney
Cheminée EXCEL or RIS min 18"
EXCEL or RIS chimney Elbow
Coude de cheminée EXCEL or RIS
Respect clearances as PER NBC or NFPA 211
Respecter les dégagements selon CNB ou NFPA 211
31
Using an existing masonry chimney
Warning. If you are considering using an existing
chimney, it must first be thoroughly inspected by an
organization qualified to determine the following:
- The masonry chimney is well constructed and fully lined,
in accordance with local building codes and the National
Building Code of Canada (NBC) or the National Fire
Protection Association chimney standard (NFPA 211).
- It has been thoroughly cleaned of any soot or creosote
residue and inspected to determine that it is in good
working condition.
- There is no insulation of any type in contact with
the masonry chimney and there is no insulation stuck
anywhere in the chimney.
- All the necessary clearances around the masonry chimney
and along its complete length comply with NBC or NFPA
211 codes. If the masonry chimney is enclosed in drywall,
openings will probably be required in order to check the
clearances.
- The masonry chimney will only be used as a fireplace and
with no other appliance.
If major repairs are required to comply with the above
requirements, a new chimney should be constructed.
To make the hole through the masonry chimney and make
the connection to the fireplace, we recommend that you
follow these steps:
Locate and mark the spot where the ICC-RIS chimney will
be inserted into the masonry chimney.
Using a large (3/4 - 2’’) masonry bit, drill a hole exactly
in the center of the oval outline. With an impact hammer
and drill, slowly enlarge the hole to the size required.
Remember to work from the center out. Be especially
careful with the clay liner behind the brick because three
sides of it must stay in place.
Slide the stainless-steel liner down from the top of the
chimney. If you are using rigid liner you will need enough
room to secure an elbow to it with at least two screws.
If it is difficult to install the rigid stainless-steel liner in the
existing masonry chimney or if the inside diameter of the
masonry chimney is less than 10’’ X 10’’, an approved
flexible stainless-steel liner can be used along with a
flexible/rigid adapter (LM-7LAF) available from your
dealer. Install the liner elbow and masonry adapter on the
lower edge of the liner.
Move the fireplace forward to install the ICC-RIS chimney
on it (elbow and section), then move the fireplace back as
you connect the masonry adapter to the ICC-RIS chimney.
Utilisation d’une cheminée de maçonnerie
existante
Mise en garde : si vous envisagez d’utiliser une cheminée
de maçonnerie existante, vous devez la faire inspecter au
préalable par les autorités compétentes afin de confirmer
les points suivants :
La cheminée de maçonnerie est construite suivant les règles
de l’art, est entièrement doublée et respecte les règlements
municipaux ainsi que le Code national du bâtiment du
Canada (CNB) ou la norme de l’association nationale de
protection contre les incendies (NFPA 211). La cheminée
de maçonnerie a été entièrement nettoyée de tout résidu
de suie et de créosote et a été inspectée pour confirmer
qu’elle est toujours en bon état de fonctionnement. Il n’y
a aucun isolant, quelle qu’en soit la sorte, en contact avec
la cheminée de maçonnerie et il n’y a aucun isolant, quelle
qu’en soit la sorte, qui se trouve coincé quelque part dans
la cheminée.
Tous les dégagements nécessaires autour de la cheminée
de maçonnerie, sur toute la longueur de celle-ci, sont
respectés selon CNB ou NFPA 211. Si la cheminée de
maçonnerie est encloisonnée derrière des panneaux de
Placoplatre, des ouvertures devront être pratiquées afin de
confirmer tous les dégagements.
La cheminée de maçonnerie sera utilisée uniquement pour
le foyer et pour aucun autre appareil.
Si des réparations majeures sont nécessaires pour
rencontrer les points mentionnés ci-dessus, une nouvelle
cheminée de maçonnerie devra être construite.
Pour faire le trou dans la cheminée de maçonnerie et faire
le raccordement avec le foyer, nous vous recommandons
de suivre les étapes suivantes : Déterminez et indiquez
l’endroit d’insertion de la cheminée ICC-RIS dans la
cheminée de maçonnerie.
En utilisant une grosse mèche de maçonnerie (3/4 – 2’’),
percez un trou exactement au centre du tracé ovale. À
l’aide d’un marteau de maçonnerie et d’une perceuse,
élargissez graduellement le trou jusqu’à la grandeur
désirée.
N’oubliez pas de travailler du centre du trou vers
l’extérieur.
Soyez particulièrement prudent en perçant la gaine en
argile cuite derrière la brique car les trois autres côtés
doivent rester en place.
Glisser la gaine d’acier inoxydable du haut de la cheminée
vers le bas.
Si vous utilisez une gaine rigide, vous aurez besoin d’assez
d’espace pour fixer un coude avec au moins 2 rivets. Si
la gaine rigide glisse difficilement ou si la cheminée de
maçonnerie offre une ouverture intérieure inférieure à 10’’
X 10’’, une gaine flexible homologuée peut être utilisée
avec un adaptateur flexible/rigide (LM-7LAF) disponible
chez votre détaillant.
Installez le coude de gaine rigide et l’adaptateur de
maçonnerie à l’extrémité inférieure de la gaine.
Avancez le foyer afin d’y installer la cheminée ICC-RIS
(coude et longueur) puis reculez le foyer en place tout en
reliant la cheminée ICC-RIS à l’adaptateur de cheminée de
maçonnerie.
32
1
2
4
5
Connecting the hot-air outlets
(mandatory)
3
Raccordement des sorties d'air chaud
(obligatoire)
A minimum of 2 room air inlets and 2 hot-air outlets are
required.
Un minimum de 2 entrées d’air ambiant et 2 sorties d’air
chaud est requis.
Use only the Stûv convection system kit.
Utilisez uniquement le système de convection fournit par
Stûv.
Retirer les prédécoupes en tapant le côté le plus près
possible de la sortie de fumée, retirer la laine isolante et
retirer les deuxièmes prédécoupes au fond du trou. Vissez
ensuite les collerettes.
Fixer les conduits d’air chaud a l’aide de colliers de serrage.
Remove the knockout parts by tapping as closely as possible
to the side nearest the smoke outlet. Then screw in the
flanges. Attach the hot-air outlets using clamping collars.
Placing the fireplace in position
Placing the fireplace in position
Note:
The fireplace will stand:
Placement
– on 2 layers of 1/2"
cement boarddu
or;foyer
Placement
du
foyer
–The
on afireplace
masonry base
or;
will
stand::
Remarque
– on an adjustable Stûv base (optional).
– on 2 layers of 1/2" cement board or;
Le foyer sera posé soit :
– sur deux épaisseurs de fibro
– sur un socle Le
maçonné,
foyer sera
– sur un podium ajustable Stû
– sur deux ép
- Note:
The fireplace must rest on an adequate bearing surface.
– LeRemarque
foyer doit: être installé sur un sol ayant une portance
–surface.
on
masonry
base
– sur un de
socle
- The fireplace must rest on an adequate bearing 1.
–
Le or;
doit être
On acement
boards
or
afoyer
masonry
base:installé sur un sol ayant une
1. portance
sur les panneaux
fib
suffisante.
- -ItItmust
the
–
on
an
adjustable
Stûv
base
(optional).
–
sur
un
podi
mustbebeinstalled
installedtotofacilitate
facilitateaccess
accessfor
forcleaning
cleaning
the
suffisante.
Level the fireplace with the four adjustable struts, accessed
maçonné :
hearth,
duct,and
andthe
thesmoke
smoke
outlet.
– Il –doit
êtrechamber.
installé
de
àmm
faciliter
l’accèsl’accès
pour
le
hearth, the
the connecting
connecting duct,
outlet.
Il doit
être
installé
de
àAllen
faciliter
pourle lefoyer de niveau
from inside the combustion
Usefaçon
a 5-façon
Placer
- It must be free to expand when hot. In no case
must
the
nettoyage
du
foyer,
dubase:
conduit
de raccordement
nettoyage
dufour
foyer,
du conduit
de raccordement
et duet du
key
to adjust
the height
at the
corners
(photo
1).
réglables
en hauteur
1.
On
cement
boards
or
a
masonry
1. sur depuis
les p
- masonry,
It must be
free or
to ornamental
expand when
no case
the
walls,
trimhot.
be In
allowed
to must
contact
conduit
fumée.
combustion. Utiliser la clé Alle
conduit
de de
fumée.
Level
the
fireplace
with
the
four
adjustable
struts,
accessed
:
masonry,
walls,
oratornamental
trim
be allowed2.
toOn
contact
the hearth.
Allow
least a 3/16_
gap.
– Le base:
foyer doit pouvoir se dilater librement. En aucun
cas, ladesmaçonné
the optional Stûv
la hauteur
4 coins (photo
from
inside
the
combustion
chamber.
Use
a
5mm
Allen
Placer
le
foy
the
hearth.
Allow
leastcorrectly,
a 3/16_the
gap.surface finish
–
Le
foyer
doit
pouvoir
se
dilater
librement.
En
aucun
cas,
- For
the door
to at
open
of
the
maçonnerie,
les
murs
ou
les
matériaux
décoratifs
ne
devront
Remove the two M10x40 screws (four in total) attached to
key
to
height
atcontact
the
corners
wall must be on the same level as the base of each
the hearth
entrer
avec
celui-ci
;(photo
prévoir
au
moins
5sur
mm
de
réglables
en
la maçonnerie,
les four
murs
ou
décoratifs
ne
legadjust
(photo the
2).
Tilt
theenfireplace
to
lay
itles
onmatériaux
its
back, 1).
2.
un
podium
Stûv
(optio
- opening
For the (photo
door to1).open correctly, the surface finish of the
jeu. entrerstruts
then remove the
adjustable
located
under
the; prévoir au
devront
en contact
avec
celui-ci
moins
combustion.
Retirer
les5 2 vis
M10 X 40
wall must be on the same level as the base of the
hearth
Pour
unbase:
basculement
correct
de full
la porte, la total)
finition
du la
fireplace
(photo
3).
Screw
them
onto the base
for the
(photo
2).hauteur
Coucher de
le
mm– de
jeu.
2. On the optional
Stûv
opening (photo 1).
mur doit
se trouver
au(photo
même
niveau que la
baseà rotule
de
length
of
the
thread
without
tightening
them
4).
pieds
réglables
(pho
Remove the two
M10x40
screws
(four
in
total)
attached to
l'ouverture
du
foyer (photo
1).de
– Pour
un basculement
correct
la porte, la finition
les pieds à rotule (sans les blo
each
leg
(photo
2).
Tilt
the
fireplace
to
lay
it
on
its la
back,
2. sur un pod
du mur
se trouver
même
niveau
base de
Caution: To prevent
anydoit
unwanted
airau
flow
inside
the que
then seal
remove
the
adjustable
struts
located
under
the
Retirer
hearth,
the threads
that
held
the
adjustable
struts
with
Attention
:
Pour
éviter les
une 2ci
l’ouverture du foyer (photo 1).
fireplace
(photoscrews
3). Screw
onto the
thefour
base
for the full
the
extra M10x40
(photothem
5). Remove
caps
foyer, revissertotal)
les vis M10
X4
(photo
Le (photo
foyerwithout
sera
soit : recut
by
pryingofthem
off
6). Ifposé
necessary,
the (photo
base
réglables
length
the thread
tightening
them
4). pieds à rotule pieds
à (photo
rotul
– surfireplace
deux épaisseurs
de fibro-ciment
1/2".
elements so that the
can be raised
to the required
Retirer les 4 opercules
les piedsenà fais
ro
height. Insert these
intoun
thesocle
square
holes (photo 7).
éventuellement les éléments
– sur
maçonné,
Caution: To prevent any unwanted air flow inside the
foyer soit surélevé de la haute
– sur un podium ajustable Stûv (fourni en option).
n socle maçonné,
hearth,they
sealare
thenot
threads
that held
the adjustable
:P
Because
symmetrical,
the longer
sides of thestruts with
les trous carrésAttention
dégagés (phot
n podium ajustable
(fourni
en or
option).
1. surscrews
lesplaced
panneaux
de5).
fibro-ciment
ou sur
socle
1. OnStûv
cement
boards
a masonry base:
the extra
M10x40
(photo
fouruncaps
base
elements
should
be
toward
theRemove
front of the
the
foyer,
revisse
Les piètements
ne sont
pas s
fireplace.
If these
are
cut,
raise the fireplace
côtés vers l’avant
du à
foyer.
maçonné
: they
Level the fireplace with the four adjustable struts,
by accessed
prying
them
offnot(photo
6). will
If necessary,
recut the base
pieds
rotule
with
hearth
opening
23-3/4"
above
Sans recoupe,Retirer
ils rehaussen
Placer
foyer deatniveau
auxtofloor
4 the
piedsrequired
à rotule
the combustion
chamber.
Use a 5-17-1/2"
mm Allen
les panneauxfrom
de inside
fibro-ciment
ou sur
un socle
elements
sothe
that
thelefireplace
can
begrâce
raised
les 4 o
level 2).
(photo 9). réglables en hauteur depuis l’intérieur de la chambre
l’ouverture
du foyer se trouv
de
key to adjust the height at the four corners (photo
height. Insert these
into the square holes (photo 7).
né :
éventuelleme
combustion. Utiliser la clé Allen de 5mm pour le 9).
réglage de
The fireplace will stand:
– on
er sera posé soit
: 2 layers of 1/2" cement board or;
–
on
a masonry base
or;
eux épaisseurs de fibro-ciment
1/2".
– on an adjustable Stûv base (optional).
le foyer de niveau
auxStûv
4 base:
pieds à rotule
33
2. On thegrâce
optional
des 4 coins (photo
2).
Because they la
arehauteur
not symmetrical,
the longer
sides 34
of the
es en hauteur depuis l’intérieur de la chambre de
The two layers of cement boards are still needed
with
the
base elements2.should
be
placed
toward
the
front
of
the
stion. Utiliser la clé Allen de 5mm pour le réglage de
sur un podium Stûv (option) :
use of the Stûv podium.
fireplace. If these are not cut, they will raise the fireplace
eur des 4 coins (photo 1).
L'utilisation de deux épaisseurs de fibro-ciment est tout
17-1/2" with the hearth opening at 23-3/4" above floor
de même requis avec l'utilisation du podium Stûv.
Remove the two M10x40 screws (four in total) attached
level (photo 9).
un podium Stûv
:
to (option)
each leg (photo
3). Tilt the fireplace to lay it on its
Retirer les 2 vis M10 X 40 fixées sur chaque pied (4 au
les 2 vis M10back,
X 40
fixées
surthe
chaque
piedstruts
(4 au
then
remove
adjustable
located under the
total) (photo 3). Coucher le foyer sur son dos, retirer les
(photo 2). Coucher
le (photo
foyer sur
son dos,
lesbase for the full
fireplace
4). Screw
them retirer
onto the
pieds à rotule réglables (photo 4). Revisser complètement
34
à rotule réglables
(photo
Revisser
complètement
length
of the3).
thread
without
tightening them (photo 5).
les
pieds
à
rotule
(sans
les
bloquer)
sur
le
podium
(photo
ds à rotule (sans les bloquer) sur le podium (photo 4).
on : Pour éviter une circulation d’air parasite dans le
revisser les vis M10 X 40 dans les trous où étaient les
rotule réglables (photo 5).
les 4 opercules en faisant levier (photo 6). Recouper
5).
33
foyer soit sur
les trous carré
Les piètemen
côtés vers l’av
Sans recoup
l’ouverture d
9).
d:
6
7
9
10
LeLefoyer
foyersera
seraposé
posésoit
soit: :
ment
mentboard
boardor;or;
;
vbase
base(optional).
(optional).
rora amasonry
masonrybase:
base:
– –sur
surdeux
deuxépaisseurs
épaisseursdedefibro-ciment
fibro-ciment1/2".
1/2".
– –sur
surununsocle
soclemaçonné,
maçonné,
– –sur
surununpodium
podiumajustable
ajustableStûv
Stûv(fourni
(fournienenoption).
option).
25
hthe
thefour
fouradjustable
adjustablestruts,
struts,accessed
accessed
ustion
tion chamber.
chamber.Use
Usea a5-5-mm
mmAllen
Allen
at
t atthe
thefour
fourcorners
corners(photo
(photo1).1).
ûvbase:
base:
8
25
1.1.sur
surleslespanneaux
panneauxdedefibro-ciment
fibro-cimentouousur
surununsocle
socle
maçonné
maçonné: :
Placer
Placerlelefoyer
foyerdedeniveau
niveaugrâce
grâceaux
aux4 4pieds
piedsà àrotule
rotule
réglables
réglablesenenhauteur
hauteurdepuis
depuisl’intérieur
l’intérieurdedelalachambre
chambredede
combustion.
combustion.Utiliser
UtiliserlalaclécléAllen
Allendede5mm
5mmpour
pourleleréglage
réglagedede
lalahauteur
hauteurdes
des4 4coins
coins(photo
(photo1).1).
x40
0 screws
screws(four
(fourinintotal)
total)attached
attachedtoto
Attention : Pour éviter une circulation d’air parasite dans
Caution: To prevent any unwanted air flow inside the
ltthe
thefireplace
fireplacetotolaylayit itononitsitsback,
back,
2.2.sur
surununpodium
podiumStûv
Stûv(option)
(option)
::
le foyer, revisser les vis M10 X 40 dans les trous où étaient
hearth, seal the threads that held the adjustable struts with
ustable
justable struts
strutsthe
located
located
under
under
the
the
Retirer
Retirer
les
les
2
2
vis
vis
M10
M10
X
X
40
40
fixées
fixées
sur
surchaque
chaquepied
pied(4(4
auRetirer
au
les pieds à rotule
réglables
(photo
6).
les 4 opercules
extra M10x40 screws (photo 6). Remove the four caps
rew
w them
themonto
ontothe
the
base
base
for
for
the
the
full
full
total)
total)
(photo
(photo
2).
2).
Coucher
Coucher
le
le
foyer
foyer
sur
sur
son
son
dos,
dos,
retirer
retirer
les
les
en faisant levier (photo 7). Recouper éventuellement les
by prying them off (photo 7). If necessary, recut the base
To complètement
calculate
the re-cut:
thout
out tightening
tightening
them
them(photo
(photo
4).4).
à àrotule
réglables
réglables(photo
(photo3).
3).Revisser
Revisser
complètement
éléments
de
piétement
de
sorte que le foyer soit surélevé
elements
so that
the fireplace can pieds
bepieds
raised
torotule
the required
lespieds
pieds
à àrotule
rotule
(sanslesles
bloquer)
bloquer)
sur
sur
lelepodium
podium
(photo
(photo4).
4). les trous carrés
de
la hauteur
voulue
; les introduire
dans
height. Insert these into the squarelesholes
(photo
8). (sans
Opening of fireplace before recut minus required fir
ny
anyunwanted
unwantedairairflow
flowinside
insidethe
the
dégagés (photo 8).
opening height.
Because
they
are not
symmetrical, the longer sides of the
that
s thatheld
heldthe
theadjustable
adjustable
struts
struts
with
with
Attention
Attention: Pour
: Pouréviter
éviterune
unecirculation
circulationd’air
d’airparasite
parasitedans
danslele
Les piètements ne sont pas symétriques, placer les grands
base elements should be placed toward the front of the
ws
s (photo
(photo5).5).Remove
Removethe
thefour
fourcaps
caps
foyer,
foyer,revisser
revisserleslesvisvisM10
M10X X4040dans
dansleslestrous
trousoùoùétaient
étaientlesles
côtés vers l’avant duIf foyer.
fireplace. If these are not cut, they will raise the fireplace
you wish to have the fireplace opening at a height
oto
hoto6).6).If Ifnecessary,
necessary,recut
recutthe
thebase
base
pieds
piedsà àrotule
rotuleréglables
réglables(photo
(photo5).5).
17-1/2" with the hearth opening at 23-3/4" above floor
3/4": 23 3/4" - 17 3/4" = 6" recut.
Sans
recoupe,
ils(photo
rehaussent
leRecouper
foyer de 44,3 cm ;
replace
place can
canbeberaised
raisedtotothe
therequired
required
Retirer
Retirerlesles4 4opercules
operculesenen
faisant
faisant
levier
levier
(photo6).6).Recouper
level (photo 10).
l’ouverture
du foyer se
trouve
alors
àle60
sol (photo
othe
thesquare
squareholes
holes(photo
(photo7).7).
éventuellement
éventuellementlesleséléments
éléments
dedepiétement
piétement
de
de
sorte
sorte
que
le cm du
First, place que
the
fireplace
(photo 8) in its initial position
10).
foyer
foyersoit
soitsurélevé
surélevédedelalahauteur
hauteurvoulue
voulue; les
; place
lesintroduire
introduire
dans
dans
the fireplace in the desired location and level th
symmetrical,
mmetrical, the
thelonger
longersides
sidesofofthe
the
leslestrous
trouscarrés
carrésdégagés
dégagés(photo
(photo7).7).
using the 5mm Allen key (photo 9).
Calcul
de la recoupeplacer
:placerleslesgrands
To calculate
the of
re-cut:
ebeplaced
placedtoward
toward
the
thefront
front
ofthe
the
Les
Lespiètements
piètementsnenesont
sontpas
passymétriques,
symétriques,
grands
ot
notcut,
cut,they
theywill
will
raise
raise
the
the
fireplace
fireplace
côtés
côtés
vers
vers
l’avant
l’avant
du
du
foyer.
foyer.
Ouverture du foyer sans recoupe moins ouverture du foyer
Opening of fireplace before
required
de laminus
recoupe
: fireplace
Calculrecut
de larecoupe,
recoupe
Calcul
hrthopening
openingatat23-3/4"
23-3/4"
above
abovefloor
floor
désirée. lele foyer
opening
height.
Sans
Sans
recoupe,:ilsils rehaussent
rehaussent
foyer dede 44,3
44,3 cm
cm ; ;
l’ouverture
l’ouverture
du
du
foyer
foyer
se
se
trouve
trouve
alors
alors
à
à
60
60
cm
cm
du
du
sol
sol
(photo
(photo
ut minus required
fireplace
Convection
circulation
Ouverture
du
foyer
sans
recoupe
moins
ouverture
du
foyer
vous désirez
avoir du
votre
ouverture air
foyère
à une hauteur
you wishfireplace
to have the fireplace
openingdu
at foyer
a height
of recoupe
17- Si moins
ore recut minus Ifrequired
Ouverture
sans
ouverture
foyer
9).
9).
désirée.
de 45 cm : 60 cm - 45 cm = 15 cm de recoupe.
3/4": 23 3/4" - 17 3/4" = 6" recut.
désirée.
Convection air can route one or more hot air outlet
Redresser
le foyer
(photo 8). Le placer à son emplacement
First,
place
the
fireplace
(photo
8) in itsavoir
initialvotre
position.
34
opening at a height of 17Si vous 34
désirez
ouverture foyère
à une
hauteur
room
other than the one in which the Stûv 21 is in
eplace opening Then
at a height
of 17Si vous désirez
foyère
à une
hauteur
définitif
et régler
le niveau
à l’aide de la clé Allen de 5mm
place the
fireplace
locationavoir
and votre
level ouverture
ut.
dein45the
cmdesired
:
(verify with your local authorities). In this case, wa
6" recut.
de 45(photo
cm : 10).
the unit using the 5mm
60Allen
cm -key
45 cm = 15
cm de recoupe. (photo 10).
delivery must be compensated by a return duct to av
60 cm - 45 cm = 15 cm de recoupe.
) in its initial position. Then
Redresser le foyer (photo 8). Le placer à son emplacement
hoto 8) in its initial position. Then
Redresser
le
foyer
(photo
8).
Le
placer
à
son
emplacement
depression in the room and its associated hazar
location and level the unit
définitif et régler le niveau à l’aide de la clé Allen de 5mm
desired location and level the unit
définitif
et
régler
le
niveau
à
l’aide
de
la
clé
Allen
de 5mmdraught (Fig. 11).
impeded
9).
(photo 9).
photo 9).
(photo 9).
n
lation
r more hot air outlets to a
one or more hot air outlets to a
ich the Stûv 21 is installed
in which the Stûv 21 is installed
es). In this case, warm air
uthorities). In this case, warm air
y a return duct to avoid air
ated by a return duct to avoid air
its associated hazards of
and its associated
34 hazards of
.
ould have a section at least
wall should have a section at least
from the fireplace.
Circulation de l’air de convection
Circulation de l’air de convection
A grilled opening in the wall should have a section a
equal to that of the hot air outlet from the fireplace.
On peut diriger une ou plusieurs sorties d’air chaud vers un
On peut diriger une ou plusieurs sorties d’air chaud vers un
local autre que celui où est installé le Stûv 21 (Vérifier avec
local autre que celui où est installé le Stûv 21 (Vérifier avec
les autorités locales). Dans ce cas, il faut compenser ce
les autorités locales). Dans ce cas, il faut compenser ce
départ d’air par une gaine de retour pour éviter que la pièce
départ d’air par une gaine de retour pour éviter que la pièce
où se trouve le foyer ne soit en dépression, avec les risques
où se trouve le foyer ne soit en dépression, avec les risques
de refoulement que cela comporte (figure 11).
de refoulement que cela comporte (figure 11).
Prévoir dans Le mur une grille dont la section est au moins
Prévoir dans Le mur une grille dont la section est au moins
égale à celle de la sortie d'air chaud du foyer.
égale à celle de la sortie d'air chaud du foyer.
Connecting the hot-air outlets
(mandatory)
Raccordement des sorties d'air chaud
(obligatoire)
A minimum of 2 room air inlets and 2 hot-air outlets are
required.
Un minimum de 2 entrées d’air ambiant et 2 sorties d’air
chaud est requis.
Use only the Stûv convection system kit.
Utilisez uniquement le système de convection fournit par
Stûv.
Remove the knockout parts by tapping as closely as
possible to the side nearest the smoke outlet. Then screw
in the flanges. Attach the hot-air outlets using clamping
collars.
Retirer
25 les prédécoupes en tapant le côté le plus près
possible de la sortie de fumée, retirer la laine isolante et
retirer les deuxièmes prédécoupes au fond du trou. Vissez
ensuite les collerettes.
Fixer les conduits d’air chaud a l’aide de colliers de serrage.
To calculate theair
re-cut:
Convection
circulation
Calcul de la recoupe
Circulation
de l’air: de convection
Opening ofair
fireplace
before
minus
fireplace
Convection
can route
onerecut
or more
hotrequired
air outlets
to a
opening height.
room other than the one in which the Stûv 21 is installed
(verify
local
In thisatcase,
warm
If youwith
wish your
to have
theauthorities).
fireplace opening
a height
of air
17delivery
must
be
compensated
by
a
return
duct
to
avoid
3/4": 23 3/4" - 17 3/4" = 6" recut.
air depression in the room and its associated hazards of
First, place
the fireplace
(photo 8) in its initial position. Then
impeded
draught
(Fig. 11).
duune
foyerousans
recoupe
moinsd’air
ouverture
foyer
On Ouverture
peut diriger
plusieurs
sorties
chauddu
vers
désirée.
un local autre que celui où est installé le Stûv 21 (Vérifier
avec les autorités locales). Dans ce cas, il faut compenser
Si vous désirez avoir votre ouverture foyère à une hauteur
ce départ
d’air
de 45 cm
: par une gaine de retour pour éviter que la
pièce
où
se
trouve
nerecoupe.
soit en dépression, avec les
60 cm - 45 cm =le15foyer
cm de
risques
de refoulement
que cela
comporte
(figure
11).
Redresser
le foyer (photo
8). Le
placer à son
emplacement
Ausing
grilled
in the
should
theopening
5mm Allen
keywall
(photo
9). have a section at least
equal to that of the hot air outlet from the fireplace.
Prévoir
dans
(photo
9). Le mur une grille dont la section est au moins
égale à celle de la sortie d’air chaud du foyer.
place the fireplace in the desired location and level the unit
définitif et régler le niveau à l’aide de la clé Allen de 5mm
Convection air circulation
Circulation de l’air de convection
Convection air can route one or more hot air outlets to a
room other than the one in which the Stûv 21 is installed
(verify with your local authorities). In this case, warm air
delivery must be compensated by a return duct to avoid air
depression in the room and its associated hazards of
impeded draught (Fig. 11).
On peut diriger une ou plusieurs sorties d’air chaud vers un
local autre que celui où est installé le Stûv 21 (Vérifier avec
les autorités locales). Dans ce cas, il faut compenser ce
départ d’air par une gaine de retour pour éviter que la pièce
où se trouve le foyer ne soit en dépression, avec les risques
de refoulement que cela comporte (figure 11).
Prévoir dans Le mur une grille dont la section est au moins
égale à celle de la sortie d'air chaud du foyer.
A grilled opening in the wall should have a section at least
equal to that of the hot air outlet from the fireplace.
35
35
Natural
Natural convection
convection (Fig. 1)
Convection
naturelle
Convection
naturelle (fig. 1)
Caution, this
this step
step is
is crucial
crucial for
Caution,
for the
the proper
proper performance
performanceofof
your
fireplace!
your fireplace!
Attention,
est pour
cruciale
pour
Attention,
cettecette
étape étape
est cruciale
le bon
fonctionnement
du
foyer
!
fonctionnement du foyer !
Toget
getthethe
most
efficiency
your 21,
Stûv
To
most
efficiency
fromfrom
your Stûv
we21, we
recommend that
that as
asmany
many air
airinlets/outlets
inlets/outlets as
as possible
possible be
be
recommend
installed.
Using
a
hammer,
open
at
least
2
of
the
6
fresh-air
installed. Using a hammer, open at least 2 of the 6 fresh-air
inlet knockouts in the bottom part of the stove (1 left and
inlet knockouts in the bottom part of the stove (1 left and
1 right) and at least 2 of the 8 hot-air outlets in the upper
1part
right)
and 42).
at least 2 of the 8 hot-air outlets in the upper
(photo
part
(photo
42).
Operate
symmetrically
to avoid any overheated areas. This
de profiter
au mieux
de votre
21, vous
nous vous
AfinAfin
de profiter
au mieux
de votre
Stûv Stûv
21, nous
recommandons
d'utiliser
un maximum
d’entrées
recommandons
d’utiliser
un maximum
d’entrées
et deet de
sorties
d’air.
À l’aide
d’un
marteau,libérer
libérerau
aumoins
moins 22 des
des 6
sorties
d’air.
À l’aide
d’un
marteau,
6
entrées d’air pré-découpées (1 à gauche et 1 à droite) dans
entrées d’air pré-découpées (1 à gauche et 1 à droite) dans
la partie inférieure du foyer et au moins 2 des 8 sorties d’air
la partie
du foyer
au moins
8 sorties
d’air
chaudinférieure
(1 à gauche
et 1 àetdroite)
dans2lades
partie
supérieure
chaud
à gauche
à droite) dans
partie supérieure
du (1
foyer
(photo et
2).1 Effectuer
cette la
opération
de manière
du foyer
(photopour
2). Effectuer
cette
opération
de manièreCeci
symétrique
éviter des
zones
de surchauffe.
permettrapour
uneéviter
convection
entrede
l’enveloppe
extérieure
du
symétrique
des zones
surchauffe.
Ceci
foyer etune
la chambre
de combustion
(fig 1). extérieure du
permettra
convection
entre l’enveloppe
foyer et la chambre de combustion (fig 1).
will allow convection between the outer skin of the
Operate symmetrically to avoid any overheated areas.
fireplace and the combustion chamber (fig 1).
This will allow convection between the outer skin of the
fireplace and the combustion chamber (fig 1).
Flange installation
Flange installation
Usethe
the10
10mm
mmsocket
socketdriver
driver to
to attach
attach the
the flanges
flanges (photo
(photo
Use
3).They
Theyprovide
provide an
an attachment
Ø flexible
duct
3).
attachmentbase
baseforfora 6"
a 6»
Ø flexible
connection.
TheseThese
ductsducts
will direct
warmwarm
air directly
from
duct
connection.
will direct
air directly
the hearth to an adjacent room without carrying any dust
from the hearth to an adjacent room without carrying any
that could be suspended between the walls and the hearth.
dust that could be suspended between the walls and the
hearth.
bon
Placement
desdes
buselots
Placement
buselots
À l’aide d’une visseuse avec une douille de 10, placer les
À l’aide
d’une
visseuse
avec 3).
uneCes
douille
de 10,permettent
placer les le
buselots
fournis
(photo
buselots
buselots
fournis (photo
3). Cesflexibles
buselots
le mm.
raccordement
des conduits
depermettent
diamètre 150
raccordement
conduits
flexibles
de diamètre
150 vers
mm.la
Ce gainage des
conduit
l’air chaud
directement
du foyer
pièce à chauffer
les poussières
suspension
Ce gainage
conduitsans
l’airentraîner
chaud directement
duen
foyer
vers la
entre
la maçonnerie
et le foyer.
pièce
à chauffer
sans entraîner
les poussières en suspension
entre la maçonnerie et le foyer.
36
36
le
1
2
3
Lining the combustion chamber
The primary air circulator
Place the primary air diffuser or check its position
(the diffuser’s lugs fit into slots designed to receive
them) before positioning the refractors [diagram and
fotos 1, 2 & 3].
Positioning the refractor panels
Make sure you always position chamfers towards the inside
of the hearth [diagram 4].
Follow the sequence indicated, depending on the model of
fireplace to be lined.
To fine-tune the alignment of the refractors, lever them
with a flat screwdriver.
Stûv 21/65H SF, 21/75 SF, 21/85 SF & 21/95 SF
Lining the bottom : place the rebated refractors to the far
end (to receive the back wall refractors).
Stûv 21/95SF, 21/125SF, 21/135SF as well as all
double sided (see through) models have a restrictive
bottom.
Place the side refractors as far forward as possible (with the
rebate towards the front of the fireplace) so as to be able
to fit the refractors lining the back wall.
Place the back wall refractors as far to the outside as
possible then centre them.
Finally push the side refractors towards the back (to hold in
place the refractors lining the back wall).
Garnissage de la chambre de combustion
Le diffuseur d’air primaire
Placer le diffuseur d’air primaire ou vérifier sa position (les
ergots du diffuseur se logent dans les encoches prévues à
cet effet) avant de placer les réfractaires
[schéma et photos 1, 2 & 3].
Placement des réfractaires
Veiller à placer toujours le chanfrein vers l’intérieur du
foyer [schéma 4].
Suivre l’ordre indiqué suivant le modèle de foyer à garnir.
Pour ajuster l’alignement des réfractaires, faire levier avec
un tournevis plat.
Stûv 21/65H SF, 21/75 SF, 21/85 SF & 21/105 SF
Garnissage du fond : placer les réfractaires, battée vers
l’arrière (pour accueillir les réfractaires du dos).
Les Stûv 21/95SF, 21/125SF, 21/135SF ainsi que les
DF possèdent un fond restrictif.
Placer les réfractaires latéraux au maximum vers l’avant
(battée vers l’avant du foyer) de manière à pouvoir
introduire les réfractaires garnissant le dos.
Placer ceux de l’arrière au maximum vers l’extérieur puis les
recentrer.
Repousser enfin les réfractaires latéraux vers l’arrière (pour
bloquer
les réfractaires garnissant le dos).
37
4
21/65H SF
21/75 SF
25
22
23
26
18
20
14
16
10
12
17
24
18
14
21
Inside the stove
17
13
9
19
10
9
6
11
8
7
4
5
7
3
2
1
4
3
5
12
13
REFR 2165CSF
(119 x 244 mm)
11
8
6
REFR 2165HSF
(119 x 294 mm)
15
16
15
REFR2175SF
(144 x 294 mm)
2
1
21/85 SF
21/95 SF
21/105 SF
17
17
18
14
16
15
18
14
21
22
16
15
18
12
13
11
10
8
9
11
10
9
19
15
17
13
12
8
10
7
6
6
5
4
3
2
9
11
4
5
14
16
8
7
6
12
13
20
23
5
3
7
2
1
1
REFR2175SF (144 x 294mm)
REFR2195SF
(194 x 394 mm)
REFR2185SF
(169 x 344 mm)
21/125 SF
21/135 SF
21/75 DF
25
21
22
20
27
19
15
14
22
23
13
12
8
9
18
17
12
19
10
24
21
16
15
10
11
14
13
11
7
8
6
11
20
16
17
26
28
23
18
REFR21105SFCEN (144x 304mm)
5
12
3
2
9
9
7
4
10
1
REFR2175SF (144x 294mm)
REFR21105SFCEN (144x 304mm)
REFR21125SF (179x 367mm)
REFR21125SFCEN (179x 354mm)
21/85 DF
REF2175DF (144 x 439 mm)
21/95 DF
21/125 DF
9
7
14
10
15
8
6
8
14
11
5
15
13
7
6
10
12
12
13
11
12
9
10
9
11
8
REF2185DF (169 x 439 mm)
38
REFR2175DF (144 x 439 mm)
REFR2185DF (169 x 439 mm)
1
2
3
4
5
6
7
Stûv 21/105 SF, 21/125 SF,
& 21/135 SF
Stûv 21/105 SF, 21/125 SF,
& 21/135 SF
The basic procedure (order of steps) is identical to the
other single-sided models but the refractory sections
without spacers are placed in the centre of the back wall.
La procédure de base (ordre des étapes) est identique
aux autres modèles simple-face mais les réfractaires sans
battée se placent au centre de la paroi arrière. Pour assurer
le maintien des réfractaires de dos, utiliser les clés en inox
[schémas 1 à 8].
Use the stainless steel keys to carry out maintenance of the
back refractory sections [diagrams 1 to 8].
Ensure these elements are positioned as illustrated in
diagram 4.
Veiller à positionner ces pièces tels qu'illustré sur le schéma
4.
39
Position the front crosspiece (photo 1). Its lug should rest
inPosition
the notch
thecrosspiece
side support
(photo
andshould
3). rest in
the of
front
(photo
1). Its2lug
the notch of the side support (photo 2 and 3).
Note: Supports for the North American market have only
one
notch. Insert the vermiculite plates according to model
Note: Supports for the North American market have only
(photo
4).
one notch.
Secure and center the entire assembly: stainless steel
Insert the vermiculite plates according to model (photo 4).
supports and vermiculite plates (photo 5).
Secure and center the entire assembly: stainless steel
supports and vermiculite plates (photo 5).
Placer la traverse avant (photo 1). L’ergot de la traverse
doitPlacer
venirlasetraverse
loger dans
support
latéral
avantl’encoche
(photo 1).du
L’ergot
de la
traverse doit
(photos
3). dans l’encoche du support latéral (photos 2 et
venir 2seet
loger
3).
Note: Les supports destinés au marché nord-américain
n'ont
qu'une
seule encoche.
Note:
Les supports
destinés au marché nord-américain n'ont
qu'une seule encoche.
Placer
les plaques de vermiculite – suivant modèle – (photo
4). Resserrer et centrer l’ensemble des pièces : supports
Placer les plaques de vermiculite – suivant modèle – (photo
inox4).et Resserrer
plaques de
(photo 5).
et vermiculite
centrer l’ensemble
des pièces : supports
inox et plaques de vermiculite (photo 5).
39
40
15
A
B
B
A
C
16
17
18
A
Positioning of the lower chicane in the
double-sided models
Placement de la chicane inférieure dans les
modèles double-face
Fit side supports [diagram 15 A] ; the short 4 cm lugs
[photo 16 A] should be turned towards the inside of the
hearth.
Placer les supports latéraux [schéma 15 A] ; les petites
pattes de 4 cm [photo 16 A] doivent être tournées vers
l'intérieur du foyer.
Tips of side supports lodge into grooves [photo 17].
Les pointes des supports latéraux se logent dans les
gouttières [photo 17].
Make sure that these supports run perfectly parallel to the
side refractor plates.
Check that the tips of support are well lodged in the
grooves and that they are not stuck between the tip of the
groove and the hearth wall.
Fit the “front” crosspieces [photo 15 B] into the hearth’s
outermost notch.
Position the central crosspiece [diagram 15 C] : it is made
up of two pieces positioned back to back. Lodge the lugs
into the central notches (dip of V) of side uprights.
Fit the 4 vermiculate plates : first rest towards the outside
of the hearth on the front crosspiece then rest on the
central crosspiece [photo 18].
Attention, ces supports doivent être bien parallèles aux
réfractaires latéraux. Vérifer que les pointes du support
sont bien logées dans les gouttières et qu‘elles ne sont pas
coincées entre l'extrémité de la gouttière et la paroi du
foyer.
Placer les traverses "avant"
[photo 15 B] dans l’ergot le plus à l’extérieur du foyer.
Placer la traverse centrale [schéma 15 C] : elle se compose
de deux pièces positionnées "dos à dos". Placer les ergots
dans les encoches centrales (creux du V) des montants
latéraux.
Placer les 4 vermiculites : prendre appui d’abord vers
l’extérieur du foyer sur la traverse avant puis les poser sur
la traverse centrale [photo 18].
41
14
Finish the installation
Terminer l'installation.
You must finish the front side of the fireplace using a
cement board. To check dimensions of the cement board,
see our chapter in page 14 "minimum non combustible
wall section".
Il est nécessaire de terminer la niche avec un panneau
de fibro-ciment. Pour les informations concernant les
dimensions de ce panneau, veuillez consulter le chapitre
"Section minimale de mur non-combustible" page 14.
Caution!
Attention !
Il est recommandé de placer un panneau d'une seule pièce
plutôt que d'assembler des languettes afin de prévenir les
risques de fissures.
Stûv recommends the use of one piece cement board in
place of multiple in order to avoid cracks.
> Screw the cement board on the frame of the
prefabricated shell.
> Finish the wall.
> Place L or J finishing trim to obtain sharp angles.
> Plaster.
Please see the Stûv "finishings installation
manual" to learn how to install Stûv frames and
steel coverings.
42
> Placer le panneau fibro-ciment en le fixant au cadre du
caisson de convection.
> Terminer votre cloison
> Placer des cornières de fintion afin d'obtenir des angles
vifs
>Plafonner
Pour connaitre la marche à suivre pour
l'installation de cadres ou habillages Stûv, veuillez
vous référer à la notice dédiées aux finitions
d'installation
Stûv Subsidiary in North America
Filiale Stûv en Amérique
Stûv America inc.
4747 rue Bourg
Montréal QC H4T 1H9 Canada
+1 866 487 7888
www.stuvamerica.com
[email protected]
Stûv fireplaces are design and made in Belgium by :
Les foyers Stûv sont conçus et fabriqués en Belgique par :
Stûv s.a/n.v
Rue Jules Borbouse n°4 B-5170 Bois-de-Villers
[email protected] / www.stuv.com