1
S-SERIES
Indoorcycling Group GmbH
Happurger Strasse 84-88
90482 Nuernberg – Germany
[email protected]
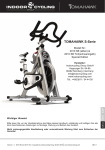
Tomahawk S- Series
Model no. 2008 S – Chain drive
Model no. 2008 SB – Belt drive
CAUTION !
Read all precautions and instructions in this manual before using this equipment. Keep this manual
for future reference.
Improper assembly, maintenance or use can void the warranty terms.
|
Version 2.1 Copyright by Indoorcycling Group GmbH 2009 www.indoorcycling.com
ENG 1
S-SERIES
TABLE OF CONTENTS
Important Precautions
page 3
Before You Begin
page 4
How to Assemble the Indoor cycle
page 5-7
How to Adjust the Indoor cycle
page 8
Pedal Strap Adjustment
page 8
Saddle Height Adjustment
page 8
Saddle Horizontal Adjustment
page 9
Handlebar Adjustment
page 10
Resistance Adjustment
page 11
How to Move the Indoor cycle
page 11
Preventative Maintenance
page 12
Daily Maintenance
page 12
Weekly Maintenance
page 12
Bi-Weekly Maintenance
page 13-14
Monthly Maintenance
page 14-17
Maintenance Activity Plan & Checklists
page 18-19
Explosion Drawings of Structural Components
page 20-26
Spare Part Reference List
page 27-28
Limited Warranty S – X Series
page 28-30
Technical specifications:
The Tomahawk S-Series Bike is according to EN 957 a Class S product for professional
and / or commercial use. Such training equipment is intended for the use in training areas
of organizations such as fitness clubs or sport associations, where access and control is
specially regulated by the person who has the legal responsibility.
Foot print:
Weight of Bike:
Max saddle height:
Max handlebar height:
Max user weight:
55 x 115 cm / 22 x 46 inch
55 KG / 159 Lbs
115 cm / 45,5 inch
115 cm / 45,5 inch
130 KG / 287 Lbs
The Bike is designed to accommodate most users from 150 to 205 cm / 59 to 81 inch
body height.
|
Version 2.1 Copyright by Indoorcycling Group GmbH 2009 www.indoorcycling.com
ENG 2
S-SERIES
IMPORTANT PRECAUTIONS
WARNING!
To reduce the risk of serious injury, read the following important precautions and information before
operating the indoor cycle.
1. It is the responsibility of the owner to ensure that all users of the indoor cycle are informed of all
warnings and precautions.
2. Operate and maintain the indoor cycle only as described in this manual.
3. Do not operate the indoor cycle until it is properly assembled (see page 5-8).
4. Keep the bike indoors, away from moisture and dust. Do not place the indoor cycle in a
garage or covered patio or near water.
5. Place the indoor cycle on a level surface. To protect the floor or carpet from damage, place a
mat beneath the indoor cycle. Make sure that there is adequate room around the indoor cycle to
mount, dismount, and operate it.
6. Regularly inspect and properly tighten all parts of the indoor cycle as recommended in this
manual. Please replace defective parts immediately and do not use the Bike until repair is
performed. Only use original parts from the manufacturer.
7. Children under the age of 14 should only be allowed use of the indoor cycle with parental
consent and guided by a specially trained instructor.
8. The indoor cycle should not be used by persons weighing more than 290 pounds (130 kg).
9. Always wear appropriate athletic clothes and shoes while operating the indoor cycle. Do not wear
loose clothes that could become caught on the indoor cycle or shoes with loose laces.
10. Before using the indoor cycle, make sure that you are familiar with the operation of the indoor
cycle (see pages 8-11).
11. The indoor cycle does not have an independently moving flywheel (wheel); the pedals will
continue to move together with the flywheel until the flywheel stops.
12. Always regulate the flywheel resistance so that your pedalling motion is controlled (see page 11).
13. Keep your back straight while using the indoor cycle; do not arch your back.
14. If you feel pain or dizziness while exercising, stop immediately, rest and cool down.
WARNING:
Before beginning any exercise program, consult your physician. This is especially important for
persons over the age of 35 or persons with pre-existing health problems. Read all instructions before
using. Be aware that incorrect or extensive training may result in serious health injuries. The
manufacturer assumes no responsibility for personal injury or property damage sustained by or
through the use of this product.
|
Version 2.1 Copyright by Indoorcycling Group GmbH 2009 www.indoorcycling.com
ENG 3
ENG
15. If replacement parts are needed, use only manufacturer supplied parts.
S-SERIES
BEFORE YOU BEGIN
Dear Customer,
Congratulations for selecting the TOMAHAWK indoor cycle. The TOMAHAWK indoor
cycle offers an impressive array of features designed to enhance cardiovascular fitness,
tone muscles, and develop endurance. Whether users are beginners or experienced
athletes, the indoor cycle offers workouts that will help users to reach their individual
fitness goals.
IMPORTANT: Read this manual carefully before assembling or using the indoor cycle.
If you have questions after reading this manual, please contact your local distributor or
refer to the website www.indoorcycling.com. Before reading further, please familiarize
yourself with the parts that are labeled in the drawing below.
Resistance Knob
Emergency Brake Handle
Handlebar
Saddle
Lock Handle
Lock Handle
Adjustment Knob
Adjustment
Knob
Brake Pad
Pedal /
Toe Clip
Flywheel
Chain Guard
Transport Wheel
Maintenance Cover
Levelling Feet
You will find the production code on the left side of the indoor Cycles within the lower
range of the frame. Please register to these in servicing and maintenance lists.
|
Version 2.1 Copyright by Indoorcycling Group GmbH 2009 www.indoorcycling.com
ENG 4
S-SERIES
SW 17/19mm
SW 13/15mm
2
☞
3
4
hand tight
ENG
1
☞
3mm
6mm
☞
HOW TO ASSEMBLE THE INDOOR CYCLE
|
Version 2.1 Copyright by Indoorcycling Group GmbH 2009 www.indoorcycling.com
ENG 5
SW 17/19mm
SW 13/15mm
3mm
6mm
☞
S-SERIES
hand tight
6
5
Stop mark
7
8
|
☞
Stop mark
Version 2.1 Copyright by Indoorcycling Group GmbH 2009 www.indoorcycling.com
ENG 6
SW 17/19mm
SW 13/15mm
3mm
6mm
ENG
12
☞
11
hand tight
10
☞
9
☞
S-SERIES
|
Version 2.1 Copyright by Indoorcycling Group GmbH 2009 www.indoorcycling.com
ENG 7
S-SERIES
HOW TO ADJUST THE INDOOR CYCLE
The indoor cycle can be adjusted for maximum comfort and exercise effectiveness. The
instructions below describe one approach to adjusting the indoor cycle to ensure
optimal user comfort and ideal body positioning; you may choose to adjust the indoor
cycle differently.
Pedal strap adjustment:
Sit on the saddle and position your feet on the pedals, with the balls of your feet directly
above the spindles of the pedals (see the drawing below). Adjust the pedal straps so the
toe clips (cages) are snug but not too tight. Note: In the case of a Bike being fitted with
Combi-pedals, the pedals feature toe clips on one surface and SPD cleats on the opposite
surface. If desired, use the SPD cleats with cycling shoes instead of the toe clips.
Please do not adjust
handlebar height beyond
the Stop mark on the stem
(see page 6).
Please do not adjust saddle
height beyond the Stop
mark
on
the
stem
(see page 5).
Saddle height adjustment:
Sit on the saddle and slowly pedal until the right pedal is in the lowest position. Your knees
should be slightly bent without a dropping of the hips.
To avoid hyper extending your knees, make sure that your legs are not completely
straight.
|
Version 2.1 Copyright by Indoorcycling Group GmbH 2009 www.indoorcycling.com
ENG 8
S-SERIES
Saddle horizontal adjustment:
Proper horizontal adjustment of the saddle is very important in avoiding injury to the knees.
Sit on the saddle and move the pedals until the crank arms are in horizontal position.
ENG
Using your forward most leg as a marker, your kneecap should be directly above the
center of the pedal so that a straight line is created between knee and center of the pedal
(see the dotted line in image below). To adjust the horizontal position of the saddle, first
dismount the indoor cycle. Next, loosen the rear adjustment knob, slide the saddle
forward or backward as required, and then retighten the knob.
|
Version 2.1 Copyright by Indoorcycling Group GmbH 2009 www.indoorcycling.com
ENG 9
S-SERIES
Handlebar adjustment:
Begin with the top of the handlebar at relatively the same height or just slightly higher than
the top of the saddle (dotted horizontal line A in the drawing below) and at a neutral
fore/aft position (see dotted vertical line B in drawing below). If your knees touch the
handlebars or if you experience back discomfort while pedalling for extended periods of
time, the height of the handlebars can be adjusted. First, dismount the indoor cycle.
Next, turn the front adjustment knob counter clockwise, slide the handlebar post up or
down, and then retighten the adjustment knob.
B
Handlebar
fore-aft
lock handle
A
Handlebar
up-down
lock handle
Next, the horizontal position of the handlebar should be adjusted. If the handlebar is
too close to the saddle, your breathing may feel restricted; if the handlebar is too far
from the saddle, you may experience back discomfort. To adjust the horizontal position
of the handlebar, first dismount the indoor cycle. Check for proper handlebar position
by positioning your elbow so that it is touching the front tip of the saddle at a 90 degree
angle and checking that the fingertip of your middle finger is touching the handlebar at the
mid-point. If it is not as described then loosen the fore-aft lock handle and slide the
handlebar forward or backward until your middle finger is touching the handlebar at the
mid-point, and then retighten the lock handle.
The handlebar offers a wide variety of hand positions for personal preferences. Changing
your hand position can change the angle of your back, neck, and arms. To minimize the
stress on your muscles during your workouts, change your hand position frequently.
|
Version 2.1 Copyright by Indoorcycling Group GmbH 2009 www.indoorcycling.com
ENG 10
S-SERIES
HOW TO OPERATE THE INDOOR CYCLE
Resistance adjustment:
The preferred level of difficulty in pedalling (resistance) can be regulated in fine
increments by use of the resistance knob. To increase the resistance, turn the resistance
knob clockwise. To decrease the resistance, turn the knob counter clockwise.
IMPORTANT: To stop the flywheel (wheel) while pedalling, pull up the red emergency
handle. The flywheel should quickly come to a complete stop. Please make sure your
shoes are fixed into the toe clip or in case cycling shoes are used your shoe cleat is
connected to the pedal binding while riding.
!
The indoor cycle does not have a free moving flywheel (wheel); the pedals will continue to move together with the flywheel until the flywheel stops. Reducing speed in a
controlled manner is required. To stop the flywheel immediately, pull up the red
emergency break handle. Always pedal in a controlled manner and adjust your
desired cadence according to your own abilities. Pull the red emergency handle up =
emergency Stop
!
Resistance knob
Red emergency
brake handle
If the indoor cycle rocks on the floor after being
set down, turn the levelling feet (see diagram)
underneath the front or rear stabilizer until the
rocking motion is eliminated. Important: Please
do not unscrew the levelling feet more then ½ inch!
|
Version 2.1 Copyright by Indoorcycling Group GmbH 2009 www.indoorcycling.com
ENG
How to move the indoor cycle:
Due to the weight of the indoor cycle, it is recommended that two persons move it. While
one person lifts the back of the indoor cycle, the second person firmly holds the handlebar
and tips the indoor cycle forward until it rolls on the wheels. Carefully move the indoor
studio cycle to the desired location and then lower it. CAUTION: To reduce the risk of
injury, use extreme caution while moving the indoor studio cycle. Do not attempt
to move it over uneven surfaces and make sure a safety space of min 20 inch to the
nearest equipment is redeemed.
Leveling feet
ENG 11
S-SERIES
PREVENTATIVE MAINTENANCE
Regular maintenance must be performed on the indoor cycle for optimal performance and longevity. Please read and follow all instructions below. If the indoor
cycle is not maintained as described, components may wear excessively and the
indoor cycle may become damaged. Improper maintenance will void the warranty
terms. If you have questions about maintenance, contact your local distributor or
refer to www.indoorcycling.com
Note: Many maintenance procedures require lubricant spray. Manufacturer
recommends WD40, Brunox or any other solvent free lubricant.
Daily maintenance:
1. Make sure that the indoor cycle is level. If the indoor cycle rocks on your floor, turn the
levelling feet underneath the front or rear stabilizer until the rocking motion is eliminated
(see HOW TO MOVE THE INDOOR CYCLE on page 11).
2. After each user finishes exercising, the indoor cycle should be disinfected and cleaned
to maintain a hygienic environment. First, apply a disinfectant spray to the handlebars and
the saddle. Using a lint-free cloth, dry the handlebars and the saddle. Next, apply a small
amount of disinfectant to a lint-free cloth and clean the adjustment knobs and the lock
handles. Avoid using strong detergents on the indoor cycle frame.
Weekly maintenance:
1. Apply a small amount of the lubrication spray to a lint-free cloth, and thoroughly clean
the frame, the handlebar slider and seat sliders the flywheel and the plastic parts of the
indoor cycle.
2. For optimal performance of the Resistance
system, and to minimize wear on the brake pad,
the solvent free lubricant spray should be applied
to the brake pad using the lubrication holes on the
plastic part of the brake pad. If fuzz or lint appears
on the brake pad, the brake pad has become too
dry—lubricant spray should be applied more
frequently. Make sure brake pad is thoroughly
soaked from end to end with lubricant spray.
Then, wipe the excess off.
|
2
Version 2.1 Copyright by Indoorcycling Group GmbH 2009 www.indoorcycling.com
ENG 12
S-SERIES
Bi-weekly maintenance:
1. The indoor cycle should not be used if the
emergency brake system is not working properly.
While sitting on the saddle and pedalling, test the
brake by pulling the emergency brake handle
upward. The flywheel should come to a quick and
complete stop.
2. To maintain the easy adjustability of the saddle
post, the saddle post should be cleaned and
lubricated. Turn the rear adjustment knob counter
clockwise and slide the saddle post out of the
frame. Apply a small amount of lubricant spray to a
lint-free cloth, and clean the saddle post (A).
Next, apply a small amount of lubricant spray
inside of the rear frame sleeve. Then, reinsert
the saddle post into the frame and adjust it to the
desired height.
1
2
A
ENG
Next, loosen the rear lock handle and slide
the saddle carriage as far backward as possible.
Apply a small amount of lubricant spray to a lintfree cloth, and clean the top of the saddle slide (B).
Then, slide the saddle carriage as far forward as
possible and clean the top of the saddle slide.
Finally, adjust the saddle to the desired position.
|
Version 2.1 Copyright by Indoorcycling Group GmbH 2009 www.indoorcycling.com
ENG 13
S-SERIES
3. To maintain the easy adjustability of the handlebar post, the handlebar post should be cleaned
and lubricated. First, turn the front adjustment knob
counter clockwise and slide the handlebar post out
of the frame. Apply a small amount of lubricant
spray to a lint-free cloth, and clean the handlebar
post (A). Next, apply a small amount of lubricant
spray inside of the front frame sleeve.
3
Then, reinsert the handlebar post into the frame
and adjust it to the desired height. Next, loosen
the front lock handle and slide the handlebar
carriage as far backward as possible. Apply a small
amount of lubricant spray to a lint-free cloth, and
clean the surface of the handlebar slide. Then,
slide the handlebar carriage as far forward as
possible and clean the top of the handlebar slide.
Finally, adjust the handlebar to the desired position.
Monthly maintenance:
1. To maintain the smooth function of the adjustment knobs controlling the handlebar and saddle,
the metal threads (A) on the adjustment
knobs must be lubricated.
A
1
A
|
Version 2.1 Copyright by Indoorcycling Group GmbH 2009 www.indoorcycling.com
ENG 14
S-SERIES
2. To maintain the easy adjustability of the
Resistance system, the threads on the lower end
of the brake rod should be lubricated. First, turn the
Resistance knob clockwise until it stops. Next, look
under the right or left side of the frame and locate
the brake rod, which has two lock nuts on its lower
end. Apply a small amount of synthetic grease
(white lithium grease) to the threads on the brake
rod above the two lock nuts. Then, turn the
resistance knob counter-clockwise until it stops.
2
! ONLY CHAIN DRIVE !
Important: A loose chain as well as an overtightened chain will cause damage to the chain and
drive system. Checking Chain Tension: To check
for an over-tightened chain, sit on the saddle, place
your feet on the pedals, and begin pedaling while
feeling for excess vibration. Unusual noises or
vibrations are indications that the chain may be over
tightened or that the flywheel is at an angle
(misaligned). To check for a loose chain, sit on the
saddle, place your feet on the pedals, move the
pedals until the crank arms are horizontal. Next,
push down the emergency brake handle and hold
it. Then, stand on the pedals and rock forward and
backward. There should be no more than 1/8th inch
(2–3 mm) of play in the chain. If there is too much
play in the chain, or if the chain makes a clicking
noise, this indicates that the chain is too loose.
To correct an over-tightened chain: To adjust the
chain, pull off the right and the left maintenance
covers (A). Loosen the axle nut (B) on both ends
of the flywheel axle by two full turns. Loosen the inner
adjustment nut (D) facing the flywheel axle nut
on each side of the flywheel. Then, turn both (right
and left sides) of the outer adjustment nuts (C) on
the outside of the flywheel bracket ¼ of a turn at a
time (downward on the R side and upward on L side)
until the chain is properly adjusted. Make sure to turn
both adjustment nuts exactly the same amount to
avoid misalignment of the flywheel. Re-check the
amount of play in the chain as described at the beginning of this step. If necessary, readjust the chain.
3
! ONLY CHAIN DRIVE !
|
Version 2.1 Copyright by Indoorcycling Group GmbH 2009 www.indoorcycling.com
A
B
C
ENG
3. Chain driven bike
Graphics are the right side
of the Bike (ridding position)
ENG 15
S-SERIES
Finally, retighten the two inner adjustment nuts (D)
and the two axle nuts (B), and reattach the
maintenance covers. To correct a loose chain:
To adjust the chain, pull off the right and the left
maintenance covers (A). Loosen the axle nut (B)
on both ends of the flywheel axle by two full turns.
Loosen the outer adjustment nut (C) facing the
head of the allen bolt on each side of the flywheel.
Then, turn both (right and left sides) of the inner
adjustment nuts (D) on the inside of the flywheel
bracket ¼ of a turn at a time (upward on the R side
and downward on L side) until the chain is
properly adjusted. Make sure to turn both
adjustment screws exactly the same amount to
avoid misalignment of the flywheel. Re-check the
amount of play in the chain as described at the
beginning of this step. If necessary, readjust the
chain. Finally, retighten the two outer adjustment
nuts (C) and the two axle nuts (B), and reattach
the maintenance covers. To avoid damage to the
flywheel bearings, do not over tighten the axle nuts
(B). Unusual noises or vibrations are indications
that the chain has been over tightened or that the
flywheel is at an angle.
D
Check if belt drive is firmly tighten and does not slip
while riding under resistance load. In case that the
belt slips, proceed using the same technique as
described above. Please note that a belt drive gear
never shows slack. In case of adjustment do not
apply to much tension.
The manufacturer recommends using an ultrasonic
voltage meter adhering to a natural frequency of
the belt of 3200 Hz ± 150th. Ball bearing damage
due to incorrect belt tension is excluded from
warranty.
|
Version 2.1 Copyright by Indoorcycling Group GmbH 2009 www.indoorcycling.com
ENG 16
S-SERIES
! ONLY CHAIN DRIVE !
4
4. Check the chain for proper lubrication. To do
this, run your fingers along the chain (not shown)
in the service opening provided (A). Make sure that
the chain is not in movement during this checkup!
If the chain feels dry, slowly turn the flywheel with
one hand while equally applying a small amount
of bicycle chain grease along the chain. To avoid
injuring your hands, keep your hands away from
moving parts.
! ONLY CHAIN DRIVE !
5
6. The brake pad will become worn as a result of
repeated use. The indoor cycle should not be used
if the emergency braking system is not working
properly (see page 13)! Should you feel that the
resistance system’s functions are deficient, it is
essential to fine-tune the resistance system before
the bike is used again! Please check the setting of
the brake system as follows: First turn the
resistance regulator on the brake system as far as
it will go to the left (minimum braking effect). If the
setting is correct, the brake pads should be flush
with the flywheel and barely touching so that it’s
possible to cycle with a hardly noticeable amount
of resistance. The brake pad can be adjusted using
a 10 mm wrench. Next, check the brake pad for
signs of wear. If the brake pad does show signs of
excessive wear, thoroughly soak the brake pad
with lubricant spray using the 2 lubrication holes
(B), and then wipe the excess off.
6
|
Version 2.1 Copyright by Indoorcycling Group GmbH 2009 www.indoorcycling.com
B
ENG
5. Some parts of the indoor cycle may become
loose as a result of repeated use. Check pedals,
toe clips, and pedal straps, and make sure that
they are properly tightened. Next, check all
exposed screws, bolts, and nuts, and make sure
that they are properly tightened. Finally, check the
saddle to make sure that it is not lose damaged.
ENG 17
S-SERIES
MAINTENANCE ACTIVITY REQUIRED SCHEDULE
Activity
Rotation
Details found on
Feet leveling, disinfection and cleaning of the bike
daily
page 11-12
Servicing brake pads, detailed cleaning of the entire bike
weekly
page 12
Check emergency brake function
bi-weekly
page 13
Clean and lubricate saddle and handlebar sliders / posts
bi-weekly
page 13-14
Check adjustment knobs
monthly
page 14
Check brake pad for signs of wear
monthly
page 12
Check brake system, lubricate
monthly
page 12,15
Check chain play
monthly
page 15-17
Check chain lubrication
monthly
page 17
Check pedals, toe clip and straps for signs of wear
monthly
page 17
Check all connections and fixings if they are secure and correctly tighten
monthly
page 17
Examples
of
Maintenance
Plan
Charts
for
in
house
service
technicians:
Weekly Maintenance Checklist
Bike No.
Production code
Observations
Action Taken
|
Version 2.1 Copyright by Indoorcycling Group GmbH 2009 www.indoorcycling.com
Result
Name / date
ENG 18
S-SERIES
Bi-Weekly Maintenance Checklist
Bike No.
Production code
Observations
Action Taken
Result
Name / date
Result
Name / date
Monthly Maintenance Checklist
Production code
Observations
Action Taken
ENG
Bike No.
|
Version 2.1 Copyright by Indoorcycling Group GmbH 2009 www.indoorcycling.com
ENG 19
S-SERIES
SPARE PARTS
Drive Gear Parts
02 40 C MD20 08
02 40 BE
02 40 90
02 40 CrMO L SX 08
02 40 CrMo R SX 08
02 40 C S 08
For optional chain guard please refer to page 23.
Brake Parts
02 50 A SX
02 50 03 A SX
02 50 02
02 50 01
02 50 01
02 50 06 SX
02 50 05 SX
02 50 03 B
02 50 04
|
Version 2.1 Copyright by Indoorcycling Group GmbH 2009 www.indoorcycling.com
ENG 20
S-SERIES
Flywheel
02 40 02
02 40 08 ES 08
02 40 08 X
02 40 H L
Handlebar
02 10 E
ENG
02 30 02 AL
02 10 B 08
|
Version 2.1 Copyright by Indoorcycling Group GmbH 2009 www.indoorcycling.com
ENG 21
S-SERIES
Chain Guard
02 42 01 SX 08
02 42 02 SX 08
02 99 05
02 42 03 SX 08
02 42 04
02 99 03
Frame
02 10 A
02 20 04
02 99 02 SX 08
2004 RA SX
|
Version 2.1 Copyright by Indoorcycling Group GmbH 2009 www.indoorcycling.com
ENG 22
S-SERIES
Chain Drive Kit
02 40 F 4
02 40 D
Cycle Well Kit (Optional)
01 21 S
02 32 10
ENG
02 32 00
|
Version 2.1 Copyright by Indoorcycling Group GmbH 2009 www.indoorcycling.com
ENG 23
S-SERIES
0121VL-3125sw
Saddle Support
02 21 AK
02 10 E
02 21 05 AL
Pedals
01 40 A2
|
Version 2.1 Copyright by Indoorcycling Group GmbH 2009 www.indoorcycling.com
ENG 24
S-SERIES
Rear Stabilizer
02 11 02 SX08
02 11 E
02 11 06 SX 08
02 11 05 B
Front Stabilizer
02 11 B
02 11 01 SX 08
|
Version 2.1 Copyright by Indoorcycling Group GmbH 2009 www.indoorcycling.com
ENG
02 11 A
ENG 25
S-SERIES
Protection Plates
02 99 10
02 99 11
|
Version 2.1 Copyright by Indoorcycling Group GmbH 2009 www.indoorcycling.com
ENG 26
S-SERIES
SPARE PARTS LIST
Drive Gear Parts
Chain Guard
02 40 D
Chain
02 42 02 SX 08
Outer chain guard
02 40 F 4
Chain ring
02 42 04
Plastic cover
02 40 90
Chain ring bolt
02 42 01 SX 08
Inner chain guard
02 40 CrMo R SX 08
Right crank
02 99 05
Plastic washer
02 40 CrMo L SX 08
Left crank
02 42 03 SX 08
Left cover
02 40 C S 08
Flange nuts for crank
02 99 03
Allen bolt M4x15
02 40 C MD20 08 BB assembly MD20
02 40 C 2 RS
Frame
Ball bearing SKF 6004Z
Brake Parts
2004 RASX
S-Series frame
02 10 A
Vertical insert sleeve
02 50 A SX
Brake adjustment knob
02 20 04
Rubber stop handleb.tube
02 50 02
Adjustment ball
02 10 B 08
Pop pin adjustment knob
02 50 01
Emergency brake handle
02 99 02 SX 08
Bottle holder
02 50 06 SX
Bell crank
02 50 04
Brake pad
02 50 03 A SX
Upper brake rod
02 50 05 SX
Lower brake rod
02 50 03 B
Adjustment drum
Belt drive kit
02 40 BE
Belt
Cycle Well (optional)
Flywheel
02 40 H
Flywheel axle
02 40 02
Chain tensioner
02 40 H L
Flywheel bearing 6001Z
02 40 08 ES 08
S-Series flywheel
02 32 10
Cycle Well Kit
01 21 S
Cycle Well Saddle
02 32 00
Cycle Well Modul
Saddle Support
Tomahawk Saddle
02 21 AK
Saddle mounting bracket
02 21 05 AL
Horizontal & vertical
saddle support
02 10 E
Lock handle
Handlebar
02 30 02 AL
Horizontal & vertical
adjustable handlebar
02 10 E
Lock handle
02 10 B 08
Pop pin adjustment knob
ENG
0121VL-3125sw
Pedals
|
01 40 A 2
Version 2.1 Copyright by Indoorcycling Group GmbH 2009 www.indoorcycling.com
Combi-Pedals
ENG 27
S-SERIES
SPARE PARTS LIST
Front Stabilizer
Rear Stabilizer
02 11 E
PVC gasket
02 11 01 SX 08
Front Stabilizer
02 11 02 SX 08
Rear stabilizer
02 11 B
Stabilizer mounting kit
02 11 06 SX 08
Plastic end cover
02 99 10
Front protection plates (3pc.)
02 11 05 B
Rubber foot stand
02 11 A
Transport Wheel
02 99 11
Rear protection plates (3pc.)
Indoorcycling Group GmbH warrants that all new equipment will be free of manufacturing
defects in workmanship and materials, becoming effective on the date of original
installation. Parts repaired or replaced under the terms of this warranty will be warranted
for the remainder of the original warranty period only. Warranty may vary by region or
country.
LIMITED WARRANTY S-SERIES INDOOR CYCLE
S-Series Indoor Cycle
10 Year warranty:
Frame
3 Year warranty:
Handlebar and saddle assembly, brake system (excluding
brake pad), lever handles and knobs, cranks, belt drive
system, bottom bracket assembly, flywheel and hub assembly,
powder coating.
2 Year warranty:
Pedals, insert sleeves for handle bar and saddle post,
leveling feet.
1 Year warranty:
Saddle
The following wear items are excluded from warranty:
Pedal straps, pedal binding system, water bottle holder.
|
Version 2.1 Copyright by Indoorcycling Group GmbH 2009 www.indoorcycling.com
ENG 28