1
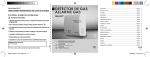
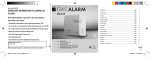
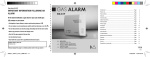
GAS ALARM
Gas alarm GA 617
Introduction.................................................................................................... Page
4
Proper use...................................................................................................... Page 4
Pack contents................................................................................................. Page 4
Features......................................................................................................... Page 4
If the alarm indicates a gas leak or you can smell gas:
Technical data................................................................................................ Page 5
g DANGER OF EXPLOSION!
Safety instructions.......................................................................................... Page 5
Initial operation............................................................................................... Page 8
IMPORTANT INFORMATION FOLLOWING AN
ALARM
GA 617
• Extinguish all open flames, embers and burning tobacco ! h
• Do not under any circumstances switch electrical devices on or off !c
• Do not disconnect any electric plugs (including that of the alarm unit)!
• Warn any persons at risk in the danger zone.
L 96
• Shut off the gas supply at the gas tap.
• Air all affected rooms.
• Deal with the cause with a qualified/authorized expert.
Gas Alarm
Operation and Safety Notes
(Please display this page in a visible position next to the gas alarm)
9
Installation...................................................................................................... Page 10
Operation........................................................................................................ Page 10
Function test................................................................................................... Page 11
Fault indicator . .............................................................................................. Page 11
Troubleshooting.............................................................................................. Page 12
Maintenance and cleaning.............................................................................. Page 13
Disposal......................................................................................................... Page 13
Warranty......................................................................................................... Page 13
Service........................................................................................................... Page 14
Declaration of conformity................................................................................ Page 14
#
Replace after 5 years use.
Installation date :
Power supply.................................................................................................. Page 2
KOE217_GA617_Cover_LB6.indd 1-3
18.09.2007 15:16:57 Uhr
A
Q
R
B
W
Introduction
Please read these operating instructions thoroughly and carefully. They are part of this
product and contain important instructions
relating to its operation and handling. Please
always observe all safety instructions. Before
initial operation, please check that all parts are
fitted correctly. If you have any questions or
are unsure about handling of the device,
please contact the dealer or the service office.
Please keep these instructions in a safe place
and pass them on to anyone else intending to
use the device.
I
E
T
U
O
Y
{
P
Proper use
C
15-30 cm
Position for methane
(town gas/natural gas): high
max. 6m
max. 4m
15-30 cm
Position for liquid gas
(propane/butane): low
Possible source of escaping gas
(consumer appliance)
3
KOE217_GA617_Cover_LB6.indd 4-6
The gas alarm indicates a leakage of methane,
propane or butane gas from appliances, lines,
etc. with a high-frequency tone and a flashing
red ALARM LED c . It is intended for use in
dry areas inside buildings, vehicles, caravans
and boats. The power supply is either by way
of the supplied 12 V DC mains adapter connected to the 230 V ~ 50 Hz mains electricity
or by connection to the 12 V DC on-board
power supply system of a car, caravan or boat.
The device is for private use only. Any other
use or modification of the device constitutes
improper use and poses a serious risk of accident. The manufacturer is not liable for dam-
age caused by improper use or incorrect operation of the device. Before initial operation,
please read all operating instructions carefully
and refer to the page showing the illustrations.
Keep these operating instructions in a safe
place. Please pass on all supplied documents
along with the device to anyone else intending
to use it.
Pack contents
We supply the gas alarm with the following
components (see Fig. A ):
1x gas alarm
1x 12 V DC mains adapter
1x mounting fixture
2x fastening screws
2x wall plugs
1x operating instructions
Features
On the front of the casing (see Fig. A):
a Front of casing
b Piezo siren opening
c ALARM LED
d POWER LED
e FAULT LED
f 12 V DC mains adapter connecting cable
4
18.09.2007 15:16:57 Uhr
On the rear of the casing (see Fig. B):
g Rear of casing
h Mounting fixture
i 12 V DC terminal screws
j Cable guide
k Side and lower sensor openings
Technical data
Gas alarm:
Power supply:12 Volt DC (±10%)
mains adapter (delivered with the gas
alarm) or on-board
power supply system
Current consumption: max. 150 mA
Gas sensor: hot-wire method
Sensitivity/alarm
threshold:corresponds to a concentration of approx.
12 % of the relevant
lower explosive limit
Propane: 0.2 %
Butane: 0.17 %
Methane
(town gas/natural gas): 0.53 %
Alarm signal: loud high-frequency
tone
Volume: 85 dB(A) 3m
KOE217_GA617_Content_LB6.indd 5
Operating temperature: -10 °C to +40 °C
Relative air humidity: max. 95 %
Material: ABS plastic
Dimensions: 35 x 85 x 85 m (h x w x l)
Weight: approx. 100 g
Protection class: III
Mains adapter (delivered with the gas
alarm):
Power supply: 230 V ~ 50 Hz
Current consumption: 60 mA
Current output:12 Volt DC 300 mA
Connecting cable length:approx. 2 m
Safety instructions
The following instructions are for your own
safety and satisfaction when operating the GA
617 gas alarm. Please note that non-compliance with these safety instructions can lead to
a serious risk of accident.
Explanation of the symbols and terms
used:
cDanger! Failure to observe this instruction endangers life and health.
m Caution! Failure to observe this instruction poses a risk to property.
5
20.11.2007 16:03:49 Uhr
c Danger!
• D
o not leave small children unsupervised
with the packaging material. Danger of
suffocation.
• Do not leave children unsupervised with
the device. Danger to life and risk of injury.
• Do not damage any gas, electricity or
telecommunication lines when fitting the
device. Danger to life and risk of injury
and damage.
• Never expose the device to fire, heat or to
temperatures of over 50° C for any length
of time. Danger to life from explosion.
• Make sure that your hearing is not
exposed to the loud alarm signal for any
length of time. This can cause serious
damage to the hearing.
• Make sure that the alarm signal is not
triggered close to the ears. This can
cause serious damage to the hearing.
• Handle the connecting cable with care.
Install it so that it cannot get damaged
and does not create a stumbling hazard.
Otherwise there is danger to life and a
risk of injury and fire.
What to do in the event of a gas leak
Please proceed as follows if the gas alarm signals a gas leak or if you smell gas:
6
• D
o not ignite any naked lights. Extinguish
any burning tobacco or candles etc.
immediately.
• In the event of a gas leak, do not switch
any electrical devices (light switch, torch,
door bell, telephone, intercom, or other
electric consumers) on or off.
• Do not under any circumstances disconnect the gas alarm from the power supply.
• Immediately warn all people at risk and
make sure that they evacuate the area to
safety.
• Shut off the gas supply on the main gas
tap or bottle valve.
• Open the windows and doors and air the
room, the house, the caravan, etc. thoroughly.
• Note on airing rooms: certain gases (propane and butane) are heavier than the
ambient air, and some are lighter (methane). When airing, please make sure that
the intake of air is suitable for the properties of the gas.
• If leaking gas is indicated constantly or
repeatedly, please contact your energy
provider. Do not use the telephone or any
other electrical device near or around the
gas leak to notify the provider.
• The gas leak must only be dealt with by a
qualified and authorized expert.
m Caution
• If you are uncertain which type of gas you
use or you have problems installing the
gas alarm you must have the device
installed by a suitably qualified person.
• Only connect the device to 12 V DC!
Check before connecting the 12 V DC
adapter to the mains that the electricity
supply to the device is protected by the
appropriate fuse or trip in accordance
with the applicable regulations.
• This device does not serve as primary
explosion protection as defined by the
guidelines of the employer’s liability insurance associations.
• Do not cover the device with any object. This
could diminish the performance of the sensor.
• Make sure that the device does not come
into contact with moisture.
• Protect the device from strong magnetic
or electric fields.
• Protect the device from heavy mechanical
strain and shocks.
• Only use the device with the supplied
original parts or parts that are designed for it.
• Check before initial operation that all
components are assembled in accordance with the operating instructions.
• Before assembly and initial operation of
the device, check that the contents are
complete and undamaged.
• T he device must only be repaired by authorized and skilled specialists. Failure to observe
this instruction risks damage resulting from
improper use and loss of the warranty.
• Position the device so that the sensors
can detect escaping gas.
• Only use within the temperature range
specified in the „Technical Data“ section.
Higher or lower temperatures can diminish
performance.
• Do not open the device. Opening the
device will lead to expiry of the warranty.
• For connection in cars, caravans or on
boats, fit the (12 V DC) power supply
cable with a switch approved for this purpose.
• Connect the 12 V DC terminal screws i
either to the mains adapter supplied with
the gas alarm or a 12 V DC power supply
source in cars, caravans and boats. Dual
connection (parallel connection) will damage the mains adapter.
• For connection to the 12 V DC battery, fit
the 12 V DC connecting cable with a fuse
(250 mA).
• Detach the page containing the information “IMPORTANT ADVICE” from the operating manual. Fix this page where it can
be easily seen on the wall directly adja7
KOE217_GA617_Content_LB6.indd 6-7
20.11.2007 16:03:50 Uhr
cent to the gas alarm and write on it the
date you first used the alarm.
• W
rite the date of first use in the space
provided on the label on the side of the
gas alarm.
Initial operation
Preparation and materials required:
The stated materials are not included in the
delivery scope. The information provided here
is non-binding and intended as a guide. The
material depends on individual local requirements.
You will need:
oPower supply: 12 V DC mains adapter
connection to a 230 V~50 Hz socket, or
12 V DC on-board power supply system.
oA crosstip screwdriver for installation with
the fastening screws.
o A pen to mark the installation points.
o A drill for the mounting holes.
oAn in-line fuse holder (250 mA/slow-acting
fuse) – only for connection to on-board
supply system.
Selecting the installation position
When there is an escape of gas, the gas detector
can only give the alarm if it is reached by the
escaping gas. Anything which prevents gas from
entering the alarm housing can result in the
8
alarm being given only after a delay or not at all.
Select an installation position that is as close as
possible to the gas appliance, but not farther
away than 4 m (liquefied petroleum gases) or 6
m (methane) (see Fig. C). Make sure that the
mains socket for connection of the 12 V DC
mains adapter is located max. 2 m away from
the installation position of the gas alarm. To
detect town, natural and methane gas, the installation position should be as far up on the wall as
possible. The gas alarm should be mounted
15-30 cm below the room ceiling and must be
higher than the highest door or window opening.
The gases in question are lighter than air and
therefore rise.
To detect propane and butane gas, choose a
low installation position on the wall. It should
be 15-30 cm above the floor. Liquid gases are
heavier than air and therefore sink to the floor
and spread from there.
c Do not under any circumstances install
the gas alarm in any of the following
places:
o Outside buildings, e.g. to guard open
crates of bottled gas.
o Enclosed spaces (e.g. in cupboards or
behind curtains), which could prevent the
alarm from responding in the event of a
gas leak.
o Directly next to an oven.
o Directly above a washbasin or drain.
o Next to a door, window, ventilation, fan, air
conditioning unit, etc.
o Areas in which the temperature can fall
below –10° C or rise above +50°C or in
which air humidity can rise above 95%.
o Areas in which dust or dirt can clog the
sensor.
o Any position in which it could accidentally
get damaged or pulled down.
o Areas under the risk of explosion.
Power supply
cDanger! Ensure that no voltage is present
when connecting to the power supply and
during installation.
o Only operate the gas alarm connected to
a 12 V DC power supply. Connect it either
with the 12 V DC mains adapter (included
in the delivery scope) or to a 12 V DC onboard power supply system of a car, caravan or boat.
o Check before connecting the 12 V DC
adapter to the mains that the electricity
supply to the device is protected by the
appropriate fuse or trip in accordance
with the applicable regulations.
12 V DC mains adapter
oLead the bare cable ends (approx. 8 mm)
of the 12 V DC connecting cable f from
the 12 V DC mains adapter to the terminal
screws i in the cable guide j . The
cable guide provides strain relief.
o Attach each cable end to a terminal screw
i . The polarity is not important for this
connection.
12 V DC on-board power supply system
oRemove the connecting cable of the mains
adapter from the terminal screws i.
o Equip the connecting cable for the power
supply (12 V DC) in cars, caravans or
boats with a switch.
oLead the bare cable ends (approx. 8 mm)
of the 12 V DC connecting cable of the
12 V DC power source to the terminal
screws i in the cable guide j . The
cable guide helps to prevent strain on the
connections.
o Attach each cable end to a terminal screw i.
The polarity is not important for this connection.
o Important information regarding on-board
operation: only one power supply may be
connected to the terminal screws i,
even if the mains adapter is not plugged
in. The mains adapter will be damaged if
9
KOE217_GA617_Content_LB6.indd 8-9
20.11.2007 16:03:50 Uhr
a dual connection (parallel connection) is
made.
Installation
cDanger: make sure that the gas alarm is
not powered during installation.
oRemove the mounting fixture h from the
rear side of the casing g by sliding it
downwards (see Fig. B).
o Mark the installation position with the aid
of the two round holes in the mounting
fixture h .
o Install the mounting fixture h in the chosen and marked position using the fastening screws and wall plugs supplied
with the gas alarm.
o Push the gas alarm flush from above onto
the mounting fixture h .
Operation
Once the power supply has been connected
properly, an automatic self-test is carried out:
the gas alarm emits several loud alarm signals
and at the same time the red ALARM LED c
on the front of the casing a flashes. The green
POWER LED d then lights up to indicate that
the device is ready for operation (see Fig. A)
12 V DC mains adapter
Switching on:
oPlug the mains adapter directly and fully
into a 230 V~50 Hz mains socket. Do not
use any type of tabletop socket or extension cable, since these can cause interruptions in the power supply.
Switching off:
oRemove the mains adapter from the
mains socket.
12 V DC on-board supply system
Switching on:
o Switch the 12 V DC on-board power supply
on.
Switching off:
o Switch the 12 V DC on-board power supply
off.
Alarm in the event of a gas leak
The gas alarm detects a gas leak with the
sensor. If the concentration of gas at the sensor
exceeds the pre-set sensitivity threshold on
the gas alarm, the alarm responds: the red
ALARM LED c flashes and the loud alarm
signal is emitted.
The alarm continues until the gas concentration
falls back to below the pre-set sensitivity level.
10
KOE217_GA617_Content_LB6.indd 10-11
Follow the instructions in the section
„What to do in the event of a gas leak“
Function test
Use a gas lighter to test the function of the gas
alarm.
oAllow gas to escape from the gas lighter
directly next to the lower or side sensor
opening k .
oMake sure that there is no flame on the
lighter. The gas alarm detects the gas
with the sensor. If the gas concentration
at the sensor exceeds the pre-set sensitivity threshold, the alarm responds: the
red ALARM LED c flashes and the loud
alarm signal is emitted.
oDo not allow any more gas to escape
from the lighter once the gas alarm has
responded.
The alarm continues until the gas concentration falls back to below the pre-set
sensitivity level.
Fault indicator
The device carries out a self-checking routine
for your safety. Possible errors are displayed
by the FAULT-LED e flashing and a coincident
beeping noise from the device.
This fault indicator may also be triggered by
the gas alarm’s surroundings or by an internal
problem inside the device.
If a fault is indicated you must check first:
oWhether the ambient temperature is outside the specified range (-10° C to +40° C).
oWhether chemicals present in the air may
have cause the fault, e.g. a high concentration of acid or alcohol. If this cannot be
confirmed, then try the device in another
room. If no fault is indicated there then
the problem lies in the surroundings.
If the fault indicator is still active then the
problem lies within the device itself:
o The gas alarm has suffered internal damage.
oThe gas alarm can be used for approximately 5 years.
Then it should be replaced.
11
20.11.2007 16:03:50 Uhr
Troubleshooting
Fault
Maintenance and cleaning
c Danger: make sure that the gas alarm is
Cause
Remedy
The gas alarm responds
when there is no actual
gas leak.
The gas alarm will respond to
fumes from cleaning agents,
paint, lacquers, sprays, cooking
fumes, tobacco smoke and
smoke from candles.
Remove the source of the
fumes.
The gas alarm fails the
function test.
The service life of the gas
alarm expires after approx.
5 years of operation.
Replace the gas alarm.
Disposal
The gas alarm does not
work.
The power supply is faulty.
Make sure that the power
supply is free of faults.
FAULT-LED flashes
See section on
“Fault display”
See section on
“Fault display”
12
KOE217_GA617_Content_LB6.indd 12-13
not live when maintaining or cleaning the
device.
oClean the casing of the gas alarm with a
dust cloth or a damp cloth. Use a mild
detergent (no solvents) to clean the plastic
surface.
o Remove all deposits of dust from the sensor
openings regularly with a brush.
o Check regularly that the device is working
properly (see section „Function test“).
oReplace the gas alarm after it has been in
use for approximately 5 years.
Please take all packaging materials to a disposal facility in your city or district.
In accordance with European Directive
2002 / 96 / EC on used electrical and electronic
appliances and its implementation in national
law, used electrical appliances must be collected
separately and recycled in an ecologically
compatible manner.
Please dispose of the alarm at the end of its
useful life at a disposal facility in your city or
district.
Warranty
This device has a warranty of 3 years from the
date of purchase. The device was manufactured with care and inspected thoroughly
before delivery. Please keep your receipt as
proof of purchase. If you have a claim under
the warranty, please contact the service office
for your country. This is the only way to ensure
that your device can be sent in free of charge.
This warranty is only valid for the first purchaser and is not transferable.
The warranty furthermore covers material or
manufacturing defects only. It does not apply
to wear parts or damage to fragile parts. The
product is solely intended for private use and
not for commercial use. No claim for damages
may be brought in the event of fire or explosion. An alarm is no substitute for insurance
cover and does not replace your duty of care.
In the event of incorrect and / or improper handling, the use of force or any work on the
device that is not performed by the service
office, the warranty shall expire. This warranty
does not restrict your statutory rights.
13
20.11.2007 16:03:50 Uhr
Service
Information on dealing with problems can be
found under www.dexaplan.com.
If you have any questions, please contact our
service office by email ([email protected])
or by telephone ( T 0870 241 3029
T 1890 851 851; Monday - Friday
between 08.30 and 17.00).
Here you can obtain all necessary information
on service questions such as returns, etc.
Declaration of conformity
This product satisfies the requirements of the
valid European and national directives (Electromagnetic Compatibility 89 / 336 / EEC and
Low-Voltage Directive 73 / 23 / EEC). Its conformity has been verified.
Dexaplan GmbH
Paul-Böhringer-Str. 3 · D-74229 Oedheim
Information last updated 11/2007
Ident.-No.: 11-2007-GA-617-GB/IE
14
KOE217_GA617_Content_LB6.indd 14-15
15
20.11.2007 16:03:50 Uhr
16
KOE217_GA617_Content_LB6.indd 16
20.11.2007 16:03:50 Uhr