1
a dual connection (parallel connection) is
made.
Installation
cDanger: make sure that the gas alarm is
not powered during installation.
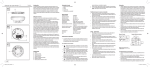
oRemove the mounting fixture h from the
rear side of the casing g by sliding it
downwards (see Fig. B).
o Mark the installation position with the aid
of the two round holes in the mounting
fixture h .
o Install the mounting fixture h in the chosen and marked position using the fastening screws and wall plugs supplied
with the gas alarm.
o Push the gas alarm flush from above onto
the mounting fixture h .
Operation
Once the power supply has been connected
properly, an automatic self-test is carried out:
the gas alarm emits several loud alarm signals
and at the same time the red ALARM LED c
on the front of the casing a flashes. The green
POWER LED d then lights up to indicate that
the device is ready for operation (see Fig. A)
12 V DC mains adapter
Switching on:
oPlug the mains adapter directly and fully
into a 230 V~50 Hz mains socket. Do not
use any type of tabletop socket or extension cable, since these can cause interruptions in the power supply.
Switching off:
oRemove the mains adapter from the
mains socket.
12 V DC on-board supply system
Switching on:
o Switch the 12 V DC on-board power supply
on.
Switching off:
o Switch the 12 V DC on-board power supply
off.
Alarm in the event of a gas leak
The gas alarm detects a gas leak with the
sensor. If the concentration of gas at the sensor
exceeds the pre-set sensitivity threshold on
the gas alarm, the alarm responds: the red
ALARM LED c flashes and the loud alarm
signal is emitted.
The alarm continues until the gas concentration
falls back to below the pre-set sensitivity level.
10
KOE217_GA617_Content_LB6.indd 10-11
Follow the instructions in the section
„What to do in the event of a gas leak“
Function test
Use a gas lighter to test the function of the gas
alarm.
oAllow gas to escape from the gas lighter
directly next to the lower or side sensor
opening k .
oMake sure that there is no flame on the
lighter. The gas alarm detects the gas
with the sensor. If the gas concentration
at the sensor exceeds the pre-set sensitivity threshold, the alarm responds: the
red ALARM LED c flashes and the loud
alarm signal is emitted.
oDo not allow any more gas to escape
from the lighter once the gas alarm has
responded.
The alarm continues until the gas concentration falls back to below the pre-set
sensitivity level.
Fault indicator
The device carries out a self-checking routine
for your safety. Possible errors are displayed
by the FAULT-LED e flashing and a coincident
beeping noise from the device.
This fault indicator may also be triggered by
the gas alarm’s surroundings or by an internal
problem inside the device.
If a fault is indicated you must check first:
oWhether the ambient temperature is outside the specified range (-10° C to +40° C).
oWhether chemicals present in the air may
have cause the fault, e.g. a high concentration of acid or alcohol. If this cannot be
confirmed, then try the device in another
room. If no fault is indicated there then
the problem lies in the surroundings.
If the fault indicator is still active then the
problem lies within the device itself:
o The gas alarm has suffered internal damage.
oThe gas alarm can be used for approximately 5 years.
Then it should be replaced.
11
20.11.2007 16:03:50 Uhr