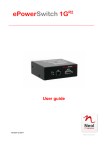
1
8XM Master
8XS Satellite
System Administrator’s
Guide
EPS 8XM
EPS 8XS
September 2005
Neol S.A.S www.neol.com 4 Rue Nationale - B.P. 11 - 67801 BISCHHEIM cedex - France
© Copyright 2001-2005 by NEOL S.A.S - 4 Rue Nationale, BP 11, 67801 BISCHHEIM Cedex, France
Printed in France
All rights reserved. No part of this documentation, accompanying software or other components of the described
product may be reproduced or transmitted in any form or by any means, electronic or mechanical, including
photocopying and recording, for any purpose other than the personal use of the purchaser without the express
written permission of NEOL S.A.S.
This documentation, the ePowerSwitch and its accessories (sensors, I/O extension board, power supply…) and
accompanying software were produced with great care, yet errors are possible.
NEOL S.A.S assumes no responsibility for errors within the documentation, the hardware or the software.
NEOL S.A.S reserves the right to change programs or the documentation from time to time without informing the
user; errors and omissions excepted.
Trademarks
Neol and ePowerSwitch are registered trademarks of NEOL S.A.S. All other brand names and product
names used in this book are trade names, service marks, trademarks, or registered trademarks of their
respective owners.
Chapter Description
Chapter 1
Safety Instructions
This chapter contains important safety instructions you should know before working with
ePowerSwitch 8XM and 8XS.
IMPORTANT SAFETY INSTRUCTIONS TO BE READ
This warning symbol means danger. You are in a situation that could cause bodily injury.
Before you work on any ePowerSwitch device:
- be aware of the hazards involved with electrical circuitry
- be familiar with the practices for preventing accidents
SAVE THESE INSTRUCTIONS !
Chapter 2
Description
This chapter introduces you to the ePowerSwitch 8XM and 8XS Packing List. It also
introduces the ePowerSwitch accessories (temperature sensor, temperature/humidity sensor
and the I/O Extension Board)
Chapter 3
Diagram
This chapter describes the Front and Back Panel of the ePowerSwitch 8XM and the
ePowerSwitch 8XS.
Chapter 4
Installation the ePowerSwitch 8XM
This chapter describes how to install the ePowerSwitch 8XM.
Chapter 5
Configuring the ePowerSwitch 8XM
This chapter describes how to configure the ePowerSwitch 8XM.
Chapter 6
Controlling the Power Outlets
This chapter describes how to control the Power Outlets of the Master and the Satellite over
IP.
Chapter 7
Installation the ePowerSwitch 8XS
This chapter describes how to install the ePowerSwitch 8XS.
Chapter 8
Controlling the Power Outlets of ePowerSwitch Satellites using a terminal connection
This chapter describes how to control the Power Outlets of the ePowerSwitch 8XS.
Chapter 9
Accessories
This chapter describes the accessories, which can be connected to the ePowerSwitch 8XM.
Annexes
Ping and Scan method
Commonly used ports
SysLog Messages: Severity Level Definitions
Pinout of the RJ11 6/6 x-Bus connector
Technical Data
1
Contents
Contents
Chapters
1. Safety instructions: to read before use!_________________________________________________ 3
2. Description ______________________________________________________________________ 5
2.1 Description ______________________________________________________________________________5
2.2 Package list _____________________________________________________________________________6
2.3 ePowerSwitch accessories (must be ordered separatly) ___________________________________________6
3. Diagram_________________________________________________________________________ 7
3.1 The Front Panel of the ePowerSwitch 8XM (Master)_____________________________________________7
3.2 The Back Panel of the ePowerSwitch 8XM ____________________________________________________9
3.3 The Front Panel of the ePowerSwitch 8XS (Satellite) ____________________________________________10
3.4 The Back Panel of the ePowerSwitch 8XS ____________________________________________________11
4. Installation the ePowerSwitch 8XM___________________________________________________ 12
5. Configuring the ePowerSwitch 8XM __________________________________________________ 13
5.1 Configuring the network settings of the ePowerSwitch 8XM with the Finder Program_____________________14
5.2 Configuring the network settings of the ePowerSwitch 8XM through a Terminal connection _______________16
5.3 Configuring the ePowerSwitch 8XM with a browser _______________________________________________17
5.3.1 General / IP Configuration Page __________________________________________________________________
5.3.2 General / System Time Page _____________________________________________________________________
5.3.3 General / SMTP Page __________________________________________________________________________
5.3.4 General / Tools Page ___________________________________________________________________________
5.3.5 Settings / Accounts Page ________________________________________________________________________
5.3.6 Settings / Groups Page _________________________________________________________________________
5.3.7 Settings / Power Outlets Page ____________________________________________________________________
5.3.8 Settings / Sensors Page_________________________________________________________________________
5.3.9 Settings / Rules Page___________________________________________________________________________
5.3.10 Ping Monitoring Rule __________________________________________________________________________
5.3.11 Scan Monitoring Rule__________________________________________________________________________
5.3.12 Dry Contact Monitoring Rule ____________________________________________________________________
5.3.13 Power Supply Monitoring Rule___________________________________________________________________
5.3.14 Schedule Rule _______________________________________________________________________________
5.3.15 Environment Rule_____________________________________________________________________________
5.3.16 Misc / Peripherals page ________________________________________________________________________
5.3.17 Misc / Log page ______________________________________________________________________________
5.3.18 Misc / Log Settings Page _______________________________________________________________________
18
19
20
21
22
24
25
27
28
29
31
33
35
37
39
41
42
43
6. Controlling the Power Outlets of the Master and Satellites __________________________________ 44
7. Installation the ePowerSwitch 8XS ___________________________________________________ 45
8. Controlling the Power Outlets of the Satellites using a Terminal Connection ____________________ 46
8.1 Using the RS232 port ______________________________________________________________________46
8.2 Using the RS485 port ______________________________________________________________________46
8.3 Commands ______________________________________________________________________________46
8.3.1 Controlling of the Power Outlet(s) _________________________________________________________________
8.3.2 Reading out the Power Outlet Status_______________________________________________________________
8.3.3 Setting of the Power Up Delays ___________________________________________________________________
8.3.4 Reading out of the Power Up Delay(s)______________________________________________________________
8.3.5 Setting the Restart Delays _______________________________________________________________________
8.3.6 Reading out of the Restart Delays _________________________________________________________________
8.3.7 Setting the Power Up Default Status _______________________________________________________________
8.3.8 Reading out the Power Up Default Status ___________________________________________________________
8.3.9 Reading out the Switching Counter Values of the Relays _______________________________________________
8.3.10 Resetting the Switching Counter Values of the Relays ________________________________________________
8.3.11 Restoring to Factory Settings____________________________________________________________________
47
48
49
49
50
50
51
51
52
53
53
9. Accessories______________________________________________________________________ 54
9.1 Temperature sensor _______________________________________________________________________54
9.2 Temperature and Humidity sensor ____________________________________________________________54
9.3 I/O extension module ______________________________________________________________________55
9.4 Horizontal cable manager___________________________________________________________________55
Annexes __________________________________________________________________________ 56
Ping and Scan methods _______________________________________________________________________56
Address Pinging ___________________________________________________________________________________ 56
Port Scanning _____________________________________________________________________________________ 56
Recommended values ______________________________________________________________________________ 56
Commonly used ports_________________________________________________________________________56
SysLog Messages: Severity Level Definitions ______________________________________________________57
Pinout of the RJ11 6/6 x-Bus connector ___________________________________________________________58
Technical Data ______________________________________________________________________________59
Statement of Conformity_______________________________________________________________________60
2
ePowerSwitch 8XM / 8XS
1. Safety instructions: to read before use!
English
NOTE
In the following instructions "ePowerSwitch device" refers to both devices ePowerSwitch 8XM and
ePowerSwitch 8XS.
• The ePowerSwitch devices can only be installed by qualified people with the following installation and use
instructions. The manufacturer disclaims all responsibility in case of a bad utilization of the ePowerSwitch
devices and particularly any use with equipments that may cause personal injury or material damage.
• This equipment is designed to be installed on a dedicated circuit that must have a circuit breaker or fuse
protection.
• The electrical power sockets used to plug the power cords of the ePowerSwitch devices must be close to
the ePowerSwitch devices and easily accessible.
• Check that the power cords, plugs and sockets are in good condition.
• The ePowerSwitch devices can only be connected to three-wire 230 VAC (50-60Hz) sockets.
• Always plug the ePowerSwitch devices into properly grounded power sockets (two poles plus ground).
• Never exceed 10 Amp total load for each group of 4 power outlets of an ePowerSwitch device.
• The ePowerSwitch devices are intended for indoor use only. Do NOT install them in an area where
excessive moisture or heat is present.
• Always disconnect the 2 (two) power cords of the ePowerSwitch device if you want to intervene on the
ePowerSwitch device or on the equipment powered from the ePowerSwitch device.
• The Power Outlets of the ePowerSwitch devices are not circuit breakers! If you want to intervene on
equipments connected to an ePowerSwitch device you must disconnect these equipments from the
ePowerSwitch device.
• Do NOT attempt to disassemble the ePowerSwitch devices, they contain potentially hazardous voltages.
• The ePowerSwitch devices contain no user serviceable parts and repairs are to be performed by factory
trained service personnel only.
• Always use a shielded cable for the Ethernet connection.
3
CHAPTER 1: Safety instructions
Consignes de sécurité : à lire avant utilisation !
Français
Remarque
Dans les consignes suivantes, "équipements ePowerSwitch" fait référence aux deux produits ePowerSwitch
8XM et ePowerSwitch 8XS.
•
Les équipements ePowerSwitch ne peuvent être installés que par un personnel qualifié. Le fabricant
décline toute responsabilité en cas de mauvaise utilisation des équipements ePowerSwitch et tout
particulièrement en cas d’utilisation avec des équipements pouvant occasionner des blessures
corporelles ou des dommages matériels.
•
Les équipements ePowerSwitch sont destinés à être installés sur un ou plusieurs circuits électriques
dédiés protégés par des disjoncteurs ou des fusibles.
•
La/les prise(s) secteur utilisée(s) pour brancher le/les cordon(s) secteur d’alimentation des équipements
ePowerSwitch doit/doivent être à proximité des équipements ePowerSwitch et facilement accessible(s).
•
Vérifiez que le/les cordons secteur d’alimentation, les connecteurs et les prises secteur sont en bon état.
•
Les équipements ePowerSwitch ne peuvent être connectés qu’à une/des prise(s) secteur à 3
conducteurs (2 prises + terre) 230 VAC (50-60Hz).
•
N’utilisez que des prises secteur correctement mises à la terre (deux prises + terre) pour brancher les
câbles secteur des équipements ePowerSwitch.
•
Ne jamais dépasser un courant total de 10 Amp pour chaque entrée secteur des équipements
ePowerSwitch.
•
Les équipements ePowerSwitch sont destinés à une utilisation intérieure. NE les installez JAMAIS dans
un endroit où règne une humidité ou une chaleur excessive.
•
Débrancher TOUJOURS les 2 cordons secteur d’alimentation des équipements ePowerSwitch si vous
souhaitez intervenir sur les équipements ePowerSwitch ou sur les appareils alimentés au travers des
équipements ePowerSwitch.
•
Les prises secteur des équipements ePowerSwitch ne sont PAS des coupe-circuits ! Si vous souhaitez
intervenir sur les appareils alimentés au travers des équipements ePowerSwitch vous devez
IMPERATIVEMENT débrancher ces appareils des équipements ePowerSwitch.
•
Ne démonter JAMAIS l'ePowerSwitch, il y a risque de choc électrique !
•
Les équipements ePowerSwitch ne contiennent pas de pièces nécessitant une maintenance. Les
éventuelles réparations ne peuvent être faites que par un personnel habilité et formé par le fabricant.
•
Toujours utiliser un câble blindé pour la connexion Ethernet.
4
ePowerSwitch 8XM / 8XS
2. Description
2.1 Description
ePowerSwitch 8XM (the Master) and ePowerSwitch 8XS (the Satellite) are a couple of power control units
that enables remotly power control with the highest security over Intranet or Internet.
ePowerSwitch 8XM is a power control unit with a built-in Web server, an Ethernet and a RS232 connection.
It enables to control the power supply of 8 Power Outlets through an Ethernet connection. The number of
controlled Power Outlets can be extended up to 136 by cascading up to 16 ePowerSwitch 8XS to the
Master. It supports a maximum load of 2x10A through 2 separate power inputs.
This high security unit offers HTTPS protocol with Web browsers that support SSL version 2 or 3.
It also supports plenty of control options, like monitoring IP devices, external temperature/humidity sensors
and dry contacts. It is able to send Syslog information and e-mails, and to record all events into a timestamped log file.
ePowerSwitch 8XS is a power control unit with a serial connection. It enables to control the power supply of
8 Power Outlets either through a serial RS232 or RS485 connection. The number of the controlled Power
Outlets can be extended up to 128 by cascading up to 16 ePowerSwitch 8XS.
Like the Master, this unit has two separate power inputs to increase the security and the load available on
the power outlets.
5
CHAPTER 2: Description
2.2 Package list
ePowerSwitch units
ePowerSwitch 8XM (Master)
The following items are included:
2 Power cables
1 serial cable SUB-D 9 points male / female
CD including this user guide and the ePowerSwitch Finder program
Quick Installation guide
ePowerSwitch 8XS (Satellite)
The following items are included:
2 Power cables
1 xBus connection cable, length 0.30 Meters
1 serial cable SUB-D 9 points male / female
CD including this user guide
Quick Installation guide
2.3 ePowerSwitch accessories (must be ordered separatly)
ePowerSwitch Temperature sensor
The following items are included:
1 xBus connection cable, length 1.80 Meters
Printed user guide
ePowerSwitch Temperature and Humidity sensor
The following items are included:
1 xBus connection cable, length 1.80 Meters
Printed user guide
ePowerSwitch I/O Extension Board
The following items are included:
1 SUB-D 25 points male/male cable, length 1.80 Meters
Printed user guide
6
ePowerSwitch 8XM / 8XS
3. Diagram
3.1 The Front Panel of the ePowerSwitch 8XM (Master)
Auxiliary Power Supply
RJ45 Connector
For the Web Server only
12 VDC 300 mA
Ethernet Network
5 LEDs (Group A)
SUB-D 25F Connector
A = Power Supply A
1 - 4 = Status of Outlets 1 - 4
8 Inputs / 4 Dry Contact Outputs
SUB-D9F Connector
LEDs DC (Dry Contact)
Terminal Connection
Status of Output Contacts 1 - 4
RJ11 Connectors
LEDs (Group B)
Cascading Connection
S= Status
B = Power Supply B
5 - 8 = Status of Outlets 5 -8
Dip Switches
x Bus Termination
A 1 2 3 4 (LEDs)
A
1
2
3
4
Green. Lights up when Power applied on Group A
Red. Status of Power Outlets 1
Red. Status of Power Outlets 2
Red. Status of Power Outlets 3
Red. Status of Power Outlets 4
10/100 (RJ45 Connector)
Network connection 10/100 Mbits/sec
Link (LED)
Off = Network connection not detected
On = Network connection detected
Flashing = the device is sending or receiving data over this port
100 (LED)
Off = 10 Mbits/sec connection
On = 100 Mbits/sec connection
RS232 (SUB-D 9F Connector)
Serial port RS232 with DB-9 female connector
Pinout
2 = TxD
3 = RxD
5 = Gnd
7
CHAPTER 3: Diagram
xBus
These connectors are used for cascading ePowerSwitch devices together (up to 16 ePowerSwitch 8XS and
up to 4 Temperatrur / Humidity sensors.
Maximal TOTAL line length: 200 Meters
Term (RS485 Termination DIP Switch)
The x Bus interface (RS485) has built-in termination resistors. To enable these resistors slide the two DIP
Switch to the ON position (down).
Termination should be enabled at the two end stations on an RS485 network.
No more than two stations should be terminated on an RS485 network
S B 5 6 7 8 1 2 3 4 (LEDs)
S
Status
Off = power default
1 time repeatedly = power on but not ready
2 times repeatedly = waiting on IP address from DHCP server
3 times repeatedly = SSL key computing in progress (takes several minutes!!!)
4 times repeatedly = System error (contact the manufacturer)
Green. Lights up when Power applied on Group B
Red. Status of Power Outlets 5
Red. Status of Power Outlets 6
Red. Status of Power Outlets 7
Red. Status of Power Outlets 8
Yellow. Dry contact Output 1
Yellow. Dry contact Output 2
Yellow. Dry contact Output 3
Yellow. Dry contact Output 4
B
5
6
7
8
1
2
3
4
I/O (SUB-D 25F Connector)
Dry Contacts: 4 Outputs and 8 Inputs
Do NOT exceed 24VDC – 20 mA
(see Annexe Table for the Pin configuration)
12 VDC AUX Power Supply
The Web server can be powered either by Power Input A or Power Input B.
To increase the operational safety of the Web server, an auxiliary Power Supply (12 VDC / 300 mA) can be
connected to this input (double insulated, ie. not connected to ground).
8
ePowerSwitch 8XM / 8XS
3.2 The Back Panel of the ePowerSwitch 8XM
Power Outlets (Group B)
Power Outlets (Group A)
Power Outlets 5 - 8
Power Outlets 1 - 4
Power Input B
Power Supply A
Status of Outlets 1 - 4
Power Input A
Power Supply A
Status of Outlets 1 - 4
9
CHAPTER 3: Diagram
3.3 The Front Panel of the ePowerSwitch 8XS (Satellite)
LEDs
A = Power Supply A
B = Power Supply B
1 - 8 = Status of Outlets 1 - 8
Dip Switches
1 - 4 : physical address of device
5 - 6 xBUS Termination
A B 1 2 3 4 5 6 7 8 (LEDs)
A
Green. Lights up when Power applied on Group A
B
Green. Lights up when Power applied on Group B
1
Red. Status of Power Outlets 1
2
Red. Status of Power Outlets 2
3
Red. Status of Power Outlets 3
4
Red. Status of Power Outlets 4
5
Red. Status of Power Outlets 5
6
Red. Status of Power Outlets 6
7
Red. Status of Power Outlets 7
8
Red. Status of Power Outlets 8
Dip Switches
1 - 4: physical address of device
5 – 6: x Bus Termination
RS232 (SUB-D 9F Connector)
Serial port RS232 with DB-9 female connector
Pinout
2 = RxD
3 = TxD
5 = Gnd
xBus (RS485)
These connectors are used for cascading ePowerSwitch devices together,
up to 16 ePowerSwitch Satellite and up to 4 Temperature / Humidity sensors.
Maximal TOTAL line length: 4.000 feet / 1.200 Meters
10
SUB-D9F Connector
Terminal Connexion
RJ11 Connectors
Cascading Connection
ePowerSwitch 8XM / 8XS
3.4 The Back Panel of the ePowerSwitch 8XS
Power Outlets (Group B)
Power Outlets (Group A)
Power Outlets 1 - 4
Power Outlets 5 - 8
Power Input B
Power Supply A
Status of Outlets 1 - 4
Power Input A
Power Supply A
Status of Outlets 1 - 4
11
CHAPTER 4: Installation the ePowerSwitch 8XM
4. Installation the ePowerSwitch 8XM
Remark:
Make sure that the ePowerSwitch 8XM is powered off.
Connection Instructions
1. Use a shielded RJ45 Network Cable to connect your ePowerSwitch 8XM to the network.
2. Use appropriated three-wire Power Cords (two poles plus ground) to connect your electrical devices to
the ePowerSwitch 8XM unit.
3. Plug the 2 power cables into 2 grounded sockets. The Power Supply LED of group A and of group B light
on to confirm that power is on.
4. You can now configure the ePowerSwitch 8XM by following the indications of the chapter "Configuration
of the ePowerSwitch 8XM" or, if necessary, install the ePowerSwitch 8XS as indicated hereafter.
12
ePowerSwitch 8XM / 8XS
5. Configuring the ePowerSwitch 8XM
To use the ePowerSwitch 8XM on your network, you must first configure its network parameters. Ask your
network administrator for the parameters to use.
There are three different methods to configure the ePowerSwitch 8XM:
Method 1:
Through a network using the ePowerSwitch Finder Program (on the delivered CD).
It is the simplest and fastest configuration method if you use Windows as operating system. We suggest that
you use this program at least during the first configuration: it allows you to configure your ePowerSwitch 8XM
through your local network even if its network parameters (IP Address, Subnet mask and Port) are not
compatible with those of your PC or your local network.
If you decide to use this method you can directly go to chapter "Configuring the network settings of the
ePowerSwitch 8XM with the Finder program".
Method 2:
Through a network using a Web browser (Internet Explorer > 6.0 or Netscape > 6.1).
This method can only be used if the network parameters of the ePowerSwitch 8XM (IP Address, Subnet
mask…) have already been configured using either the ePowerSwitch Finder program (Method 1) or using a
Terminal program (Method 3).
For the first configuration you can also change the Network parameters of your PC according to the default
settings of the ePowerSwitch.
Default Network parameters:
IP address
Subnet mask
Gateway
Port
192.168.100.100
255.255.255.0
no address
80
If you decide to use this method you can directly go to the chapter "Configuring the ePowerSwitch 8XM with
a browser".
Method 3:
Through a RS232 serial connection using a Terminal connection.
If you use a PC, use the serial cable supplied with the product and a Terminal program such as Widows
HyperTerminal or the MicroTerminal program on the CD (folder miscellaneous).
If you decide to use this method, you can directly go to the chapter "Configuring the network settings of the
ePowerSwitch 8XM through a Terminal connection".
13
CHAPTER 5: Configuring the ePowerSwitch 8XM
5.1 Configuring the network settings of the ePowerSwitch 8XM with the Finder Program
Remarks:
The ePowerSwitch 8XM and the PC used to configure it, have to be connected on the same segment of the
network. The protocol of this program can not be routed so it can not be used to configure the ePowerSwitch
through a WAN or the Internet.
This program does not work if the administrator has deactivated it in the configuration of the ePowerSwitch
8XM (for security reasons for example).
1. Start the eps-Finder.exe program on the CD-ROM.
The ePowerSwitch Finder window appears.
2. In the tool bar click on the first left button or choose the File/Scan Menu. The program browses the
segment on which is connected your PC and displays the name, the type, the IP and MAC Address of
the connected ePowerSwitch.
3. In the tool bar click on the second left button or choose the File/Configure Menu. The properties dialog
box appears and you can now configure the network parameters.
This page enables to define all IP parameters of the ePowerSwitch 8XM device (IP Address, Subnet Mask,
Default Gateway, Primary and Secondary DNS Server).
DHCP Client enabled
If this check box is selected, the web server will automatically initialize the IP address from a DHCP host and
disable manual IP address setup. Note that use of DHCP (Dynamic Host Configuration Protocol) requires a
DHCP host to be set up on the network.
IP Address
IP address of ePowerSwitch 8XM, default is 192.168.100.200.
Subnet Mask
Subnet Mask of ePowerSwitch 8XM, default is 255.255.255.0.
14
ePowerSwitch 8XM / 8XS
Primary DNS Address
Primary DNS (Domain Name Server), default is blank.
Secondary DNS Address
Secondary DNS, default is blank.
Finder Program authorized
The Network parameters of the ePowerSwitch 8XM (IP address, Default Gateway...) can also be configured
through a network using the delivered Finder Program. It is the simplest and fastest configuration method if
you use Windows as operating system.
If you want to desable the use of the Finder Program, uncheck the box "Finder program authorized".
15
CHAPTER 5: Configuring the ePowerSwitch 8XM
5.2 Configuring the network settings of the ePowerSwitch 8XM through a Terminal connection
Remarks:
For security reasons, we advise you to disable the Finder program after the first installation. This program
does not use SSL technology, it is only intended for a first quick installation over the LAN.
If you change the IP address, the system needs to compute new SSL keys. This operation takes several
minutes and the LED marked "S" on the front panel blinks 3 times repeatedly during all the process. During
all this time, you cannot login.
1.
Use the supplied RS232 serial cable to connect the serial port marked RS232 on the front panel of the
ePowerSwitch 8XM to an available serial port of your PC.
2.
Run a terminal program such as Windows HyperTerminal or the MicroTerminal program on the CD
(“Miscellaneous” folder).
3.
Configure the appropriate serial port with the following settings: 9.600 bauds, 8 bits, no parity, 1 stop bit
and no flow control. If you use the MicroTerminal program on the supplied CD-ROM (“Miscellaneous”
folder) you only have to choose the used serial port, this program is already configured at 9600,n,8,1.
4.
On your computer, press <ENTER> until the configuration's menu appears on your screen, then press
"M" and follow the menu to configure the network parameters of your ePowerSwitch 8XM.
The serial connection also enables you to use following commands.
/viewlog
/initlog
/initsslkey
/initadminaccount
/restorefactconf
/help
/?
16
Display the log file
Clear the log file
Compute new SSL keys (needs several minutes!)
Restore default administrator password
Restore to factory default settings
Display this help
Display this help
ePowerSwitch 8XM / 8XS
5.3 Configuring the ePowerSwitch 8XM with a browser
Remarks:
In order to be able to access the Web server of the ePowerSwitch 8XM, you must before have configured its
network parameters (ask your network administrator for the parameters to use).
The Web server of the ePowerSwitch 8XM works with Internet Explorer Version 6.0 or higher and with
Netscape Version 6.1 or higher.
1. Start your Web browser.
2. Type the IP address of your ePowerSwitch 8XM following by /sysadmin.htm to access to the
configuration page .
Example: http://192.168.1.180/sysadmin.htm
The browser displays the authentication dialog box.
3. Enter the administrator name and password then click on OK
(default values = admin for name and password).
The configuration page is displayed, allowing you to set all the parameters of the ePowerSwitch 8XM.
There are four main tabs: General, Settings, Misc and Help. Additional tabs will be available after you click one of
the main tabs.
17
CHAPTER 5: Configuring the ePowerSwitch 8XM
5.3.1 General / IP Configuration Page
This page enables you to define all the IP parameters of the ePowerSwitch 8XM device (IP Address, Subnet
Mask, Default Gateway, Primary and Secondary DNS Server).
DHCP Client enabled
If this check box is selected, the web server will automatically initialize the IP address from a DHCP host and
disable manual IP address setup. Factory default setting for this option is enabled.
Note : Use of DHCP (Dynamic Host Configuration Protocol) requires a DHCP host to be set up on the
network.
IP Address
IP address of ePowerSwitch 6XM, default is 192.168.100.200.
Note: If you change the IP address, the system needs to compute new SSL keys.. This operation takes
several minutes and the LED marked "S" on the front panel blinks 3 times repeatedly during all the process.
During all this time, you cannot login.
Subnet Mask:
Subnet Mask of ePowerSwitch, default is 255.255.255.0.
Default Gateway:
Generally the address of your router, default is blank
Primary DNS Address
Primary DNS (Domain Name Server), default is blank
Secondary DNS Address
Secondary DNS, default is blank
Finder Program enabled
The Network parameters of the ePowerSwitch 8XM (IP address, Default Gateway...) can also be configured
through a network using the provided Finder Program. It is the simplest and fastest configuration method if
you use Windows as an operating system.
If you do not want to use the Finder Program, uncheck the box "Finder program enabled".
LOGOUT
Click "Logout" at the bottom of the page to exit the session without saving changes.
DISCARD CHANGES
Click "Discard Changes" at the bottom of the page to discard all the changes you have made on this page.
APPLY CHANGES
Click "Apply Changes" at the bottom of the page to save changes.
18
ePowerSwitch 8XM / 8XS
5.3.2 General / System Time Page
The system time of the ePowerSwitch 8XM is used for synchronizing scheduling actions and to timestamp emails and system logging activities. The system time can be set manually with the browser time of the
connected computer or can be set automatically synchronize with a NTP timeserver.
Current System Time
This field shows the current system time of the ePowerSwitch 8XM. As the system time is displayed through
the browser, a small difference (1 to 2 sec) can appear as compared to the exact hour. The system time is
nevertheless correct.
Use Browser Time
If you want to set the system time using the current Browser time of your PC, select this option and click on
the button "Set System Time".
Use NTP Server
If you want to set the system time using a NTP timeserver, select this option, choose a refresh interval
and enter the IP address of the timeserver you wish to use in the "Primary" field. The address of a second
timeserver can be specified in the "Secondary" field. The secondary time server is optional and is used only
if the primary timeserver is not available. You can enter either the hostname or the IP address of a NTP
server. Note that NTP uses port 123/UDP.
Example: time.ePowerSwitch.net or 192.168.1.252
Time Zone
Set the time zone corresponding to your location. The system clock will subsequently show local time.
Without setting this, the system clock will show UTP. Setting a time zone is only relevant if you are
synchronizing with an NTP server.
Daylight Saving Time
If you want to set Daylight Saving dates, check this box and specify the date you want to use.
LOGOUT
Click "Logout" at the bottom of the page to exit the session without saving changes.
DISCARD CHANGES
Click "Discard Changes" at the bottom of the page to discard all the changes you have made on this page.
APPLY CHANGES
Click "Apply Changes" at the bottom of the page to save changes.
19
CHAPTER 5: Configuring the ePowerSwitch 8XM
5.3.3 General / SMTP Page
The ePowerSwitch 8XM can be configured to send e-mails to addresses specified in the Settings/Rules Tab.
To send e-mails, you will need a SMTP server on the network and you will have to configure the following
parameters:
SMTP enabled
Check this box if you want the ePowerSwitch 8XM to be able to send e-mails.
SMTP Server Address
In this field, enter the address of the e-mail server you want to use.
You can enter either the hostname or the IP address of a NTP server.
Example: smtp.yahoo.com or 127.0.0.1
SMTP Port
In this field, enter the Port Number you want to use, default and usual value is 25.
From Address
In this field, enter the E-Mail address that ePowerSwitch 8XM messages will appear to come from. This
should be a valid address (generally servers rejects messages that don't have a valid from address).
LOGOUT
Click "Logout" at the bottom of the page to exit the session without saving changes.
DISCARD CHANGES
Click "Discard Changes" at the bottom of the page to discard all the changes you have made on this page.
APPLY CHANGES
Click "Apply Changes" at the bottom of the page to save changes.
20
ePowerSwitch 8XM / 8XS
5.3.4 General / Tools Page
This page enables you to save and download the current system settings. It also enables you to restore the
factory settings.
Save button
Click this button to save the current system settings onto the local hard drive.
Load button
Click this button and select a setting file you want to download to the ePowerSwitch.
Restore
Click this button if you want to restore the factory default settings.
LOGOUT
Click "Logout" at the bottom of the page to exit the session without saving changes.
21
CHAPTER 5: Configuring the ePowerSwitch 8XM
5.3.5 Settings / Accounts Page
This page is used to create, activate, deactivate, modify and delete accounts.
- To create an account, click on "Add a New Account" on the right side of the page.
A new page appears, allowing you to set all parameters of the account.
- To activate or deactivate an account, check or uncheck the corresponding checkbox.
- To modify an account, click on "Edit" of the corresponding account.
- To delete an existing account, click on "Delete" of the corresponding account.
User Name
In this field, enter the name you want to give to the user. The name can be from 1 to 32 characters long, and
can contain alphanumeric characters.
Password
In this field, enter the password you want to give to the user. The password can be from 4 to 32 characters
long, and can contain alphanumeric characters.
Confirm Password
In this field, enter again the password.
Groups
In this field, you will find all the created groups. If no group has been created, this field is empty.
To add a group or groups of power outlets to the account you are creating, press the Ctrl key and click on the
group(s) you want to add. The selected groups are marked dark blue and their names are listed at the right
of the field "Groups".
Device
In this drop-down list, choose a device from which you want to add power outlets to the current account.
22
ePowerSwitch 8XM / 8XS
Power Outlets
This field is used to add and remove power outlets to/from the current account.
- To add power outlets to the current account, press the Ctrl key and click on the power outlets device
selected in the field above. The selected power outlets are marked dark blue and their names are listed at
the right of the field "Power Outlets".
Sensor
In this drop-down list, choose the sensor box you want to add to the current account.
The ePowerSwitch 8XM supports up to 4 sensor boxes (currently for temperature or temperatur and
humidity) identified by ID Codes T1 to T4. A character between brackets can follow this ID Code:
- The "X" character means that the corresponding sensor is physically not connected.
- The "!" character means that the corresponding sensor is physically connected but not activated. If you
want to activate it, go to the "Settings/Sensor" tab.
- The " " character (blank) means that the corresponding sensor is physically connected and activated.
Sensor Type
This field is used to add and remove sensor types to/from the current account.
- To add sensor types (temperature or humidity) to the current account, press the Ctrl key and click on the
sensor type of the device selected in the field above. The selected sensors are marked dark blue and their
names are listed at the right of the field "Power Outlets".
- To remove a sensor type, press the Ctrl key and click on the sensor type you wish to remove.
LOGOUT
Click "Logout" at the bottom of the page to exit the session without saving changes.
DISCARD CHANGES
Click "Discard Changes" at the bottom of the page to discard all the changes you have made on this page.
APPLY CHANGES
Click "Apply Changes" at the bottom of the page to save changes.
23
CHAPTER 5: Configuring the ePowerSwitch 8XM
5.3.6 Settings / Groups Page
Groups Page
This page is used to manage groups of power outlets. This functionnality is particularly usefull if you have to
control the power supply of devices using redundant power supplies.
You can create groups including several power outlets distributed on a ePowerSwitch 8XM and several
ePowerSwitch 8XS.
This page is used to create, modify and delete groups.
- To add a new group click on "Add a New Group" on the right side of the page. A new page appears
allowing you to set all parameters of the group.
- To delete an existing group, click on "Delete" of the correponding device.
- To add or remove power outlets to from an existing group, click on "Edit" of the correponding device.
Group Id
The ePowerSwitch 8XM automatically creates an ID Code to clearly identify each groupe of Power Outlets.
All the ID Codes used to identify groups start with the character "G".
Group Name
In this field, enter the name you want to give to the group. The name can be from 1 to 32 characters long,
and can contain alphanumeric characters.
Device
In this drop-down list choose an ePowerSwitch from which you want to add power outlets to the group.
Power Outlets
This field is used to add and remove power outlets from the group.
- To add power outlets to the group, press the Ctrl key and click on the power outlets of the ePowerSwitch
device selected in the field above. The selected power outlets are marked dark blue and their names are
listed at the right of the field "Power Outlets".
- To remove a power outlet from the group, press the Ctrl key and click on the power outlet you wish to
remove.
LOGOUT
Click "Logout" at the bottom of the page to exit the session without saving changes.
DISCARD CHANGES
Click "Discard Changes" at the bottom of the page to discard all the changes you have made on this page.
APPLY CHANGES
Click "Apply Changes" at the bottom of the page to save changes.
24
ePowerSwitch 8XM / 8XS
5.3.7 Settings / Power Outlets Page
This page is used to configure all the power outlets of the ePowerSwitch 8XM and all ePowerSwitch 8XS.
The main page is also very usefull to give on an overview of all the ePowerSwitch 8XS that are activated and
detected by the ePowerSwitch 8XM.
- To activate an ePowerSwitch 8XS check the box "Activated" of the corresponding ePowerSwitch 8XS. The
ePowerSwitch 8XM can not be deactivated.
- To deactivate an ePowerSwitch 8XS uncheck the box "Activated" of the corresponding ePowerSwitch 8XS.
Even if the device remains physically connected to the Master, its power outlets will no longer be accessible
by its authorized users.
- To configure or modify the settings of an ePowerSwitch device, click on "Edit" of the correponding device.
A new page appears allowing you to set all parameters of the group.
ID
The ePowerSwitch 8XM automatically creates an ID Code to clearly identify each Power Outlet.
- All the ID Codes used to identify the power outlets of an ePowerSwitch 8XM start with the character "M"
followed by a number identifying each power outlet.
- All the ID Codes used to identify the power outlets of an ePowerSwitch 8XS start with the character "S"
followed by a number identifying each power outlet.
Name
In this fields, enter the name you want to give to the selected device and to each of its power outlets. The
name can be from 1 to 32 characters long, and can contain alphanumeric characters.
25
CHAPTER 5: Configuring the ePowerSwitch 8XM
Default Power-Up Delay
In the drop-down lists choose for each power outlet the default status to apply after power-up.
You can choose between:
- On if you want the corresponding power outlet to be always switched to On after power-up.
- Off if you want the corresponding power outlet to be always switched to Off after power-up.
- Last Status if you want that the corresponding power outlet takes again the state it was in the before power
failure.
Delay before Restart
In this fields, enter the Restart Delay you want to define for each power outlet. Restart delay means how long
the plug will remain Off before it is switched back On again after a restart operation.
The delay can be set between 0 and 65535 seconds.
LOGOUT
Click "Logout" at the bottom of the page to exit the session without saving changes.
DISCARD CHANGES
Click "Discard Changes" at the bottom of the page to discard all the changes you have made on this page.
APPLY CHANGES
Click "Apply Changes" at the bottom of the page to save changes.
26
ePowerSwitch 8XM / 8XS
5.3.8 Settings / Sensors Page
This page is used to configure the temperature and humidity sensors.
Sensor Id
The ePowerSwitch 8XM automatically creates an ID Code to clearly identify each Sensor. All the ID Codes
used to identify Sensors start with the character "T" followed by a number identifying each Sensor.
Sensor Name
In this field, enter the name you want to give to the selected sensor. The name can be from 1 to 32
characters long, and can contain alphanumeric characters.
Sensor Type
In this drop-down list, choose the sensor type you want to use.
LOGOUT
Click "Logout" at the bottom of the page to exit the session without saving changes.
DISCARD CHANGES
Click "Discard Changes" at the bottom of the page to discard all changes you have made on this page.
APPLY CHANGES
Click "Apply Changes" at the bottom of the page to save changes.
27
CHAPTER 5: Configuring the ePowerSwitch 8XM
5.3.9 Settings / Rules Page
Rules are used to control actions according to a specific event. For example, you can define a rule to switch
a power outlet OFF and send an e-mail to a specific user when a predefined temperature is reached or a
contact is open.
This page is used to create, modify and delete rules.
- To add a new rule, click on "Add a New Rule" on the right side of the page.
A new page appears, allowing you to set all the parameters of the rule.
- To remove an existing rule, click on "Delete" of the correponding rule.
- To modify a rule, click on "Edit" of the correponding rule.
A total of 255 rules can be created and there are 6 different types of rules.
Ping Monitoring Rule
This rule is used to control actions according to the response to a Ping command.
Scan Monitoring Rule
This rule is used to control actions according to the response to a Scan command.
Dry Contact Monitoring Rule
This rule is used to control actions according to the state of a dry contacts (for example, the dry contact could
be connected to a door contact or a fog sensor).
Power Supply Monitoring Rule
This rule is used to control actions according to the state of the power supplies of any Master or Satellite
Unit.
Schedule Rule
This rules is used to control actions according to the scheduler of the Master Unit.
Environment Rule
This rule is used to control actions according to environment values (temperature and/or humidity).
28
ePowerSwitch 8XM / 8XS
5.3.10 Ping Monitoring Rule
This rule can be used to check if a computer or any IP device is connected to the network. It sends ping
packets and listens for replies from the specific host (for more details, see Annexes "Ping and Scan
method").
Rule ID
The ePowerSwitch 8XM automatically creates an ID Code to clearly identify each rule. All the ID Codes used
to identify rules start with the character "R" followed by a number.
Rule Name
In this field, enter the name you want to give to the rule. The name can be from 1 to 32 characters long, and
can contain alphanumeric characters.
Rule Type
In this field is displayed the type of the rule you are configuring (Ping Monitoring Rule in that case).
Rules are used to control actions according to specific events. After choosing the type of the rule in the dropdown list, you will have first to configure the event and then to configure the actions to perform.
IP device to monitor
In this field, enter the IP address of the IP device that you want to monitor using the Ping command.
Interval between Monitoring
In this field, define the delay in seconds between ping commands sent to the IP device to monitor. The delay
can be set between 0 and 65535 seconds.
Number of unsuccessful Ping commands before Action
In this field, define the number of Ping commands to send to the IP device before executing the actions.
Delay before Restarting the Monitoring after Action
In this field, define the time in seconds before restarting the monitoring after the reboot action.
The delay can be set between 0 and 65535 seconds.
Type of action
For the Ping Monitoring Rule defined above, you can choose and configure the following actions:
Set Power Outlet
Check this box and in the corresponding drop-down list, choose the power outlet the rule will apply to. In the
next corresponding drop-down list, select the action to execute. Each power outlet can be switched On/Off
and restarted. If you choose "restart" you will also be able to define a restart delay between 0 and 65535
seconds.
29
CHAPTER 5: Configuring the ePowerSwitch 8XM
Set Group
This type of action is only possible if you already created at least one group!
Check this box and in the corresponding drop-down list, choose the power outlet group the rule will apply to.
In the next corresponding drop-down list, select the action to execute.
Each power outlet group can be switched On/Off and restarted. If you choose "restart" you will also be able
to define a restart delay between 0 and 65535 seconds.
- If you choose 0 second for the delay, the delay will be the delay defined in the "Power Outlets Page".
- If you choose a delay different from 0, the delay will replace the delay setted in the "Power Outlets Page".
Set Dry Contact
Check this box and in the corresponding drop-down list, choose the dry contact the rule will apply to. In the
next corresponding drop-down list, select the action to execute.
Each power dry contact can be switched On/Off and pulsed (open or close) for a specified delay. The delay
can be define between 0 and 65535 seconds.
Send Syslog Messages
Check this box if you want to send a message to a Syslog server. In the following drop-down lists choose the
facility and the severity of the message to send.
The address of the Syslog server has to be defined in the "Log Settings Page".
Mail to
Check this box and specify an e-mails address in the corresponding field if you want to send an E-Mail to a
specific user. To send e-mails, you will need a SMTP server on the network and you will have to configure its
parameters in the "SMTP Page".
LOGOUT
Click "Logout" at the bottom of the page to exit the session without saving changes.
DISCARD CHANGES
Click "Discard Changes" at the bottom of the page to discard all the changes you have made on this page.
APPLY CHANGES
Click "Apply Changes" at the bottom of the page to save changes.
30
ePowerSwitch 8XM / 8XS
5.3.11 Scan Monitoring Rule
This rule can be used to check if a specific protocol is available on a server (for example HTTP, FTP, Telnet,
SMTP, POP...). If the connection is possible, ePowerSwitch 8XM knows that a server program is running
there. If the connection is not possible, ePowerSwitch 8XM can automatically switch the powered device off
and after a specified delay switch it again on.
Rule ID
The ePowerSwitch 8XM automatically creates an ID Code to clearly identify each rule. All the ID Codes used
to identify rules start with the letter "R" followed by a number.
Rule Name
In this field, enter the name you want to give to the rule. The name can be from 1 to 32 characters long, and
can contain alphanumeric characters.
Rule Type
This field displayes the type of the rule you are configuring (Scan Monitoring Rule in that case).
Rules are used to control actions according to specific events. After choosing the type of the rule in the dropdown list, you will have first to configure the event and then to configure the actions to execute.
IP device to monitor
In this field enter the IP address of the IP device that you want to monitor using the Scan command. In the
"Port to scan" field, enter the port you want to check.
Interval between Monitoring
In this field, define the delay between the scan commands sent to the IP device. The delay can be set
between 0 and 65535 seconds.
Number of unsuccessful Requests before Action
In this field, define the number of Port scaning commands to be sent to the IP device before executing the
actions.
Delay before Restarting the Monitoring after Action
In this field, define the time in seconds before restarting the monitoring after the reboot action.
The delay can be set between 0 and 65535 seconds.
Type of action
For the Event defined above, you can choose and configure the following actions:
31
CHAPTER 5: Configuring the ePowerSwitch 8XM
Set Power Outlet
Check this box and in the corresponding drop-down list, choose the power outlet the rule will apply to. In the
next corresponding drop-down list, choose the action to perform. Each power outlet can be switched On/Off
and restarted. If you choose "restart" you will also be able to define a restart delay between and 65535
seconds.
Set Group
This type of action is only possible if you already created at least one group!
Check this box and in the corresponding drop-down list, choose the power outlet group the rule will apply to.
In the next corresponding drop-down list, choose the action to perform.
Each power outlet group can be switched On/Off and restarted. If you choose "restart" you will also be able
to define a restart delay between 0 and 65535 seconds.
- If you choose 0 second for the delay, the delay will be the delay defined in the "Power Outlets Page".
- If you choose a delay different from 0, the delay will replace the delay defined in the "Power Outlets Page".
Set Dry Contact
Check this box and in the corresponding drop-down list, choose the dry contact the rule will apply to. In the
next corresponding drop-down list, choose the action to perform.
Each power dry contact can be switched On/Off and pulsed (open or close) for a specified delay. The delay
can be define between 0 and 65535 seconds.
Send Syslog Messages
Check this box if you want to send a message to a Syslog server. In the following drop-down lists, choose
the facility and the severity of the message to send.
The address of the Syslog server has to be defined in the "Log Settings Page".
Mail to
Check this box and specify an e-mails address in the corresponding field if you want to send an e-Mail to a
specific user. To send e-mails, you will need a SMTP server on the network and you will have to configure its
parameters in the "SMTP Page".
LOGOUT
Click "Logout" at the bottom of the page to exit the session without saving changes.
DISCARD CHANGES
Click "Discard Changes" at the bottom of the page to discard all the changes you have made on this page.
APPLY CHANGES
Click "Apply Changes" at the bottom of the page to save changes.
32
ePowerSwitch 8XM / 8XS
5.3.12 Dry Contact Monitoring Rule
This rule is used to control actions according to the state of any dry contacts (for example, the dry contact
could be connected to a door contact or a fog sensor).
Rule ID
The ePowerSwitch 8XM automatically creates an ID Code to clearly identify each rule. All the ID Codes used
to identify rules start with the letter "R" followed by a number.
Rule Name
In this field, enter the name you want to give to the rule. The name can be from 1 to 32 characters long, and
can contain alphanumeric characters.
Rule Type
This field displays the type of the rule you are configuring (Dry Contact Monitoring Rule in that case).
Rules are used to control actions according to specific events. After choosing the type of the rule in the dropdown list, you will have first to configure the event and then to configure the actions to perform.
Dry contact to monitor
In this Drop-Down list, choose the Dry Contact Input you want to monitor. The ePowerSwitch 8XM uses ID
Codes to clearly identify each Input. All ID Codes used to identify Dry Contact Inputs start with the letter "I"
followed by a number, 1 for dry contact 1, 2 for dry contact 2.....4 for dry contact 4.
Action if contact...
In this Drop-Down list, choose if the action has to be executed if the contact opens or closes.
Type of action
For the Ping Monitoring Rule defined above, you can choose and configure the following actions:
33
CHAPTER 5: Configuring the ePowerSwitch 8XM
Set Power Outlet
Check this box and in the corresponding drop-down list, choose the power outlet the rule will apply to. In the
next corresponding drop-down list, select the action to execute. Each power outlet can be switched On/Off
and restarted. If you choose "restart" you will also be able to define a restart delay between 0 and 65535
seconds.
Set Group
This type of action is only possible if you already created at least one group!
Check this box and in the corresponding drop-down list, choose the power outlet group the rule will apply to.
In the next corresponding drop-down list, choose the action to perform.
Each power outlet group can be switched On/Off and restarted. If you choose "restart" you will also be able
to define a restart delay between 0 and 65535 seconds.
- If you choose 0 second for the delay, the delay will be the delay defined in the "Power Outlets Page".
- If you choose a delay different from 0, the delay will replace the delay defined in the "Power Outlets Page".
Set Dry Contact
Check this box and in the corresponding drop-down list, choose the dry contact the rule will apply to. In the
next corresponding drop-down list, choose the action to perform.
Each power dry contact can be switched On/Off and pulsed (open or close) for a specified delay. The delay
can be define between 0 and 65535 seconds.
Send Syslog Messages
Check this box if you want to send a message to a Syslog server. In the following drop-down lists, choose
the facility and the severity of the message to send.
The address of the Syslog server has to be defined in the "Log Settings Page".
Mail to
Check this box and specify an e-mails address in the corresponding field if you want to send an e-Mail to a
specific user. To send e-mails, you will need a SMTP server on the network and you will have to configure its
parameters in the "SMTP Page".
Example
You want to monitor the entrance door of your data center and in case of intrusion you want to send a message to a
Syslog server and receive an e-mail.
You need:
- the ePowerSwitch I/O extension board
- a door contact switch with an external magnetic contact
- 2-wire cable
Installation:
- Connect the ePowerSwitch I/O extension board to the SUB-D 25 connector of the ePowerSwitch 8XM using the cable
supplied with the I/O extension board
- Connect the 2 wires of the door contact to the Dry Contact Input 1 (DC1)
The door contact can be located up to 10 meters from the I/O extension board.
Event configuration:
- Click on the Settings Tab, then on the Rules Tab
- Click on Add a New Rule
- In "Type of the Rule", choose "Dry Contact Monitoring Rule"
- In "Dry Contact to monitor", choose "IO1" (if you connected the door contact on Input 1)
- In "Action", choose "open" (normally the door contact switch opens when the door is open).
Action configuration:
- Check the box "Send Syslog Message" and choose the Facility and the Severity you want to give to the Syslog
message.
- Check the box "Mail to" and specify the e-mail address the e-mail has to be sent to.
LOGOUT
Click "Logout" at the bottom of the page to exit the session without saving changes.
DISCARD CHANGES
Click "Discard Changes" at the bottom of the page to discard all the changes you have made on this page.
APPLY CHANGES
Click "Apply Changes" at the bottom of the page to save changes.
34
ePowerSwitch 8XM / 8XS
5.3.13 Power Supply Monitoring Rule
This rule can be used to monitor the status of the power suplies of each ePowerSwitch 8XM and
ePowerSwitch 8XS.
Rule ID
The ePowerSwitch 8XM automatically creates an ID Code to clearly identify each rule. All the ID Codes used
to identify rules start with the character "R" followed by a number.
Rule Name
In this field, enter the name you want to give to the rule. The name can be from 1 to 32 characters long, and
can contain alphanumeric characters.
Rule Type
In this Drop-Down list, choose Power Supply Monitoring Rule.
Rules are used to control actions according to specific events. First you will have to configure the choosen
event as follows, then you will choose the actions to execute.
Device to monitor
In this Drop-Down list, choose the device for which you want to monitor the power supply.
Each device name is preceded by the ID Code of the device (M0 for the Master, S1 for the Satellite 1, S2 for
the Satellite 2...).
A character between brackets can follow this ID Code:
- The "X" character means that the corresponding satellite is physically not connected.
- The "!" character means that the corresponding satellite is physically connected but not activated. If you
want to activate it, go to the "Settings/Power Outlets" tab.
- The " " character (blank) means that the corresponding satellite is physically connected and activated.
35
CHAPTER 5: Configuring the ePowerSwitch 8XM
Power Supply to monitor
In this Drop-Down list, choose the power supply you wish to monitor.
- If in the previous drop-down list, you choose Master unit (ID Code M0), you can choose to monitor the
power supply input A, the Power supply input B and the auxiliary power supply input located on the front
panel of the Master unit.
Power supply A is used for the power outlets 1 to 4 and of course to supply the Webserver.
Power supply B is used for the power outlets 5 to 8 and of course to supply the Webserver.
Auxiliary Power Supply is used only for the Web server.
- If in previous drop-down list, you choose a Satellite unit (ID Code S1 to S16), you can choose to monitor
the power supply input A and the Power supply input B.
Power supply A is used for the power outlets 1 to 4 and of course to supply the electronic circuits of the
Satellite.
- Power supply B is used for the power outlets 5 to 8 and of course to supply the electronic circuits of the
Satellite.
Action if power failure or power back
In this Drop-Down list, choose if the action has to be executed on power-up or power-off.
Set Power Outlet
Check this box and in the corresponding drop-down list, choose the power outlet the rule will apply to. In the
next corresponding drop-down list, choose the action to execute. Each power outlet can be switched On/Off
and restarted. If you choose "restart" you will also be able to define a restart delay between 0 and 65535
seconds.
Set Group
!!! This type of action is only possible if you already created at least one group.
Check this box and in the corresponding drop-down list, choose the power outlet group the rule will apply to.
In the next corresponding drop-down list, choose the action to execute.
Each power outlet group can be switched On/Off and restarted. If you choose "restart" you will also be able
to define a restart delay between 0 and 65535 seconds.
- If you choose 0 second for the delay, the delay will be the delay setted in the "Power Outlets Page".
- If you choose a delay different from 0, the delay will replace the delay setted in the "Power Outlets Page".
Set Dry Contact
Check this box and in the corresponding drop-down list, choose the dry contact the rule will apply to. In the
next corresponding drop-down list, choose the action to execute.
Each power dry contact can be switched On/Off and pulsed (open or close) for a specified delay. The delay
can be define between 0 and 65535 seconds.
Send Syslog Messages
Check this box if you want to send a message to a Syslog server. In the following drop-down lists, choose
the facility and the severity of the message to send.
The address of the Syslog server has to be defined in the "Log Settings Page".
Mail to
Check this box and specify an e-mails address in the corresponding field if you want to send an e-Mail to a
specific user. To send e-mails, you will need a SMTP server on the network and you will have to configure its
parameters in the "SMTP Page".
LOGOUT
Click "Logout" at the bottom of the page to exit the session without saving changes.
DISCARD CHANGES
Click "Discard Changes" at the bottom of the page to discard all the changes you have made on this page.
APPLY CHANGES
Click "Apply Changes" at the bottom of the page to save changes.
36
ePowerSwitch 8XM / 8XS
5.3.14 Schedule Rule
This rule can be used to execute some actions according to a defined time table.
Rule ID
The ePowerSwitch 8XM automatically creates an ID Code to clearly identify each rule. All the ID Codes used
to identify rules start with the character "R" followed by a number.
Rule Name
In this field, enter the name you want to give to the rule. The name can be from 1 to 32 characters long, and
can contain alphanumeric characters.
Rule Type
In this Drop-Down list, choose Power Schedule Rule.
Rules are used to control actions according to a specific event. First you will have to configure the chosen
event as follows, then you will choose the actions to perform.
Schedule Action
Here you can define the time when the rule has to be executed.
In the Drop-Down lists, choose the time and below, check one or more day boxes.
Set Power Outlet
Check this box and in the corresponding drop-down list, choose the power outlet the rule will apply to. In the
next corresponding drop-down list, choose the action to perform. Each power outlet can be switched On/Off
and restarted. If you choose "restart" you will also be able to define a restart delay between 0 and 65535
seconds.
Set Group
!!! This type of action is only possible if you already created at least one group.
Check this box and in the corresponding drop-down list, choose the power outlet group the rule will apply to.
In the next corresponding drop-down list, choose the action to perform.
Each power outlet group can be switched On/ Off and restarted. If you choose "restart" you will also be able
to define a restart delay betweeen 0 and 65535 seconds.
- If you choose 0 second for the delay, the delay will be the delay setted in the "Power Outlets Page".
- If you choose a delay different from 0, the delay will replace the delay setted in the "Power Outlets
Page".
37
CHAPTER 5: Configuring the ePowerSwitch 8XM
Set Dry Contact
Check this box and in the corresponding drop-down list, choose the dry contact the rule will apply to. In the
next corresponding drop-down list, choose the action to perform.
Each power dry contact can be switched On/Off and pulsed (open or close) for a specified delay. The delay
can be define between 0 and to 65535 seconds.
Send Syslog Messages
Check this box if you want to send a message to a Syslog server. In the following drop-down lists, choose
the facility and the severity of the message to send.
The address of the Syslog server has to be defined in the "Log Settings Page".
Mail to
Check this box and specify an e-mails address in the corresponding field if you want to send an E-Mail to a
specific user. To send e-mails, you will need a SMTP server on the network and you will have to configure its
parameters in the "SMTP Page".
LOGOUT
Click "Logout" at the bottom of the page to exit the session without saving changes.
DISCARD CHANGES
Click "Discard Changes" at the bottom of the page to discard all the changes you have made on this page.
APPLY CHANGES
Click "Apply Changes" at the bottom of the page to save changes.
38
ePowerSwitch 8XM / 8XS
5.3.15 Environment Rule
This rule can be used to monitor a temperature or a humidity value and perform actions when the predefined
value is exceeded.
Rule ID
The ePowerSwitch 8XM automatically creates an ID Code to clearly identify each rule. All the ID Codes used
to identify rules start with the character "R" followed by a number.
Rule Name
In this field, enter the name you want to give to the rule. The name can be from 1 to 32 characters long, and
can contain alphanumeric characters.
Rule Type
In this Drop-Down list, choose Environment Rule.
Rules are used to control actions according to a specific event. First you will have to configure the choosen
event as follows, then you will choose the actions to perform.
Sensor to monitor
Choose in this Drop-Down list the sensor you want to monitor.
The ePowerSwitch 8XM supports up to 4 sensors and each sensor name, which can be defined by the
administrator (go to Settings/Sensors Tab), is preceded by the ID Code of the sensor. All ID Codes used to
identify temperarture and temperature/humidity sensors start with the character "T" followed by a number.
This ID Code can be followed by a character between brackets:
- The "X" character means that the corresponding sensor is physically not connected.
- The "!" character means that the corresponding sensor is physically connected but not activated. If you
want to activate it, go to the "Settings/Power Outlets" tab.
- The " " character (blank) means that the corresponding sensor is physically connected and activated.
Sensor type to monitor
According to the sensor model you use, choose temperature or humidity in this Drop-Down list. Two sensor
models are available (see the label on the back of your sensor box): the first one uses a temperature sensor
and the second one a temperature and humidity sensor.
39
CHAPTER 5: Configuring the ePowerSwitch 8XM
Action Condition
The options "higher than" and "lower than" enables you to define when the rule has to be executed.
- Choose "higher than" if you want to execute the rule if the environment value exceeds the value you
defined in the field on the right of "higher than".
- Choose "lower than" if you want to execute the rule if the environment value is below the value you defined
in the field on the right of "lower than".
For temperature, you can define values between xx° and yy °C
For relative humidity, you can define values between xx RH and yy RH
Set Power Outlet
Check this box and in the corresponding drop-down list, choose the power outlet the rule will apply to. In the
next corresponding drop-down list, choose the action to execute. Each power outlet can be switched On/Off
and restarted. If you choose "restart" you will also be able to define a restart delay between 0 and 65535
seconds.
Set Group
!!! This type of action is only possible if you already created at least one group.
Check this box and in the corresponding drop-down list, choose the power outlet group the rule will apply to.
In the next corresponding drop-down list, choose the action to perform.
Each power outlet group can be switched On/Off and restarted. If you choose "restart" you will also be able
to define a restart delay between 0 and 65535 seconds.
- If you choose 0 second for the delay, the delay will be the delay defined in the "Power Outlets Page".
- If you choose a delay different from 0, the delay will replace the delay defined in the "Power Outlets Page".
Set Dry Contact
Check this box and in the corresponding drop-down list, choose the dry contact the rule will apply to. In the
next corresponding drop-down list, choose the action to execute.
Each power dry contact can be switched On/Off and pulsed (open or close) for a specified delay. The delay
can be define between 0 and 65535 seconds.
Send Syslog Messages
Check this box if you want to send a message to a Syslog server. In the following drop-down lists, choose
the facility and the severity of the message to send.
The address of the Syslog server has to be defined in the "Log Settings Page".
Mail to
Check this box and specify an e-mails address in the corresponding field if you want to send an e-Mail to a
specific user. To send e-mails, you will need a SMTP server on the network and you will have to configure its
parameters in the "SMTP Page".
LOGOUT
Click "Logout" at the bottom of the page to exit the session without saving changes.
DISCARD CHANGES
Click "Discard Changes" at the bottom of the page to discard all the changes you have made on this page.
APPLY CHANGES
Click "Apply Changes" at the bottom of the page to save changes.
40
ePowerSwitch 8XM / 8XS
5.3.16 Misc / Peripherals page
This page displays the ID, Type and Name of all detected peripherals.
If you want to know the actual firmware version of the connected peripherals, click on the corresponding
"Info" button. For the ePowerSwitch 8XM and 8XS you will then also have access to the switching operations
counters of each power outlet. This counters can be reset by clicking the "Clear All Counters" button on the
bottom of the page.
41
CHAPTER 5: Configuring the ePowerSwitch 8XM
5.3.17 Misc / Log page
This page allows you to configure the logs. The Log file is used by the system to record actions, warnings,
errors and problems. It is often quite useful to discover the causes of tricky problems. The messages
recorded in the log file and sent as copy to a Syslog server are classified into 8 severity levels (Emergency,
Alert, Critical, Error, Warning, Notice, Informational and Debug).
42
ePowerSwitch 8XM / 8XS
5.3.18 Misc / Log Settings Page
ePowerSwitch 8XM can output Syslog messages and/or send selected logs to a specific e-mail address. The
logs are often quite useful for discovering the causes of tricky problems.
For the logs to be sent to a specific e-mail address, the administrator can choose the severity of the
messages to be sent.
Syslog Server Address
If you want to enable the ePowerSwitch 8XM to send messages to a Syslog Server, check the box "Syslog
Server Address" and enter the address of the Syslog Server you wish to use.
You can enter either the hostname or the IP address of a Syslog server.
ePowerSwitch 8XM uses the usual UDP Port 514 to output Syslog messages.
Example: syslog.ePowerSwitch.com or 192.168.1.252
E-Mail Address
If you want to enable the ePowerSwitch 8XM to send e-mails, check the box "e-mail address" and specify the
destination e-mail address to be used.
Type of messages to sendSeverity of the messages to be sent
Specify in this field the severity of the messages you want to send to the specified e-mail address. The
messages are classified in 8 severity Levels (see Syslog Messages: Severity Level Definition).
LOGOUT
Click "Logout" at the bottom of the page to exit the session without saving changes.
DISCARD CHANGES
Click "Discard Changes" at the bottom of the page to discard all the changes you have made on this page.
APPLY CHANGES
Click "Apply Changes" at the bottom of the page to save changes.
43
CHAPTER 6: Controlling the Power Outlets of the Master and the Satellites
6. Controlling the Power Outlets of the Master and
Satellites
1. Start your Web browser and type the IP address of your ePowerSwitch 8XM.
The browser displays the authentication dialog box.
2. Enter a user name and its corresponding password.
If you log in as system administrator, you will be able to:
- control individually all the power outlets and all the power outlets groups of the ePowerSwitch
Master,
- control all the power outlets and all the power outlet groups of the connected ePowerSwitch
satellites,
- display the values of all the connected temperature and humidity sensors,
- display the connection status of the I/O extension module and the status of the eight dry contact
inputs.
If you log in as a user (ePowerSwitch 518 MA handles up to 255 accounts), you will be able to:
- control individually all the power outlets and all the power outlet groups for which you have the
rights,
- display the values of all the connected temperature and humidity sensors for which you have the
rights
The ON button allows you to switch to ON the corresponding Power Outlet or group of Power Outlets.
The OFF button allows you to switch to OFF the corresponding Power Outlet or group of Power Outlets.
The Restart button allows you to switch OFF the corresponding Power Outlet or group of Power
Outlets.The Power Outlet(s) will then be automatically switched ON after the delay defined by the
administrator during the configuration (default value is 10 sec).
44
ePowerSwitch 8XM / 8XS
7. Installation the ePowerSwitch 8XS
Remark:
Make sure that all the ePowerSwitch devices are powered off.
Connection Instructions
1. Connect the supplied RJ11 link-up cable to one of the x Bus connector of the ePowerSwitch 8XM and to
one of the xBus connector of the ePowerSwitch 8XS.
To cascade several Satellites, link the second xBus connector of a Satellite with one of the x Bus
connector of the next Satellite.
Slct
x Bus
RS232
x Bus
RS232
Power
A B 1 2 3 4 5 6 7 8
Term
Slct
Power
A B 1 2 3 4 5 6 7 8
10/100
RS232
x Bus
Term
A 1 2 3 4
Term
I/O
S B 5 6 7 8 1 2 3 4
Link
DC
100
DRY CONTACTS
MAX 24VDC - 20mA
12VDC AUX
POWER SUPPLY
2. Allocate an address to each Satellite by positioning the address selection DIP-switches marked "Slct" on
the front panel according to the following table.
Remarks
− Unplug the power cords of the ePowerSwitch 8XS before changing its DIP switches.
− Do NOT use the same address for two different Satellites.
Satellite
Address
DIP-Switch
1
DIP-Switch
2
DIP-Switch
3
DIP-Switch
4
1
2
3
4
5
6
7
8
9
10
11
12
13
14
15
16
Off
[ON]
Off
[ON]
Off
[ON]
Off
[ON]
Off
[ON]
Off
[ON]
Off
[ON]
Off
[ON]
Off
Off
[ON]
[ON]
Off
Off
[ON]
[ON]
Off
Off
[ON]
[ON]
Off
Off
[ON]
[ON]
Off
Off
Off
Off
[ON]
[ON]
[ON]
[ON]
Off
Off
Off
Off
[ON]
[ON]
[ON]
[ON]
Off
Off
Off
Off
Off
Off
Off
Off
[ON]
[ON]
[ON]
[ON]
[ON]
[ON]
[ON]
[ON]
Position Off = switch upwards,
Position On = switch downwards
DIP-Switch 1 is located on the left
side
3. Plug the 2 power cables into 2 grounded sockets. The A and B LEDs light on to confirm that power is on.
45
CHAPTER 8: Controlling the Power Outlets of the Satellites using a Terminal Connection
8. Controlling the Power Outlets of the Satellites using
a Terminal Connection
The power outlets of the ePowerSwitch 8XS can be individually controlled and the status of each power
outlet can be read out using a simple ASCII protocol through a serial connection. The connection can be
done either using the RS232 or the RS485 port of the ePowerSwitch 8XS.
8.1 Using the RS232 port
(SubD-9F connector marked RS232 on the front panel).
In this case, use the supplied RS232 serial cable to connect the ePowerSwitch 8XS to an available serial
port of your PC.
8.2 Using the RS485 port
(RJ11 connector marked xBus on the front panel).
In this case, you have to make a special serial cable (see pinout on Annexe).
8.3 Commands
Run a terminal program such as Windows HyperTerminal or the MicroTerminal program on the CD (folder
miscellaneous) and configure the appropriate serial port with the following settings:
9.600 bauds, 8 bits, no parity, 1 stop bit and no flow control.
Note:
If you use the MicroTerminal program on the CD (folder miscellaneous) you only have to choose the used
serial port, this program is already configured at 9600,n,8,1.
Summary of the commands:
Controlling of the Power Outlet(s)
Reading out the Status of the Power Outlet(s)
§ 8.3.1
§ 8.3.2
Setting the Power Up Delays
Reading out of the Power Up Delays
§ 8.3.3
§ 8.3.4
Setting the Restart Delays
Reading out the Restart Delays
§ 8.3.5
§ 8.3.6
Setting the Power Up Default Status
Reading out the Power Up Default Status
§ 8.3.7
§ 8.3.8
Reading out the Switching Counters of the Relays
Resetting the Switching Counters of the Relays
§ 8.3.9
§ 8.3.10
Restoring to Factory Settings
§ 8.3.11
46
ePowerSwitch 8XM / 8XS
8.3.1 Controlling of the Power Outlet(s)
This command enables to control individually each Power Outlet or all Power Outlets of the same
ePowerSwitch 8XS in one command.
Command to be sent to the ePowerSwitch 8XS:
Pxy=z[CR]
Pxy=z,t1[CR]
Pxy=z,t1,t2[CR]
Reply from the ePowerSwitch 8XS:
Pxy=z[CR]
Pxy=z,t1[CR]
Pxy=z,t1,t2[CR]
Explanations:
Parameter
Value
x
address of the ePowerSwitch
1 to 16
specifies the address of the ePowerSwitch 8XS
y
number of the Power Outlet
z
command
t1
delay to execute the command
0
1 to 8
0
1
r
t
1 to 255
means all the Power Outlets
specify the number of the Power Outlet
set Power Outlet to OFF
set Power Outlet to ON
RESTART the Power Outlet(s)
TOGGLE the Power Outlet(s)
set the delay (in sec) to execute the command
t2
restart delay
1 to 255
set the restart delay (in sec)
If t2 is not specified, the used Restart Delay is the
default value of the Restart Delay of the corresponding
Power Outlet (see § 8.3.6)
Examples:
P11=1
P11=0
P35=r
P30=1
P168=t
P10=r,10,20
Function/Remark
Switch Power Outlet #1 of ePowerSwitch #1 to On
Switch Power Outlet #1 of ePowerSwitch #1 to Off
Restart Power Outlet #5 of ePowerSwitch #3
Switch all Power Outlets of ePowerSwitch #3 to On
Toggle Power Outlet #8 of ePowerSwitch #16
Execute the Restart Command (switch all Power Outlets of ePowerSwitch #1 to off)
after a delay of 10 sec., then switch all Power Outlets to On after a delay of 20 sec.
Remarks:
The ePowerSwitch 8XS accepts lower case and upper case commands.
The ePowerSwitch 8XS sends its reply only after having received a valid command terminated by the
character [CR].
47
CHAPTER 8: Controlling the Power Outlets of the Satellites using a Terminal Connection
8.3.2 Reading out the Power Outlet Status
This command enables to read out the status of each Power Outlet.
Command to be sent to the ePowerSwitch 8XS:
Rxy[CR]
Reply from the ePowerSwitch 8XS:
Rxy=z[CR]
Explanations:
Parameter
Value
Function/Remark
x
address of the ePowerSwitch
1 to 16
specifies the address of the ePowerSwitch 8XS
y
number of the Power Outlet
1 to 8
specify the number of the Power Outlet
z
status
Examples:
R11[CR]
R168[CR]
0
1
status of the corresponding Power Outlet is OFF
status of the corresponding Power Outlet is ON
Read Status of the Power Outlets #1 of ePowerSwitch #1
Read Status of the Power Outlets #8 of ePowerSwitch #16
Remarks:
The ePowerSwitch 8XS accepts lower case and upper case commands.
The ePowerSwitch 8XS sends its reply only after having received a valid command terminated by the
character [CR].
48
ePowerSwitch 8XM / 8XS
8.3.3 Setting of the Power Up Delays
This command enables to set the Power Up Delay individually for each Power Outlet. The Delay value can
be between 1 and 255 seconds (4 min 15 sec).
Command to be sent to the ePowerSwitch 8XS:
TUxy=z[CR]
Reply from the ePowerSwitch 8XS:
TUxy=z[CR]
Explanations:
Parameter
Value
Function/Remark
x
address of the ePowerSwitch
1 to 16
specifies the number of the ePowerSwitch 8XS
y
number of the Power Outlet
1 to 8
specifies the number of the Power Outlet
z
timer value
Examples:
TU12=2
T163=10
1 to 255
set the Power Up Delay (in sec)
Set Power Up Delay of the Power Outlet #2 of ePowerSwitch #1 to 2 sec
Set Power Up Delay of the Power Outlet #3 of ePowerSwitch #16 to 10 sec
Remarks:
The ePowerSwitch 8XS accepts lower case and upper case commands.
The ePowerSwitch 8XS sends its reply only after having received a valid command terminated by the
character [CR].
8.3.4 Reading out of the Power Up Delay(s)
This command enables to read out the Power Up Delay individually for each Power Outlet.
Command to be sent to the ePowerSwitch 8XS:
TUxy[CR]
Reply from the ePowerSwitch 8XS:
TUxy=z[CR]
Explanations:
Parameter
Value
Function/Remark
x
address of the ePowerSwitch
1 to 16
specifies the number of the ePowerSwitch 8XS
y
number of the Power Outlet
1 to 8
specifies the number of the Power Outlet
z
timer value
1 to 255
shows the Power Up Delay (in sec)
Remarks:
The ePowerSwitch 8XS accepts lower case and upper case commands.
The ePowerSwitch 8XS sends its reply only after having received a valid command terminated by the
character [CR].
49
CHAPTER 8: Controlling the Power Outlets of the Satellites using a Terminal Connection
8.3.5 Setting the Restart Delays
This command enables to set the Restart Delay individually for each Power Outlet. The Delay value can be
between 1 and 255 seconds (4 min 15 sec).
Command to be sent to the ePowerSwitch 8XS:
TRxy=z[CR]
Reply from the ePowerSwitch 8XS:
TRxy=z[CR]
Explanations:
Parameter
Value
Function/Remark
x
address of the ePowerSwitch
1 to 16
specifies the address of the ePowerSwitch 8XS
y
number of the Power Outlet
1 to 8
specifies the number of the Power Outlet
z
timer value
Examples:
TR31=17
1 to 255
set the Restart Delay (in sec)
Set Restart Delay of the Power Outlet #1 of ePowerSwitch #3 to 17 sec
Remarks:
The ePowerSwitch 8XS accepts lower case and upper case commands.
The ePowerSwitch 8XS sends its reply only after having received a valid command terminated by the
character [CR].
8.3.6 Reading out of the Restart Delays
This command enables to read out the Restart Delay individually for each Power Outlet.
Command to be sent to the ePowerSwitch 8XS:
TRxy[CR]
Reply from the ePowerSwitch 8XS:
TRxy=z[CR]
Explanations:
Parameter
Value
Function/Remark
x
address of the ePowerSwitch
1 to 16
specifies the address of the ePowerSwitch 8XS
y
number of the Power Outlet
1 to 8
specifies the number of the Power Outlet
z
timer value
1 to 255
shows the Restart Delay (in sec)
Remarks:
The ePowerSwitch 8XS accepts lower case and upper case commands.
The ePowerSwitch 8XS sends its reply only after having received a valid command terminated by the
character [CR].
50
ePowerSwitch 8XM / 8XS
8.3.7 Setting the Power Up Default Status
This command enables to set the Power Up Default Status individually for each Power Outlet. Settings can
be "always On", "Always Off" or "Last memorized Status" before power failure.
Command to be sent to the ePowerSwitch 8XS:
DPxy=z[CR]
Reply from the ePowerSwitch 8XS:
DPxy=z[CR]
Explanations:
Parameter
x
y
z
address of the ePowerSwitch
number of the Power Outlet
default status after Power up
Examples:
DP37=LAST
DP165=OFF
Value
1 to 16
1 to 8
ON
OFF
LAST
Function/Remark
specifies the number of the ePowerSwitch 8XS
specifies the number of the Power Outlet
set Power Up Default Status of the Power Outlet to ON
set Power Up Default Status of the Power Outlet to OFF
set Power Up Default Status of the Power Outlet to last
memorized status
Set Power Up Default Status of the Power Outlet #7 of ePowerSwitch #3 to last
memorized status
Set Power Up Default Status of the Power Outlet #5 of ePowerSwitch #16 to OFF
Remarks:
The ePowerSwitch 8XS accepts lower case and upper case commands.
The ePowerSwitch 8XS sends its reply only after having received a valid command terminated by the
character [CR].
8.3.8 Reading out the Power Up Default Status
This command enables to read out the Power Up Default Status individually for each Power Outlet.
Command to be sent to the ePowerSwitch 8XS:
DPxy[CR]
Reply from the ePowerSwitch 8XS:
DPxy=z[CR]
Explanations:
Parameter
x
y
z
address of the ePowerSwitch
number of the Power Outlet
default status after Power up
Value
1 to 16
1 to 8
ON
OFF
LAST
Function/Remark
specifies the address of the ePowerSwitch 8XS
specifies the number of the Power Outlet
power up default status of the power outlet is ON
power up default status of the power outlet is OFF
power up default status of the power outlet is last memorized
status
Remarks:
The ePowerSwitch 8XS accepts lower case and upper case commands.
The ePowerSwitch 8XS sends its reply only after having received a valid command terminated by the
character [CR].
51
CHAPTER 8: Controlling the Power Outlets of the Satellites using a Terminal Connection
8.3.9 Reading out the Switching Counter Values of the Relays
This command enables to read out the number of power up cycles of the ePowerSwitch 8XS and the number
of switching cycles (Off to On) of each power outlet.
Command to be sent to the ePowerSwitch 8XS:
Cxy[CR]
Reply from the ePowerSwitch 8XS:
Cxy=z[CR]
Explanations:
Parameter
x
y
address of the ePowerSwitch
counter
Value
Function/Remark
1 to 16
0
specifies the address of the ePowerSwitch 8XS
reads the number of power up cycles of the ePowerSwitch
8XS
specifies the number of the Power Outlet switching
counter
shows the number of power up or switching cycles of the
selected Power Outlet
1 to 8
z
counter value
Remarks:
The ePowerSwitch 8XS accepts lower case and upper case commands.
The ePowerSwitch 8XS sends its reply only after having received a valid command terminated by the
character [CR].
52
ePowerSwitch 8XM / 8XS
8.3.10 Resetting the Switching Counter Values of the Relays
This command enables to reset the switching counter values of the Relays.
Command to be sent to the ePowerSwitch 8XS:
/RC[CR]
Reply from the ePowerSwitch 8XS:
No reply
Remarks:
The ePowerSwitch 8XS accepts lower case and upper case commands.
The ePowerSwitch 8XS sends its reply only after having received a valid command terminated by the
character [CR].
8.3.11 Restoring to Factory Settings
This command enables to restore all factory settings.
Command to be sent to the ePowerSwitch 8XS:
/FS[CR]
Reply from the ePowerSwitch 8XS:
No reply
Remarks:
The ePowerSwitch 8XS accepts lower case and upper case commands.
The ePowerSwitch 8XS sends its reply only after having received a valid command terminated by the
character [CR].
53
CHAPTER 9: Accessories
9. Accessories
9.1 Temperature sensor
9.2 Temperature and Humidity sensor
The figure below shows an example how to connect 2 sensors.
Humidity &
Temperature
Sensors
Humidity &
Temperature
Sensors
Slct
x Bus
RS232
x Bus
RS232
Power
A B 1 2 3 4 5 6 7 8
Term
Slct
Power
A B 1 2 3 4 5 6 7 8
10/100
A 1 2 3 4
x Bus
Term
I/O
S B 5 6 7 8 1 2 3 4
Link
54
RS232
Term
100
DC
DRY CONTACTS
MAX 24VDC - 20mA
12VDC AUX
POWER SUPPLY
ePowerSwitch 8XM / 8XS
9.3 I/O extension module
10/100
A 1 2 3 4
RS232
x Bus
8
1
8
7
COM
7
COM
COM
6
5
COM
5
COM
COM
COM
6
4
4
DC INPUT
COM
3
COM
3
COM
2
COM
COM
2
1
COM
1
DRY CONTACTS
MAX 24VDC - 20mA
COM
COM
COM
INPUT
COM-GND
1
2
2
3
DC OUTPUT
DC INPUT
Term
3
4
4
I/O
S B 5 6 7 8 1 2 3 4
Link
100
DC
DRY CONTACTS
MAX 24VDC - 20mA
12VDC AUX
POWER SUPPLY
8
7
COM
COM
DC INPUT
1
8
7
COM
COM
6
5
COM
COM
6
COM
5
4
DC INPUT
COM
3
4
2
COM
COM
3
2
COM
DRY CONTACTS
MAX 24VDC - 20mA
COM
1
COM
1
COM
COM
COM
INPUT
COM-GND
1
2
3
2
3
DC OUTPUT
4
4
9.4 Horizontal cable manager
The horizontal cable manager allows the secure fastening of the power cables and consist of two angle
brackets and a secure cable support bar on the rear of the angle brackets.
55
Annexes
Annexes
Ping and Scan methods
ePowerSwitch 8XM has two methods to check whether an IP equipment (PC, server, router, Webcam...) is
still alive:
Address Pinging
The first method uses the well-known Ping command whereby a request is sent to a specific IP address. The
Ping command, which is an echo request, enables you to determine through an ICMP protocol (Internet
Control Message Protocol) if an IP device is available on the network. If the system reacts to this request,
ePowerSwitch 8XM knows that the TCP/IP connection is established. If the system does not react to one or
several requests, ePowerSwitch 8XM can automatically switch off and after a specified delay switch it again
on (Reboot function).
Port Scanning
The second method uses the Port Scan command to test a specific TCP/IP port. In other words, this
command allows you to find out if a specific protocol is available on a server (for example HTTP, FTP,
Telnet, SMTP, and POP...). ePowerSwitch 8XM simply tries to connect to a specific server port. If the
connection is possible, ePowerSwitch 8XM knows that a server program is running there. If the connection is
not possible, ePowerSwitch 8XM can automatically switch off and after a specified delay switch again on the
IP equipment (Reboot).
Remarks:
- The Supervision function works only if the ePowerSwitch 8XM is disconnected from the LAN.
- The Ping and Scan functions can be used separately or together.
- The network route between ePowerSwitch 8XM and the IP device you wish to supervise should be as
direct as possible, so do not use unnecessary routers and complex wiring between them. A problem on a
router or the wiring could reboot the IP device to supervise.
- Execute several Pings and/or Scans before running the Reboot function. It could be possible that the IP
device doesn't respond although is still working.
- Choose a realistic supervision cycle. One second is possible, however it’s not necessary to overload the
network with Ping and Scan requests.
Recommended values
Interval between Requests:
Number of unsuccessful Requests before Reboot:
Delay before Reboot:
Delay before restarting monitoring after Reboot:
10 sec or more
3 or more
10 sec or more
120 sec or more
Commonly used ports
TCP 25
TCP 80
UDP 123
TCP 443
UDP 514
56
This port is used to deliver e-mails over SMTP (Simple Mail Transfer Protocol).
This port is used for http connections.
The ePowerSwitch 8XM ONLY uses Secure Port 443 (HTTPS).
Ensure that your Firewall / Router is configured to allow HTTPS to pass through.
This port is used to allow time synchronization over NTP (Network Time Protocol).
This port is used to allow SSL support (Secure Socket Layer).
This port is used to deliver Syslog messages.
ePowerSwitch 8XM / 8XS
SysLog Messages: Severity Level Definitions
The Emergency level is the most severe type of message generated by ePowerSwitch 8XM and the Debug
severity level is the least severe one.
Severity Level 0, Emergency: system is unusable
The following messages appear at severity 0:
Continuous error!
An SMTP Client could not be created
Severity Level 1, Alert: action must be taken immediately
The following messages appear at severity 1:
Settings have been reinitialized through the serial connection
ePowerSwitch 8XM does not respond
Satellite "number" does not respond.
Sensor "number" does not respond.
Failure on Power Input A of Master M0
Failure on Power Input B of Master M0
Failure on auxiliary Power Input of Master M0
Failure on Power Input A of Satellite (number)
Failure on Power Input B of Satellite (number)
I/O Extension Module has been disconnected
A Mail could not be sent "subject" to "name"
SMTP Client not available: a Mail could not be sent "subject" to "name"
Severity Level 2, Critical: critical conditions
The following messages appear at severity 2:
"file" config corrupted : restoring default values
Severity Level 3, Error: error conditions, Necessary action is required.
ePowerSwitch 8XM doesn't generate Severity Level 3.
Severity Level 4, Warning: warning conditions, a minor condition has occurred.
The following messages appear at severity 4:
Settings have been changed through the serial connection
Settings have been changed through the network by User "name"
Severity Level 5, Notice: normal but significant condition has occurred.
The following messages appear at severity 5:
Master M0 has been connected
Satellite (number) has been connected
Sensor (number) has been connected
SSL Key has been reinitialized through the serial connection
System has been restarted through the serial connection
Power Supply A of Master restored
Power Supply B of Master restored
Auxiliary Power Supply of Master restored
Power Supply A of Satellite (number) restored
Power Supply B of Satellite (number) restored
I/O Extension Module has been connected
Rule (number) : Outlet (number) of Master has been switched ON
Rule (number) : Group (number) has been switched ON
Rule (number) : Dry Contact Output (number) has been opened
Rule (number) : Mail "subject" has been sent to "name"
57
Annexes
Severity Level 6, Informational: informational messages
The following messages appear at severity 6:
System has been started
Date & Time have been synchronized to a Network Time Server
User "name" : Outlet (number) of Master M0 has been switched ON
User "name" : Group (number) has been switched ON
Dry Contact Input (number) has been open
Dry Contact Input (number) has been closed
Dry Contact Output (number) has been open
Dry Contact Output (number) has been closed
Mail "subject" has been sent to "name"
Session opened by user "name"
Severity Level 7, Debug: debug-level messages
ePowerSwitch 8XM doesn't generate Severity Level 7.
Pinout of the RJ11 6/6 x-Bus connector
123456
RJ11 6/6 FRONT VIEW
Pin
Signal
1
2
3
4
5
6
+Vout (+7V / 100mA)
GND
RS485 – B
RS485 – A
GND
+Vout (+7V / 100mA)
The power supply delivers a voltage of 7V +-10% for a load of 100mA. The output is overload protected and
protected against polarity inversion. The xBus connectors of both ePowerSwitch 8XM and 8XS have the
same features and pinout.
The symmetrical pinout of power output (+Vout) and GND prevents the risk of short circuits if the RJ11
connector is inverted.
58
ePowerSwitch 8XM / 8XS
Technical Data
Network standards
Network protocols
Network connection
Max. network cable length
Serial connection
SSL Technology
Nominal input voltage
Input power outlet
Output voltage
Output power outlet
Maximum total current
LEDs
Operating temperature
Operating humidity
Dimensions (LxDxH)
Weight
Approvals
IEEE 802.3, 10 / 100 BASE-T
TCP/IP, HTTP
RJ-45 connector for UTP CAT5
100 meters (not included)
RS232, SUB-D 9 female
Version 2 and 3
230 V/50Hz
IEC-320
230 V/50Hz
IEC-320
2 x 10 A
1 for Power Supply A
1 for Power Supply B
8 for the Power Outlets status
1 for System Status
4 for Dry Contacts Output Status
1 for Network traffic
1 for Network Speed 10 / 100 Mbits/s
0°C to +40°C
10% to 80%
437 x 107 x 42 mm
2 kg
CE, EN55022 & EN55024
59
Annexes
Statement of Conformity
STATEMENT OF CONFORMITY
NEOL S.A.S. declares that this equipment is in compliance with the Electromagnetic
Compatibility Directive 89/336/EEC and the Low Voltage Directive 73/23/EEC
Application of Council Directives:
89/336/EEC, 92/31/EEC,
73/23/EEC, 93/68/EEC
Standards to Which Conformity declared:
EN 60950, EN 55022, EN 55024
Manufacturer's Name and Address:
NEOL S.A.S.
4 Rue Nationale
67800 BISCHHEIM -FRANCE
Type of Equipment:
Power Control Unit
Type Designation:
ePowerSwitch 8XM Master
ePowerSwitch 8XS Satellite
Reference:
EPS 8XM
EPS 8XS
Years of Manufacture:
2005
We, the undersigned, hereby declare that the equipment specified above
conforms to the above directives.
Bischheim, 25th April 2005
Paul REYSER,
General Manager
NEOL S.A.S.
EPS-8X MasterSatellite TEXT UG EN 2005 09.doc
06/09/2005
60