1
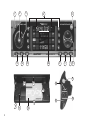
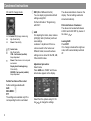
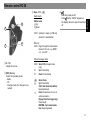
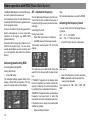
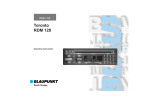
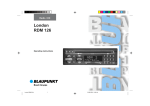
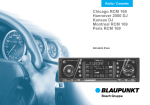
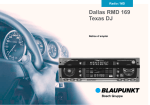
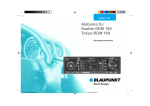
Radio / CD
München RDM 169 US
Operating instructions
2
1
3
12
13
4
5
10
11
9
8
7
6
19
14
18
2
15
21
1
3
2
17
16
20
KeyCard anti-theft protection
system ........................................... 13
Switching on the unit ............................ 13
Removing the KeyCard ........................ 13
Teaching in a second KeyCard/
replacing a KeyCard ............................. 13
Displaying the radio passport data ....... 14
Visual display for anti-theft
protection .............................................. 14
Care of the KeyCard ............................. 14
KeyCard lost/damaged ......................... 14
Teaching in the new KeyCard .............. 14
Input errors ........................................ 14
Selecting the operating mode .... 15
Enhancing display legibility ....... 15
CD mode/CD changer mode ....... 22
Inserting a CD ....................................... 22
Removing the CD ................................. 22
Activating CD mode .............................. 22
Activating changer mode ...................... 22
Selecting the display type ..................... 23
Selecting CD and track ......................... 23
Clock - Time .................................. 26
Setting the time ..................................... 26
Displaying the time ............................... 26
Correcting the time following an
interruption to the power supply ........... 26
Deactivating hours adjustment ............. 26
Equalizer setting .......................... 27
Adjustment instructions ........................ 27
Adjusting the frequency level ............ 27
Selecting a quality factor for the
bass or mid-range ............................. 28
Selecting the preset sound setting 28
Tips on adjusting the equalizer ......... 29
Programming with DSC ............... 30
Overview of the factory default settings
with DSC ............................................... 32
Technical data .............................. 32
DEUTSCH
ENGLISH
Read the following before using
the unit .................................................. 12
Traffic safety ......................................... 12
Installation ............................................. 12
Telephone mute .................................... 12
Accessories .......................................... 12
Guarantee ............................................. 12
International hotline .............................. 12
FRANÇAIS
Important ...................................... 12
ITALIANO
Activating/deactivating RDS ................. 16
AF - alternative frequency .................... 16
Selecting the frequency band ............... 16
Station tuning ........................................ 17
Paging through the transmission chains
(FM only) ............................................... 17
Changing the memory level (FM) ......... 17
Storing stations ..................................... 17
Automatically saving the strongest
station with Travelstore ........................ 18
Calling up stored stations ..................... 18
Sampling stored stations with
Preset Scan .......................................... 18
Sampling stations with Radio Scan ...... 19
Changing the sampling time (Scan) ..... 19
Changing the sensitivity of the
seek run ................................................ 19
Toggling between stereo and mono
(FM) ...................................................... 19
Automatic bandwidth switching
(SHARX) ............................................... 19
PTY – Program Type ............................ 20
Program type ........................................ 20
NEDERLANDS
Remote control RC 08 ................. 11
Repeating a track/CD ........................... 23
TPM (Track Program Memory) ............. 23
MIX ........................................................ 24
Selecting MIX functions .................... 24
SCAN .................................................... 25
Assigning names to CDs ...................... 25
Deleting the CD name/TPM store using
DSC-UPDATE ...................................... 25
SVENSKA
Radio operation with RDS ........... 16
Glossary of technical terms ....... 33
Installation and
connection instructions ............ 135
3
PORTUGUÊS
Condensed instructions ................ 4
ESPAÑOL
Contents
Condensed instructions
2
1 Disengaging the fold-down control
panel
Disengage the control panel to insert
or remove the KeyCard and CD.
To disengage the control panel, press
knob 1: the control panel folds down.
The control panel cannot be removed,
nor should it be used a shelf.
To re-engage the control panel, push it
back into its original position (Arrow 3).
1
3
For safety reasons, the control
panel must always be engaged
whilst the vehicle is moving.
When leaving the vehicle, open the
control panel and remove the KeyCard in order to prevent theft.
4
2 ON
Switching on the unit
Insert the KeyCard and press ON briefly.
The unit is switched on in the last operating mode selected and with the
previously selected volume.
Switching off the unit
Press ON for approx. 1 second.
The display can be adjusted for the desired viewing angle in order to improve
legibility. Refer to “Improving the legibility of the display” if necessary.
Switching the sound on/off
Press ON briefly. “MUTE” appears on
the display when the sound is switched
off.
To switch the sound back on again,
turn the volume knob 3.
Switching the unit on/off using the
KeyCard
Insert/remove the KeyCard to switch
the unit on and off.
Refer also to the description of the
KeyCard anti-theft system @ in the
condensed instructions.
Switching on/off by the ignition
The unit may be connected up such
that it is switched on and off by the vehicle ignition.
When the ignition is switched off, a
double beep reminds you to remove
the KeyCard before leaving the vehicle.
Switching on whilst the ignition is
off
With the ignition off (and the KeyCard
inserted), proceed as follows to operate the unit:
Press ON when the double beep
sounds.
The unit is switched on.
The unit switches itself off automatically after an hour’s use in order to prevent the vehicle battery from running
down.
Menu level 1
Station keys and memory levels
Menu level 2
Adjusting radio functions
In radio mode, use TU to toggle between menu level 1 and menu level 2.
The system automatically returns to
menu level 1 when no key has been
pressed for eight seconds.
BND
Select the frequency band and memory level (FM I, FM II, FM T, AM, AMT).
NEDERLANDS
ITALIANO
ST1 - ST6
ST1- ST6 can be used on this menu
level to store radio stations on the FM
levels I, II and “T”.
You can store six stations each on the
AM and AMT bands.
Store station – press one of the station buttons ST1- ST6 until the station
can be heard again (beep).
Call up station – select the frequency
band. On FM, select the memory level
using NEXT and press the appropriate
station key briefly.
SVENSKA
Radio mode
NEXT - FM
Switch between the memory levels
FM I, FM II, FM T.
NEXT - AM, AMT
Switch between the AM and AMT frequency bands.
SCA - Scan
a) PTY is deactivated (logo is lit normally, not in reverse video)
Press SCA (Radio Scan) briefly –
“SCAN” appears in the display alternately with the code of the sampled
station. All stations on the frequency
band which can be received are sampled briefly.
ESPAÑOL
4 Softkeys/display
Softkey = key with variable function.
The functions shown in the display can
be selected.
NEXT - FM
Switch between the memory levels
FM I, FM II, FM T.
NEXT - AM, AMT
Switch between the AM and AMT frequency bands.
PORTUGUÊS
The selected value is shown on the
display. When switched on, the unit
plays at the preselected volume (ON
VOL).
ON VOL can be changed (refer to
“Programming with DSC – ON VOL”).
FRANÇAIS
ENGLISH
3 Adjusting the volume
Turn the knob to adjust the volume.
DEUTSCH
Condensed instructions
5
Condensed instructions
Press SCA for approx. 1 second (Preset Scan) –
a beep sounds, “SCAN” appears in the
display alternately with the code
of the sampled station.
The stations stored on the station keys
and which can be received are sampled briefly.
Stopping Radio Scan/Preset Scan:
Press SCA or the seek rocker again.
b) PTY is activated (logo appears in
reverse video on the display)
for a frequency with better reception
for the same station.
AF on/off: Select menu level 2 using
TU and hold AF down.
AF
(RDS mode/Alternative Frequency)
RDS mode on/off: Select menu level 2
using TU and press AF briefly.
If “AF” appears in reverse video in the
display, the radio automatically looks
6
CD and changer mode
EXIT
Press the key briefly to terminate or
abort the adjustment process.
ENT (Enter)
Press briefly to accept/save the adjustments.
TS (Travelstore)
Press TS to switch from any frequency
band to FMT or AMT. The six strongest stations are automatically stored.
When they have been stored, the
strongest station is selected and
played.
Press SCA –
the stations transmitting the selected
PTY program type are sampled briefly.
key (hold down for approx. 2 seconds
until the beep sounds).
PTY (Program Type)
PTY turns the station keys into program type keys.
“PTY” must first appear on the display
in reverse video (press PTY if necessary).
A program type can now be stored and
selected with each station key.
Call up PTY program types using the
rocker << >> and save with the station
MIX, SCAN, RPT (repeat) and TPM
can be selected in CD and changer
mode by means of the corresponding
softkeys.
MIX
CD tracks can be played in random order.
You can select the following functions
by pressing the MIX key:
- MIX CD = CD tracks are played in
random order.
In changer mode, CDs are selected
in numerical order, tracks are played
in random order.
- MIX MAG (changer mode only) = all
tracks in the magazine are played in
random order.
- MIX OFF = Switches off function.
Activating/deactivating the equalizer:
Press DPE until the beep sounds.
When the equalizer is activated, “EQ”
appears in the display.
Changing the equalizer settings:
Press DPE briefly. Further information
on changing the equalizer settings:
“Equalizer settings”:
ENGLISH
FRANÇAIS
/
ITALIANO
5 DPE
For activating/deactivating the equalizer and changing the equalizer settings.
If the rocker is pressed on menu level
2, menu level 1 is automatically called
up.
Station seek
Up
Down
<< / >> Up/down in steps
(on FM, only when AF and PTY are
deactivated)
FM only:
<< / >> Page through the transmission
chains when AF is activated and
PTY deactivated,
e.g.: NDR 1, 2, 3, 4, N-JOY ... .
NEDERLANDS
RPT - Repeat
CD tracks and, in changer mode, CDs,
can be repeated.
Press the RPT key to select the following functions:
- REP TRCK = Repeat track
- REP CD = Repeat CD (only in
changer mode)
- RPT OFF = Deactivate function.
Radio mode
SVENSKA
Ending Scan:
Press SCA. The last track selected
continues playing.
CLR
For clearing the TPM memory (refer to
the “Clearing the TPM memory” section).
6 Rocker
ESPAÑOL
Starting Scan:
Press SCA. The tracks are sampled
briefly in turn in ascending order. The
sampling time can be adjusted.
(Refer to “Programming with DSC –
SCANTIME”.)
TPM - Track Program Memory
For storing and playing preferred
tracks in CD and CD changer mode.
Up to 30 CDs can be managed in CD
mode and 99 CDs in changer mode
with a maximum of 40 tracks per CD.
(Refer to the “Storing tracks with TPM”
section.)
PORTUGUÊS
SCA - Scan
For sampling the tracks briefly (in CD
changer mode, the tracks of all CDs).
DEUTSCH
Condensed instructions
7
Condensed instructions
CD and CD changer mode
<< / >> Select CD (changer mode only)
>>
Up: Press briefly
<<
Down: Press briefly
/
Select track
Up: Press briefly
CUE - fast forward (audible):
Keep depressed
Down: Press twice or more in quick
succession
Replay track from beginning:
Press briefly
REVIEW - fast rewind (audible):
Keep depressed
Further functions of the rocker:
Further settings available with
AUD
8
DSC-MODE 7
PTY
The settings are available only if the
corresponding function is activated.
8
7 DSC (Direct Software Control)
You can adjust programmable default
settings using DSC.
Further information: “Programming
with DSC”.
8 AUD
For adjusting the treble, bass, balance
(left/right), fader (front/rear) and loudness settings.
Loudness = adjustment of the lowvolume sounds to the human ear.
Different treble, bass and loudness
settings can be stored for the FM, AM,
CD and AUX modes.
Adjustment procedure:
Select mode.
Press AUD once: “BASS” and the selected value appear on the display.
Select from the options using << / >>.
Use / to change the settings.
The values selected are shown on the
display. The last setting selected is
stored automatically.
Particular feature of loudness:
The values can be selected between
LOUD 6 and LOUD OFF by means of
the rocker / .
Leaving AUD:
Press EXIT.
If no change is made within eight seconds, AUD is automatically switched
off.
NDR2
FM
I, II, T
Press DIS for approx. two seconds:
Toggle display between time and frequency band (incl. memory level in the
case of FM).
PTY
AF
CD mode
EQ
DISC-IN
Press DIS briefly:
- Track number, time
- Track number, time played
- CD name, track number
lo
- Station name
- Frequency band
- Memory level I, II or Travelstore
- Program type is activated
- Alternative frequency with
RDS
- Seek sensitivity can be selected with DSC
- Equalizer is activated
- CD is inserted
ENGLISH
FRANÇAIS
ITALIANO
TRACK 13 - Track number
or
VIVALDI - CD name (CD changer mode)
or
CD 5 T 2 - CD number and track number
(CD changer mode)
MIX
- Tracks can be played in random order
SCA
- Sample tracks
RPT
- Repeat function for CD/
changer mode
TPM
- Save and play preferred
tracks
CLR
- Clear TPM memory
NEDERLANDS
: Display
SVENSKA
Press DIS briefly:
- Name of the selected station
- Currently selected frequency
- PTY code
A condition is that an RDS station can
be received with an adequate field
strength.
Press DIS briefly:
- CD number, track number, time
- CD number, track number, time
played
- CD name, track number
FM I, II, T
or
AM, AMT
or
00:20
or
12:50
ESPAÑOL
Radio mode
Changer mode
- FM memory level
- Frequency band
PORTUGUÊS
9 DIS
Selecting various display modes.
DEUTSCH
Condensed instructions
- Time (time played)
- Time
9
Condensed instructions
< CD
Switch to CD mode
= TU (TUNER)
For switching to the radio mode, for
toggling between FMI, FM II, TS (Travelstore), AM and AMT memory levels/
frequency bands.
> Slot for CD
When the CD is inserted with the label
facing upwards it is automatically
transported into the operating position.
CD play mode is selected automatically.
? Visual anti-theft protection
The following conditions must be met if
the LED is to flash as a visible antitheft protection measure:
The unit is switched off;
The control panel is open;
The KeyCard is removed;
10
The ignition is off and LED ON is selected in the DSC menu (factory default setting).
Further information: “Programming
with DSC, LED ON/OFF”.
@ KeyCard anti-theft protection system
The KeyCard must be inserted before
the unit can be operated.
Remove the KeyCard following the
procedure in reverse.
Important: read the information under
“KeyCard anti-theft protection system”.
A Eject
Hold the key for CD ejection down for
approx. 2 seconds: the CD is ejected.
KeyCard
Inserting the KeyCard
To disengage the control panel, press
key 1. The control panel folds down.
Insert the KeyCard with the contact
surface facing downwards (see diagram). Engage the control panel.
2
; CDC
Switch to changer mode (only if a
changer is fitted).
If a changer is not fitted, AUX is selected. Condition: AUX ON must be selected in the DSC menu.
1
3
For safety reasons, the control
panel must always be engaged
whilst the vehicle is moving.
When leaving the vehicle, open the
control panel and remove the KeyCard in order to prevent theft.
/
Radio mode
19
18
Station seek
Up
Down
E
Switching replay on/off:
Press
briefly. “MUTE” appears on
the display when the sound is switched
off.
20
FM only:
<</>> Page through the transmission
chains, if AF is on, e.g. NDR 1,
2, 3, 4, N-JOY ... .
ITALIANO
21
FRANÇAIS
<</>> Up/down in steps (on FM only
when AF is deactivated)
Select track
Up: Press briefly
CUE - fast forward (audible):
Keep depressed
Down: Press twice or more in
quick succession
Replay track from beginning:
Press briefly
REVIEW - fast rewind (audible): Keep depressed
ESPAÑOL
/
SVENSKA
<</>> Select CD (changer mode
only)
>>
Up: Press briefly
<<
Down: Press briefly
PORTUGUÊS
C SRC (Source)
Select the operating mode
- Radio
- CD
- Changer mode (if a changer is connected)
NEDERLANDS
CD and changer mode
B V- / V+
Adjust the volume
DEUTSCH
D Keys <</>>,
ENGLISH
Remote control RC 08
11
Important
Read the following before using
the unit
Before using the car radio, read the following instructions carefully.
Traffic safety
Traffic safety is of paramount importance.
Always use your car radio system in a way
which enables you to cope with the traffic
situation.
Remember that your vehicle covers 45 feet
a second at a speed of 32 mph.
In critical situations, do not operate the radio.
You must remain able to hear warning signals, for example from police and fire service vehicles, immediately and reliably.
Keep the volume therefore at a reasonable
level whilst driving.
Telephone mute
If a mobile phone is connected, radio and
CD sound can be muted automatically when
the phone is in use (telephone mute).
“PHONE” then appears on the display.
Accessories
Only use accessories and spare parts approved by Blaupunkt.
The following Blaupunkt products can be
used with this unit:
Guarantee
Remote control RC 08
Irrespective of the statutory provisions, Blaupunkt guarantees the unit for twelve months.
The RC 08 infrared remotecontrol permits operation of
the chief functions from the
steering wheel.
Installation
If you intend to install or modify the system
yourself, read the installation and connection instructions at the end of the operating
instructions before doing so.
12
CD changer
The following CD changers can be fitted directly:
CDC A 06, A 071, A 072, A 08, IDC A 09.
CD changers A 05 and A 071 can be fitted
by means of the 7 607 889 093 adapter cable.
Amplifier
All Blaupunkt amplifiers
The unit is guaranteed in accordance with
the statutory provisions of the country in
which it was purchased.
Should you have any questions concerning
the guarantee, please consult your dealer.
Your receipt suffices as proof of guarantee.
International hotline
Do you have any questions regarding operation of the unit, or do you require further
information?
Simply give us a call.
You can reach us on the following numbers:
Tel.
Fax:
800-266 25 28
708-681 71 88
The last state selected such as frequency
band, station setting, AF, SCAN-TIME, seek
run sensitivity, ON VOL (volume at switch
on), SHARX, is also saved.
Your selected settings are therefore selected automatically when you insert your KeyCard.
Switching on the unit
• Switch on the unit with ON.
To insert the KeyCard, disengage the control panel:
• Press the knob 1: the control panel
folds down forwards.
•
Insert the KeyCard with the contact
surface downwards, as shown in the
diagram (Arrow 1).
•
Slide the card in the direction of the arrow (2) and engage the control panel
(Arrow 3).
The car radio is ready for use.
Should a KeyCard other than that belonging to the unit be inserted, CARD ERR” appears on the display.
Teaching in a second KeyCard/
replacing a KeyCard
The unit switches itself off after approx. 10
seconds.
An additional KeyCard can be “taught in”
whilst the unit is in operation with the first
KeyCard.
Should a card other than a KeyCard be inserted (e.g. a phonecard or credit card),
“WRONG KC” is displayed for approx. 2
seconds.
To “teach in” a second KeyCard:
• Slide the first KeyCard in and switch
the unit on.
In this case, remove the card and insert a
KeyCard for the unit.
• Press ON to switch on the unit.
Removing the KeyCard
Disengage the control panel as follows
• Press the knob 1: the control panel
folds down forwards.
•
Press DSC and use
“LEARN KC”.
/
SVENSKA
Station key assignment, bass, treble, balance and fader settings, loudness, beep
volume, LOW-EQ, HIGH-EQ.
1
3
to select
• Press << or >>.
“CHANGE” appears on the display.
•
Remove the first KeyCard and, with
“CHANGE” on the display, insert the
new KeyCard.
When “READY” or “LEARN KC” appears:
• Press DSC.
13
ESPAÑOL
You can customize the following functions:
For safety reasons, the control
panel must always be engaged
whilst the vehicle is moving.
When leaving the vehicle, open the
control panel and remove the KeyCard in order to prevent theft.
PORTUGUÊS
If you are using two KeyCards, the settings
are taken from the first KeyCard.
DEUTSCH
Engage the control panel.
ENGLISH
•
FRANÇAIS
Should you lose or damage a KeyCard, you
can obtain a replacement from a specialist
dealer.
Slide the card as far as possible to the
right, and remove from the front.
ITALIANO
•
2
Two KeyCards are supplied with the unit.
NEDERLANDS
KeyCard anti-theft protection system
KeyCard anti-theft protection system
The unit is now also ready for operation with
the new KeyCard.
A maximum of two KeyCards can be taught
in.
If a third KeyCard is taught in, the card which
is not employed for the teaching-in process
of the new card automatically loses its validity.
Displaying the radio passport
data
You can use the KeyCard supplied to call
up the radio passport data such as the unit
name, type number (7 6 ...) and serial number on the display.
Refer to “Programming with DSC – READ
KC” for the procedure.
Visual display for anti-theft
protection
Anti-theft protection is provided in the form
of a flashing LED ? when the vehicle is
parked and the KeyCard removed.
The following conditions must be met:
Battery positive and constant battery positive are connected as described in the installation instructions.
14
The unit is switched off; the control panel is
open; the KeyCard is removed; LED ON is
selected in the DSC menu (default factory
setting).
Teaching in the new KeyCard
•
Insert the new KeyCard and engage
the control panel.
If necessary, refer to “Programming with
DSC – LED”.
•
Press ON.
•
Press TU and ST1 within 5 seconds:
“0000” appears on the display.
Deactivating the flashing LED
•
Using the rocker, enter the four-digit
master code from the car radio passport:
/
- Enter the digits (press once for
one, twice for two, etc.)
<< >> - Select the insertion point
Select “LED OFF” in the DSC menu to deactivate the flashing LED.
Care of the KeyCard
The KeyCard will function perfectly only if
the contacts are kept free of foreign particles. Avoid touching the contacts directly
with your hands.
If necessary, clean the KeyCard contacts
using a cotton bud soaked in alcohol.
KeyCard lost/damaged
Should you damage or lose the KeyCard for
your unit, you can teach in a new KeyCard.
You can purchase the new KeyCard from
your dealer. You will also require the master code for the unit, which can be found in
the car radio passport.
Keep the car radio passport in a safe
place, but not in the car.
•
After entering the correct master code,
press ENT.
The new KeyCard is accepted when the unit
switches to play.
Input errors
Should the input not be correct, “CODE
ERR” appears on the display. After three
successive incorrect inputs, “WAIT 1h” appears on the display. The unit remains in
Wait mode for one hour.
• Switch the unit off and on again.
Repeat the teach-in process.
You can select from the radio (TU), CD and
CDC changer modes.
The display can be adjusted to your preferred viewing angle in order to enhance
legibility.
CDC can be selected only if a Blaupunkt A
06, A 072, A 08 or A 05, A 071 or IDC A 09
CD changer is connected and a magazine
containing at least one CD is inserted.
Proceed as follows:
• Press DSC.
“ANGLE” appears on the display.
FRANÇAIS
CD mode can be selected only if a CD is
inserted.
DEUTSCH
Enhancing display
legibility
ENGLISH
Selecting the operating
mode
Use the rocker << >> to select optimum legibility for your driving position.
After selecting the setting:
• Press DSC.
ESPAÑOL
SVENSKA
NEDERLANDS
•
PORTUGUÊS
• Press TU, CD or CDC.
If TU is pressed again, menu level 2 is called
up. Radio function adjustments can be made
on this level. Menu level 1 is called up automatically if no input is made for approx. eight
seconds.
ITALIANO
Toggling between operating modes:
15
Radio operation with RDS (Radio Data System)
The Radio Data System provides FM reception with enhanced convenience.
AF - alternative frequency
An increasing number of radio stations now
broadcast RDS information supplementary
to the program proper.
The AF (alternative frequency) function ensures that the best available frequency of
the station being received is selected automatically.
As soon as stations can be recognized, the
station code appears, in some cases with
indication of the region, e.g. NDR1 NDS
(Niedersachsen).
Switching AF on/off:
During radio mode
• Press TU: menu level 2 is called up.
Activating RDS causes the station keys to
function as program keys. You now know
exactly what station you are receiving, and
you can therefore also select the desired
station.
• Hold AF down until the beep sounds.
This function is active when “AF” is lit in the
display.
Note:
AF is deactivated when you switch off RDS.
Selecting the frequency band
You can select from the following frequency bands:
FM
AM
•
87.7 – 107.9 MHz,
530 – 1710 kHz as follows:
Press TU: menu level 2 is displayed.
Activating/deactivating RDS
Activating/deactivating RDS:
During radio mode
• Press TA briefly.
The selected settings appear briefly on the
display. When RDS is activated, “AF” appears in reverse video on the display.
The radio may be muted briefly during the
search for the channel with the best reception.
If “SEARCH” appears on the display when
the unit is switched on or when a stored frequency is called up, the unit is automatically searching for an alternative frequency.
“SEARCH” disappears when an alternative
frequency has been found, or when the
waveband has been completely searched.
If the station can no longer be received with
satisfactory quality:
• Select a different station.
16
Menu level 2
•
Select the frequency band by pressing
BND repeatedly until the desired frequency band appears.
The sequence is: FM I, FM II, FMT, AM,
AMT.
Press << >>: the frequency is increased/reduced in steps.
Hold the << >> rocker down to the right or
left to change the frequency quickly.
You can use << >> to call up stations from
the region in which they can be received.
Manual tuning with << >>
You can tune manually.
Condition:
AF and PTY are deactivated (the corresponding symbols are not lit in the display).
If a number of programs in the station chain
can be received, you can page through them
with >> (forwards) or << (backwards), e.g.
NDR 1, 2, 3, 4... .
You can also start Travelstore, for example:
• Press TU: menu level 2 is displayed.
If “AF” fails to come on:
• Hold down AF on menu level 2.
Changing the memory level (FM)
You can change between memory levels I,
II and T to store stations and retrieve them
again. The selected memory level appears
on the display.
FRANÇAIS
•
Paging through the transmission chains (FM only)
Station seek
Up
Down
<< / >> Up/down in steps
(on FM, only when AF is deactivated)
ENGLISH
Manual tuning:
Storing stations
You can store six stations on the FM band
on each memory level (I, II, T) using the station keys ST1 - ST6.
You can also store six stations each on the
AM/AMT bands. Proceed as follows:
• Press TU: menu level 2 is displayed.
•
Select the frequency band using BND.
•
Select a station using the rocker (automatically / or manually << >>).
Hold the desired station key down until
the program can be heard again after it
has been muted and the beep sounds
(approx. 2 seconds).
The station is now stored.
ITALIANO
Press / : the radio automatically
looks for the next station.
If / is held down at the top or bottom, the
seek run continues forwards or backwards
at higher speed.
NEDERLANDS
•
Press NEXT briefly and repeatedly until the desired memory level appears
on the display.
SVENSKA
/
•
•
ESPAÑOL
Station seek
If necessary, these functions can be deactivated on menu level 2.
PORTUGUÊS
Station tuning
DEUTSCH
Radio operation with RDS (Radio Data System)
17
Radio operation with RDS (Radio Data System)
Note:
Should you store a station which has already
been stored, the corresponding station key
and the memory level flash briefly if a different memory level is called up.
Automatically saving the strongest station with Travelstore
You can store the six strongest FM and AM
stations in the current reception region automatically in the order of field strength. This
function is particularly useful on long journeys. Proceed as follows:
•
Calling up stored stations
Sampling stored stations with
Preset Scan
You can call up stored stations at the touch
of a button.
FM
Call up the stations directly on the selected
memory level as follows:
• Press the keys ST1 - ST6.
To call up stations on a different memory
level:
• Press NEXT until the desired memory
level is displayed, then select a stored
station with ST1 - ST6.
Press TU: menu level 2 is displayed.
• Press TS briefly.
“T-STORE” flashes on the display.
The six strongest FM stations are automatically stored on the “T” (Travelstore) memory level. If fewer than six stations can be
received, four lines appear through the
memory locations which are not occupied.
When the procedure has been completed,
the strongest station (ST 1) is selected.
Stations can also be stored manually on the
Travelstore level if required (see “Storing
stations”).
18
AM, AMT
You can call up the stations on the selected
frequency band directly:
• Press the keys ST1 - ST6.
Calling up stations on the other frequency
band:
• Press NEXT: the other frequency band
is displayed. Then select the stored
stations using ST1 -ST6.
You can sample stored stations briefly on
all frequency bands and on the selected FM
memory level.
Preset Scan can be started only when PTY
is disabled (“PTY” is not lit on the display).
If necessary, deactivate PTY on menu level
2. Proceed as follows:
• Press TU and disable PTY using the
PTY key.
Starting Preset Scan:
• Press SCA for approx. 1 second.
All stored stations on the frequency band
which can be received are sampled briefly
in turn. “SCAN” and the flashing station
name/frequency appear alternately on the
display.
Selecting sampled stations/terminating
Preset Scan:
• Press SCA or one of the rocker keys
briefly.
Radio Scan can be started only when PTY
is deactivated (“PTY” is not lit on the display).
If you wish to change the duration of the
sampling time, refer to “Programming with
DSC – SCANTIME”.
If necessary, deactivate PTY on menu level
2. Proceed as follows:
Changing the sensitivity of the
seek run
•
You can change the sensitivity of the automatic seek run.
Press TU and disable PTY using the
PTY key.
Switching on Scan:
• Press SCA briefly.
All stations on the frequency band which can
be received are sampled briefly in turn.
“SCAN” and the flashing station name/frequency appear alternately on the display.
Selecting a sampled station/deactivating Scan:
• Press SCA or one of the rocker keys
briefly.
If a station is not selected, Scan is switched
off automatically when the seek function has
passed through the complete frequency
range. The station previously selected is
played.
If “lo” is displayed, seek only recognizes stations with good reception (low sensitivity).
If “lo” is not displayed, seek also recognizes
stations with poorer reception.
To adjust the sensitivity, refer to “Programming with DSC – FM/AM Sens”.
When reception is poor, the unit switches
smoothly to mono.
If you wish to switch to mono, refer to “Programming with DSC – STEREO/ MONO”.
The state selected appears briefly on the
display.
Automatic bandwidth switching
(SHARX)
You can activate automatic bandwidth
switching on the FM band by means of the
SHARX function in the DSC menu.
This is very useful when a number of stations are close together.
Interference from strong adjacent stations
is largely eliminated when SHARX ON is
selected (factory default setting).
If necessary, refer to “Programming with
DSC – SHARX”.
19
FRANÇAIS
You can toggle between stereo and mono
in the DSC menu. This can be useful in areas where reception is critical. When the unit
is switched on, stereo is selected automatically.
ITALIANO
The sampling time can be selected between
5 and 30 seconds.
NEDERLANDS
You can sample briefly the stations which
can be received on the selected frequency
band.
SVENSKA
Toggling between stereo and
mono (FM)
ESPAÑOL
Changing the sampling time
(Scan)
PORTUGUÊS
Sampling stations with
Radio Scan
ENGLISH
DEUTSCH
Radio operation with RDS (Radio Data System)
Radio operation with RDS (Radio Data System)
PTY – Program Type
Condition: PTY is activated.
This is an RDS service which is being implemented progressively by the radio stations. The service enables FM stations to
be selected according to a specific program
content. After selecting the program type,
you can select the stations using seek or
Scan.
The program types listed below are available:
Activating/deactivating PTY:
•
Press PTY.
When the function is activated, the last program type selected, e.g. “SPORT”, is displayed briefly. “PTY” remains on the display
as long as PTY is activated.
Program type
You can display the last program type selected and select a different program type
with << >>.
Use the station keys 1 - 6 to select stored
program types.
20
NEWS
INFORM
SPORTS
TALK
ROCK
CLS ROCK
ADLT HIT
SOFT ROCK
TOP 40
COUNTRY
OLDIES
SOFT
NOSTALGA
JAZZ
CLASSICAL
R+B
SOFT R + B
LANGUAGE
REL MUSIC
REL TALK
PERSNLTY
PUBLIC
WEATHER
Prompting the station for the program
type
On menu level 2:
• Hold PTY down for approx. 2 seconds.
After the beep, the program type of the station currently being received is displayed.
If “NONE” is displayed, the station has no
PTY code.
Displaying the selected program type
• Press << or >>.
The last program type selected is displayed
briefly.
Selecting the program type
a) Using the station keys
If PTY is activated, the program types
defined by the factory can be selected
by means of the keys ST 1 - ST 6.
• Press one of the keys 1 - 6.
The selected program type appears on
the display for two seconds.
To listen to a station broadcasting this
program type:
• Start the seek run with / .
If no station broadcasting the selected program type is found, “NO PTY” appears briefly on the display, and the beep sounds. The
last station selected is played.
You can assign different available program
type to each memory location. Refer if necessary to the “Saving the program type” section below.
To listen to a station broadcasting this
program type:
• Start the seek run with / .
If no station broadcasting the selected program type is found, “NO PTY” appears briefly on the display, and the beep sounds. The
last station selected is played.
Storing the program type
A program type is stored on each of the keys
ST1 - ST6 by the factory.
You can however store other available program types.
“PTY” must be displayed before you can
store a different program type.
• If necessary, activate “PTY” using the
PTY key.
•
Select the program type with << >>
and
“PTY” on the display
-
“POP” selected
-
Seek run started
Sampling stations with PTY-SCAN
-
No station with “PTY-POP” found
Condition: “PTY” must be displayed.
-
Display shows “NO PTY” and
• Press SCA.
The stations with this program type which
can be received are sampled briefly.
-
Switches back to NDR 3 automatically
-
NDR 2 is broadcasting “PTY-POP”
-
Unit switches within the station chain
to NDR 2 and plays it as long as the
station continues to broadcast “POP”.
Deactivating PTY-SCAN:
• Press SCA or the seek rocker again.
Following a frequency seek run, PTY-SCAN
is automatically deactivated.
PTY priority
Situation:
PTY is activated, the logo appears on the
display.
No station broadcasting the selected program type can be received at this time (by
seek or by Scan).
The unit switches back to the previous station.
As soon as a station broadcasting the selected program type can be received within
the station chain, the unit switches to this
station in radio mode for the duration of the
program.
The unit also switches automatically in CD
mode to the station broadcasting the selected program type within the transmission
chain.
When the PTY program is over, the unit
switches back to the source previously selected (radio or CD).
Note:
As already mentioned, these functions are
not currently available with all RDS stations.
FRANÇAIS
ENGLISH
Previous station: NDR 3.
-
ITALIANO
• Press << or >> as many times as
necessary.
-
NEDERLANDS
• During this time, select the desired
program type with >> (forwards) or
<< (back).
Example:
SVENSKA
• Press << or >>: the last program
type selected is displayed for three
seconds.
Hold the desired key (ST1- ST6) down
until the beep sounds.
The selected program type can be called up
by means of this key when PTY is activated
(“PTY” appears on the display).
ESPAÑOL
If PTY is activated, you can select a
program type with << >>.
•
PORTUGUÊS
b) With the seek run rocker << >>
DEUTSCH
Radio operation with RDS (Radio Data System)
21
CD mode/CD changer mode
This unit enables you to play CDs.
CDs can also be played with the aid of a
Blaupunkt CDC A 06, A 072, A 08, A 05,
A 071 or IDC A 09 CD changer.
These changers are available from your
dealer.
•
Fold the control panel up on the lefthand side and engage.
Removing the CD
CD mode
Do not obstruct or assist automatic insertion or ejection of the CD, as the mechanism may otherwise be damaged.
•
Switch on the unit and disengage the
control panel with knob 1.
The control panel drops forward.
•
Insert the CD (with the label facing upwards) without using force.
The CD is automatically transported to the
playing position. The CD is played.
22
A CD is inserted, “DISC-IN” appears on the
display.
•
Note:
Only use standard circular 12 cm diameter
CDs.
8 cm diameter CDs or CDs with different
shapes, e.g. of a butterfly or beer glass, are
not suitable for playing.
Such CDs present a serious risk of damage
to the CD and to the drive.
We can accept no liability for damage arising from the use of unsuitable CDs.
Inserting a CD
Activating CD mode
With the control panel disengaged,
hold the Eject key (arrow) down for approx. 1 second.
The CD is ejected.
Press CD: the CD functions (track
number, name/time played) appear on
the display.
•
If the CD is not removed, it is drawn in again
automatically after approx. 30 seconds.
For safety reasons, the control
panel must always be engaged
whilst the vehicle is moving.
Changer mode
Activating changer mode
A magazine containing at least one CD must
be inserted.
•
Press CDC: the changer functions
such as CD and track number, name/
time played appear on the display.
Selecting the display type
Selecting CD and track
Repeating a track/CD
You can switch the display type over in CD
and changer replay mode:
You can select CDs, tracks and parts of
tracks conveniently using the rocker. CDs
can be selected only if a changer is fitted.
You can repeat a track or (in changer mode)
a CD continually.
You can select the following functions using the RPT key:
ENGLISH
DEUTSCH
CD mode/CD changer mode
- REP CD = Repeat CD (only in changer
mode)
- RPT OFF = Deactivate function.
“TRACK 13” – track number
“14:34”
– Time
“00:20”
– Time played
“VIVALDI”
– CD name
The name of the CD can be displayed only
if a name has been entered.
Refer to the “Assigning names to CDs” section below.
/
Select track
Up: Press briefly
CUE - fast forward (audible): Keep
depressed
Down: Press twice or more in quick
succession
Replay track from beginning: Press
briefly
REVIEW - fast rewind (audible): Keep
depressed
TPM (Track Program Memory)
For storing and playing preferred tracks in
CD and CD changer mode. Up to 30 CDs
can be managed in CD mode and 99 CDs
in changer mode with a maximum of 40
tracks per CD. TPM is active only in the
mode in which the track program was stored
(CD or changer mode).
ITALIANO
NEDERLANDS
– CD number (appears in
changer mode only)
Press RPT repeatedly until the desired
function is activated.
The track or the CD is played repeatedly until
you switch to “RPT OFF” using RPT.
SVENSKA
“CD 10”
<</>> Select CD (changer mode only)
>>
Up: Press briefly
<<
Down: Press briefly
ESPAÑOL
Press DIS repeatedly until the desired
display type is selected.
•
The rocker acts as a sequence switch:
pressing it repeatedly causes several CDs
or tracks to be skipped.
PORTUGUÊS
•
FRANÇAIS
- REP TRCK = Repeat track
23
CD mode/CD changer mode
Storing tracks with TPM
Clearing the TPM memory
MIX
A track can be stored only whilst it is being
played.
You can clear tracks stored with TPM.
TPM tracks can be cleared with CLR only
during replay.
CD tracks can be played in random order.
MIX is activated when “MIX” appears in reverse video on the display.
•
You can select from the following MIX functions:
To store:
• Hold TPM down for approx. 1 second:
“TPM PROG” appears on the display.
This track has been stored.
Activating/deactivating TPM replay
•
Press TPM briefly. The activated state
is indicated briefly on the display (TPM
ON/OFF).
If “TPM” is shown in reverse video on the
display, TPM replay is activated. All tracks
on the CD which were stored with TPM in
the operating mode are played. If SCA
(Scan) is activated in addition to TPM, only
the stored tracks are sampled.
TPM replay can be switched on only if tracks
have been stored using TPM.
24
Activate TPM.
“TPM” appears on the display in reverse video. In this case, “CLR” appears below TPM.
If you wish to delete the current track only:
• Hold CLR down for approx. 2 seconds:
“TRCK CLR” appears briefly on the
display.
If you wish to delete all TPM tracks on the
CD:
• Hold CLR down for approx. 5 seconds:
“DISC CLR” appears briefly on the display.
To delete the stored TPM tracks of all CDs
in changer mode:
• Hold CLR down for approx. 8 seconds:
“ALL CLR” appears on the display.
If you wish to delete TPM and CD names
simultaneously, refer to “Deleting CD name/
TPM store using DSC-UPDATE”.
MIX CD
Tracks on the selected CD are played in
random order. In changer mode, the remaining CDs are selected in numeric order. MIX
applies to the order in which the tracks are
played (random).
MIX MAG (changer mode only)
CDC A 08, IDC A 09: All tracks in the magazine are played in random order.
CDC A 05, A 06, A 071, A072: The CDs are
selected in random order; all tracks of the
selected CD are then replayed in random
order.
MIX OFF
MIX is deactivated. CDs are played in numeric order.
Selecting MIX functions
•
Press MIX briefly: the display signals
briefly the activated state.
SCAN is also terminated when the rocker,
MIX, RPT, DSC, AUD, TU or CDC are
pressed.
Assigning names to CDs
Names can be assigned to up to 30 CDs in
CD mode and 99 CDs in changer mode.
This name (e.g. VIVALDI) appears in the
display when you have selected the corresponding display mode using DIS.
Starting input:
• Press the DSC key and / repeatedly until “CD/C-NAME” appears in the
display.
• Press << >>.
The first input field flashes.
•
Now select a character using the rocker / .
Use / to select from the magazine
the next CD to which a name is to be
assigned.
To change a name, enter and save other
characters (overwrite).
•
Deleting the CD name/TPM store
using DSC-UPDATE
Press DSC.
Press / repeatedly until “UPDATE”
appears on the display.
•
Use >> “CLR DISC” for selection if you
wish to delete the name and TPM of
the stored CD.
Or
•
Use << “CLR ALL” to select if you wish
to delete the names including TPMs of
all stored CDs.
•
Hold ENT down for approx. 1 second:
“DELETING” appears briefly on the
display.
The display operation has been completed.
To return to the DSC menu item “UPDATE”
without deleting CD names and TPMs:
• Press ENT briefly
DEUTSCH
ENGLISH
FRANÇAIS
Storing/terminating the input:
• Press ENT to store the input.
If you wish to abort input of this name:
• Press DSC.
If you wish to enter a name for another CD:
• In CD mode, insert a new CD.
Or
• In changer mode, press the rocker
<< />> and
•
•
ITALIANO
Ending SCAN:
• Press SCA briefly.
The last track selected continues playing.
A CD the stored data (name and TPM) of
which are to be deleted must be replayed
for this purpose.
NEDERLANDS
Starting SCAN:
• Press SCA briefly: “SCAN” appears on
the display.
The tracks are sampled briefly in turn in ascending order.
You can delete the names and TPMs of all
stored CDs with “CLR ALL”.
ESPAÑOL
For brief sampling of the CD tracks.
The letters of the alphabet in capitals (A-Z),
the numbers 0-9 and special characters
appear in turn.
• Move to the next underline using the
rocker << >>, and select a character.
Up to eight characters can be selected in
this way.
The stored names and the TPMs of CDs can
be deleted simultaneously by means of
DSC-Update.
PORTUGUÊS
SCAN
SVENSKA
CD mode/CD changer mode
You can delete the names and TPMs of the
inserted CD with “CLR DISC”.
25
Clock - Time
The unit has an internal clock which is set
automatically through RDS for absolute accuracy.
A condition for correction by RDS is that an
RDS transmitter with CT function (CT = clock
time) is being received.
Displaying the time
The time can be displayed in radio and CD
mode.
If you wish to correct the time manually, refer to “Programming with DSC – CLOCKSET”.
Radio mode:
Deactivating hours adjustment
Automatic correction of the time can be deactivated.
The display can be toggled between time
and frequency band (incl. memory level in
the case of FM) as follows:
• Press DIS for approx. 2 seconds.
Correction of the hours can be deactivated
by “CLK MAN/CLK AUTO” in the DSC menu.
The minutes continue to be corrected.
Setting the time
CD mode:
This is useful if you wish to display the time
of a different time zone, for example.
a) Automatically
You can select from three different display
modes:
If necessary:
• Press DSC briefly and
The time is set automatically when an
RDS transmitter with the “CT” (clock
time) function is being received.
b) Manually by means of DSCCLOCKSET
• Press DSC briefly: “CLOCKSET” appears on the display.
• Press << >> to set the hours/minutes. The flashing range can be adjusted with / .
• After correcting the time, press ENT
briefly to save the setting.
- Track number, time
- Track number, time played
- CD name, track number
To toggle:
• Press DIS briefly.
Correcting the time following an
interruption to the power supply
If the unit has been isolated from the supply
voltage for a longer period, “0:00” is displayed when the power is reconnected.
The time is corrected automatically by RDSCT, but can also be adjusted manually.
The time need be adjusted manually only if
an RDS station with CT (clock time) is not
being received.
26
Press / repeatedly until “CLK MAN/
CLK AUTO” is displayed.
To deactivate hours correction, select << >>
“CLK MAN”.
•
The subjective sound impression can be
improved considerably by suppression or
amplification of certain frequency ranges by
the car radio.
This unit is equipped with two parametric filters. The first filter, “LOW EQ”, can be adjusted from 32 to 500 Hz, the second, “HIGH
EQ”, from 630 to 10 000 Hz. In this case,
parametric means that one frequency can
be increased or reduced for each of the two
filters (+10 to -20 dB). The bandwidth/quality of the two filters can also be adjusted.
Adjustment instructions
The instructions below represent a recommendation only. You can adjust the sound
characteristics according to your own personal preference.
We recommend that you use a familiar music CD for adjustment of the filters. The CD
should include tracks with a range of instruments and voice. Pure electronic music is
not suitable for evaluation purposes, since
the original sound is not known.
Before adjusting the equalizer, set the bass,
treble, balance and fader to “0”.
This setting is described in the condensed
instructions under 8 AUD.
Now listen to the CD with which you are familiar.
Adjusting the frequency level
•
Press / repeatedly until “HIGH EQ”
or “LOW EQ” appear in the display.
•
Press << or >> once or several times
to select the frequency.
•
Press / once or several times to
adjust the level (GAIN +8 ... GAIN -8).
•
Press << or >> once or several times
to select a different frequency and to
adjust the level accordingly.
•
Press DPE or EXIT to save the selected level and to return to the DPE main
menu.
•
Press DPE or EXIT again to close the
DPE menu.
DEUTSCH
ENGLISH
FRANÇAIS
The “HIGH EQ” and “LOW EQ” filters can
be adjusted in the DPE menu:
• Press DPE to call up the DPE main
menu.
ITALIANO
This can result in the bass frequencies
booming or being absent, mid-frequencies
encroaching excessively, musical instruments or voices being strongly distorted, or
the sound generally being muffled.
The steps required for adjustment are described in the table.
Use the LOW EQ filter for settings in the
bass and lower mid-range, and the HIGH
EQ filter for the treble and upper mid-range.
NEDERLANDS
Even when suitable loudspeakers have
been selected and installed properly, resonances in the passenger compartment may
have a detrimental effect upon the sound.
In addition, you can select from seven preprogrammed equalizer settings, which are
adjusted for different musical styles. Refer
to the “Selecting pre-set sound settings”
section.
Now read the “Tonal effect/problem” column
in the table, and look for solutions under
“Measure”.
SVENSKA
The position and installation of the loudspeakers and the volume to the rear, for example of the door or rear shelf, are however also important.
The parametric filters can be adjusted exactly without instruments.
PORTUGUÊS
The sound in the vehicle is influenced decisively by the acoustic characteristics of the
passenger compartment, substantially more
than by the characteristics of the loudspeakers.
ESPAÑOL
Equalizer setting
Evaluate your impression of the sound according to your taste.
27
Equalizer setting
Selecting a quality factor for the bass
or mid-range
•
Press / repeatedly until “LO-QFAC” or “HI-Q-FAC” appear in the display.
•
Press << or >> once or several times
in order to set the quality factor (QFACT 1 to Q-FACT 3).
•
Press / to save the selected factor
and return to the DPE main menu.
Or
•
Press DPE or EXIT to save the selected factor and to close the DPE main
menu.
Selecting the preset sound setting:
Selecting a preset influences the equalizer
and sound settings of the unit.
Each selected preset can be adjusted manually. When a different preset is selected,
however, the factory default setting is restored. Your personal sound settings for
BASS, TREBLE, EQ and LD are stored in
the “USER” preset mode.
To call up the presets:
• Press / repeatedly until “PRESET”
appears on the display.
•
Press << or >> once or several times
to select the (*USER* >> LINEAR >>
ROCK >> DISCO >> JAZZ >>
CLASSIC >> VOCAL) equalizer setting.
•
Press / to save the selected equalizer setting and return to the DPE main
menu.
Or
•
28
Press DPE or EXIT to save the selected equalizer setting and to close the
DPE main menu.
To activate/deactivate the equalizer, hold
DPE down for approx. 2 seconds.
This enables you to compare the sound with
and without equalizer.
DEUTSCH
Equalizer setting
Tips on adjusting the equalizer
ENGLISH
Begin adjustment with the mid-range/treble and complete it with the bass range.
Tonal effect/problem
Measure
Note
Bass range
30 to 100 Hz
Bass response too weak
Increase the bass with
Filter: “LOW EQ”
Frequency: 50 to 100 Hz
Level: +4 to +6 dB
Avoid distortion.
Raise the level cautiously if
the loudspeaker diameter is
too small.
Bass not clean
Booming
Unpleasant pressure on the ears
Reduce the lower mid-frequencies with Filter: “LOW EQ”
Frequency: 125 to 400 Hz
Level: Approx. -4 dB
The tonal response may become too thin and aggressive.
Pay attention to the fundamental tone range of the music.
Sound lacks depth,
aggressive, no stereo effect
Reduce the mid-frequencies
with Filter: “HIGH EQ”
Frequency: 1 000 to 2 500 Hz
Level: -4 to -6 dB
Reproduction must not become too faint.
Tonal response too weak.
Response is dull
Clarity lacking
Instruments lack brilliance
Increase the treble range with
Filter: “HIGH EQ”
Frequency: Approx. 10 kHz
Level: +2 to +4 dB
Avoid a sharp tonal response.
Loud hissing impairs the quality.
Treble
4 000 to 20 000 Hz
ITALIANO
NEDERLANDS
SVENSKA
ESPAÑOL
Mid-range
400 to 4 000 Hz
PORTUGUÊS
Lower mid-range
100 to 400 Hz
FRANÇAIS
Frequency ranges
29
Programming with DSC
The car radio offers the facility to adjust certain settings and functions to your requirements and to store these changes with the
aid of DSC (Direct Software Control).
ANGLE
Adjust the display to your
own viewing angle.
DIM DAY
Select the display brightness for daylight (Stages 19).
The default settings are selected at the factory.
An overview of the factory default settings
is provided below for future reference.
To alter a programming setting:
• Press DSC.
Select and adjust the functions described
below by means of the rocker and the ENT
key. The status of adjustment is shown on
the display.
/
<< >>
Select function
Adjust/call up value
DIM NIGHT
Select the display brightness for darkness (Stages
1-9).
The brightness is switched
over automatically by the
headlights.
ON VOL
Select the initial volume.
Use << >> to select the desired initial volume.
If “LAST VOL” is selected,
the initial volume is the
same as that last selected.
PEAK ON/OFF
Activate/deactivate the dynamic volume level display.
SHARX
30
Automatic bandwidth switching on the FM band.
Where the station density is
high, switch to SHARX ON
with << >>: this largely elimi-
nates interference from adjacent stations.
“SHARX ON” is the factory
default setting.
HICUT
Interference-driven treble
reduction.
Treble frequencies are reduced only when interference is present. Can be selected from NO HICUT
(OFF) to HICUT 3 (strongest
treble reduction). Decide for
yourself which setting is the
most pleasant.
FM/AM SENS
Change the sensitivity of the
seek run.
“SENS 1” indicates close reception, “SENS 6” distant
reception.
Select “SENS 1” if you wish
to receive strong stations in
the near range; select
“SENS 6” if you also wish to
receive weaker, distant stations.
CDC NAME Displayed only in CD replay
mode.
You can use this function to
assign any desired name to
the CDs. (Refer to “Assigning names to CDs”.)
BEEP
Confirmation signal for functions which require a key to
be held down for approx. 1
second.
The volume can be selected
from 0 to 9 (0 = off).
CLOCKSET Manual adjustment of the
time.
Use << >> to select hours/
minutes. The flashing range
can be adjusted with / .
Press ENT briefly to save
after completing the setting.
Refer also to “CLOCK time”.
LED ON/OFF You can select between
LED ON and LED OFF.
When LED ON is selected,
the “ON” knob flashes to
provide additional security
when the unit is switched off
and the KeyCard removed.
LEARN KC
This function enables you to
teach in a second KeyCard.
Refer to the instructions under “KeyCard anti-theft protection system”: “Teaching
in a second KeyCard”.
READ KC
The data can be read out
from a KeyCard.
Unit data such as name,
type number (76...) and serial number are displayed by
the KeyCard supplied.
Should you remove the KeyCard during the read process, “READ KC” appears in
the display.
31
ENGLISH
FRANÇAIS
ITALIANO
AUX ON/OFF This menu item does not appear when a CD changer is
connected. “OFF” is the default factory setting.
If an external unit is connected through AUX, “ON”
must be selected.
NEDERLANDS
CLK ON/OFF The time can be displayed
with the ignition on and the
unit switched off. Select
CLK ON in this case.
This setting defines the
sampling time (5 - 30 seconds) for radio broadcasts
and CD tracks.
SVENSKA
12/24H MODE
Select the time display
(12-hour or 24-hour).
SCANTIME
ESPAÑOL
AMP DELAY Energization delay of external amplifiers. DLAY OFF
signifies no energization delay. DLAY 1 to DLAY 4 signify the energization delay in
seconds.
CLK AUTO/MAN
For activating/deactivating
automatic hours correction.
Refer also to “CLOCK time,
hours correction”.
PORTUGUÊS
STEREO/MONO
Toggle << >>.
The display indicates the selected state briefly.
STEREO is selected automatically when the unit is
switched on.
DEUTSCH
Programming with DSC
Programming with DSC
UPDATE
TUNER
In CD and changer mode,
this function enables the
names of CDs to be deleted
in order to create space for
new CDs. (Refer to “Deleting CD names with DSCUPDATE”.)
Selecting the reception
range for your country. The
frequency range in kHz within the waveband is shown in
brackets for each setting.
USA (AM 10, FM 200)
LATIN (AM 10, FM 200)
EUROPA (AM 9, FM 100)
End DSC programming/store settings:
• Press DSC.
Technical data
Overview of the factory default
settings with DSC
ANGLE
DIM DAY
DIM NIGHT
ON VOL
PEAK ON/OFF
SHARX
HICUT
FM/AM SENS
STEREO/MONO
AMP DELAY
CDC NAME
CLOCKSET
CLK AUTO / MAN
12/24H MODE
CLK ON/OFF
BEEP
LED
SCANTIME
AUX
LEARN KC
READ KC
UPDATE
0
9
9
LAST VOL
ON
SHARX ON
HICUT 2
SENS 6
STEREO
DLAY OFF
0:00
CLK AUTO
24H MODE
CLK OFF
3
ON
10 sec.
OFF
-
Amplifier
Output power:
4 x 25 watts sinusoidal
to DIN 45 324 at 14.4 V
4 x 40 watts max.
power
Tuner
Frequency bands:
FM :
87.7 – 107.9 MHz
AM :
530 – 1710 kHz
FM sensitivity:
0.7 µV at a signal-tonoise ratio of 26 dB.
FM mono sensitivity:
7.8 dBf
FM transmission range:
20 - 16 000 Hz
CD
Transmission range:
20 - 20 000 Hz
We reserve the right to make changes!
32
With RDS, this function ensures that the best
frequency of the current program which can
be received is selected automatically.
Press briefly to accept/save the adjustments.
For selection of a desired program type in
FM mode (e.g. sport, news).
Refer also to RDS.
Equalizer
Sound control for adjustment of the frequency response to the acoustic conditions and
personal taste.
Quality
Power amplifier for increasing the output
power.
AUD – Audio
EXIT
RDS – Radio Data System
Sound adjustment of basses and trebles,
adjustment of the right/left (balance) and
front rear (fader) volume ratios.
Press the key briefly to terminate or abort
the adjustment process.
Service provided by the broadcast stations
for improved listening convenience.
For example, the station name is shown in
place of the frequency.
Blaupunkt’s anti-theft protection system. The
unit can be operated only with the correct
KeyCard.
Further RDS functions include:
Selection of the frequency band and the
memory level.
NEDERLANDS
KeyCard
BND (Band)
Edge steepness of the frequency filters in
the parametric equalizer.
AF – Alternative Frequency
PTY – Program Type
MIX
RPT (Repeat)
Play CDs/CD tracks in random order.
DSC – Direct Software Control
Preset Scan
Repeat CD tracks. Tracks or CDs can be
repeated in CD changer mode.
DSC can be used to adjust certain factory
default settings according to the user’s personal requirements.
See SCAN.
ESPAÑOL
CL – Clear
Return to the previous menu item.
SVENSKA
Amplifier
DEUTSCH
PTY
ENGLISH
ENT (Enter)
FRANÇAIS
AF – Alternative Frequency
ITALIANO
Glossary of technical terms
Preset Equalizer
PORTUGUÊS
Preprogrammed sound settings
33
Glossar - Fachwortverzeichnis
SCAN
For brief sampling of the radio stations which
can be received, or of the tracks in CD mode.
The stored radio stations can be sampled
with Preset Scan.
Softkey (Software key)
Key with variable function.
SRC – Source
Toggles the source between radio and CD
changer.
TPM – Track Program Memory
For storing and playing preferred tracks in
CD and CD changer mode.
TS – Travelstore
Automatically saves the station with the
strongest reception; can be called up using
the station keys.
Particularly useful on long journeys.
34
Blaupunkt-Werke GmbH
Bosch Gruppe
08/99 Sc
K7/VKD 8 622 402 096