1
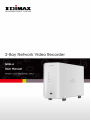
COPYRIGHT Copyright Edimax Technology Co., Ltd. all rights reserved. No part of this publication may be reproduced, transmitted, transcribed, stored in a retrieval system, or translated into any language or computer language, in any form or by any means, electronic, mechanical, magnetic, optical, chemical, manual or otherwise, without the prior written permission from Edimax Technology Co., Ltd. Edimax Technology Co., Ltd. makes no representations or warranties, either expressed or implied, with respect to the contents hereof and specifically disclaims any warranties, merchantability, or fitness for any particular purpose. Any software described in this manual is sold or licensed as is. Should the programs prove defective following their purchase, the buyer (and not this company, its distributor, or its dealer) assumes the entire cost of all necessary servicing, repair, and any incidental or consequential damages resulting from any defect in the software. Edimax Technology Co., Ltd. reserves the right to revise this publication and to make changes from time to time in the contents hereof without the obligation to notify any person of such revision or changes. The product you have purchased and the setup screen may appear slightly different from those shown in this QIG. For more information about this product, please refer to the user manual on the CD-ROM. The software and specifications are subject to change without notice. Please visit our website www.edimax.com for updates. All brand and product names mentioned in this manual are trademarks and/or registered trademarks of their respective holders. Linux Open Source Code Certain Edimax products include software codes developed by third parties, which are subject to the GNU General Public License (GPL) or GNU Lesser General Public License (LGPL). Please see the GNU (www.gnu.org) website for the terms and conditions of each license. The GNU GPL and GNU LGPL software codes used in Edimax products are distributed without any warranty and are subject to the copyrights of their respective authors. The firmware files for this product can be found under the “Download” page at the Edimax website (www.edimax.com). 1 CONTENTS CHAPTER I: INTRODUCTION...............................................................................................................................4 1.1 Features ...............................................................................................................................................4 1.2 Safety Instructions ...............................................................................................................................4 1.3 Package Contents.................................................................................................................................5 1.4 Getting Familiar with Your New NVR...................................................................................................5 1.5 Setting up Your NVR.............................................................................................................................7 CHAPTER II: USING THE NVR WEB INTERFACE ................................................................................................14 2.1 Locating the NVR’s IP Address ...........................................................................................................14 2.2 Accessing the Web Interface .............................................................................................................15 2.3 Controlling Network Cameras............................................................................................................17 2.4 Setup Wizard......................................................................................................................................19 2.5 Camera Setup.....................................................................................................................................22 2.6 Network Setup ...................................................................................................................................25 2.7 Recording Settings .............................................................................................................................28 2.7.1 Recording Setup......................................................................................................................29 2.7.2 Storage Setup..........................................................................................................................31 2.8 Video Playback ...................................................................................................................................34 2.9 System Setup......................................................................................................................................37 2.9.1 “General” Settings ..................................................................................................................37 2.9.2 “Maintenance” Settings..........................................................................................................38 2.9.3 “Config Backup” Settings ........................................................................................................39 2.10 Server Setup.....................................................................................................................................40 2.11 User Management ...........................................................................................................................42 2.12 Device Information ..........................................................................................................................43 CHAPTER III: CMS LITE......................................................................................................................................46 3.1 Installation .........................................................................................................................................46 3.2 Main Menu.........................................................................................................................................49 3.3 Device Maintenance ..........................................................................................................................50 4.1 Area Setup..........................................................................................................................................51 3.3.1 Area Setup...............................................................................................................................51 3.3.2 Location Setup ........................................................................................................................53 3.3.3 Group Setup ............................................................................................................................57 3.3.4 Status Collecting Steps............................................................................................................59 3.4 View....................................................................................................................................................59 3.4.1 Device View.............................................................................................................................59 3.4.2 Group Check............................................................................................................................62 3.4.3 Event Alarm.............................................................................................................................63 3.5 Electronic Map ...................................................................................................................................64 3.5.1 Electronic Map Maintenance..................................................................................................64 3.5.2 Electronic Map Browser..........................................................................................................67 2 3.6 Event Schedule...................................................................................................................................68 3.6.1 Schedule Setup........................................................................................................................69 3.6.2 Event Server ............................................................................................................................70 3.6.3 Event Trigger ...........................................................................................................................72 3.7 Device Status......................................................................................................................................73 3.8 System Maintenance .........................................................................................................................74 3.8.1 Account Management ............................................................................................................74 3.8.2 Address Book ..........................................................................................................................75 3.8.3 System Setup ..........................................................................................................................77 3.9 Video Playback ...................................................................................................................................79 3.10 Report Log........................................................................................................................................80 3.10.1 System Use Log .....................................................................................................................80 3.10.2 Video Playback Log ...............................................................................................................81 3.10.3 Account Change Log..............................................................................................................82 CHAPTER IV: APPENDIX....................................................................................................................................84 4.1 Troubleshooting.................................................................................................................................84 4.2 Specifications .....................................................................................................................................84 Federal Communication Commission Interference Statement.......................................................................86 3 CHAPTER I: INTRODUCTION 1.1 Features Congratulates on purchasing this high-performance network video recorder! With this NVR, you can view and manage four IP cameras on the network, and keep their video in hard drive for future usage. With built-in 2-bay SATA hard drive design, the storage capacity and system stability is highly expanded, and the total recording time is extended. Other highlights of this network video recorder include: Compact size and outstanding looking, fits into your household environment. 2 SATA hard drive bays provide maximum storage capacity and stability. A front access USB port to ease external storage device access. High-speed 10/100/1000 Gigabit Ethernet port provides maximum network access speed. Supports EDIMAX IP cameras. User-friendly WEB interface for configuration and video management. 1.2 Safety Instructions Please obey the safety instructions listed below when you are using this Network Video Recorder, or you would harm this NVR and / or yourself! In addition, the warranty will become void if you disobey these safety instructions. This network video recorder is sophisticated electronic device; do not drop it from high places. Do not place this NVR at hot / humid places, and avoid direct sunlight. This NVR is not a toy; keep it out from the reach of children. Do not insert any accessories of this NVR into your body. Place the NVR at a safe and secure place when you are using it, and never move it when it is powered on. Hard drives may fail and malfunction if you tried to move the NVR when it is working! Do not pull any cord that is connected to this NVR by force. If the NVR falls into water when powered, do not attempt to retrieve it back by yourself! Find a qualified electric technician for help. Do not pull the hard drive out when NVR is powered ON, or data stored on hard drive will be damaged! 4 1.3 Package Contents Please check the contents of your new Network Video Recorder when you unpack the package. If any item is missing, please contact your dealer of purchase for help. Item 1 2 3 4 5 Description Network Video Recorder AC power adapter Power cord CD with utility software and user manual Quick installation guide 1.4 Getting Familiar with Your New NVR Front Item Description Indicates system power status ON: NVR is powered on OFF: NVR is powered off Indicates network status ON: Network cable connected OFF: Network cable disconnected 5 Quantity 1 1 1 1 1 Flash: Transferring network data Indicates hard drive 1 status ON: Hard drive 1 is online OFF: Hard drive 1 is offline Flash: Accessing hard drive 1 Indicates hard drive 2 status ON: Hard drive 2 is online OFF: Hard drive 2 is offline Flash: Accessing hard drive 2 Indicates USB status USB Port ON: USB device connected OFF: USB device not connected Flash: Accessing USB device Connects to your external USB device. Back Item Description Hard drive bay 1 (left) HDD bay for hard drive 1 Hard drive bay 2 (ICON 1): HDD 1 is online (ICON 2): Accessing HDD 1 HDD bay for hard drive 2 6 (right) Power switch (ICON 1): HDD 2 is online (ICON 2): Accessing HDD 2 Switch NVR on/off 1: Switch NVR on 0: Switch NVR off System reset (button) Resets NVR when NVR is not working properly. Use a pen or other sharp objects to press (10 seconds) the button inside the hole to reset the NVR. Power socket Connects to AC power adapter Ethernet socket Connects to Ethernet cable 1.5 Setting up Your NVR Please follow the following instructions to setup your new network video server. Please prepare the following items in advance: 1 or 2 3.5” SATA HDD(s), maximum capacity 2TB AC power outlet (AC 100V-240V) IP address that will be assigned to this NVR Note: the NVR does not support HDD hot-plug, please do not insert or remove HDD when NVR is working. For such kind of inhibited action may cause HDD internal data to be damaged. 7 1. Press the black tab on HDD enclosure 1 down. 2. Pull the black tab downward. 8 3. Hold the HDD enclosure and pull it out. 4. Use your finger to remove white bracket in HDD enclosure, as instructed by the arrows. 9 5. Put a 3.5” SATA HDD in the HDD enclosure, as instructed. HDD’s SATA connector should be located at left. 6. Use screwdriver with screws to fasten HDD to HDD enclosure. Please use the screws that come with HDD package, and be careful when you are doing this. DO NOT use forces to fasten HDD. 10 7. Press the top of HDD enclosure and fully push it back into NVR, as instructed (do not press white lever back now, and it should remain in open position in this step). Note: Do not pull the hard drive out when the NVR is powered on, or data stored on the hard drive will be damaged. 8. Push the lever until you hear a ‘click’ sound. If you want to install second hard drive, please repeat step 1 to 6 on HDD bay 2. 11 9. Connect AC cord to AC adapter and connect AC cord to power outlet on the wall. 10. Insert the AC adapter’s power plug into NVR’s power socket. 12 11. Insert the Ethernet cable into NVR’s Ethernet socket. The other end of Ethernet cable should connect to your local network’s hub or switch. 12. Switch the power switch of NVR on. The ‘POWER’ LED on the front panel of NVR should light up now. If not, please recheck step 7 to 9 and make sure the power outlet you are connecting to is properly working. 13 CHAPTER II: USING THE NVR WEB INTERFACE 2.1 Locating the NVR’s IP Address You can use your new Network Video Recorder by its web user interface via web browser. You must know the IP address of NVR before you can connect to it. The NVR will use DHCP server on your local network to obtain an IP address automatically by default. Therefore, you can check your DHCP server’s IP address lease table to find the IP address of NVR. You can also use the utility named ‘EdiView Finder.exe’ to find the IP address of NVR, which is located on CD-ROM: Press ‘Discover’ to search for all NVRs on your local network. When you find any NVR, you can click on it and click ‘Link’ button to connect to it by your web browser. If you need to change a certain NVR’s IP address, you can also click on the NVR you wish to change IP address, then click ‘Change IP’ button to change select NVR’s IP address setting. If you no longer need to use this utility, click ‘Exit’ button to close it. Note: If you have several network connections, please disable connections that are not connected to IP camera, or IP finder may fail to search IP camera. 14 2.2 Accessing the Web Interface When you know the IP address of NVR, you can connect to it by web browser by entering its IP address in address bar. The use login screen will appear when you are connected: Lon in the NVR. The default username is ‘admin’ and the default password is ‘1234’. Click ‘Apply’ or press ‘ENTER’ key on your keyboard when you finish entering username and password. When you connect to NVR for the first time, you will see the following: If you use Internet Explorer web browser. This message prompts you that you need to install ActiveX plug-in before you can see the video from IP camera. 15 IE 8 and earlier versions: Right click the indication bar and click ‘Install This Add-on for All Users on This Computer…’ to install ActiveX plug-in. For IE 9: Click ‘Allow’ to install ActiveX plug-in. If you see ‘Windows Firewall has blocked some features of this program’, click ‘Allow access’, or video server will not be able to function properly. Note: If this is the first time you use this NVR, you can jump to chapter 2.4 for instructions on Setup Wizard, which will guide you to complete the software setup of your new NVR. 16 Click ‘Yes’ to allow changes. After ActiveX plugin is installed, you should be able to see the video stream from camera 2.3 Controlling Network Cameras Your new NVR is capable to connect to multiple IP cameras and display their video streams simultaneously. You can also change Pan and Tilt of camera. In this chapter, you will learn how to control remote IP camera by web interface. After you logged into NVR’s web interface, you will see ‘Home’ screen, it is also the page where you can control camera: 17 Item Time & Date Pan & Tilt Single/Quad Display Camera Select Description Displays current date and time. If the date and/or time is incorrect, please correct it or the data recorded by this NVR will become inaccurate when you need to review them. You can correct date and time by System setup -> General -> Time Setup menu. Controls the pan and tilt of remote IP cameras. Please note that not every camera supports pan and tilt control, nothing will happen when you try to control pan and tilt on these cameras. To move camera left, right, up, and down, just click on corresponding button. To re-position the camera back to its ‘Home’ position (i.e. starting position), click the black circle button in the center of pan and tilt control. To view the video of a certain camera only, click button. To view the video of four cameras simultaneously, click button. Click on the dropdown menu to select a certain camera to view from all of the cameras. To get the camera’s IP address, you can move the move and stop on this icon: Connect Connect to selected IP camera and start playing video. Disconnect Disconnect from connected IP camera and stop playing video. Snapshot Take an image snapshot of current video stream. You will be prompted to input the directory where you wish to save the snapshot file. Start recording current video stream and save to a video file. You will be prompted to input the directory where you wish to save the video file. Enable digital zoom to enlarge video from camera, so you can see some certain objects in detail. Record Digital Zoom Fit the window size Display the video streams original size or fit the window size. 18 IP address In Quad display, mouse move over the icon, will get the IP address information. 2.4 Setup Wizard Setup wizard allows you to setup the NVR quickly and easily. It is a good idea to setup NVR by this way if it is first time you use this NVR. To access ‘Setup Wizard’ menu, click indicated button on the top of web interface: The following will appear: Item Host Name Network Type: LAN Description Input the hostname of this NVR. You can give this NVR a unique name so you can identify each other easily. Specify an IP address to this NVR. There are two ways: 19 DHCP: This NVR will allocate an IP address automatically from your DHCP server on local network. Static IP: Input the IP address information manually; please assign a unique IP address on your network. DNS1 and DNS2 are optional, but some network functionalities will not work if both fields are blank. Input at least DNS1 when possible. Network Type: PPPoE Start UPnP: Start UPnP function and computers capable to locate UPnP resources on network can discover this NVR automatically. The PPPoE cannot be selected under Wizard mode. When you finish with above settings, click ‘Next’ button to continue: In this screen, you can locate all compatible IP cameras on the local network. Click ‘Auto Search’ to start locating IP cameras, you can click this button more than one time if not all IP cameras are found. In this example, an IP camera named ‘CAMER-1’ which model is ‘NC-213’ has been found: Please note that this function is only capable to locate IP cameras on local network. For cameras on Internet, please setup them manually. Click ‘Next’ button to continue when all IP cameras you wish to connect are found. In this screen, you can configure hard drive(s) as your video storage space. In this example, there is only one hard drive found on NVR: 20 Click ‘Next’ to continue and NVR will configure the hard disk(s) for you. Please note that if you configured hard disk(s) before, you will receive this message: You can click ‘Next’ button as you have configured storage space already. After these setup steps, you will be prompted with the setup information so far: Click ‘Back’ to return to previous screens to change settings, or click ‘Start’ button to start NVR with settings listed above. NVR need few seconds to configure its setting, please be patient. After configuration is complete, you will see this message: 21 Please wait until countdown finishes, and you will be prompted to close current Internet Explorer window: Click ‘Yes’ to close window, and reconnect to NVR. Your NVR will be ready to use. 2.5 Camera Setup Camera setup allows you to setup remote IP camera’s parameters, so NVR can access IP camera and start recording. To access ‘Camera Setup’ menu, click indicated button on the top of web interface: The following screen will appear: 22 Item Description Auto Search Click this button and NVR will search all compatible IP cameras on your local area network, this may require few seconds to complete, please be patient. Search results will be displayed as follows: Check all boxes of IP camera you wish to add, and click ‘Apply’ to add all cameras into camera list, or click ‘Back’ to go back to previous page and not adding any camera. Add Note: IP cameras which are added in the NVR already will not appear here again. Add a new IP camera manually. You’ll be prompted to input following camera parameters: IP Address: Input the IP address of IP camera. Username: Input the login user name of IP camera. 23 Password: Input the login password of IP camera. Model: Select the IP camera’s model from dropdown menu. HTTP port: Input the HTTP (web) port of IP camera. By default this setting should be ‘80’, if you changed the web port setting on IP camera, input correct web port number here. RTSP port: Input the RTSP (Real Time Streaming Protocol) port of IP camera. By default this setting should be ‘554’, if you changed the RTSP port setting on IP camera, input correct RTSP port number here. Edit Delete Click ‘Apply’ to add a new IP camera with above settings, or click ‘Back’ to discard all settings and go back. You can modify the settings of an existing IP camera in Camera list. Please click the number of camera you wish to modify setting first: Then click ‘Edit’ button to show the setting page of selected camera. You can change settings and click ‘Apply’ to apply new settings. You can delete an existing IP camera in Camera list. Please click the number of camera you wish to delete first: Then click ‘Delete’ button. You’ll be prompted to confirm camera deletion: 24 Click ‘OK’ and the IP camera will be deleted, click ‘Cancel’ to abort. Start Click this button to start video recording. When recording video from this camera, this field will look like this: To stop recording, click ‘Stop’ button. Note: If you want to configure disk space, you must stop recording first. If NVR is recording any camera’s video, you will not be able to configure disk space. 2.6 Network Setup Network setup allows you to setup NVR’s network parameters. This NVR supports DHCP, static IP assignment, and PPPoE. To access ‘Network Setup’ menu, click indicated button on the top of web interface: The following screen will appear: 25 Item LAN Description Select this item to assign an IP address to network interface. You will also need to select DHCP (NVR will obtain IP address from DHCP server automatically), or Static IP (You have to assign IP address manually). If you selected static IP, Please input the IP address information: IP address: Please input the IP address you wish to assign to NVR. Subnet Mask: Input the subnet mask of your local area network. Gateway: Input your local area network’s gateway IP address. If you’ll only use this NVR on local area network, and will not access from other 26 places (like from Internet), you can leave this field blank. DNS1: Please input the IP address of DNS server. If you don’t know its IP address, please consult your network administrator. Start UPnP PPPoE DNS2: Input backup DNS server’s IP address here. You can leave this field blank if you have only one DNS server. Check this box and this NVR will start UPnP service, so computers that are compatible with UPnP can discover the presence of NVR and get connected. It’s recommended to check this box to enable UPnP. Select this item to use PPPoE to connect to network. Username: Please input PPPoE username. HTTP Port RTSP Port Enable DDNS Password: Please input PPPoE password. Input HTTP port number. Please note that if you changed HTTP port setting here, you have to use the “address:port” format to connect to NVR by web browser. For example, if you changed HTTP port to 8080, and NVR’s IP address is 192.168.2.5, please input ‘http://192.168.2.5:8080’ in browser’s address bar. Input NVR’s RTSP port number. It is recommended to leave this setting untouched unless required. Check this box to enable DDNS (Dynamic DNS) function. This function will help you to locate your NVR on Internet by host name. Before you use this function, please register an account from one of DDNS service provider first: www.dyndns.org or www.tzo.com 27 Provider: Select DDNS service provider from dropdown list. Hostname: Input hostname you acquired from DDNS service provider. Username: Input DDNS account’s username. Password: Input DDNS account’s password. When you finish, click ‘Apply’ to save settings. NVR will start countdown for 120 seconds: Please wait until countdown finishes, and you will be prompted to close current Internet Explorer window: Click ‘Yes’ to close window, and reconnect to NVR. Your NVR will be ready to use. 2.7 Recording Settings You can configure NVR’s video recording settings here. To access ‘Recording Setup’ menu, click indicated button on the top of web interface: 28 The following screen will appear: To setup recording, select an IP camera from ‘Camera list’ by clicking its number (under ‘#’ field) first, then click ‘Edit’ button. There are two recording settings pages available: ‘Recording Setup’ and Storage’. Please note: To make sure the camera’s motion detection has been enabled 2.7.1 Recording Setup You can configure IP camera’s recording settings here. Every IP camera can has its own settings and different from others. Please click ‘Recording Setup’ tab: All IP cameras will be listed here. Select one camera by clicking its radio button under ‘#’: 29 Then click ‘Edit’ button. The following setup page will appear: Item Split File Space Motion Recycle Limit Description When recording, NVR will split the recording file into smaller ones to ease file access. You can select the individual file size from dropdown menu here. Select the hard disk space you wish to save the video recorded by this camera. Enable or disable camera’s motion detection function here. When motion detection is enabled, NVR will record only when there’s something change in camera’s view, and this will save hard disk space. Please note that you need to switch IP camera’s motion detection function on first. When you select enable, NVR will remove oldest record files when recording limit is reached (see below). If you select ‘Disable’ NVR will stop recording when recording limit is reached. Input the recording limit of this camera, and select unit (GB or MB). Minimum recording limit is 500MB. When you finish settings on this page, click ‘Next’ to continue: 30 You can define the recording schedule here. Each box represents an hour of a weekday, camera will record only when corresponding box is checked. All boxes are checked by default, and you can check the weekday box under weekly (all) to check all 0-23 hours in a weekday automatically. If you want to define a record job in the future, click ‘Job’ tab: You can make a pre-defined recording job here: You can setup up to 5 recording jobs here. You must define the starting date / time (under ‘From’), and ending date / time (under ‘To’). To enable a job, the box under ‘Job’ must be checked. When you finish, click ‘Apply’ button. 2.7.2 Storage Setup You can configure NVR’s storage space here. This NVR supports up to 2 internal hard drives, and USB flash drives. 31 Please click ‘Recording Setup’ tab: The following setup page will appear: All hard drives will be listed here. If a disk is not configured for video recording, the ‘Space’ field will be blank, and you will not be able to store video files on it. If you want to delete a configured disk space, select the disk by click its radio button and click ‘Delete space’ button. To add a space for recording, click the radio button of the disk you wish to configure, and then click ‘Add space’ button: You can configure the whole disk as a single space for recording. Click ‘Single Disk’ radio button and click ‘Apply’ button, then NVR will start configure disk: 32 This procedure may require few minutes, please be patient. After disk space has been configured, you will see this message: Please wait until countdown finishes, and you will be prompted to close current Internet Explorer window: Click ‘Yes’ to close window, and reconnect to NVR. Your NVR will be ready to use. If NVR have two hard drives in the NVR, system will display following option for you’re choose. You can make single disk or RAID (RAID 0/RAID 1/JBOD). If the space type chooses the RAID, the two hard drives must use the same capacity and same brand hard disk. 33 USB flash drives: If the NVR connect one USB flash, system will display the information. 2.8 Video Playback You can play recorded video clips here. To access ‘Playback’ menu, click indicated button on the top of web interface: When you enter this page for the first time, you may receive add-on notification (on the top of bottom of Internet Explorer): Right-click on the notification: 34 And click ‘Run Add-on’, then you’ll be prompted to run ActiveX control: Please click ‘Run’ to enable Windows media player in Internet Explorer, or you will not be able to see recorded video. When Windows media player is enabled, you can search for recorded file: Item Camera Start Time Description Please select an IP camera from dropdown menu. Only video files recorded by selected camera will be found. Specify the starting date and time of video search. To select date, click calendar icon . A calendar will appear: 35 End Time Search You can use this calendar to select a specific date. For time, you can use dropdown menu to select hour and minute. Specify the ending date and time of video search. Start search for video files between starting and ending time. When a video file is found, the search window will look like this: All found files will be listed on the left, you can select a file to play by click on it and click ‘Play’, or Click ‘Delete’ to delete selected file. Click ‘Download’ to download selected file to your computer’s hard drive. Click ‘Backup to USB’ to store selected file to external USB device. If there is no USB device connected to NVR, you will receive an error message. Storage setup can check the USB flash is ready or not. 36 Please note that you will not be prompted to confirm file deletion, so only use ‘Delete’ button when you really want to remove a video file from NVR. 2.9 System Setup You can configure NVR’s system parameters here. To access ‘System Setup’ menu, click indicated button on the top of web interface: There are 3 sub-menus available: General, Maintenance, and Config Backup, which can be accessed by three tabs in this page: 2.9.1 “General” Settings You can configure NVR’s basic system parameters here. 37 Item Hostname Time Zone Synchronize with Computer Time Synchronize with NTP Server Set Manually Description You can configure NVR’s hostname. This will help you to identify NVR on network (Some network servers and computers can discover NVR’s hostname you set here). Select the time zone of residence from dropdown menu here. Select this option and NVR will set its time by your computer’s time setting. Select this option and NVR will set its time by NTP (Network Time Protocol) server. Please note that NVR must be able to access Internet if you want to use a NTP server on Internet. If this NVR will not be able to access Internet, please select other options, or use a NTP server located on your local area network. Set NVR’s date and time manually. When you finish setting, click ‘Apply’ button to save changes you made. 2.9.2 “Maintenance” Settings You can reboot, reset, and shutdown NVR here. Item Reboot Description Reboot the NVR. You can use this function when you think NVR is not 38 Reset Shutdown Browse Update working properly. Clear all settings of NVR and reset to factory default settings. You’ll be prompted to confirm factory reset. Shutdown NVR. When you want to remove the power supply or add / remove hard drive from NVR, please use this function or the data saved on hard drive may corrupt and not be able to use again. Select a firmware file on your computer for firmware update. You’ll be prompted to select a firmware file on your computer’s hard drive. Please note: Use wired network connection to transfer firmware file, refrain from using wireless network connection. Incomplete or corrupt firmware file will cause problem to this NVR and makes it become unusable. After you selected a firmware file, you can click this button to update the NVR’s firmware file. Please follow the instructions to complete update procedure. Firmware update requires few minutes to complete, please be patient. 2.9.3 “Config Backup” Settings You can backup and restore NVR’s configuration file here. This function is handy when you have many NVRs and their configuration is similar. Item Backup Config File Restore Config File Description Save NVR’s configuration to your computer. You will be prompted to select a folder on your computer to save the file. Pick a saved configuration file from your computer and apply to NVR. Click ‘Browse’ button to select the file. After you select ‘Backup’ or ‘Restore’, click ‘Apply’ button to begin backup or restore procedure. 39 2.10 Server Setup You can configure NVR’s built-in network server upload functionality here. When you enable FTP server, you can receive log file on remote FTP file server when camera is disconnected; when you enable Email function, you’ll receive PPPOE notification email when network PPPOE function is opened. To access ‘Server Setup’ menu, click indicated button on the top of web interface: FTP Item Enable FTP Server FTP Server Port Username Password Description Check this box to enable FTP server functionality. Input FTP server’s IP address or host name. Input FTP server’s port number. Generally, FTP server will use default value ‘21’, you can change port number when this FTP server does not use standard port number 21. The user name used to login FTP server. The password used to login FTP server. 40 Folder Test FTP The folder on FTP server you wish to save video files. Click this button to establish a connection to FTP server to test connection. Email Item Enable SMTP Server SMTP Server Sender Email Primary Email Secondary Email Authorization Username Password Confirm Password Test Mail Description Enable Email notification functionality. Input SMTP server’s IP address or host name. Input an E-mail address here. This E-mail address will appear as email sender in all outgoing E-mail. Input primary E-mail receiving address here. Input secondary (backup) E-mail receiving address here. You can leave this field blank if you only have one E-mail address. If your mail server requires authorization, check this box. Please note: Please consult your E-mail server’s administrator to know if you need to check this box. User name used to pass E-mail server’s authorization. Password used to pass E-mail server’s authorization. Input password again for confirmation. Click this button to establish a connection to mail server to test connection. When you finish settings, click ‘Apply’ button to apply changes you made. 41 2.11 User Management This NVR allows two kinds of user to login: Administrator and user. Administrator can configure NVR and apply changes, while user only allowed viewing video files. Only 1 administrator is allowed, while more than one user is allowed. To access ‘User Management’ menu, click indicated button on the top of web interface: Administrator Item User Description Password Description Input descriptions for administrator. You can input any description text here. Input administrator’s new password here. 42 Confirm Password Input administrator’s new password again for confirmation. When you decided administrator’s new password, click ‘Edit’ button to save changes. If the passwords in ‘Password’ and ‘Confirm Password’ field are different, you will receive an error message. Account Item Account List Delete Account User Description Password Confirm Password Description Lists all user accounts on NVR. Delete a user. Select one user from ‘Account List’ first. Input a new account name. Input any description text for this user here. Input this user’s password here. Input this user’s password again for confirmation. When you finish, click ‘Add’ button to add a new user with the information you provided, or click ‘Reset’ to clear all texts in this page. 2.12 Device Information Displays NVR’s current configuration. To access ‘Device Information’ menu, click indicated button on the top of web interface: 43 There are two tabs in this page: You will find general NVR information under ‘General’: NVR activities are recording under ‘Log’: 44 Item First page Previous Next Final page Clear Refresh Description Go to first page of system log. Go to previous page. Go to next page. Go to last page of system log. Remove all logs from NVR. Reload log and display latest log information. 45 CHAPTER III: CMS LITE 3.1 Installation Perform CMSLite installation: setup.exe Click Next 46 Click Install Installation steps: Press Finish to complete system installation. After completing installation, there will be a hyperlink CMSLite produced on desktop. 47 Shortcut Click desktop link to execute CMSLite. Enter valid account and password (the default account is “admin” and the default password is “1234”). Click OK button to enter main menu. In case of wrong information entered, there will a notice shown. Click Exit button to complete the system. Note: The minimum screen resolution supported by CMS system is 1024*768. 48 3.2 Main Menu : Capable to check the current camera device list and group list (tree structure). Click the arrow to pop up or scale the whole list. Device maintenance: To create new area, location, device sating, group setup. View video: classified into device check and group check; or directly click camera page or group page at top left; click the desired real time video to be viewed. Electronic map: Electronic map maintenance, electronic map browser. Schedule maintenance: Schedule setup, event server, event trigger setup Device status: Check current status of all device System maintenance: Account management, address book and system maintenance (System setup, language and database maintenance) Video playback: Open video playback window for remote video playback or video file download 49 Report log: Provide system use log, video playback log, account abnormal change log for check and output PTZ operating panel and preset point operation and setup are valid only in one split window. In case that it does not support model PTZ, no response will be achieved if to click some functional buttons. Eight directional PT operations In case that all statuses are normal with the device, the figure does not flash. In case of abnormality of the device, the figure flashes; it is a triggered response in case of setup for abnormality of the device, and it perfumes this action. In case of couples of camera abnormal at the same time, all triggered actions will be performed in turn. One abnormal camera will trigger once triggered action except for new abnormal state. Directly click the flashing figure to browse the abnormal devices To browse the real time video, select split 1, split 4 split 9, split 16 and full screen (press ESC button to exit full screen). If the camera is over one page, there will be a button for page-next or page-previous on right bottom part, or select automat scan. When browsing video in spilt 1 window PT functions are valid for option. Click to select minimum logout or exit from the system 3.3 Device Maintenance Including four functions: area setup, location setup, device maintenance, and group setup. Click the page with items to be maintained on for information setup and maintenance. 50 4.1 Area Setup Administrators can add/modify/remove area data at will. Add: Press Add button. It will be OK to click Save button just after entering area name. Modify: Slide the mouse to click one area name to be changed from area list; enter the correct name and press Save button to complete modification. 3.3.1 Area Setup Administrators can add/modify/remove area data at will. 51 Add: Press Add button. It will be OK to click Save button just after entering area name. Modify: Slide the mouse to click one area name to be changed from area list; enter the correct name and press Save button to complete modification. Remove: After sliding the mouse to click one area name to be changed from area list, it will OK just to press Remove button. In case of location data existing in this location, “remove” is prohibited. 52 3.3.2 Location Setup Administrators can add/modify/remove location data at will. Add: Press Add button; after selecting data (Other data are for reference only, they are not required for input.) of area located and entering location name, it will be OK just to click Save button. Modify: Slide the mouse to click the area name to be changed from location list; enter the correct name and press Save button to complete modification. 53 Remove: After sliding the mouse to click one location to be changed from location list, it will OK just to press Remove button. In case of location data existing in this location, “remove” is prohibited. 4.3 Camera device setup: The devices include IP Camera, Video Server and NVR. Administrators can add/modify/remove data of the devices at will. Cameras of each device differ from each other. Quantity of cameras allowed to be input to system differs from each other due to different versions. Add 54 Select brand and model (Pop up to select brand of camera. In case of wrong selection, camera can not be correctly shown.) Enter device name (Caption displayed on real time camera or icon shown on figure) Enter IP location (Directly enter IP or Domain name) Enter device number and location (not required) Enter linked account and password (the default is admin/1234). In case of wrong account and password entered, there is no way to determine if the device is currently and correctly being linked. . Enter Http port and RTSP port (the preset is 80/554). In case of wrong Http port entered, camera can not be normally displayed. Select streaming type (Different branded model device support different streaming.). In case of wrong information entered, camera can not be normally displayed. Select if to capture device connecting status, select if to determine the device is currently connecting Camera quantity (The system will automatically make judgment based on brand and model selected.) Device search: If to press search device button, the system will list out all devices searched in the current area. In the searched list, double click with the mouse to select the device to be added, it will be filled information of machine model, device name, IP address and Http port in to the related field. In case of fail to find the desired information, you press search button again or back to page for added data. 55 Modify: Slide the mouse to click one device name to be changed from camera device list; after making modification in field to be changed, press Save button to complete modification. The operation modes of each field are the same as the added action. Remove: Slide the mouse to click one camera device name to be changed from camera device list. It will be OK just to press Remove button. While removing the camera, all the other related setups are also removed (Remove from group and electronic map). 56 3.3.3 Group Setup Administrators can add/modify/remove group data of the camera devices at will. Group setup is convenient for video management and view. Add: Press Add button; after entering group name and clicking camera located, it will OK just to press Save button. Modify: Slide the mouse to click one group name to be changed from camera device list; after entering data to be changed, press Save button to complete modification. Remove: Slide the mouse to click one group name to be removed from group list. It will be OK just to press Remove button. The system will ask you to make sure if to really remove data of this group. 57 Back to main menu: After completing setup the related devices, press OK button to return to the main menu. (If not to press OK button, some operations of the main menu are locked and can not be performed.) At this time, the camera device group data at top left corner of the main menu will ails be accordingly changed. (Arrow zoom list can be selected by click.) 58 3.3.4 Status Collecting Steps If the status collecting field of the camera device is set to Yes, the system will supervise if the device if normal by CMS IP Camera Status service procedure being performed at background. If abnormality detected, it will notify CMNS for processing (Event trigger) System exiting will automatically close this procedure. If the user closes this program, the user will have no way to collect abnormal status in the future. 3.4 View Classified into device check (for all camera devices) and group view mode 3.4.1 Device View Click device view to connect all camera devices. Firstly to display video in split 1 interface. Aiming at demand, functions including 1/4/9/16/full screen/page-next/page-previous/automatic scan, snapshot/audio listen/talking/PTZ can be performed. If to click to select single camera from tree list of device camera area location at top left corner of the main interface, it is also to directly enter spilt 1 mode for device view. 59 Real time video 1/4/9/16: According to spilt mode selected, it is to display real time video. If camera quantity is more than quantity of split, page-next and page-previous button will be shown. The current total number of page is shown in the middle. Page-next/page-previous: Switchover of displayed video camera. Automatic scan: When spilt mode displayed exceeds one page, automatic scan can be started. After a certain period of interval of the system (Time in second for interval can be set in system maintenance.), it will automatically skip to the next page. Press the Automatic Skip button again to delete the action. PTZ: Theses functions can be performed in spilt 1 mode. Full screen: In different spilt modes, if to press Full Screen button, the system will switch over to full screen display mode as shown in the figure for spilt 4 of full screen display. If to remove full screen display, press ESC button to return to the main menu. 60 Right button list: Click right button of the mouse on device name to select to display a list. Click the desired function. Connect: In case of video interrupted, click Connect to connect with the camera again. Disconnect: If stop is required, click Disconnect. If displaying camera is required, it is to click Connect. Camera switchover: If to switch over to another camera displayed, Camera Switchover can be selected for changing camera displayed. 61 3.4.2 Group Check Click group check, click one group name from the list; the system will record camera data of this group set. The system will firstly display camera in split 1. And , aiming at demand, the system performs functions like 1/4/9/16/full screen/page-next/page-previous/automatic scan/PT. If to click to select a certain group name from the group tree list at top left corner of the main menu, you may also directly enter split 1 mode of group check. Click to select one group name from group list: Click group tree list: 62 The button operating method is the same as device view mode. 3.4.3 Event Alarm When the system detects abnormality with the device, the icon at bottom of the main menu will start flashing. Click event alarm icon to check location of abnormality with the device. Press X button at left bottom to return hide event alarm list, return to the main menu. Event trigger: In case of abnormal camera with set event trigger, and the time the event occurs is within the range of the action, trigger will be performed. Send e-mail Play audio Pop up electronic map: The reporting device on the electronic map will flash. 63 3.5 Electronic Map Including functions of electronic map maintenance and electronic map browser 3.5.1 Electronic Map Maintenance Administrators can add/modify/remove electronic map data at will. Add: Press Add button; after selecting one map file (the uploaded file types are BMP/JPG/GIF/PNG), you can find map file in the preview area at this time. Click Save button to complete adding to the electronic map. 64 After completing adding, editing camera location button will be shown. Click it to enter camera location editing. Add camera to map: Select one camera from camera list to be placed into the map, slide the mouse to this E-MAP to find the location to be placed in, and then press the mouse to pop up a window for selecting camera direction. After selecting direction, it is press setup to complete camera location editing. Remove camera from map: find the camera in the map to remove, click right button of the mouse. The system till pop up a dialogue box to ask you to make sure if to remove it. In case Yes (Y) replied, it will be removed. 65 Added to map link: Electronic maps can be linked together. After selecting the electronic map to be linked, move the mouse to map area to find the location to be placed in. Then, click the mouse to complete electronic map location editing. Remove map link from the map: Find map link in the map, click right button of the mouse. The system will pop up a dialog box to ask you to make sure if to remove it. In case of Yes (Y) replied, it will be removed. Save: After completing editing, press Save button to complete setup. Return to map list. Back: If no any changes made, you may click Back button to return to electronic map maintenance. Modify: Click one electronic map name in the electronic map list desired to change; after entering data to be changed, press Save button to complete modification. If to change camera location or electronic map link, you may also directly click editing camera location button to enter editing. 66 Remove: Click one electronic map name in the electronic map list to be removed; it will be OK just to press Remove button. The system will ask you to make sure if really to remove data of the electronic map. 3.5.2 Electronic Map Browser After clicking the main menu, you can select one electronic map to browse. 67 Map list: List out electronic map for users to operate. Click any electronic map to show this map and camera location linking with the map. Click any camera icon to browse real time video of the camera (pop up the window); click map link to switch over to another electronic map. Close map: Return to browse real time video of the main menu 3.6 Event Schedule Including the functions of schedule setup, event server setup and event trigger; click the page with items to be maintained on to set and maintain data. 68 3.6.1 Schedule Setup Administrators can add/modify/remove schedule setup data at will. Add: Press Add button; after entering schedule name, select period of time (half hour is one period); and finally click Save button to complete adding. Click setup of each period of time with the mouse (Press Setup for once, and press it again to remove it.), or click day of the week to set a whole day of this week (Press it again to remove it.), or press to select all for setup all time or remove all not selected. Click day of the week to set a whole day of this week (Press it again to remove it.), or press to select all for setup all time or remove all not selected. Modify: Click one schedule name from the schedule list to be changed; enter a correct name and period of time to be modified, and finally press Save button to complete modification. 69 Remove: Click one schedule name in the schedule list to be changed; it will be OK just to press Remove button. If there is still set trigger data in the schedule, there will be a warning note shown, and “remove” is prohibited. 3.6.2 Event Server Administrators can add/modify/remove event server setup data at will. SMTP server Enable SMTP: With setup to enable SMTP; only with setup for event trigger, message can be normally sent. SMTP main unit location; 70 Sender: E-mail from sender to send trigger event notice; Authentication information: If authentication is required for SMTP, please enter account/password of the sender; SMTP port: The preset is 25; if SMTP server port and port event are with preset value, they can be changed to correct data. FTP server: Enable FTP: With setup to enable FTP; only with setup for event trigger, log file can be sent to the ftp server. Host address: FTP server address FTP port: The preset is 21; if FTP server port and port event are with preset value, they can be changed to correct data. Authentication information: If authentication is required for FTP, please enter user name /password. Test: User can test SMTP or FTP setting is correct or not. Save: Click Save button to complete adding. Remove: To erase the event server setup, you may click Remove button. The system will ask you to confirm. If to click Yes, the setups of the event server will be erased. 71 3.6.3 Event Trigger Aiming at each camera, administrator can add/modify/remove event trigger setup data at will. In case of abnormal event happened, disposal action to be triggered can be selected. Setup for each camera to be triggered is required. Firstly select the camera to be set from the camera list. If it was set ready, there would be trigger action set before displayed in the right field. Setup event trigger can be based on the schedule. If time is beyond the schedule, and an abnormal event happens, no trigger action will be performed. Camera list: Select the camera device to be set Event schedule: Select one schedule being performed FTP: If to send log file to FTP when event happens, please select FTP 72 SMTP: If to send notice when event happens, please select SMTP and click e-mail information in the address book. Message subject and text to be sent can be set. Play audio: If to send audio when event happens, you may click browser button to select one sound level (*.wav). You may press test button to check if normal play can be performed. Electronic map: If to interlink with the electronic map when event happens, select one electronic map with this camera. When event happens, the main menu will switch over to this electronic map. Meanwhile, the icon of this camera will turn red and flash. It will be OK to press Save button after completion of setup. To delete event trigger action of a certain camera, click Remove button for deletion. 3.7 Device Status In the main menu, clock Device Status button to check status of all camera devices. Status is indicated by different colors: Green: Normal Red: Interrupted Time of event happened In this menu system, there will not keep updating. If updating camera device status is required, click the update button. 73 Press OK button to return to the main menu. 3.8 System Maintenance Including the functions of account management, address book setup, system setup and password change (Common user account login), click the page with item to be maintained on for data setup and maintaining. 3.8.1 Account Management Administrator can change password of administrator, and add/modify/remove user’s account data. Change administrator password To change administrator’s password, it is required to firstly enter current password and new password, and then press Change button to complete change. In case of wrong data, change fail will be caused and a warning notice will be popped up. User Account Add: Press Add button; after entering user account, it will be OK to click Save button. Enter user account, user name and password; same user account is prohibited. User group: Classified into general user and advanced user. Different group can access to different functions of the system. Camera device use right: It is set camera devices for users after login of the system. 74 Modify: Click one user account from user account list to be changed with the mouse; after entering correct data in the right field, press Save button to complete modification. Remove: Click one account from the user account list to be deleted, it will be OK just to press Remove button. The system will pop up a notice to confirm your removing. 3.8.2 Address Book add/modify/remove user’s account data. The data in address book can be used for clocking during camera event trigger setup. Add: Press Add button to select enter name and e-mail data, or directly click the preset user account data as address book; it will OK finally to click Save button. 75 Modify: Click one name from address book to be changed with the mouse; after entering the correct data, press Save button to complete modification. Remove: Click one name to be removed from the address book with the mouse, it will OK just to press Remove button. The system will pop up a notice for confirm your removing. 76 3.8.3 System Setup System information: Scan time interval: Automatic scan time interval by second; after selecting the desired seconds, it will be OK just to press the Apply button. Enable start the software when windows start Language: Set language for the system; after selecting the desired language, it will be OK just to press the Apply button. Database maintenance Backup: press Backup button to produce a backup file in computer of the user; Restore: Select one file for restoring from backup database list; press Restore 77 button to restore the system to the status of the database. Before performing restoring, the system will ask you to make sure if to make a backup; Remove: Select one file to be removed from the backup database list; just to press Remove button to delete the backup database; Download: Select one file to be downloaded from the backup database list; after pressing Download button, the system will ask you which file to be downloaded to. After selection, this database will be copied to this catalogue (Totally two database files); Upload: To upload the downloaded database file to the system, it is to press Upload button. The system will ask you to select the file for uploading. After pressing catalogue browsing button for selection (Totally two files to be uploaded), press Upload button to complete uploading. After uploading, a file will be generated. The file can be restored based on your actual need (restore the reference database).. Reset: Clear all system information to the initial installation status. Change password: After login with general user account, account management and address book function can not be performed. If changing password for login of the system, you enter the page for password change. User change password: It is required to firstly enter the current password and new password, and then to complete changing password just to click Change button. 78 3.9 Video Playback After pressing Playback button in the main menu, the system will pop up a playback page (If another screen is connected, it will be popped up on the second screen.) User may perform operation in the main menu and playback interface. Select camera and inquiry conditions: Select a camera and a period of time for playback (Begin time and end time). In case of being searched, it will automatically download and play the video file. The method to find the video file follows the setup for camera device timing and video information. In case of video set to NVR-4, the system will be linked to the set installation route to ask. In case of fail to ask, the reply is the fail to find the video. In case of no setup, the system will pop up a dialogue box to ask the location of 79 the video file. Play control Control of play/pause/stop can be performed on the video; In case of couples of videos in the folder, the previous and last video are for option; Click the right button of the mouse on the being played video, advanced operation can be performed (play speed, volume and zoom) Download video file: Select the video file to be downloaded (Couples of file can be selected); after pressing Save button, the system will ask you for the catalogue to be saved in. After that, it will download the selected file from the remote end. Download decoder: In case of replay found during video file playback, however the video image is blank that indicates that there is no a video decoder installed on the computer. Please click a decoder hyperlink to download the updated decoder. 3.10 Report Log Click Report Log button in the main menu to access to use log, video playback log and account change log of the system provided. 3.10.1 System Use Log All functions of system login with the account and operation time are kept as the log. 80 Search: Select the account, functions to be performed and period of time to be searched; press Search button to find out system use log. Export: After pressing export CSV file for the searched files, the system will export the file to the designated catalogue. Remove: In case of too many log files, when the file can be searched, press Delete Log button for deletion. 3.10.2 Video Playback Log During playing the image of video playback file function, all the video files searched within this period of time are kept as the log. 81 Search: Select the camera, account and period of time for file playback to be searched, and press Search button to find video playback log. Export: After pressing export CSV file for the searched file, the system will export the file to the designated catalogue. Remove: In case of too many log files, when the file can be searched, press Delete Log button for deletion. 3.10.3 Account Change Log During performing account management function, all changes for the account are kept as the log. 82 Search: Select the changed account, operation action (Add/Modify/Remove) and period of time for change to be searched, and press Search button to find account change log. Information of current password, name and password, and new account, name and password will be recorded. Export: After pressing export CSV file for the searched file, the system will export the file to the designated catalogue. Remove: In case of too many log files, when the file can be searched, press Delete Log button for deletion. 83 CHAPTER IV: APPENDIX 4.1 Troubleshooting Please don’t panic when you found this NVR is not working properly. Before you send this NVR back to us, you can do some simple checks to save your time: Problem Cannot connect to the NVR No network camera found Solution 1. Please check the IP address of NVR again. 2. Please make sure the network cable is correctly connected to your local area network. 3. Please make sure power cable is correctly connected to NVR. 4. Please make sure NVR is switched on (the LED lights on front panel or NVR will light up). 1. ‘Auto search’ function only works on IP cameras located on local area network. To add a remote IP camera, you must use manual configuration. 2. Only ‘EDIMAX’ IP cameras are supported currently. 4.2 Specifications Description Microprocessor Flash ROM RAM Supported Image Format Maximum Number of Cameras HDD Type HDD Bay & Max. Capacity RAID Network Interface USB Buttons LEDs Recording Mode Alarm Event Snapshot 4 CH Network Video Recorder Cavium 32 MB 256 MB H.264 / MPEG-4 / M-JPEG 4 Channels SATA I/II/III Compatible 2 Bays ; Total capacity: 2TB x2 ( SATA 3.0 ) Standard, RAID 0, 1(Mirror) 10/100/1000 Mbps RJ45 Ethernet port USB 2.0 x 1: supporting Flash-disk Reset / Power on/off Power / Network Indicator / HDD Status Indicator / USB Indicator Continuous / Manual / Schedule /Motion Detection Yes Yes Yes 84 Recording Frame Rate Export File Format Recording Playback Video Split Mode PTZ Control Event Handling Event Trigger Action CMS Log Remote Management Expandability Supported Protocols Device Network Configuration Security Display Mode Video Channels Concurrent Recording Compression Format Resolution Mobile Device Live View Supported Camera ONVIF 120 fps at H.264 AVI Search Date/Time Play / Pause / Stop / Fast Forward 1/4 split Yes Motion / System FTP Yes (CMS Lite) Yes IE / CMS Free Bundled CMS ( CMS Lite ) Manage 16 sets of NVR Total 64 ch IPV4, ARP, TCP, UDP, ICMP,DHCP,NTP,DNS, DDNS,SMTP, FTP,HTTP,UPnP,RTP,RTCP,RTSP; PPPoE Static IP/DHCP Multi-level User Management / Event Log 1 or 4 channels Live View and 1 channel Playback View 4 4 H.264/MPEG4/MJPEG up to 3Megapixel 3GPP Edimax camera Yes 85 Federal Communication Commission Interference Statement This equipment has been tested and found to comply with the limits for a Class B digital device, pursuant to Part 15 of FCC Rules. These limits are designed to provide reasonable protection against harmful interference in a residential installation. This equipment generates, uses, and can radiate radio frequency energy and, if not installed and used in accordance with the instructions, may cause harmful interference to radio communications. However, there is no guarantee that interference will not occur in a particular installation. If this equipment does cause harmful interference to radio or television reception, which can be determined by turning the equipment off and on, the user is encouraged to try to correct the interference by one or more of the following measures: 1. Reorient or relocate the receiving antenna. 2. Increase the separation between the equipment and receiver. 3. Connect the equipment into an outlet on a circuit different from that to which the receiver is connected. 4. Consult the dealer or an experienced radio technician for help. FCC Caution This device and its antenna must not be co-located or operating in conjunction with any other antenna or transmitter. This device complies with Part 15 of the FCC Rules. Operation is subject to the following two conditions: (1) this device may not cause harmful interference, and (2) this device must accept any interference received, including interference that may cause undesired operation. Any changes or modifications not expressly approved by the party responsible for compliance could void the authority to operate equipment. Federal Communications Commission (FCC) Radiation Exposure Statement This equipment complies with FCC radiation exposure set forth for an uncontrolled environment. In order to avoid the possibility of exceeding the FCC radio frequency exposure limits, human proximity to the antenna shall not be less than 2.5cm (1 inch) during normal operation. Federal Communications Commission (FCC) RF Exposure Requirements SAR compliance has been established in the laptop computer(s) configurations with PCMCIA slot on the side near the center, as tested in the application for certification, and can be used in laptop computer(s) with substantially similar physical dimensions, construction, and electrical and RF characteristics. Use in other devices such as PDAs or lap pads is not authorized. This transmitter is restricted for use with the specific antenna tested in the application for certification. The antenna(s) used for this transmitter must not be co-located or operating in conjunction with any other antenna or transmitter. R&TTE Compliance Statement This equipment complies with all the requirements of DIRECTIVE 1999/5/EC OF THE EUROPEAN PARLIAMENT AND THE COUNCIL of March 9, 1999 on radio equipment and telecommunication terminal equipment and the mutual recognition of their conformity (R&TTE). The R&TTE Directive repeals and replaces in the directive 98/13/EEC (Telecommunications Terminal Equipment and Satellite Earth Station Equipment) As of April 8, 2000. Safety This equipment is designed with the utmost care for the safety of those who install and use it. However, special attention must be paid to the dangers of electric shock and static electricity when working with electrical equipment. All guidelines of this and of the computer manufacture must therefore be allowed at all times to ensure the safe use of the equipment. EU Countries Intended for Use The ETSI version of this device is intended for home and office use in Austria, Belgium, Bulgaria, Cyprus, Czech, Denmark, Estonia, Finland, France, Germany, Greece, Hungary, Ireland, Italy, Latvia, Lithuania, Luxembourg, Malta, Netherlands, Poland, Portugal, Romania, Slovakia, Slovenia, Spain, Sweden, Turkey, and United Kingdom. The ETSI version of this device is also authorized for use in EFTA member states: Iceland, Liechtenstein, Norway, and Switzerland. EU Countries Not Intended for Use None 86 87