1
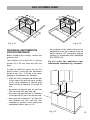
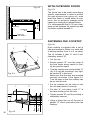
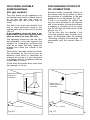
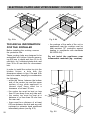
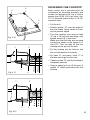
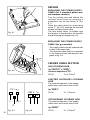
WITH CUPBOARD DOORS (fig. 6.3) ;;;;;;; ;À@À@ ;;À@ ;À@;À@ Fig. 6.3 Cupboard door Space for connections 30 mm Clearance ;;;;; ;;;;;;;; ;; The fixture has to be made according to specific requirements in order to prevent the gas burners from going out, even when the flame is turned down to minimum, due to pressure changes while opening or closing the cupboard doors. It is recommended that a 30 mm clearance be left between the cooker top and the fixture surface beneath it. FASTENING THE COOKTOP (fig. 6.4) A A Each cooktop is supplied with a set of tabs and screws to fasten it on units with a working surface from 2 to 4 cm deep. A A The kit includes 4 tabs “A” and 4 selfthreading screws “B”. ✓ Cut the unit. ✓ Stretch gasket “D” over the edge of the hole made, being careful to overlay the junction edges ✓ Turn the cooktop over and put tabs “A” (fig. 6.4) into the mountings, only tighten screws “B” a few turns. Make sure that the tabs are mounted correctly as shown in the figure 6.4. Turn the tabs so that the cooktop can be put into the hole. Fig. 6.4 C ✓ Put the cooktop into the hole cut into the unit and position it correctly. D ✓ Put tabs “A”; into place, tooth “C” of the tabs should go into the hole. ✓ Tighten screws “B” until the cooktop is completely secured. 20 A 40 mm max. B Fig. 6.5 20 mm min. ✓ Using a sharp tool cut off the part of gasket “D” which protrudes from the cooktop.