1
Manual
(UK)
Professional answering machine with
time control, SMS service and message
transfer
Retell 540 office
Safety instructions
Safety instructions
When installing, connecting and operating the Retell 540 office please observe the
following instructions:
•
Only connect the connection cable to the appropriate sockets.
•
Make sure the cables are laid in such a way that accidents cannot occur. Connected cables must not be subject to excessive mechanical strain.
•
Install the device away from sources of electrical interferance.
•
Only use authorised accessories for this device.
•
Never open the device yourself. Do not use sharp or metal objects to open the
wrapping.
•
Use only a soft damp cloth to clean the device. Do not use abrasive liquids or
chemicals to clean the device.
•
Protect the device from moisture, dust, liquids and vapours.
•
Do not use the device in direct sunlight.
•
Do not use the device in areas where there is a risk of explosions.
•
Only use the original power adapter and the original telephone connection cable
3
Button allocation
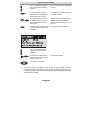
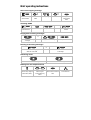
Button allocation
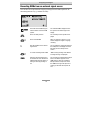
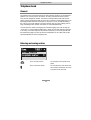
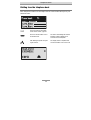
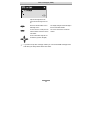
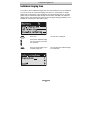
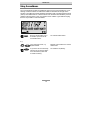
Playback: Starts playback of incoming messages that have not yet been
listened to. If pressed during playback it repeats the last 3 seconds.
Stop: Ends the current function; is used to close open menus.
Answering mode: Switches answering mode on or off.
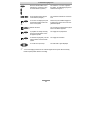
Menu: Opens the menu. For text entries is used as the entry button for
letters and numbers.
Message: When pressed briefly starts playing current message back. When
pressed and held starts recording the current message. For text entries is
used as the entry button for letters and numbers.
Message transfer: Switches message transfer on or off. For text entries is
used as the entry button for letters and numbers.
Timer: Switches timer on or off. For text entries is used as the entry button
for letters and numbers.
Secondary function: Enables a secondary function. For text entries is used
as the entry button for letters and numbers.
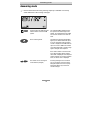
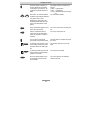
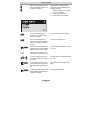
Control button (up): Opens the call list, is used to navigate through and
make settings in the menus.
Control button (down): Opens the telephone book, is used to navigate
through and make settings in the menus.
or
Control buttons (left/right): changes the volume, is used to navigate through
and make settings in the menus.
4
Button allocation
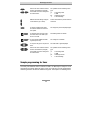
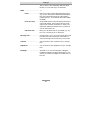
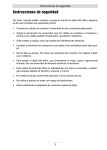
Selection button: Used to select from menus, entry fields and functions that
are displayed next to the corresponding button.
and
Secondary function and playback can be pressed in succession: Starts
playback for all incoming messages. Playback starts with the oldest and
ends with the newest recording.
and
Secondary function and Control button (down) pressed in succession:
Opens the entry field for the telephone book.
and
Secondary function followed by pressing and holding message: Starts
recording the outgoing message via the audio input.
and
Secondary function and Answering mode pressed in succession: opens
the settings and activates the absence manager.
5
User elements
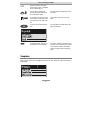
User elements
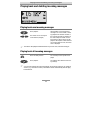
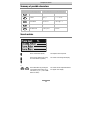
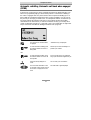
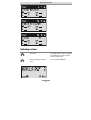
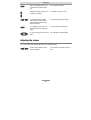
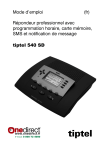
SMS-LED
Flashes when there are new, unread SMS messages. Flashes quickly if
the mail inbox is full and there is no more memory for new short messages..
LED in the answering
mode button
Is lit when answering mode is switched on (answering machine active).
LED in the playback
button
Flashes when there are new, unread incoming messages. Flashes
quickly if the memory is full and there is no more space for new incoming messages.
6
Contents
Contents
Safety instructions.......................................................................................... 3
Button allocation ............................................................................................ 4
User elements................................................................................................. 6
Contents.......................................................................................................... 7
Display symbols ............................................................................................. 10
Getting started ................................................................................................ 12
Parts supplied..............................................................................................12
Installation ...................................................................................................12
Connecting ..................................................................................................12
Outgoing messages ....................................................................................... 14
General ........................................................................................................14
Sample outgoing messages .......................................................................14
Recording an outgoing message ...............................................................15
Recording OGMs from an external signal source ......................................16
Checking OGMs..........................................................................................17
Deleting OGMs ............................................................................................17
Answering mode............................................................................................. 18
Playing back and deleting incoming messages ........................................... 20
Playing back new incoming messages ......................................................20
Playing back all incoming messages .........................................................20
Repeating ....................................................................................................21
Pausing playback........................................................................................21
Skip..............................................................................................................21
Fast forward and rewind .............................................................................21
Deleting individual incoming messages .....................................................21
Deleting all incoming messages.................................................................22
Dialling the caller directly ............................................................................22
Monitoring/Personal info (memo) ................................................................. 23
Monitoring telephone calls..........................................................................23
Personal info (playback) .............................................................................24
Absence manager........................................................................................... 25
Call list ............................................................................................................ 27
Telephone book.............................................................................................. 29
General ........................................................................................................29
7
Contents
Entering and saving entries ........................................................................29
Summary of possible characters ................................................................32
Search entries .............................................................................................32
Checking and changing entries..................................................................33
Personal OGM (call filter) ............................................................................34
Vocal clip .....................................................................................................35
Dialling from the telephone book................................................................36
Automatic redialling /Automatic call back when engaged (CCBS)............37
Message function ........................................................................................... 38
Remote access ............................................................................................... 39
Remote access............................................................................................39
Remote access functions............................................................................40
Remote activation of the answer mode ......................................................43
Short messages (SMS) ................................................................................. 44
Configuring the telephone connection .......................................................44
Registering and de-registering with your message center ........................45
Entry options for short messages ...............................................................45
Inbox............................................................................................................46
Outbox .........................................................................................................48
Sending a message (SMS) .........................................................................50
Templates....................................................................................................51
Message center...........................................................................................52
Timer ............................................................................................................... 54
Setting options for timer..............................................................................54
Programming timer .....................................................................................55
Sample programming for timer...................................................................56
Switching on timer.......................................................................................57
Message transfer............................................................................................ 58
Setting options for message transfer..........................................................58
Settings for message transfer .....................................................................59
Message transfer by SMS ...........................................................................61
Sample call number entries ........................................................................62
Switching on message transfer...................................................................62
Individual ringing tone ................................................................................... 63
Call forwarding ............................................................................................... 65
Setting options for call forwarding ..............................................................65
Settings for call forwarding .........................................................................66
Sample call forwarding entries ...................................................................68
Automatic monitoring..................................................................................... 69
8
Contents
Setting options for automatic monitoring ...................................................69
Settings for automatic monitoring...............................................................70
Security lock ................................................................................................... 71
Locking the device/Changing PIN ..............................................................71
Unlocking device.........................................................................................72
Mailboxes........................................................................................................ 73
General ........................................................................................................73
Setting options for mailboxes .....................................................................73
Setting up mailboxes...................................................................................74
Using the mailboxes....................................................................................76
Remote access to mailboxes ......................................................................77
Automatic call forwarding to the mailbox ...................................................77
Settings ........................................................................................................... 78
Setting options ............................................................................................78
Setting menu ...............................................................................................81
Adjusting the volume...................................................................................82
Service menu .................................................................................................. 83
Appendix ......................................................................................................... 85
Service.........................................................................................................85
Guarantee....................................................................................................85
Legality of Recording ..................................................................................86
CE sign ........................................................................................................87
Ecological information ................................................................................87
Troubleshooting ..........................................................................................88
Delivery status .............................................................................................90
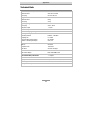
Technical Data.............................................................................................92
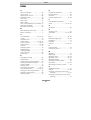
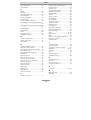
Index................................................................................................................ 93
Brief operating instructions ........................................................................... 95
Operating card for remote control................................................................. 97
9
Display symbols
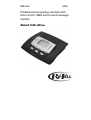
Display symbols
Answering mode switched on.
A>
Answering mode switched on,
new incoming messages
available.
Playback
Caller's number, telephone
answering mode.
Recording taking place,
microphone on.
Call forwarding
Monitoring active
Volume
General recording
Remaining incoming message
capacity
Timer on, switching time, time
Secondary function
Message transfer switched on
Enter a call number from the
telephone book
Selected outgoing message.
Delete
Search forwards
Automatic call back
Search backwards
Redial
Call unsuccessful
Call successful
Branch to a sub-menu
Mailbox 1 set up, new incoming
messages available
Device locked
Mailbox 1 set up
Ongoing recording via audio
input
Inbox old
A>
10
Delete
Inbox new
Display symbols
Entry (text) possible
Send/receive short message
Switch on/off basic settings,
software update, call forwarding
Automatic answering, line busy
Ringing signal for incoming
calls
Outgoing call
Notes on errors and operation
11
Appointment, absence manager
active
Transfer telephone book to a
second device
Getting started
Getting started
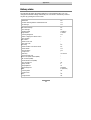
Parts supplied
Your Retell 540 office package contains:
•
•
•
•
•
Retell 540 office
Telephone connection cable
Mains plug 11.5V / 350 mA
2 transfer cables - 3.5mm stereo to stereo cable and a 3.5mm stereo to phono
lead
Operating instructions with separable brief operating instructions and operating
card for remote control
Installation
Your Retell 540 office has been produced for normal operating conditions. Solutions
in furniture varnish, cleaning oils or paint cleaners can attack the rubber feet on the
base. Damaged feet may leave tracks behind on the furniture.
Therefore use a non-slip mat especially for new or freshly treated furniture.
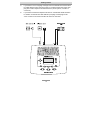
Connecting
Before you can use your Retell 540 office you first need to connect all the necessary
cables.
1
Fit the small connector of the mains plug into the "POWER" jack and the plug
into a 230 V socket outlet.
2
Fit the small connector of the telephone connection cable into the "LINE" jack
and the BT plug into the telephone socket
3
If you want to transfer incoming messages to an external medium fit the transfer cable with the jack plug to the "OUT" socket and the phono plug to the audio input on the external device (audio system, cassette recorder etc.).
12
Getting started
4
If you want to record outgoing messages from an external source fit the transfer cable with the stereo jack plug to the "IN" socket and the other stereo jack
plug to the audio output on the external device (audio system, cassette recorder etc.).
5
If you want to transfer the telephone book from one different Retell 540 office
to another use the transfer cable with two jack plugs. Fit the plugs to the
"OUT" socket on one device and the "IN" socket on the other.
13
Outgoing messages
Outgoing messages
General
Your Retell 540 office has 5 individual outgoing messages (OGM 1-5) and one preconfigured outgoing message (OGM 6). You can select the OGMs via the selection
button next to the OGM symbol. OGM 6 can not be personalised. A distinction is
made between two types of outgoing message: OGMs with and without the option
to record an incoming message. For OGMs that can record an incoming message
the caller can leave a message after the OGM. For OGMs that cannot record an incoming message (OGM only) the caller is given information but cannot leave a
message.
Sample outgoing messages
Outgoing message with incoming message option
Hello, this is the connection for Manfred Müller from … I am currently away from the
office and expect to return by [time]. You can reach me in person between [time]
and [time] or call me on … Alternatively, you can leave your name and number and
I will call you back. Please speak after the beep.
Outgoing message without incoming message
Hello, this is Willi Lohmann, sales representative for … in … My office is temporarily
closed due to illness (annual holidays etc.). Please call Mr. …, in … on … He will be
happy to assist you. Thank you for your call. Goodbye.
14
Outgoing messages
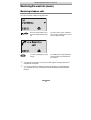
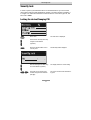
Recording an outgoing message
Select the desired OGM using the
selection button next to the OGM
symbol.
The selected OGM is displayed next to
the symbol on the bottom right of the
display.
Press and hold OGM.
Wait, you will hear a short tone, a microphone is displayed to signal ongoing incoming message.
Start speaking (maintain approx. 5
cm distance from the microphone).
The display shows the time that you
have been speaking.
Release OGM to interrupt recording.
"With incoming message" and "Without
incoming message" is displayed.
To continue the recording press
and hold OGM again.
The recording continues.
To cancel the recording press stop.
The recording is cancelled.
Using the selection button next to
the relevant line select whether the
OGM should provide the option of
leaving an incoming message or
not.
The OGM is completed and is played
back for verification purposes. If the
OGM gives the option of recording and
ICM you will hear a beep at the end. If
the OGM does not give the option of recording you will hear two beeps at the
end.
If you record OGM 5 without the option to record (OGM only) when the incoming message capacity is full your Retell 540 office switches to this
OGM automatically.
15
Outgoing messages
Recording OGMs from an external signal source
You can also record professional outgoing messages via the audio input from an
external signal source (e.g. cassette recorder).
Select the desired OGM using the
selection button next to the OGM
symbol.
The selected OGM is displayed next to
the symbol on the bottom right of the
display.
Press secondary function
The secondary function symbol is displayed.
Press and hold OGM.
Wait, you will hear a short tone, a cassette is displayed to signal an ongoing
recording.
Start the playback for the external
signal source.
You can follow the ongoing recording via
the loudspeaker. The display shows the
time that you have already been recorded.
To end the recording release OGM.
"With incoming message" and "Without
incoming message" is displayed.
Using the selection button next to
the relevant line select whether the
OGM should provide the option of
leaving an incoming message or
not.
The recording is completed and is played
back for verification purposes. If the
OGM gives the option of recording an
ICM you will hear a beep at the end. If
the OGM does not give the option of recording you will hear two beeps at the
end.
16
Outgoing messages
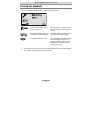
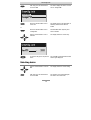
Checking OGMs
Select the desired OGM using the
selection button next to the OGM
symbol.
The selected OGM is displayed next to
the symbol at the bottom right of the display.
Press OGM briefly.
The OGM is played back. The playback
symbol, the time that you have already
heard and the number of the current
OGM are displayed.
The volume can be set using the
control buttons (left/right).
Deleting OGMs
Press the selection button next to
the delete symbol speed during
playback.
17
The current OGM is deleted.
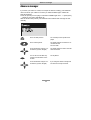
Answering mode
Answering mode
Ensure that sufficient incoming message capacity is available. If necessary
delete individual or all incoming messages.
If required select the OGM using the
selection button next to the OGM
symbol.
The selected OGM is displayed next to
the symbol on the bottom right of the
display. The symbol flashes if the OGM
has not been recorded or has been deleted.
Press answering mode.
The LED in the answering mode button
lights up. For OGMs "without the option
to record" a telephone with the number
of calls is displayed. For OGMs "with the
option to record" in addition the number
of incoming messages is shown in large
digits to the right of the telephone.
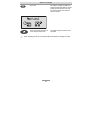
If the caller's number is transferred during a call the display changes and the
call number is displayed. If the telephone
number matches one from the telephone
book, the caller's name is displayed.
The volume can be set using the
control buttons (left/right).
18
Incoming messages can be screened.
You can accept the call at any time by
lifting the telephone receiver. The playback button flashes if you have new,
unread messages.
Answering mode
Press answering mode again to
switch off answering mode.
Further incoming calls will not be answered. The standby status is displayed.
If you record OGM 5 without the option to record (OGM only) when the incoming message capacity is full your Retell 540 office switches to this OGM automatically. Otherwise the device leaves the answering mode and does not respond to further calls.
19
Playing back and deleting incoming messages
Playing back and deleting incoming messages
Playing back new incoming messages
Press playback.
The volume can be set using the
control buttons (left/right).
Starts playback of unheard incoming
messages. The current number, remaining playback time and date and time of
the incoming message are displayed. If
the caller's telephone number is transferred during a call then this is also displayed. If the telephone number matches
one from the telephone book, the caller's
name is displayed.
The LED in the playback button flashes if you have new, unread messages.
Playing back all incoming messages
Press secondary function
The secondary function symbol is displayed.
Press playback.
The playback starts with the first incoming message.
You can also transfer incoming messages via the audio output on an external
device (e.g. cassette recorder). The transfer starts automatically with the playback function.
20
Playing back and deleting incoming messages
Repeating
Press playback during playback.
The last three seconds are repeated.
Pausing playback
Press stop.
Playback is paused.
Press playback.
Playback continues.
Press the selection button next to
the go backwards or forwards
symbol.
The incoming message you are listening
to is skipped or repeated.
Skip
Fast forward and rewind
next to the go backwards or for-
Press and hold the selection button
Playback is interrupted and the display
counts down or up the playback time.
wards symbol.
Deleting individual incoming messages
Press the selection button next to
the delete symbol during playback.
21
The current incoming message is
erased. New message numbers are assigned to all incoming messages that
follow.
Playing back and deleting incoming messages
Deleting all incoming messages
2s
Press stop.
The display shows standby and answering mode.
Press the selection button next to
the delete symbol for 2 seconds.
All incoming messages are deleted.
Dialling the caller directly
Press the selection button next to
the displayed telephone number or
the name during playback.
The device starts dialling the selected
telephone number. Dialling can be
screened via the loudspeaker.
After dialling accept the call by lifting the receiver.
The display shows a stopwatch that
counts the duration of the current call.
22
Monitoring/Personal info (memo)
Monitoring/Personal info (memo)
Monitoring telephone calls
You can record the content of important calls.
Press the selection button next to
the record symbol speed during a
call.
The device starts to record. A lifted telephone receiver is displayed so as to indicate an ongoing recording.
To end the recording press stop or
hang up.
The standby status is again displayed. If
answering mode was activated before,
this continues.
A monitoring recording is stored as any other regular recording and can be
played back at any time.
You can also transfer recordings via the audio output on an external device
(e.g. cassette recorder). The transfer starts automatically with the playback
function.
23
Monitoring/Personal info (memo)
Personal info (playback)
You can record personal information via the in-built microphone.
Press the selection button next to
the record symbol.
Wait, you will hear a short tone, a microphone is displayed to signal ongoing recording.
Start speaking (maintain approx. 15
cm distance from the microphone).
The display shows the minutes and seconds that you have been speaking.
To stop the recording press stop.
The recording ends. The LED in the playback button flashes to signal a new
message. If answering mode was activated before, the incoming message
counter increases by 1.
You can also record your personal info during answering mode. Other people
can call this up using the remote control code.
24
Absence manager
Absence manager
If you leave your office for a while, for example to attend a meeting, your Retell 540
office can inform your callers as to when you will be available again. Callers will
hear this message:
"Hello, the person you are trying to call will be available again from … I repeat [time]
… Thank you, the device will switch off."
After the set time has passed your Retell 540 office switches this message off automatically.
Press secondary function
The secondary function symbol is displayed.
Press answering mode.
The display changes and shows the current date and time.
The hours flash.
Set the desired time using the control buttons (up/down, left/right).
The display shows the absence time that
will be announced.
You can also reset the date entry
using the selection button next to
the date.
The day flashes.
Set the desired date using the control buttons (up/down, left/right).
If you change the date the message will
also announce the day and month.
25
Absence manager
Press stop.
The setting is complete, the LED in the
answering mode button lights up and the
display shows the absence time. Calls
are answered and the caller hears the
absence message.
Press Answer mode to end the absence manager ahead of time.
The display changes and returns to the
initial state.
Timer switching times are not activated when the absence manager is active.
26
Call list
Call list
The last 50 calls received are saved in call list with their date and time. If the caller's
telephone number is transferred during a call then this is also displayed. If the telephone number matches one from the telephone book, the caller's name is displayed. The call list also provides information on whether the call was successful
(conversation took place or a message was left). You can select the telephone
numbers from the call list directly by pressing the button. You can delete individual
entries or the complete list. You can transfer telephone numbers directly into the
telephone book.
Press control button (up).
The display shows the newest entry from
the call list. A smiling or sad face indicates whether the connection was successful or whether the caller hung up
without being answered.
You can search the whole list using
the control buttons (up/down).
To call a caller back press the selection button next to the telephone
number.
The telephone number is dialled automatically.
To copy the telephone number to
the telephone book, press the selection button next to the sub-menu
symbol.
The entry field for the telephone book is
displayed with the copied telephone
number. Now all you have to do is enter
the name.
27
Call list
To delete an entry press the selection button next to the delete symbol.
2s To delete the whole call list press
the selection button next to the delete symbol for 2 seconds.
To exit the list press stop.
The entry is deleted.
The entire call list is deleted.
The initial state is again displayed.
28
Telephone book
Telephone book
General
The telephone book manages the names and telephone numbers of your business
partners. You can save up to 100 entries. An entry comprises the name (search
term) and the telephone number. The name must begin with a letter and the telephone number should begin with an area code so that the corresponding name can
be displayed later when the call number is received. You can do without entering
the code for your local network if you have already done so in the settings (refer to
Page 78"Settings/Own number". All entries are sorted alphabetically.
You also have the option of assigning an individual ringing tone (refer to Page 35
“Vocal clip”) or a personalised OGM (refer to Page 34 "Personal outgoing message"
to an entry. If at a later stage the call number for this entry is received you will hear
the individual ringing tone from the device's loudspeaker or the caller will hear the
special OGM that you have assigned to him.
Entering and saving entries
Press secondary function
The secondary function symbol is displayed.
Press control button (down).
The entry field for the name and the telephone number are displayed. The cursor
is positioned in the name field.
29
Telephone book
If required change occupancy of
the entry buttons by pressing the
control button (up) (refer to p. 32,
"Summary of possible characters"
table).
...
Enter name. You reach the individual letters by pressing the individual
entry button once or more.
The display shows the possible occupancies:
↑(ABC) = Capital letters
↑(abc) = Small letters
↑(12!?) = Numbers and special characters
The entry location flashes.
Example: You require "M". Press
forwarding button three times (the
"M" is in the third position on this
button).
Press control button (right) to move
to the next entry location.
The cursor moves to the next entry location.
Use the control button (left) to
move the cursor one place backwards, for example to overwrite a
character.
The cursor moves to the left.
You can insert a character by
pressing the control button (down).
An empty space is inserted to the left of
the cursor.
To delete an entry move the cursor
to the location and press the selection button next to the delete symbol.
The character under the cursor is deleted.
2s To delete the whole entry press the
selection button next to the delete
symbol for 2 seconds.
Press the selection button next to
the empty entry field for the telephone number.
30
The whole entry is deleted.
The cursor appears in the telephone
number entry field.
Telephone book
2s
Enter the first digit of the call number using the control buttons
(up/down).
Digits and special symbols are displayed. The special symbols have the
following meanings:
~ = Wait for dial tone / 3 Sec. pause
i = Internal (for PABX)
F = Flash (for PABX)
H = Hook flash (for PABX)
Press control button (right) to
change to the next entry location.
The cursor to the next entry location.
Use the control button (left) to
move the cursor once place backwards, for example to overwrite a
character.
The cursor moves to the left.
You can insert a character by
pressing secondary function and
the control button (down).
An empty space is inserted to the left of
the cursor.
To delete an entry move the cursor
to the location and press the selection button next to the delete symbol.
The character under the cursor is deleted.
To delete the whole entry press the
selection button next to the delete
symbol for 2 seconds.
The whole entry is deleted.
To stop the entry press stop several
times.
The entry is stored. The initial state is
again displayed.
For PABX the prefix for the public telephone network is dialled before each
call number (refer also to Page 80 "Settings, PABX/prefix"). To suppress this
enter "i" before internal call numbers.
31
Telephone book
Summary of possible characters
Button
Occupancy (ABC)
Occupancy (abc)
Occupancy (12!?)
ABCDEÄÉ
abcdeäéè
,.?!:‘;“
FGHIJ
fghijì
( )-+&=%
KLMNOÖ
klmnoöò
/*#€@<>
PQRST
pqrstß
12345
UVWXYZÜ
uvwxyzüù
67890
Search entries
Press control button (down).
The telephone book is opened.
Search for the desired entry using
the control buttons (up/down).
The entries scroll through the display.
Select initial letters by pressing the
corresponding entry button one or
more times (e.g. "T" – press "OGM"
button five times).
The entries with the requested initial letters appear in the display.
or
...
32
Telephone book
You can enter (up to 5) other letters
for the search using the control
button (right) and the corresponding entry keys.
The corresponding entries are displayed
for selection.
Checking and changing entries
Search for names as described
under "Search entries".
2s
Search for names as described
under "Search entries".
Press the selection button next to
the desired name for 2 seconds.
Carry out the required changes.
33
The entry field for the name and the telephone number are displayed. The entry
location flashes.
Telephone book
Personal OGM (call filter)
You can assign each entry in the telephone book to one of the fourteen individual,
recordable OGMs. If the telephone number calling matches the entry the caller
hears an OGM that is specially recorded for him. You can also switch the answering
machine off for certain callers.
Open entry field.
The entry field for the name and the telephone number are displayed.
For a new entry: Press second
function and then control button
(down).
2s
For an existing entry:
Search for entry (as described in
"Searching entries") and press
the selection button next to the
entry for 2 seconds.
Press the selection button next to
the sub-menu symbol for 2 seconds.
The display shows the current OGM.
Set the desired OGM using the
control buttons (up or down).
The numbers 1 to 5, none and a dash appear in the display. If you select "none" the
answering machine does not switch itself
on automatically for this entry. The function is switched off using the dash.
To stop the entry press stop several times.
The entry is stored. The initial state is again
displayed.
The desired OGM can be recorded as described in the "OGM" chapter (Page
15).Vocal Clip
34
Telephone book
Vocal clip
You can assign each entry in the telephone book to one of the fourteen individual
ringing tones. If the telephone number calling matches the entry you hear an individual ringing tone from the Retell 540 office loudspeaker.
Open entry field.
The entry field for the name and the telephone number are displayed.
For a new entry: Press second
function and then control button
(down).
2s
For an existing entry:
Search for entry (as described in
"Searching entries", p. 32) and
press the selection button next to
the entry for 2 seconds.
2x Press the selection button next to
the sub-menu symbol twice.
The display shows the current ringing
tone.
Set the desired ringing tone using
the control buttons (up or down).
The numbers 1 to 14 and a dash appear
in the display. The function is switched
off using the dash.
To stop the entry press stop several
times.
The entry is stored. The initial state is
again displayed.
The desired ringing tone can be recorded as described in the "Individual ringing tone" chapter (Page 63).
35
Telephone book
Dialling from the telephone book
Each telephone number from the telephone book can be dialled directly from your
Retell 540 office.
Search for names as described
under "Search entries", page 32.
Press the selection button next to
the desired name.
The device starts dialling the selected
telephone number. Dialling can be
screened via the loudspeaker.
After dialling accept the call by lifting the receiver.
The display shows a stopwatch that
counts the duration of the current call.
36
Telephone book
Automatic redialling /Automatic call back when engaged
(CCBS)
If the person you are trying to call is constantly engaged your Retell 540 office can
take over by repeatedly trying to call the other person. For automatic re-dialling if
the caller is engaged there is a pause and the device repeats the dialling up to 10
times. With the "Call back if engaged" function a call is signalled to you as soon as
the person you are trying to reach is free. Your telephone network or extension system must support this function (refer also to your network operator and PABX
manufacturer user instructions). To activate "Call back on busy" you usually dial a
certain combination of digits (e.g. Hook flash *37#). The combination of digits must
be pre-entered as described in "Settings/Call back code" (Page 79).
You call someone and the number
is engaged.
"Subscriber busy" is displayed.
To start automatic re-dialling press
the selection button next to the redial symbol.
After the pre-set time the dialling is repeated up to 10 times.
To start automatic call back, press
the selection button next to the call
back symbol.
As soon as the person you called has
hung up the call back is signalled to you.
Accept the call by lifting the receiver.
You can have your conversation.
You do not want automatic re-dial
or call back on busy. Press stop, lift
the receiver or simply wait 10 seconds.
The initial state is again displayed.
oder
37
Message function
Message function
The message function enables a caller that knows the message code to leave a
message even if your Retell 540 office plays an OGM with no option to leave an incoming message. The message function enables the caller to skip the OGM for
OGMs that give the option of leaving an ICM.
You can enter your personal message code as described in "Settings" (Page 79).
Call Retell 540 office.
You hear the OGM.
Start entry with the star button.
The OGM stops.
Enter the message code via the
telephone keypad. If you make a
mistake delete entry using the star
key and start again.
A voice message confirms recognition of
each digit.
To confirm the entry press the hash
button.
The device requests you to speak. If you
enter an incorrect code your Retell 540
office switches off immediately.
Leave a message and then replace
the handset.
The telephone from where you make the settings must be set to tone dialling
(DTMF).
38
Remote access
Remote access
You can access your Retell 540 office remotely from anywhere in the world using
the keypad on a tone-enabled (DTMF) telephone. You need a personal remote access code to access the phone remotely. You can set your personal remote access
code as described in "Settings" (Page 79).
Remote access
Call Retell 540 office.
You hear the OGM.
Start entry with the star button.
The OGM stops.
Enter the remote access code via
the telephone keypad. If you make
a mistake delete entry using the
star key and start again.
A voice message confirms recognition of
each digit.
To confirm the entry press the hash
button.
If the correct code is detected your Retell
540 office notifies you via a voice message. If the code is wrong the device
breaks the connection.
Start the desired function by entering the corresponding number.
If there are new messages playback
starts automatically.
Press digit 8 to end a function.
The current function ends.
End remote access by pressing star
and hash in succession.
180 seconds after the last button entry your Retell 540 office asks whether you
are still on the line with the "Please quit" voice message. You must respond to
this quit request within 8 seconds by pressing any key otherwise the device
breaks the connection.
39
Remote access
Remote access functions
Playback ICM function
To playback all ICM
Press 3.
The playback starts with the first recording.
To playback new ICM
Press 2.
Starts playback of recordings that have not
yet been listened to.
Repeat
Press 5 during playback.
The last three seconds are repeated.
To pause playback
Press 8.
Playback is paused.
To continue playback
Press 5.
Playback is continued from where it was
paused (e.g. after a quit request).
Skip
Press 4 for back or 6 for forwards during playback.
The ICM you are listening is skipped or
repeated.
To delete the current ICM
Press 7 during playback.
The current incoming message is deleted.
To delete all ICMs
Press * and 7 in succession.
All incoming messages are deleted.
Intercom function
Room monitoring/intercom
Press 1.
The microphone switches on and you can
listen to what is happening in the surroundings of your Retell 540 office.
Press 1 again.
The device switches to intercom. People
located there can hear your voice from the
loudspeaker.
40
Remote access
Switching function
To switch message transfer on/off
Press * and 4 in succession.
The current status "on" or "off" is announced.
To switch timer on/off
Press * and 3 in succession.
The current status "on" or "off" is announced.
To change the OGM
Press 7 and the desired OGM 1 … in
succession
The selected outgoing message is played
back for checking. The next caller is
greeted with this message.
... Changing the OGMs function
... To change the OGM
Press 9 and the desired OGM 1 … in
succession
The Retell 540 office asks you to speak.
Record an outgoing message.
For an outgoing message with incoming message option: After recording
the OGM press 8.
The OGM is played back for checking. At
the end you hear one signal tone.
For an OGM without incoming message option (OGM only):
After recording the OGM press #.
The OGM is played back for checking. At
the end you hear two signal tones.
or
The message is played back again for checking after you change or modify it.
Your Retell 540 office will then ask whether you are still on the line with the
"Please quit" voice message. You must respond to this quit request within 8
seconds by pressing any key otherwise the device breaks the connection.
41
Remote access
Message transfer function
Changing the 1st call number for
message transfer (only the first number can be changed)
Press * and 9 in succession.
The first current call number is announced. Next comes the request to enter
a new call number.
Enter new call number.
For special symbols press the following buttons in succession:
Each digit is confirmed.
= Wait for dial tone / 3 Sec. pause
= Flash (short)
= Internal
= Hook flash (long)
= S (send by SMS)
=*
To delete the call number
Press * and 7 in succession.
The call number is deleted.
To accept the call number
Press * and 8 in succession.
The new call number is played back for
checking.
Call forwarding function
Activating call forwarding
Press * and 1 in succession
The current target call number is announced. Next comes the request to enter
a new target call number.
Enter the new target call number.
Each digit is confirmed.
For special symbols press the following buttons in succession:
= Wait for dial tone / 3 Sec. pause
= Flash (short)
= Internal
= Hook flash (long)
=*
To delete the target call number
Press * and 7 in succession.
The target call number is deleted.
42
Remote access
To accept the target call number without executing the function press * and
8 in succession.
The new target call number is played back
for checking.
To accept the target call number and
execute the function press * and # in
succession.
After ending the remote access your Retell
540 office switches call forwarding on. All
new calls are forwarded to the new target
call number.
Switch off device function
Switching answering mode on/off
Press * and 0 in succession.
Your Retell 540 office disconnects and will
not answer any more calls.
Remote activation of the answer mode
Call Retell 540 office.
After 50 seconds the device answers
with a beep.
Enter the remote access code via
the telephone keypad. Start entry
with * and confirm with #.
The OGM is played for checking. The
device can be operated remotely (e.g. to
record a new OGM). After leaving the
function your Retell 540 is in answering
mode and will answer calls.
43
Short messages (SMS)
Short messages (SMS)
The SMS service allows you to send or receive SMS messages to other terminals.
The messages are not transferred directly to the other terminal but instead are sent
to your network operator's message center. The message can contain up to 160
characters. You can save up to 20 messages in the inbox. To use the SMS it is essential that there is support for transferring the call number (CLIP). Then all you
have to do is register with your message center and away you go.
You can also send your short message to a subscriber that does not have an SMSenabled device. The short message is then read out loud as a voice message.
Please refer to your network operator's information material for this and other functions.
Please observe the following points so that you can send and receive short messages (SMS) with your Retell 540 office:
Configuring the telephone connection
Analogue telephone connection
If you have an analogue telephone connection, please check whether you can access the "Call number transfer" and "Call number display" (CLIP, incoming and outgoing) functions. To do so, please ask your network operator if these features are
available for your connection.
ISDN connection
If you have an ISDN connection check that call number display (CLIP), is activated
and that call number transfer (CLIR) is not suppressed in your PABX.
44
Short messages (SMS)
Registering and de-registering with your message center
You have to register your Retell 570 office with your network provider to enable the
send and receive of SMS messages. With BT, for example, you must first set up the
send and receive message centre numbers under ‘SMS Center’. Currently the BT
text send number is 147017094009000 (enter this under location 1) and the BT Text
receive number is 0800587529 (enter this under location2). You must register your
BT telephone line to send/ receive text messages first – to do this you need to send
a SMS message from the device. Ensure that you have entered the text send and
receive numbers under SMS center and follow the instructions for sending SMS
messages. Once the SMS message has been sent then the device can send and
receive SMS messages.
As of: January 2005
Entry options for short messages
Inbox ....................................... This is where you find all the short messages you
have received and can scroll through, read, delete
or copy them to templates.
Outbox..................................... The messages here can be sent directly when dispatch is activated next time. You have the option of
creating a new message, changing an old one or
deleting it. The SMS can contain up to 160 characters.
Dispatch.................................. Enter the recipient's number here (including area
code). You can transfer the call number from the
telephone book.
Templates ............................... You can create up to 5 different templates, change
or delete old templates. Each template can be copied to the outbox.
Message center...................... Enter the number for the message center here. Your
network operator will provide the correct number.
You can also enter a second center for another
supplier. It is then possible to receive SMS messages via both centers. Please note that in contrast
messages are only sent via the first center.
Never enter outside line numbers (prefixes) for your
45
Short messages (SMS)
PABX before the call number (e.g. 0)! This is done
in the "Settings/PABX/prefix" menu (refer to Page
80).
Inbox
If you have new, unread messages (SMS) the SMS LED flashes. If the SMSLED blinks rapidly there is no space in the inbox for new messages. Delete
the older messages to create more space.
Press menu.
The main menu is displayed.
Press the selection button next to
"Messages (SMS)".
The messages menu is displayed.
Press the selection button next to
"Inbox".
The inbox is displayed.
46
Short messages (SMS)
2s
You can scroll through individual
entries using the control buttons
(up/down).
New, unread messages are marked with
an arrow.
To copy a message to the templates press the corresponding selection button for two seconds.
The message is copied and the display
changes to templates.
To copy the telephone number to
the telephone book, press secondary function and the relevant selection button.
The entry field for the telephone book is
displayed with the copied telephone
number. Now all you have to do is enter
the name.
To read a message press the selection button next to the desired message briefly.
The selected message is displayed.
You can scroll through the messages using the control buttons
(up/down).
2s To delete the message press the
selection button next to the delete
symbol for 2 seconds.
The message is deleted.
To exit the menu press stop.
The device must be in standby for you to receive a message (SMS). Your Retell 540 office will not respond if you are currently scrolling through the menu
or changing settings. This ensures that you can not be disturbed (for example
when entering an SMS).
47
Short messages (SMS)
Outbox
Press menu.
The main menu is displayed.
Press the selection button next to
"Messages (SMS").
The messages menu is displayed.
Press the selection button next to
"Outbox".
The display changes and displays the
outbox.
You can scroll through the existing
messages using the control buttons
(up/down).
To delete the outbox press the se2s lection button next to the delete
symbol for 2 seconds.
To edit the text press the selection
button next to the desired line.
48
The outbox is deleted.
The cursor is displayed at the start of the
corresponding line.
Short messages (SMS)
...
If required change the occupancy
of the entry buttons by pressing the
control button (up) (refer to "Summary of possible symbols" table in
the "Telephone book" chapter).
The display shows the possible occupancies:
↑(ABC) = Capital letters
↑(abc) = Small letters
↑(12!?) = Numbers and special
characters
You reach the individual letters by
pressing the individual entry button
once or more.
The entry location flashes.
Example: You require "M". Press
forwarding button three times (the
"M" is in the third position on this
button).
Press control button (right) to
change to the next entry location.
The cursor to the next entry location.
Use the control button (left) to
move the cursor once place backwards, for example to overwrite a
character.
The cursor moves to the left.
You can insert a character by
pressing the control button (down).
An empty space is inserted to the left of
the cursor.
To delete an entry move the cursor
to the location and press the selection button next to the delete symbol.
The character under the cursor is deleted.
To stop the entry press stop.
49
Short messages (SMS)
Sending a message (SMS)
For a message (SMS) to be sent it is essential that something is in the outbox
and that a message center has been entered.
Open the message menu as described in "Inbox" and "Outbox".
Press the selection button next to
"Dispatch".
The messages menu is displayed.
Enter the first digit of the call number using the control buttons
(up/down).
The numbers 0 to 9 in the display.
Press control button (right) to
change to the next entry location.
The cursor to the next entry location.
Use the control button (left) to
move the cursor once place backwards, for example to overwrite a
digit.
The cursor moves to the left.
To transfer a call number from the
telephone book, press the selection
button next to the "Insert" symbol.
The call number is entered to the left of
the cursor.
50
The display changes to send. The cursor
is at the first digit of the recipient's call
number.
Short messages (SMS)
Search for names as described
under "Search entries" ("Telephone
book" chapter Page 32).
You can insert a character by
pressing secondary function and
the control button (down).
An empty space is inserted to the left of
the cursor.
To delete an entry move the cursor
to the location and press the selection button next to the delete symbol.
The character under the cursor is deleted.
To transfer the call number press
stop.
The call number is transferred and "Dispatch" is displayed.
To start the transfer, press the selection button next to "Dispatch".
The device creates the connection to the
message center and transfers the outbox
to the selected recipient's call number.
Then the messages menu is displayed
again.
Templates
Here you can save up to 5 templates that you can edit, delete or copy to the outbox
individually.
51
Short messages (SMS)
2s
Open the message menu as described in "Inbox" and "Outbox".
The messages menu is displayed.
Press the selection button next to
"Templates".
The display switches to the templates.
You can scroll through individual
templates using the control buttons
(up/down).
The start of the selected template is displayed.
To copy a template to the outbox
press the corresponding selection
button for two seconds.
To create or edit a template press
the selection button next to the desired template briefly.
The template is copied and the display
changes to outbox.
The selected template is displayed.
Open or edit the template as described in detail in "Outbox".
Message center
Enter the telephone number for your message centre here (e.g. BT). If you are using the device on a BT telephone network then there are two numbers which have
to be entered – one for the sending of SMS messages and one for the receiving.
Location1 is for the send number - enter 14701709400900 if you are using the device on a BT telephone line. In location 2 enter the receive number – if you are using
the device on a BT telephone line enter 0800587529. If you are using the device on
a different telephone network then please refer to them for the correct send and receive numbers. The send number must be saved in memory location 1.
52
Short messages (SMS)
Open the message menu and
search for the message center entry.
Press the selection button next to
"Message center".
The display changes and the first digit in
the first call number flashes.
To move to the 2nd center press the
selection button next to the second
call number.
The cursor moves to the second call
number.
Set the call number using the control buttons (up/down, left/right).
If you have set up two message centers you can receive SMS messages from
both. But you always send via the first center.
53
Timer
Timer
The timer function contains up to 10 switching times during which answering mode,
outgoing messages, message transfer and call forwarding can be switched on/off
or changed.
Setting options for timer
Switching time ....................... You set the times here for when the function should
be switched on, off or changed. Dashes mean that
no switching time has been programmed.
Weekday ................................ You set the weekdays here for when the function
should be switched on, off or changed. A dash
means that no change takes place on this day.
Answering mode ................... On, off or -. A dash means no change (the previous
status is continued).
OGM ....................................... 1 to 6 or -. A dash means that the previous message
is continued.
Message transfer .................. On, off or -. A dash means no change (the previous
status is continued).
Call forwarding ...................... On, off or -. A dash means no change (the previous
status is continued).
54
Message transfer
Programming timer
Press menu.
The main menu is displayed.
Press the selection button next to
timer.
The entry field for the first switching time
is displayed.
You can search the individual
switching times using the control
buttons (up/down).
The display switches between the 10
possible switching times.
Press the selection button next to
the switching time and make the
desired settings using the control
buttons (up/down).
The cursor is at hours.
Use the control buttons (left/right)
to switch between the desired
hours, minutes and weekdays on
which the switching time is to be
valid.
The cursor moves between hours, minutes and weekdays. A dash for "Mo" for
example means that the switching time
will not be carried out on Monday.
55
Message transfer
Use the two lower selection buttons
and the control buttons (left/right)
to find what needs to be changed in
the selected time.
The symbols have the following meanings:
Make the desired settings using the
control buttons (up or down).
A dash means that the previous status is
continued.
To delete a switching time press
the selection button next to the delete symbol.
The empty entry field is displayed again.
To delete the timer press the selection button next to the delete symbol for 2 seconds.
All switching times are deleted.
2s To stop entering additional switching times press stop.
= Answering mode
= OGM
= Message transfer
= Call forwarding
The settings are confirmed.
To stop the entry press stop several
times.
The initial state is again displayed.
Use the two lower selection buttons
and the control buttons (left/right)
to find what needs to be changed in
the selected time.
The symbols have the following meanings:
= Answering mode
= OGM
= Message transfer
= Call forwarding
Sample programming for timer
You want your Retell 540 office to switch on OGM 1 on Mondays to Fridays at 17.00
and switch off at 08.00. When the office closes on Friday and over the weekend the
answering machine should use OGM 2 throughout. This requires 3 switching times.
56
Message transfer
Switching on timer
Press timer.
The display shows a clock as the symbol
for activated timer. The timer sets the
current functional status.
Press timer again to switch off
timer.
The clock symbol disappears.
57
Message transfer
Message transfer
For message transfer the answering machine dials the saved call numbers consecutively after each new incoming message. If the subscriber called picks up he
will hear the following outgoing message:
"Automatic call, ..x.. incoming messages, please collect remotely, I repeat …" or if
you have entered your own call number as identification "automatic call from subscriber (own call number), ..x.. incoming messages, please collect remotely, I repeat".
It is possible to start remote control for the recorded message(s) during the message. Proceed as described in "Carry out remote control" (*Code#). If you do not
access the messages remotely the device dials the next call number after a waiting
period (5 - 180 seconds). If no remote control is carried out during the repeat time
(5 – 60 minutes) the device dials the complete call number sequence again as a
reminder. If there is no remote control your Retell 540 office makes no, one or two
repetitions depending on the setting you have chosen.
Setting options for message transfer
Waiting period ....................... 5 to 180 sec. This is the time from hanging up to
dialling the next call number.
Repeat period ........................ 5 to 60 minutes. This is the time that passes before
all call numbers are called again.
Repetitions ............................ 1, 2 or no repetitions
Playbacks .............................. 1 – 8 times. You can set here how often to replay
the forwarding message.
1. Call number........................ >>
2. Call number........................ >>
3. Call number........................ >>
4. Call number........................ >>
58
Message transfer
Settings for message transfer
Press menu.
The main menu is displayed.
Press the selection button next to
message transfer.
The message transfer menu is shown in
the display.
Search for the desired setting option using the control buttons
(up/down).
All setting options are displayed.
Press the selection button next to
the desired line and if necessary
change the entry using the control
buttons (up/down).
The display shows the current setting.
or
59
Message transfer
When entering the call numbers
press the selection button next to
"Call number" and make the desired
settings using the control buttons
(up/down).
The entry location flashes.
Digits and special symbols are displayed. The special symbols have the
following meanings:
~ = Wait for dial tone / 3 Sec. pause
i = Internal (for PABX)
F = Flash (short, for PABX)
H = Hook flash (long, for PABX)
S = Send by SMS
Press control button (right) to
change to the next entry location
and enter other digits.
The cursor to the next entry location.
Use the control button (left) to
move the cursor once place backwards, for example to overwrite a
character.
The cursor moves to the left.
To transfer a call number from the
telephone book press the selection
button next to the "Insert" symbol.
The call number is entered to the left of
the cursor.
Search and select names as described under "Search entries".
The name is displayed below the call
number.
To enter a character press secondary function and then control button (down).
An empty space is inserted to the left of
the cursor.
To delete a digit, move the cursor
to the location and press the selection button next to the delete symbol.
The character under the cursor is deleted.
2s To delete the whole call number
press the selection button next to
60
The entire call number is deleted.
Message transfer
the delete symbol for 2 seconds.
To make further settings press
stop.
The settings are confirmed.
To stop the entry press stop several
times.
The initial state is again displayed.
Message transfer by SMS
In addition to normal message transfer (as described above) you can also be informed about new voice messages by SMS. You will receive a short message, e.g.
on your mobile phone:
You have 2 new messages from:
1. 01701234567
2. Ashton, Deidra
Use this function if you do not want to be disturbed and will pick up your messages
later using remote access.
To ensure you receive an SMS instead of a message place an "S" before the target
call number.
Your device must also be set up for SMS messages, refer to "Short messages
(SMS) chapter".
Example:
You would like to receive an SMS to your mobile phone when you have new messages on your Retell 540 office.
When you enter your mobile phone call number in the "Forwarding/call number"
menu, enter an "S" before it.
61
Message transfer
Sample call number entries
For PABX the prefix for the public telephone network is dialled before each call
number (refer also to Page 80 "Settings, PABX/prefix"). To suppress this enter "i" before internal call numbers.
If you would like message transfer by short message (SMS) you must enter an "S"
before the call number.
Normal subscriber
0123456789
PABX
Extension to extension
i 269
Short message (SMS)
S 017012345678
Switching on message transfer
Press message transfer.
The message transfer symbol is displayed.
Press message transfer again to
switch off message transfer.
The symbol for message transfer is displayed.
During ongoing message transfer the message transfer symbol flashes.
62
Individual ringing tone
Individual ringing tone
If you want to select a different ringing tone from the standard one on the telephone
you can record up to 14 different ringing tones here. It is not possible to change
ringing tone 15 because it is pre-configured. Choose the ringing tone for your telephone and your Retell 540 office will play it back. Please note that your individual
ringing tone is only played back on the second call signal. During playback it is not
possible to receive a new call number (CLIP).
Press menu.
The main menu is displayed.
Search for the "Individual ringing
tone" entry using the control buttons (up/down).
Press the selection button next to
"Individual ringing tone".
63
The entry field for the individual ringing
tone is displayed.
Individual ringing tone
Press the selection button next to
"Ringing tone" and select it using
the control buttons (up/down).
The numbers 1 to 15 and "-" appear in
the display. The individual ringing tone is
switched off using the "-".
Set the desired volume using the
control buttons (left/right).
The volume bar indicates the set volume
level.
To record a new ringing tone press
and hold the selection button next
to the record symbol.
Now record your individual ringing tone
by playing any sound in front of the integrated microphone.
Release the button.
The recording is completed and is played
back for verification purposes.
To playback an existing recording
press the selection button next to
the playback symbol.
The ringing tone is played back.
To delete the ringing tone, press the
selection button next to the delete
symbol.
The ringing tone is deleted.
To exit the menu press stop.
The initial state is again displayed.
To record ringing tones from an external signal source press the secondary
function (2nd) button before recording.
64
Call forwarding
Call forwarding
If your telephone network or PABX supports the "call forwarding" function you can
enter the required settings here. Then you only have to enter the times for which
you want to activate call forwarding in the "timer". For example at 6 pm you can
switch calls automatically to your private line and then switch them back again to
your business line at 8 am the following day (day/night switching).
In order to switch on call forwarding it is usual to dial a code before the target call
number (e.g. *21*). A second code (e.g. #21#) switches call forwarding off again.
(Refer also to your network operator's or system manufacturer's user instructions).
Setting options for call forwarding
Activate ................................... You can enter the code to switch on call forwarding
here. You can enter up to 15 characters. A dash
means: "Entry location deleted".
Deactivate ............................... You can enter the code to switch off call forwarding
here. You can enter up to 15 characters. A dash
means: "Entry location deleted".
Target call number ................. >>
Target call number ...... Enter the target call number to which the call is to
be forwarded here. You can enter up to 25 characters for the target call number.
65
Call forwarding
Settings for call forwarding
Press menu.
The main menu is displayed.
Search for the "Call forwarding"
entry using the control buttons
(up/down).
Press the selection button next to
"Call forwarding".
The call forwarding menu is shown in the
display.
Press the selection button next to
the setting that you wish to change.
The cursor is located at the entry point.
Select the desired entry location
using the control buttons (left/right)
and change it with the control buttons (up/down).
The display shows the current setting.
or
66
Call forwarding
When entering the target call number set the first digit using the control buttons (up/down).
Digits and special symbols are displayed. The special symbols have the
following meanings:
~
i
F
H
= Wait for dial tone / 3 Sec. pause
= Internal (for PABX)
= Flash (short, for PABX)
= Hook flash (long, for PABX)
Press control button (right) to
change to the next entry location
and enter other digits.
The cursor to the next entry location.
Use the control button (left) to
move the cursor once place backwards, for example to overwrite a
character.
The cursor moves to the left.
To transfer a call number from the
telephone book, press the selection
button next to the "Insert" symbol.
The call number is entered to the left of
the cursor.
Search and select names as described under "Search entries", p.32.
To enter a character press secondary function and then control button (down).
An empty space is inserted to the left of
the cursor.
To delete a digit, move the cursor
to the location and press the selection button next to the delete symbol.
The character under the cursor is deleted.
2s To delete the whole entry press the
selection button next to the delete
symbol for 2 seconds.
67
The entire entry is deleted.
Call forwarding
To make further settings press
stop.
The current setting is confirmed.
To stop the entry press stop several
times.
The initial state is again displayed.
You can also activate call forwarding by remote access (Refer to remote access)
Sample call forwarding entries
Example 1:
Your main connection is with "Deutsche Telekom" and you have activated the "call
forwarding" service. Please note that the target call number must end with a hash
(#).
Activate ................................... *21*
Deactivate ............................... #21#
Target call number ................. 021024712#
Example 2:
You have a Tiptel 810 PABX, the answering machine is connected to extension 23
and you want to divert the calls to extension 21.
Activate ................................... 82
Deactivate ............................... 80
Target call number ................. i 21
Example 3:
You have a Tiptel 1/8 fax clip PABX, are connected with it to "Deutsche Telekom"
and you have activated the "call forwarding" service. You want to forward all external
calls to your private connection.
Activate ................................... *21*
Deactivate ............................... #21#
Target call number ................. 336699#
For PABX the prefix for the public telephone network is dialled before each
call number (refer also to Page 80 "Settings, PABX/prefix"). To suppress this
enter "i" before internal call numbers.
68
Automatic monitoring
Automatic monitoring
If you have activated "automatic monitoring" the recording starts as soon as the
handset is lifted. The recording stops automatically when you replace the receiver.
You can decide whether to record all calls or only incoming calls (recording threatening calls). To avoid filling up the memory with unimportant recordings you still
have the option of saving the recording only after pressing a confirmation on the
device. You also have the option of activating the monitoring via the contact control
via the alarm input.
Setting options for automatic monitoring
Activate function ................... Yes or no. You can switch the function on and off
here.
All calls ................................... Yes or no. Select "No" if you only want to record incoming calls.
Confirm save ......................... Yes or no. If you select "Yes" you have to confirm
saving the recording otherwise it will be deleted
automatically.
69
Automatic monitoring
Settings for automatic monitoring
Press menu.
The main menu is displayed.
Search for the "Automatic monitoring" entry using the control buttons
(up/down).
Press the selection button next to
"Automatic monitoring".
The entry field for automatic monitoring
is displayed
Press the selection button next to
the setting that you wish to change
until the desired setting is displayed.
The display shows the current setting.
To stop the entry press stop several
times.
The initial state is again displayed.
70
Security lock
Security lock
In order to protect your Retell 540 office from unauthorised use you can lock the
device with a PIN (personal identification number). The PIN is number containing 1
to 4 digits. You must enter this PIN to unlock the device. In the factory pre-set, the
PIN code is "0000".
Locking the device/Changing PIN
Press menu.
The main menu is displayed.
Search for the "Security lock" entry
using the control buttons
(up/down).
Press the selection button next to
"Security lock".
The PIN entry field is displayed.
Enter the first digit of the PIN using
the control buttons (up/down).
The display shows the current setting.
Select the next or previous entry
location using the control buttons
(left/right).
The cursor is located at the selected entry point.
71
Security lock
After entry press the selection button next to PIN.
The device displays the choice of "Lock
unit" or "Change PIN".
Press the selection button next to
"Lock unit".
The display returns to the initial state. A
small key shows that the device is
locked.
Press the selection button next to
"Change PIN".
The Retell 540 office requests you to
enter a new PIN.
Use the control buttons to enter a
new PIN.
The display shows the current entry.
To stop the entry press stop several
times.
The new PIN is confirmed and the initial
state is again displayed.
or
Unlocking device
Use the control buttons to enter the
PIN.
The display shows the current setting.
After entry press the selection button next to PIN.
The small key is no longer displayed.
The device can now be used.
72
Mailboxes
Mailboxes
General
You have the option or setting up in addition to the actual answering machine up to
4 mailboxes. Each mailbox has its own OGM, remote control code and its own target call number for message transfer. If your Retell 540 office is used by several
people the caller can leave a message in the relevant mailbox. You should mention
this function in the OGM. To select one of the 4 mailboxes the caller has to press
the relevant number (1…4) on the keyboard of a tone-enabled telephone. The mailbox OGM is played and the caller can leave a message.
For PABX systems under certain circumstances there is the option of selecting the
relevant mailbox automatically (refer to “Automatic call forwarding to the mailbox”,
p. 77).
Another usage is an information center where the caller first hears the set message
from the actual answering machine. The OGM contains notes on where the desired
information is located (mailbox 1, 2, 3 or 4).
Setting options for mailboxes
Activate .................................. Yes or no. If you enter "Yes" here the mailbox will be
switched on. If a mailbox is switched off any existing
ICMs and the OGM are lost.
Access code .......................... If you want to access your mailbox remotely you
have to enter the access code for this mailbox.
Quick check code .................. If you want to access your mailbox by remote control quickly without having to enter the access code,
you can for example enter your mobile phone call
number here. If this call number is detected for a
call the device starts remote control immediately.
73
Mailboxes
Extension ............................... If you want to use the "Automatic call forwarding to
mailbox" function you can enter the relevant extension number here.
Target call number ................ If you want to use the mailboxes and the "message
transfer" function you must enter the target call
number here.
Setting up mailboxes
Press menu.
The main menu is displayed.
Search for the "Set up mailboxes"
entry using the control buttons
(up/down).
Press the selection button next to
"Mailbox setup".
The mailbox setup menu is displayed.
Search for the desired mailbox using the control buttons (up/down).
4 mailboxes are displayed.
74
Mailboxes
Select the desired mailbox using
the selection button.
The settings menu for the selected mailbox is displayed.
Search for the desired setting option using the control buttons
(up/down).
All setting options are displayed.
Press the selection button next to
the setting that you wish to change
until the desired setting is displayed.
The display shows the current setting.
When entering digits press the selection button next to the desired
line.
The entry location flashes.
Change the settings using the control buttons (up/down).
The display counts up or down.
For settings with several digits
move the entry location to the required location using the control
buttons (left/right).
The selected entry location flashes.
To end digit entry press the selection button next to the desired line
again.
The entry location stops flashing.
To stop the entry press stop several
times.
The initial state is again displayed.
or
75
Mailboxes
Using the mailboxes
The corresponding symbols are displayed when you have set up mailboxes. In answering mode the number of ICMs in the mailbox is indicated to the right of the
symbol. The mailboxes include playback and delete ICMs, monitoring/personal info
(memo) and OGM functions. These functions are described in detail in the previous
chapters. Because there is only one OGM for each mailbox it goes without saying
that it is not possible to select the OGM.
Press the selection button next to
the mailbox symbol until the desired mailbox flashes.
The selected mailbox flashes.
Carry out desired function, e.g.
playback all ICMs.
Playback of all the ICMs in the selected
mailbox starts.
To go back to the actual answering
machine press the selection button
next to the mailbox symbols until
no mailbox is flashing.
The mailboxes stop flashing.
E. g.
76
Settings
Remote access to mailboxes
Remotely accessing mailboxes is done in the same manner as remotely accessing
the answering machine. The precise description is found in the "Remote access"
chapter.
The following mailbox functions are available remotely:
Room monitoring/Intercom
Playing back the new ICMs in this mailbox
Playing back all ICMs in this mailbox
Skip back
Repeat the last 3 seconds/continue playback
Skip forwards
Deletes the ICM currently playing back
Stopping and pausing playback
Changing the outgoing message for this mailbox
Deleting all incoming messages for this mailbox
Changing the target call number for message transfer for this mailbox
Automatic call forwarding to the mailbox
Your PABX must meet the following requirements: The CLIP function (transfer of call
number) must be supported and the call number of the extension that has forwarded must be transferred (for example as with the Retell 31 home or Retell
4011XT PABX).
Connect your Retell 540 office to a free extension (analogue port) on your PABX.
Set the mailboxes up and enter the call numbers of the corresponding extensions.
Record individual OGMs for the individual mailboxes and switch the device to answering mode. In order to now switch the mailbox on or off from an extension you
have to activate call forwarding from this extension to the Retell 540 office.
Example: Your Retell 540 office is connected to extension 25 on your PABX. The
extensions 21 to 24 are assigned to mailboxes 1 to 4. Extension 21 is
programmed to forward calls to 25. An incoming call on extension 21 is
forwarded to mailbox 1. The caller hears the message from mailbox 1
and can then leave a message.
77
Settings
Settings
Setting options
Language ............................... German, English, French, Italian or Dutch
Clock ...................................... >>
Time ............................. You can re-set the time here.
Date ............................. You can re-set the date here.
Network time............... Yes or no. You can transfer the time to the internal
clock if this is permitted by your telephone network
or your PABX (the year is not transferred and must
be set manually).
DST .............................. Yes or no. Select "Yes" if you want your Retell 540
office to change automatically to summer time on
the last Sunday in March and to winter time on the
last Sunday in October.
Time ancmnt ............... Yes or no. You can set here whether to announce
the time after each ICM.
Date ancmnt ............... Yes or no. You can set here whether to announce
the date after each ICM.
Number ancmnt .......... Yes or no. You can set here whether to announce
the call number transferred after each ICM.
Ancmnt at unit ............ Yes or no. Here you can switch the "speaking clock"
off and on when playing back from the device.
Quality .................................... 128 KB/sec or 64 KB/sec. There are two levels for
the recording quality. At the higher quality (128
KB/sec) the recording capacity halves.
Rec. length ............................ 1 to 5 minutes or endless. Here you can limit the
time that is available to callers for messages.
Call screening ....................... Yes or no. You can set here whether to monitor the
message during recording or not.
Ringing tones ........................ 2 to 9 ringing tones. The number of ringing tones
before calls are answered can be set here.
78
Settings
My number
Area ............................ Enter your area code here
Number ....................... If you enter your own call number your Retell 540
office announces this call number for internal OGM
texts.
Remote control....................... >>
Access code ............... The access code is a 1 to 4 digit number between 0
and 9999. Remote control is switched off using the "
– " code.
Quick check ................ If you want to access the remote control quickly
without having to enter the access code you can for
example enter your mobile phone call number here.
If this call number is detected for a call the device
starts remote control immediately.
Toll-saver..................... Yes or no. If you select "Yes" and there are new
ICMs your Retell 540 office answers calls after two
ringing tones (no matter the number of ringing
tones set). If there are no new ICMs the device only
answers the calls after the number of ringing tones
set in the "Ringing tones" option. So before accepting the call you already know whether there are new
ICMs and whether remote control is worthwhile.
Remote on/off ............ Yes or no. You set whether the answering mode
should be activated remotely or not.
Remote delete............. Yes or no. You can set here whether the "Delete
ICMs remotely" option is activated or not.
Room monitoring........ Yes or no. You set whether the "room monitoring"
should be activated or not.
Message code ....................... The message code is a 1 to 4 digit number between
0 and 9999. The message function is switched off
using the " – " code.
Redial ..................................... Every 5 to 60 seconds. You can set the pause between the dialling attempts for automatic redialling
here.
Call-back code ...................... You enter the call-back code of your network operator (for Deutsche Telekom network e.g. H*37#).
79
Settings
The "H" refers to the request key with hook flashfunction. You can enter up to 15 characters.
PABX ...................................... >>
Prefix ........................... Enter your prefix for the public telephone network
(e.g. 0) here. This prefix is dialled automatically before each call number unless the call number is
marked with an "i" as an internal call number within
the PABX.
CLIP correction ......... Some PABX systems add in numbers before the received call number. This produces incorrect messages for the received call number. In order to recognise the additional numbers and to cut them off
you can enter them here.
Call-back code ........... Enter your call-back code for your PABX (e.g. 79)
here. You can enter up to 15 characters.
Message tone ........................ Volume levels 1 to 4 or off. If you activate the sound
by setting the volume each time a new ICM is received a message tone sounds every 10 seconds.
Contrast ................................. You can set the screen contrast in up to 16 steps
here.
Brightness .............................. You can set the screen brightness in up to 16 steps
here.
Backlight ................................ Automatic or on. For the "automatic" setting the
backlight is switched off automatically after 10 seconds. If you want the backlight on continuously, select "On".
80
Settings
Setting menu
Press menu.
The main menu is displayed.
Search for the "Settings" entry using the control buttons (up/down).
Press the selection button next to
settings.
The settings menu is displayed.
Search for the desired setting option using the control buttons
(up/down).
All setting options are displayed.
Press the selection button next to
the setting that you wish to change
until the desired setting is displayed.
The display shows the current setting.
or
81
Settings
When entering digits press the selection button next to the desired
line.
The entry location flashes.
Change the settings using the control buttons (up/down).
The display counts up or down.
For settings with several digits
move the entry location to the required location using the control
buttons (left/right).
The selected entry location flashes.
To end digit entry press the selection button next to the desired line
again.
The entry location stops flashing.
To stop the entry press stop several
times.
The initial state is again displayed.
Adjusting the volume
You can set the volume when the device is in the initial state.
Set the volume using the control
buttons (left/right).
82
The volume bar shows the current setting.
Service menu
Service menu
The service menu gives you the option of querying the current program version,
recreating the default status, deleting the telephone book or loading the current
program version via the telephone network. There is also the option of transferring
the telephone book from one Retell 540 office to another via the audio sockets. To
do this first set one device to "Receive a telephone book" and the other to "Send a
telephone book". The "Default status" function returns all settings to the status they
had on delivery. The call list and all ICMs (and OGMs and individual ringing tones)
are deleted. The telephone book entries are retained. The "Delete telephone book"
function deletes the entire telephone book.
The function „firmware download“ loads the latest program version via the telephone network and then replaces the former program by the new program. One
download process may take approx. 20 minutes.
Press menu button.
The main menu is displayed.
Search for the "Service menu" entry
using the control buttons
(up/down).
Press the selection button next to
"Service menu".
83
The display shows the service menu.
The current program version is in the
first line on the right.
Service menu
Search for the desired function using the control buttons (up/down).
All service menu functions are displayed.
Press the selection button next to
the desired function and follow the
displayed instructions.
To carry out the software update, enter the phone number of the update
server. This entry has to be made only once; the number will then be available
for all further software updates. The relevant telephone number for your country is indicated in the appendix under „service“.
84
Appendix
Appendix
Service
You have purchased a modern product of Tiptel AG made for Retell Ltd. It was designed and manufactured in Ratingen near Düsseldorf. Our high-tech manufacturing facilities “Made in Germany” grant a continuous level of the highest quality. This
is even underlined by our certification according to DIN EN ISO 9001.
If, however, problems occur or you have questions on operating the device, please
contact your local dealer.If, however, problems occur or you have questions on operating the device, please contact your local dealer.
Please note the server number for a firmware update of this device:
+49 21 02 428 438 (dial your international access code instead of “+”)
Guarantee
Compliance with directive 1999/5/EC and Class 1 of the R&TTE
Hereby Retell declares that this answering machine, Retell 540, is in compliance
with the essential requirements and other relevant provisions of directive 1999/5/EC.
Retell declares that your Retell 540 meets the requirements of Class 1 of the R&TTE
directive and so is designed as not to adversely affect the operation of the telecommunications network.
A full copy of the certificate is available from the address below
Retell, 53 Thames Street, Sunbury on Thames, Middlesex TW16 5QH England
Tel: 01932 779755
Fax: 01932 780383
E-mail: [email protected]
WWW: www.Retellrecorders.co.uk
Guarantee
Subject to the conditions listed below Retell will repair or at its option replace the
equipment supplied by them which in Retell’s opinion is faulty or below standard as
a result of inferior workmanship or materials
1.
Applies to issues raised within one year of purchase. Please keep your invoice to prove date of purchase.
85
Appendix
2.
3.
4.
5.
6.
Does not cover any faults or defects caused by accident, misuse, fair wear
and tear, neglect, tampering with the equipment or any attempt at adjustment or repair except by Retell.
RETELL EXPRESSLY EXCLUDES TO THE EXTENT PERMITTED
BY LAW LIABILITY FOR CONSEQUENTIAL LOSS, DAMAGE OR
INJURY ARISING FROM OR IN CONNECTION WITH ANY OF ITS
PRODUCTS. NO LIABILITY CAN BE ACCEPTED FOR ANY LOSS
OF DATA OR RECORDINGS OR FALIURE TO RECORD OR CONSEQUENCES OF ANY SUCH LOSS
If a defect occurs, the equipment should be returned prepaid to Retell. Retell cannot be held responsible for damage in transit for goods sent to
them. We suggest sending goods by Recorded Delivery to prove receipt.
Proof of posting is not proof of receipt.
The guarantee does not apply to any batteries or cassettes supplied by Retell nor to any damage caused by leaking batteries.
Only Retell has any authority to vary the terms and conditions of this guarantee. This guarantee is offered as an additional benefit to the purchasers’
rights and does not affect these rights in any way.
Legality of Recording
Oftel says that you should make every reasonable effort to inform all parties to a call
that it may or will be recorded, silently monitored or intruded into. They say that it is
up to you how you do this and that acceptable options, depending on circumstances, might include warning tones, pre-recorded messages, spoken warnings by
the operator or written warnings included in publicity material, telephone directories,
contracts, terms of business, staff notices etc. Oftel says that it may not always be
possible to warn first time callers with whom you have had no previous contact but
what is important is that you have a systematic procedure in place, which provides
the necessary information where this is a realistic possibility. Oftel also suggest following on a ruling from the European Court of Human Rights that staff are told of a
phone that they can call from which will not be recorded.
If you require further information or for the latest updates since this leaflet was printed contact Oftel, 50 Ludgate Hill, London EC4M 7JJ. Tel: 0345 145 000. You may
also want to contact the Data Protection Registrar for the latest updates on 01625
545745 for the latest updates.
Retell occasionally monitors calls for quality.
86
Appendix
CE sign
This device is approved for the connection and use within the analogue public telephone networks in all EC countries – according to the European Requirements. Due
to technical deviations in individual countries, we cannot grant an unlimited guarantee for the successful operation at all types of telephone accesses.
RETELL AG hereby declares that the device complies with all fundamental requirements of the European directive 1999/5/EC. This conformity is confirmed by the CE
sign on the device.
Further details on the declaration of conformity can be found under the following
internet address:
http://www.Retell.org
Ecological information
During the normal use of the telephone you will not have any contact to substances
damaging to your health. The device is not battery-operated. The plastics used for
manufacturing this device exclusively consist of partially recycled granules. The
packaging materials do not consist of plastics but of partially recycled cardboard
and paper.
If you do not have further use of your Retell 540 office, RETELL Ltd will take back
the device without any charge. The device will be properly taken to pieces for recycling.
87
Appendix
Troubleshooting
Power failure
The device is not operational during a power failure. The internal clock stops. But all
settings are retained so that the previous status is reset when power returns. You
may need to reset the time.
Using the following table try to define the cause of a problem and solve the error.
Problem
Possible cause
Remedy/Recommendation
Unit does not hang up after
caller leaves a message
There is not a standard hangup tone
Check if you have a hang up
tone. The unit is voice
activated so if there is
speaking eg Please Hang up,
then the unit will keep on
recording. You need to contact
your telephone provider to get
the hang up tone changed.
No display.
No contact with mains power
supply.
Check all cables and plugs. If
necessary try another plug.
Display too weak or dark.
Contrast set incorrectly.
Set contrast.
No sound.
Volume set to zero.
Adjust volume.
OGM symbol flashing.
No OGM recorded.
Record an outgoing message.
No answer, no monitoring.
No contact with connection
cable.
Check all cables and plugs.
No response in PABX.
No call signal switched on.
Check PABX programming.
Buzzing or other interference
on loudspeaker.
Interference from cordless
telephone, monitor etc.
Chang installation location.
Messages not recorded.
Device is set to OGM without
ICM option (message only).
Change or re-record OGM.
No answer, subsequent
telephone does not work.
Wrong connection cable,
Only use original cables, check
wiring boxes incorrectly wired. wiring boxes (if nec. get a
specialist to check).
Incorrect or no connection
when dialling from PABX.
The prefix for the public
network has not been entered.
No automatic call-back on
busy
Call back code not entered,
Enter call back code.
network operator or PABX dies Check with network operator
or PABX as to whether
not support the function or
88
Enter prefix.
Appendix
function is not authorised.
function is supported or needs
to be authorised.
Can not set up call forwarding
Call forwarding settings are
missing or incorrect.
Network operator or PABX
does not support the function
or function is not authorised.
Make, check and if nec.
change settings. Check with
network operator or PABX as
to whether function is
supported or needs to be
authorised.
No call number displayed
when a call is received
Network operator or PABX
does not support the function
or function is not authorised.
The caller has suppressed his
call number or has a secret
number.
The call comes from a public
telephone.
The called is made via a
telephone network that does
not support transferring call
numbers.
Check with network operator
or PABX as to whether
function is supported or needs
to be authorised.
89
Appendix
Delivery status
The following list states the default settings for your Retell 540 office. You can
change these default settings individually. You can return to the delivery status at
any time by opening the service menu.
Language
Network time
Automatic switching between summer/winter time
Time message
Date message
Call number message
Device message
Recording quality
Length of ICM
Monitoring during ICM
Number of ringing tones before answer
Queue message
Own number
Remote access code
Quick check code
Toll-saving
Remote activation of the answer mode
Remote deletion
Room monitoring
Message code
Redial every
External call back code
Prefix for the public network (PABX)
CLIP correction (PABX)
Internal call back code (PABX)
Query message tone
Display contrast
Display brightness
Display background
OGM
Answering mode
Message center
Timer
Message transfer
90
English
No
Yes
Yes
Yes
No
No
128 kb/sec
2 minutes
Yes
2
No
No
Yes
Yes
10 seconds
Off
8
16
Automatic
6 (Fixed text)
Off
Off
Off
Appendix
Waiting period
Repeat period
Repetitions
OGM playback
60 seconds
20 minutes
2
5
Individual ringing tone
Activation code for call forwarding
Deactivation code for call forwarding
Automatic monitoring
All calls
Confirm save
Appointments
PIN
Mailboxes
Off
No
No
Yes
Off
0000
Off
91
Appendix
Technical Data
Dimensions (W x H x D)
Retell 540 office
Mains plug
220 x 50 x 190 mm
53 x 68 x 44 mm
Weight
Retell 540 office
Mains plug
540 g
270 g
Operating voltage
Mains plug
Idle power output
230 V / 50 Hz
< 2,5 W
Ambient temperature
0 – 40 °C
Number of outgoing messages
6
Incoming messages
Recording method
Sampling rate
Total recording capacity approx.
Number of incoming messages
PCM 64 / 128 kBit/s
8 / 16 kHz
60 / 30 Min.
max. 199
Memory
Call list
Telephone book
SMS inbox
50 entries
100 entries
20 short messages
CLIP
Call number display
Dual mode DTMF / FSK
Data retained after power failure
> 10 years
Time
Network synchronous
Display
Graphics LCD 64 x 128 pixels, backlit
"OUT" output level
150 mV / 10 kΩ
"IN" input sensitivity
150 mV / 47 kΩ
92
Index
Index
A
E
Absence manager ............................ 25
Access code..................................... 73
Adjusting the volume........................ 82
Answering mode .............................. 18
Area code ......................................... 29
Audio input ....................................... 12
Audio output ..................................... 13
Auto. call forwarding to the mailbox. 77
Automatic redialling.......................... 37
Automatic-monitoring....................... 69
Ecological information ......................87
Entering entries.................................29
Extension ..........................................74
External signal source ................16, 64
B
H
Brief operating instructions .............. 95
Button occupancy .............................. 4
Holding a call....................................37
Hook flash.............................37, 60, 80
C
I
Call forwarding ..................... 42, 54, 65
Call list .............................................. 27
Call-back code ................................. 79
Caller's name........................ 18, 20, 27
Caller's number........................... 18, 20
Capital letters.............................. 30, 49
CE sign ............................................. 87
Changing entries .............................. 33
Changing PIN ................................... 71
Checking OGMs............................... 17
CLIP correction................................. 80
Connecting ....................................... 12
Inbox ...........................................45, 46
Individual ringing tone ................35, 63
Installation.........................................12
Installing..............................................3
Internal ..................................31, 60, 67
F
Fast forward and rewind...................21
Flash .....................................31, 60, 67
G
Guarantee.........................................85
L
Length of ICM ...................................78
Locking the device............................71
M
Mailboxes..........................................73
Mains plug ........................................12
Message center ..........................45, 52
Message code............................38, 79
Message transfer..............................58
Message transfer by SMS ................61
Monitoring...................................23, 78
Monitoring via contact control ..........69
D
Day/night switching .......................... 65
Default status ................................... 83
Deleting all incoming messages ...... 22
Deleting individual messages .......... 21
Deleting OGMs................................. 17
Delivery status .................................. 90
Destination call number.............. 65, 74
Dial tone/dial pause ............. 31, 60, 67
Dialing from the telephone book ...... 36
Dialing the caller directly .................. 22
Display symbols ............................... 10
O
OGM without ICM .............................41
Outbox ........................................45, 48
Outgoing message with incoming
message .................................14, 41
Outgoing message without incoming
message .......................................14
93
Index
Sample outgoing messages ............14
Search entries...................................32
Security lock .....................................71
Send telephone book .......................83
Sending a message .........................50
Sending SMS....................................45
Service ..............................................85
Service menu....................................83
Set backlight .....................................80
Set language ....................................78
Set remote control ............................79
Setting contrast.................................80
Setting options..................................78
Setting time.......................................78
Setting up mailboxes ........................74
Settings/Own number.......................29
Short messages................................44
Skip.............................................21, 40
Small letters ................................30, 49
SMS ..................................................44
Summary of possible characters......32
Switching on timer ............................57
Switching time ..................................54
Own call number .............................. 58
Own number..................................... 79
P
PABX ................................................ 80
Package ........................................... 12
Packaging materials......................... 87
Parts supplied .................................. 12
Pausing playback ............................. 21
Personal info..................................... 24
Personal OGM (call filter) ................. 34
Playing back all incoming messages
...................................................... 20
Playing back new incoming messages
...................................................... 20
Power adapter .................................... 3
Power failure..................................... 88
Prefix................................................. 80
Program version ............................... 83
Programming timer........................... 55
Q
Query message tone........................ 80
Quick check code ............................ 73
Quit request...................................... 39
T
R
Technical-Data..................................92
Telephone book................................29
Telephone connection cable ........3, 12
Templates ...................................45, 51
Text entry ..........................................29
Timer.................................................54
Transfer cables .................................12
Troubleshooting................................88
Receive telephone book................... 83
Recipient's call number .................... 50
Recording an outgoing message..... 15
Recording quality ............................. 78
Recording threatening calls ............. 69
Redialling.......................................... 79
Remote access ................................ 39
Remote access code ....................... 39
Remote access functions................. 40
Remote access to mailboxes ........... 77
Remote activation............................. 43
Remote deletion ............................... 40
Repeat period................................... 58
Repeating ......................................... 21
Repetitions........................................ 58
Ringing tones ................................... 78
Room monitoring.............................. 40
U
Unlocking device ..............................72
Update ..............................................83
User elements.....................................6
Using the mailboxes .........................76
V
Vocal Clip....................................34, 35
W
Waiting period...................................58
Weekday ...........................................54
S
Safety instructions .............................. 3
94
Brief operating instructions
Record an outgoing message
Select OGM using
selection button
Start speaking.
Press and hold
OGM.
Release OGM.
Select type of OGM
using selection
button
Checking OGMs
oder
Select OGM using
selection button
Press OGM briefly.
Adjust volume
Press selection button
to delete.
Playing back incoming messages
or
To play back all recordings
To play back new incoming
messages
Adjust volume
Deleting all incoming messages
or
Press selection button during playback to
delete the current ICM
Press selection button for 2 seconds to delete
all messages
Answering mode
Press to switch on answering mode
Press to switch off answering mode
Dialling from the telephone book
...
Open telephone book and
search for entry using the
control button (down).
To limit the search select
letters using the
corresponding entry
button
Press the selection
button next to the desired
name
After dialling lift receiver
and conduct call.
Operating card for remote control
Retell
53 Thames Street,
Sunbury on Thames
Middlesex
TW16 5QH
England
Tel: +44 (0)1932 779755
Fax: +44 (0)1932 780383
Email: [email protected]
www.Retellrecorders.co.uk
© Retell 2005
05/2005
EDV 4933312