1
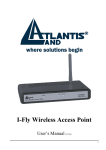
I-Fly Wireless Access Point
Quick Start Guide
A02-WAP-54G/G2 (February 2004)V1.00
I-Fly Wireless Access Point
For more detailed instructions on configuring and using the IStorm Lan Router ADSL, please refer to the online manual.
1.1 Package contents
Make sure that you have the following items:
• I-Fly Wireless Access Point
• Network cable (CAT 5)
• Power Adapter AC-DC (5V, 2A)
• CD-ROM (with manual, software and driver)
• This Quick Start Guide
If any of the above items are missing, please contact your reseller.
1.2 Cabling
Connect to RJ45 ports by an Ethernet cable your PCs or Switch.
Finally connect the Adapter to power inlet. Now the I-Fly AP will
enter a self-test phase for about ten seconds. After this phase a
solid light (POWER Led) indicates a proper connection to the
power supply.Now you should see the LAN (WLAN) is solid or
blinking.
2
I-Fly Wireless Access Point
1.3 The Front Panel LEDs
LED
POWER
LAN
WLAN
MEANING
ON=Indicates proper connection to power supply.
OFF= The unit is not receiving power
ON= Indicates connection is established.
BLINKING= Data transmissions
OFF= No LAN connections
ON= Link is established
BLINKING= Packet transmit or receive activity
OFF= No Link activity
3
I-Fly Wireless Access Point
1.4 The Rear Ports
PORT
POWER (Jack)
LAN
MEANING
Receptor for the Power Adapter
Auto MDI/MDIX LAN ports automatically sense the
cable type when connecting to
Ethernet-enabled computers.
RESET
After the device has turned on, press it (10s) to reset the
device or restore to factory default settings.
1.5 Default Settings
Before you configure this I-Fly WirelessAccess Point, you need to
know the following default settings.
Below the I-Fly Access Point default settings:
•
User Name:admin
•
Password:admin
•
IP Address (192.168.1.1)
•
Subnet Mask (255.255.255.0)
•
DHCP Server: inactive
•
Wireless: Channel 6, Open Shared
1.6 IE Configuration
Now open IE, go to Instruments menu, select the Connections
tab and select one of the following options:
4
I-Fly Wireless Access Point
•
Never use remote connection
•
Use remote connection if another network connection
isn’t available
1.7 Browser configuration
Open the web browser, enter the local port IP address of this IFly Router, which default at 192.168.1.1, and click “Go” to get the
login page.
The default username is admin, password admin and click “OK”
to continue.
If the Wizard Quick Setup doesn't automatically depart, press on
the button Wizard.
5
I-Fly Wireless Access Point
1.8 Quick Setup with Wizard
Setup wizard is provided as the part of the web configuration
utility. You can simply follow the step-by-step process to get
your wireless router configuration ready to run in 4 easy steps
by clicking on the “Wizard” button on the function menu. The
following screen will appear. Please click “Next” to continue.
Step 1: Set your new Password
You can change the password as you like and then click
“Next” to continue.
6
I-Fly Wireless Access Point
Step 2: Set SSID and channel
Type the SSID in the text box and select a communications
channel. The SSID and channel must be the same as wireless
devices attempting communication to the router.
You can select the channel range of 1 to 13 for European
(ETSI) domain.
Step 3: Set Ecryption
To enable WEPsecurity, there are 2 types to select – 64bits and
128 bits. When it is selected, the key value must be entered in
HEX format.
7
I-Fly Wireless Access Point
Step 4: Restart
The Setup wizard is now completed. The new settings will be
effective after the Wireless AP restarted.
Please click
“Restart” to reboot the router. If you do not want to make any
changes, please click “exit” to quit without any changes.
8
I-Fly Wireless Access Point
Click “Close” to finish the AP Wizard.
9