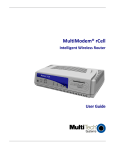
1
MultiConnect™ AW Analog‐to‐Wireless Converter User Guide Copyright and Technical Support MultiConnect™ AW User Guide MT200A2W‐G, MT200A2W‐C1, MT200A2W‐H5 S000504F, Revision F Copyright This publication may not be reproduced, in whole or in part, without the specific and express prior written permission signed by an executive officer of Multi‐Tech Systems, Inc. All rights reserved. Copyright © 2011‐2013 by Multi‐Tech Systems, Inc. Multi‐Tech Systems, Inc. makes no representations or warranties, whether express, implied or by estoppels, with respect to the content, information, material and recommendations herein and specifically disclaims any implied warranties of merchantability, fitness for any particular purpose and non‐infringement. Multi‐Tech Systems, Inc. reserves the right to revise this publication and to make changes from time to time in the content hereof without obligation of Multi‐Tech Systems, Inc. to notify any person or organization of such revisions or changes. Trademarks Multi‐Tech and the Multi‐Tech logo are registered trademarks and MultiConnect is a trademark of Multi‐Tech Systems, Inc. All other brand and product names are trademarks or registered trademarks of their respective companies. Revisions Revision A B C D E F Date 05/05/11 05/06/11 06/02/11 09/08/11 12/05/12 04/16/13 Description Initial release. Add exclamation warning (!) diagram to back panel. Add flashing signal LED descriptions. Add –C1, Sprint version Added pacemaker and medical device information. Updated RoHS and power draw. Added –H5 Contacting Multi‐Tech Knowledge Base The Knowledge Base provides immediate access to support information and resolutions for all Multi‐Tech products. Visit http://www.multitech.com/kb.go. Installation Resources To download manuals, firmware, and software, visit http://www.multitech.com/setup/product.go. Support Portal To create an account and submit a support case directly to our technical support team, visit: https://support.multitech.com Technical Support Business Hours: M‐F, 9am to 5pm CT Country By Email By Phone Europe, Middle East, Africa: [email protected] +(44) 118 959 7774 U.S., Canada, all others: [email protected] (800) 972‐2439 or (763) 717‐5863 World Headquarters Multi‐Tech Systems, Inc. 2205 Woodale Drive Mounds View, Minnesota 55112 Phone: 763‐785‐3500 or 800‐328‐9717 Fax: 763‐785‐9874 Warranty To read the warranty statement for your product, please visit: http://www.multitech.com/warranty.go 2 MultiConnect AW User Guide Contents Contents
Chapter 1 – Product Overview ............................................................................................................................ 6 Features ...................................................................................................................................................................... 7 AT Command Information ........................................................................................................................................... 7 Safety .......................................................................................................................................................................... 7 Dial Port Caution .............................................................................................................................................................. 7 RF Safety .......................................................................................................................................................................... 7 Interference with Pacemakers and Other Medical Devices ............................................................................................. 8 Handling Precautions ....................................................................................................................................................... 8 Front Panel.................................................................................................................................................................. 9 Package Contents ....................................................................................................................................................... 10 Specifications ............................................................................................................................................................. 11 MT200A2W‐G ................................................................................................................................................................ 11 MT200A2W‐C1 ............................................................................................................................................................... 12 MT200A2W‐H5 .............................................................................................................................................................. 13 Power ........................................................................................................................................................................ 14 Power draw for MT200A2W‐G ...................................................................................................................................... 14 Power Draw for the MT200A2W‐H5 (GSM850/HSDPA) ................................................................................................ 14 Power Draw for the MT200A2W‐C1 .............................................................................................................................. 15 Cellular Information ................................................................................................................................................... 15 Antenna System for Cellular Devices ............................................................................................................................. 15 PTCRB Requirements for the Antenna ........................................................................................................................... 16 FCC Requirements for the Antenna ............................................................................................................................... 16 Antenna Specifications ............................................................................................................................................... 16 CDMA Antenna Requirements/Specifications ............................................................................................................... 16 GSM Antenna Requirements/Specifications .................................................................................................................. 16 Command Connector .................................................................................................................................................. 17 Chapter 2 – Installation ..................................................................................................................................... 18 Account Activation for Wireless Devices ..................................................................................................................... 18 Insert the SIM Card into Holder .................................................................................................................................. 18 Connect the Antenna, Serial and Modem Cables, and Power ...................................................................................... 18 Optional – Attach the Modem to a Flat Surface........................................................................................................... 19 Chapter 3 – Configuring Ports ............................................................................................................................ 20 Connecting to the Device ............................................................................................................................................ 20 Logging In ................................................................................................................................................................... 21 Configuring the Port ................................................................................................................................................... 22 MultiConnect AW User Guide 3 Contents GPRS Cellular Port Configuration ................................................................................................................................... 22 GSM Cellular Port Configuration .................................................................................................................................... 24 CDMA Cellular Port Configuration ................................................................................................................................. 25 Chapter 4 – Device Configuration ...................................................................................................................... 26 Introduction Menu ..................................................................................................................................................... 26 Device Configuration .................................................................................................................................................. 27 Cellular Port Configuration ......................................................................................................................................... 27 GPRS Cellular Port Configuration ................................................................................................................................... 28 GSM Cellular Port Configuration .................................................................................................................................... 31 CDMA Cellular Port Configuration ................................................................................................................................. 32 View or Change Phone Number/IP Conversion Table .................................................................................................. 33 Analog (PSTN) Port Configuration ............................................................................................................................... 34 PSTN Modem Settings ................................................................................................................................................... 34 System Login .............................................................................................................................................................. 35 Setting up a Secret Question ......................................................................................................................................... 35 Timers ........................................................................................................................................................................ 36 Reset Parameters to Defaults ..................................................................................................................................... 36 System Reboot ........................................................................................................................................................... 37 Enable Debug ............................................................................................................................................................. 37 Chapter 5 – Upgrading Firmware ....................................................................................................................... 38 Determining if You Need to Upgrade the Firmware ..................................................................................................... 38 Downloading the Upgrade File and the Flash Wizard................................................................................................... 38 Identifying the COM port ............................................................................................................................................ 39 Upgrading Firmware ................................................................................................................................................... 39 Restoring Parameters ................................................................................................................................................. 41 Chapter 6 – Configuration Scripts ...................................................................................................................... 42 GPRS/GSM Configuration Script Example .................................................................................................................... 42 CDMA Configuration Script Example ........................................................................................................................... 46 Chapter 7 – Troubleshooting ............................................................................................................................. 50 Flashing Signal Strength LEDs ...................................................................................................................................... 50 Appendix A – Regulatory Compliance ................................................................................................................ 51 EMC, Safety, and R&TTE Directive Compliance ............................................................................................................ 51 International Modem Restrictions .............................................................................................................................. 51 47 CFR Part 15 Regulation Class B Devices ................................................................................................................... 51 Industry Canada ......................................................................................................................................................... 52 Waste Electrical and Electronic Equipment Statement ................................................................................................ 52 WEEE Directive ............................................................................................................................................................... 52 Instructions for Disposal of WEEE by Users in the European Union .............................................................................. 52 4 MultiConnect AW User Guide Contents REACH Statement ....................................................................................................................................................... 53 Registration of Substances ............................................................................................................................................. 53 Substances of Very High Concern (SVHC) ...................................................................................................................... 53 Restriction of the Use of Hazardous Substances (RoHS) ............................................................................................... 54 Information on HS/TS Substances According to Chinese Standards ............................................................................. 55 Information on HS/TS Substances According to Chinese Standards (in Chinese) .......................................................... 56 依照中国标准的有毒有害物质信息 ............................................................................................................................ 56 MultiConnect AW User Guide 5 Chapter 1 – Product Overview
The MultiConnect™ AW Analog‐to‐Wireless converter is a convenient turnkey solution that allows legacy equipment with built‐in analog modems to connect to a cellular network. By emulating the traditional dial‐up PSTN network and using a cellular modem, the affordable MultiConnect AW converter gives new life to devices currently using traditional analog dial‐up communications. ●
The MultiConnect AW model (MT200A2W‐G) with either internal GPRS or GSM cellular modem allows connection to the cellular packet data network (GPRS) or the circuit switched data network (GSM). ●
The MultiConnect AW model (MT200A2W‐C1) with an internal CDMA cellular modem allows connection to a CDMA 2000 1xRTT cellular network. ●
The MultiConnect AW model (MT200A2W‐H5) with an internal HSPA+ modem allows connection to a HSPA+ network. The MultiConnect AW converter operates on standards‐based communication networks and can be desktop or panel mounted. MT200A2W‐G MT200A2W‐C1 MT200A2W‐H5 6 MultiConnect AW User Guide Chapter 1 – Product Description and Specifications Features ●
Quad‐band GSM/EGSM 850/900/1800/1900 MHz (MT200A2W‐G) ●
Dual‐band CDMA2000 1Xrtt (MT200A2W‐C1) ●
Penta‐band HSPA+ 850/900/1700/1900/2100 MHZ (MT200A2W‐H5) ●
Packet data up to 85.6 Kbps (MT200A2W‐G) ●
CDMA speeds 153K bps forward and reverse (MT200A2W‐C1) ●
Multi‐Tech UIP stack ●
Circuit‐switched data up to 14.4 kbps (MT200A2W‐G only. MT200A2W‐H5 and MT200A2W‐C1 do not support this protocol) ●
Analog connection speed up to 33600 (V34) ●
Serial interface used for configuration and debug, fixed speed @ 115200 ●
On hook, off hook, and DTMF digit detection ●
Dial tone and busy tone generation ●
Phone number to IP conversion ●
Device configuration via menu selections ●
Device initialization script AT Command Information The AT commands for the MultiConnect AW are published in separate documents. These commands are documented in the Reference Guide for the GPRS AT Commands for Multi‐Tech G2 Cellular Modems (MT200A2W‐
G), the Reference Guide for the CDMA C1 AT Commands for the Multi‐Tech Modems or the H5 AT Commands for Multi‐Tech H5 modems. You can download these documents from the Multi‐Tech website. Safety Dial Port Caution The dial port is not designed to be connected to a Public Telecommunications Network (PSTN/phone line) or used outside the building. RF Safety The remote modems are cellular devices. It is important to follow any special regulations regarding the use of radio equipment due in particular to the possibility of Radio Frequency (RF) interference. Caution: A separation distance of at least 20 cm must be maintained between the modem transmitter’s antenna and the body of the user or nearby persons. The modem is not designed for or intended to be used in portable applications within 20 cm of the body of the user. Check your local standards regarding safe distances, etc. ●
Operation of a cellular modem close to other electronic equipment may also cause interference if the equipment is inadequately protected. Observe any warning signs and manufacturers’ recommendations. ●
Different industries and businesses have their own restrictions governing the use of cellular devices. Please observe the local restrictions of the environment where you intend to operate the cell modem. MultiConnect AW User Guide 7 Chapter 1 – Product Description and Specifications ●
Under no circumstances should antenna be placed outdoors. Interference with Pacemakers and Other Medical Devices Potential interference Radio frequency energy (RF) from cellular devices can interact with some electronic devices. This is electromagnetic interference (EMI). The FDA helped develop a detailed test method to measure EMI of implanted cardiac pacemakers and defibrillators from cellular devices. This test method is part of the Association for the Advancement of Medical Instrumentation (AAMI) standard. This standard allows manufacturers to ensure that cardiac pacemakers and defibrillators are safe from cellular device EMI. The FDA continues to monitor cellular devices for interactions with other medical devices. If harmful interference occurs, the FDA will assess the interference and work to resolve the problem. Precautions for pacemaker wearers If EMI occurs, it could affect a pacemaker in one of three ways: ●
Stop the pacemaker from delivering the stimulating pulses that regulate the heart's rhythm. ●
Cause the pacemaker to deliver the pulses irregularly. ●
Cause the pacemaker to ignore the heart's own rhythm and deliver pulses at a fixed rate. Based on current research, cellular devices do not pose a significant health problem for most pacemaker wearers. However, people with pacemakers may want to take simple precautions to be sure that their device doesn't cause a problem. ●
Keep the device on the opposite the side of the body from the pacemaker to add extra distance between the pacemaker and the device. ●
Avoid placing a turned‐on device next to the pacemaker (for example, don’t carry the device in a shirt or jacket pocket directly over the pacemaker). Device Maintenance To maintain the MultiConnect: ●
Do not attempt to disassemble the device. There are no user serviceable parts inside. ●
Do not expose your device to any extreme environment where the temperature or humidity is high. ●
Do not expose the device to water, rain, or spilled beverages. It is not waterproof. ●
Do not place the device alongside computer discs, credit or travel cards, or other magnetic media. The information contained on discs or cards may be affected by the phone. ●
Rough handling, such as dropping or shaking it, can damage the device. ●
Using accessories that Multi‐Tech has not authorized or that are not compliant with Multi‐Tech’s accessory specifications may invalidate the warranty. If the device is not working properly, contact Multi‐Tech Technical Support. Handling Precautions All devices must be handled with certain precautions to avoid damage due to the accumulation of static charge. Although input protection circuitry has been incorporated into the devices to minimize the effect of this static build up, proper precautions should be taken to avoid exposure to electrostatic discharge during handling and mounting. 8 MultiConnect AW User Guide Chapter 1 – Product Description and Specifications Front Panel The front panel displays three Signal Strength LEDs, a Carrier Detect LED, a Link Status LED, and a Power LED. Signal Strength LEDs display the internal wireless device signal level when they are on; when they flash, a failure has occurred. Refer to Chapter 7 for a description of the flashing Signal Strength LEDs. The Carrier Detect LED works for both analog and wireless. When solidly ON, both connections are established. The Link Status LED lights when the unit is registering with the network and blinks when the unit is registered with the network. The Power LED lights when power is supplied to the unit. The SIM door on the right side provides access to the SIM card holder. MT200A2W‐G MT200A2W‐C1 MT200A2W‐H5 LEDs LED Indicators Signal ALL OFF ‐ Unit is off, not registered on network, or extremely weak signal (RSSI <7). 1 Bar “ON” – Very weak signal (7 < = RSSI < =14) 1 Bar and 2 Bar “ON” – Weak signal (15 < = RSSI < =23) 1 Bar, 2 Bar, and 3 Bar “ON” – Good signal ( 24<= RSSI < = 31) CD CD – Carrier Detect – The Carrier Detect LED has three states. Slow Blink – Waiting for wireless connection. Fast Blink – After the wireless connection, a fast blink indicates waiting for analog connection. Solid Blink – Both sides are connected. LS LS – Link Status – Link Status is ON when the unit is registering with the network and blinks when the unit is registered with the network. Lights when DC power is applied to unit. MultiConnect AW User Guide 9 Chapter 1 – Product Description and Specifications Package Contents ●
1 MultiConnect Converter ●
1 antenna ●
1 RJ‐11 cable ●
1 power supply ●
1 Quick Start Guide Notes: ●
If required, your wireless provider will supply the SIM card. ●
If you are mounting the unit to a flat surface, you must supply the mounting screws. 10 MultiConnect AW User Guide Chapter 1 – Product Description and Specifications Specifications MT200A2W‐G Category Description Standard Band, Frequency Packet Data Circuit‐Switched Data Data Format Flow Control Antenna Connector SIM Connector Serial Command Port Analog Connection Command Connector Dial Connector Antenna Connector Power Connector Voltage Range Dimensions GPRS; Class 10 Quad‐band GSM 850/900/1800/1900 MHz Up to 85.6K bps Coding Scheme CS1‐4 Up to 14.4K bps, non‐transparent For serial interface – Asynchronous, 8‐N‐1, fixed 115Kbps Hardware flow control RF Antenna: 50 ohm SMA (female connector) Standard 1.8 and 3V SIM receptacle Fixed @ 115200bps Supports connection speeds up to 33600bps (V34) DE9 (female connector) RJ11 RF Antenna: SMA (female connector). Refer to Antenna Specifications. 2.5mm miniature screw‐on 9V to 32V @ 400mA 4.75” W x 1.58”H x 2.89”D 5.2oz 12.06cmW x 4.01cmH x 7.34cmD 0.147Kg ‐40° C to +85° C UL listed @ +40° C Operating Temperature1 Storage Temperature Humidity EMC Compliance Radio Compliance Safety Network ‐40° C to +85° C Relative humidity 20% to 90% noncondensing FCC Part 15 Class B EN55022 Class B EN55024 FCC Part 22, 24 RSS132,133 EN301 489‐1 EN301 489‐7 EN301 511 AS/ACIF S042.1, S042.3 UL60950‐1, 2nd Edition cUL60950‐1, 2nd Edition IEC60950‐1, 2nd Edition PTCRB 1UL Listed @ 40°C. Limited by power supply. UL Certification does not apply or extend to an ambient above 40°C and has not been evaluated by UL for ambient greater than 40°C “UL has evaluated this device for use in ordinary locations only. Installation in a vehicle or other outdoor locations has not been evaluated by UL. UL Certification does not apply or extend to use in vehicles or outdoor applications or in ambient above 40° C.” Optional power must be UL Listed ITE power supply marked LPS or Class 2 rated 9‐32Vdc, 1.44 – 0.4A
MultiConnect AW User Guide 11 Chapter 1 – Product Description and Specifications MT200A2W‐C1 Category Description Standard Band, Frequency Packet Data Data Format Flow Control Antenna Connector Serial Command Port Analog Connection Command Connector Dial Connector Antenna Connector Power Connector Voltage Range Dimensions CDMA2000 1xRTT Dual‐band 800/1900 MHz bands with Receive Diversity support on both bands Up to 153K bps, forward and reverse For serial interface – Asynchronous, 8‐N‐1, fixed 115Kbps Hardware flow control RF Antenna: 50 ohm SMA (female connector) Fixed @ 115200bps Supports connection speeds up to 33600bps (V34) DE9 (female connector) RJ11 RF Antenna: SMA (female connector). Refer to Antenna Specifications. 2.5mm miniature screw‐on 9V to 32V @ 400mA 4.75” W x 1.58”H x 2.89”D 5.2oz 12.06cmW x 4.01cmH x 7.34cmD 0.147Kg ‐40° C to +85° C UL listed @ +40° C Operating Temperature1 Storage Temperature Humidity EMC Compliance Radio Compliance Safety Network ‐40° C to +85° C Relative humidity 20% to 90% noncondensing FCC Part 15 Class B FCC Part 22, 24 UL60950‐1, 2nd Edition IEC60950‐1:2005 (Second Edition with EN 60950‐1:2006+A11:2009) CDG 1&2 1UL Listed @ 40°C. Limited by power supply. UL Certification does not apply or extend to an ambient above 40°C and has not been evaluated by UL for ambient greater than 40°C “UL has evaluated this device for use in ordinary locations only. Installation in a vehicle or other outdoor locations has not been evaluated by UL. UL Certification does not apply or extend to use in vehicles or outdoor applications or in ambient above 40° C.” Optional power must be UL Listed ITE power supply marked LPS or Class 2 rated 9‐32Vdc, 1.44 – 0.4A
12 MultiConnect AW User Guide Chapter 1 – Product Description and Specifications MT200A2W‐H5 Category Description Standard High Speed Packet Access (HSPA+) Band, Frequency Data Speed Operating Temperature1 Penta band 850/900/1700/1900/2100 MHz HSDPA data service of up to 7.2 Mbps HSUPA data service of up to 5.76 Mbps For serial interface ‐‐ Asynchronous, 8‐n‐1, fixed 115Kbps Hardware flow control RF Antenna: SMA (female connector). Refer to Antenna Specifications Fixed @115200bps Supports connections speeds up to 33600bps (V34) DE9 (female connector) RJ11 2.5mm miniature screw‐on 9V to 32V @400mA 4.75” W x 1.58”H x 2.89”D 5.2oz 12.06cmW x 4.01cmH x 7.34cmD 0.147Kg ‐40° C to +85° C UL listed at +40° C Storage Temperature ‐40° to +85° C Humidity EMC Compliance 20% to 90% non‐condensing FCC Part 15 Class B EN 55022 Class B EN 55024 FCC Part 22 FCC Part 24 FCC Part 27 RSS 132 RSS 133 RSS 139 EN301 511 EN301 489‐1 EN301 489‐7 EN301 489‐24 UL 60950‐1 cUL 60950‐1 EN 60950‐1 AS/NZ 60950‐1 PTCRB AT&T Others pending Data Format Flow Control Antenna Connector Serial Command Port Analog Connection Command Connector Dial Connector Power Connector Voltage Range Dimensions Radio Compliance Safety Network 1UL Listed @ 40°C. Limited by power supply. UL Certification does not apply or extend to an ambient above 40°C and has not been evaluated by UL for ambient greater than 40°C “UL has evaluated this device for use in ordinary locations only. Installation in a vehicle or other outdoor locations has not been evaluated by UL. UL Certification does not apply or extend to use in vehicles or outdoor applications or in ambient above 40° C.” Optional power must be UL Listed ITE power supply marked LPS or Class 2 rated 9‐32Vdc, 1.44 – 0.4A Note: Radio performance may be affected by temperature extremes. MultiConnect AW User Guide 13 Chapter 1 – Product Description and Specifications Power Multi‐Tech Systems, Inc. recommends that you incorporate a 10% buffer into your power source when determining product load. Power draw for MT200A2W‐G Input Voltage= 9.0Volts Sleep Mode Typical Maximum Peak Tx Peak Rst (Inrush) GSM850 9.26 Current(AMPS) 0.111 Watts 1.03 Inrush Current (AMPS) (approx. 8ms duration) 9.25 0.172 1.59 Input Voltage= 16.0 Volts Typical Maximum Peak Tx Peak Rst (Inrush) Sleep Mode GSM850 16.00 Current(AMPS) 0.068 Watts 1.09 Inrush Current (AMPS) (approx. 8ms duration) 16.00 0.105 1.68 9.24 0.254 2.35 16.00 0.151 2.42 1.43 0.745 1.20 1.56 Power Draw for the MT200A2W‐H5 (GSM850/HSDPA) GSM850 Input Voltage =9V Sleep Mode Idle Typical Peak Tx Peak Rst (Inrush) Current (A) Watts 0 0 0.125 1.13 0.234 2.11 1.51 2.560 Input Voltage =16V Sleep Mode Idle Typical Peak Tx Peak Rst (Inrush) Current (A) Watts 0 0 0.074 1.18 0.137 2.19 0.715 2.120 Input Voltage =9V Sleep Mode Idle Typical Peak Tx Peak Rst (Inrush) Current (A) Watts 0 0 0.129 1.16 0.261 2.35 0.34 2.560 Input Voltage =16V Sleep Mode Idle Typical Peak Tx Peak Rst (Inrush) Current (A) Watts 0 0 0.074 1.18 0.137 2.19 0.440 2.120 HSDPA Notes for models G2 and H5 ●
Peak Tx: The peak current during maximum data transmission. ●
Typical: The average current during maximum data transmission. ●
Inrush Current: The input current during power up, or a reset. 14 MultiConnect AW User Guide Chapter 1 – Product Description and Specifications Power Draw for the MT200A2W‐C1 US CELLULAR 800 MHz Input Voltage =9V Sleep Mode Typical Maximum Peak Tx Peak Rst (Inrush) Current (A) Watts 0.110 1.019 0.190 1.76 0.590 0.455 Input Voltage =20V Sleep Mode Typical Maximum Peak Tx Peak Rst (Inrush) Current (A) Watts 0.055 1.10 0.100 2.00 0.330 0.665 Input Voltage =32V Sleep Mode Typical Maximum Peak Tx Peak Rst (Inrush) Current (A) Watts 0.040 1.280 0.065 2.08 0.235 0.520 0.410 3.76 0.200 4.00 0.135 4.32 US PCS 1900MHz Input Voltage =9V Sleep Mode Typical Maximum Peak Tx Peak Rst (Inrush) Current (A) Watts 0.110 1.019 0.194 1.79 Input Voltage =20V Sleep Mode Typical Maximum Peak Tx Peak Rst (Inrush) Current (A) Watts 0.055 1.10 0.110 2.20 Input Voltage =32V Sleep Mode Typical Maximum Peak Tx Peak Rst (Inrush) Current (A) Watts 0.040 1.280 0.065 2.08 0.510 4.68 0.245 4.90 0.160 5.12 0.695 0.372 0.276 0.455 0.665 0.520 Notes for model C1 ●
Peak Tx: The peak current during transmission burst period. ●
Maximum: The continuous current during maximum data rate with the radio transmitter at maximum power. ●
Inrush Current: The input current during power up, or a reset. Cellular Information Antenna System for Cellular Devices The cellular/wireless performance is completely dependent on the implementation and antenna design. The integration of the antenna system into the product is a critical part of the design process; therefore, it is essential to consider it early so the performance is not compromised. If changes are made to the certified antenna system of the MultiModem, then recertification will be required by specific network carriers such as Sprint. The Antenna System is defined as the UFL connection point from the MultiModem to the specified cable specifications and specified antenna specifications. MultiConnect AW User Guide 15 Chapter 1 – Product Description and Specifications PTCRB Requirements for the Antenna There cannot be any alteration to the authorized antenna system. The antenna system must maintain the same specifications. The antenna must be the same type, with similar in‐band and out‐of‐band radiation patterns. FCC Requirements for the Antenna The antenna gain, including cable loss, for the radio you are incorporating into your product design must not exceed the requirements at 850 MHz and 1900 MHz as specified by the FCC grant for mobile operations and fixed mounted operations as defined in 2.1091 and 1.1307 of the FCC rules for satisfying RF exposure compliance. The antenna used for transmitting must be installed to provide a separation distance of at least 20cm from all persons and must not transmit simultaneously with any other antenna transmitters. User and installers must be provided with antenna installation instructions and transmitter operating conditions to satisfying RF exposure compliance. Antenna Specifications CDMA Antenna Requirements/Specifications Frequency Range Impedance VSWR Typical Radiated Gain Radiation Polarization TRP/TIS 824 – 894 MHz / 1850 – 1990 MHz 50 Ohms VSWR shall not exceed 2.0:1 at any point across the bands of operation 2 dBi on azimuth plane Omni‐directional Vertical The total radiated power (TRP) at the antenna shall be no less than +21/20 dBm for PCS/CELL channels respectively, and the total isotropic sensitivity (TIS) at the antenna shall be no less than ‐104/104 dBm for PCS/CELL channels respectively. GSM Antenna Requirements/Specifications Frequency Range Impedance VSWR Typical Radiated Gain Radiation Polarization TRP/TIS 16 824 – 960 MHz / 1710 – 1990 MHz 50 Ohms VSWR shall not exceed 2.0:1 at any point across the bands of operation 2 dBi on azimuth plane Omni‐directional Vertical Including cable loss the total radiated power (TRP) at the antenna shall be no less than +22/24.5 dBm for 850/1900 MHz respectively, and the total isotropic sensitivity (TIS) at the antenna shall be no less than ‐99/101.5 dBm for 850/1900 MHz respectively. MultiConnect AW User Guide Chapter 1 – Product Description and Specifications Command Connector The following table explains the pin functions. External Power MultiConnect AW User Guide Signal IN/OUT
Pin 1 CD Pin 2 RX Pin 3 TX Pin 4 DTR Pin 5 GND Pin 6 DSR Pin 7 RTS Pin 8 CTS Pin 9 RI N/A O I N/A GND N/A I O N/A Command Connector (DE‐9 ‐ Female) 17 Chapter 2 – Installation
Account Activation for Wireless Devices Please refer to Multi‐Tech’s Cellular Activation Web site at http://www.multitech.com/activation.go for information on activating your cellular modem. On the Cellular Activation Web site, click the down arrow in Select Your Product and select the desired model of MT200A2W from the pull down listing. Insert the SIM Card into Holder This section applies to models MT200A2W‐G and MT200A2W‐H5. The MultiConnect requires the power supply connection to begin operation. It also requires a SIM card (Subscriber Identity Module) in the unit to operate on a GPRS/GSM and HSPA+ network. To install the SIM, perform the following procedure: 1.
Before changing a SIM, ensure that power is removed from the unit. 2.
Open the SIM door by pressing down on the tab on the top of the door and prying open the door. 3.
Insert the SIM card into the card holder. The above graphic illustrates the correct SIM card orientation. 4.
Verify that the SIM card fits into the holder properly and then close the door. Connect the Antenna, Serial and Modem Cables, and Power Caution: The dial port is not designed to be connected to a Public Telecommunications Network (PSTN/phone line) or used outside the building. 1.
Connect a suitable antenna to the ANT connector on the back of the unit, (see antenna specifications in Chapter 1). 2.
Connect the DE9 connector (9‐pin) of the RS232 cable to the COMMAND connector on the unit and connect the other end to serial port on your PC. 18 Multi‐Tech Systems, Inc. MultiConnect AW User Guide Chapter 1 – Product Description and Specifications 3.
Connect the RJ11 phone cable to the DIAL connector on the unit and connect the other end of the phone cable to the analog modem. 4.
Remove the protective shipping cover. Attach the appropriate input connector to the power supply device by holding down on the slide lock and tipping the input connector to fit into the notch on top of the device and then lowering it into the slide lock. Then release the slide lock. 5.
Screw on the power lead from the power supply device to the power connection on the unit. Now, plug the power supply into your power source. Note: If desired you can press the Reset button to reset the hardware. Optional – Attach the Modem to a Flat Surface The modem can be panel mounted with screws spaced according to the measurement shown. Note: Use a #6 pan head screws for all mount locations. MultiConnect AW User Guide 19 Chapter 3 – Configuring Ports
Before you start configuring your MultiConnect unit, establish a wireless network account. Then, log into your MultiConnect unit using either HyperTerminal or an equivalent terminal emulation program. Connecting to the Device The following configuration procedures use the Windows XP Operating System. Older Windows versions have similar paths to HyperTerminal. Windows Vista and newer Windows versions do not include HyperTerminal. If you are using one of these, download a terminal emulator program to communicate with your MultiConnect unit. 1.
Go to Start I All Programs I Accessories I Communications and click HyperTerminal. The Connection window displays. 2.
Enter a name for the connection. 3.
Click OK. The Connect To screen appears with Country/region, Area code, and Phone number grayed out. 4.
Select the MultiConnect’s COM port from the Connect using drop down list. The COM Properties screen displays. 20 MultiConnect AW User Guide Chapter 3 – Configuring Ports 5.
Change the Bits per second to 115200. 6.
Click Apply and then click OK. 7.
Press ENTER. Logging In The Login screen displays. 1.
Enter the default password, admin. The Introduction Menu displays and prompts What would you like this port to do? 2.
Enter A to select Display Main Menu (Configuration options). MultiConnect AW User Guide 21 Chapter 3 – Configuring Ports Configuring the Port When you use a terminal emulation program to connect to your MultiConnect, it detects the unit’s configuration. The analog (PSTN) port menu defaults to a typical configuration. For the MT200A2W‐G and MT200A2W‐H5 use either the default GPRS or select GSM port configuration. For the MT200A2W‐C1, CDMA is the only port configuration option. GPRS Cellular Port Configuration 1.
Enter 1 for Cellular Port. GPRS is the default. 2.
Set the port options as described in GPRS Port Options. 3.
Save your configuration by entering a + at the prompt. Return to the Main Menu and wait for the cellular wireless network and the analog modem to change to a READY state. The Current Settings will change to: (WIRELESS_READY) (ANALOG_READY). 22 MultiConnect AW User Guide Chapter 3 – Configuring Ports GPRS Port Options GPRS Network Dependent Option B) Protocol C) Inbound or Outbound D) Wireless Connection Default TCPClient Outbound only On Demand Description Select either TCPClient, Telnet, UDP, or PassThru No selection. Select either On Demand or Always On. Note: If you want Always On, do not select this option until you finish making other configuration changes. Default Description Port Dependent Option Note: When you change the Remote Port or Remote IP, they become the default without pressing the + key to save the configuration. F) Remote Port G) Remote IP 1 None TCP/IP port that remote device is listening on. IP address of remote device on the network you are connecting to.
Default Description Wireless Band Option Note: The Wireless Band is set depending on the region of the world the unit is set up for, e.g., 850/1900MHz for NAM. K) Wireless Band Dual‐band 850‐
1900 MHz This option is default depending on the region of the world the unit is set up for, e.g., 900/1800MHz for Europe. 0) dual‐band 850/1900 MHz 1) dual‐band 900/1800 MHz Default Description APN Dependent Option Note: Configure options L thru N based on your Access Point Name (APN) Server requirements. L) APN User Name M) APN Password N) APN Server The user name may not be required by all network providers. The password may not be required by all network providers. The APN assigned by your cellular network provider. MultiConnect AW Security Option Default Description Note: If required by wireless provider, enter SIM pin code. S) SIM Pin Code MultiConnect AW User Guide Not required If enabled, select option 2 and enter your pin code. The pin code is four to eight digit number. Note: After 3 unsuccessful attempts to enter the PIN, the PUK (Personal Unblocking Key) is required. 23 Chapter 3 – Configuring Ports GSM Cellular Port Configuration 1.
Enter 1 for Cellular Port. GPRS is the default. 2.
Enter 2 for GSM. The GSM Cellular Port menu displays. 3.
Set the port options as described in GSM Port Options. 4.
Save your configuration by entering a + at the prompt. Return to the Main Menu and wait for the cellular wireless network and the analog modem to change to a READY state. The Current Settings will change to: (WIRELESS_READY) (ANALOG_READY). GSM Port Options GSM network Dependent Option A) GPRS or GSM B) Protocol K) Wireless Band 24 Default GPRS Pass Thru Dual‐band 850/1900 MHz Selection Select GSM No selection This option is default depending on the region of the world the unit is set up for, e.g., 850/1900MHz for NAM. 0) dual‐band 850/1900 MHz 1) dual‐band 900/1800 Mhz MultiConnect AW User Guide Chapter 3 – Configuring Ports CDMA Cellular Port Configuration 1.
Enter 1 for Cellular Port. CDMA is the default for the MT200A2W‐C1, so the CDMA Cellular Port menu displays. 2.
Set the port options as described in CDMA Port Options. 3.
Save your configuration by entering a + at the prompt. Return to the Main Menu and wait for the cellular wireless network and the analog modem to change to a READY state. The Current Settings will change to: (WIRELESS_READY) (ANALOG_READY). CDMA Port Options CDMA network Dependent Option B) Protocol Default TCPClient Selection Select either TCPClient, Telnet, UDP, or PassThru Default Description Port Dependent Option Note: These options depend on your local/remote port. F) Remote Port G) Remote IP MultiConnect AW User Guide 1 None The TCP/IP port that the remote device is listening on. The IP address of the remote device on the network you are going to. 25 Chapter 4 – Device Configuration
Introduction Menu Use Introduction Menu to configure your device, upgrade firmware within the device, or develop a script to automatically configure multiple devices. Options are: ●
A) Display Main Menu (configuration options) which allows you to configure the MultiConnect. Refer to Device Configuration in this chapter. ●
B) Firmware Upgrade for Main Control Code. Refer to Chapter 5 for firmware upgrade procedures. ●
C) Start Receiving Configuration Script to automatically configure a device. Refer to Chapter 6 for a configuration script example. 26 MultiConnect AW User Guide Chapter 4 – Device Configuration Device Configuration The Main Menu lists configuration and navigation options. Navigation options include exiting and refreshing the page. To select an configuration option: ●
Enter the option number. To save changes and exit: ●
Enter +. To exit without saving changes ●
Enter !. Current Settings displays the device’s current configuration and the wireless device status as it negotiates a connection with the wireless network. When Current Settings shows WIRELESS READY and has an acceptable signal strength, the device is ready to initiate a wireless connection. Analog information shows when the device is ready to initiate an analog connection. Cellular Port Configuration Cellular portion options depend on your model. MultiConnect AW User Guide 27 Chapter 4 – Device Configuration GPRS Cellular Port Configuration Network Dependent Option A) GPRS or GSM Default GPRS B) Protocol TCP Client Option C) Inbound/Outbound Default Outbound only D) Wireless Connection On Demand Description The GPRS or GSM option is based on the SIM installed in the unit. 1) GPRS option requires a packet switched cellular network. 2) GSM option requires circuit switch cellular network. If you select GSM, skip to GSM Cellular Port Configuration for configuration information. 1) TCP Client option is an internet protocol intended to get data from one network device to another. 2) Telnet option is a client communication. 3) UDP option is a connectionless protocol in that UDP makes no provision for acknowledgement of packets received. 4) Pass Thru option allows for data to be transferred from a legacy device to a remote destination without being modified. Description This option defaults to Outbound and there are no additional selections. 1) On‐Demand option initiates the wireless connection when a request made. 2) Always On option is always connected to the cellular network. Note: If you want Always On, do not select this option until you finish making other configuration changes. Port Dependent Option E) Local Port F) Remote Port 28 Default 23 1 Description Not applicable. Remote Port is the IP port that the remote device listens on. When you change the Remote Port, it becomes the new default MultiConnect AW User Guide Chapter 4 – Device Configuration G) Remote IP None port. Remote IP is the IP address of the device you are connecting to for outbound. When you change the Remote IP, it becomes the new default IP. Phone Number/IP Conversion Table Option J) View or change Phone Number/IP Conversion Table Default Selection This option allows for additional remote server IPs to be added to the Phone Number/ IP Conversion Table. When a dialed number matches one of those in this table, the default Remote Port and IP options are overridden during the call. If the entry does not match, the default is used. For detailed instructions on entering data in this table, refer to View or Change Phone Number/IP Conversion Table in this chapter. Default Dual‐band 850/1900 MHz Selection This option is default depending on the region of the world the unit is set up for, e.g., 900/1800MHz for Europe. 0) dual‐band 850/1900 MHz ‐ NAM 1) dual‐band 900/1800 MHz – Euro/ROW Wireless Band Option K) Wireless Band APN Dependent Option Default Selection The Access Point Name (APN) is the server name provided by your carrier. For example, AT&T; PROXY, INTERNET, or PUBLIC, T‐Mobile; INTERNET2, VOICESSTREAM.COM, INTERNET2, or WAP.VOICESTREAM.COM Rogers Wireless of Canada; INTERNET.COM The APN User name is assigned by your cellular network provider L) APN Username for security and authentication purposes. The user name may not be required by all network providers. Option M) APN Password Default N) APN Server Selection The APN Password is assigned by your cellular network provider for security and authentication purposes. The password may not be required by all network providers. The APN assigned by your cellular network provider. MultiConnect AW Security Option O) PhyTimeout (Min) Default 15 Min P) DLE Mode 1 MultiConnect AW User Guide Selection The Physical Time out option is a time limit in which the MultiConnect AW will drop the connection to the cellular network if no activity is sensed on the network. The range is zero to 255 minutes, with 0 disabling the time out. The default is 15 minutes. Normally, this option should be left in the default value. DLE Mode 0 is enabled, no specific process is needed on [ETX] characters. This means that is not possible for a host to request an end of connection or to receive a clear indication of the end of a connection from the TCP/IP stack. 29 Chapter 4 – Device Configuration Q) TCP TxDelay 100 milliseconds R) Handshake TimeOut (sec) S) SIM Pin Code 90 seconds Not Required Z) Enter Wireless Modem Command Mode 30 DLE Mode 1 is enabled, the [ETX] characters means a request or an indication of end of connection. As a consequence, [ETX] characters that belong to the payload must be sent by the host on the serial port preceded by a DLE character. Similarly, ETX characters received by the TCP/IP stack from the Internet are sent to the host through the serial port preceded by a DLE character. This option determines the time delay introduced before sending a TCP frame that has not been entirely filled with user data. The time is entered in milliseconds, and it should be noted that a value of 0 initiates the sending of a TCP frame as soon as possible after the reception of a single character value from the host. The handshake timeout is a wireless modem timeout of between 1 and 255 seconds. Default is 90 seconds. The default option (1) is the SIM pin code is not required. Option 2 is enter or change the pin code. The pin code is four to eight digit number. Note: After 3 unsuccessful attempts to enter the PIN, the PUK (Personal Unblocking Key) will be required. This option opens the command port on the wireless modem to enter AT commands. MultiConnect AW User Guide Chapter 4 – Device Configuration GSM Cellular Port Configuration Network Dependent Option A) GPRS or GSM Default GPRS B) Protocol Pass Thru Description The GPRS or GSM option is based on the SIM installed in the unit. GSM option requires a circuit switched cellular network. This option defaults to Pass Thru and there are no additional selections. Wireless Band Option K) Wireless Band Default Dual‐band 850/1900 MHz Selection This option is set depending on the region of the world the unit is set up for, e.g., 850/1900MHz for NAM. 0) dual‐band 850/1900 MHz ‐ NAM 1) dual‐band 900/1800 MHz ‐ Euro/ROW MultiConnect AW Security Option R) Handshake TimeOut (sec) S) SIM Pin Code Z) Enter Wireless Modem Command Mode MultiConnect AW User Guide Default 90 seconds Not required Selection The handshake timeout is a wireless modem timeout between 1 and 255 seconds. The default option (1) is the SIM pin code is not required. This option opens the command port on the wireless modem allowing you to enter AT commands. 31 Chapter 4 – Device Configuration CDMA Cellular Port Configuration Network Dependent Option A) CDMA B) Protocol Default CDMA (Internal) TCPClient C) Inbound/Outbound D) Wireless Connection Outbound OnDemand Description No selection 1) TCPClient option is an internet protocol intended to get data from one network device to another. 2) Telnet option is a client communication. 3) UDP option is a connectionless protocol in that UDP makes no provision for acknowledgement of packets received. 4) Pass Thru option allows for data to be transferred from a legacy device to a remote destination without being modified. No selection 1) On‐Demand option initiates the wireless connection when a request made. 2) Always On option is always connected to the cellular network. Note: If you want Always On, do not select this option until you finish making other configuration changes. Port Dependent Option Default Description E) Local Port 23 Local Port is the port that the MultiConnect AW listens on for inbound traffic. F) Remote Port 0 Remote Port is the IP port that the remote device listens on. When you change the Remote Port, it becomes the new default port. G) Remote IP none Remote IP is the IP address of the device you are connecting to for outbound. When you change the Remote IP, it becomes the new default IP. Phone Number/IP Conversion Table 32 MultiConnect AW User Guide Chapter 4 – Device Configuration Option Default Selection J) View or change Phone Number/IP Conversion Table This option allows for additional connections to be added to the Phone Number/ IP Conversion Table. When a dialed number matches one of those in this table, the default Remote Port and IP options are overridden during the call. If the entry does not match, the default is used. For detailed instructions on entering data in this table, refer to View or Change Phone Number/IP Conversion Table in this chapter. MultiConnect AW Security Option Default Selection R) Handshake TimeOut (sec) 90 seconds The handshake timeout is a wireless modem timeout of between 1 and 255 seconds. Default is 90 seconds. Z) Enter Wireless Modem Command Mode This option opens the command port on the wireless modem to enter AT commands. View or Change Phone Number/IP Conversion Table The Phone number/IP conversion table uses an analog (PSTN) phone number to look up a remote server’s IP address. Phone number/IP conversion table holds up to 5 entries. When a dialed number matches a number in the table, the default Report Port and Remote IP are overridden for this call. To set up the conversion table: 1.
If you are still on the Main Menu, enter J to go to the Phone number/IP Conversion Table. 2.
Enter number for the entry you want to change. 3.
Enter a Server Port Number. 4.
Enter the Server Phone Number without dashes between the area code, exchange, and extension number. 5.
For Server IP, enter the IP address of the server on your cellular network. 6.
You do not have to enter + to save these changes. MultiConnect AW User Guide 33 Chapter 4 – Device Configuration Analog (PSTN) Port Configuration The default settings in the Analog (PSTN) Port Configuration are typically the correct ones. Option Default Description Modem Initialization String Modem Settings “ “ Allows you to enter initialization commands into the internal analog modem. Allows you to reconfigure the internal analog modem. Select this option to change baud rate, flow control, etc. See PSTN Modem Settings. V34,33600 PSTN Modem Settings Use the PSTN Modem Settings menu to reconfigure analog modem. Option Default A) Rate The analog modem’s maximum speed. Options are: A) 56000 B) 33600 C) 28800 D) 14400 E) 12000 F) 9600 G) 4800 H) 2400 I) 2200 J) 1200 K)300. Options are: A) V92 B) V90 C) V34 D) V32bis E) V32 F) V22bis G) V22 V34 H) BELL212A I) BELL103. Options are: A) V.42/MNP B) V.42 Only C) MNP Only D) Direct Mode V.42/MNP E) NoECM. V.42bis/MNP5 Options are: A) Enable V.42bis/MNP5 Data Compression B) Disable Data Compression. B) Modulation C) Error Correction D) Data Compression 34 Description/Options 33600 MultiConnect AW User Guide Chapter 4 – Device Configuration Option Default Description/Options E) Flow Control F) Auto Modulation Negotiation G) Handshake TimeOut Timer (sec) RTS/CTS ON Options are: A) RTS/CTS B) XON/XOFF C) Disable Options are: A) ON or B) OFF 90 Enter a value from 0 to 255 seconds. Zero disables the timer. System Login Option Description A) No Login B) Login Required C) Change Password Allows access to the MultiConnect without a login. Requires a user to login. Select to change the password. The default password is admin all lower case letters. Adds secret question and answer to be used when a user forgets the password. D) Modify/View Secret Question Info Setting up a Secret Question From the System Login page: 1. Enter D. 2.
Select Y to create or modify the secret question/answer. 3.
To fill in the blank for <What/who/where> is your favorite <__________>, enter up to 30 characters to define your favorite category, for example, teacher or car. 4.
Enter an answer to the question, up to 30 characters. 5.
Enter + to save your secret and exit. MultiConnect AW User Guide 35 Chapter 4 – Device Configuration Timers Option Default Description A) Menu Inactivity Timer 30 (sec) B) No Signal Reset Timer 300 (sec) C) TimeOut Between Dialed Digits 5 (sec) Enter, in seconds, how long a menu displays with no activity. Zero disables the timer. Use this timer to reset the device if it cannot find a signal strong enough to establish a wireless connection. Enter the number of seconds to attempt a wireless connection. Zero disables the timer. Use this timer to set the maximum time allowed between dialing two digits before the device assumes that dialing is complete. When the timer expires, device attempts the call. For example, if the timer is set to 5 seconds, when 5 seconds has elapsed the device assumes you finished entering the phone number and attempts to place the call. Reset Parameters to Defaults To reset all parameters to back to defaults: ●
36 Enter Yes. Note that you must type the entire word, not just y or n. MultiConnect AW User Guide Chapter 4 – Device Configuration System Reboot To reboot the system: ●
Enter Y or yes. Enable Debug To turn on debugging: ●
Enter Y. MultiConnect AW User Guide 37 Chapter 5 – Upgrading Firmware
Your device is controlled by semi‐permanent firmware, which is stored in flash memory. The firmware stays in memory when the modem is turned off. It can be updated when new features are added. Since the firmware in your unit is stored in flash memory, you can upgrade the firmware in a few minutes. Determining if You Need to Upgrade the Firmware 1.
Use a terminal emulation program to login to the device. The firmware version displays in the Introduction Menu. In the image below, the version is 1.0.10, dated Aug 29 2011 10:02:03. 2.
Go to http://www.multitech.com/en_US/SUPPORT/Updates/Firmware. 3.
Select MultiConnectAW from the Product Family drop down list or select your specific model from the Select a Model drop down list. 4.
Look at the firmware version number. 5.
●
If the firmware version number matches the firmware version number in Step 1, your firmware is current. ●
If the firmware version number is greater than the firmware version number found in Step 1, you need to upgrade your unit’s firmware. Make a note of your configuration settings. You may need to restore some settings after the upgrade. Downloading the Upgrade File and the Flash Wizard 1.
Right‐click on the firmware file link from http://www.multitech.com/en_US/SUPPORT/Updates/Firmware and save the file in a temporary folder on your hard disk. 2.
Go to http://www.multitech.com/setup/product.go and select your model from the Choose your Product drop down list. 3.
Click Software. 4.
Click the Flash Wizard link and run the installation program. 5.
Find the firmware file and double‐click the file name to open the WinZip Self‐Extractor. 6.
Click Browse and find the Flash Wizard folder. In a default installation, this is C:\Program Files\MultiTech Systems\Flash Wizard\. Click Unzip. You must extract the firmware file to the Flash Wizard folder.
38 MultiConnect AW User Guide Chapter 5 – Firmware Upgrade Identifying the COM port 1.
Go to Start I Control Panel and then Open Device Manager. 2.
Verify the COM port that is connected to the MT200A2W unit. In this example, it is MosChip PCI Serial Port (COM18). 3.
Close the device manager. Upgrading Firmware Note the filename for the new firmware (example: KKQG_1_0_13.hex). Warning: Never install an older version of firmware over a newer version. Doing this WILL DESTROY THE FLASH PROM! If the flash PROM is destroyed, the unit must be sent in for repair. 1.
If you closed the HyperTerminal, restart it and log back in. 2.
Enter B to select B) Firmware Upgrade for Main Control Code. You will be prompted to confirm your selection. Enter Yes. MultiConnect AW User Guide 39 Chapter 5 – Firmware Upgrade 3.
Close the terminal program. 4.
Double‐click the Flash Wizard icon or filename to run Flash Wizard. The Identifying Devices window displays as the Flash Wizard locates and identifies the devices connected to your system. Note: If the message ERROR: No valid devices detected displays, verify that the MultiConnect is turned on, that all cables are correctly and securely attached, and the correct COM port is being used. 5.
Click to highlight the model and click Next. 6.
Click the port to be upgraded from the Port list and click Next. The Progress dialog box appears, showing a status bar that indicates the progress of the upgrade. Caution: Disrupting the Flash Wizard during this stage of the upgrade may make your unit inoperable. 40 MultiConnect AW User Guide Chapter 5 – Firmware Upgrade 7.
When the flash upgrade is complete, Programming Complete appears. 8.
Click Next. The Results window appears. 9.
Click Finish to exit Flash Wizard. Restoring Parameters Your MultiConnect has been updated. You can now open your terminal program to re‐set your Device Configuration. MultiConnect AW User Guide 41 Chapter 6 – Configuration Scripts
The following are example scripts you can use to configure a MultiConnect through a terminal program. These examples were created with Tera Term. Multi‐Tech System does not support the Tera Term terminal emulator; it was used to show how a terminal emulator can be used to configure a script for the MultiConnect. This chapter includes samples for GPRS/GSM and CDMA configurations. GPRS/GSM Configuration Script Example ; ;TeraTerm Script ; ;Configuration Script for MT200A2W‐G (GPRS) device ;Date: 02/28/2011 ;Author: ;Version: 1.0 ‐ Initial Version ;NOTE: use ';' to comment out any option and its corresponding wait'OK' ; that are not needed to be modified. ; ; Parameters within the double quotes are separated by a single space. ; Parameters have to be in Capital letters. ; ; Make sure to reboot the device before running this script ;‐‐‐‐‐‐‐‐‐‐‐‐‐‐‐‐‐‐‐‐‐‐‐‐‐‐‐‐‐‐‐‐‐‐‐‐‐‐‐‐‐‐‐‐‐‐‐‐‐‐‐‐‐‐‐‐‐‐‐‐‐‐ ; Determine which menu we are currently in ;‐‐‐‐‐‐‐‐‐‐‐‐‐‐‐‐‐‐‐‐‐‐‐‐‐‐‐‐‐‐‐‐‐‐‐‐‐‐‐‐‐‐‐‐‐‐‐‐‐‐‐‐‐‐‐‐‐‐‐‐‐‐ sendln "" ;Send dummy char to get fresh menu timeout = 3 :LOGIN wait 'Please enter password to login =>' 'Enter selection =>' if result=2 then pause 1 goto HANDSHAKE elseif result=1 then timeout = 10 pause 2 sendln "admin" ;Login password goto LOGIN else goto LOGIN endif :HANDSHAKE ;‐‐‐‐‐‐‐‐‐‐‐‐‐‐‐‐‐‐‐‐‐‐‐‐‐‐‐‐‐‐‐‐‐‐‐‐‐‐‐‐‐‐‐‐‐‐‐‐‐‐‐‐‐‐‐‐‐‐‐‐‐‐ ; Handshake section ;‐‐‐‐‐‐‐‐‐‐‐‐‐‐‐‐‐‐‐‐‐‐‐‐‐‐‐‐‐‐‐‐‐‐‐‐‐‐‐‐‐‐‐‐‐‐‐‐‐‐‐‐‐‐‐‐‐‐‐‐‐‐ pause 1 sendln "C" wait 'Are you sure you want to start the configuration script?' wait 'Enter (yes/no) => ' 42 MultiConnect AW User Guide Chapter 6 – Configuration Scripts sendln "yes" wait 'ConfigMenuScript' pause 1 ;‐‐‐‐‐‐‐‐‐‐‐‐‐‐‐‐‐‐‐‐‐‐‐‐‐‐‐‐‐‐‐‐‐‐‐‐‐‐‐‐‐‐‐‐‐‐‐‐‐‐‐‐‐‐‐‐‐‐‐‐‐‐‐‐‐‐‐‐‐‐‐‐‐‐‐‐‐‐‐‐‐‐‐‐‐‐‐‐‐‐‐‐‐‐ ; Cellular port section ;‐‐‐‐‐‐‐‐‐‐‐‐‐‐‐‐‐‐‐‐‐‐‐‐‐‐‐‐‐‐‐‐‐‐‐‐‐‐‐‐‐‐‐‐‐‐‐‐‐‐‐‐‐‐‐‐‐‐‐‐‐‐‐‐‐‐‐‐‐‐‐‐‐‐‐‐‐‐‐‐‐‐‐‐‐‐‐‐‐‐‐‐‐‐ sendln "1 A GPRS" ; Choices for the last parameter: "GPRS", "GSM" wait 'OK' pause 1 sendln "1 B TCPCLIENT" ; Choices for the last parameter: "TCPCLIENT", "TELNET", "UDP", "PASSTHRU" wait 'OK' pause 1 sendln "1 C OUTBOUND" ; Choices for the last parameter: "OUTBOUND" wait 'OK' pause 1 sendln "1 E 23" ; Choice for the last parameter: Enter the LOCAL PORT for option E wait 'OK' pause 1 sendln "1 F 7000" ; Choice for the last parameter: Enter the REMOTE PORT for option F wait 'OK' pause 1 sendln "1 G 254.254.254.254" ; Choice for the last parameter: Enter the REMOTE IP address for option G wait 'OK' pause 1 ;*************** Phone/IP Conversion Table ************************************************** sendln "1 J 1 7001 7173500 254.254.254.254" ; The last 3 parameters are: portnum phonenum IP wait 'OK' pause 1 sendln "1 J 2 7002 7173500 254.254.254.254" ; The last 3 parameters are: portnum phonenum IP wait 'OK' pause 1 sendln "1 J 3 7003 7173500 254.254.254.254" ; The last 3 parameters are: portnum phonenum IP wait 'OK' pause 1 sendln "1 J 4 7004 7173500 254.254.254.254" ; The last 3 parameters are: portnum phonenum IP wait 'OK' pause 1 sendln "1 J 5 7005 7173500 254.254.254.254" ; The last 3 parameters are: portnum phonenum IP wait 'OK' pause 1 ;********************************************************************************************* sendln "1 K NAM" ; for the last parameter: "NAM", "EURO" wait 'OK' MultiConnect AW User Guide 43 Chapter 6 – Configuration Scripts pause 1 ; sendln "1 L ???" ; for the last parameter: Enter the APN USERNAME for option L if applicable ; wait 'OK' ; pause 1 ; sendln "1 M ???" ; for the last parameter: Enter the APN PASSWORD for option M if applicable ; wait 'OK' ; pause 1 sendln "1 N wap.cingular" ; last parameter: Enter the APN SERVER for option N if applicable wait 'OK' pause 1 ; sendln "1 O 15" ; Choice for the last parameter: Enter the Physical TimeOut in minute for option O ; wait 'OK' ; pause 1 ; sendln "1 P ON" ; Choices for the last parameter: "ON", "OFF" ; wait 'OK' ; pause 1 ; sendln "1 Q 100" ; last parameter: Enter the TCP package transmit delay in msec for option Q ; wait 'OK' ; pause 1 ; sendln "1 R 90" ; last parameter: Enter the radio handshake TimeOut in sec for option R ; wait 'OK' ; pause 1 ; sendln "1 S 1234" ; last parameter: "DISABLE", or Enter the SIM unlock code for option S ; wait 'OK' ; pause 1 ;‐‐‐‐‐‐‐‐‐‐‐‐‐‐‐‐‐‐‐‐‐‐‐‐‐‐‐‐‐‐‐‐‐‐‐‐‐‐‐‐‐‐‐‐‐‐‐‐‐‐‐‐‐‐‐‐‐‐‐‐‐‐‐‐‐‐‐‐‐‐‐‐‐‐‐‐‐‐‐‐‐‐‐‐‐‐‐‐‐‐‐‐‐‐‐‐‐‐‐‐‐‐‐ ; Analog port section ‐ In most cases, this section can be commented out ;‐‐‐‐‐‐‐‐‐‐‐‐‐‐‐‐‐‐‐‐‐‐‐‐‐‐‐‐‐‐‐‐‐‐‐‐‐‐‐‐‐‐‐‐‐‐‐‐‐‐‐‐‐‐‐‐‐‐‐‐‐‐‐‐‐‐‐‐‐‐‐‐‐‐‐‐‐‐‐‐‐‐‐‐‐‐‐‐‐‐‐‐‐‐‐‐‐‐‐‐‐‐‐ ; sendln "2 A ATI" ; last parameter: Enter the init string you want to send to the analog modem ; wait 'OK' ; pause 1 ; sendln "2 B A 33600" ; for the last parameter: "56000", "33600", "28800", "14400", ; "12000", "9600", "4800", "2400", "2200", "1200", "300" ; wait 'OK' ; pause 1 ; sendln "2 B B V34" ; for the last parameter: "V92", V90", "V34", "V32BIS", "V32", "V22BIS", ; "V22", "BELL212A", "BELL103" ; wait 'OK' ; pause 1 ; sendln "2 B C V42_MNP" ; for the last parameter: "V42_MNP", "V42_ONLY", "MNP DIRECT_MODE", "NO_ECM" ; wait 'OK' ; pause 1 ; sendln "2 B D V42BIS_MNP5" ; Choices for the last parameter: "V42BIS_MNP5", "NO_COMPRESSION" ; wait 'OK' 44 MultiConnect AW User Guide Chapter 6 – Configuration Scripts ; pause 1 ; sendln "2 B E RTS_CTS" ; Choices for the last parameter: "RTS_CTS", "XON_XOFF", "DISABLE" ; wait 'OK' ; pause 1 ; sendln "2 B F ON" ; Choices for the last parameter: "ON", "OFF" ; wait 'OK' ; pause 1 ; sendln "2 B G 90" ; last parameter: Enter the Analog modem handshake timeOut in seconds ; wait 'OK' ; pause 1 ;‐‐‐‐‐‐‐‐‐‐‐‐‐‐‐‐‐‐‐‐‐‐‐‐‐‐‐‐‐‐‐‐‐‐‐‐‐‐‐‐‐‐‐‐‐‐‐‐‐‐‐‐‐‐‐‐‐‐‐‐‐‐‐‐‐‐‐‐‐‐‐‐‐‐‐‐‐‐‐‐‐‐‐‐‐‐‐‐‐‐‐‐‐‐ ; System Login section ;‐‐‐‐‐‐‐‐‐‐‐‐‐‐‐‐‐‐‐‐‐‐‐‐‐‐‐‐‐‐‐‐‐‐‐‐‐‐‐‐‐‐‐‐‐‐‐‐‐‐‐‐‐‐‐‐‐‐‐‐‐‐‐‐‐‐‐‐‐‐‐‐‐‐‐‐‐‐‐‐‐‐‐‐‐‐‐‐‐‐‐‐‐‐ ; sendln "3 ON" ; Choices for the last parameter: "ON", "OFF" ; wait 'OK' ; pause 1 ;‐‐‐‐‐‐‐‐‐‐‐‐‐‐‐‐‐‐‐‐‐‐‐‐‐‐‐‐‐‐‐‐‐‐‐‐‐‐‐‐‐‐‐‐‐‐‐‐‐‐‐‐‐‐‐‐‐‐‐‐‐‐‐‐‐‐‐‐‐‐‐‐‐‐‐‐‐‐‐‐‐‐‐‐‐‐‐‐‐‐‐‐‐‐ ; Changing System Login Password ‐ In most cases, this section can be commented out ;‐‐‐‐‐‐‐‐‐‐‐‐‐‐‐‐‐‐‐‐‐‐‐‐‐‐‐‐‐‐‐‐‐‐‐‐‐‐‐‐‐‐‐‐‐‐‐‐‐‐‐‐‐‐‐‐‐‐‐‐‐‐‐‐‐‐‐‐‐‐‐‐‐‐‐‐‐‐‐‐‐‐‐‐‐‐‐‐‐‐‐‐‐‐ ; sendln "3 C ????? ?????" ; Choices for the last 2 parameters: old password, new password ; wait 'OK' ; pause 1 ;‐‐‐‐‐‐‐‐‐‐‐‐‐‐‐‐‐‐‐‐‐‐‐‐‐‐‐‐‐‐‐‐‐‐‐‐‐‐‐‐‐‐‐‐‐‐‐‐‐‐‐‐‐‐‐‐‐‐‐‐‐‐‐‐‐‐‐‐‐‐‐‐‐‐‐‐‐‐‐‐‐‐‐‐‐‐‐‐‐‐‐‐‐‐ ; Timers section ‐ In most cases, this section can be commented out ;‐‐‐‐‐‐‐‐‐‐‐‐‐‐‐‐‐‐‐‐‐‐‐‐‐‐‐‐‐‐‐‐‐‐‐‐‐‐‐‐‐‐‐‐‐‐‐‐‐‐‐‐‐‐‐‐‐‐‐‐‐‐‐‐‐‐‐‐‐‐‐‐‐‐‐‐‐‐‐‐‐‐‐‐‐‐‐‐‐‐‐‐‐‐ ; sendln "4 A 0" ; Choice for the last parameter: Enter the Menu Inactivity timer in seconds ; wait 'OK' ; pause 1 ; sendln "4 B 300" ; Choice for the last parameter: Enter the No Signal Reset timer in seconds ; wait 'OK' ; pause 1 ; sendln "4 C 5" ; last parameter: Enter the Timeout Between Dialed Digits in seconds ; wait 'OK' ; pause 1 ;‐‐‐‐‐‐‐‐‐‐‐‐‐‐‐‐‐‐‐‐‐‐‐‐‐‐‐‐‐‐‐‐‐‐‐‐‐‐‐‐‐‐‐‐‐‐‐‐‐‐‐‐‐‐‐‐‐‐‐‐‐‐‐‐‐‐‐‐‐‐‐‐‐‐‐‐‐‐‐‐‐‐‐‐‐‐‐‐‐‐‐‐‐‐ ; Debug section ‐ Enable or Disable debug ;‐‐‐‐‐‐‐‐‐‐‐‐‐‐‐‐‐‐‐‐‐‐‐‐‐‐‐‐‐‐‐‐‐‐‐‐‐‐‐‐‐‐‐‐‐‐‐‐‐‐‐‐‐‐‐‐‐‐‐‐‐‐‐‐‐‐‐‐‐‐‐‐‐‐‐‐‐‐‐‐‐‐‐‐‐‐‐‐‐‐‐‐‐‐ ; sendln "8 Y" ; Choices for the last parameter: "Y", "N" ; wait 'OK' ; pause 1 ;‐‐‐‐‐‐‐‐‐‐‐‐‐‐‐‐‐‐‐‐‐‐‐‐‐‐‐‐‐‐‐‐‐‐‐‐‐‐‐‐‐‐‐‐‐‐‐‐‐‐‐‐‐‐‐‐‐‐‐‐‐‐‐‐‐‐‐‐‐‐‐‐‐‐‐‐‐‐‐‐‐‐‐‐‐‐‐‐‐‐‐‐‐‐‐ ; Wireless Connection ‐ save this option for last because if "Always On" is selected because the ; system will start the connection right away! MultiConnect AW User Guide 45 Chapter 6 – Configuration Scripts ;‐‐‐‐‐‐‐‐‐‐‐‐‐‐‐‐‐‐‐‐‐‐‐‐‐‐‐‐‐‐‐‐‐‐‐‐‐‐‐‐‐‐‐‐‐‐‐‐‐‐‐‐‐‐‐‐‐‐‐‐‐‐‐‐‐‐‐‐‐‐‐‐‐‐‐‐‐‐‐‐‐‐‐‐‐‐‐‐‐‐‐‐‐‐‐ sendln "1 D ON_DEMAND" ; Choices for the last parameter: "ON_DEMAND", "ALWAYS_ON" wait 'OK' pause 1 ;‐‐‐‐‐‐‐‐‐‐‐‐‐‐‐‐‐‐‐‐‐‐‐‐‐‐‐‐‐‐‐‐‐‐‐‐‐‐‐‐‐‐‐‐‐‐‐‐‐‐‐‐‐‐‐‐‐‐‐‐‐‐ ; Save Configuration? ;‐‐‐‐‐‐‐‐‐‐‐‐‐‐‐‐‐‐‐‐‐‐‐‐‐‐‐‐‐‐‐‐‐‐‐‐‐‐‐‐‐‐‐‐‐‐‐‐‐‐‐‐‐‐‐‐‐‐‐‐‐‐ sendln "SAVE" wait 'OK' pause 3 ;‐‐‐‐‐‐‐‐‐‐‐‐‐‐‐‐‐‐‐‐‐‐‐‐‐‐‐‐‐‐‐‐‐‐‐‐‐‐‐‐‐‐‐‐‐‐‐‐‐‐‐‐‐‐‐‐‐‐‐‐‐‐ ; Configuration is done ;‐‐‐‐‐‐‐‐‐‐‐‐‐‐‐‐‐‐‐‐‐‐‐‐‐‐‐‐‐‐‐‐‐‐‐‐‐‐‐‐‐‐‐‐‐‐‐‐‐‐‐‐‐‐‐‐‐‐‐‐‐‐ sendln "FINISH" CDMA Configuration Script Example ; TaraTerm Script ; ;Configuration Script for MT100A2W (CDMA) device ;Date: 07/14/2009 ;Author: ;Version: 1.0 ‐ Initial Version ; ; 12/09/2009 ‐ Added "Debug section ‐ Enable or Disable debug" ;NOTE: use ';' to comment out any option and its corresponding wait'OK' ; that are not needed to be modified. ; ; Parameters within the double quotes are seperated by a single space. ; Parameters have to be in Capital letters. ; ; Make sure to reboot the device before running this script ;‐‐‐‐‐‐‐‐‐‐‐‐‐‐‐‐‐‐‐‐‐‐‐‐‐‐‐‐‐‐‐‐‐‐‐‐‐‐‐‐‐‐‐‐‐‐‐‐‐‐‐‐‐‐‐‐‐‐‐‐‐‐ ; Determind which menu we are currently in ;‐‐‐‐‐‐‐‐‐‐‐‐‐‐‐‐‐‐‐‐‐‐‐‐‐‐‐‐‐‐‐‐‐‐‐‐‐‐‐‐‐‐‐‐‐‐‐‐‐‐‐‐‐‐‐‐‐‐‐‐‐‐ send 13 timeout = 10 wait 'Please enter password to login =>' 'Enter selection =>' if result=1 goto LOGIN sendln "!" pause 2 :LOGIN timeout = 0 pause 2 sendln "admin" :HANDSHAKE ;‐‐‐‐‐‐‐‐‐‐‐‐‐‐‐‐‐‐‐‐‐‐‐‐‐‐‐‐‐‐‐‐‐‐‐‐‐‐‐‐‐‐‐‐‐‐‐‐‐‐‐‐‐‐‐‐‐‐‐‐‐‐ ; Handshake section 46 MultiConnect AW User Guide Chapter 6 – Configuration Scripts ;‐‐‐‐‐‐‐‐‐‐‐‐‐‐‐‐‐‐‐‐‐‐‐‐‐‐‐‐‐‐‐‐‐‐‐‐‐‐‐‐‐‐‐‐‐‐‐‐‐‐‐‐‐‐‐‐‐‐‐‐‐‐ pause 1 sendln "C" wait 'Are you sure you want to start the configuration script?' wait 'Enter (yes/no) => ' sendln "yes" wait 'ConfigMenuScript' pause 1 ;‐‐‐‐‐‐‐‐‐‐‐‐‐‐‐‐‐‐‐‐‐‐‐‐‐‐‐‐‐‐‐‐‐‐‐‐‐‐‐‐‐‐‐‐‐‐‐‐‐‐‐‐‐‐‐‐‐‐‐‐‐‐‐‐‐‐‐‐‐‐‐‐‐‐‐‐‐‐‐‐‐‐‐‐‐‐‐‐‐‐‐‐‐‐ ; Cellular port section ;‐‐‐‐‐‐‐‐‐‐‐‐‐‐‐‐‐‐‐‐‐‐‐‐‐‐‐‐‐‐‐‐‐‐‐‐‐‐‐‐‐‐‐‐‐‐‐‐‐‐‐‐‐‐‐‐‐‐‐‐‐‐‐‐‐‐‐‐‐‐‐‐‐‐‐‐‐‐‐‐‐‐‐‐‐‐‐‐‐‐‐‐‐‐ sendln "1 B TCPCLIENT" ; Choices for the last parameter: "TCPCLIENT", "TELNET", "UDP", "PASSTHRU" wait 'OK' sendln "1 C OUTBOUND" ; Choices for the last parameter: "AUTODETECT", "OUTBOUND", "INBOUND" wait 'OK' sendln "1 E 23" ; Choice for the last parameter: Enter the LOCAL PORT for option E wait 'OK' sendln "1 F 7000" ; Choice for the last parameter: Enter the REMOTE PORT for option F wait 'OK' sendln "1 G 65.126.90.5" ; Choice for the last parameter: Enter the REMOTE IP address for option G wait 'OK' ;*************** Phone/IP Conversion Table ************************************************** sendln "1 J 1 7001 7173500 254.254.254.254" ; The last 3 parameters are: portnum phonenum IP wait 'OK' sendln "1 J 2 7002 7173500 254.254.254.254" ; The last 3 parameters are: portnum phonenum IP wait 'OK' sendln "1 J 3 7003 7173500 254.254.254.254" ; The last 3 parameters are: portnum phonenum IP wait 'OK' sendln "1 J 4 7004 7173500 254.254.254.254" ; The last 3 parameters are: portnum phonenum IP wait 'OK' sendln "1 J 5 7005 7173500 254.254.254.254" ; The last 3 parameters are: portnum phonenum IP wait 'OK' ;********************************************************************************************* ; sendln "1 R 90" ; last parameter: Enter the radio handshake TimeOut in sec for option R ; wait 'OK' ;‐‐‐‐‐‐‐‐‐‐‐‐‐‐‐‐‐‐‐‐‐‐‐‐‐‐‐‐‐‐‐‐‐‐‐‐‐‐‐‐‐‐‐‐‐‐‐‐‐‐‐‐‐‐‐‐‐‐‐‐‐‐‐‐‐‐‐‐‐‐‐‐‐‐‐‐‐‐‐‐‐‐‐‐‐‐‐‐‐‐‐‐‐‐‐‐‐‐‐‐‐‐‐ ; Analog port section ‐ In most cases, this section can be commented out ;‐‐‐‐‐‐‐‐‐‐‐‐‐‐‐‐‐‐‐‐‐‐‐‐‐‐‐‐‐‐‐‐‐‐‐‐‐‐‐‐‐‐‐‐‐‐‐‐‐‐‐‐‐‐‐‐‐‐‐‐‐‐‐‐‐‐‐‐‐‐‐‐‐‐‐‐‐‐‐‐‐‐‐‐‐‐‐‐‐‐‐‐‐‐‐‐‐‐‐‐‐‐‐ ; sendln "2 A ATI" ; last parameter: Enter the init string you want to send to the analog modem ; wait 'OK' MultiConnect AW User Guide 47 Chapter 6 – Configuration Scripts ; sendln "2 B A 33600" ; Choices for the last parameter: "56000", "33600", "28800", "14400", ; wait 'OK' ; "12000", "9600", "4800", "2400", "2200", "1200", "300" ; sendln "2 B B V34" ; Choices for the last parameter: "V92", V90", "V34", "V32BIS", "V32", ; wait 'OK' ; "V22BIS", "V22", "BELL212A", "BELL103" ; sendln "2 B C V42_MNP" ; last parameter: "V42_MNP", "V42_ONLY", "MNP DIRECT_MODE", "NO_ECM" ; wait 'OK' ; sendln "2 B D V42BIS_MNP5" ; Choices for the last parameter: "V42BIS_MNP5", "NO_COMPRESSION" ; wait 'OK' ; sendln "2 B E RTS_CTS" ; Choices for the last parameter: "RTS_CTS", "XON_XOFF", "DISABLE" ; wait 'OK' ; sendln "2 B F ON" ; Choices for the last parameter: "ON", "OFF" ; wait 'OK' ; sendln "2 B G 90" ; last parameter: Enter the Analog modem handshake timeOut in seconds ; wait 'OK' ;‐‐‐‐‐‐‐‐‐‐‐‐‐‐‐‐‐‐‐‐‐‐‐‐‐‐‐‐‐‐‐‐‐‐‐‐‐‐‐‐‐‐‐‐‐‐‐‐‐‐‐‐‐‐‐‐‐‐‐‐‐‐‐‐‐‐‐‐‐‐‐‐‐‐‐‐‐‐‐‐‐‐‐‐‐‐‐‐‐‐‐‐‐‐ ; System Login section ;‐‐‐‐‐‐‐‐‐‐‐‐‐‐‐‐‐‐‐‐‐‐‐‐‐‐‐‐‐‐‐‐‐‐‐‐‐‐‐‐‐‐‐‐‐‐‐‐‐‐‐‐‐‐‐‐‐‐‐‐‐‐‐‐‐‐‐‐‐‐‐‐‐‐‐‐‐‐‐‐‐‐‐‐‐‐‐‐‐‐‐‐‐‐ sendln "3 OFF" ; Choices for the last parameter: "ON", "OFF" wait 'OK' ;‐‐‐‐‐‐‐‐‐‐‐‐‐‐‐‐‐‐‐‐‐‐‐‐‐‐‐‐‐‐‐‐‐‐‐‐‐‐‐‐‐‐‐‐‐‐‐‐‐‐‐‐‐‐‐‐‐‐‐‐‐‐‐‐‐‐‐‐‐‐‐‐‐‐‐‐‐‐‐‐‐‐‐‐‐‐‐‐‐‐‐‐‐‐ ; Changing System Login Password ‐ In most cases, this section can be commented out ;‐‐‐‐‐‐‐‐‐‐‐‐‐‐‐‐‐‐‐‐‐‐‐‐‐‐‐‐‐‐‐‐‐‐‐‐‐‐‐‐‐‐‐‐‐‐‐‐‐‐‐‐‐‐‐‐‐‐‐‐‐‐‐‐‐‐‐‐‐‐‐‐‐‐‐‐‐‐‐‐‐‐‐‐‐‐‐‐‐‐‐‐‐‐ ; sendln "3 C ????? ?????" ; Choices for the last 2 parameters: old password, new password ; wait 'OK' ;‐‐‐‐‐‐‐‐‐‐‐‐‐‐‐‐‐‐‐‐‐‐‐‐‐‐‐‐‐‐‐‐‐‐‐‐‐‐‐‐‐‐‐‐‐‐‐‐‐‐‐‐‐‐‐‐‐‐‐‐‐‐‐‐‐‐‐‐‐‐‐‐‐‐‐‐‐‐‐‐‐‐‐‐‐‐‐‐‐‐‐‐‐‐ ; Timers section ‐ In most cases, this section can be commented out ;‐‐‐‐‐‐‐‐‐‐‐‐‐‐‐‐‐‐‐‐‐‐‐‐‐‐‐‐‐‐‐‐‐‐‐‐‐‐‐‐‐‐‐‐‐‐‐‐‐‐‐‐‐‐‐‐‐‐‐‐‐‐‐‐‐‐‐‐‐‐‐‐‐‐‐‐‐‐‐‐‐‐‐‐‐‐‐‐‐‐‐‐‐‐ ; sendln "4 A 30" ; Choice for the last parameter: Enter the Menu Inactivity timer in seconds ; wait 'OK' ; sendln "4 C 5" ; Choice for the last parameter: Enter the Timeout Between Dialed Digits in seconds ; wait 'OK' ;‐‐‐‐‐‐‐‐‐‐‐‐‐‐‐‐‐‐‐‐‐‐‐‐‐‐‐‐‐‐‐‐‐‐‐‐‐‐‐‐‐‐‐‐‐‐‐‐‐‐‐‐‐‐‐‐‐‐‐‐‐‐‐‐‐‐‐‐‐‐‐‐‐‐‐‐‐‐‐‐‐‐‐‐‐‐‐‐‐‐‐‐‐‐ ; Email section ‐ In most cases, this section can be commented out ;‐‐‐‐‐‐‐‐‐‐‐‐‐‐‐‐‐‐‐‐‐‐‐‐‐‐‐‐‐‐‐‐‐‐‐‐‐‐‐‐‐‐‐‐‐‐‐‐‐‐‐‐‐‐‐‐‐‐‐‐‐‐‐‐‐‐‐‐‐‐‐‐‐‐‐‐‐‐‐‐‐‐‐‐‐‐‐‐‐‐‐‐‐‐ ; sendln "5 A ?????" ; Choice for the last parameter: Enter the SMTP username ; wait 'OK' ; sendln "5 B ?????" ; Choice for the last parameter: Enter the SMTP password ; wait 'OK' ; sendln "5 C 25" ; Choice for the last parameter: Enter the SMTP portnum ; wait 'OK' 48 MultiConnect AW User Guide Chapter 6 – Configuration Scripts ; sendln "5 D ON" ; Choices for the last parameter: "ON", "OFF" ; wait 'OK' ; sendln "5 E ?????" ; Choice for the last parameter: Enter the SMTP server ; wait 'OK' ; sendln "5 F ?????" ; Choice for the last parameter: Enter the SMTP domain ; wait 'OK' ; sendln "5 G ?????" ; Choice for the last parameter: Enter the SMTP sender's name ; wait 'OK' ; sendln "5 H ?????" ; Choice for the last parameter: Enter the SMTP sender's address ; wait 'OK' ; sendln "5 I ?????" ; Choice for the last parameter: Enter the SMTP recipient's address ; wait 'OK' ;‐‐‐‐‐‐‐‐‐‐‐‐‐‐‐‐‐‐‐‐‐‐‐‐‐‐‐‐‐‐‐‐‐‐‐‐‐‐‐‐‐‐‐‐‐‐‐‐‐‐‐‐‐‐‐‐‐‐‐‐‐‐‐‐‐‐‐‐‐‐‐‐‐‐‐‐‐‐‐‐‐‐‐‐‐‐‐‐‐‐‐‐‐‐ ; Debug section ‐ Enabale or Disable debug ;‐‐‐‐‐‐‐‐‐‐‐‐‐‐‐‐‐‐‐‐‐‐‐‐‐‐‐‐‐‐‐‐‐‐‐‐‐‐‐‐‐‐‐‐‐‐‐‐‐‐‐‐‐‐‐‐‐‐‐‐‐‐‐‐‐‐‐‐‐‐‐‐‐‐‐‐‐‐‐‐‐‐‐‐‐‐‐‐‐‐‐‐‐‐ sendln "8 Y" ; Choices for the last parameter: "Y", "N" wait 'OK' ;‐‐‐‐‐‐‐‐‐‐‐‐‐‐‐‐‐‐‐‐‐‐‐‐‐‐‐‐‐‐‐‐‐‐‐‐‐‐‐‐‐‐‐‐‐‐‐‐‐‐‐‐‐‐‐‐‐‐‐‐‐‐‐‐‐‐‐‐‐‐‐‐‐‐‐‐‐‐‐‐‐‐‐‐‐‐‐‐‐‐‐‐‐‐‐‐‐‐‐‐‐‐ ; Wireless Connection ‐ save this option for last because if "Always On" is selected, the system ; will start the connection right away! ;‐‐‐‐‐‐‐‐‐‐‐‐‐‐‐‐‐‐‐‐‐‐‐‐‐‐‐‐‐‐‐‐‐‐‐‐‐‐‐‐‐‐‐‐‐‐‐‐‐‐‐‐‐‐‐‐‐‐‐‐‐‐‐‐‐‐‐‐‐‐‐‐‐‐‐‐‐‐‐‐‐‐‐‐‐‐‐‐‐‐‐‐‐‐‐‐‐‐‐‐‐‐ sendln "1 D ON_DEMAND" ; Choices for the last parameter: "ON_DEMAND", "ALWAYS_ON" wait 'OK' ;‐‐‐‐‐‐‐‐‐‐‐‐‐‐‐‐‐‐‐‐‐‐‐‐‐‐‐‐‐‐‐‐‐‐‐‐‐‐‐‐‐‐‐‐‐‐‐‐‐‐‐‐‐‐‐‐‐‐‐‐‐‐ ; Save Configuration? ;‐‐‐‐‐‐‐‐‐‐‐‐‐‐‐‐‐‐‐‐‐‐‐‐‐‐‐‐‐‐‐‐‐‐‐‐‐‐‐‐‐‐‐‐‐‐‐‐‐‐‐‐‐‐‐‐‐‐‐‐‐‐ ; sendln "SAVE" ; wait 'OK' ;‐‐‐‐‐‐‐‐‐‐‐‐‐‐‐‐‐‐‐‐‐‐‐‐‐‐‐‐‐‐‐‐‐‐‐‐‐‐‐‐‐‐‐‐‐‐‐‐‐‐‐‐‐‐‐‐‐‐‐‐‐‐ ; Configuration is done ;‐‐‐‐‐‐‐‐‐‐‐‐‐‐‐‐‐‐‐‐‐‐‐‐‐‐‐‐‐‐‐‐‐‐‐‐‐‐‐‐‐‐‐‐‐‐‐‐‐‐‐‐‐‐‐‐‐‐‐‐‐‐ sendln "FINISH" MultiConnect AW User Guide 49 Chapter 7 – Troubleshooting
Flashing Signal Strength LEDs Flashing signal strength LEDs indicate a failure condition has occurred. ●
Low Flashing LED – Physical connection failed ●
Medium Flashing LED – Analog line has returned to on‐hook ●
High Flashing LED – PPP user interrupt error ●
Low and Medium Flashing LEDs – PPP failed to meet protocol error ●
Low and High Flashing LEDs – PPP connection lost ●
Medium and High Flashing LEDs – PPP failed authentication challenge ●
Low, Medium, High Flashing at 50 msec – Get host by name failed ●
Low, Medium, High Flashing at 200 msec – Failed to create TCP socket ●
Low, Medium, High Flashing at 800 msec – Network connection failed
50 MultiConnect AW User Guide Appendix A – Regulatory Compliance Appendix A – Regulatory Compliance
EMC, Safety, and R&TTE Directive Compliance The CE mark is affixed to this product to confirm compliance with the following European Community Directives: Council Directive 2004/108/EC of 31 December 2004 on the approximation of the laws of Member States relating to electromagnetic compatibility; and Council Directive 2006/95/EC of 12 December 2006 on the harmonization of the laws of Member States relating to electrical equipment designed for use within certain voltage limits; and Council Directive 1999/5/EC of 9 March 1999 on radio equipment and telecommunications terminal equipment and the mutual recognition of their conformity. International Modem Restrictions Some dialing and answering defaults and restrictions may vary for international modems. Changing settings may cause a modem to become non‐compliant with national telecom requirements in specific countries. Also note that some software packages may have features or lack restrictions that may cause the modem to become non‐
compliant. 47 CFR Part 15 Regulation Class B Devices This equipment has been tested and found to comply with the limits for a Class B digital device, pursuant to part 15 of the FCC Rules. These limits are designed to provide reasonable protection against harmful interference in a residential installation. This equipment generates, uses, and can radiate radio frequency energy and, if not installed and used in accordance with the instructions, may cause harmful interference to radio communications. However, there is no guarantee that interference will not occur in a particular installation. If this equipment does cause harmful interference to radio or television reception, which can be determined by turning the equipment off and on, the user is encouraged to try to correct the interference by one or more of the following measures: ●
●
●
●
Reorient or relocate the receiving antenna. Increase the separation between the equipment and receiver. Connect the equipment into an outlet on a circuit different from that to which the receiver is connected. Consult the dealer or an experienced radio/TV technician for help. Warning: Changes or modifications to this unit not expressly approved by the party responsible for compliance could void the user’s authority to operate the equipment. MultiConnect AW User Guide 51 Appendix A – Regulatory Compliance Industry Canada This Class B digital apparatus meets all requirements of the Canadian Interference‐Causing Equipment Regulations. Cet appareil numérique de la classe B respecte toutes les exigences du Reglement Canadien sur le matériel brouilleur. This device complies with Industry Canada RSS Appliance radio exempt from licensing. The operation is permitted for the following two conditions: 1.
the device may not cause harmful interference, and 2.
the user of the device must accept any interference suffered, even if the interference is likely to jeopardize the operation. Le présent appareil est conforme aux CNR d'Industrie Canada applicables aux appareils radio exempts de licence. L'exploitation est autorisée aux deux conditions suivantes: 1.
l'appareil ne doit pas produire de brouillage, et 2.
l'utilisateur de l'appareil doit accepter tout brouillage radioélectrique subi, même si le brouillage est susceptible d'en compromettre le fonctionnement. Waste Electrical and Electronic Equipment Statement WEEE Directive The WEEE Directive places an obligation on EU‐based manufacturers, distributors, retailers, and importers to take‐
back electronics products at the end of their useful life. A sister directive, ROHS (Restriction of Hazardous Substances) complements the WEEE Directive by banning the presence of specific hazardous substances in the products at the design phase. The WEEE Directive covers all Multi‐Tech products imported into the EU as of August 13, 2005. EU‐based manufacturers, distributors, retailers and importers are obliged to finance the costs of recovery from municipal collection points, reuse, and recycling of specified percentages per the WEEE requirements. Instructions for Disposal of WEEE by Users in the European Union The symbol shown below is on the product or on its packaging, which indicates that this product must not be disposed of with other waste. Instead, it is the user’s responsibility to dispose of their waste equipment by handing it over to a designated collection point for the recycling of waste electrical and electronic equipment. The separate collection and recycling of your waste equipment at the time of disposal will help to conserve natural resources and ensure that it is recycled in a manner that protects human health and the environment. For more information about where you can drop off your waste equipment for recycling, please contact your local city office, your household waste disposal service or where you purchased the product. July, 2005 52 MultiConnect AW User Guide Appendix B – Environmental Information REACH Statement Registration of Substances After careful review of the legislation and specifically the definition of an “article” as defined in EC Regulation 1907/2006, Title II, Chapter 1, Article 7.1(a)(b), it is our current view Multi‐Tech Systems, Inc. products would be considered as “articles”. In light of the definition in § 7.1(b) which requires registration of an article only if it contains a regulated substance that “is intended to be released under normal or reasonably foreseeable conditions of use,” Our analysis is that Multi‐Tech Systems, Inc. products constitute nonregisterable articles for their intended and anticipated use. Substances of Very High Concern (SVHC) Per the candidate list of Substances of Very High Concern (SVHC) published October 28, 2008 we have reviewed these substances and certify the Multi‐Tech Systems, Inc. products are compliant per the EU “REACH” requirements of less than 0.1% (w/w) for each substance. If new SVHC candidates are published by the European Chemicals Agency, and relevant substances have been confirmed, that exceeds greater than 0.1% (w/w), Multi‐
Tech Systems, Inc. will provide updated compliance status. Multi‐Tech Systems, Inc. also declares it has been duly diligent in ensuring that the products supplied are compliant through a formalized process which includes collection and validation of materials declarations and selective materials analysis where appropriate. This data is controlled as part of a formal quality system and will be made available upon request. MultiConnect AW User Guide 53 Appendix B – Environmental Information Restriction of the Use of Hazardous Substances (RoHS) Multi‐Tech Systems, Inc. Certificate of Compliance 2011/65/EU Multi‐Tech Systems confirms that its embedded products comply with the chemical concentration limitations set forth in the directive 2011/65/EU of the European Parliament (Restriction of the use of certain Hazardous Substances in electrical and electronic equipment ‐ RoHS) These Multi‐Tech products do not contain the following banned chemicals1: ●
●
●
●
●
●
Lead, [Pb] < 1000 PPM Mercury, [Hg] < 1000 PPM Hexavalent Chromium, [Cr+6] < 1000 PPM Cadmium, [Cd] < 100 PPM Polybrominated Biphenyl, [PBB] < 1000 PPM Polybrominated Diphenyl Ether, [PBDE] < 1000 PPM Environmental considerations: ●
●
Moisture Sensitivity Level (MSL) =1 Maximum Soldering temperature = 260C (in SMT reflow oven) 1Lead usage in some components is exempted by the following RoHS annex, therefore higher lead concentration would be found in some modules (>1000 PPM); –Resistors containing lead in a glass or ceramic matrix compound. 54 MultiConnect AW User Guide Appendix B – Environmental Information Information on HS/TS Substances According to Chinese Standards In accordance with China’s Administrative Measures on the Control of Pollution Caused by Electronic Information Products (EIP) # 39, also known as China RoHS, the following information is provided regarding the names and concentration levels of Toxic Substances (TS) or Hazardous Substances (HS) which may be contained in Multi‐Tech Systems Inc. products relative to the EIP standards set by China’s Ministry of Information Industry (MII). Hazardous/Toxic Substance/Elements Name of the Component Lead (PB) Mercury (Hg) Cadmium Hexavalent Chromium (CD) (CR6+) O O O O O O O O O O O O O O O O O O O O O O O O O O O O O O Polybrominated Biphenyl (PBB) O O O O O O O O O O O O O O O Polybrominated Diphenyl Ether (PBDE) O O O O O O O O O O O O O O O Printed Circuit Boards O O Resistors X O Capacitors X O Ferrite Beads O O Relays/Opticals O O ICs O O Diodes/ Transistors O O Oscillators and Crystals X O Regulator O O Voltage Sensor O O Transformer O O Speaker O O Connectors O O LEDs O O Screws, Nuts, and other X O Hardware AC‐DC Power Supplies O O O O O O Software / O O O O O O Documentation CDs Booklets and O O O O O O Paperwork Chassis O O O O O O X Represents that the concentration of such hazardous/toxic substance in all the units of homogeneous material of such component is higher than the SJ/Txxx‐2006 Requirements for Concentration Limits. O Represents that no such substances are used or that the concentration is within the aforementioned limits. MultiConnect AW User Guide 55 Appendix B – Environmental Information Information on HS/TS Substances According to Chinese Standards (in Chinese) 依照中国标准的有毒有害物质信息
根据中华人民共和国信息产业部 (MII) 制定的电子信息产品 (EIP) 标准-中华人民共和国《电子信息产品污染控制管理办法》(第 39 号),也称作中国 RoHS,下表列出了 Multi‐Tech Systems, Inc. 产品中可能含有的有毒物质 (TS) 或有害物质 (HS) 的名称及含量水平方面的信息。 有害/有毒物质/元素 成分名称 铅 汞 镉 (PB) (Hg) (CD) 六价铬 (CR6+) 多溴联苯 多溴二苯醚 (PBB) (PBDE) 印刷电路板 O O O O O O 电阻器 X O O O O O 电容器
X O O O O O 铁氧体磁环 O O O O O O 继电器/光学部件
O O O O O O IC 二极管/晶体管
O O O O O O O O O O O O 振荡器和晶振 X O O O O O 调节器 O O O O O O 电压传感器 O O O O O O 变压器 O O O O O O 扬声器 O O O O O O 连接器 O O O O O O LED 螺丝、螺母以及其它五金件 O X O O O O O O O O O O 交流‐直流电源 O O O O O O 软件/文档 CD O O O O O O 手册和纸页
O O O O O O 底盘 O O O O O O 56 X 表示所有使用类似材料的设备中有害/有毒物质的含量水平高于 SJ/Txxx‐2006 限量要求。 O 表示不含该物质或者该物质的含量水平在上述限量要求之内。 MultiConnect AW User Guide