1
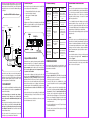
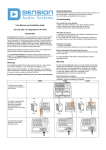
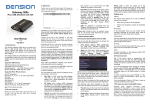
Remove the optical cable and the Quadlock connector. Follow the
recommended installation on Fig 2. (previous page), connect our
Quadlock cable to the Head Unit and connect the original female
Quadlock to the male end of our cable. For further details, please
check Fig. 3.
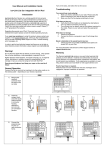
Smartlink for BMW installation diagram
MHL / HDMI cable
Microphone
Audio / Video AUX in
(Fig. 3)
4. Connector port
Connector port is a very useful extension port for Smartlink. This
accessory gives you the following functions:
•
•
•
•
•
AV-input (additional RCA video cable required)
Mode selector (Active / Bypass*)
USB extension for Firmware updates
Status LED
Reset switch
* In Bypass mode (LED flashes) the Smartlink device will be fully
‘invisible’ so no functions will be accessible. Using this mode is
recommended if the car is taken to the service.
Connector port
Smartlink
hardware
Car
Symptom
Cause
Solution
Status LED is OFF
on the Connector
Port
There is a brake on
the MOST ring or the
power connection is
missing
Check the installation,
make sure that the
light directions and the
optical connections are
correct
Smartlink is not
recognized
Wrong DIP switch
settings or the TV
option is not activated
Check the DIP switches,
program the required
option (TV)
TV source
option is greyed
out and status
LED is flashing
continuously on
the Connector
Port
Bypass mode
selected
Change the mode
from Bypass to Active
mode according to the
manual
MHL works if
the vehicle is
in stationery or
parking mode (P)
Video in motion (VIM)
is not available /
activated
Program (code) Video in
Motion function
Fuzzy, distorted
picture, incorrect
or inverted colors
Wrong video standard
setting
Check the DIP switch
configuration (PAL /
NTSC) or setting on the
device
Smartlink
i-Drive Professional
(CCC / CIC, Dual Slot)
optical inline
connector
When all devices and cables are connected and powered (as it
can be seen on the above diagram) you can continue with the
enabling procedure using the GEN enabler or with the product
testing if the required options (factory TV and VIM – Video in
Motion) are programmed / available already.
3. TEST AND REFIT
Before you refit the head unit, test the Smartlink device with your
car audio, making sure all connections are operational and that
you have full functionality.
Note: If during testing you encounter any changes or
inconsistencies in the way the car’s electrical system
operates, disconnect the Smartlink immediately and consult
your dealer.
When you have tested everything, and found no faults, you can
continue refitting your head unit. Do not trap the cables, or
leave them in a position where they may become trapped
after refitting the head unit. Please mount the module away
from heat or damp surfaces.
Refit is the reversal of the removal process for your vehicle
specifically, as per your manufacturer’s instructions.
8. DISCLAIMER AND WARRANTY
6. Troubleshooting
5. Bypass Mode and Reset
Certain vehicles have complex system management capabilities,
and when servicing the use of a diagnostic computer may be
involved. To avoid conflict with such diagnostics devices, we
highly recommend using the switch on the Connector Port to
put the Smartlink in Bypass mode, which temporarily disables
the operation of the Smartlink.
In order to switch to Bypass mode, fully turn the engine off,
remove the car key and wait until the blue LED on the connector
port turns off (usually takes 2-5 minutes depending on the car
specification). When the LED turned off remove all previously
connected devices from the Smartlink and switch the mode
selector button from Active mode to Bypass. Next time when
you turn the ignition ON the Smartlink will be in bypass mode
when no functions are accessible and the LED flashes on the
connector port.
To get back to Active mode, turn everything off completely until
the flashing blue light goes off and select Active mode on the
Connector Port.
The Connector Port has a reset button to use on the rare occasion
when a full hardware reset is needed.
7. FIRMWARE UPDATE
We recommend to visit our website on a regular basis in order
to get continuous software updates for your product to enjoy the
best performance and features.
How to:
1. Take a USB stick formatted to FAT32
2. Copy the update file (MHLA_UPD.ROM) to the root of the
USB stick. You do not have to remove any content from the
USB stick (e.g. music, document files)
3. Connect the USB drive to the Smartlink device (or the
Connector Port) while the vehicle is powered up (ignition
ON)
4. The update procedure will start automatically within a
few seconds and takes approximately 2 minutes. Do not
disconnect the USB device or turn the ignition OFF within
this time since it might result in malfunction. When it is
finished the device will disappear as a TV tuner and reboot
5. After a succesful update the firmware is deleted from the
USB flash drive and MHLA_NFO.NFO will appear with the
new software version
6. Select the Smartlink device as source (TV) again from your
car entertainment system
7. Take the control over from the iDrive system and test the
Smartlink functionalities
Disclaimer
If your car’s electrical system begins to behave erratically, please
disconnect the Smartlink interface physically immediately and
have it checked by your installer. Dension and its authorized
distributors and retailers are not liable for any incidental,
consequential or indirect damages or loss and do not assume
liability for any diagnostic fees.
The use of handheld devices while driving may be subject to
government legislation. Please ensure that your use of the
Dension device complies with applicable traffic laws. Dension
does not assume liability for any events resulting from the illegal
or irresponsible use of handheld devices while driving.
Dension reserves the right to modify its products or specifications
without prior notice.
Warranty
Dension devices carry a one-year limited warranty that protects
you from defects in material and workmanship of products sold
by Dension or its authorized distributors and retailers. Dension
does not warrant any installation work or assume liability for
any damage caused due to negligence, improper installation or
operation. For warranty claims, proof of purchase is required.
Further assistance
If you need further assistance in using your Dension product,
please contact your local supplier or visit www.dension.com
and click on ‘Support’.
Please check the download section for the latest firmware version
and product documentation, as these may provide additional
features or easier use of the product.