1
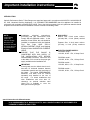
I N S TA L L AT I O N G U I D E
PERFORMANCE SERIES™
GAS RANGES
THE POWER OF PERFORMANCE™
1
contents
message
important safety warnings
i
ii-iii
contents
1
important installation instructions
2
STEP 1
unpacking, moving, and placing the range
3
STEP 2
ventilation requirements
4
STEP 3
3a cabinet preparation
cabinet clearances
3b backguard installation
3c electrical supply
4
6
7
8
STEP 4
installing anti-tip device
9
STEP 5
gas connection and hookup
11
testing and adjustments
13
caring for stainless steel
13
installer checklist
14
we're here for you
15
warranty
16
capital cooking is your friend
hello and welcome to Capital...
We thank you for choosing our Performance
Series™ cooking equipment. Because of the
unique features found in our products, we
recommend spending some time to familiarize
yourself with this booklet before using your
product. In it you will find valuable information
on how to safely operate and maintain your
appliance for years of enjoyable cooking.
We understand that questions arise from time to
time on use and care about our products, so we
want to make it easy for you to find the answers.
That’s why we pride ourselves on superior
customer service and work harder to respond
to your needs quickly and effectively.
Our Customer Service representatives are
here to assist you and are just a phone call away.
You can reach us toll free: 1-866-402-4600; by
e-mail: [email protected];
or by standard mail: 13211 Florence Ave. Santa
Fe Springs, CA, 90670.
When you contact us, please make sure you
have the model # and your serial # ready.
This allows us to better serve your needs.
We realize you have a choice in your appliance
needs so we feel honored to welcome you to our
family, where passion for improving the quality of
your culinary life is our number one priority.
your friends at Capital Cooking Equipment.
warnings
ii
IMPORTANT:
Save these instructions for the Local Gas Inspector’s use.
INSTALLER:
Please leave these Installation Instructions with the
unit for the owner.
OWNER:
Please retain these instructions for future reference.
This range was designed for ease of installation and operation.
However, we recommend that you read all sections of this
manual before beginning installation and that your range is
installed by an approved gas installation technician, OR IN THE
COMMONWEALTH OF MASSACHUSSETTS A LICENSED
PLUMBER OR LICENSED GAS FITTER, capable of reviewing
and performing the manufacturers installation checklist included
in your information packet.
The installation of appliances assigned for manufactured (mobile)
home installation must conform with the Manufactured Home
Construction and Safety and Safety Standard, Title 24 CFR, Part
3280 or, when such standard is not applicable, the Standard for
Manufactured Home Installations, ANSI/NCSBCS A225.1, or with
local codes as applicable.
The installation of appliances designed for Recreation Park
Trailers must conform with state or other codes or, in the
absence of such codes, with the standard for Recreational
Park Trailers, ANSI A119.5.
The appliance, when installed, must be electrically grounded in
accordance with local codes or, in the absence of local codes, with
the National Electrical Code, ANSI/NFPA 70
The appliance and its individual shutoff valve must be disconnected
from the gas supply piping system during any pressure testing of that
system at test pressures in excess of 1/2 psi (35 kPa).
The appliance must be isolated from the gas supply piping system by
closing its individual manual shutoff valve during any pressure
testing of the gas supply piping system at test pressures equal to or
less than 1/2 psi (35 kpa).
DO NOT store or use gasoline or other flammable liquids or
vaporous products in the vicinity of this appliance.
• Smother flames with a close fitting lid, or any metal tray.
• Turn OFF the burner. Be careful to prevent burns. If the flames do
not extinguish, immediately evacuate and call the fire department.
• NEVER pick up a flaming pan. By doing so, you may be burned.
• DO NOT use water or a wet dishcloth on fire. A violent steam
explosion will result.
WARNING!
If the information in this manual is
not followed EXACTLY, a fire or
explosion
may
resuly,
causing
property damage, personal injury
or death.
* DO NOT store or use gasoline or other
flammable vapors and liquids in the vicinity
of this or any other appliance.
**WHAT TO DO IF YOU SMELL GAS**
DO NOT try to light any appliance.
DO NOT touch any electrical switch.
DO NOT use any phone in your building.
IMMEDIATELY call your gas supplier
from a neighbor's phone. Follow the
gas supplier's instructions.
If you cannot reach a gas supplier,
call the fire department.
INSTALLATION AND SERVICE must be
performed by a qualified installer, service
agency or the gas supplier.
NOTE:
USE FIRE EXTINGUISHER ONLY IF:
• You have CLASS ABC extinguisher
and you know how to operate it.
• The fire is small and contained in the
area where it started.
• The fire department has been called.
• You can fight the fire with your back to
the exit.
WARNING!
Disconnect Power before installing.
Before turning power ON, be sure that
all controls are in the OFF position.
IMPORTANT!
Installation must conform with local
codes or, in the absence of local
codes, with the National fuel Gas
Code, ANSI Z223.1/NFPA 54.
warnings
iii
CAUTION!
When connecting the unit to propane gas,
make certain the propane tank is equipped with
its own high-pressure regulator in addition to
the pressure regulator supplied with the range.
The pressure of the gas supplied to the
appliance must not exceed 14” (34.57 mB)
water column from the propane gas tank
to the pressure regulator.
!
IMPORTANT!
Installation must conform with local codes or, in
the absence of local codes, with the National
fuel Gas Code, ANSI Z223.1/NFPA 54.
PLEASE NOTE:
In the Commonwealth of Massachusetts, gas
connection must be performed by a licensed plumber
or licensed gas fitter.
important technical information:
TESTED IN ACCORDANCE WITH ANSI Z21.1b-2003, 27th Edition, supplemented by CGA Interim Requirement 58b
(IR58) STANDARD FOR HOUSEHOLD COOKING GAS APPLIANCES. IN CANADA TESTED IN ACCORDANCE WITH
CUL 1.1 GAS RANGES, CURRENT ISSUE. Check your local building codes for the proper method of installation. In the
absence of local codes, this unit should be installed in accordance with the National Fuel Gas Code No. Z223.1 Current
issue and the National Electrical Code ANSI/NFPPA No. 70 Current issue or the Can B149 Installation Codes for Gas
Burning Appliances and C22.1 Canadian Electrical Code Part 1.
please
retain
this
manual
for
future
reference!
important installation instructions
2
INTRODUCTION:
Capital’s Performance Series™ Gas Ranges are tested and approved in accordance with ANSI Z21.1b-2003/CGA IR
58, 1995, Household Cooking Appliances. It is STRONGLY RECOMMENDED that this appliance be installed in
conjunction with a suitable overhead VENT HOOD. Due to the high heat output of this unit, particular attention should
be paid to the hood and ductwork installation to assure it meets local building codes.
NOTE:
Local building
codes vary.
Cabinet storage
above the unit
should be avoided
to prevent the risk
of accidental fire
or burns.
Installation,
electrical
connections,
grounding and gas connections must
comply with all applicable codes. In the
absence of local codes, the unit should be
installed in accordance with the National
Fuel
Gas
Code
ANSI
Z223.1/
NFPA54-CURRENT ISSUE and National
Electrical Code ANSI/NFPA70-CURRENT
ISSUE.
ENSURE
THAT
THE
RANGE
IS
COMPATIBLE WITH GAS SUPPLY AT
THE INSTALLATION SITE BEFORE
PROCEEDING FURTHER. Return the unit
to the dealer if it is not set for the proper gas
supply available at the installation site.
IMPORTANT:
A back guard must be utilized when there is
less than 12” horizontal clearance between
combustible materials and the back edge of
the range. The Capital PERFORMANCE
SERIES™ Low Back must be ordered
separately and installed at the rear of
the range. For island installations and
other installations with more than 12”
clearance, an optional stainless steel
Island Trim is available to cover the
back-guard mounting flanges.
GAS SUPPLY:
Natural Gas: 6-inch water column.
(14.9mb) Min., 8 inch (20mb) nominal
Propane Gas: 11-inch water column.
(27.4mb), 14 inch (37mb) maximum
ELECTRIC POWER SUPPLY:
PSGR244 model –
120 VAC, 60 HZ. 1 Ph., 10 Amp Circuit
PSGR304 model –
120 VAC, 60 Hz., 1 Ph., 10 Amp Circuit
PSGR36 models –
120 VAC, 60Hz., 1 Ph., 10 Amp Circuit
PSGR48 models –
120 VAC, 60 Hz., 1 Ph., 10 Amp Circuit
special instructions for Massachusetts:
In the COMMONWEALTH OF MASSACHUSETTS, GAS CONNECTION MUST BE PERFORMED BY A
LICENSED PLUMBER OR GAS FITTER.
step 1: unpacking, moving and placing the range
CAUTION!
Proper equipment and adequate manpower
must be used in moving the range to avoid
damage to the unit or the floor. The unit is
heavy and rests on stainless steel legs.
WARNING!
DO NOT lift the range by the oven door handles!
DO NOT remove the griddle and grill sections!
WEIGHT:
24” Range = 295 lbs
30” Range = 350 lbs
36” Range = 450 lbs
48” Range = 595 lbs
We're here for you
If you have any questions about this section,
please call us at 1-866-402-4600, and a
Performance Series™ Customer Service
Specialist will be glad to help answer any
questions you may have.
3
1) Remove the outer carton and packing
materials from the shipping base. The all gas
ranges are held to the skid by four (4) bolts.
After removing the bolts the range must be
lifted and removed from the skid.
2) It is strongly recommended that after removing
the packing material, remove the door(s), top
grates, oven racks, front kick plate and drip
pan(s) to facilitate lifting and easier handling.
3) To remove door, open the door completely,
close the hinge latches and release the door.
Remove door by lifting and pulling.
4) Support the range uniformly across the bottom
5) Lift the range from the skid with a soft
wheel dolly.
6) Remove the angle mounting brackets from
range. This requires the installer to remove two
screws holding each bracket, then remove
bracket and reinstall screws.
7) Make sure gas and electric connections
are made, anti-tip device is installed, and the
back guard installed prior to placing the
range in position.
8) Measure the height of the counter top and
adjust the range height to match countertop
height by adjusting front and rear leveling feet.
9) Slide the range in place and ensure that the
range is level.
10) Reinstall the kick plate, top grates, oven
door(s), drip pan tray(s), and make sure burner
caps are seated firmly and locked into position.
step 2: ventilation system requirements
CAUTION!
Ventilation hoods and blowers are designed
for use with single wall ducting. However,
some local building codes or inspectors may
require double wall ducting. Consult local
building codes and/or local agencies, before
starting, to assure that hood and duct
installation will meet local requirements.
VENT HOOD
BLOWER CFMS
PSVH24
PSVH30
PSVH36
PSVH36HL
PSVH48
PSVH48HL
PSVH60
PSVH60HL
=
=
=
=
=
=
=
=
600 CFM motor
600 CFM motor
1200 CFM motor
1200 CFM motor
1200 CFM motor
1200 CFM motor
1200 CFM motor
1200 CFM motor
all units are 18" High X 24"
deep X width of ventilation system,
for example, 18" H X 24" D X 36" W)
chart A
step 3a: cabinet preparation
1. The range is a freestanding unit. If the unit is to be placed
adjacent to cabinets, the clearances shown in Fig. 1 are required.
The same clearances apply to island installations, except for the
overhead cabinets, which must have a space wide enough to
accept a suitable flared island hood, as indicated in (Fig. 1-pg. 5)
2. The maximum depth of overhead cabinets installed on either
side of the hood is 13”.
4
It is strongly recommended that a suitable exhaust
hood be installed above the range. Downdraft
ventilation should NOT be used (see chart A below)
(A) SELECT A VENTILATION SYSTEM:
For wall installations, the hood width must, at a
minimum, equal the width of the range’s cooking
surface. Where space permits, a hood larger in width
than the cooking surface may be desirable for
improved ventilation performance.
NOTE:
Capital Cooking does not manufacture an island
style ventilation hood. A wall mount hood is not
suitable for island type installations.
Hood blower speeds should be variable to reduce
noise and loss of heated or air-conditioned
household air when maximum ventilation is not
required. Normally the maximum blower speed is
only required when using the grill section.
(B) HOOD PLACEMENT:
For best smoke elimination, the lower edge of the
hood should be installed a minimum of 30” to a
maximum of 36” above the range cooking surface.
If the hood contains any combustible materials (i.e.
wood covering), it must be a minimum of 40” above
the cooking surface.
A 30-inch minimum distance is necessary when the
bottom of the wood or metal cabinet is protected by not
less than 1/4 inch of a flame retardant material covered
with no less than No. 28 MSG Sheet Steel, 0.015-inch (0.4
mm) thick stainless steel, 0.024-inch (0.6 mm) aluminum,
or 0.020 inch (0.5 mm) thick copper. Flame retardant
materials bear the mark:
UNDERWRITERS LABORATORIES INC.
Classified Mineral and Fiber Boards
Surface Burning Characteristics
Followed by the flame spread and smoke ratings. These
designations are shown as “FHC (Flame Spread/Smoke
3. Clearances:
Developed).” Materials with “O” flame spread ratings are
40-inch minimum clearance is required between the top of the flame retardant. Local codes may allow other flame
range and the TOP of an unprotected cabinet (See Fig. 1-pg. 5) spread ratings.
5
step 3: cabinet preparation (cont.)
4. Any openings in the wall behind the range and in
the floor under the range must be sealed.
We're here for you
If you have any questions about this section,
please call us at 1-866-402-4600, and a
Performance Series™ Customer Service
Specialist will be glad to help answer any
questions you may have.
5. When there is less than a 12” horizontal clearance
between combustible material D and the back edge
of the range above the cooking surface, a Capital
Low Back or High Shelf back guard must be installed
(see Fig. 2). When clearance to combustible
material D is over 12”, a Capital Island Trim may
be used. Figure 2 indicates the space required
for each type of back guard.
WARNING!
DO NOT obstruct the flow of combustion and
ventilation air to the unit.
6. Always keep appliance are clear and free from
combustible materials, gasoline, and other
flammable vapors and liquids.
7. Models with BBQ-Grill, noncombustible material is
to be installed on the underside of a cabinet located
above the broiler section or unit in accordance with
local codes, or in the absence of local codes, with
the National Fuel Gas code, ANSI Z223.1/NFPA 54.
Fig. 1
-INORINCH
(OOD
-).TOCOMBUSTIBLE
MATERIALEACHSIDE
-IN
!
-AX
#ABINET
$EPTH
"
#!54)/.
-INTO
COMBUSTIBLE
MATERIALFROM
COOKINGSURFACE
!
COOKINGSURFACE
%LECTRICAL3UPPLY
'AS3UPPLY
-AXFORLEVELCOUNTER
-AXW2ANGE
,EVELINGLEGSFULLYEXTENDED
4HERANGEHEIGHTISADJUSTABLE4HELEVELOF
THERANGETOPMUSTBEATTHESAMELEVELOR
ABOVETHECOUNTERTOPLEVEL
ASDEFINEDINTHE.ATIONAL&UEL'AS#ODE!.3):,ATEST%DITION
4HERANGE
HEIGHTISADJUSTABLE4HELEVELOFTHERANGETOPMUSTBEATTHESAMELEVELORABOVETHE
COUNTERTOPLEVEL
!"
03'2MODELS
03'2MODELS
03'2MODEL
03'2MODEL
RANGE WIDTHS:
PSGR48
PSGR36
PSGR30
PSGR24
47
35
29
23
7/8"
7/8"
7/8"
7/8"
CUT OUT WIDTHS:
PSGR48
PSGR36
PSGR30
PSGR24
48
38
30
24
1/8"
1/8"
1/8"
1/8"
6
step 3a: cabinet preparation (cont.)
Fig. 2
Combustible Materials
H
12" Min. to
Combustibles
without backguard
40" Min. to
Combustibles
10-3/4"
HIGH SHELF 22"
G
LOW BACK 12"
ISLAND TRIM
I
F
E
D
J
wall
O" Clearance
KICKPLATE
A
B
C
MODEL #
PSGR24
PSGR30
PSGR36
PSGR48
WIDTH
23-7/8"
29-7/8"
35-7/8"
47-7/8"
A
25"
25"
25"
25"
B
43-1/4"
43-1/4"
43-1/4"
43-1/4"
C
27-3/8"
27-3/8"
27-3/8"
27-3/8"
D
38-5/8"
38-5/8"
38-5/8"
38-5/8"
E
44-1/2"
44-1/2"
44-1/2"
44-1/2"
F
58-1/2"
58-1/2"
58-1/2"
58-1/2"
G
1-5/16"
1-5/16"
1-5/16"
1-5/16"
H
28-1/4"
28-1/4"
28-1/4"
28-1/4"
I
6"
6"
6"
6"
J
36-1/2"
36-1/2"
36-1/2"
36-1/2"
7
step 3b: backguard installation
Fig. 2Ab
1. Remove the rang e back panel by removing
the 6 screws -- 3 screws on each side
(see Pics. A and B).
2. Remove, then discard the 4 screws
(2 at each side at the top of range side trim).
Pic. A
Pic. B
3. Set IT, LB or HS on top of the range (Pic. C)
and secure it with the two (2) screws at each
end from the bottom of the range side-trim
(Pic. D).
4. Replace the range back panel by sliding it
under the bottom lip of high shelf (Pic E).
5. Secure the IT, LB, or HS to the range back
panel with five (5) screws across the back
on 24, 30, and 36 inch ranges; and seven (7)
screws for 48" ranges (Pic. F).
Pic. C
6. Replace the final six (6) screws (3 on each
side of range back).
CAUTION!
DO NOT USE THE LOW BACK
OR HIGH SHELF TO MOVE RANGE.
Pic. D
Pic. E
Pic. F
8
step 3c: electrical supply
Installation of All Gas ranges must be
planned so that the rough-in of the
junction box for the receptacle or
conduit connection allows for maximum
clearance to the rear of the unit.
This is especially critical if the junction
box in the wall will be directly behind the
junction box of the unit when the unit is
installed. To minimize binding when the
unit is connected to the receptacle or
junction box, orient the receptacle or
conduit connector, and slide back into
position (Fig. 3).
Fig. 3
Fig. 4
CAUTION!
Disconnect the electrical
supply cord from the wall
outlet before servicing the
range. Follow all governing
codes and ordinances when
grounding. In the absence of
codes follow the National
Electrical Codes ANSI / NFPA
No. 70 (current issue).
GROUNDING METHOD:
The range is factory fitted with a power
supply and cord with a three-prong
grounding plug. It must be plugged into a
matching grounding type receptacle
connected to a correctly polarized 120 Volt
circuit. If the circuit does not have a
grounding type receptacle, it is the
responsibility of the installer to have the
existing receptacle changed to a properly
grounded and polarized receptacle in
accordance with all applicable local
codes and ordinances. The receptacle
replacement shall be in accordance with
the national Electrical Code (Fig. 4).
WARNING!
The third prong SHOULD NOT, under any
circumstances, be cut or removed!
9
step 4: installing anti-tip device
NOTE:
The anti-tip device supplied with each range
MUST be installed per these instruictions!
failure to do so WILL void warranty.
READ THESE IMPORTANT
SAFETY WARNINGS!
WARNING!
• All ranges can tip
• Injury to persons and
property could result
• Install anti-tip device
packed with range
• See installation instructions
Fig. 5
CAUTION!
PROPERTY DAMAGE!
• Contact a qualified installer or contractor
to determine the proper method for drilling holes
through the wall or floor material (such as
ceramic tile, hardwood, marble, etc.).
• DO NOT slide range across unprotected floor.
• Failure to follow these instructions may result in
damage to wall or floor coverings.
start here!
A. TOOLS NEEDED FOR INSTALLATION OF
ANTI-TIP DEVICE!
1. Screwdriver, Phillips
2. Drill, electric or hand
3. Measuring tape or ruler
4. 1/8” drill bit (wood or metal wall or floor)
5. 3/16” carbide-tipped masonry drill bit
(concrete or concrete block wall or floor)
6. 3/16” anchors, drywall, or concrete, 2 each
(not required if mounting bracket is being
attached to solid wood or metal.
7. Hammer
8. Pencil or other marker
WARNING!
RANGE TIPPING HAZARD!
1) All ranges can tip and injury can result.
To prevent accidental tipping of the range,
attach it to the floor, wall or cabinet by
nstalling the Anti-Tip Device supplied.
2) A risk of tip-over may exist if the
appliance is not installed in accordance
with these instructions.
3) If the range is pulled away from the wall
for cleaning, service or any other reason,
ensure that the Anti-Tip Device is properly
reengaged when the range is pushed back
against the wall.
4) In the event of abnormal usage (such
as a person standing, sitting, or leaning
on an open door), failure to take this
precaution can result in tipping of the
range. Personal injury might result
from spilled hot liquids or from the
range itself (Fig. 5).
WARNING!
ELECTRICAL SHOCK HAZARD!
1) Use extreme caution when drilling
holes into the wall or floor. There may be
concealed electrical wires located behind
the wall or under the floor.
2) Identify the electrical circuits that
could be affected by the installation
of the Anti-Tip Device, then turn off
power to these circuits.
3) Failure to follow these instructions
may result in electrical shock or other
personal injury.
step 4: installing anti-tip device (cont.)
10
B. IMPORTANT INSTALLATION INFORMATION:
1) The Anti-Tip Bracket may be attached to a solid wood
cabinet having a minimum wall thickness of 3/4”.
2) The thickness of the wall or floor may require use of
longer screws, available at your local hardware store.
3) In all cases at least two (2) of the bracket mounting
screws must be fastened to solid wood or metal.
4) Use appropriate anchors when fastening the mounting
bracket to any material other than hardwood or metal.
Prepare holes at fastener locations as
identified below:
• FOR WALLS, WALL STUDS, OR FLOORS
COMPOSED OF SOLID WOOD OR METAL,
DRILL 1/8” PILOT HOLES.
• FOR WALLS OR FLOORS COMPOSED OF
DRYWALL, SHEET ROCK, OR OTHER SOFT
MATERIALS, DRILL 3/16” HOLES TO A MINIMUM
OF 1-3/4”, THEN TAP PLASTIC ANCHORS INTO
EACH OF THE HOLES USING A HAMMER.
• FOR WALLS OR FLOORS COMPOSED OF
CONCRETE OR CONCRETE BLOCK, DRILL 3/16”
HOLES TO A MINIMUM DEPTH OF 1-3/4”, THEN
TAP CONCRETE ANCHORS INTO EACH OF THE
HOLES USING A HAMMER.
• FOR WALLS OR FLOORS HAVING CERAMIC TILE
COVERING, DRILL 3/16” HOLES THROUGH THE TILE
ONLY, THEN DRILL INTO THE MATERIAL BEHIND
THE TILE AS INDICATED IMMEDIATELY ABOVE.
C. MOUNTING ANTI-TIP BRACKET:
The alternative floor mounted bracket shall be
installed as follows:
1) Place bracket on floor in position shown (Fig. 6),
2) Secure to floor or wall stud.
3) Later, when unit is installed, the adjustable leg
will slide under the bracket.
Fig. 6
step 5: gas connection and hook-up
11
START HERE:
NEXT:
Verify the type of gas being used at the installation site
matches the gas type of the range. As shipped from the
factory, units are configured for use with Natural Gas or
Propane (LP). Make certain the range matches the type
of gas available at this location.
HOOK UP:
a) A manual shut off valve must be installed external
to the range in an accessible location from the front
for shutting off the gas supply when required (Fig. 7).
For installation of the appliance at high altitude, please
consult your local gas company for their recommendation
of the correct orifice sizes and any other necessary
adjustments that will provide proper gas combustion at
specified altitudes.
NOTE:
Capital DOES NOT supply ranges to match varying
altitudes. Orifices to adjust for combustion for differing
altitudes may be purchased through Capital Cooking
Equipment by calling our Parts Department at
1-866-402-4600, or email us at [email protected].
CAUTION!
When connecting unit to Propane (LP) gas, make
certain the propane tank is equipped with its own
high-pressure regulator in addition to the pressure
regulator supplied with the appliance. The pressure of
the gas supplied to the appliance regulator must not
exceed 14” (37 mb) water column.
NATURAL GAS REQUIREMENTS:
Inlet Connection: 1/2” N.P.T.
Min. 5/8” Dia. Flex Line.
Supply Pressure: 6” to 14” W.C.
PROPANE (LP) GAS RQUIREMENTS:
Inlet Connection: 1/2” N.P.T.
Min. 5/8” Dia. Flex Line.
Supply Pressure: 11” to 14” W.C.
A Regulator is required at the LP source to provide a
maximum of 14” W.C. pressure to the range regulator.
WARNING!
Gas line cannot be run inside back cover of range.
Run gas line in channel in back of range.
b) The supply line MUST NOT protrude beyond the
back of the range.
c) Ensure that the gas supply is turned OFF at the
external shut-off valve before connecting the range.
d) The gas supply connection must be made by an
experienced technician and in accordance with local
codes or ordinances. In the absence of local codes or
ordinances, please refer to National Fuel Gas Code
ANSI Z223.1 / NFPA54-Current Issue.
e) The range is supplied with its own pressure
regulator that has been permanently mounted with
the range body.
f) Use 5/8” diameter flex line to connect between the
gas supply and the appliance manifold pipe, which
exists at the upper left rear of the appliance. The
appliance manifold pipe connection is 1/2”. Use
caution to avoid crimping the 1/2” flex line.
NOTE:
The flex line for the gas supply must be metal and
approved by an approved certifying agency (AGA,
CGA, CSA, UL or CUL). NEVER use a hose made of
rubber or other synthetic material as the heat may
cause the hose to melt and develop leaks, thus
causing fires, physical and property damage.
g) Always use pipe dope or Teflon® tape on the
pipe threads, and be careful not to apply excessive
pressure when tightening the fittings.
h) Leak testing of the appliance shall be in
accordance with the manufacturer’s instructions.
i) Turn on gas and check supply line connections for
leaks using a soap solution. Do not use a flame of
any sort to test for leaks.
step 5: gas connection and hook-up (cont.)
12
CAUTION!
The appliance must be isolated from the gas
supply piping system by closing its individual
manual shut-off valve during any pressure testing
of the gas supply piping system at test pressures
equal to or less than 1/2 psig (3.5kPa.).
The Appliance and its individual shut off valve
must be disconnected from the gas supply piping
system during any pressure testing of the system
at test pressures in excess of 1/2 psig (3.5kPa.).
When checking the manifold gas pressure,
the inlet pressure to the regulator should be
at least 6.0”.
DO NOT attempt any adjustment of the pressure
regulator.
Fig. 7
testing and adjustments
Install any loose components, such as burner caps and grates, oven racks that may have been removed earlier to facilitate
moving the appliance. Be certain that burner caps seat properly into the alignment slots in the burner bases. Before
testing operation of the appliance, verify that the unit and the gas supply have been carefully checked for leaks and that
the unit has been connected to the electrical power supply. Turn the manual gas shut-off valve to the open position.
Check the operation of the sealed gas burners and grill by pushing and turning each knob counterclockwise to “HI”.
The burner igniters will click until the flame ignites.
Burner flames should be BLUE and stable with no yellow tips, excessive noise, or lifting of the flame from the burner.
If any of these conditions exist, check that the air shutter (grill and griddle only) or burner ports are not blocked or clogged.
Remove any blockages that exist. If the flame is too yellow, indicating insufficient air, adjust the shutter counterclockwise
to increase air inlet (grill and griddle only).
The sealed top burner flames should be approximately 1” to 1-1/4” High. The griddle and grill flames should be as shown
in (Fig. 8) on next page.
CAUTION! A qualified technician must make burner adjustments at the time of installation. Improper or lack of
adjustments may cause harmful by-products or void your warranty!
NOTE: NO air shutter or low flame adjustment is necessary or possible with the sealed top burners.
13
testing and adjustments (cont.)
NOTE:
If the sealed burners do not ignite and there is
NO clicking sound, turn OFF the gas and check for
tripped circuit breakers, blown fuse or wire
connection to the igniter.
Fig. 8
cleaning stainless steel
The stainless steel surfaces may be cleaned by wiping with a damp soapy cloth, rinsing with clear water and drying with a
soft cloth to avoid water marks. Any mild glass cleaner will remove fingerprints and smears. Always wipe in the direction
of the grain, and never in a circular motion.
For discolorations or deposits that persist, refer to the Use and Care Manual.
To polish and protect the stainless steel, use a cleaner/polish such as Stainless Steel Magic®.
• DO NOT allow deposits to remain for long periods of time.
• DO NOT use ordinary steel wool or steel brushes. Small bits of steel may adhere to the surface causing rust.
• DO NOT allow salt solutions, disinfectants, bleaches or cleaning compounds to remain in contact with stainless steel
for extended periods of time. Many of these compounds contain chemicals, which could prove harmful. Rinse with water
after exposure and wipe dry with a clean cloth.
NOTE: For detailed cleaning instructions, please see the Use and Care Guide supplied with your range.
final checklist
14
installer, please initial beside each item
GENERAL:
OPERATION:
c Placement of unit
c Specified clearances maintained to cabinet
surfaces
c Unit level--front to back-- side to side
c Burner caps positioned properly on sealed
burner bases
c All packing materials removed
c Island trim or backguard attached (if horizontal
clearance to combustible materials behond
cooking surface is less than 12")
c Check door adjustment and hold down brackets
c All internal packing materials removed. Check
below grates and grill pans and within ovens
c If used on propane gas, verify that the propane
gas supply is equipped with its own highpressure regulator in addition to the pressure
regulator supplied with this appliance
c Burner caps are properly seated onto
burner bases
c Each burner lights satisfactorily, both individually
and with other burners operating
c Air shutter adjustment for proper flame made for
grill and griddle sections
c Griddle is level and does not rock
c Oven door hinges seated and hinge locks in
proper position. Door opens and closes properly.
c Burner grates correctly positioned, are level
and do not rock
GAS SUPPLY:
c Connection: 1/2" NPT with a minimum of 5/8"
diameter flex line
c The appliance is connected only to the type of
gas for which it is certified for use
c Manual gas shut-off valve installed in an
accesible location (without requiring removal
of range)
c Unit tested and free of gas leaks
c Gas supply pressure does not exceed
14" (37 mb) W.C.
ELECTRICAL:
c Receptacle with correct over current protection
is provided for service cord connection
c Proper ground connection
c Proper polarity at receptacle
c Kick panel in place with all screws secure
INSTALLER: Please sign and date
here and leave these instructions
with customer:
CUSTOMER: Ensure that installer completes checklist,
explains each item before leaving. Please make sure the
installer signs in the space provided.
X
date:
we're here for you
15
HOW TO OBTAIN SERVICE:
For service, contact one of our PERFORMANCE SERIES SPECIALISTS at:
1-866-402-4600.
Before you call, please have the following information ready:
• Model Number ____________________________________
(please make a notation for future reference)
• Serial Number ____________________________________
(please make a notation for future reference)
• Date of purchase and Installation ____________________
(please make a notation for future reference)
• A brief description of the problem____________________
(please make a notation for future reference)
• Dealer name____________________________________________________________________
Your satisfaction is of the utmost importance to us. If a problem cannot be
resolved to your satisfaction, please write or fax us at:
Capital Cooking Equipment
Attn: Customer Service
13211 Florence Ave
Santa Fe Springs, CA
90670
USA
Fax us at: 562-903-1167
For service email us at: [email protected]
For parts email us at: [email protected]
THE POWER OF PERFORMANCE™
16
PERFORMANCE SERIES™ RANGES
WARRANTY
Two (2) years full parts and one (1) year labor covers the entire unit.
Five (5) years on all Burners (Oven, Grill, Griddle Burners, Oven Racks, Sealed Burner), Burner Grates, Grill Grates,
Griddle Plate and Porcelain Enameled Parts.
WILL PAY FOR:
All repair labor found to be defective due to materials or workmanship for one full year “IN HOME” warranty during
the first year of ownership. This does not apply if the unit was subjected to other than normal household use.
Service must be performed by a Factory Authorized Service Agent during normal business hours. No charges will
be made for repair or replacement at the location of initial installation or factory for parts returned pre-paid, through
the dealer and claimed within the warranty period, and found by Capital to be defective.
Replacement will be FOB Capital, and Capital will not be liable for any transportation costs, labor costs, or export
duties. This warranty shall not apply, nor can we assume responsibility for damage that might result from a failure to
follow manufacturer’s instructions or local codes, where the appliance has been tampered with or altered in any way
or which, in our judgment, has been subjected to misuse, negligence, or accident. Implied warranty shall not extend
beyond the duration of this written warranty. This warranty is in lieu of all warranties expressed or implied and all
other obligations or liability in connection with the sale of this appliance.
WILL NOT PAY FOR:
•
•
•
•
Installation or start up.
Shipping damage.
Service by an unauthorized agency.
Damage or repairs due to service performed by an unauthorized service agency or the use of
unauthorized parts.
• Service during other than normal business hours.
• Improper installation, such as improper hook-up.
• Service visits to teach consumers how to use the appliance, correct the installation, reset circuit breakers or
replace home fuses.
• Repairs due to other than normal household use.
• Damage caused from accident, abuse, alteration, misuse, incorrect installation or installation not in accordance
with local codes.
• Units installed in non-residential application such as day care centers, bed and breakfast centers, churches,
nursing homes, restaurants, hotels, motels, schools, etc.
• Isolated geographic locations of 50 miles of travel distance or two hours of travel time both ways, for example,
such places that require plane, train, boat or ferry trips, etc.
This warranty applies to appliances used in residential application only. It does not cover their use in
commercial situations (commercial situations include but are not limited to restaurants, public parks and
recreation areas, any area where units are exposed to multiple users, public cooking areas, etc.) This
warranty is for products purchased and retained in the 50 States of the U.S.A, the District of Columbia and
Canada. This warranty applies even if you should move during the warranty period. Should the original
purchaser sell the appliance during the warranty period, the new owner continues to be protected until the
expiration date of the original purchaser ’s warranty period. This warranty gives you the specific legal
rights. You may also have other rights, which vary from State to State.
All illustrations and specifications contained in this use and care guide are based on
the latest product information available at the time of this printing. Because product
improvement is an ongoing process, Capital reserves the right to make changes at
any time, without notice, in colors, materials, equipment, specifications, features and
models. Some product pictures may be shown with optional equipment. Further
information can be obtained from your authorized Capital Cooking Equipment dealer
or visit us online at www.capital-cooking.com.
© 2006 Capital Cooking Equipment, Inc. Not to be reproduced wholly or in part
without written permission from Capital Cooking Equipment, Inc.
Capital Cooking Equipment, Inc.
13211 Florence Ave.
Santa Fe Springs, Ca 90670 USA
866.402.4600 Toll Free
562-903-1167 Fax
MADE IN USA
UL and CUL certified for USA and Canada
PART #: 87021-01
THE POWER OF PERFORMANCE™