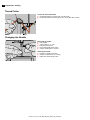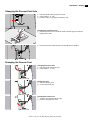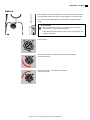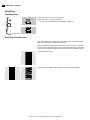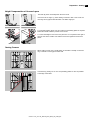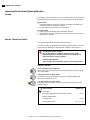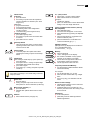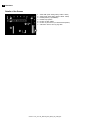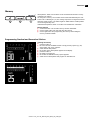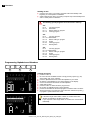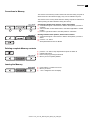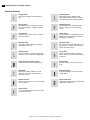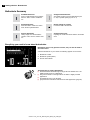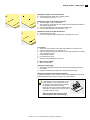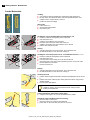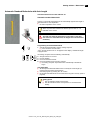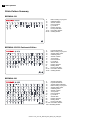
1
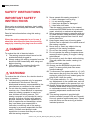
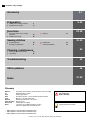
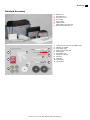
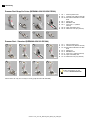
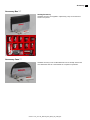
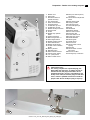
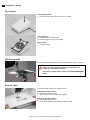
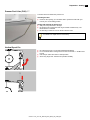
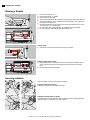
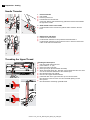
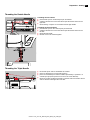
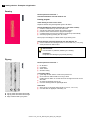
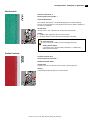
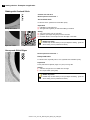
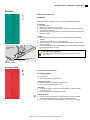
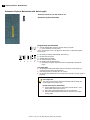
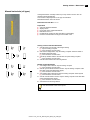
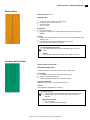
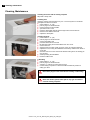
BERNINA 330 | 350 PE | 380 Introduction Dear Bernina Customer, Congratulations! You’ve decided on BERNINA, a reliable choice that will delight you for years to come. For over 100 years, our family has placed the highest value on satisfied customers. For myself, it is a matter of personal pride to offer you Swiss precision at the height of perfection, future-oriented sewing technology, and a comprehensive customer service. The BERNINA 330, 350 and 380 are primarily aimed at the occasional sewer who puts great stock in design and customer benefit. These sewing computers are very ergonomically built and therefore even easier to operate, to help you, our esteemed customers, on your journey to even greater sewing pleasure and perfect results. Enjoy creative sewing with BERNINA: Find out about our varied range of accessory and let yourself be inspired by new sewing projects at www.bernina.com. And don’t forget to make use of service and maintenance offers from our highly trained BERNINA dealers. H.P. Ueltschi Owner BERNINA International AG CH-8266 Steckborn www.bernina.com 033301.71.04_2014-02_Manual_B330_B350_PE_B380_EN 1 2 Safety Instructions SAFETY INSTRUCTIONS IMPORTANT SAFETY INSTRUCTIONS When using an electrical appliance, basic safety precautions should always be followed, including the following: Read all instructions before using this sewing computer. When the sewing computer is not in use, it should be disconnected from the electricity supply by removing the plug from the outlet. DANGER! To reduce the risk of electrical shock: 1. The sewing computer should never be left unattended when plugged in. 2. Always unplug the sewing computer from the electrical outlet immediately after using and before cleaning. 3. LED radiation. Do not view directly with optical instruments. LED class 1M WARNING! To reduce the risk of burns, fire, electric shock or injury to persons: 1. Use the sewing computer only for purposes as described in this manual. Use only attachments/accessory recommended by the manufacturer as contained in this manual. 2. Do not allow the sewing computer to be used as a toy. Close attention is necessary when this sewing computer is used by or near children and infirm persons. This sewing computer is not intended for use by persons (including children) with reduced physical, sensory or mental capabilities, or lack of experience and knowledge, unless they have been given supervision or instruction concerning use of the sewing computer by a person responsible for their safety. Children must be kept under supervision to ensure that they do not play with the sewing computer. 3. Never operate this sewing computer if: it has a damaged cord or plug it is not working properly it has been dropped or damaged it has fallen into water Take the sewing computer to the nearest authorized BERNINA dealer for examination, repair, electrical or mechanical adjustment. 4. Never operate the sewing computer with any air vents blocked. Keep ventilation openings of the sewing computer free from lint, dust and/or fabric bits. 5. Keep fingers away from all moving parts. Special care is required in the needle area of the sewing computer. 6. Never drop or insert any objects into any opening on the sewing computer. 7. Do not use the sewing computer outdoors. 8. Do not operate the sewing computer where aerosol products (spray) or oxygen is being administered. 9. Do not pull or push the fabric while stitching. This may deflect the needle, causing it to break. 10.Do not use bent needles. 11.Always use the BERNINA original stitch plate. The wrong stitch plate can cause needle breakage. 12.To disconnect, turn power switch to «0» (off), then remove the plug from the outlet. Do not unplug by pulling the cord, instead grasp the plug to pull it from the outlet. 13.Turn power switch to «0» (off) when making any adjustments in the needle area, such as changing the needle or the presser foot, etc. 14.Always unplug the sewing computer from the electrical outlet when carrying out cleaning or maintenance work or any other user servicing adjustments mentioned in this manual. 15.This sewing computer is provided with double insulation (except USA and Canada). Use only genuine replacement parts. Please note the advice on the servicing of doubleinsulated products. ██ ██ ██ ██ 033301.71.04_2014-02_Manual_B330_B350_PE_B380_EN Safety Instructions SERVICING DOUBLE INSULATED PRODUCTS In a double-insulated product, two systems of insulation are provided instead of grounding. No grounding means is provided on a doubleinsulated product nor should a means for grounded be added to the product. Servicing a double-insulated product requires extreme care and knowledge of the system and should only be done by qualified service personnel. Replacement parts for a double-insulated product must be identical to the original parts in the product. A double insulated product is marked with the words: «Double-Insulation» or «double-insulated». The symbol product. may also be marked on the DISCLAIMER No liability will be assumed for any possible damage which arises from misuse of this sewing computer. This sewing computer is intended for household use only. SAVE THESE INSTRUCTIONS! Please find the latest version of your instruction manual at www.bernina.com Environmental Protection BERNINA is committed to the protection of the environment. We strive to minimize the environmental impact of our products by continuously improving product design and our technology of manufacturing. At end of life please dispose this product in an environmentally responsible way according to the national directive. Do not throw away this product with your household waste. In case of doubt, please contact your dealer. If the sewing computer is stored in a cold room, it should be brought to a warm room about one hour before use. 033301.71.04_2014-02_Manual_B330_B350_PE_B380_EN 3 4 Contents - Key to Signs Accessory 5-7 Preparation ██ ██ Details of the sewing computer Preparation for sewing Functions ██ ██ Function buttons on the sewing computer Details of the screen Sewing stitches ██ ██ Practical stitches Examples of application 8-23 8 10 24 26 30 31 ██ ██ ██ Memory 27 Buttonholes Practical-/Quiltstitch 36 43 24-29 30-43 Cleaning, maintenance 44 ██ ██ Sewing computer and screen Lubricating 44 44 45 Troubleshooting Stitch patterns 46 47-49 Index Glossary Balance clr LED FHS mem Bartack Satin stitching Fabric fold Hook Correcting abnormalities in stitch formation due to the fabric Deleting settings or data Sewing light system Free-Hand System = Knee-operated presser-foot lifter Memory = Longterm data store Buttonhole-bead cross-connections Dense zig-zag Folded edge of material «Catches» the needle-thread loop, forming the seam together with the lower thread Very important! Risk of damage! Supplementary information! * Not supplied as standard with the BERNINA 330 ** Not supplied as standard with the BERNINA 350 *** Not supplied as standard with the BERNINA 380 033301.71.04_2014-02_Manual_B330_B350_PE_B380_EN Accessory Standard Accessory ██ ██ ██ ██ ██ ██ ██ ██ 5 3 4 6 8 7 2 9 Fabric cover Accessory box */** Accessory case *** Foot control Power cable Slide-on table* Stitch pattern summary card Free-Hand System FHS */** 1 5 bobbins (one of them in the bobbin case) 2 Selection of needles 3 Seam guide, right 4 Height compensating tool 5 Seam ripper 6 Screwdriver, red 7 Angular Torx button 8 Lint brush 9 Lubricator 10 2 foam pads 11 3 spool discs 11 1 10 033301.71.04_2014-02_Manual_B330_B350_PE_B380_EN 5 6 Accessory Presser Feet/Snap-On Soles (BERNINA 330/350/350 PE/380) 1 2 4 5 6 7 3 1 No. 1 Reverse pattern sole 2 No. 2 Overlock sole (without 350 PE) 3 No. 3A Automatic Buttonhole foot with slide 4 No. 4 Zipper sole 5 No. 5 Blindstitch sole 6 No. 8 Jeans sole */**/(without 350 PE) 7 No. 20 Open embroidery sole * 8 No. 37 Patchwork sole (only 350 PE) 8 Presser Feet - Standard (BERNINA 350/350 PE/380) 1 2 3 4 5 6 7 8 1 No. 1 Reverse pattern foot 2 No. 2 Overlock foot (without 350 PE) 3 No. 3A Automatic Buttonhole foot with slide 4 No. 4 Zipper foot 5 No. 5 Blindstitch foot 6 No. 8 Jeans foot **/(without 350 PE) 7 No. 20 Open embroidery foot 8 No. 37 Patchwork foot (only 350 PE) More accessories you can found on www.bernina.com Presser Feet: can vary from country to country (Snap-On Soles or Standard). 033301.71.04_2014-02_Manual_B330_B350_PE_B380_EN Accessory Accessory Box */** Storing Accessory Standard accessory are supplied in a plastic bag. They can be stored as shown in the picture. Accessory Case *** Standard accessory for the models B330/350 can be carefully stored in the case. Buttonhole foot 3A is stored inside in a separate compartment. 033301.71.04_2014-02_Manual_B330_B350_PE_B380_EN 7 8 Preparation - Details of the sewing computer Front View 9 18 8 20 17 10 16 11 7 21 15 12 19 13 33 14 22 6 5 4 23 2 24 3 25 1 26 Detail View 44 40 39 41 43 42 033301.71.04_2014-02_Manual_B330_B350_PE_B380_EN Preparation - Details of the sewing computer 9 28 27 29 18 30 31 32 33 34 37 38 1 Bobbin cover 2 Stitch plate 3 Attachment base for special accessory 4 LED sewing light 5 Quick reverse button 6 Start/Stop button 7 Thread take-up cover 8 Thread take-up lever 9 Bobbin winder pre-tension 10 Speed control 11 Screen 12 Needle stop up/down button 13 Pattern end button 14 Mirror image button */** 15 Stitch length buttons 16 Needle position buttons 17 Stitch width buttons 18 Bobbin winder device 19 Thread cutter on bobbin winder 20 Memory buttons 21 Alphabet button 22 Stitch selection buttons 23 #-button (hash button) 24 «clr» (clear) button 25 Slide-on table socket 26 FHS (Free Hand System) connection * 27 Thread tension adjustment wheel 28 Rear thread guide 29 Carrying handle 30 Vertical spool pin 31 Horizontal spool pin 32 Eyelet 33 Handwheel 34 Balance adjuster 35 Foot control socket 36 Feed-dog drop 37 Power switch on/off 38 Power plug socket 39 Needle threader 40 Thread guide 41 Needle clamp 42 Presser Foot 43 Thread cutter in hook opening 44 Feed dog 45 Thread cutter on head frame (left) 46 Presser foot lifter 47 Darning hoop connection 35 (USA/Canada only): The sewing computer has a polarized plug (one blade wider than the other). To reduce the risk of electrical shock, this plug is intended to fit in a polarized outlet only one way. If the plug does not fit fully in the outlet, reverse the plug. If it still does not fit, contact a qualified electrician to install the proper outlet. Do not modify the plug in any way! 36 45 46 47 3 2 25 033301.71.04_2014-02_Manual_B330_B350_PE_B380_EN 9 10 Preparation - Sewing Foot Control Sewing speed control ██ control the sewing speed by pressing the foot control Self storing cord ██ wind the cable around the spool ██ insert the plug into the groove provided While sewing ██ unwind the cable LED Sewing Light The LED sewing light illuminates the sewing area and has a long product life. Please note that a defective sewing light must ONLY be replaced by an authorized technician. The sewing computer must be taken to an authorized BERNINA dealer! Slide-on Table * The slide-on table increases the sewing surface. Attaching the slide-on table ██ raise needle and presser foot ██ slide over free-arm to the right until it engages Removing the slide-on table ██ raise needle and presser foot ██ press button down and pull off slide-on table to the left 033301.71.04_2014-02_Manual_B330_B350_PE_B380_EN Preparation - Sewing Presser Foot Lifter (FHS) */** The FHS raises and lowers the presser foot. Attaching the lifter ██ insert into the opening; you should be able to operate the FHS with your knee in your normal sitting position Raising and lowering the presser foot ██ with your knee push lever to the right ██ the presser foot is raised; the feed dog is lowered simultaneously. The thread tension is released ██ the feed dog is raised as soon as the first stitch is sewn Your dealer can adjust the FHS if necessary. Vertical Spool Pin ██ ██ ██ ██ the vertical spool pin is on the side behind the handwheel it is an essential aid for sewing with more than one thread, i.e. double needle work raise the pin until it clicks into its vertical position when using large reels, add the foam pad A for stability A 033301.71.04_2014-02_Manual_B330_B350_PE_B380_EN 11 12 Preparation - Sewing Winding a Bobbin ██ ██ ██ ██ ██ ██ ██ ██ turn power switch on (to «I») place empty bobbin on spindle place thread on spool pin attach appropriate spool disc; diameter of thread spool determines disc size following the direction of the arrow take thread through the rear guide and round the pre-tension stud wind the thread two to three times around the empty bobbin and cut off any excess thread on the thread cutter push engaging lever against bobbin, the winder works automatically the motor will stop automatically when the bobbin is full Thread cutter ██ pull thread over thread cutter when removing the bobbin Bobbin winding while sewing ██ place thread spool on vertical spool pin then, following the direction of the arrow, take thread through the thread guide and around the pre-tension stud ██ then proceed as mentioned above Inserting a Bobbin Insert the bobbin so that the thread runs clockwise. Laying the thread into the slot Pull the thread counter clockwise into the slot. Pulling the thread under the spring Pull the thread to the left under the spring until it lies in the T-shaped slit at the end of the spring. The bobbin must turn clockwise. 033301.71.04_2014-02_Manual_B330_B350_PE_B380_EN Preparation - Sewing Bobbin Case To remove the bobbin case ██ raise needle ██ power switch to «0» (off) ██ open the bobbin cover ██ grasp the latch of the bobbin case ██ remove bobbin case To insert the bobbin case hold the bobbin case latch ██ the finger on the case should point upwards ██ insert the case so that it clicks into place ██ The bobbin thread does not have to be brought up as the loose end is just the right length to start sewing. A Bobbin thread cutter ██ insert the bobbin case ██ take the thread over cutter A and cut it ██ close the bobbin cover 033301.71.04_2014-02_Manual_B330_B350_PE_B380_EN 13 14 Preparation - Sewing Needle Threader 1 Press lever down ██ raise needle ██ lower the presser foot ██ hold thread to the left and back ██ press lever A down and simultaneously guide the thread around hook B to the right to the needle A 2 Guide thread to front of the needle ██ put the thread from the front into the guide C until it catches in the wire hook B 1 C 2 3 Release lever and thread ██ release lever A and thread ██ put the thread under the foot and pull the thread backwards or ██ put the thread under the foot and pull it from front to back over the thread cutter on left side of the head frame A 3 Threading the Upper Thread Attaching the thread spool ██ raise the needle and presser foot ██ power switch to «0» (off) ██ place foam pad on pin base ██ place spool on pin (thread unwinds clockwise) ██ attach appropriate spool disc - diameter of spool determines disc size, there must be no clearance between the disc and the spool ██ take thread through rear guide A ██ then into slit of upper thread tension B ██ pull thread down to the right of the take-up cover and around C ██ take thread up to the left of the cover and around D, placing it in the take-up lever ██ take thread down and through guides E and F A B D C E F 033301.71.04_2014-02_Manual_B330_B350_PE_B380_EN Preparation - Sewing Threading the Double Needle Threading the First Thread ██ place thread spool on horizontal spool pin and thread ██ guide the thread to the front in the slit and past the tension disc A on the right side ██ thread sewing computer as usual and thread the right needle Threading the Second Thread ██ place thread spool on the vertical spool pin and thread ██ guide the thread to the front in the slit and past the tension disc A on the left side ██ thread the left needle ██ threads must not be twisted together A Threading the Triple Needle ██ ██ A ██ ██ two thread spools and one full bobbin are needed place one thread spool on horizontal spool pin place second thread spool and the bobbin, separated by a spool disc, on vertical spool pin (both spools have to turn in the same direction) thread as usual by guiding two threads on the left side of the tension disc A and one thread on the right side of the disc 033301.71.04_2014-02_Manual_B330_B350_PE_B380_EN 15 16 Preparation - Sewing Thread Cutter On the left of the head frame pull both threads from front to back over the cutter ██ the threads release automatically as soon as the first stitch is sewn ██ Changing the Needle Removing the needle ██ raise needle ██ power switch to «0» (off) ██ lower the presser foot ██ loosen the needle clamp screw ██ pull the needle down to remove Inserting the needle ██ flat side of needle to the back ██ insert the needle as far as it will go ██ tighten the needle clamp screw 033301.71.04_2014-02_Manual_B330_B350_PE_B380_EN Preparation - Sewing Changing the Presser-Foot Sole ██ ██ ██ raise the needle and the presser foot shaft power switch to «0» (off) press the button on the shaft to release the sole Attaching the presser-foot sole ██ place the presser-foot sole under the shaft so that the peg sits under the opening of the shaft 3 ██ lower the presser-foot lifter and the foot sole will click into position Changing the Presser Foot Changing the Presser Foot ██ raise the needle and presser foot ██ power switch to «0» (off) Raising the Lever ██ raise the clamping lever ██ remove the presser foot Attaching the Presser Foot ██ guide the foot upwards over the cone ██ press the clamping lever down 033301.71.04_2014-02_Manual_B330_B350_PE_B380_EN 17 18 Preparation - Sewing Stitch Plate B A Stitch Plate Markings ██ the stitch plate is marked with vertical, horizontal and diagonal lines in mm and inches ██ the lines help to guide the fabric for sewing seams and precise topstitching, etc. ██ the horizontal markings are helpful for sewing corners and buttonholes, etc. ██ the diagonal markings are useful for quilting ██ the vertical measurements correspond to the distance between the needle and the line ██ needle insertion point is position 0 (center needle position) ██ the measurements are marked to the right and left, measuring from the center needle position Removing the Stitch Plate ██ raise the presser foot and needle ██ power switch to «0» (off) ██ press the stitch plate down at the right back corner B until it flips up ██ remove the stitch plate Replacing the Stitch Plate ██ place the stitch plate over the opening A and press down until it clicks into place Thread Tension Optimal upper thread tension is set in the factory. For this, Metrosene threads 100/2 weight (Mettler, Switzerland) are used in the bobbin and also in the upper thread. The tension may vary when using other types of thread such as embroidery thread, and it may therefore be necessary to adjust the tension to suit the fabric and stitch type. For example: Metallic thread Monofilament A Tension approx. 3 approx. 2-4 Needle 90 80 The Basic Setting ██ is indicated when the red line on the tension adjustment wheel is in line with the marking A ██ the tension does not need adjusting for normal sewing work ██ for special sewing work, the tension can be adjusted to suit the fabric Perfect Stitch Formation ██ the interlooping of the threads is in the fabric Upper thread tension too tight ██ the lower thread is pulled more up, i.e. to the right side of the fabric ██ to reduce the upper thread tension turn tension adjustment wheel to 3-1 Upper thread tension too loose ██ the upper thread is pulled more down, i.e. to the wrong side of the fabric ██ to increase the upper thread tension turn tension adjustment wheel to 5-10 033301.71.04_2014-02_Manual_B330_B350_PE_B380_EN Preparation - Sewing Balance Different fabrics, threads and stabilizers can naturally affect the stitch balance so that the stitch patterns are sewn too close together or not close enough. This can be remedied with Balance to suit the fabric and produce perfect results. Test-sewing When using decorative stitches, we recommend to test-sew the stitch pattern on a piece of the project fabric. If the balance has been adjusted, return it to the normal setting once sewing is completed! Normal position Denser stitch formation - pulling the stitch pattern closer together (shorter stitch length) Finer stitch formation - extending the stitch pattern (longer stitch length) 033301.71.04_2014-02_Manual_B330_B350_PE_B380_EN 19 20 Preparation - Sewing Feed Dog Feed-Dog Drop Button flush with housing = sewing position. Button depressed = feed-dog is lowered. ██ for free-motion sewing (darning, embroidery, quilting, etc.) Feed-dog and fabric feed With each stitch the feed dog moves forward by one step. The length of this step is determined by the stitch length selected. With an extremely short stitch length, the steps are also very short. The fabric moves under the foot quite slowly, even at full sewing speed. e.g. buttonholes, satin stitch and decorative stitches are all sewn with a very short stitch length. Let the fabric feed evenly. Pulling, pushing or holding back the fabric will result in uneven stitches. 033301.71.04_2014-02_Manual_B330_B350_PE_B380_EN Preparation - Sewing Height Compensation of Uneven Layers The feed dog works accurately when the foot is level. If the foot is at an angle, e.g. when sewing over thick to thin or vice-versa, the feed dog cannot grip and feed the fabric. The fabric might jam. 1 1 To solve this problem, place one, two or three compensating plates as required behind the needle under the presser foot to level it. To correct the height in front of the foot, place one or more plates to the right of the foot close to the needle. Sew until the foot is level again and remove the plates. Sewing Corners When sewing corners only a small section of the fabric is actually on the feed dog. Therefore it cannot grip the fabric well. Correct this by placing one or more compensating plates as close as possible to the edge of the fabric. 033301.71.04_2014-02_Manual_B330_B350_PE_B380_EN 21 22 Preparation - Sewing Important Facts about Sewing Needles Thread The thread is chosen according to use. For a perfect sewing result, thread and fabric quality play an important role. It is recommended to use quality brands. Cotton thread ██ cotton thread has the advantage of being a natural fiber and therefore is especially suitable for sewing cotton fabrics ██ if cotton thread is mercerized, it has a slight sheen Polyester thread ██ it has a high tensile strength and is particularly colorfast ██ polyester thread is more flexible and is recommended where a strong and elastic seam is required Needle, Thread and Fabric Care must be taken when choosing needle and thread. The correct needle size depends on the selected thread and fabric. The fabric weight and type determine the thread weight, needle size and point form. Checking the needle condition The needle condition should be checked and the needle replaced regularly. A defective needle not only damages the fabric but also the sewing computer. Follow these guidelines: Always replace the needle when starting a new sewing project. Needles, Threads Correct needle/thread combination When sewing, the thread should travel smoothly down the long groove on the front of the needle. Too thin thread or too thick needle The thread has too much clearance in the groove. Skipped stitches and damage to the thread can occur. Too thick thread or too fine needle The thread rubs on the edges of the groove and can get jammed. This can break the thread. Fabric/Thread Needle size Fine fabrics: Fine thread (darning thread, embroidery thread) 70-75 Medium weight fabrics: Normal thread 80-90 Heavy weight fabrics: 100, 110, 120 033301.71.04_2014-02_Manual_B330_B350_PE_B380_EN Preparation - Sewing Overview Needles Universal 130/705 H/60-100 Metafil 130/705 H-MET/75-90 Normal point, slightly rounded Large eye For nearly all natural and synthetic fabrics (woven and knitted) Sewing with metallic threads Jersey/Stretch 130/705 H-S, H-SES, H-SUK/70-90 Cordonnet (Topstitching) 130/705 H-N/80-100 Ball point Small ball point, long eye Jersey, knits, stretch fabrics Topstitching with thick thread Leather 130/705 H-LL, H-LR/90-100 Wing needle (hemstitch needle) 130/705 HO/100-120 With cutting point Wide needle (wing) Natural and synthetic leather and plastic films Hemstitching Jeans 130/705 H-J/80-110 Double wing needle 130/705 H-ZWI-HO/100 Very fine sharp point Heavy weight fabrics such as jeans, canvas, overalls Special effects with hemstitch embroidery Microtex 130/705 H-M/60-90 Double needle 130/705 H-ZWI/70-100 Especially fine sharp point Needle distance: 1.0/1.6/2.0/2.5/3.0/4.0 Micro fiber fabrics and silk Visible hems in stretch fabrics, pintucks, decorative sewing Quilting 130/705 H-Q/75-90 Triple needle 130/705 H-DRI/80 Fine sharp point Needle distance: 3.0 Straight and topstitching For decorative sewing Embroidery 130/705 H-SUK/75-90 Large eye, slight ball point Embroidery on all natural and synthetic fabrics 033301.71.04_2014-02_Manual_B330_B350_PE_B380_EN 23 24 Functions Function Buttons on the Sewing Computer Stitch Selection ██ ██ ██ for stitch patterns 1-10: press the number button of your choice; stitch number and default width and length settings appear ██ press «0» to select stitch number 10 (standard buttonhole) for stitch patterns 11-99: press #-button and enter desired stitch number for stitch patterns 100 and beyond: press #-button twice and enter desired stitch number Customizing Stitch Settings Altering stitch width ██ left button = narrow the stitch width ██ right button = widen the stitch width ██ the basic settings of the chosen stitch blink constantly Altering needle position ██ left button = needle to the left ██ right button = needle to the right Altering stitch length ██ left button = shortens the length ██ right button = elongates the length 033301.71.04_2014-02_Manual_B330_B350_PE_B380_EN Functions clr» (clear) button ██ press button = reverts to basic settings ██ other selected functions are cleared Exception: ██ needle stop up/down ██ press «clr» button twice to clear altered basic settings of the auto-length buttonhole Quick reverse temporary: ██ press the button ██ the sewing computer sews stitch pattern in reverse until button is released (max. stitch length 3mm) Application: ██ programs buttonholes ██ programs darning length ██ for switching when in the straight stitch securing program ██ manual securing (seam begin and end) continous reverse: ██ press button quickly twice ██ the sewing computer sews the chosen stitch in reverse ██ press button once to cancel Letters, numbers and characters (330 only Block alphabet) ██ press Alphabet button ██ one of the fonts will appear on the screen ██ select desired font by pressing the alphabet button ██ press the right button to scroll letters and numbers forwards (A B C ...) ██ press the left button to scroll letters and numbers backwards (@ Ç ?...) Start/Stop button ██ starts and stops the sewing computer when operating it without foot control - the connected foot control is idle Speed control ██ to infinitely adjust the speed control when operating the sewing computer via start/stop button Needle stop Basic setting is needle stop up (arrow points up). ██ press the button ██ arrow points down = sewing computer stops with needle down (needle in the fabric) ██ press button again ██ arrow points up = sewing computer stops with needle up Press button a bit longer = the needle will go automatically up or down. Pattern end ██ press the button ██ sewing computer stops at the end of a single stitch pattern or stitch combination (in Memory) Mirror image (right/left) */** ██ press the button ██ selected stitch pattern will be sewn in mirror image #-button ██ stitch selection button (see page 24) Alphabet contents A B C D E FGH IJK LMN OP QR S TU VWXYZ Ä Ö Ü Å ÆŒØÑ È É Ê À  01234567890_-.’ & ? Ç @ 1 2 3 Memory ██ press the button 2 ██ «mem» will appear on the display ██ the number of available memory spaces (capacity of 30) and the cursor blink ██ use the left 1 and right arrow buttons 3 to scroll patterns, letters and numbers ██ use the right arrow button 3 to save Temporary altered stitch Memory ██ any stitch length or width alterations will be saved automatically For example: ██ sew an altered stitch, e.g. zig-zag ██ select and sew another stitch, e.g. straight stitch ██ return to zig-zag, your alterations are still active Return to basic settings ██ individual stitch patterns can be reverted to basic settings manually ██ all altered settings are lost when the «clr»button is pressed or when the sewing computer is turned off Application: ██ for all stitch patterns ██ particularly useful for switching between different applications 033301.71.04_2014-02_Manual_B330_B350_PE_B380_EN 25 26 Functions Details of the Screen 1 1 2 3 4 5 6 7 2 3 4 Stitch width (basic setting always visible - blinks) Stitch length (basic setting always visible - blinks) Needle position (9 possibilities) Needle stop up/down Number of stitch pattern Number of presser foot (for selected stitch pattern) Satin stitch: dense, short zig-zag stitch 5 6 7 033301.71.04_2014-02_Manual_B330_B350_PE_B380_EN Functions Memory 1 2 3 Stitch patterns, letters, and numbers can be combined and stored in memory (capacity of 30 spaces). It's a long-term memory. The contents remain saved until deleted by the user. Power cuts or switching off («0») the sewing computer for a longer time will not affect the saved program. The stitch lengths or widths and the needle position can be changed at any time. Individual stitch patterns, letters or numbers can be deleted or overwritten. Memory buttons ██ use the left button 1 to scroll the memory contents backwards ██ use the center button 2 to open and close the memory ██ use the right button 3 for programming the memory and scrolling the memory contents forwards Programming Practical and Decorative Stitches Opening the memory ██ press the button 2 ██ the cursor and the available number of empty memory spaces (e.g. 30) start to blink, and «mem» appears ██ select desired stitch pattern ██ the number of the stitch pattern appears on the display ██ press the button 3 ██ the stitch is programmed ██ the number of available memory spaces appears ██ select the next stitch pattern and program as described, etc. 033301.71.04_2014-02_Manual_B330_B350_PE_B380_EN 27 28 Functions Starting to sew ██ ██ press the foot control = the sewing computer starts automatically at the beginning of a stitch pattern combination select Pattern End as well = the sewing computer stops automatically at the end of a stitch pattern combination The following special programs cannot be saved in memory: 330: No.5 No.10 No.11 No.16 Securing program Buttonhole Button sewing-on program Darning program 350: No.5 Securing program No.10-11Buttonholes No.12 Button sewing-on program No.13 Eyelet No.20 Darning program No.21 Basting stitch 380: No.5 Securing program No.10-13Buttonholes No.14 Button sewing-on program No.15 Eyelet No.22 Darning program No.23 Basting stitch Programming Alphabets and Numbers 4 5 6 Opening the memory ██ press the button 2 ██ the cursor and the available number of empty memory spaces (e.g. 30) start to blink, and «mem» appears ██ press the Alphabet button 5 to select the alphabet of your choice ██ the letter A in the alphabet of your choice appears on the display ██ use the arrow buttons 4 and 6 to scroll the alphabet ██ select letter/number ██ press the button 3 = letter/number is programmed ██ the number of available memory spaces appears ██ proceed as described to select and program more letters and/or numbers ██ when programming more than one word, select the underscore symbol (_) to program a space between the words If the stitch length and/or width of letters or numbers have been altered, the alterations will affect all of them. If you only want to alter single letters or numbers, this must be done individually. 033301.71.04_2014-02_Manual_B330_B350_PE_B380_EN Functions Corrections in Memory The contents of the Memory remain saved even when the sewing computer is disconnected from the electrical supply. They can be recalled at any time. The contents of the memory will be lost if the sewing computer is switched off without pressing the button 2 before closing the memory. 1 2 3 Overwriting individual stitch patterns, letters and numbers ██ scroll with the right 3 or left 1 button to find the stitch pattern you want to overwrite ██ select new stitch number/letter/number, new stitch length/width or needle position ██ press the right arrow button 3; the stitch pattern is overwritten Deleting individual stitch patterns, letters and/or numbers ██ scroll with the right 3 or left 1 button to find the stitch pattern you want to delete ██ press the «clr» button ██ stitch pattern/letter/number is deleted Deleting complete Memory contents ██ ██ ██ ██ press the «clr»-button, keep depressed and press the button 2 release both buttons leave memory by pressing the button 2 Memory is now completely deleted Leaving the Memory ██ ██ ██ press button 2 = contents are saved Memory is closed «mem» disappears from the display 033301.71.04_2014-02_Manual_B330_B350_PE_B380_EN 29 30 Sewing stitches - Practical stitches Practical Stitches Straight stitch All non-stretch fabrics; all straight-stitch work Gathering stitch Most types of fabric. Gathering with shirring elastic. Butted seams = butting two pressed edges and sewing together Zig-zag stitch Most fabric types; all simple zig-zag such as overcasting edges. Sewing on elastic and lace Stretch overlock Mediumweight knits, toweling and firm wovens. Overlock seams, flat joining seams Vari-overlock Primarily for fine jerseys, stretch overlock seams and hems Jersey stitch Natural, blended or synthetic fabrics and delicate knits. Visible seams and hems. Mending jersey/interlock Running stitch Most types of fabric. Mending, patching, reinforcing seams, etc. Universal stitch Firm fabrics such as felt and leather. Flat joining seams, visible seams, attaching elastic, decorative seams Securing stitch All types of fabric. Secures the beginning and end of seams sewn with straight stitch Lycra stitch All two-way stretch fabrics, flat joining seams and hems, reinforced seaming on underwear Triple straight and triple zig-zag Reinforced seams in firm, heavy fabrics Stretch stitch All stretch fabrics; open seam in sportswear Blindstitch Most types of fabric. Blind hems; shell edging on soft jerseys and fine fabrics; decorative seams Darning program Automatic darning for fine and mediumweight fabrics Double overlock All types of knit; Overlock = sew and neaten in one operation Honeycomb stitch Most types of interlock and smooth fabrics; visible seams and hems 1 2 3 4 5 6 7 8 Super stretch For super-stretch fabrics; open seam in all super-stretch fabrics 9 033301.71.04_2014-02_Manual_B330_B350_PE_B380_EN Sewing stitches - Examples of application Examples of Application Zippers Zipper foot/sole No. 4 Straight Stitch Preparation ██ baste seam closed and clean finish the seam allowance ██ baste or pin zipper in place so that fabric folded edges meet over the center of the zipper Sewing ██ open zipper a little ██ start sewing from top left ██ position the foot so the needle stitches along the edge of the zipper coils ██ stop in front of the pull (needle position down), raise the presser foot and close zipper again ██ continue to sew to the base of the zipper (needle position down) ██ turn fabric and sew across the seam (needle position down) ██ turn fabric again and sew second side of the zipper from bottom to top Variation: Sew both sides of zipper from bottom to top ██ suitable for all fabrics with nap or grain (e.g. velvet) ██ prepare zipper as described above ██ start sewing in the seam of the zipper end and sew first side from bottom to top ██ sew the second side the same way from bottom to top To sew around zipper pull close the zipper and sew up to about 2” (5cm) away from the pull ██ stop with the needle down in the fabric, raise the presser foot. Open zipper, pulling the tab below the needle; lower presser foot and continue to sew ██ Seam begin Hold thread firmly when starting to sew = pull fabric slightly to the back (fewer stitches). Zipper or fabric is thick or densely woven For even stitch formation use a 90 -100 needle. 033301.71.04_2014-02_Manual_B330_B350_PE_B380_EN 31 32 Sewing stitches - Examples of Application Darning Reverse pattern foot/sole No. 1 Automatic Buttonhole foot with slide No. 3A Darning program Quick darning of holes or worn areas Replaces threads along the lengthwise grain in all fabrics. Darning with Reverse pattern foot/sole No. 1 (auto stitch counter) ██ insert the needle in the top left of the worn area ██ sew the first vertical row and stop the sewing computer ██ press the Quick reverse button to program the length ██ complete Darning program; the sewing computer stops automatically ██ clear the program by pressing the «clr» button Move project accordingly for a wider and/or longer darning area. Darning with the Automatic buttonhole foot with slide No. 3A ██ use for small tears and damaged areas, not more than 3cm (1 1/4”) long ██ same procedure as with foot No. 1 Reinforcement Use fine fabric or (adhesive) interlining as a backing. Preparation Hoop fabric into darning ring to prevent puckering. Zig-zag Reverse pattern foot/sole No. 1 ██ ██ ██ ██ for all fabrics overcasting elastic seams decorate sewing Overcasting edges ██ guide edge of fabric into the center of the presser foot ██ do not select too wide a width or too long a stitch ██ needle goes into fabric on one side and over the edge into the air on the other side ██ the edge should lie flat and not roll ██ use a fine darning thread for lightweight fabric A B Satin stitch ██ dense, short zig-zag stitch (stitch length 0.5-0.7mm, 1/5" to 1/3") ██ use satin stitch for appliqué, embroidery, etc C A Zig-zag stitch with altered stitch width B Zig-zag stitch with altered stitch length C Edge neatened with zig-zag stitch 033301.71.04_2014-02_Manual_B330_B350_PE_B380_EN Sewing stitches - Examples of application Vari-Overlock Overlock foot/sole No. 2 Reverse pattern foot/sole No. 1 Vari-overlock stitch The Overlock foot/sole No. 2 is specifically designed for overlock stitching. The pin on the foot allows for more thread in each stitch so that the elasticity of the seam is maintained. Closed seam Stretchy seam in fine, soft knits such as silk jersey and interlock. Sewing ██ guide the open edge along the pin on the foot/sole ██ the stitch will form over the pin and over the edge of the fabric Knits and jersey Use a new Jersey needle to prevent damaging the loops. Sewing stretch fabrics If neccessary use a stretch needle (130/705H-S) = needle point slides between the fibers. Double Overlock Overlock foot/sole No. 2 Reverse pattern foot/sole No. 1 Double overlock stitch Closed seam Overlock seam in loose knits and cross seams in knits and jerseys. Sewing Guide the open edge along the pin on the foot/sole. 2 033301.71.04_2014-02_Manual_B330_B350_PE_B380_EN 33 34 Sewing stitches - Examples of application Ribbing with Overlock Stitch Overlock foot/sole No. 2 Reverse pattern foot/sole No. 1 Vari-overlock stitch For all fine cotton, synthetic and mixed fiber jersey. Wrong side of fabric Preparation ██ fold ribbing in half and press ██ with right sides together, pin and baste ribbing to neckline Sewing ██ sew Vari-overlock over the raw edge ██ guide the open edge along the pin on the foot/sole ██ the stitch will form over the pin and over the edge of the fabric Right side of fabric Needle stop down Needle stays in fabric when you stop to adjust the ribbing - great aid when sewing curves (necklines/armholes). Honeycomb Stitch Edges Reverse pattern foot/sole No. 1 Honeycomb stitch For all firm knits, especially cotton, wool, synthetic and mixed fiber jersey. Preparation Press (and baste if required) edge 1cm (3/8") to wrong side. Sewing ██ sew from the right at a foot's width from the edge ██ trim surplus fabric (wrong side) Needle stop down Needle stays in fabric when you stop to adjust the ribbing - great aid when sewing curves (necklines/armholes). 033301.71.04_2014-02_Manual_B330_B350_PE_B380_EN Sewing stitches - Examples of application Blind hem Blindstitch foot/sole No. 5 Blindstitch For invisible hems in medium to heavy cotton, wool and blended fabrics. Preparation ██ finish raw edges ██ fold the hem and baste or pin in place ██ fold the fabric back over the right side of the fabric to expose the finished lower edge (see drawing) ██ place the work under the presser foot with the guide positioned against the folded-back fabric wrong side of fabric Sewing ██ the needle should just pierce the edge of the fold (as when hand blindstitching) ██ adjust the stitch width to suit the fabric thickness ██ after sewing about 4” (10cm), check both sides of fabric and adjust width again if necessary ██ the metal guide on the sole of the blindstitch sole can be adjusted sideways by turning the screw on the right 5 Fine stitch-width adjustment Guide the folded edge evenly along the metal guide on the foot = even depth. wrong side of fabric right side of fabric Securing Stitch Reverse pattern foot/sole No. 1 Securing program ██ ██ for all fabrics secures beginning and end of seam Sewing long seams ██ quicker securing at beginning and end of seam ██ even securing by defined stitch count Sew begin ██ the sewing computer secures seam automatically (5 stitches forward, 5 stitches reverse) ██ then it continues with straight-stitch forward Ending the seam ██ press the Quick reverse button on head frame; the sewing computer secures automatically (5 stitches reverse, 5 stitches forward) ██ the sewing computer stops automatically when securing is complete 033301.71.04_2014-02_Manual_B330_B350_PE_B380_EN 35 36 Sewing stitches - Buttonholes Buttonhole Summary Standard buttonhole Fine to mediumweight woven fabrics; blouses, shirts, trousers, bedlinens, etc. Straight-stitch buttonhole Stay-stitch program for bound buttonholes (foot no. 3A) or pocket openings (foot no. 3) Stretch buttonhole All stretch fabrics made from cotton, wool, silk and synthetic fibers Button sewing-on program For buttons with 2 and 4 holes Keyhole buttonhole Heavy weight, non-stretch fabrics. Jackets, coats, trousers, leisure wear, etc. Straight-stitch eyelet Openings for cords and narrow ribbons, decorative work Everything you need to know about buttonholes Buttonholes are not only practical closures, they can also be used to decorative effect Select the buttonhole of your choice; the following appears on the screen: 1 Buttonhole number 2 Buttonhole symbol (blinks) 3 Presser foot indicator 2 1 3 A Thread tension for sewing buttonholes ██ thread the bobbin thread through the finger A of the bobbin case = the bobbin thread tension is a little tighter ██ this gives the beads on the right side of the fabric a slightly rounded appearance ██ the buttonhole looks more attractive ██ gimp reinforces buttonholes and enhances their appearance (page 38) 033301.71.04_2014-02_Manual_B330_B350_PE_B380_EN Sewing stitches - Buttonholes Marking the length of manual buttonholes ██ mark the buttonhole length in the desired position ██ use Buttonhole foot/sole no. 3 */**/*** Marking the length of automatic buttonholes ██ mark the length of just one buttonhole ██ after sewing the first buttonhole, the length for all subsequent buttonholes is automatically programmed ██ mark only the beginning of all subsequent buttonholes ██ use Automatic buttonhole foot with slide no. 3A Marking the length of keyhole buttonholes ██ mark the bead length only ██ the correct length eye will be added when the buttonhole is sewn Test sewing ██ always sew a test sample on the fabric with stabilizer you intend to use ██ select the buttonhole type you intend to use ██ sew the buttonhole in the same direction on the fabric (horizontal or vertical, with or against the grain) ██ cut the buttonhole open ██ push the button through ██ adjust the buttonhole length if necessary To adjust the bead width ██ alter the stitch width Altering the stitch length ██ stitch length adjustments affect both buttonhole beads (spacing between the stitches) ██ reprogram the buttonhole length after changing the stitch length Balance for automatic and manual buttonholes Any balance alterations to the manual and auto-length buttonholes affect both beads identically because they are sewn in the same direction. If a buttonhole is sewn at right angles to the fabric edge/fold, we recommend the use of the height compensating plates for buttonholes (available as optional accessory). Place the plates from the back between fabric and bottom of slide foot up to the thick part of the fabric and push to front. When all buttonholes have been sewn, return balance to the normal setting! 033301.71.04_2014-02_Manual_B330_B350_PE_B380_EN 37 38 Sewing stitches - Buttonholes Corded Buttonhole Cording ██ use cording to reinforce buttonholes and enhance their appearance ██ the loop of the cord should be at the end of the buttonhole that is most subject to wear = where button is sewn on ██ position the work accordingly Ideal cords ██ Perle cotton no. 8 ██ strong hand-sewing thread ██ fine crochet yarn Hooking the cord in the buttonhole foot with slide no. 3A ██ insert the needle at the beginning of the buttonhole ██ raise the presser foot ██ guide the cord under the foot to the right ██ hook the cord over the pin at the back of the foot ██ guide the cord back to the front under the foot to the left ██ pull the cord ends into the slits Sewing ██ sew the buttonhole in the usual manner, do not hold the cord ██ the buttonhole will form over the cord, covering it Hooking the cord onto presser foot no. 3 or buttonhole sole no. 3 */**/*** ██ insert the needle at the beginning of the buttonhole ██ raise the presser foot ██ hook the cord over the center pin on the front of the foot ██ place both ends of the cord in their respective grooves on the sole of the foot and pull them to the back ██ lower the presser foot Sewing ██ sew the buttonhole in the usual manner, do not hold the cord ██ the buttonhole will form over the cord, covering it Securing the cord ██ pull the cord through the buttonhole until the loop disappears into the end of it ██ pull the ends of the cord through to wrong side of the fabric, using a hand stitching-needle ██ knot or secure with stitches It might be useful to secure the bartack with an extra pin when working short buttonholes. Cutting buttonholes open with the seam ripper ██ using the seam ripper, cut from the ends towards the middle Buttonhole cutter and block (special accessory) ██ place the fabric on the wood ██ place the cutter in the centre of the buttonhole ██ press down on the cutter with your hand or a hammer 033301.71.04_2014-02_Manual_B330_B350_PE_B380_EN Sewing stitches - Buttonholes Automatic Standard Buttonhole with Auto-Length Automatic buttonhole foot with slide No. 3A Automatic standard buttonhole The lens on automatic buttonhole foot 3A automatically registers the length of the buttonhole for exact duplication. ██ the active step blinks on the screen When any automatic buttonhole is selected, presser foot no. 3 is indicated on the screen. The slide foot must lie perfectly flat on the fabric! If the slide foot rests on a seam allowance, the length cannot be measured accurately. Programming the standard buttonhole 1. sew the first bead forwards, stop the sewing computer ██ press the Quick reverse button «auto» and the presser foot no. 3A appear on the display = buttonhole length is programmed. 1 2 3 4 5 the sewing computer sews the following automatically: 2. straight stitches in reverse 3. the first bartack 4. the second bead forwards 5. the second bartack and securing stitches ██ the sewing computer stops and returns automatically to buttonhole begin Auto-buttonhole ██ all subsequent buttonholes will be sewn to exactly the same length (no need to press the Quick reverse button) ██ clear the program by pressing the «clr» button ██ the programmed buttonhole can be saved in the long-term memory (refer to page 42) Sewing speed sew at moderate speed for best results ██ sew all buttonholes at the same speed for a consistent bead density ██ 033301.71.04_2014-02_Manual_B330_B350_PE_B380_EN 39 40 Sewing stitches - Buttonholes Automatic Keyhole Buttonhole with Auto-Length Automatic buttonhole foot with slide No. 3A Automatic keyhole buttonhole Programming the buttonhole 2 3 4 1 1. sew the straight stitch forward, stop the sewing computer ██ press the Quick reverse button «auto» and presser foot no. 3A appear on the screen = buttonhole length is programmed. 5 2. 3. 4. 5. 6. 6 the sewing computer automatically sews the eye the first bead in reverse straight stitches forwards the second bead in reverse the bartack and securing stitches ██ the sewing computer stops and returns automatically to buttonhole begin Auto-buttonhole ██ all subsequent buttonholes will be sewn to exactly the same length (no need to press the Quick reverse button) ██ clear the program by pressing the «clr» button ██ the programmed buttonhole can be saved in the long-term memory (refer to page 42) Exact duplicates The auto function ensures that each buttonhole will be exactly the same length as the previous one. Double-sewn keyhole buttonholes keyhole buttonholes can be sewn twice on thick fabrics - use a longer stitch length for the first run ██ after sewing the first buttonhole, do not move the work ██ reduce the stitch length and tap the foot control once to begin sewing again ██ 033301.71.04_2014-02_Manual_B330_B350_PE_B380_EN Sewing stitches - Buttonholes Manual buttonhole (all types) Sewing buttonholes manually is ideal if you only need to sew one; also for repairing existing buttonholes. The number of steps depends on the type of buttonhole. Manual buttonholes cannot be saved. Buttonhole foot/sole No. 3 */**/*** Preparation ██ select the desired buttonhole ██ display shows: ██ the number of the selected buttonhole ██ Buttonhole foot no. 3 ██ the buttonhole symbol (the first step blinks on the display) ██ insert the lower thread in the finger of the bobbin case Sewing a manual standard buttonhole 1. sew the bead up to the end of the length marking ██ stop the sewing computer ██ press the Quick reverse button 2. sew reverse straight-stitch, stop the sewing computer at the first stitch of the bead (buttonhole begin) ██ press the Quick reverse button 3. sew the top bartack and the second bead, stop the sewing computer ██ press the Quick reverse button 4. sew the bottom bartack and securing stitches 2 1 4 3 1 2 3 4 5 Manual keyhole buttonhole 1. sew straight-stitch forwards, stop the sewing computer ██ press the Quick reverse button 2. sew the eye and the first bead in reverse, stop the sewing computer at the first stitch of the bead (buttonhole begin) ██ press the Quick reverse button 3. sew straight-stitch forwards and stop the sewing computer at the keyhole ██ press the Quick reverse button 4. sew the second bead in reverse, stop the sewing computer at the first stitch of the bead (buttonhole begin) ██ press the Quick reverse button 5. sew bartack and securing stitches Sew both beads at the same speed. 033301.71.04_2014-02_Manual_B330_B350_PE_B380_EN 41 42 Sewing stitches - Buttonholes Buttonhole in Long-Term Memory Saving programmed buttonholes in long-term memory ██ after programming press the button 3 ██ the buttonhole is now saved in long term memory 1 2 3 Recalling saved buttonhole Programmed saved buttonholes can be opened for re-use even after the sewing computer has been disconnected. ██ select the desired buttonhole type ██ press the button 2 ██ sew the programmed buttonhole ██ only one length per buttonhole can be saved. Saving a new length with the button 3 will overwrite the previously saved buttonhole length Button Sewing-On Program Darning foot No. 9 */**/*** Button sew-on foot No. 18 */**/*** Sews buttons with 2 or 4 holes. Sewing on buttons ██ buttons sewn on for decorative purposes only are stitched without a thread shank ██ the length of the shank (= thread between button and fabric) can be made shorter or longer as required with foot no. 18 Sewing on buttons with Darning foot no. 9 ██ select Button sew-on program ██ check distances between holes with the handwheel and adjust stitch width if necessary ██ sew the securing stitches; hold the threads when starting to sew ██ sew program ██ sewing computer stops automatically when program is completed and is ready for the next button Beginning and ending threads ██ the threads are secured and can be trimmed For secure results ██ pull both bobbin thread ends until the ends of the upper thread are visible on the wrong side (knot if required) ██ trim thread ends Sewing on buttons with foot no. 18 set the shank length with the screw on the foot ██ select Button sewing-on program and continue as with foot no. 9 ██ Beginning and ending threads ██ the threads are secured and can be trimmed For secure results ██ pull both bobbin thread ends until the ends of the upper thread are visible on the wrong side (knot if required) ██ trim thread ends Sewing 4-hole button sew the front holes ██ carefully move the button forward ██ sew the back holes with the same program ██ 033301.71.04_2014-02_Manual_B330_B350_PE_B380_EN Sewing stitches - Practical-/Quiltstitch Basting Stitch Darning foot No. 9 */**/*** Basting stitch ██ ██ ██ ██ for all work which requires a very long stitch for basting seams, hems, quilts, etc. temporary joining easy to remove Preparation ██ lower the feed-dog ██ pin work at a right angle to basting direction to prevent the layers from slipping Basting ██ position work under the presser foot and sew one stitch; hold threads when starting to sew ██ pull work from behind to the required length of the stitch ██ sew one stitch and repeat the procedure Securing/fixing the thread Sew a few short basting stitches at the beginning and end of a seam. Thread Use a fine darning thread for basting as it is easier to remove. Handlook Quilting Stitch Reverse pattern foot/sole No. 1 Handlook quilting stitch Suitable for all fabrics and work which should look «hand sewn». Test sewing ██ the bobbin thread must come through to the right side ██ 1 stitch is visible (bobbin thread) ██ 1 stitch is invisible (monofilament) = hand-look effect Upper thread tension Depending on the fabric = increase the tension (6-9). Balance Adjust stitch with the Balance if necessary. Perfect corners activate Pattern end and Needle stop down and pivot the work ██ when pivoting make sure that the fabric does not become distorted ██ Monofilament breaks ██ sew more slowly ██ reduce upper thread tension slightly 033301.71.04_2014-02_Manual_B330_B350_PE_B380_EN 43 44 Cleaning, maintenance Cleaning, Maintenance Cleaning the screen and the sewing computer Wipe with a damp cloth. Feed-dog area Clean the sewing computer after every use - remove any lint from under the stitch plate and in the hook area. ██ power switch to «0» (off) ██ pull out plug from electrical outlet ██ remove presser foot and needle ██ open the free arm cover ██ press the stitch plate down at the back right corner, lift and remove ██ clean the area with the lint brush ██ replace the stitch plate Cleaning the hook ██ power switch to «0» (off) ██ pull out plug from electrical outlet ██ remove the bobbin case ██ push the release lever to the left ██ let down the locking lever and the black hook race cover ██ remove the hook ██ clean the hook race with a cloth or brush, never use a sharp instrument ██ replace the hook, turning the handwheel if necessary until the hook driver is on the left ██ close the hook race cover and secure with the locking lever, the locking pin must engage ██ check by turning the handwheel ██ insert the bobbin case Lubricating ██ power switch to «0» (off) ██ pull out plug from electrical outlet ██ squeeze 1 or 2 drops of oil into the hook race ██ run the sewing computer for a short time without thread to prevent oil soiling your work Disconnect plug from the socket before cleaning or lubricating! Never use alcohol, petrol, white spirit or any type of solvent to clean the sewing computer! 033301.71.04_2014-02_Manual_B330_B350_PE_B380_EN Troubleshooting Troubleshooting In most cases you will be able to identify and remedy faults by checking the following. Check whether: ██ the upper and lower threads are threaded correctly ██ the needle is inserted correctly with the flat side to the back ██ the needle size is correct - check the needle/thread table page 22 ██ the needle tip and shaft are undamaged ██ the sewing computer is clean - brush out any thread lint ██ the hook race is clean ██ any threads are trapped between the tension discs or under the bobbin case spring Fault Uneven stitch formation Cause ██ ██ ██ ██ ██ ██ Skipped stitches ██ ██ ██ ██ Upper thread breaks ██ ██ ██ ██ Lower thread breaks ██ ██ ██ Needle breaks ██ ██ ██ ██ Thread is caught in the area of the take-up lever Faulty stitching ██ ██ Upper thread too tight/too slack Needle blunt or bent, poor-quality needle Needle inserted incorrectly Poor-quality thread Needle/thread combination is incorrect Incorrectly threaded Incorrect needle system Needle blunt or bent, poor-quality needle Needle inserted incorrectly Incorrect needle point Upper thread tension too tight Incorrectly threaded Poor-quality or old thread Stitch plate or hook tip damaged Lower thread tension too tight Stitch hole in the stitch plate has been damaged Needle blunt or bent Needle not correctly inserted Fabric was pulled Fabric was pushed when thick material used Poor-quality thread, unevenly wound or knotted Upper thread breaks Remnants of thread between the tension discs ██ Incorrect threading Remnants of thread under the bobbin case spring ██ Sewing computer fails to run or runs slowly ██ Sewing computer Repair ██ ██ ██ ██ ██ ██ ██ ██ ██ ██ ██ ██ ██ ██ ██ ██ ██ ██ ██ ██ ██ Reduce/increase upper thread tension Use new, high-quality needle (BERNINA) The flat side of the shank must be to the back Use quality threads (Isacord, Mettler, Gütermann) Match the needle to the thread size Check upper thread threading path/lower thread threading path Use needle system 130/705 H Use new, good quality needles Insert needle as far up as it will go Match the needle type to the fabric Reduce upper thread tension Check upper thread threading path Use high-quality thread Have sewing computer checked by a specialized dealer Reduce lower thread tension Have sewing computer checked by a specialized dealer Use new needle Tighten the needle clamp screw Do not pull the fabric during sewing Use the correct presser foot for thick material (e.g. Jeans foot no. 8, use height compensating tool when sewing over a thick seam Use high-quality thread If the lower thread breaks and the thread is trapped in the area of the take-up lever, proceed as follows: ██ power switch to «0» (off) ██ remove the screw on the headframe with the angular Torx button ██ turn headframe cover slightly to the left, then slide it upwards ██ remove remnants of thread ██ attach headframe and retighten screw ██ ██ ██ ██ ██ ██ Fold a piece of thin fabric and slide the folded edge (not the raw edges) between the thread tension discs, moving the fabric back and forth to clean the right and left side of the thread tension Check upper and lower thread Carefully remove any thread remnants from under the spring Plug not properly inserted Power switch to «0» (off) Sewing computer has been standing in a cold room 033301.71.04_2014-02_Manual_B330_B350_PE_B380_EN 45 46 Stitch patterns Stitch-Pattern Summary BERNINA 330 11 12 13 14 15 16 17 18-37 38-40 Button sewing-on program Gathering stitch Stretch overlock Universal stitch Lycra stitch Darning program Honeycomb stitch Decorative stitches Quilting stitches 11 12 13 14 15 16 17 18 19 20 21 22 23-74 75-85 Keyhole buttonhole Button sewing-on program Straight-stitch eyelet Gathering stitch Stretch overlock Jersey stitch Universal stitch Lycra stitch Stretch stitch Darning program Basting stitch Honeycomb stitch Decorative stitches Quilting stitches BERNINA 350/350 Patchwork Edition BERNINA 380 11 Stretch buttonhole 12 Keyhole buttonhole 13 Straight-stitch buttonhole 14 Button sewing-on program 15 Straight-stitch eyelet 16 Gathering stitch 17 Stretch overlock 18 Jersey stitch 19 Universal stitch 20 Lycra stitch 21 Stretch stitch 22 Darning program 23 Basting stitch 24 Honeycomb stitch 25-103 Decorative stitches 104-115Quilting stitches 033301.71.04_2014-02_Manual_B330_B350_PE_B380_EN Index 47 Index A Accessory5-7 Adjusting the stitch width/length 24 Alphabets/characters ██ Changing the size of lettering 28 ██ Combining28 ██ In long-term memory 42 ██ Selecting 9, 25, 28 ██ Sewing28 Automatic Buttonhole ██ Foot with slide 3A 6 ██ Programming39-40 Automatic functions ██ Darning32 ██ Needle stopp 9, 25 ██ Pattern end 9, 25 B Balance19 ██ Buttonholes 19, 37 ██ Decorative stitches 19 Basting43 Blind stitch ██ Practical stitch 30, 35 ██ Presser foot 6 Bobbin ██ Removing/inserting the bobbin 12 ██ Winding12 Bobbin case ██ Removing/inserting13 Button sew-on program 42 Buttonhole ██ 4-steps41 ██ 5-steps41 ██ Automatic39-40 ██ Balance37 ██ Buttonhole type 36 ██ Cutting open 38 ██ Important information 36-37 ██ In long-term 42 ██ Manual41 ██ Presser feet 6 ██ Programming39 ██ Stabilizers38 C Carrying handle Change Letter size in alphabets ██ Programmed buttonhole 42 Sewing speed 10, 25 ██ Stitch patterns 27 ██ Stitch width and length 9, 24, 28 ██ Thread tension 9, 18, 36 Cleaning44 ██ 9 ██ Combining ██ Alphabets28 ██ Correcting29 ██ Deleting29 ██ Practical-/decorative stitches 27 ██ Saving 27-28 Contents4 D Darning 30, 32 Decorative Stitch patterns 46 ██ Summary46 Deleting ██ clr25 ██ Combinations29 ██ Stitches29 Details ██ Accessory5 ██ Sewing computer 8-9 Display26 ██ Overview26 Double and triple needles ██ For decorative stitching ██ Threading double and triple needles 23 15 E External function buttons 9, 24-25 F Fabric ██ Feed20 ██ Needle and thread 22 Fabric feed 20 Feed-dog ██ Position ██ Raising/lowering the feed-dog 20 20 Foot control ██ Connection9 Free Hand System (FHS) 5, 9, 11 28 033301.71.04_2014-02_Manual_B330_B350_PE_B380_EN 48 Index H O Handwheel9 Hem Blind hem ██ High compensation tool 35 5, 21 I Inserting a bobbin Overlock ██ Overlock foot 6 ██ Seam33-34 ██ Stitches30 Overwriting29 P 12 L LED sewing light 10 Lettering size 28 Mirror-image function ██ Left/right 25 Patchwork ██ Special Feet Permanent reverse Sewing 6 25 Power cable ██ Connection9 Long Term Memory 27, 42 Practical stitches ██ Adjusting individual 24 ██ Lubricating44 Brief Description 30 ██ Overview30 M Preparing and setting up ██ Main power switch 9 The sewing computer 8-23 Maintenance and troubleshooting 44-45 Presser foot ██ ██ Cleaning44 Changing the presser foot 17 ██ ██ Maintenance44 Display26 ██ ██ Troubleshooting45 Presser feet summary 6 ██ Raise/lower the presser foot 9, 11 Manual threading ██ Double and triple needles 15 Pre-tension9 ██ Lower thread 12 ██ Upper thread 14 Q Memory Quilting ██ ██ Modifications29 Stitches 43, 46 ██ Opening 27, 28 ██ Stitch combinations 27 R Reverse sewing ██ Button ██ Permanent reverse sewing N Needle ██ Altering the needle position 24 ██ Changing the needle 16 ██ Double and triple needles 15, 23 ██ In standard accessory 5 ██ Information22 ██ Needle stop up/down 25 ██ Needle summary 23 ██ Needle/thread combination 22 ██ Position button 24 ██ Threading14 Needle clamp 9 Running stitch 9, 25 25 30 S Safety instructions 2 Saving ██ Function button 25 ██ Saving stitch pattern combinations 27, 28 Select ██ Alphabets 9, 25, 28 ██ Buttonholes 36, 46 ██ Practical stitches 30, 46 ██ Quilting stitches 46 ██ Stitch patterns 24, 46 Servicing44 033301.71.04_2014-02_Manual_B330_B350_PE_B380_EN Index Sewing ██ Accessory5 ██ Balance19 ██ Basic settings 26 ██ Content4 ██ Function buttons 24-25 ██ Reverse sewing/Backstepping 25 ██ Sewing corners 21 ██ Sewing pattern combinations 28 ██ Stitchcategory46 ██ With height compensation plates 21 Sewing computer cover Sewing light LED Sewing speed 5 10 10, 25 Single pattern ██ Changing in pattern combination 29 ██ Deleting29 ██ Securing25 ██ Selection by number 24 Slide on table 5, 9, 10 Speed control Spool discs 9, 25 5 Spool holder 9, 11 Start-Stop Button 9, 25 Stitch pattern ██ Buttonholes 36, 46 ██ Decorative stitches 46 ██ Display26 ██ Functions25 ██ Overview46 ██ Practical stitches 30, 46 ██ Quilt stitches 46 Stitch pattern selection ██ By number 24 Stitch plate ██ Attaching/removing 18 Stitchcategory46 Straight stitch Thread cutter ██ For bobbin thread ██ For bobbin winder ██ On Head Frame Thread path/Thread guides 9 9, 14 Thread tension 9, 18 Triple Straight Stitch 15, 23 30 Troubleshooting45 U Upper thread ██ Breaks45 ██ Tension18 ██ Threading14 W Winder ██ Pre-tension9 ██ Switching on/off 12 Z Zig-zag stitch Zipper ██ Inserting a zipper ██ Zipper foot 30 Summary ██ Screen26 ██ Sewing computer 8-9 ██ Sewing functions 25 ██ Stitch patterns 46 T Thread ██ General facts ██ Matching fabric, thread and needle 13 9, 12 9, 16 Thread take up cover Triple Needle 49 22 22 033301.71.04_2014-02_Manual_B330_B350_PE_B380_EN 30, 32 31 6 50 Imprint Text Herbert Stolz Graphics www.sculpt.ch Fotos Patrice Heilmann, CH-Winterthur Typesetting, Layout Susanne Ribi/Erika Vollenweider-Czibulya Copyright 2009 BERNINA International AG, CH-Steckborn All rights reserved For technical and product improvement reasons, the sewing computer's features, parts and accessory are subject to unannounced changes and alterations at any time. The accessory included can differ from country to country. 2014/02 EN 033301.71.04 033301.71.04_2014-02_Manual_B330_B350_PE_B380_EN