1
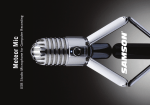
Condenser Microphone
PROFESSIONAL MICROPHONES
CL2
Table of Contents
Introduction. . . . . . . . . . . . . . . . . . . . . . . . . . . . . . . . . . . . . . . . . . . . . . . . . . . . . . . 1
Features. . . . . . . . . . . . . . . . . . . . . . . . . . . . . . . . . . . . . . . . . . . . . . . . . . . . . . . . . . . 2
Operating the CL2. . . . . . . . . . . . . . . . . . . . . . . . . . . . . . . . . . . . . . . . . . . . . . 3 - 4
CL2 Polar Characteristics . . . . . . . . . . . . . . . . . . . . . . . . . . . . . . . . . . . . . . . . . . . 4
Operating the CL2. . . . . . . . . . . . . . . . . . . . . . . . . . . . . . . . . . . . . . . . . . . . . . . . . 5
Changing the Capsule and Pick-up Pattern . . . . . . . . . . . . . . . . . . . . . . . . . 5
P-Popping. . . . . . . . . . . . . . . . . . . . . . . . . . . . . . . . . . . . . . . . . . . . . . . . . . . . . . . . . 5
Operating the CL2. . . . . . . . . . . . . . . . . . . . . . . . . . . . . . . . . . . . . . . . . . . . . . . . . 6
CL2 Applications Notes . . . . . . . . . . . . . . . . . . . . . . . . . . . . . . . . . . . . . . . . . . . . 7
Wiring Guide . . . . . . . . . . . . . . . . . . . . . . . . . . . . . . . . . . . . . . . . . . . . . . . . . . . . . . 8
Specifications. . . . . . . . . . . . . . . . . . . . . . . . . . . . . . . . . . . . . . . . . . . . . . . . . . . . . . 9
Copyright 2006 Samson Technologies Corp.
Printed October, 2006 v1.1
Samson Technologies Corp.
45 Gilpin Avenue
Hauppauge, New York 11788-8816
Phone: 1-800-3-SAMSON (1-800-372-6766)
Fax: 631-784-2201
www.samsontech.com
Introduction
Thank you for purchasing the CL2 Condenser Microphone, stereo matched
pair kit from Samson Audio. Ideal for a variety of miking applications from
vocals to instruments, ensembles to soloist, to just about any sound source
that needs to be amplified or recorded, the CL2 condenser microphone
brings a high level of accuracy and audio performance. The CL2 is a pencil
style, externally biased, true capacitor (condenser) pressure gradient microphone that excels in both live performance and recording applications. For
added versatility, the CL2 matched pair kit comes with interchangeable omni
and cardioid capsules featuring three micron, gold-sputtered diaphragms and
precision-tuned back plates. Equipped with a linear frequency response for
superior reproduction, the microphone has also been designed to withstand
high sound pressure level capabilities of 141 dB in cardioid and 138 db in
omni. The microphone also features a built-in selectable High Pass Filter and
10dB pad. Plus, the CL2 matched pair kit includes a complete set of useful
accessories for each microphone. Two 360 degree suspension mounts, two
micro-perforated stainless steel pop filters, two windscreens, two microphone
clips and a twin mic holder for stereo miking, fit neatly in the included aluminum carry case protecting the microphones while in storage, in the studio or
on the road with the band.
Should your microphone ever require servicing, a Return Authorization number (RA) must be obtained before shipping your unit to Samson. Without this
number, the unit will not be accepted. Please call Samson at 1-800-3SAMSON
(1-800-372-6766) for a Return Authorization number prior to shipping your
unit. Please retain the original packing materials and if possible return the
unit in the original carton and packing materials.
Features
CL2 Features
The Samson CL2 matched pair kit has been produced using state-of-the-art microphone technology and is engineered to the finest detail. Here are some of its main
features:
•Extended range linear frequency response for optimum reproduction and exceptionally clear, crisp sound with great transient response. The pair of CL2 microphones of been matched within 1.5 dB.
• Ultra sensitive, low mass capsules featuring three micron, gold-sputtered diaphragms capture up all of the nuances of any performance.
• The CL2 matched pair kit comes with interchangeable capsules for each microphone allowing you to configure the microphones for different response patterns.
The Cardioid polar pattern rejects signals not originating directly in front of the
mic capsule minimizing feedback problems and providing increased separation. The Omni polar pattern picks sounds for all directions producing a natural
response that’s free from proximity effect.
• High SPL capability of 141 db (cardioid) and 138 db (omni), lending itself to a
wide range of miking situations like brass percussion.
• Special shock-mounted mic holder is included to minimize noise and provide
additional protection.
• The CL2 matched pair kit comes with two micro-perforated pop filters that help
eliminate annoying "p-popping".
• The included foam wind screen can be fitted to greatly reduce turbulent noise
when used in an outdoor environment.
• Lightweight and compact, the CL2 can be mounted on any standard microphone
stand using the included shock-mount or mic clip.
• The CL2 matched pair kit also comes with a twin mic mount for stereo miking
applications.
• Rugged brass case construction ensures reliable performance in even the most
demanding environments.
• Gold plated XLR Connector provide long-lasting reliable connections.
• Included foam-lined impact resistant aluminum carrying case for convenience
when transporting two CL2 microphones to or from studios to venues.
Operating the CL2
Powering the CL2
The CL2 is a condenser microphone and therefore needs to be operated by connecting
a phantom power supply. Phantom power is standard on most quality mixers, outboard
mic-pres and hard disk recorders. If necessary, an external phantom supply (like the S
phantom by Samson Audio) can also be used. The CL2 receives the phantom power
directly from a mic cable when connected to a mixer or other microphone input that
includes a phantom supply. The power is actually sent OUT of the microphone INPUT,
riding silently along with the audio signal. (Fairly mysterious, eh?) Most mixers have a
switch to engage the phantom power so be sure to check that the phantom power is
on.
Setting Up the Signal Level
When connecting the CL2 to a mixer or recorder input, be sure that the input is of
microphone level. Also, be sure that the phantom power is engaged as explained in the
previous section “Powering the CL2”. Most mixers and recorders of reasonable quality
will offer a microphone input with mic trim (usually called Trim or Gain) control. The
purpose of the mic trim control is to optimize the amount of good signal to any noise
associated with the mixers electronics. A good mic pre with trim also will have a PEAK
or CLIP LED. To set a good level on the mic, set the CL2 up in front of the desired sound
source and slowly raise the mic trim control until you see the PEAK LED light up. Then,
turn the mix trim control down until the LED does not light any more. On most mixers,
the ideal setting is that the trim control is turned up as much as possible without lighting the PEAK LED. If you try turning the Gain control all the way down, and the PEAK
light is still lighting, try using the CL2’s PAD as explained in the following section.
Using the PAD Switch
The CL2 includes a PAD switch, which you can use to lower the input sensitivity of the
microphone. When the PAD switch is set at the 0dB position the PAD is bypassed and
there is no effect on the signal. When the PAD switch is set to the –10dB position, the
microphone’s input sensitivity will be lowered by 10dB. You can use the PAD when you
are miking high SPL (Sound Pressure Level), or loud, sound sources.
Using the Hi-Pass Filter
The CL2 offers a user selectable hi-pass (low-cut) filter, which you can use to eliminate
any unwanted low frequency reproduction. When the Hi-pass Filter is set to the “flat”
(indicated by the straight line) position, there is no effect on the signal. When the Hipass switch is set to the “roll-off” position (indicated with the angled line), a 12dB per
octave low-cut at 80Hz is applied to the signal. This can be extremely useful for removing low frequency stage rumble, wind noise during outdoor use, and filtering out lows
from drums when used as an overhead cymbal microphone on a drum kit.
Microphone Placement
In order to maximize the sound quality, you must pay careful attention to the placement
of your CL2 and how it is positioned for the instrument or vocalist that you are miking.
All uni-directional or cardioid microphones exhibit a phenomenon known as “proximity
effect.” Very simply put, proximity effect is a resulting change in the frequency response
of a microphone based on the position of the mic capsule relative to the sound source.
Specifically, when you point a cardioid mic directly at the sound source (on axis) you
will get the best frequency response, however when you start pointing the microphone
slightly away (off axis) you will notice the low frequency response dropping off and the
microphone will start to sound thinner.
Operating the CL2
CL2 Polar Characteristics
Every microphone has a characteristic polar pattern that determines how well it
accepts or rejects signal coming from various areas around the microphone. For example, bi-directional or figure-eight microphones pick up directly from the front and
back while rejecting the signal at the sides and omnidirectional microphones accept
all signals regardless of where those signals originate (in front of the mic, behind it, to
the side, etc.). In contrast, directional cardioid mics are specifically designed to accept
mostly signal coming from directly in front, and to reject signal coming from behind or
from the side. The CL2 matched pair kit comes complete with both cardioid and omni
capsules for each microphone adding to the versatility of the microphone kit. Below is
a description of the Cardioid and Omni pick-up patterns and how they may be useful
in different applications.
Note: For information in changing the microphone capsule, see the section Changing the
CL2 Capsules and Patterns on page 5 in this manual
Cardioid
While Omni and Bi-directional microphones are very useful for a variety of specialty
applications, the majority of miking situations in recording and live sound require
uni-directional or cardioid microphones. The uni-directional pick-up pattern allows
for better separation of instruments in the studio and more control over feedback in
live sound reinforcement. To select the Cardioid pickup pattern, choose the Cardioid
capsule, indicated by engraved the “heart shaped” icon. When positioned correctly,
the cardioid pickup pattern allows you to pick up more of the sound you want and
less of the sound you don’t want. In live sound situations, the polar pattern also determines how prone a particular microphone is to inducing feedback. Feedback is that
characteristic nasty howling sound that occurs when a mic is placed too close to a
loudspeaker—the signal from the loudspeaker is fed into the mic, then into the loudspeaker, then into the mic, over and over again until an oscillating tone is generated.
The cardioid pattern utilized by the CL2 is so good at rejecting signal not coming from
directly in front of the microphone, you’ll find that use of the CL2 greatly minimizes
feedback problems.
Omni
Omni, or omni-directional, microphones pick up sound from all directions. To select
the Omni pickup pattern, choose the Omni capsule, indicated by engraved the “O”
icon. You can use the omni pickup pattern if you want to capture the ambient sound
and natural reverb in a room where an instrument or voice is being recorded. The
Omni mode is also great for recording ensemble performances from groups of vocals,
brass, woodwind and other instruments with the artists facing each other in a circle
around the microphone. As an added benefit, the omni pattern is the least susceptible
to the proximity effect. This can be extremely useful when recording artists who have
a tendency to move their instrument, including their voice, around the microphone
while performing. In these situations, using a cardioid pattern can result in the frequency response changing tremendously with just a few inches of movement resulting in a recorded track with the lows moving up and down in volume. Using the omni
pick up pattern can help control these tricky miking situations, allowing you to capture
the best performance without inhibiting the talent by forcing them to try to stay in a
fixed position.
Operating the CL2
Changing the Capsule and Pick-up Pattern
Changing the Capsule is a simple procedure,
however special care should be taken when
handling the capsule.
Follow these instructions carefully:
1. If the microphone is plugged in, turn off
the phantom power and disconnect the
microphone from its cable.
2. Carefully unscrew the currently installed
capsule by rotating it to the left or counterclockwise. (Figure 1) Place the capsule you
removed in the case for safe storage.
3.Carefully align the replacement capsule
and screw in place by rotating it in a right
or clockwise direction. (Figure 2)
IMPORTANTNOTE: Be careful not to cross
thread or over tighten the capsule when
screwing on.
CL2
4.Once the capsule is fully screwed down,
the microphone is ready to operate. (Figure
3.)
P-Popping
P-Popping is that annoying pop that you can
get when the microphone diaphragm gets a
blast of air from a vocalist pronouncing words
with the letter “P” included. There are a few
ways to deal with the problem including using
an external pop filter. Some famous engineers
have relied on an old nylon stocking over a
bent clothes hanger, which actually works very
well. You can also try placing the microphone
slightly off axis (on a slight angle) from the
vocalist. This can often solve the problem
without using an external pop filter. However,
for a more reliable solution, the CL2 matched
pair kit comes with two micro perforated pop
filters which are extremely useful in reducing
p-popping. For outdoor use you may find the
included foam windscreen useful for reducing
the turbulent noise.
CL2
Operating the CL2
Stand Mounting the CL2
The CL2 can be mounted to any standard microphone stand using the included mic
clip or shock-mounts . Be aware of a phenomenon called the proximity effect which
causes a noticeable increase in low frequencies (bass response) when a microphone
is close to the audio source. This can have positive impact—for example, it will cause
your instrument or voice to sound much fuller when you sing close to the mic than
when you mic it at a distance. The key to developing the best mic technique is experimentation, along with awareness of the general principle that, the closer your CL2 is to
a signal source, the greater the bass response.
Installing the SP-02 Shockmount
The CL2 matched kit comes with two shockmounts, which you can use to greatly reduce
any noise transmitted through the mic stand.
The shockmounts are especial useful in
reducing the problems caused by a boomy
soundstage, for example when miking
overhead cymbals, or even in the studio with
talent that likes to move a lot on a floor that
may not be a solid as it should be.
L2
C
•To use the CL2 with their included
shockmounts, screw the shockmount on
a standard mic stand. If you are using a US
standard 5/8-inch mic stand, remove the
Euro adapter by unscrewing it from the
shockmount.
•Once the shockmount is mounted to the
stand, carefully slide the CL2 through the
elastic bands of the shockmount.
•Use the thumb screw to set the microphone angle.
CL2 Applications Notes
Application Notes
The CL2 is a great microphone choice for many instrument miking situations. Below is
a brief guide on using the CL2 in some typical applications:
Acoustic Guitar
There are a variety of ways that the CL2 can be used to mic an acoustic guitar. The
microphone placement will depend on the type of instrument and what kind of sound
you’re looking to capture, for example the tonal quality you want to focus on, and how
much finger slide or pick noise you may or may not want. When miking a standard
steel string acoustic, a good place to start is with the microphone positioned pointing towards the end of the fingerboard at a distance of about 6 inches to 2 feet away
from the instrument. You can experiment by moving the microphone slightly in the
direction of the sound hole, which will produce more low frequencies, or move it in
the direction of the fingerboard to capture more high-end or to remove any unwanted
boominess. For nylon string acoustic, try positioning the microphone above the
bridge to emphasize more of the attack from the sound of the finger picking, or for
less, move the mic closer to the sound hole. If you have a pair of CL2’s, try one positioned at the fingerboard and the second over the sound hole.
Piano
You can achieve outstanding results using the CL2 on acoustic piano. Several placement approaches can be used depending on the size of the piano, and the type of
sound you are looking to record. When miking a Grand Piano, (for an ambient sound
like that used in a classical recital), a single CL2 can be positioned directly in front of
the instrument. Open the lid to the full position and place the microphone five to
twenty feet in front of the instrument. For a more contemporary ensemble sound,
place two CL2’s in the piano positioning one over the low strings and the other of the
high strings.
Overhead Drum Kit
Because of it’s extended high frequency response and fast transient response, the CL2
performs outstandingly when used as an overhead cymbal microphone. You can position one CL2 on a boom mic stand directly above the kit pointing from front to back.
For stereo miking, use two CL2’s placed over the drum set at a distance of three to five
feet. You can experiment with the exact placement depending on the size of the room
and whether you’re looking for an ambient or close-miked sound. In general, when
miking a drum kit, it’s a good idea to start with the overhead mics. Even though you
use the overhead mics mostly for the cymbals, try to get the entire kit to sound great
in the overheads. Then it will be easier to just bring up your individual mics for more
attack and thickness in the overall sound.
Hi Hat
The CL2 is a perfect microphone for miking Hi Hats thanks to its smooth top end and
the ability to capture fast attack transients. Try placing the microphone over the edge
of the top cymbal. Experiment by moving the mic further over the cymbal to produce
more of a stick sound, but keep in mind it may pick up more of the kit. Remember that
the CL2 has a cardioid frequency response, so position the microphone in the direction of the Hi hat, but for increased separation, be sure to point the mic away from
other drums or cymbals whenever possible.
Wiring Guide
The CL2 can be connected to any mixer, mixer/amplifier, or mic preamp using a standard microphone cable. As shown in the wiring diagrams below, connect the female
XLR end directly to the CL2’s gold-plated connector and the other end (normally a
male XLR end, although some mixers use 1/4" connectors) to the mixer, mixer/amplifier, or mic preamp.
Specifications
CL2 Specifications
Type
Polar Pattern
Frequency Response
Sensitivity
Cardioid
Omni
Rated Impedance
Equivalent Noise level
Cardioid
Omni
Max. SPL
Cardioid
Omni
Power Supply
Current Consumption
Dimensions
Weight
Condenser
Cardioid, Omni
20~20000 Hz
-37 dBV/pa (14.1mv/pa)
-36 dBV/pa (15.8mv/pa)
200Ω
19 dB (A weighted IEC/DIN 651)
18 dB (A weighted IEC/DIN 651)
134 dB (THD≤ 0.5% 1000 Hz)
133 dB (THD≤ 0.5% 1000 Hz)
48V Phantom Power (IEC 268-15/DIN 45596)
< 3 mA
ø 20 x 150 mm
170g
CL2 Cardioid Frequency Chart
CL2 Omni Frequency Chart
CL2 Cardioid Polar Pattern
CL2 Omni Polar Pattern
Samson Technologies Corp.
45 Gilpin Avenue
Hauppauge, New York 11788-8816
Phone: 1-800-3-SAMSON (1-800-372-6766)
Fax: 631-784-2201
www.samsontech.com