1
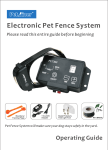
Electronic Pet Fence System
Please read this entire guide bef ore beginning
.@
Boundary/
Training Flags
,
%
I
ll.rl
G_:._t TIT'
Metal Probels &
Test Light Tool
Wire
Pet Fence System will make sure your dog stays saf ely in the yard.
.Operatin g Guide
?
Table of Contents
MainFeafures
.. ......
2
Package Contents:
Otheritemsyoumayneed:
J
.... ....
...
.
J
CAUTION
3
IMPORTANTNOTE
4
t
'{
Electronic Pet Fencing System PET803
This electronic pet fencing system
PET803 is one of the most reliable,
!ilxo&sffi
T4MGftMECDOC
MdBT'E&UNDffi
snMULU3 l$
DEUVEK' IX
soRf ru!*6
cost-efficient pet containment systems
available today. Aburied wire transmits
a harmless radio signal. When your dog
approaches the boundary, The signal
causes the dog's collar receiver to deliver
warning beep first. Ifyour dog continues
closer to the boundary, the system will
issue a mild shock. If your dog continues further, the system will issue stronger
shocks until your dog returns to within the boundary your have set up. Your dog will
naturally seek to avoid correction and is contently staying within established
a
Operating Guide
SECTION I
INSTRUCTIONS FOR SETTING UP THIS FENCING SYSTEM
SECTION2 HOWTHECORRECTIONWORKS
SECTION
3
TRAININGYOUR DOG
SECTION4 SYSTEMMAINTENANCETIPS
SECTION
5
TROUBLESHOOTINGGUIDELINES
boundaries.
l3
13
l5
t6
Main Features:
Proportional staticl shock
The closer your dog gets to the boundary, the more intense the shock
Progressive Warning Tone
will be issued twice
A warning tone
Common size of different dogs
18
to move closer to the boundary;
Commonweight of dogs
l8
Variable Field Width Control
and then a shock stimulus
will be;
if your dog continues
Allows you to precisely control the width of the signal field;
AWARNING
Audible and VisualWire Break lndicators
Should your buried wire ever break, a loud sonic alarm
will sound accompanied by
flashing light;
Please charge the collar receiver before using the product!
a
!f the collar receiver don't work for a long time, You should
charge it fully before keeping it idle, and charglng It every
one month.
Speed Detect Anti-Run through
The faster your dog is moving, and the higher level ofintensity is issued;
Multiple Collar Operation
Add as many collars as you like to contain as many animals you have. There is no
limit to the number of collars it can control.
Up to 2500 square meters range (over 0.62 acre).
2
Package Contents:
o
o
I x Indoor wall-mounted Transmitter;
I x Rechargeable and Waterproof Collar Receiver;
NEVER perform set-up procedures when the collar is on your dog.
An electronic collar should only be used under close supervision by the dog's
owner.
.
o
KEEPOUT OF THE REACH OF CHILDREN.
I x Power plug;
2 xExtra Metal Contact Points
I x Adjustable Collar
20 x Boundary/Training Flags;
I xACAdaptor
I x Test Light Tool
IMPORTANT NOTE
2 x USB Charging Cable
4 x Screws;
I x Boundary Wire of 200 Metres;
1
Realize that because individual dogs have unique temperaments, there is no way of
knowing how your dog will react to its introduction to this product. For the safety
ofyour dog, initial training should take place using a long leash to keep you in control
of the situation. Also realize that an aggressive animal could turn against upon
receiving the stimulus. Therefore, ifyou feel your dog has an aggressive behaviour
andlor it has a history ofaggressive behavior, you should consult a certified animal
behaviorist before using this product.
x User's Manual.
Other items you may need:
Screwdriver;
Straight edged spade or
a
lawn edger;
Wire stripping pliers;
SECTION
Electrical tape:
Waterproofing compound
Read all instructions before using this product.
(e.
1
INSTRUCTIONS FOR SETTING UP THIS FENCING SYSTEM
g. silicone caulk);
Patching compound for your type of driveway or sidewalk;
PVC pipe if crossing a gravel or dirt driveway, pond or lake;
PREPARE A LAYOUT OF YOUR CONTAINMENT AREA
Pencil, Ruler or Protractor;
A. Design and Draw Diagram
Drill with drill bit or masonry bit if drilling through wood or concrete;
CAUTION
Prepare a diagram ofthe area you want to contain your dog. Including the
location of house, driveway, pond, garden, swimming pool, etc. A diagram
will help to avoid unforeseen obstacles. Ifyour neighbour has a containment
system installed, mark the location of the buried wire on your diagram.
Please take a few minutes to read the instruction manual prior to your first use.
B. Contact Utility Company
For best results, follow these important rules:
Contact your utility companies to mark any buried
Additional Boundary Wire.
o
utility lines. Be sure to
include the buried lines on your drawing because these utility lines will
affect the placement of your wire.
The electronic dog collar is intended only for use on dogs.
o A low battery
low battery.
may cause intermittent operation. Do
Nor usE if you suspect
o Allow
a
your dog to get used to the collar before you begin training. you want
your dog to accept the collar as part ofa routine, not to associate the collar
with correction-
o
1
DO NOT leave the collar on your dog for more than l2hours per day.
C. Delermine Location of Wall Transmitter
The transmitter can be mounted to a wall near any standard 1l0l24O-Yolt
household outlet with the included screws. It will withstand freezing
temperatures, but it is not waterproof. Therefore, it is best to locate the
transmitter in an enclosed area. Install the transmitter at least three feet
away from any large metal objects such as breaker boxes, water heaters,
metal garage doors, or washer and/or dryer. When installing the transmitter
make sure the wire is not cut off or pinched by a window, door or garage
door. when drilling holes, make sure there are no electrical wires, ,ruilr or
screws inside the area you are drilling.
D. Determine the Exit Route of
Dual Zones
Open Back Zone
your Boundary Wire f rom th
Transmitter to the Outside Containment Area
since your transmitter must be mounted in an enclose d area to protect it
from the weather, give careful consideration on where the wire .iitr to the
exterior. Existing openings such as a window, door or utility line hole may
provide easy access to the outside. you may need to drill a hole through the
exterior wall.
Keep pets separated, or to prevent
run-thru.
$tep
&
ADD PROPOSED WIRE LOCATION TO YOUR
DRAWING
This lets your pet have access to the
lake or other rear area.
Single loop - BackYard Zone
Single Loop - Front Yard Zone
Your pet has run ofthe house and
back yard.
Your pet has run ofthe house and
front yard.
Double Loop - BackYardZone
Double Loop - F'ront Yard Zone
Mark your diagram with the proposed location of your wire. This will
provide an easy reference as you install the wire. For the system to work
properly, the wire must make one continuous loop. The signal is transmitted
from one terminal of the transmitter, through the wire and back to the
other terminal.
Example lnstallation Diagrams
Zones
within Zones
Keeps your pet safely away from
gardens, pools, and other areas.
Basic Single Wire Zone
Your pet has a 360 degree perimeter
to roam within.
Your pet has run ofthe house and
back yard.
Your pet has run ofthe house and
front yard.
Front & Rear Barrier Zones
Side
(c)Size ofthe signal field. The signal field is the distance from the wire
to the place where the collar receiver first activates. A 3 to 4 meters wide
Barrier Zones
field is preferred.
INSTALL THE WALL TRANSMITTER
Install the wall transmitter close to a standard 1101240-Yolt household
outlet. Do not plug the transmitter to the outlet until the boundary wire is
in place.
Your pet has full access to both
sides, but not to the front or rear
IMPORTANT NOTE:
Your pet has full access to the front
or rear, but not to the sides.
We recommend that you unplug the transmitter and disconnect the fence
wire during lightning storms.
IMPORTANT NOTES FOR WIRE PLAGEMENT:
lf underground wire break, aloud
sonic alarm will sound
Do NOT run the wire less than 15 metres under any occasions. Do NOT
run the level of the signal field to maximum "H" when the wire is just over
15 metres, otherwise it will burn the wall transmitter (level 5 of field is
maximum). Wire MUST be over 100 metres if you need to use the level "H"
6f dhe signal field. If required wire is shorter than 100 metres, it will be
safer to run double or even triple loop to make the layout wire over 100
,. The Signal
1 rieto wiotn
Calbe Break
Cable OK
metres.
Do NOT run the loop within 2 meters parallel to electrical, telephone,
cable TV, or other buried wire in the yard.
re teminals
Nor run one section of wire within 3 meters of another section or the
signal may cancel.
Do
Do
Nor
Charging Port
for Collar Receiver
run your wire within 3 meters of any adjacent containment
ON/OFF f ield width
adjust ment knob
Power Light
system's wire.
Power Port for Transmitter
Nor run your wire within 3 centi-meters of any steels bars under
concrete ground otherwise signal strength will be reduced.
Do
ESTIMATE THE AMOUNT OF WIRE NEEDED
PET803 model includes 200 metres of boundary wire. It can enclose an
area
ofover 0.8
acres.
The amount of wire needed is determined by several factors:
(a)Total area to be contained;
(b)Using
a
double loop. This requires twice as much wire.
LAY OUT THE PERIMETER WIRE
'risw
i.r*ee'
:$&
IMPORTANT NOTE: Do NOT bury the wire until you have tested the
system and are sure it is working properly. Do NOT nick or scrape the
wire during installation. Improper function may result.
,1 mY
1. Use your drawing as a reference. Begin laying the wire around the
perimeter of your containment area to form a continuous loop. Use gradual
turns at the corners with a minimum of lmeterradius. This provides amore
consistent signal fie1d.
2.
If you are using more wire than initially supplied with your fencing
system, the wire connections must be waterproof to provide u ..uraFconnection between the wires. Do not use electrical tape or twisted wire
nuts. This will cause an intermittent signal or disarm the system.
connected, and the wire forms an unbroken, continuous loop. If the Break
light turns red, it means that one or both wires are not properly connected
or both wires are connected but the wire is broken. Correct the problem
and retest.
3. Continue around your perimeter until you return to the start of the loop,
::,)
4. Cut the wire.
ti**
*.*4,
,\
ffi*
'*-
I?
_-(M
CONNECT THE PERIMETER WIRE TO THE WALL
TRANSMlTTER
The wire from the perimeter to the wall transmitter should be twisted to
cancel the signal. This allows the dog to cross the area without receiving
a correction. It also eliminates possible interference from electrical wires,
etc.
&
,..t&
.,X
SET UP YOUR COLLAR RECEIVER
Before using our Rechargeable and Waterproof Collar Receiver, for the
first use, please make sure charging it at least 4 hours.
Turn on the power button on the receiver and the red LED light will turn
on. When the indicator light turns flashing red, it means battery is running
down and needs to be recharged.
Contact Points
l. Measure the distance from the wall transmitter to the edge of the
perimeter wire.
2. Because twisting the wire decreases the length of the wire, multiply the
distance by lh.
3. Measure and cut two wires of equal lengths of the above measurement.
4. Hold the two ends of the wire side by side and twist them together. The
wires can be twisted manually until ihe twists. a re 6 to 12 cm apart. The
tighter the wire is twisted the better the signal cancellation.
LED lndication Light
5. Pull the twisted wire to the perimeter location of the two ends of your
boundary wire loop. Splice the ends of the twisted wire to the ends
the boundary wire ONLYwith waterproof splices.
6. Put the twisted wires through the existing opening or
can be connected to the transmitter.
drilled hole
of
so
8. Insert the wires into the terminals of the transmitter.
9. P1ug the power adapter into a standar d Z4O-volt household outlet.
10. Connect the power adapter to the transmitter's power port.
L/{rf-i
n&
x
tr
M
&xt
9
IMPORTANT NOTE:
Do NOT place the collar receiver on your dog
been tested and the signal field adjusted.
it
7. Strip off about I cm of insulation from the end of each twisted wire.
VERIFY TRANSMITTER IS FUNCTIONING PROPERLY
To verify the transmitter is functioning properly, look for OK and power
lights on the transmitter. when the oK turns green and the power light
turns red, it means the transmitter is receiving power, both wires are
ON/OFF Button
Xe&
"
"X
rtt
X
'lxr
until
the fencing system has
TEST THE FENCING SYSTEM
Do Not Test The Fencing System with The Collar Receiver On The Dog.
You must manually test the containment system to verify that the signal
is properly transmitted through the wire. Use the supplied test light.
Select a section ofstraight boundary wire that is at least 50 feet long.
Attach the supplied test light to the receiver probes and hold the collar
receiver at your dog's neck height. Slowly walk the collar toward the
boundary wire. Listen for the warning tone and watch for the test light to
light. The wider you can make the Fencing field, the less chance your dog
can run through. Adjust the FIELD WIDTH as necessary and test again.
l0
Driveways / Sidewalks
When crossing an asphalt driveway make a 2cm deep cut across the
driveway using a circular saw and masonry blade. Place the wire in the
crack and seal with asphalt sealant. On driveways and sidewalks, if an
expansion joint is available, simply place the wire in the j oint and seal
with an outdoor caulk. When crossing gravel, bury the wire at least 7 cm
deep. Use an old garden hose or plastic PVC piping to protect the wire. In
water, anchor the wire with large rocks. Protect the wire with an old garden
hose or plastic PVC piping.
Test in a number of different areas until you are satisfied there are no wire
breaks and the system is functioning properly.
Next walk al1 around the "safe" part ofthe yard to ensure there are no stray
signals, particularly near the twisted wire coming from the transmitter,
Test collar in and around the inside ofthe house as well. Signals from
Cable TV, electrical or telephone lines can "couple" causing stray signals
inside and outside the house that can activate the dog's collar accidentally.
Ifyou do encounter this phenomenon, your boundary wire is probably too
close to these outside lines and will need to be moved or modified.
Containment collars should not be worn inside the house.
INSTALL THE BOUNDARY TRAINING FLAGS
ADJUST THE SIGNAL FIELD WIDTH
&x*
After installing the wire, retest the fencing system as described in Step 10,
Verify that the signal field width is consistent by following the instructions
in Step I l. Adjust the Signal Field Width. As you are retesting and verifying
the system, install the boundary training flags. Place the flags where the
warning tone is first heard as you approach the wire. The flags should be
placed at the edge of the signal field width, not directly on the wire. This
The signal field is the distance from the wire to the place where the collar
receiver first activates. The "+" "-" button on the transmitter adjusts the
size ofthe signal field, not the correction intensity. Pushing the "+" button
increases the signal fieldwidth; Pushing "-" button decreases it. Pushing
ON/OFF button to turn on/off the transmitter power.
Follow the instructions in Step 10 to test the signal field width. Walk the
entire perimeter to be sure that the signal field is consistent throughout
your containment area. The signal field should extend a minimum of 2
meters on either side of the wire (creating a 4 qeter wide field). A 3 to 4
meter wide field is preferred. The wider the signal field width, the less
chance that a dog can run through the field.
will
add a visual cue to the audio warning tone and help your dog to learn
the boundary.
:p
FITTTNG THE COLLAR TO YOUR DOG
{& TMPoRTANT NorE:
a:t...^
INSTALL THE BOUNDARY WIRE
Never leave the collar receiver on the dog for longer than 12 hours a day.
Leaving the collar on the dog for extended periods could result in skin
irritation. Check your dog's neck periodically for skin irritation.
&i5{ llrix
Tools Needed
A. Probes
xx
x& tt
Straight-edged spade, wire cutter / stripper, and standard screwdriver. If
you plan to run the wire across concrete, you will also need a caulk gun,
silicone caulking, and a circular saw with a masonry blade.
Burying the Wire
The wire does not have to be buried, but for protection you probably want
to bury it at least one inch underground. Start by digging about 7 to 1Ocm
deep where the wire first enters the ground near the transmitter and continue
around thb path of the loop wire.
Note:
When covering a large area, you may wish to use a trenching machine to
cut into the ground. However, we recommend that the wire be placed in the
trench by hand. A commercial wire-placing machine may break the wire.
Make sure both probes contact the dog's skin. If needed, a small amount
of hair removal or thinning will improve probe contact with the skin.
Use short probes for short-haired dogs. Use long probes for long-haired
dogs.
Finger-tighten the probes then turn them one additional revolution. Do
not over-tighten.
Check the tightness ofthe probes regularly to prevent loss ofthe receiver
box.
Always make sure the collar is functioning properly BEFORE putting it on
the dog. Verify the system is operating properly and the field width is
B. Collar Strap
To prevent accidental correction inside the home, remove the collar from
appropriate as described in Section 1, Step
the dog's neck when it comes inside.
Place the collar around the dog's neck with the receiver box under the chin.
The collar must be on relatively tight to keep the probes making skin
contact without restricting breathing. You should be able to slide only one
finger under the strap at the back ofthe dog's neck.
Always make sure the collar is functioning properly BEFORE putting
l
Adjust the Signal Field Width.
Keep training sessions brief. Never continue a session after your dog has
lost interest. Take a break to rest or play.
ALWAYS praise your dog for good behaviour.
it
The following steps outline a successful training plan:
on the dog.
FLAG TRAINING
Remove other metal collars when the dog wears the containment collar.
Metal collars may interfere with proper operation.
1.
Remove the collar and trim the excess strap
'
be given to your
3. Place a long leash on your dog. Play with your dog in the safe area of
the yard for 2-4 minutes. Do not allow your dog to run free or cross the
flag lines.
_
4. Walk towards,the flags. Reach down and shake a flag. Say "bad flag" in
1. Pre-Correction Warning Tone:
a
When the dog reaches the edge of the signal field in the yard, it will hear a warning
tone that lasts about 1 0 seconds. Ifthe dog does not return.to the safe part ofthe yard,
it will receive two static shocks every a warning tone until it returns to the safe area.
Within 20 seconds, if the dog reaches the edge of the signal field in the yard again, a
warning tone plus static shock will be activated.
:
will
2.Place the collar receiver on your dog.
HOW THE CORRECTION WORKS
The receiver automatically increases the correction as the dog enters the signal field.
A four warning tone along with 4 correction shocks and a six warning tone along with
5 correction shocks will be activated as the dog move closer and closer to the wire.
The dog cannot "run through" the signal field without receiving a strong correction.
Turn the wall transmitter "off" so no corrections
dog.
SECTION 2
2. Run-Through Prevention
1
Stay positive and playful during the training session.
disapproving tone.
5. Return to the centre part of the yard and play
with your dog. Reward
with treats.
6. Repeat this exercise several times in various locations ofthe yard.
THE FIRST CORRECTION
rx'
1.
i{ffit
2.Place the collar receiver on your dog in the safe area ofthe yard.
{xx
You need to reset the signal field width before placing the collar receiver
on your dog. Follow the instructions outlined in Section l, Step I l,
adjust the Signal Field Width.
3. Place a long leash on your dog. Play with the dog in the safe area
SECTION 3
4. Walk towards the flags.
TRAIN!NG YOUR DOG
To get the most out of your fencing system when training, keep these tips in the mind:
To prevent accidental correction inside the home, remove the collar from
the dog's neck when it comes inside.
t3
ofthe
yard.
If your dog tries to avoid the flags, praise and
reassure your dog.
5. Repeat this step in other locations ofthe yard.
6.
Allow
no more than three corrections in a day or seven in a week. This
depends on your dog's stress tolerance. Most dogs only receive a few
corrections during the training phase; they respond to tone very quickly.
l4
8. Play in the safe zone with your dog before ending this training session.
The wall transmitter is not waterproof and must be protected from the weather. A
close lightning strike may damage the unit. Unplug the transmitter and disconnect
the wires during stbrms.
ON.LEASH PROOFING
Do not attempt to dismantle or repair any of the system components; this
l. With the collar
the manufacturer's warranty.
7. Reward your dog when it avoids the flags, even
xxr xxx
if a correction
is issued.
on your dog and the wall transmitter "on", play with
your dog (on leash) in the safe area. After a few minutes of play, toss a
toy or treat through the flags.
2.
Ifyour dog runs through the flags to chase the toy, wait for the startled
response and pull your dog back into the safe area. Praise and reward
your dog.
3. Reinforce training by shaking a flag. Say "bad flag" with a disapproving
tone. Consider increasing the signal field area. Ifyou choose to increase
the signal field area, remove the collar from your dog, increase the signal
field, and retest. Refer to Section l, Step I l, Adjust the Signal Field.
your dog when it avoids the flags. Stay positive and playful
during the training session.
6. When your dog refuses to run through the flags 20 consecutive times,
proceed to the next step.
N
,
tx
M
1.
Follow the instructions in Step 3, On-Leash Proofing except drop the
leash on the ground. It will be available ifyou need to retrieve your dog.
2.
If yow dog gets through the signal field during this phase, quickly
remove the collar. Bring your dog back into the safe area. Put the collar
back on your dog. Reinforce "bad flag" training. Praise and reward
your dog.
until you are confident that your dog
ignore temptations outside the containment area.
3. Repeat this off-leash training
and the test light to illuminate.
SECTION 5
TROUBLESHOOTING GUIDELINES
Adjust the collar fit.
Trim the dogh hair or use longer probes to make better skin contact.
Charge the collar receiver.
B.System Test Procedure:
OFF.LEASH PROOFING
":
Test the system once a week to make sure the collar receiver is working properly.
Also, testing the system will verify the field width setting is correct. To test, attach
the supplied test light to the collar receiver probes. Holding the receiver by the case,
Nor by the probes, walk into the signal field. Listen for the warning tone to sound
A.Dog is not responding to correction:
4. Repeat this exercise in other locations ofthe yard.
5. Praise
will void
will
Whenever you experience a malfunction, you will need to do a Test Loop
to determine which component - collar, wall transmitter, or yard wire - is
not working. To perform the Test Loop procedure:
l. Make a test loop using a piece of wire at least 4 meters in length.
2. Remove the existing wire from your wall transmitter.
3. Insert the two ends of the test loop wire into the wall transmitter.
4. Set the field width level to a low'setting.
light on the collar receiver. With the collar in hand, move
outside the field and approach the test loop. Make a mental note of the
distance between the collar and the wire when the collar activates.
5. Place the test
SECTION 4
6. Set the field width level to a medium setting.
SYSTEM MA!NTENANCE TIPS
7. Back away from the wire and approach it again. Determine the distance
Your system requires very little maintenance. The rechargeable collar receiver is
waterproof.
15
between the collar and the wire when the collar activates. The distance
should be greater on the medium range setting.
8.
If more than one collar receiver is used with the system, repeat the above
test on each collar.
t6
Results of System Test Procedures:
If there is no red PowER light on the wall transmitter with the test loop wire in
place, the wall transmitter is malfunctioning.
If the red PowER
and green
oK lights
are solid on the wall transmitter, but the
collar does not activate on the test loop wire, the collar receiver is not working' Charge
the collar receiver and repeat the test.
If the red Break light on the transmitter turns on together with beeping sound, the
problem is in the yard wire.
Warning:
L The system included a boundary wire of 200 metres. If there still have wires after
2s-30
t9
Chihuahua, Yorkshire
Temier
20-24
29-36
23
Chihuahua, Yorkshire
Temier, Poodle, Pomeranian
Medium
23-28
35-42
28
Maltese Dog, Shih Tzu
Large
27-31
4t-47
31
Large
30-34
46-53
35
Large
J)-)
I
52-59
40
Beagle
Huge
43-48
76-84
60
Husky
88-97
65
Labrador Retriever
92-r00
70
Mini
20-22
Small
yo.r rrr.d it to make the fence wire. Please cut down the unused wire. You can't use
ih. ."-ur,.nt wire to connect with the transmitter. Otherwise the transmitter will
can't working properlY.
47-52
52-62
'
:
,
,
Miniature Schnauzer,
Pekingese
Schnauzer, English Cocker
Spaniel
GoldenRetriever, Old
English'Sheepdog
Common weight of dogs
(This connect way is wrong)
(This connect way is right)
2. Ifthere are any wrong operation caused the system working unconventionally.
Please unplug the powei olthe transmitter. After 5minutes, The system will work
properly when you plug the power again.
Large Dog (Body height above 61cm, Weight above 40kg)
Medium Dog (Height 40.7 -6lcm, Weight 1 1-30kg)
Small Dog (Height 25.5-40.7cm, Weight 4-1Okg)
M
ini Dog (height under 25cm, Weight under 4kg)
18
t7