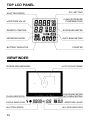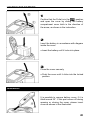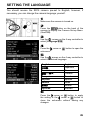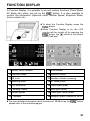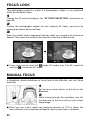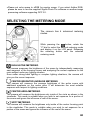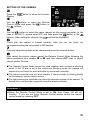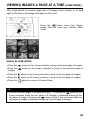
1
C24EN1031 E ENGLISH USER’S MANUAL This manual explains how to use SIGMA SD15 digital SLR camera. Please refer to the SIGMA Photo Pro User Guide, which is available in the PDF format of the supplied CD-ROM, to get information about installation of SIGMA Photo Pro software to your computer, connection between camera and computer and for detailed explanation of SIGMA Photo Pro software. 123 Thank you for purchasing the Sigma Digital Autofocus Camera The Sigma SD15 Digital SLR camera is a technical breakthrough! It is powered by the Foveon® X3™ image sensor, the world’s first image sensor to capture red, green and blue light at each and every pixel. A high-resolution digital single-lens reflex camera, the SD15 delivers superior-quality digital images by combining Sigma’s extensive interchangeable lens line-up with the revolutionary Foveon X3 image sensor. You will get the greatest performance and enjoyment from your new SD15 camera’s features by reading this instruction manual carefully before operating it. Enjoy your new Sigma camera! • Please keep this instruction booklet handy for future reference. Doing so will allow you to understand and take advantage of the camera’s unique features at any time. • The warranty of this product is one year from the date of purchase. Warranty terms and warranty card are on a separate sheet, attached. Please refer to these materials for details. Notes on Copyright This camera is intended only for personal use and should never be used in a way that infringes upon or contravenes international or domestic copyright laws and regulations. In addition, although it is intended purely for personal use, some restrictions may be applied to the photographing of demonstrations, performances, shows, exhibitions, or commercial properties, etc. Copyright or other legal rights should not be contravened. ■ FOVEON is a registered trademark of Foveon, Inc. X3, and the X3 Logos are trademarks of Foveon, Inc. ■ IBM PC/AT series computer is a trademark or registered trademark of International Business Machines Corporation (IBM) in the U.S.A. ■ Microsoft and Windows are either registered trademarks or trademarks of Microsoft Corporation in the United States and/or other countries. ■ Macintosh and MAC OS are registered trademarks or trademarks of Apple Inc. in the U.S.A. and /or other countries. ■ Adobe and Photoshop are trademarks of Adobe Systems Incorporated. ■ All other company or product names used in documents are trademarks or registered trademarks of their respective holders. ■ Ricoh True Type Font designed by Ricoh CO., Ltd. is used for the display of the menu window of this camera. 1 Disposal of Electric and Electronic Equipment in Private Households Disposal of used Electrical & Electronic Equipment (Applicable in the European Union and other European countries with separate collection systems) This symbol indicates that this product shall not be treated as household waste. Instead it shall be collected separately for the recycling of electrical and electronic equipment. If the new products are purchased, this product might be handed over to the distributor or the collection system of waste electrical and electronic equipment eventually. By ensuring this product is disposed of correctly, you will help prevent potential negative consequences for the environment and human health, which could otherwise be caused by inappropriate waste handling of this product or components of this product. If this product is disposed illegally, it might cause a possibility of penalties. For more detailed information about recycling of this product, please contact your local city office, your household waste disposal service or the shop where you have purchased the product. PACKAGE CONTENTS / ACCESSORIES Please make sure that following standard accessories are included with your camera. If any of them is missing, contact the retailer from which you purchased your camera immediately. 1. 2. 3. 4. 5. 6. 7. 8. 9. 10. 11. 12. 13. 14. Camera Body (SD15) Body Cap (on the camera) Eyepiece Cup (on the camera) Strap Finder Cap Li-ion Battery BP-21(Battery Cover is included) Battery Charger BC-21 Battery Charger Cable USB Cable Video Cable SIGMA Photo Pro Disc Instruction Manual Warranty Card SIGMA Limited Warranty & Service Network • No memory card is included with this camera. Please purchase this separately. 2 TABLE OF CONTENTS PACKAGE CONTENTS / ACCESSORIES .......................................................2 SAFETY PRECAUTIONS .................................................................................6 HANDLING PRECAUTIONS ............................................................................9 DESCRIPTION OF THE PARTS..................................................................... 11 TOP LCD PANEL ............................................................................................13 VIEWFINDER ..................................................................................................13 CONTROL DIALS ...........................................................................................14 BASIC OPERATION AND QUICK REFERENCE ...........................................15 PREPARATION 18 ATTACHING THE CARRY STRAP .................................................................18 HOW TO USE THE FINDER CAP ..................................................................18 LOADING THE BATTERY ..............................................................................19 CHECKING THE BATTERY STATUS .............................................................22 USING A HOME POWER SUPPLY (SOLD SEPARATELY) ...........................23 MOUNTING AND REMOVING THE LENS.....................................................24 SETTING THE LANGUAGE ...........................................................................26 SETTING THE TIME AND DATE ....................................................................27 CAMERA SET-UP MENU ...............................................................................28 LIST OF MENU FUNCTIONS .........................................................................29 FUNCTION DISPLAY ......................................................................................32 CAMERA INFO PAGE .....................................................................................33 INSERTING AND REMOVING THE CARD ....................................................34 FORMATTING THE CARD .............................................................................36 FILE NUMBERING SYSTEM ..........................................................................37 FRAME NUMBER COUNTER ........................................................................38 DIOPTER ADJUSTMENT ...............................................................................39 TOP LCD ILLUMINATION ...............................................................................39 HOLDING THE CAMERA ...............................................................................40 SHUTTER BUTTON .......................................................................................40 BASIC OPERATION 41 SELECTING THE EXPOSURE MODE 41 P A S M 3 PROGRAM AE..........................................................................................41 APERTURE PRIORITY AE ......................................................................43 SHUTTER SPEED PRIORITY AE............................................................44 MANUAL EXPOSURE..............................................................................45 BULB SETTING ..............................................................................................46 USING THE BUILT-IN FLASH 47 USING THE BUILT-IN FLASH ........................................................................47 EXPOSURE MODE AND BUILT-IN FLASH ...................................................48 FUNCTION SETTING OF FLASH ..................................................................49 FOCUSING 51 HOW TO USE AUTOFOCUS..........................................................................51 SELECTING THE AUTOFOCUS MODE ........................................................52 AF POINT SELECTION ..................................................................................53 AF AUXILIARY LIGHT ....................................................................................54 FOCUS LOCK .................................................................................................55 MANUAL FOCUS ............................................................................................55 OPERATION OF THE DRIVE MODE 56 DRIVE-AREA ..................................................................................................56 SINGLE FRAME SHOOTING .........................................................................56 CONTINUOUS SHOOTING ............................................................................57 SELF TIMER ...................................................................................................58 MIRROR LOCK-UP.........................................................................................58 ADVANCED OPERATION 60 SETTING THE WHITE BALANCE (WB) ......................................................60 SETTING THE SENSITIVITY(ISO EQUIVALENCY) .................................63 IMAGE FILE SETTING ...................................................................................64 COLOR MODE ................................................................................................65 IMAGE PARAMETER AND COLOR SPACE ..................................................67 SELECTING THE METERING MODE............................................................68 AE LOCK .........................................................................................................69 EXPOSURE COMPENSATION ......................................................................71 FLASH EXPOSURE COMPENSATION .........................................................72 AUTO BRACKETING ......................................................................................73 REMOTE CONTROLLER RS-31 ....................................................................75 DEPTH-OF-FIELD PREVIEW BUTTON .........................................................78 FLASH PHOTOGRAPHY................................................................................79 EXTENDED MODE SETTING ........................................................................80 AUTO ROTATE ...............................................................................................81 4 REVIEWING, DELETING AND MODIFYING IMAGES 82 QUICK PREVIEW 82 CHANGING THE QUICK PREVIEW DURATION...........................................82 REVIEWING IMAGES 84 VIEWING ONE IMAGE AT A TIME .................................................................85 MAGNIFYING IMAGES (ZOOMED-IN VIEW) ................................................86 VIEWING NINE IMAGES AT A TIME (CONTACT SHEET VIEW) ..................87 VIEWING IMAGES A PAGE AT A TIME (JUMP MODE).................................88 VIEWING IMAGE INFORMATION ..................................................................89 MAGNIFIED IMAGES IN IMAGE INFO SCREEN ..........................................90 HISTOGRAM...................................................................................................91 OVER-EXPOSURE WARNING ......................................................................92 VIEWING IMAGES ON A TV ..........................................................................93 DELETING IMAGES 94 DELETING A SINGLE IMAGE ........................................................................95 DELETING MULTIPLE IMAGES .....................................................................96 OTHER REVIEWING FEATURES 97 LOCKING IMAGES .........................................................................................98 MARKING IMAGES ......................................................................................101 ROTATING IMAGES .....................................................................................103 USING THE OK BUTTON SHORTCUT .......................................................105 SHOWING A SLIDESHOW ...........................................................................106 DPOF (DIGITAL PRINT ORDER FORMAT) .................................................108 REFERENCE 109 OPTIONAL ACCESSORIES .........................................................................109 MAINTENANCE ............................................................................................ 110 CLEANING THE IMAGE SENSOR............................................................... 110 LCD OFF AND AUTO POWER OFF............................................................. 113 EXPLANATION OF TERMS.......................................................................... 114 WARNING DISPLAYS................................................................................... 116 TROUBLESHOOTING .................................................................................. 119 SPECIFICATIONS ........................................................................................121 CONNECTING YOUR CAMERA TO A COMPUTER ...................................122 5 SAFETY PRECAUTIONS To avoid causing damage or injury, please read this instruction manual carefully, before using the camera. Please take special note of the following two cautionary symbols. the product and disregarding this warning sign may Warning !! Using cause serious injury or other dangerous results. Using the product disregarding this caution sign may cause Caution !! injury or damage. This symbol denotes warning or point, where caution is required. Symbol contains information regarding the actions that must be avoided. WARNING (BATTERY, BATTERY CHARGER AND AC ADAPTER) Keep batteries in a safe place out of children’s reach. If a battery is swallowed, call for emergency medical aid immediately. Do not use any battery other than the designated battery types. Doing so may cause battery explosion, battery leakage, camera damage, injury or fire. Do not use any battery other than that specified in this booklet. Otherwise, it might cause battery explosion, battery leakage, camera damage, injury or fire. Avoid any shock, shake and drop. Ignoring this warning may cause battery explosion, or battery leakage, resulting in injury or fire. Never disassemble, short circuit, heat, batteries or put batteries into fire. Ignoring this warning may cause battery explosion, battery leakage, injury or fire. Please only use charger with dedicated battery. Charging other battery types causes battery explosion, battery leakage, camera damage, injury or fire. If for some reason, the camera or batteries emit smoke, or if overheating or the smell of burning is detected, remove the batteries, taking care to avoid being burned, Take the camera to the retailer where you bought it, or to an authorized Sigma service station. Please follow all guidelines, rules and regulations of your community regarding the disposal of batteries. If you do not use the camera for a long period of time, remove the battery. Do not use any AC adapter other than the one provided with your camera. Using other brands may cause electrical shock and fire 6 SAFETY PRECAUTIONS The AC Adapter is designed for use with this product only. Do not use it with any other appliance. Doing so may cause overheating, fire, electric shock or injury. If the adapter is emitting smoke, generating a strange odor or making an abnormal noise, while in use, disconnect the power plug from the outlet immediately. Otherwise, fire or electric shock may result. If water or a foreign object gets into the adapter, unplug from the AC outlet immediately. It could cause fire or electric shock. Do not attempt to modify or disassemble this product. Doing so can cause fire or electric shock. Do not place any heavy objects on the power cord, or pull it, bend it unduly, or heat it. It could damage the cord, and could cause fire or electric shock. Do not use this product with AC voltage other than the specified power supply voltage (AC100V - 240V). Doing so could cause fire or electric shock. Use a safety approved AC power cord as is specified by each country. WARNING (CAMERA) Never use your camera in an environment where flammable or burnable, gas, liquids or chemicals, such as Propane, Gasoline, etc., are present. Keep the camera in a safe place that children cannot reach. Playing with the camera strap around one’s neck can cause strangulation. Do not disassemble the camera; Doing so can cause electric shocks and burns. Do not touch internal parts of the camera that become exposed as a result of damage, it could cause fire or electric shock. Remove the batteries and contact an authorized Sigma service station. After attaching a lens, do not look directly at the sun, through the viewfinder. Doing so can cause damage to the eye or loss of eyesight. Do not look at the sun with the lens of your camera; otherwise you can lose your eyesight. Keep the camera away from moisture or water. If you drop your camera/lens in water, please contact the retailer where you purchased the camera, or a service station immediately. If you use the camera with this condition it can cause electric shock or fire. Prevent water, or metallic and other conductive objects from coming into contact with the terminals of Camera Body. This can result in electric shock, overheating and fire. 7 SAFETY PRECAUTIONS Do not fire the flash close to eyes. Otherwise, the bright light would damage the eye. Keep at least 1m/3feet distance between face and the camera, when taking a picture with flash. Do not cover the flash with your finger or hand, it can cause skin burn. CAUTION (BATTERY CHARGER AND AC ADAPTER) Do not pull the Battery Charger or the AC power cord, when disconnecting the AC adapter from the AC outlet. It could cause fire or electric shock due to damaged cord. Always take hold of the moulded AC plug, when unplugging it from the outlet. Do not cover the Battery Charger or the AC adapter with cloth, cushions, etc. It could cause excessive heat, deform the case, and cause fire. When Battery Charger is not used unplug it from the outlet. CAUTION (CAMERA) Do not aim your lens or camera & lens combinations toward the sun; light entering through the lens could cause damage to eyes or fire. Please do not carry your camera while a tripod is attached, as this could result in injury or a fall. Please do not grasp the camera with wet hand, as it might cause electric shock Do not leave the camera in a hot place or in a car parked in the sun. If the camera becomes hot, it might cause burns to the skin. If the liquid crystal display (LCD) monitor becomes damaged, be careful of the fragments of glass, which can cause injury. If the liquid inside the LCD monitor leaks out, and you are faced with the following situations, please do as follows. If the liquid adheres to clothes or the skin, wash it away with soap immediately. If the liquid enters the eye, flush the affected eye with clean water immediately for 15minutes, and seek medical assistance. If the liquid is swallowed, drink large quantity of water, induce vomiting and seek medical assistance. 8 HANDLING PRECAUTIONS Please read this section before using the camera. Study and familiarize yourself with the functions of your camera before using it. No compensation or guarantee is provided for unsatisfactory pictures or loss of profit, etc. Carry spare batteries when you use the camera in a cold environment, on a field trip, or when taking many pictures at one time. Do not use this camera with any external flash unit other than Sigma Flash EF-530(500) DG SUPER SA-STTL or EF-530(500) DG ST SA-STTL, which have special contact pins on the hot shoe. The flash units are offered as optional accessories. Other brands of external flash units may damage the camera’s circuit boards or may not function properly. ENVIRONMENT ■ Your camera is a precision instrument. Do not drop it or subject it to physical shock. ■ This camera is not waterproof, and cannot be used underwater. Wipe off any water droplets with a dry cloth as soon as possible. If the camera gets really wet, promptly consult your nearest Sigma Service Center. ■ Do not leave the camera in a dusty, hot, or highly humid environment for a long period of time. ■ If the camera is moved from a cold place to a warm room, water droplets may appear on the camera. Please keep the camera in a bag until it is acclimatized to the ambient room temperature. ■ The camera will work within a temperature range between 0˚C/32˚F and +40˚C/104˚F and humidity less than 80% (no condensation). However, in cold temperatures below 0˚C, the power performance of the battery reduced. Please carry a spare battery in these circumstances, and keep the batteries warm. ■ Static electricity or magnetic fields, may effect the operation of the camera. If such exposure occurs, please remove the battery from the camera and re-insert it, to reset the camera’s microprocessors. HOW TO STORE THE CAMERA ■ If you intend to store the camera for a long time, remove the battery. ■ To avoid growth of fungus, store the camera and lens in a dry, cool and ventilated place, with a drying agent such as silica gel. Keep your equipment away from chemicals. 9 HANDLING PRECAUTIONS NOTE ON THE TFT COLOR LCD MONITOR ■ A few pixels may always be lit or may never light on the LCD monitor. This is not a failure or malfunction. Images recorded with the camera will not be affected. ■ Because of the normal physical characteristics of the liquid crystal, the reaction of the display may become slow at low temperatures. At high temperatures, the display may become dark, but it will return to normal at room temperature. SD MEMORY CARD AND MULTIMDEIA CARD (SOLD SEPARATELY) The SD15 camera uses a SD memory card, SDHC memory card and multimedia card. • In this instruction manual, SD memory card, SDHC memory card and Multimedia card are referred to as the ‘Card’. • We recommend SDHC memory card or high speed SD memory card to store images. • SD memory card or SDHC memory card incorporate the write protection switch, which prevents writing or formatting the card accidentally. If the switch is placed in the ‘LOCK’ position, it is not possible to overwrite or erase your data accidentally. ■ We do not recommend using a multimedia card in continuous shooting or Movie mode due to the slow writing speed. ■ Do not leave the card in direct sunlight or near a heating device. ■ Avoid storing cards in environments of high temperature and humidity or where static electricity or electromagnetic fields may be generated ■ For proper usage of the card, please refer to their instruction manuals. ■ The “Delete” feature of the Camera and PC may not delete the data in the memory card completely. Some data might still remain. If you wish to remove all data from card securely, please use third party software. 10 DESCRIPTION OF THE PARTS 1 2 3 8 9 4 10 11 5 12 6 13 7 14 15 22 16 23 17 24 18 25 26 18 27 19 20 21 11 28 29 30 37 31 38 32 39 33 40 41 34 42 35 36 1. 2. 3. 4. 5. 43 AF AUXILIARY LIGHT DUST PROTECTOR LENS MOUNT LENS LOCK BUTTON BATTERY COMPARTMENT COVER BATTERY COMPARTMENT COVER 6. LATCH 23. 24. 25. 26. 27. 28. (ISO SENSITIVITY) BUTTON 7. TRIPOD SOCKET 29. EXPOSURE / APERTURE COMPENSATION BUTTON 8. 9. 10. 11. 12. 13. 14. 15. 16. 17. FLASH EXPOSURE COMPERTMENT BUTTON REMOTE CONTROL SENSOR PC SYNCHRO TERMINAL DEPTH-OF-FIELD PREVIEW BUTTON CONNECTOR COVER RELEASE SOCKET FOCAL PLANE MARK HOT SHOE DIOPTER ADJUSTER D-DIAL(DRIVE DIAL) TOP LCD ILLUMINATION BUTTON C-DIAL(COMMAND DIAL) SHUTTER BUTTON TOP LCD PANEL SD CARD COVER 30. AE LOCK BUTTON (MAIN MENU) BUTTON 31. 32. (VIEW) BUTTON (INFORMATION) BUTTON 33. (MODIFY MENU) BUTTON 34. 35. (DELETE) BUTTON 36. COLOR LCD MONITOR (QUICK SET) BUTTON 37. 38. / (METERING MODE) BUTTON 18. CAMERA STRAP EYELET 39. (FUNCTION) BUTTON 19. 20. EYEPIECE CUP 21. VIEWFINDER EYEPIECE 22. MODE DIAL 40. 41. 42. 43. / (AF POINT SELECTOR) BUTTON (OK) BUTTON 4-WAY CONTROLLER BUSY LAMP (CANCEL) BUTTON 12 TOP LCD PANEL SHUTTER SPEED ISO SETTING APERTURE VALUE FLASH EXPOSURE COMPENSATION REMOTE CONTROL EXPOSURE METER METERING MODE AUTO BRACKETING BATTERY INDICATOR COUNTER VIEWFINDER CENTER AREA METERING AUTO FOCUS FRAME FLASH INDICATOR EXPOSURE METER AUTO BRACKETING FOCUS INDICATOR APERTURE VALUE SHUTTER SPEED 13 AE LOCK INDICATOR CONTROL DIALS D-DIAL AUTO BRACKETING MIRROR LOCK-UP SELF-TIMER (2s) SELF-TIMER (10s) DRIVE AREA CONTINUOUS SHOOTING SINGLE FRAME SHOOTING POWER OFF MODE DIAL PROGRAM AE APERTURE PRIORITY AE SHUTTER SPEED PRIORITY AE MANUAL EXPOSURE SETTING 14 BASIC OPERATION AND QUICK REFERENCE The SD15 camera has many advanced features. This section, describes basic camera operation. You can find more details in later sections. Charging the battery (P.19) Charge the supplied lithium ion battery with the provided battery charger. To insert the battery (P.20) Insert the battery into the chamber in accordance with the diagram. Mount the lens (P.24) Align the red mark on the camera’s lens mount with the red dot on the lens. Insert the lens into the mount of the camera, and rotate the lens clockwise until it clicks into the locked position. 15 Set the language (P.26) Set the date and time (P.27) Loading the Card (P.28) Turn the “D”-dial to the □ (single frame shooting) position. (P.56) Set the AF/MF switch on the lens to the AF position. (P.51) 16 Select the exposure mode (P.41) Set the “Mode”-Selector to P “Program AE” position Focus (P.51) Determine the composition through the finder, and then press the shutter button “Half-way” to activate exposure metering and autofocus. Take a picture Press the shutter button “All-the way-down” to take a picture Review the image. (P.82) The image is displayed for 2 seconds on the LCD monitor. 17 PREPARATION This section describes necessary preparations before using the camera. ATTACHING THE CARRY STRAP 1 Undo the strap end. 2 Thread the Finder Cap onto the strap. 3 Attach the carry strap as shown. HOW TO USE THE FINDER CAP When using the self-timer or remote control, cover the viewfinder eyepiece with the Finder Cap, to prevent stray light from entering the camera. 1 Remove the eyecup from the viewfinder. 2 Attach the Finder Cap onto the viewfinder. 18 LOADING THE BATTERY A lithium ion battery BP-21 is provided with the SD15 camera. Charge the battery, before using the camera first time. Please charge the battery by the supplied battery charger BC-21, when no charge remains. TO CHARGE THE BATTERY 1 Connect the power cable to the charger and insert the plug into the wall outlet. 2 Attach the battery, by sliding it in the direction of the arrow, as shown in the diagram. ● Charge lamp will be on during charging. ● It takes about 150 minutes to recharge the battery. ● Required time for recharging the battery depends on the ambient temperature and status of recharge level. 3 When the charge lamp goes out, charging is completed. Remove the battery from the charger and remove the power cable plug from the wall outlet. ● We recommend charging the battery before using the camera again. If it is not used for several days, battery performance decreases. ● In the case that the number of possible shots will decrease extremely after charging, it may indicate the end of battery life. battery. 19 Please purchase a new LOADING THE BATTERY 1 Confirm that the D dial is in the position, and open the cover by sliding the battery compartment cover latch in the direction of the arrow, as shown in the instruction. 2 Insert the battery in accordance with diagram inside the cover. ● Insert the battery until it locks into place. 3 Close the cover securely. ● Push the cover until it clicks into the locked position. WARNING!! It is possible to remove battery cover, if it is tilted around 35°. If this part comes off during opening or closing the cover, please insert cover as shown in the illustration. 20 TO REMOVE THE BATTERY 1 Turn the “D”- dial to the position, and open the battery compartment cover by sliding battery compartment cover latch in the direction as shown by the arrow. 2 Eject the battery by sliding the battery compartment cover latch in the direction of the arrow, as shown in the illustration. WARNING!! • While the Busy Lamp is on, please do not remove the battery. Doing so can result in data loss. Moreover, the camera and card may be damaged. 21 CHECKING THE BATTERY STATUS When “D”-dial is set to drive area (P.14), the battery icon, which shows the capacity of the battery, is shown on the top LCD panel. Explanations of the symbols are given as follows. TOP LCD PANEL COLOR LCD Battery Status MONITOR White White White Blinking Red Blinking White The battery strength is sufficient. The battery level is low and the battery will need to be changed soon. The power of the battery is insufficient, replace the battery immediately. The power of the battery is empty; it is not possible to work. Please replace the battery. The battery is working with the connected AC adapter. (The fully charged battery icon will be displayed regardless of the actual battery status.) POWER SAVING To conserve the battery, the camera has several power-saving features. After six seconds of non-operation certain camera systems automatically shut down: the shutter speed and aperture value disappear from the top LCD panel, the display in the viewfinder turns off, and some buttons no longer work (however, it is still be possible to review images or change menu settings on the color LCD monitor). Press the shutter button halfway to reactivate the camera. To prevent position the shutter from being accidentally released, turn the D-dial to the whenever the camera is not in use. Additionally, if the color LCD monitor is not used for a set amount of time, the and buttons are not active camera goes into a low-power mode. The when the camera is in low-power mode. This feature prevents the color LCD from being accidentally turned on and draining the battery while the camera is not and buttons, press the shutter button being used. To reactivate the halfway. For more information see P.113. 22 USING A HOME POWER SUPPLY (Sold Separately) You can power the camera from a wall outlet using the provided AC Adapter - (SAC-4). When using your camera for an extended period of time, reviewing the pictures or connecting the camera to a computer or cleaning the image sensor, we recommend that you operate the camera from a household power outlet. Plug and wall socket types may vary depending on country. 1 Connect the AC cable to the AC adapter. ① 2 Connect the plug of the AC adapter to the camera. ②, ③ 3 Insert the plug of the AC cable into a wall outlet. ④ When you have finished using the camera, please disconnect the plug from the wall socket. When using the SD15 with an AC power supply, the battery icon shows the full symbol, regardless of the power level of the battery. If you start to operate the camera on battery power, the display will change and show the remaining power level of the battery. WARNING!! • While the Busy Lamp is on, do not change the power supply by any means. Doing so can result in data loss or damage to the camera or card. 23 MOUNTING AND REMOVING THE LENS 1 Make sure to turn the “D”-Dial to position (Power Off position) 2 Remove the camera body cap and the rear cap of the lens’. 3 Align the red mark on the camera’s mount with the red dot on the lens. Insert the lens into the mount of the camera, and rotate the lens clockwise until it clicks into the locked position. CAUTION !! • To ensure a proper connection, do not hold down the lens lock button while mounting the lens. • The SD15 camera contains a dust protector, located inside the lens mount. The dust protector is a very delicate device. Take care not to cause scratch its surface. Touching or pushing it with your fingers can easily damage it. If there is dirt or dust on it, please refer to the Maintenance section of your manual (P.110). 24 4 To remove the lens, press the lens lock button and turn the lens counter–clockwise until it stops. Gently remove the lens from the camera body. CAUTION !! • On the mount surface of the lens, there are a number of electrical contacts. Keep them clean to ensure proper connection. To avoid damaging them, be sure to place the lens on its front end when it is off the camera. 25 SETTING THE LANGUAGE You should receive the SD15 camera pre-set to English, however, if necessary, you can change the camera language yourself. 1 Make sure the camera is turned on. 2 Press the button on the back of the camera to display the Camera Set-up Menu. (See P.28) 3 Use the arrows on the 4-way controller to select [Language/言語]. 4 Press the sub-menu. arrow or button to open the 5 Use the arrows on the 4-way controller to select the desired language. English 日本語 Deutsch 中文(简体字) Français Español Italiano 한국어 Русский English Japanese German Chinese French Spanish Italian Korean Russian 6 Press the arrow or button to apply the setting or the arrow or button to close the sub-menu without saving any changes. 26 SETTING THE TIME AND DATE The SD15 camera records the date and time when each image is captured and stores this information with the image. To ensure that the correct information is recorded with each image, set the camera’s internal clock to the correct date and time before using the camera for the first time or after extended periods of disuse. 1 Make sure the camera is turned on. 2 Press the button on the back of the camera to display the Camera Set-up Menu. (See P.28) 3 Use the arrows on the 4-way controller to select [Date/Time]. 4 Press the arrow or the the date/time set-up page. button to open 5 Use the arrows on the 4-way controller to select a setting and use the arrows to cycle through the setting options. 6 Once all changes have been made, press to save the settings and return to the main menu. ● Press at any time to close the date/ time set-up page without saving any of the changes. TIP • The date can be displayed in one of three formats: M/D/Y (month/day/year), D/M/Y (day/month/year), or Y/M/D (year/month/day). Select the desired format from “Date Format”. • The camera’s internal clock is powered by a capacitor that receives its charge from camera’s battery. If the camera is without battery for an extended period of time, such as after prolonged storage, the internal clock will need to be reset. 27 CAMERA SET-UP MENU This section describes the various settings in the Camera Set-up Menu. The Set-up Menu contains two types of menu items; items followed by an ellipsis (…) open dialog windows, all other items open sub-menus listing the setting options. TO DISPLAY THE SET-UP MENU Press the camera. button on the back of the ● Press again to close the Set-up Menu and turn off the color LCD monitor. While in the Set-up Menu: • Use the arrows on the 4-way controller to select menu items. • Press the arrow or button to open sub-menus or dialogs. While in set-up sub-menus: • Use the arrows on the 4-way controller to select setting options. arrow or button to apply • Press the new settings. • Press the arrow or button to close sub-menus without applying changes. 28 LIST OF MENU FUNCTIONS * Designates the default option. Some defaults may vary depending on the country of purchase. Menu Item Options Description Custom WB — Captures the image to be used for the custom white balance setting. 62 Picture Settings Contrast Sharpness Saturation Color Space Sets image parameter and color space. 67 Auto Bracket Setting 3 3 3 5 5 5 Sets order and number of Auto Bracket. 73-75 AEL Button Settings Lock Hold * Sets whether or not AE Lock continues when releasing button. finger from the 69 Half-pressed AEL Off On * Sets or cancels the exposure lock when the shutter button is pressed “half-way”. 70 AF Auxiliary Light Off On * Sets whether or not the AF Auxiliary Light is used in low light conditions. 54 AF Beep Off On * Sets or cancels electronic beeping sound. Extended Mode Off * On Sets whether or not Extended Mode of ISO Sensitivity and Bulb time is used. 0 ►- ►+ * - ►0 ►+ + ►0 ►0 ►- ►+ - ►0 ►+ + ►0 ►- Off Quick Preview 29 2 sec.* 5 sec. 10 sec. Sets the duration of the Quick Preview image that is automatically displayed on the color LCD monitor after the image is captured. Page 51,52 80 82,83 Menu Item Options Description Page C-dial : M Shutter speed* Aperture Sets the allocated function of C-Dial in M mode. 45,46 UP Setting Shutter button* Sets the exposure timing of after 2 sec Mirror Lock-up photography. after 10 sec File Numbering Continuous * Auto reset Sets the file numbering system used when a new card is inserted in the camera. 37 Exposure Warning Off * On Sets whether or not the over - exposure warning is shown on images. 92 OK Shortcut None * Lock/Unlock Mark/Unmark Rotate Rotate Exp. warning Sets the function that the button will perform during image review. 105 Applied Rotate Off On * Sets whether or not vertically orientated images are automatically rotated and displayed vertically. — Auto Rotate Off On * Sets or cancels to record the vertical image information. 81 Format Card — Formats the card. (Formatting will erase all data on the card.) 36 — Sets the date and time in the camera’s internal clock and the format in which the date and time will be displayed. 27 Sets whether or not it is possible to release the shutter when the card is not inserted into the camera. 40 Date/Time Disable * Release Without Card Enable 58,59 30 Menu Item Options Description Page Key Sound Off On * Sets or cancels Key Sound. — Sets the delay before the backlight of the color LCD monitor turns off automatically if no operation has occurred. 113 Auto Power Off Off 30 sec. 1 min. 2 min. 5 min. * 10 min. Sets the delay before the camera shuts down automatically if no operation has occurred. 113 Video Mode NTSC * PAL Sets the standard to be used for video output when the camera is connected to a television or VCR. 93 Language/言語 English * 日本語 Deutsch Français Español Italiano 中文(简体字) 한국어 Русский Sets the language in which menus and messages will be displayed. 26 Firmware — Confirm current firmware version and update the latest firmware version from card. — — Restores all menu options to their default settings. (Default settings are indicated by a *.) (Language setting will not be restored.) — Off LCD Off Camera Reset 31 10 sec. 30 sec. 1 min. * 3 min. 5 min. 10 min. FUNCTION DISPLAY In Function Display, it is possible to set and confirm functions (Flash Mode, button. It is also possible to AF Mode etc) which are set by the confirm the information (Aperture value, Shutter Speed, Exposure Mode, frame number etc). z To show the Function Display, press the button. z When Function Display is on, the LCD monitor will be turned off by pressing the button, the button or the shutter button “half-way”. 1 Battery Level Indicator 9 Auto Bracket 2 Exposure Mode 10 Exposure Meter 3 AE Lock 11 Number of shots remaining 4 Metering Mode 12 AF Mode (P.52) 5 ISO Sensitivity 13 Flash Mode (P.49) 6 Focusing Frame 14 Slow Sync (P.50) 7 Shutter Speed 15 Flash Sync. Mode (P.50) 8 F Number 16 Remote Control Channel (P.75-77) z For more detailed information about functions of 12-16 set by the please refer to the individual pages. button, 32 CAMERA INFO PAGE The Camera Info Page can be used to get at-a-glance information about image-capture settings (for example: Image Size, Image Quality and Picture Settings) and card status. z By pressing the button (except when reviewing images), the Camera Info Page is displayed. button again, pressing z By pressing the the button or pressing the shutter button “half-way”, the LCD monitor is turned off. 1 Battery Level Indicator 7 Sharpness 2 Image Size 8 Saturation 3 Image Quality 9 Color Space 4 Color Mode 10 Date/Time 5 White Balance 11 Used capacity 6 Contrast 12 Total capacity of the Card 33 INSERTING AND REMOVING THE CARD The SD15 camera uses a SD memory card, SDHC memory card and Multimedia card to store data. TO INSERT THE CARD 1 Turn off the camera and open the SD Card Cover, as shown in the illustration. 2 Insert the card in accordance with the instruction of the Card chamber. Insert the card until it clicks. 3 Close the SD Card Cover. Slide the SD Card Cover in the direction shown by the arrow until it clicks shut. TIP • It may be necessary to format the card before use. (See P.36) 34 TO REMOVE THE CARD 1 Turn off the camera and open the SD Card Cover, as shown in the illustration. 2 Push the card until it clicks and pull out it. 3 Close the SD Card Cover. Slide the SD Card Cover in the direction shown by the arrow until it clicks and locks. CAUTION !! • Never do any of the following while the Busy Lamp is on. (The Busy Lamp indicates when the camera is writing, reading, or erasing images from the card. Doing any of the following may cause the image data to be lost or corrupt.) 1. Do not remove the card. 2. Do not remove the battery. 3. Do not apply shock or vibrations to the camera. TIP • If the camera is turned off while the Busy Lamp is on, the camera will remain on until it has finished accessing the card. 35 FORMATTING THE CARD New cards must be formatted before use. In addition, cards with corrupt or incompatible file systems may need to be formatted before use. 1 Make sure the camera is turned on. 2 Press the button on the back of the camera to display the Camera Set-up Menu. (See P.28) 3 Use arrows on the 4-way controller to select [Format Card]. 4 Press arrow or to open the confirmation dialog. 5 Press to format the card or to close the confirmation dialog without formatting the card. CAUTION !! • Formatting erases all card contents, including locked SD15 files and all non-SD15 files. TIP • Cards formatted in other cameras or devices may not operate correctly in the SD15 camera or may have reduced capacity. To store the maximum number of SD15 files, format the card in the SD15 camera before use. 36 FILE NUMBERING SYSTEM Stored data is automatically assigned file numbers from 0001 to 9999. When data is being reviewed, the file number of each image is displayed in the right corner on the color LCD monitor (see P.85, 89). The file number is also incorporated into the filename of the image. The filename consists of “SDIM” followed by the 4-digit file number and extension. For example: image number 0023 will be stored in the file SDIM0023.X3F. All SD15 image files will be stored to ###SIGMA folder of the DCIM folder in the card. ● When [Adobe RGB] is selected from the Camera Set-up Menu (P.28) → [Color Space], the filename will consist of “_SDI” instead of “SDIM”. ● File numbering can be continuous, or can be reset every time an empty card is detected. Use the Camera Set-up Menu (P.28) to set the file numbering system. FILE NUMBERING OPTIONS Continuous (Default) Numbering is continuous. The first file number assigned on an empty card will be one higher than the last assigned number. (If the inserted card contains SD15 images with file numbers greater than the last assigned number, file numbering will continue with one higher than the highest file number on the card.) Auto Reset Each time an empty card is inserted, or all images on the current card are deleted, the file number will reset to its default value of 0001. (If the inserted card already contains SD15 images, the file number will not be reset). 1 Make sure the camera is turned on. 2 Press the button on the back of the camera to display the Camera Set-up Menu. (See P.28) 3 Use arrows on the 4-way controller to select [File Numbering]. 4 Press 5 Use arrow or to open the sub-menu. arrows on the 4-way controller to select numbering system. 6 Press arrow or to apply the setting or sub-menu without making any changes. 37 arrow or to close the FRAME NUMBER COUNTER This display shows the number of images that can be recorded on the card. z The number of images that can be recorded on the card depends on the settings you choose. For example, in the illustration on the left, 32 pictures can be stored on the card. (The number shown in the counter is only an estimate. The actual number of images, which can be recorded, will depend on the subject, shooting conditions and shooting mode.) z Even if it is possible to record more than 9999 images on the card, the maximum number of frames that can be displayed by the counter is . z If no more space is available to store images on the card, the frame number will be “ ” and the Shutter Speed display will show “ ” and blink. z You can also see “ ” shown in the viewfinder. z If a card is not inserted into the camera,“ ”appears on the LCD panel. z When the camera’s buffer is full, the frame number value blinks on the top LCD panel. A cursor will be in motion on the Shutter Speed display to show the progress. “ ” will be displayed in the Frame Number Counter. z The shutter will not release when the camera is busy with processing. It is necessary to await the end of the processing before taking a picture. 38 DIOPTER ADJUSTMENT Adjust the viewfinder diopter so that you can see clearly through the viewfinder. While looking through the viewfinder, slide the diopter adjuster to the left or to the right, until the image appears sharp on the focus screen. TIP • The camera’s adjustable diopter range is –3 to +1.5dpt. • If you still cannot see the viewfinder clearly, we suggest that you purchase a viewfinder diopter adjustment eyepiece and use it together with the built-in diopter adjuster. TOP LCD ILLUMINATION Pressing the “Top LCD Illumination Button” activates the orange color LCD illuminator, allowing the Top LCD display to be read in the dark. TIP • The top LCD illumination will not function if the camera is in Power Saving Mode (P.22). Press the shutter button “halfway down” to activate the exposure meter of the camera (aperture and shutter speed values will be shown on the LCD monitor). • If the shutter button is pressed, the top LCD illumination will be turned off. • Illumination will continue during operation of the buttons or dials. Illumination will disappear 6 seconds after stoping operating the camera. • Top LCD illumination does not function when build in flash is charged. 39 HOLDING THE CAMERA To avoid camera shake, which can cause blurring of your photograph, hold the camera steady. ● Firmly grasp the camera’s grip with your right hand. ● Hold the camera steady with your left hand and support the bottom of the camera and the lens. ● Place your eye as close to the viewfinder as possible. ● Keep your elbow close to your body and take a half step forward for a more stable stance. SHUTTER BUTTON The shutter button of the SD15 cameras has two positions. When you press the shutter button “halfway down”, the camera’s autofocus and Exposure Systems activate. When you press the button “all-the-way down”, and the shutter will release to take a picture. TIP • Before you start to take pictures, we recommend that you operate the camera, to become familiar with the “halfway down” position and other features of the camera. z Normally, if the card is not inserted to the camera body, it is not possible to release the shutter. However, this can be changed from [Release Without Card] on the Camera Set-up menu (P.28). Disable (Default) When the card is not inserted in the camera body, it is not possible to release the shutter. Enable It is possible to release the shutter, even if the card is not inserted in the camera body. 40 BASIC OPERATION SELECTING THE EXPOSURE MODE The features and the operation methods of the four different exposure modes of the camera are explained below. P PROGRAM AE To make picture taking easier, the camera will automatically select an appropriate combination of shutter speed and aperture value, according to the brightness of the subject. 1 Set the “D”-Dial to the “Drive Area” (P.14). 2 Set the “Mode”-Dial to the P position. 3 Press the shutter button “half-way” to verify the focus and exposure display in the viewfinder. If the subject is too bright or dark, both shutter speed and aperture value indicators will blink and will show the limit values. If you take a picture with these settings, the picture will be overexposed or underexposed. 41 When this symbol blinks, shutter speed may be too slow and picture may be blurred. In this case, please use a flash (P.47, 79) or use a tripod to prevent blurring. PROGRAM SHIFT You can change the combination of shutter speed and aperture value, which were automatically selected by the camera. While turning the “C”-Dial, the combination of shutter speed and aperture value will change within the range of combinations that give the equivalent exposure. ■ It will be canceled automatically, after taking the picture. 42 A APERTURE PRIORITY AE After you set the aperture, the camera will determine the appropriate shutter speed. If you select smaller apertures, depth of field will be greater. Larger apertures tend to blur the background, as depth of field will be shallower. 1 Set the “D”-Dial to “Drive–Area” (P.14). 2 Set the “Mode”-Dial to the A position 3 Press the shutter button “Half-Way” to verify the focus, and select the desired aperture value by turning the “C” –Dial. 4 Verify the setting in the viewfinder. If the appropriate shutter speed is outside the range of suitable combinations due to the subject being too bright or too dark, the shutter speed indicator will blink. If the subject is too bright, set the aperture value to a smaller one (larger F-number). If the subject is too dark, set the aperture value to a larger one (smaller F-number) until the indicator stops blinking. 43 S SHUTTER SPEED PRIORITY AE When you set the desired shutter speed, the camera will select the appropriate aperture value for correct exposure. You can achieve stop action effects by selecting a fast shutter speed, or give the feeling of motion to a moving subject by selecting a slow shutter speed. 1 Set the “D”-Dial to the “Drive –Area” (P.14). 2 Set the “mode”-Dial to the “S” position. 3 Press the shutter button “halfway” to verify the focus, and select the desired shutter speed value by turning the “C” –Dial. 4 Verify the setting in the viewfinder. If the appropriate aperture value is beyond the range of the lens in use, due to the subject being too bright or too dark, the aperture value indicator will blink. If the subject is too bright, set the shutter speed to a faster one, or if the subject is too dark, set the shutter speed to a slower one, until the indicator stops blinking. 44 M MANUAL EXPOSURE Set both the shutter speed and aperture value according to the indication of the exposure meter. You can change the exposure, as you desire. 1 Set the “D”-Dial to the “Drive-Area” (P.14). 2 Set the “Mode”-Dial to the “M” position. 3 Press the shutter button “Half-Way” to verify the focus, and rotate C dial to select the desired shutter speed. 4 While pressing button, rotate C dial to select the desired aperture. 5 Verify the settings in the viewfinder. To determine the exposure value using the camera’s exposure meter Rotate the “mode”-Dial to the M position. When you press the shutter button “Half-way”, the shutter speed and aperture value are displayed in the viewfinder, and the display indicates the difference between the manually selected exposure and the metered exposure. Such as 1.7 0.0 3.0 1 2 ⁄ 3 Step Below (under exposure) Correct Exposure 3.0 Over (over exposure) The exposure meter can display an exposure error of up to ± 3 stops from the correct exposure in 1/3 steps. If the exposure error is more than three stops, the exposure meter will blink. ● In manual exposure mode, it is possible to set the shutter speed and aperture value by operating the C-Dial and the button. It is possible to change their allocated function. 45 It can be set from [C-Dial : M] of Camera Set-up menu (P.28). Shutter Speed Shutter speed is set by rotating the C-Dial. While pressing the (Default) button, rotate the C-Dial to set the aperture value. Aperture Aperture value is set by rotating the C-Dial. While pressing the button, rotate the C-Dial to set the shutter speed. BULB SETTING When long time exposures are required (for shooting night scenes or very dark subjects) the use of the “Bulb” setting is recommended. Please use a tripod, when taking pictures with this setting. 1 Set the “D”-Dial on the “Drive Area” (P.14). 2 Set the “Mode”-Dial to the “M” position. 3 Rotate the “C” -dial until is displayed on the top LCD panel’s shutter speed location. 4 While pressing button, rotate the “C” -dial to select the desired aperture. 5 Depress the shutter button fully to take the picture. CAUTION !! • It is not possible to use Bulb photography for more than 30 seconds. The shutter will automatically close about 30 seconds after the shutter button was pressed. (If the Extended Mode (please refer to P.80) is set to [ON], it is possible to use Bulb photography up to 120 seconds.) 46 USING THE BUILT-IN FLASH The cameras have built-in flash for taking pictures at night or in low light, which is very convenient. USING THE BUILT-IN FLASH P mode, use this mode for automatic photography. The flash sync speed and aperture are set automatically. If the subject is too dark, the flash indicator ” ” in viewfinder will blink, then you can take a flash exposure by following. 1 Grasp the built-in flash (see picture) and lift it up gently. 2 Wait for the viewfinder. mark to appear in the ■ When you lift up the built-in flash, it will start charging. While the built-in flash is charging, the mark is not visible, but when the flash is sufficiently charged, the indicator in viewfinder and on the LCD panel, will show mark. ■ During the charging, the shutter cannot be released. ■ After you finish using the built-in flash, close the flash head by pressing the top part of the flash down. ■ When you use the built-in flash continuously, the grip of the camera will become warm. This is normal and not a defect. CAUTION !! • The lens hood may intrude into the light path of the built-in flash unit, resulting in a shadow at the bottom of the picture. (The same phenomenon is possible with a lens, which has a large front lens and long length) Either remove the lens hood, or use an external Sigma dedicated flash. • To prevent overheating and protect the built-in flash unit after using continous shooting with flash, please do not use your flash for a while,. 47 EXPOSURE MODE AND BUILT-IN FLASH P mode Depending on the brightness of the subject and focal length of lens, the most appropriate shutter speed (between 1/30 - 1/180 sec) and aperture will be selected. In bright situations, the flash will be “daylight synchronization flash”, and the camera will calculate the appropriate flash amount for the correct exposure, of both the subject and background. If the ambient light is too great, resulting in overexposure, the shutter speed and aperture value displays will blink. If the subject is too dark, the camera will proceed to take a flash exposure with the aperture fully open. A mode Use this mode if you want to set the desired aperture value. The camera will select the appropriate shutter speed for the background. The shutter speed will operate at 1/180 or slower. In bright situation, the camera will work the same as P mode for daylight synchronization flash and it can obtain a balanced exposure between the subject and background. If the maximum synchronized shutter speed is displayed and is blinking, please set the aperture value to a smaller aperture value (large F-number). S mode Use this mode if you want to set a specific shutter speed. The camera will select the appropriate aperture value for the background. The shutter speed will operate between 1/180 or slower. The camera will automatically correct the shutter speed to the highest synchronization speed even if you select a higher shutter speed. If the subject is too bright, the flash will be set to daylight synchronized. Then you can obtain a balanced exposure between subject and background. When the lens smallest aperture (largest F-number) value is blinking, the picture will be over-exposed. M mode This mode enables you to set both flash synchronized speed and aperture value. If you set a synchronized speed faster than 1/180, the shutter speed will be set automatically to 1/180. If the exposure meter indicates appropriate number, you will obtain the correct exposure for the subject and background. If the exposure meter indicates minus (under), you will obtain the correct exposure for subject, but the background will be dark. If the exposure meter indicates plus (over), both the subject and the background may be over-exposed. CAUTION !! • When P and A modes are showing the shutter speed as 1/200sec., the actual shutter speed value is 1/180sec. In the case of S and M modes, please select 1/200sec., if you wish to set the shutter speed to 1/180sec. 48 FUNCTION SETTING OF FLASH The built-in flash has several functions besides normal flash. The flash function settings are in Function Display. 1 To display Function Display, press the button. 2 Select the desired function by pressing the button and press the button or the button. 3 Select the desired option by pressing the button or the button and then press the button. FLASH MODE It is possible to select Normal Flash, Red-eye reduction Flash or Wireless TTL Flash Mode. NORMAL FLASH (Default) When you lift up the built-in flash, you can use your camera with Normal Flash. ■ Please use this mode for ordinary photography. RED-EYE REDUCTION FLASH When you take a picture with flash, sometimes the person’s eyes reflect the flashlight and the “redeye” phenomenon will appear in the picture. In order to avoid this effect, the red-eye reduction lamp lights approx.1sec before the main flash fires, this reduces the effect of the “redeye” phenomenon in the picture. ■ Depending on the lighting and subject conditions, the Redeye Reduction flash may not completely eliminate the redeye in all cases. WIRELESS TTL FLASH MODE C1~C3 49 It is possible to take pictures with Wireless TTL Flash Mode, if you use the optional external flash SIGMA EF SUPER series (only this Flash Type is compatible with wireless flash photography). Please refer to the Instruction Manual of the DG SUPER SA-STTL for more details. SLOW SYNC When using the flash with P/A mode, the shutter speed value, which will reduce camera shake, is set automatically. The slow synchro mode changes the shutter speed up to 30 second depending on light condition. This mode is suitable for a portrait in a nightscape. OFF (Default) ON Default setting is applied. ■ Please use this mode for ordinary photography. Slow synchro mode is applied. REAR CURTAIN SYNCHRONIZATION (Flash Sync. Mode) When you photograph a moving subject with slow synchronization, usually the furrow of the subject will be exposed in front of the subject. The ordinary flash light will fire when the front shutter curtain is fully opened, thus the subject will be exposed from the time the flash is fired to the time the shutter is closed (Front curtain synchronization). When you use rear curtain synchronization, the flash will fire just before the rear curtain begins to close and the subject will be exposed by ambient light from the time the shutter opens until the flash fires. As a result the furrow of the subject will be recorded behind the subject. This gives a more natural effect. Default (Front curtain synchronization) mode is applied. (Default) ■ Please use this mode for ordinary photography. Rear curtain synchronization mode is applied. 50 FOCUSING Adjustment of autofocus and manual focus operation are explained below. HOW TO USE AUTOFOCUS It is possible to use Autofocus function only with AF Lenses. Your camera is equipped with highly precise AF System and incorporates two different autofocus modes.(In the case of Mirror lenses and some specialized lenses, the camera can be use only in Manual Focus mode). SETTING THE AUTOFOCUS MODE 1 Set the focus mode switch of the lens, to AF. 2 Decide the composition through the viewfinder and press the shutter button halfway (if the autofocusing is selected, the camera confirms focusing with an electronic sound and a red “in-focus” indicator appears in the viewfinder). Although your camera is equipped with highly precise AF system, in some cases autofocus cannot set correctly. ■ Low-contrast subjects, such as blue sky or blank wall, etc. or when the color of the subject is same as background. ■ The subject is located in a very low light environment ■ Overlapping near and far objects, such as an animal behind a fence ■ A subject, which moves with a high speed ■ Subjects, which have repeated patterns such as building windows. In such cases, please use one of the following focusing methods. 1. Use the Focus Lock function to focus on another subject, which has a similar focusing distance as your subject. 2. Set the lens to MF mode and focus manually. 51 SELECTING THE AUTOFOCUS MODE 1 Press the Function Display. 2 Use the press the button to display the button to select AF Mode and button or the button. 3 Select the desired options by pressing the button and then press the button or the button. SINGLE AF MODE Depress and hold the shutter button “Half-way” to activate the autofocus function. In order to avoid out of focus exposures, the shutter cannot be released until the subject is in focus. This is called “focus priority”. The Focus Indicator lights up in the viewfinder, when the AF Point Selection is focused on the subject and the focus is locked. Press the shutter button the rest of the way to take the (Default) picture. If the camera cannot focus on the subject properly, remove your finger from the shutter button and press again. ■ Focus indicator will blink, if the subject is out of focus. ■ Use your camera in this mode for regular photography ■ It is possible to turn the electronic sound off. Set [AF Beep] in Camera Set-up menu (P.28) to [Off]. CONTINUOUS AF MODE Press the shutter button “Half-way” to activate the autofocus function. If the subject is in motion, the camera will focus continuously with motion prediction function. You can release the shutter any time, even if the subject is not precisely in focus. However, depending on the subject situation, (i.e. speed and direction of moving subject, the lens and shutter speed etc.) there is a possibility that the picture may be out of focus. ■ Focus indicator will not appear. ■ Autofocus lock does not work. ■ Depending on some unusual conditions of the subject, sometimes autofocusing is not possible. ■ When the Automatic Selection mode of the AF Point Selection is selected, the camera automatically selects the initial focus point for tracking the subject. 52 AF POINT SELECTION The SD15 is equipped with 5 focusing points. Selecting the AF point can be done automatically or manually by the photographer. button and select the desired AF Press point by rotating the “C”-dial displayed in the viewfinder. ■ The Selected AF point will be illuminated in red in the viewfinder. ■ Automatic AF point selection can be achieved when the five focusing points in the viewfinder are illuminated in red. ■ When you rotate the “C”-dial clockwise, the selection will occur in the looping sequence that follows. 53 AF AUXILIARY LIGHT The built-in AF Auxiliary Light of the SD15 enables focusing in low light conditions. ■ The AF Auxiliary Light can be used with (Single AF mode) and automatic or center focus AF point selection only. ■ The AF Auxiliary Light is effective with the center focus of the automatic AF selection only. ■ The effective distance of the AF Auxiliary Light is 3m. CAUTION!! • The lens hood must be removed when the AF Auxiliary Light is used. The AF Auxilary Light may not work correctly if long and large diameter lenses are attached to the camera as they may interfere with the beam. • If the AF Auxiliary Light is continuously used, it may turn off temporarily in order to protect the lamp. The AF Auxiliary Light can be used again after a short pause. • Do not use the AF Auxiliary Light for other purposes (lighting etc.) as continous use of the AF Auxiliary Light will cause damage . ■ The AF Auxiliary Light can be turned off. In the set-up menu (P.28), set the [AF Auxiliary Light] to the [Off] position. 54 FOCUS LOCK This photography method is useful if a photographic subject is not positioned within the central AF frame. 1 Choose the AF point according to the "AF POINT SELECTION” instructions on page 53. 2 Position the photographic subject into the selected AF frame, and focus by pressing the shutter button half-way. 3 Keep the shutter button depressed half-way while you compose the picture as desired. Then press the shutter button the rest of the way to take picture. ■ Focus Lock can be used with locked in (single AF mode) only. The AF cannot be (continuous AF mode). MANUAL FOCUS In situations, where autofocus or focus lock is not effective, you can focus manually. 1 Set the focus mode switch, on the lens to the M position. 2 While looking through the viewfinder, turn the focusing ring on the lens until you get a clear sharp image. ■ When you use a lens, which has maximum aperture of F5.6 or faster, the focus indicator in the viewfinder will appear, when correct focus is attained. 55 OPERATION OF THE DRIVE MODE Operation of the self-timer, and other functions of the camera are explained by the following: DRIVE-AREA Some of the important operations and settings of the camera can be activated by the drive area of the “D”-dial. Such as single frame shooting, continuous shooting, self-timer, and mirror lock-up. MIRROR LOCK-UP SELF-TIMER (2s) SELF-TIMER (10s) DRIVE-AREA CONTINUOUS SHOOTING SINGLE FRAME SHOOTING SINGLE FRAME SHOOTING When you press the shutter button in the single frame-shooting mode, only one frame will be exposed. Then the camera will be ready for the next shot by advancing one frame. Single frame shooting mode is recommended for ordinary photography. 56 CONTINUOUS SHOOTING In this mode, when you keep the shutter button fully depressed, the camera will take pictures continuously. At the time of continuous shooting the number of frames per sec. is given below. The maximum number of frames and speed of continuous shooting are as follows: Image Size (Resolution mode) HI RAW Image Quality JPEG 21 3.0 21 3.0 MED 21 3.0 LOW 21 3.0 The upper rows show the maximum number of frames, the lower rows show the maximum shooting speed in continuous mode (frames per second). CAUTION !! • When AF mode is set to AF (Single AF mode) mode and the focus indicator in the viewfinder is on, focus distance and exposure value are fixed at the setting for the first picture. It is possible that focus and exposure could be incorrect, if subject moves or the brightness changes. When AF mode is set to AF mode (Continuous AF mode), then camera will focus on the subject continuously. However, depending on the subject situation, since the shutter release has the first priority there is a possibility that the picture may be out of focus. • When you use the continuous shooting mode with external flash, the camera may be slow, because the camera will not take pictures, while the flash is re-charging. • Images taken in rapid succession, such as during Continuous shooting, are initially stored in the camera's internal memory buffer. This allows you to continue shooting without having to wait for images to be recorded to the card. Once the memory buffer is full, the shutter will be disabled until some images have been transferred to the card. 57 SELF TIMER When you want to include yourself in the picture or avoid camera shake, please use the self-timer. When you set the self-timer to 10s, then the shutter will be released 10seconds after you fully press the shutter button. When you set the self-timer to 2s, then the shutter will be released 2seconds after you fully press the shutter button. After you decide the composition of your picture, press the shutter button ”Half-way” and adjust the focusing. Then, when you press the shutter button the rest of the way, the display in the viewfinder will disappear and the self –timer will be activated. During the self-timer operation you will hear an electronic beeping sound. The beeping sound will be much faster during the last two seconds, before the shutter is released. The LCD panel will also countdown the remaining time. ■ You will hear the electronic sound during “Self-timer” operation, even if you set the electronic sound option to OFF. ■ If you want to cancel the “Self-timer” operation, turn the “D”-dial to another position. ■ When you start the “Self-timer” and do not look through the viewfinder, attach the finder cap to the viewfinder eyepiece to prevent light entering (P.18). MIRROR LOCK-UP If you want to reduce the camera’s vibration such as during Macro Photography or when using long telephoto lenses, use the Mirror Lock-up function. Set the “D”-Dial to the “UP” position. When you press the shutter button “Half-way” the camera will set the focus and exposure. As you press the shutter button further, the mirror will move up and the exposure value will be memorized. will be displayed alternately with exposure display.) ( Remove your finger from the shutter button and lightly press again to release the shutter. Mirror lock-up function can be cancelled manually by turning the “D”-dial away from the “up” position. 58 z It is possible to change the exposure timing of mirror lock-up photography. It is possible to set this [UP Setting] in the Camera Set-up menu (P.28). Shutter button (Default) After the mirror is raised, exposure will be measured by pressing the shutter button again. after 2 sec Exposure will be measured 2 seconds after the mirror is raised. after 10 sec Exposure will be measured 10 seconds after the mirror is raised. CAUTION !! • Mirror lock up will cancel automatically, and mirror will return to its original position, after 30 seconds. You can reactivate the mirror lock-up function by pressing the shutter button “Half-way” again. WARNING !! • If you are using this function in a strong light source, the shutter curtain may become particularly hot by light entering through the lens. It could cause damage or fire. Please refrain from using the mirror look-up function in such an environment. TIP • It is possible to use Mirror Lock-up with remote control (Sold Separetely). Please refer to page 75-77. 59 ADVANCED OPERATION This section explains the application of the more advanced functions of your camera, when composing the expressions of your picture. SETTING THE WHITE BALANCE (WB) The color of light reflected by an object can vary depending on the color of the light source illuminating it. For example, a neutral colored object will reflect reddish light under incandescent lighting, and greenish light under fluorescent lighting. The human brain is able to compensate for differences in the color of a light source, allowing us to see white objects as white independent of the lighting condition. Film cameras rely on special color-correcting filters and film types to adjust for these differences in lighting. Digital cameras, however, are able to use software to mimic the adjustments made by the brain, so that colors that appear white to the human eye also appear white in your photographs. WHITE BALANCE OPTIONS OPTION COLOR TEMP. DESCRIPTION Select this setting to allow the camera to Auto AWB automatically determine the appropriate (Default) white balance adjustments. Approx. Select this setting when taking pictures in full Daylight 5400 K sunlight. Approx. Select this setting when taking pictures in the Shade 8000 K shade under sunny skies. Approx. Select this setting when taking pictures under Overcast 6500 K cloudy, overcast skies. Approx. Select this setting when taking pictures Incandescent indoors under incandescent (tungsten) lighting. 3000 K Approx. Select this setting when taking pictures Fluorescent 4100 K indoors under fluorescent lighting. Approx. Select this setting when taking pictures with Flash 7000 K the Sigma EF-530 DG flash. Select this setting when using a custom white balance. Use the [Custom WB] menu Custom option to create a custom white balance setting. The "Custom" option will not be available if no custom white balance has been set. 60 1 Make sure the camera is turned on. 2 Press the menu. Button to open the quick set 3 The desired mode can be chosen by pressing the ( ) button of the 4-way controller. 4 A photograph can be taken when the shutter button is pressed half-way and this will determine the white balance mode. (alternatively, the mode can be chosen by pushing the button ). ■ If Custom White Balance ( be used for shooting. 61 ) is selected, [Custom WB] of set-up menu will SETTING A CUSTOM WHITE BALANCE For more precise control of the white balance setting or when photographing under unusual lighting conditions, the [Custom WB] option can be used to capture a sample of neutral object in a scene to be used for color correction. 1 Make sure that "D"-dial is set to Single Frame Shooting < >. 2 Press the button on the back of the camera to display the Camera Set-up Menu. (See P.28) 3 Use 4 Press arrows on the 4-way controller to select [Custom WB]. arrow or to open the custom white balance dialog screen. 5 Under the lighting conditions that will be used for the final photograph, frame a white or neutral color object, such as a sheet of white paper or a white wall, so that it fills the Center Area Metering circle inside the viewfinder. 6 Press the shutter button to release the shutter and capture a custom white balance setting. 7 If a valid white balance setting was captured, a message will appear indicating that the white balance image was captured successfully. If the capture was not successful, "Failed!" will be displayed on the color LCD monitor. Repeat steps 5 to dismiss the dialog. and 6 to capture a valid white balance setting or press CAUTION !! • When a custom white balance setting is successfully captured, "Custom" will automatically become the selected item in the White Balance menu. • It is recommended that an automatic exposure mode such as P, A, or S be used when capturing a custom white balance setting to ensure proper exposure. • It may be necessary to set the lens to manual focus (P.55) when capturing a custom white balance setting since auto focus may not work properly when photographing low contrast subjects. 62 SETTING THE SENSITIVITY(ISO EQUIVALENCY) The photosensitivity of digital cameras is described in terms of “ISO equivalent” like silver-halide film cameras. (ISO sensitivity P.115) While pressing the button, rotate C dial to set the desired ISO sensitivity. z It is possible to select the ISO sensitivity from following. (Auto), 100, 200, 400, 800, 1600 TIP • If [ISO Auto] is selected, the ISO value will automatically change to ISO 100 or 200 depending on the light condition. When using the flash, the ISO value is changed to ISO 100, 200 or 400 automatically. • If the Extended Mode in Camera Set-up menu (P.28) is set to “On”, it is possible to use ISO sensitivity from ISO50 to 3200. For more detailed information, please refer to P.80 “Extended Mode”. CAUTION !! • When Exposure Mode is set to M mode, it is not possible to select “Auto”. When AUTO is selected in S, A, P mode and then change to M mode, ISO100 will be applied. 63 IMAGE FILE SETTING The file size changes depending on resolution mode and recording quality selected. Image Size (Resolution mode) HI 2640×1760 RAW 15.4MB (RAW) FINE 3.3MB (JPEG) Image Quality NORM 1.9MB (JPEG) BASIC 1.3MB (JPEG) * The file sizes change depending on subjects. MED 1872×1248 LOW 1312×880 1.6MB 0.8MB 0.9MB 0.5MB 0.7MB 0.3MB Image Quality It is possible to record images in the widely used JPEG or RAW formats. The RAW images are recorded without digital processing in the camera body and require post-processing with the supplied software, which can convert RAW images to JPEG or TIFF format. IMAGE SIZE SETTING 1 Press the menu. Button to open the quick set 2 Use the button on the 4-way controller to select the desired Image Size. (The following recording modes (HI) → (MED) → (LOW) can be changed by pressing the button.) 3 Press the shutter button halfway or button to apply the setting. Then you can take the picture. 64 IMAGE QUALITY SETTING 1 Press the menu. Button to open the quick set 2 Use the button on the 4-way controller to select the desired Image quality. (The quality can be changed; RAW → FINE → NORM → button.) BASIC by pressing the 3 Press the shutter button halfway or button to apply the setting. Then you can take the picture. WARNING !! • When Image Quality is set to RAW, the Image Size is automatically set to Hi. • When the Image Quality is set to RAW, the Image Size cannot be changed until the Image Quality is changed. COLOR MODE It is possible to select the desired Color mode depending on the shooting conditions. In addition to the above settings, it is also possible to select Sepia and Monochrome (B&W) photography modes. 1 Press the menu. 2 Button to open the quick set Use the button on the 4-way controller to select the desired Color mode. (By pressing the button, the Color mode can be changed as follows.) 65 3 Press the shutter button halfway or can take the picture. Standard* Vivid Neutral Portrait Landscape B&W Sepia button to apply the setting. Then you Standard color mode for various situations. Saturation and contrast are enhanced for making pictures appear vivid. Subdued saturation and contrast makes images natural. This color mode makes skin tone soft. It is ideal for portraits. This mode makes blue and green more vivid and emphasizes pictures. It is possible to take Monochrome pictures. It is possible to take Sepia and monotonous pictures. TIP • It is possible to make pictures according to your intension by the combination of Color Mode and Picture Settings. For example, when Color Mode is set to Vivid and the cursor of Saturation in Picture Settings is set to + side, pictures will be made more vivid. CAUTION !! • It is possible to select the Color Mode to B&W or Sepia, only when the Image Quality is set to JEPG (FINE, NORM, BASIC). • When the Color Mode is set to B&W or Sepia and Image Quaity is changed to RAW, the Color Mode will be automatically changed to STD.(Standard). 66 IMAGE PARAMETER AND COLOR SPACE It is possible to adjust the recording image parameter (contrast, sharpness and saturation) and select the color space. Contrast Contrast can be increased by moving the cursor to + side or decreased, preserving image detail, by moving the cursor - side. Sharpness It is possible to make the pictures appear sharper, by moving the cursor to + side, or softer by moving the cursor to – side,. Saturation It is possible to increase saturation thus making pictures appear vivid, if the cursor is moved to + side. Moving the cursor to – side, decreases saturation and makes images less vivid. Color Space It is possible to select sRGB, which is a common color space or Adobe RGB, which is mainly used for commercial printing, and other industrial purposes. 1 Press the button on the back of the camera to access the setup menu. (P.28) 2 Press the button on the 4-way controller to select [Picture Settings]. 3 Press the menu. button on the 4-way controller or the button to open the sub 4 Use the button to select the desired parameter from the sub menu. 5 Use the button on the 4-way controller to select the desired value.(In the case of the color space, use the button on the 4-way controller to select sRGB or Adobe RGB). 6 Press the button to confirm the setting. • JPEG is compressed after parameter adjustment. In the case of RAW format, parameter information is recorded without adjustment. It is possible to re-adjust RAW images using the supplied Sigma Photo Pro software. 67 • Please set color space to sRGB for regular usage. If you select Adobe RGB, please be sure to use the supplied Sigma Photo Pro software or another image processing software supporting DCF 2.0. SELECTING THE METERING MODE The camera has 4 advanced metering modes. While pressing the button, rotate the “C”-dial to select the desired metering mode and display it on the LCD panel. Releasing the metering button sets the selected metering mode. EVALUATIVE METERING The camera measures the brightness of the scene by independently measuring each segment of the focusing screen and analyzing the correct exposure for the main subject under any lighting situation. Even under strong back lighting or complex lighting situations, the camera will give you the correct exposure. CENTER-WEIGHTED AVERAGE METERING The camera will measure the average brightness of the entire scene with additional emphasis on the center area. It will determine the most suitable exposure with respect to lighting conditions. CENTER AREA METERING The camera will measure the brightness only inside of the circle as shown in the viewfinder. This mode is suitable when you wish to set exposure for a portion of the scene and ignore the influence of rest of the scene. SPOT METERING The camera will measure the brightness only inside of the center focusing point in the viewfinder. This mode is suitable when you wish to set exposure for a portion of the scene and ignore the influence of the rest of the scene. 68 AE LOCK The camera will fix and memorize the exposure value whilst the “AE” Lock button is depressed. When you wish to lock the exposure of a subject off-center, AE lock is very useful. Use of this function with Spot Metering Mode is recommended. 1 Center the subject inside the viewfinder, then press the shutter button “Half-way”. 2 Keep shutter button “Half-way” depressed, button. (While and then push the operating the AE lock, the displays of the shutter speed and aperture value in the viewfinder are locked and “AEL” is visible). You can release the shutter button. 3 Hold the button while you compose the picture. Then press the shutter button to take the picture. ■ When the subject is out of focus during AE lock operation, remove your finger from shutter button and press the shutter button “Half-way” again, or remove your finger from the AE lock button and restart from the beginning. 69 ■ It is possible to continue AE Lock even if the finger is released from the button. It can be set from [AEL Button Settings] of Camera Set-up menu (P.28). Lock Hold (Default) AE Lock will continue until the or the camera is turned off. button is pressed again AEL will be dismissed upon releasing the finger from the button. AE Lock will continue while pressing the button. HALF PRESSED AEL It is possible to set the exposure lock when the shutter button is pressed “half-way” or cancel the exposure lock. Half Pressed AEL can be set from [Half Pressed AEL] of the Camera Set-up Menu (P.28). OFF ON (Default) The exposure will not be locked while pressing the shutter button “half-way”. The exposure will be determined when depressing the shutter button. The exposure will be locked when the shutter button is pressed ”half-way”. While pressing the shutter button is “half-way”, the exposure will not change. CAUTION !! • Only when the AF mode is set to , [Half Pressed AEL] will function. When the AF Mode is set to or the camera is in Manual Focus mode, it is not possible to lock the exposure by pressing the shutter button “half-way” even if [Half Pressed AEL] is set to ON. 70 EXPOSURE COMPENSATION If you want to intentionally overexpose or underexpose the picture, use this function. button, turn the “C”While pressing dial to set the desired compensation value. Then, release the Exposure Compensation button. ■ The LCD panel will show “ 0.0” when you initially press the exposure compensation button. The “ ” indicates overexposure, and “ ” indicates underexposure. ■ Exposure compensation can be set in 1/3EV increments from +3.0 to –3.0 stops. ■ For example, if you set +1.0 then the shutter speed will be one stop slower in Aperture Priority mode. In Shutter Speed Priority mode, the aperture will be one-stop larger (smaller F-number). In the case of Program mode, the shutter speed will be 0.5 stop slower and the aperture will increase 0.5 stop. CAUTION !! • Once you set the Exposure Compensation, the camera will continuously hold this mode, until the compensation amount is set to • Exposure 0.0 value. compensation function cannot be used with Manual Operation mode. TIP • During flash photography, if exposure compensation is performed, background exposure and flash output both will be compensated. If it is used together with flash exposure compensation, it is possible to adjust the balance of background exposure and the flash output amount (please refer to next page). 71 FLASH EXPOSURE COMPENSATION It is possible to compensate the flash output level without changing the background’s exposure. While pressing the button, turn the ”C”dial to set the compensation amount. ■ The LCD panel will show indicates over exposure 0.0 when you initially press the indicates underexposure. button. ■ Exposure compensation can then be set in 1/3 increments from +3.0 to –3.0 stops. ■ mark will be displayed in the top LCD panel after setting the compensation amount. Compensation amount will not be displayed. Exposure amount can be confirmed by pressing the flash exposure amount. ■ It is possible to use the camera for flash exposure compensation of the external flashgun. If the setting is done by both camera and flashgun, then the camera’s setting will have priority over the flash’s setting. WARNING!! • Once you set the flash Exposure Compensation, the camera will continuously hold this mode, until the compensation amount is reset to 0.0 value. Combination of Exposure Compensation and Flash Exposure Compensation It is possible to make adjustments by using the exposure compensation together with the flash exposure compensation, such as making the background brighter and preventing unwanted flash reflections from the subject. For instance, set the exposure compensation to +2 and the flash exposure compensation to –2, and the background exposure will be 2 stops over exposed and the flash exposure be 0 (appropriate). ■ If exposure compensation and flash exposure compensation are set, will be displayed on the display on the LCD panel, only the exposure compensation amount will be displayed. 72 AUTO BRACKETING This function of the camera lets you take a sequence of pictures of the same subject at three different exposure levels; Appropriate Exposure, Under Exposure and Over Exposure. If it is difficult to determine the proper exposure, please use this function. 1 Set the “D”-dial to position. 2 Turn the “C”-dial to set the bracketing amount. (It can be set in 1 ⁄ 3 EV step increments up to ±3 EV). 3 Set the “D”-dial to drive area (P.14). ■ The camera will take three pictures in the following sequence; Appropriate exposure, under exposure and over exposure. ■ The number of Auto Bracket exposures will be displayed on the Top LCD panel as follows. (The value of the Auto Bracketed exposure and exposure counter will be displayed together.) First Frame Second Frame Third Frame ■ For example: If you set the bracketing amount to 2.0, the indicator in the viewfinder will show as follow. P,A,S mode First Frame 0.0 M mode * Measured Value Second Frame 2.0 -2.0 EV deviation from Measured Value Third Frame 2.0 +2.0 EV deviation from Measured Value 73 (* Measured value is the difference between the correct exposure value of the camera and your setting value). ■ The exposure bracketing can be used with 4 different modes. P Mode ; Both shutter speed and aperture value will be changed. A Mode ; Only shutter speed will be changed. S Mode ; Only aperture value will be changed. M Mode ; Only shutter speed will be changed. WARNING !! • Once you set the auto bracketing mode, the camera will continuously hold that auto bracketing mode until you set the bracketing amount to “0.0”. • Auto Bracketing functuion cannot be used with the flashgun. When the built-in flashgun is lifted up, Auto Bracketing will be turned off. ■ When you set the self-timer mode, the camera will automatically take three consecutive pictures. ■ It is possible to change the drive mode during the Auto Bracketing operation. But if you set the self-timer mode, the camera will take three continuous pictures. ■ It is possible to change the Auto Bracket order and the number of possible frames. This can be set from the Camera Set-up Menu (P.28) →[Auto Bracket Setting]. 0 ►- ►+ Three frames appropriate exposure → under exposure → over exposure 3 - ►0 ►+ 3 + ►0 ►- 5 0 ►- ►+ 5 - ►0 ►+ 5 + ►0 ►- Three frames under exposure → appropriate exposure → over exposure Three frames over exposure → appropriate exposure → under exposure Five frames appropriate exposure → under exposure → over exposure Five frames under exposure → appropriate exposure → over exposure Five frames over exposure → appropriate exposure → under exposure 3 (Default) ■ When Five frames is selected on Auto Bracketing mode, the shift value can be set up to ±1.7. 74 Auto Bracketing mode can be used in combination with Exposure Compensation. You can take pictures with Auto Bracketing mode based on a compensated exposure, which you set. To do so, please set both the Auto Bracketing mode and Exposure Compensation mode as desired. The combined value (Exposure Compensation and Auto Bracketing) will be indicated on the viewfinder display. Example Exposure Compensation +1.7 with Auto Bracketing amount 1.0 First Frame 1.7 (Exposure compensation +1.7 & no shift value) Second Frame 0.7 (Exposure compensation +1.7 & shift value -1.0) Third Frame 2.7 (Exposure compensation +1.7 & shift value +1.0) REMOTE CONTROLLER RS-31 This accessory permits releasing the camera’s shutter from up to 16 feet (5m) away from in front of the camera, or up to 9.8 feet (3m) away if you are 30 degrees to either side. (Depending on the lens, there may be some restrictions when using it from the left side of the camera.) All without wires or cables. DESCRIPTION OF PARTS ① Transmit Button ② Time Delay Selector ③ Transmitting diode ④ Channel Selector OPERATION SETTING OF THE REMOTE CONTROLLER 1 Select the delay time. Shutter will be released immediately after the transmit button is pressed. Shutter will be released 3 second after the transmit button is pressed. 2 Select the channel. 75 SETTING OF THE CAMERA 3 Press the Display. button to show the Function 4 Use the buttons to select the Remote Control Mode and press the button or the buttons. 5 Use the button to select the same channel as the remote controller (In the case of the RS-11, please select C1) and then press the button or the buttons. (After setting the channel, the mark will be displayed.) 6 Check that the subject is framed correctly. After you set the focus, we recommend setting the lens switch to MF position. 7 Point the transmitting diode at the camera and press the transmit button. 8 After taking the picture, please cancel the Remote Control Mode following the above procedure from number 3 to 4, and then choose OFF mark to cancel remote control function. ■ The Remote Control Mode cannot be used together with continuous shooting mode. If the “D”-dial is set to the continuous shooting mode, the camera will expose only one frame for each activation by the remote controller. ■ The remote controller may not work properly if strong sunlight is shining directly on the camera’s remote control sensor. ■ The light entering the viewfinder can affect the exposure system of the camera. To prevent this, use the finder cap while using the remote controller. WARNING !! • When the Remote Control Mode is set to ON, Auto Power Off will not function. If you are not using Remote Control please cancel the remote control mode by choosing OFF. 76 USING THE MIRROR LOCK-UP WITH REMOTE CONTROL When using mirror-up mode with the remote controller, we recommend that after adjusting the focus, fully depress the shutter button of the camera once, to lock-up the mirror, and then release the shutter by remote control. This procedure saves your time. 1 Set the “D”-dial to “UP” position, and set the remote control mode. 2 Press the shutter button “half-way” to focus on the subject, and set the desired exposure. Then press the shutter button “all-way down” to raise the mirror-up and retain the focus and exposure. 3 To take the picture, point the remote controller’s transmitting diode at the camera and press the transmit button. REPLACING THE REMOTE CONTROLLER BATTERY (RS-31) The remote controller is powered by 1pc CR 2032 3V Lithium -- battery. 1 Use a coin or a similar subject to open the battery cover in the direction of the arrow. 2 Open the bottom cover and replace the battery. 3 Use a coin or similar object to close the battery cover by rotating clockwise. ■ Check controller operation after replacing the battery. 77 DEPTH-OF-FIELD PREVIEW BUTTON Normally, the lens’ aperture is always fully opened, except at the time the picture is actually taken, for looking through the viewfinder under maximum brightness conditions. However, by pressing the depth-of-field preview button, the aperture can be closed down to the selected shooting aperture before the picture is taken, enabling you to check depth of field through the viewfinder before shooting. DEPTH OF FIELD When you set the focus for a particular subject, there is an area in front of and behind your subject, which will also be in focus. This is called the Depth-of-Field. Depth of Field will increase when Using a smaller aperture value (Larger F-number) i.e. When you photograph the subject under the same conditions but change the aperture value from F8 to F22, F22 will show more area in focus (more depth of field). Using shorter focal length (wide-angle) lens. i.e. When you photograph the subject under the same conditions, changing only focal length from 50mm to 28mm, the 28mm lens will show more area in focus (more depth of field). Photographing the subject at greater distance When you photograph the subject with same focal length lens and aperture value but change the camera-to-subject distance, the subject at the greater distance shows more area in focus (more depth of field) compared to subject at the shorter distance. 78 FLASH PHOTOGRAPHY ELECTRONIC FLASH EF-530 DG SUPER SA-STTL (Sold Separately) ELECTRONIC FLASH EF-530 DG ST SA-STTL (Sold Separately) Optional Sigma Electronic Flashes EF-530 DG SUPER SA-STTL and EF-530 DG ST SA-STTL with the STTL system allow you to use features such as Auto Flash with the SD15. The EF-530 DG SUPER SA-STTL lets you do even more, such as use Multi Flash and other advanced features. EF-530 DG SUPER SA-STTL, EF-530 DG ST SA-STTL ○ High light output. Maximum guide number of 53 (174 ft)(ISO100, 105mm zoom head position). ○ Easy to use. The flash automatically sets the zoom position according to the focal length of the lens in use (from 24 to 105mm). A built-in wide panel can provide the ultra-wide-angle coverage of a 17mm lens. ○ Flexible. For bounce flash, the flash head can be tilted up or down, or swiveled to the left or right. Additionally, the flash head can be tilted 7° downward for close-ups. ○ High-speed. For stop action photography, shutter speeds up to 1/4000 of a second can be used with the high-speed sync FP flash (EF-530 DG Super SA-STTL only). ○ Versatile. Both flash models can be used with Sigma SD14, SD10, SD9, SA300n, SA-5, SA-7 and SA-9 cameras. WARNING !! • SD15 is compatible only with the DG series clip-on type flashguns. Non-DG type Sigma flashguns or flashguns for the other camera brands made by Sigma, or flashguns made by other manufacturers, cannot be used with Sigma SD15 camera.. To get maximum performance from SD15 in flash photography, please use EF-530(500) DG SUPER SA-STTL or EF-530(500) DG ST SA-STTL flashguns. EF-500 DG SUPER SA and EF-500 DG ST SA also can be used with SD15 camera; however, there are some restrictions with the following functions. ● AF auxiliary light may not be powerful enough, and focusing may not work properly depending on the distance or photographic subjects. In such a case, please use manual focus. ● In the case of EF-500 DG SUPER SA, sometimes, the exposure display of the camera and the exposure display of the flash may not be same. For further information, please refer to the EF-500 DG SUPER SA instruction manual. ● Wireless flash function of EF-500 DG SUPER SA cannot be used (Slave Flash can be used). 79 The SD15 is equipped with a PC Synchro Terminal, which accepts a cable connection fro external/studio flash units. CAUTION!! • S-TTL auto flash does not work, if PC Synchro Terminal is used. • Set the camera’s exposure mode to M and set to flash synchronized speed Sync (1/180) or a shutter speed of 1/160 or lower. See the instruction manual of the particular flash used for additional information. • The SD15’s PC Synchro Terminal is compatible with plugs that have a positive (+) polarity on the central pin and a negative (-) polarity on the shield. If the plug has reverse polarity, use a commercially-available polarity conversion cord. WARNING!! • The PC terminal cannot accept flashes that use a voltage of more than 250V. Higher voltage will damage the camera. Please ask the manufacturer of the flash about the voltage and compatibility with the PC terminal. EXTENDED MODE SETTING It is possible to extend the ISO Sensitivity range and the Bulb time by setting the camera to Extended Mode. The Extended Mode can be set in the Camera Set-up Menu (P.28) → [Extended Mode] ISO Sensitivity Bulb time Off (Default) 100, 200, 400, 800, 1600 Up to 30 seconds On 50, 100, 200, 400, 800, 1600, 3200 Up to 120 seconds CAUTION!! • When using the extended ISO Sensitivity and Buld time, the image quality may be lowered due to increasing noise. 80 AUTO ROTATE It is possible to record the vertical image information to images. Auto Rotate can be set in the Camera Set-up menu (P.28) → [Auto Rotate]. Off On (default) The vertical image information will not be recorded. The vertical image information will be recorded. ● When vertically orientated images are reviewed, they will automatically rotate and be displayed vertically. ● When vertically orientated images are reviewed in Sigma Photo Pro, they will automatically rotate and be displayed vertically. ● When vertically orientated images are rotated by pressing Modification Menu → [Rotate], this rotated orientation will be stored. ● If the [Applied Rotate] in the Camera Set-Up menu (P.28) is set to [Off], the vertically oriented images are displayed horizontally. WARNING !! • If the images are taken while the camera is pointed up or down, the vertical position information may not be recorded properly. 81 REVIEWING, DELETING AND MODIFYING IMAGES This section explains how to review, delete, and modify images after they have been captured. TIP • The SD15 may not be able to display images captured by other cameras, or “SD15” images that have been renamed or moved from the DCIM folder on the card. For more information on SD15 file names, see File Numbering System (See P.37). QUICK PREVIEW The SD15 camera can be set to automatically display a preview of each image immediately after it is taken. This is useful for instantly checking exposure and framing. CHANGING THE QUICK PREVIEW DURATION The Quick Preview image can be completely disabled or displayed for 2, 5, or 10 seconds. Use the Camera Set-up Menu to change Quick Preview duration. QUICK PREVIEW OPTIONS Off 2 sec. (Default) • No preview image is displayed. Preview image is displayed for 2 seconds. (Color LCD monitor shuts off automatically after 2 seconds.) 5 sec. Preview image is displayed for 5 seconds. 10 sec. Preview image is displayed for 10 seconds. icon is the recommended setting for conserving the electronic power. 82 1 Make sure the camera is turned on. 2 Press the button on the back of the camera to display the Camera Set-up Menu. (See P.28) 3 Use the arrows on the 4-way controller to select [Quick Preview]. 4 Press the 5 Use the arrow or to open sub-menu. arrows on the 4-way controller to select duration. 6 Press the arrow or to apply the setting or the sub-menu without making any changes. arrow or to close TIP • To manually turn off the Quick Preview image, press the shutter button half-way. button or the • It will not be possible to zoom in to the preview image, use the Modify Menu, or change to another image while the Quick Preview is up. • The format of Quick Preview will use the last saved setting of [VIEWING ONE IMAGE AT A TIME] of P.85 or [VIEWING IMAGE INFORMATION] of P.89. 83 REVIEWING IMAGES The pictures captured by the SD15 can be reviewed in various ways. To review images captured by the SD15 camera press the button on the back of the camera. The last image recorded on the card will be displayed on the color LCD monitor in Single-Image View. Press button on the back of the camera to turn on LCD monitor and display image. ● Pressing monitor. again will turn off the LCD TIP • If no new images have been captured in the meantime, the last reviewed image will be displayed instead. • If there are no images on the card an error message will be displayed. • Since the SD15 camera does not have a separate "playback mode" for looking at captured images, it is always ready to take pictures, even while displaying captured images. 84 VIEWING ONE IMAGE AT A TIME Press button on the back of the camera to see recorded images in Single-Image View. While in Single-Image View: • Press arrow on the 4-way controller to see next image. arrow on the 4-way controller to see previous image. • Press • Press arrow on the 4-way controller to change the indicated information. It is possible to change the information bar from the following two patterns or view the image without the information bar. Battery Level Indicator Image Size Folder numbering ⁄ File numbering Image Quality file number/total files recorded file number/total files recorded Shutter speed Date Time Aperture ISO sensitivity TIP • To scroll through images more quickly, press and hold a button on the 4-way controller. 85 Images will advance automatically until the button is released. TIP • The first and last recorded images on the card are linked. Pressing the arrow on the 4-way controller while the first image is displayed brings up the last recorded image on the card. Pressing the arrow on the 4-way controller while the last image is displayed brings up the first recorded image on the card. MAGNIFYING IMAGES (ZOOMED-IN VIEW) Reviewed images can be magnified, making it possible to check image details and focusing. While reviewing images, press the button. The magnification ratio will be changed as follows. Original→X1.25→X1.6→X2.0→X2.5→X3.15 →X4.0→X5.0→X6.3→X8.0→X10.0 WHILE IN ZOOMED-IN VIEW: ● Press the button to increase magnification. ● Press the ● Press the ● Press the ● Press the button to decrease magnification. button or the button to pan around the image. button to return to the original ratio. button to return to the original ratio. TIP • While in Zoomed-In View, the 4-way controller cannot be used to change images. Press the button or return to the original ration (Single-Image View) by pressing the button, then use the 4-way controller to change images. 86 VIEWING NINE IMAGES AT A TIME (CONTACT SHEET VIEW) Images can be viewed in a "contact sheet" of nine thumbnail images. While reviewing images, press the button. WHILE IN CONTACT SHEET VIEW: z Press the buttons to change the image selection. z Press the button to return to Single-Image View. z Press the button to go to Jump Mode. TIP • When the last row of images is reached, pressing will jump to the first 9 images on the card. 87 on the 4-way controller VIEWING IMAGES A PAGE AT A TIME (JUMP MODE) Use Jump Mode to browse large sets of images more quickly, or to skip right to the first or last page of images on the card. Press the button twice from SingleImage View (or once from Contact Sheet View). WHILE IN JUMP MODE: • Press the arrow on the 4-way controller to jump to the next page of images. • Press the images. arrow on the 4-way controller to jump to the previous page of • Press the arrow on the 4-way controller to jump to the last page of images. • Press the arrow on the 4-way controller to jump to the first page of images. • Press the button to return to Contact Sheet. TIP • The first and last pages of images are linked. Pressing the arrow on the 4-way controller while the first page of 9 images is displayed brings up the last page of images. Pressing the arrow on the 4-way controller while the last page of images is displayed brings up the first page of images. 88 VIEWING IMAGE INFORMATION The Image Info Screen contains additional information about each image. button from Single-Image or Press the Contact Sheet View. 1 Battery Level Indicator 16 Exposure Compensation Value 2 Image Size 17 3 Image Quality 18 Metering Mode 4 Folder numbering 19 Contrast 5 File numbering 20 Sharpness 6 Lock *1 7 Mark *1 21 Saturation 8 Histogram 23 Flash Mode *1 9 ISO Sensitivity 24 Auto Bracket *1 10 White Balance 25 Focus Mode *2 11 Drive Mode 26 File Number / total files recorded 12 Exposure Mode 27 DATE 13 Shutter Speed 28 TIME 14 F Number 29 Focusing Frame Flash Exposure Compensation Value *1 22 Color Mode 15 Focal Length *1 If these features are set, the icon will be displayed. *2 If the picture was taken in Manual Focus mode, the icon will be displayed. 89 While in Image Info Screen: Press again or to close the Image Info Screen and return to the previous view. Use arrows on the 4-way controller to change the image selection the same way as in Single-Image View. (See next section for the exception.) CAUTION !! • While in Zoomed-in View or Jump Mode, it is not possible to display the Image Info Screen. MAGNIFIED IMAGES IN IMAGE INFO SCREEN While the Image Info Screen is displayed, it is possible to magnify the image by pressing the button. It is possible to obtain detailed histogram information for a particular section of an image. • For more information on the histogram see next section. While magnifying the image in the Image Info Screen: • Press the arrows on the 4-way controller to pan to another part of the image. (Histogram will update automatically to reflect the new values.) • Press the button to decrease magnification or the button to increase magnification. • Press to cancel magnification and view the Image Info Screen for full image. (Press again to close the Image Info Screen.) CAUTION !! • While maginifing the image in the Image Info Screen, the 4-way controller cannot be used to change images. Press to cancel magnification or return to full image view by pressing , then use the 4-way controller to change the image selection. • While maginifiing the image in the Image Info Screen, it is not possible to return to the previous view even if the button is pressed. To returning to the previous view, it is necessary to return to the original ratio by pressing the button or cancel magnification by pressing the button, then press the button. 90 HISTOGRAM The histogram is a graph depicting the distribution of brightness values in the image for each of the three color channels (Red, Green, and Blue) (The histogram displayed in the Quick Preview is the distribution of tones in the image). The horizontal axis shows the brightness level, with darker pixels towards the left side and brighter pixels toward the right. The vertical axis shows the proportion of pixels at each level of brightness. By examining the histogram of the full image, you can gauge the over-all exposure of that image. You can also use the histogram to determine if zoomed-in sections of an image are over or under exposed. This histogram shows that the higher pixel values are never used in the image, indicating that the image is underexposed, and therefore will appear dark. In general, when the histogram is higher on the left side, the image is mostly composed of dark pixels, causing it to appear dark—either because the image is underexposed or because it is a dark scene such as night shot or sunset. This histogram shows a fairly even distribution of pixel values, indicating that the image is well exposed, with good contrast. However, the histogram distribution of a well exposed image will vary greatly depending on the subject. This histogram shows that many of the pixel values are at their brightness limit, indicating that some areas of the image may be blown out. In general, when the histogram runs off the right side, the image will have many white pixels—either because the image is overexposed or because it is a bright scene such as the beach or snow. 91 OVER-EXPOSURE WARNING It is possible to indicate the over-exposed areas by highlighting them in red. TO TURN ON OVER-EXPOSURE WARNING 1 Make sure the camera is turned on. 2 Press the button on the back of the camera to display the Camera Set-up Menu. (See P.28) 3 Use arrows on the 4-way controller to select [Exposure Warning]. 4 Press arrow or to open sub-menu. 5 Use arrows on the 4-way controller to select “On”. 6 Press arrow or to apply the setting or sub-menu without making any changes. arrow or to close the TIP • The button can be used as a shortcut key to temporarily toggle the over-exposure warning overlay on or off. Using the shortcut key will not change the Exposure Warning setting in the Set-up Menu. (See P.105 to set OK key shortcut.) 92 VIEWING IMAGES ON A TV The SD15 camera can be connected to a television or a videocassette recorder using the provided video cable, allowing the recorded images to be viewed on the television monitor or recorded on videotape. TO CONNECT THE CAMERA TO A VIDEO DEVICE 1 Open the cover protecting the camera’s VIDEO OUT, DC-IN, and USB connectors. 2 Connect the video cable to the <VIDEO OUT> terminal on the camera and to the video input terminal on the television or video cassette recorder. 3 Turn on the camera and the video device. WARNING !! • Please do not use any video cable other than provided with your Sigma SD15 camera, when connecting a video input terminal. Using other brands may cause damage. TIP • It is recommended that the camera be powered with the provided AC adapter during television playback to avoid draining the battery. • The default mode for the video signal is NTSC. When connecting the camera to a PAL device, the Video Mode setting in the Camera Set-up Menu must be changed. (See P.115) 93 DELETING IMAGES This section describes how to delete the image(s) recorded on a card. Images recorded on the card can be deleted one at a time or several at once using the Delete Menu. ● The Delete Menu can be opened from all views (Single-Image, Contact Sheet, and Zoomed-In), as well as from Jump Mode and the Image Info Screen. TO DISPLAY THE DELETE MENU Press the button while the file you want to erase is displayed. • Press again or to close the Delete Menu without deleting any images. DELETE MENU Current File Delete the currently selected image only. All Marked Delete all marked images on the card. (See P.101 - 103 for information on marking images.) All Delete all images on the card. (Locked images are not deleted) (See P.98 - 100 for information on locking images.) 94 DELETING A SINGLE IMAGE 1 Use the arrows on the 4-way controller to select the image to be deleted in Contact Sheet or Single-Image View. 2 Press to display the Delete Menu. • [Current File] will be the default selection. 3 Press to delete the image. WARNING !! • If the image is unlocked, it will be deleted without any further confirmation. • If the image is locked, a confirmation dialog will come up asking if you are sure you want to delete the locked image. Press to unlock and delete the image or to return to reviewing images without deleting. TIP • If the Delete Menu was opened from the Jump Mode, you cannot select [Current File]. 95 DELETING MULTIPLE IMAGES 1 Press 2 Use the to display the Delete Menu. arrows on the 4-way controller to select [All Marked] or [All]. • Locked images are not deleted. Locked images must be unlocked first before they can be deleted (P98 - 100). 3 Press to display the confirmation dialog. 4 Press to delete all the images or press without deleting. to return to reviewing images WARNING !! • When [All Marked] or [All] is done, it may take time to finish them depending on the number of files in the card. TIP • Marked images that are also locked will not be deleted with the [All Marked] menu item. The locked images must be unlocked first. not protected from deletion unless they are also locked. Marked images are • To erase all files from the card, including locked images as well as all non-SD15 files, use the “FORMATTING THE CARD” menu item in the camera Set-up Menu (see P.36). 96 OTHER REVIEWING FEATURES Image modifications, such as locking, marking, and rotating, as well as automatic image playback, can be performed from the Modification Menu. TO DISPLAY THE MODIFICATION MENU Press the camera. • Press again or changes. button on the back of the to close the Modification Menu without applying any Lock Mark Rotate Slideshow DPOF (see P.108) TIP • The Modification Menu can be opened from all views (Single-Image, Contact Sheet, and Zoomed-In), as well as from Jump Mode and Image Info Screen. • To make it easier to apply the same modification to a number of images, the last action performed will be the default selection when the Modification Menu is opened again. 97 LOCKING IMAGES Locking protects images from being accidentally deleted. Locked images must be unlocked before they can be deleted by the Delete Menu functions. LOCK MENU Lock/Unlock Lock the currently selected image only. If the image is already locked, the menu item changes to “Unlock”. (Not available if the Lock Menu is opened from Jump Mode.) Lock Marked Lock all marked images on the card. (See P.101 - 103 for information on marking images.) Unlock Marked Unlock all marked images on the card. (See P.101 - 103 for information on marking images.) Lock All Lock all images on the card. Unlock All Unlock all locked images on the card. CAUTION !! • Locking does not prevent images from being erased when the card is formatted. Review card contents carefully before formatting. TIP • Locked images have a “read-only” status when viewed on a computer. 98 TO LOCK A SINGLE IMAGE 1 Use the arrows on the 4-way controller to select the image to be locked in Contact Sheet or Single-Image View. 2 Press to display the Modification Menu. 3 Use the arrows on the 4-way controller to select the Lock Menu ( 4 Use the ). arrows on the 4-way controller to select [Lock]. ● If the selected image is already locked, the [Lock] menu item will change to [Unlock]. 5 Press to lock the image. ● A key icon will appear in the image indicating that the image is locked. TIP • To unlock a locked image, select the locked image and follow the same steps as above. • If the Lock Menu was opened from Jump Mode, the “Lock” menu item will not be available. 99 TO LOCK MULTIPLE IMAGES 1 Press to display the Modification Menu. 2 Use the arrows on the 4-way controller to select the Lock Menu ( 3 Use the ). arrows on the 4-way controller to select [Lock Marked] or [Lock All]. 4 Press to display the confirmation dialog. 5 Press locking. to lock the images or press ● A key icon to return to reviewing images without will appear in all locked images. TIP • To unlock multiple images, select the [Unlock All] or [Unlock Marked] in the Lock Menu. • The button can be used as a shortcut key for locking images. (See P.105) WARNING !! • When [Lock Marked] or [Unlock Marked] is done, it may take time to complete this depending on the number of files in the card. 100 MARKING IMAGES Images can be marked for various reasons, such as to identify favorites, to select images for a Slideshow, or to select images to be deleted with the “All marked” menu item in the Delete Menu (P.96). MARK MENU Mark/Unmark Mark the currently selected image only. If the image is already marked, the menu item changes to “Unmark”. (Not available if the Mark Menu is opened from Jump Mode.) Mark All Mark all images on the card. (If all images on the card are already marked, this menu item will not be available.) Unmark All Unmark all marked images on the card. TIP • Images marked on the camera will retain their marked status when viewed in SIGMA Photo Pro. TO MARK A SINGLE IMAGE 1 Use the arrows on the 4-way controller to select the image to be marked in Contact Sheet or Single-Image View. 2 Press to display the Modification Menu. 3 Use the 4 Use the arrows on the 4-way controller to select the Mark Menu ( ). arrows on the 4-way controller to select [Mark]. ● If the selected image is already marked, the [Mark] menu item will change to [Unmark]. 101 5 Press to mark the image. ● A flag icon will appear in the image indicating that the image is marked. TIP • To unmark a marked image, select the marked image and follow the same steps as above. • If the Mark Menu was opened from Jump Mode, the [Mark] menu item will not be available. • The button can be used as a shortcut key for marking images. (See P.105) MARKING ALL IMAGES 1 Press to display the Modification Menu. 2 Use the arrows on the 4-way controller to select the Mark Menu ( 3 Use the ). arrows on the 4-way controller to select “Mark all”. 4 Press to display the confirmation dialog. 5 Press to mark the images or press marking. ● A flag icon to return to reviewing images without will appear in all marked images. 102 TIP • Select [Unmark All] from the Mark Menu to unmark all marked images on the card. WARNING !! • When [Mark All] or [Unmark All] is done, it may take much time to finish them depending on the number of files in the card. ROTATING IMAGES It is possible to rotate the displayed image. The images’ new orientation will be used in all views as well as in the Slideshow. ROTATE MENU Rotate Rotate the currently selected image 90 degrees to the left (counterclockwise). Rotate Rotate the currently selected image 90 degrees to the right (clockwise). 1 Use the arrows on the 4-way controller to select the image to be rotated in Contact Sheet or Single-Image View. 2 Press to display the Modification Menu. 3 Use the 103 arrows on the 4-way controller to select the Rotate Menu ( ). 4 Use the [Rotate arrows on the 4-way controller to select the rotation direction: ] or [Rotate ]. 5 Press to rotate the image and close the Modification Menu or reviewing images without rotating. to return to TIP • To rotate an image 180 degrees, rotate it twice in the same direction. • To get an image back into its original orientation, rotate it in the opposite direction. • The button can be used as a shortcut key for rotating images. (See P.105) • If the Rotate Menu was opened from Jump Mode, both “Rotate” menu items will be unavailable. • Images rotated on the camera will be displayed in their rotated orientation in SIGMA Photo Pro. WARNING !! • When [Applied Rotate] of the Camera Set-up Menu (P.28) is set to [OFF], it is not possibel to select the Rotate Menu. 104 USING THE OK BUTTON SHORTCUT The button can be used as a shortcut key for locking, marking, or rotating images. By setting the button to perform the most commonly used operation, images can be easily locked, marked, or rotated with a single button press. Alternatively, the button shortcut can be used to temporarily toggle the over-exposure overlay on or off. The OK Button Shortcut can be set from [OK Shortcut] in the Camera Set-up Menu (P.28). Available functions to allocate to the button. Lock/Unlock Lock the currently selected image by pressing the button. If the current image is already locked, the image will be unlocked. Mark/Unmark Mark the currently selected image by pressing the button. If the current image is already marked, the image will be unmarked. Rotate button is pressed, rotate the currently Each time the selected image 90 degrees to the left (counterclockwise). Rotate button is pressed, rotate the currently Each time the selected image 90 degrees to the right (clockwise). Exp. Warning Each time the button is pressed, toggle the exposure warning on or off. z To dismiss the allocated function, set to [None]. WARNING !! • Even if [Rotate] function is allocated to the button, it is not possible to rotate the image when [Applied Rotate] of the Camera Set-up Menu (P.28) is set to [OFF]. 105 SHOWING A SLIDESHOW All images on the card, or only selected images, can be shown in an automatic playback mode using the SD15 camera’s Slideshow feature. SLIDESHOW MENU All Images Start an automated slideshow of all images on the card. Locked Images Start an automated slideshow of all locked images on the card. Marked Images Start an automated slideshow of all marked images on the card. Slideshow Settings It is possible to set the length of time that each picture will be displayed and the availability of Repeat. TO START A SLIDESHOW 1 Identify the images that you wish to include in the slideshow by marking or locking them. (See P.98-104) 2 Press 3 Use the to display the Modification Menu. arrows on the 4-way controller to select the Slideshow Menu ( ). 4 Use the arrows on the 4-way controller to select the slideshow contents: [All Images], [Locked Images] or [Marked Images]. 5 Press to close the Modification Menu and begin the slideshow. z To terminate the slideshow, press the button or the button. 106 WARNING !! • When [Show locked] is selected, it may take time to start the Slideshow depending on the number of files to be displayed. NOTE • When the slideshow is stopped, the last image will continue to be displayed. CHAGING SLIDESHOW SETTINGS Select the [Slideshow Settings] in Slideshow button to open Menu and then press the the setting display. SLIDESHOW SETTING MENU Duration 2 sec. 5 sec. 10 sec. Set the length of time that each image in a slideshow is displayed. Repeat No Yes Set whether the slideshow loops continuously or stops on the last image. Duration Select [Duration] using the button, then select the desired number of seconds by pressing the button. Repeat Select [Repeat] using the button. 107 button, then select [No] or [Yes] by pressing the DPOF (DIGITAL PRINT ORDER FORMAT) When printing images at a photo lab, it is possible to specify which photos and quantity to print in advance, using the DPOF menu. This is also available when making prints using a DPOF compatible printer. WARNING !! • In the case of RAW images (files with X3F extension), DPOF printing is not possible. 1 During image reviewing, press to display the Modification Menu. 2 Use the 3 Use the press the arrows on the 4-way controller to select the DPOF Menu ( ). arrows on the 4-way controller to select the desired options and then button. DPOF MENU Select / Quantity Set the print quantity by pressing the buttons. To set number of copies from multiple images, select the image that you wish to print by pressing the buttons and then set the print quantity for each image by pressing the buttons. Press the button to apply the setting. Select All Images This option selects all still images on the card for printing. Set print quantity by pressing the buttons and press the button to apply the setting. Cancel All Selections Reset all print quantity settings. Press the buttons to select [OK] and press the button to cancel all print quantity settings. TIP • Total number of print quantity (the total sum of print quantity for each image) is displayed at the lower right of the monitor. 108 REFERENCE OPTIONAL ACCESSORIES REMOTE CONTROLLER RS-31 Wireless remote control, permits releasing the shutter from a place away from the camera. Time for a shutter release can be set up in two stages. Moreover, a setup of a channel is also possible, to avoid interference with other cameras and remote controls. (For detailed information please refer page 75 - 77) POWER GRIP PG-21 This battery pack extends power capacity of the SD15 two times and can also be used as a vertical position grip. Two BP-21 Lithium-ion batteries can be used in Power Pack SD. In addition, it is equipped with a vertical shutter release to hold the camera steady in the vertical position. ELECTRONIC FLASH EF-530 DG SUPER SA-STTL Auto zoom flash with abundant light and STTL Automatic Exposure with the maximum guide number 53/m (174/ft) (ISO100). EF-530 DG SUPER SA-STTL allows you to use many advanced flash techniques such as “STTL system Auto Flash” or Multi Flash etc. (Please refer to page 79 - 80 for details). ELECTRONIC FLASH EF-530 DG ST SA-STTL Auto zoom flash with abundant light and STTL Automatic Exposure with the maximum guide number 53/m (174/ft) (ISO100). It provides a proper flash exposure under any lighting conditions and it is equipped with bounce flash function, same as EF-530 DG Super. (Please refer to page 79 - 80 for details.) CABLE RELEASE SWITCH CR-21 It can connect with release socket, on the camera body, and the shutter can be released, without touching the camera. This accessory minimizes the camera shake, which can result in blurriness of your photograph, especially when using Mirror up and a super-telephoto lens. (It is connected to release socket of the camera. Since it is not equipped with “Halfway” operation. Please press the shutter button “Half-way” and check the exposure. Please adjust the focus manually.) AC ADAPTER SAC-4 This is used to provide a constant electricity supply when shooting in the studio, or taking indoor shots. It is also recommended for use when connecting the camera to your computer to transfer data. 109 EYEPIECE DIOPTRIC CORRECTION LENSES The SD15 has a built-in type “Diopter Adjuster” and its range is –3 ~ +1.5dpt, if you still cannot see the viewfinder clearly, then please purchase a viewfinder diopter adjustment eyepiece. These are series of seven optional accessory lenses, which adjust the camera’s viewfinder to accommodate the vision requirements (near-sightedness or far-sightedness) of different photographers. They attach to the camera’s eyepiece frame. The dioptric correction values of these lenses range from –4 to +3. MAINTENANCE Do not use chemicals or other cleaning agents such as thinners or benzene for cleaning the camera and lens. Use a clean, soft cloth and blower to clean the camera and lens. Lens cleaners can be used for removing fingerprints. Do not lubricate the camera, lens or lens contacts. Use a blower to remove dust and dirt from the color LCD monitor. To remove fingerprints or other stains from the LCD monitor, wipe the surface gently with a soft, clean cloth. Do not apply excessive force, as this could damage the LCD monitor. The Sigma SD15 camera contains a dust protector located inside the lens mount. The dust protector is a very delicate device and care must be taken not to scratch its surface. Use a blower to remove dirt and dust from the dust protector. Do not use a blower brush, as the bristles could scratch the dust protector surface. To avoid damage, do not apply pressure to the dust protector. CLEANING THE IMAGE SENSOR Although SD15 is equipped with a dust protector to prevent dust or dirt from entering the camera, in rare circumstances, dust or dirt may adhere to the image sensor, causing black spots to appear on images. If this occurs, it may be necessary to clean the image sensor. z The image sensor is extremely delicate and can easily be damaged. We recommend that you contact an authorized Sigma Service Station to have the sensor cleaned. We do not advise attempting the procedure yourself, especially if you have no previous experience cleaning delicate optical components. WARNING!! • The image sensor is a very important part of your camera. Please take all necessary precautions to avoid damaging the sensor. • Do not use an aerosol compressed air cleaner. Liquid may leak from the cleaner and damage the image sensor or other electronics inside the camera. 110 WARNING!! • After cleaning the image sensor, please ensure the dust protector is correctly attached. If the dust protector is not properly attached, it may move and damage the image sensor of the camera or the lens. • Please do not use the blower with the brush for cleaning the image sensor. If the bruch is attached, it may scratch the image sensor of the camera. • We recommend using the AC adapter (sold separately) to clean the image sensor. If the AC adapter is not used, please be sure to fully charge the battery. If the battery voltage is less than the normal level, the camera will warn you with an electronic “beep”. In such cases, stop the cleaning process immediately and fully charge the battery. Failure to do so can result in damage. 1 Turn the “D”–Dial to the remove the lens. position and 2 To detach the dust protector, slide it upwards from its projecting lip with your fingernail. Be careful not to touch the glass on the dust protector. 3 Once the dust protector slides upwards, the lower part of the dust protector is released. Grasp it and remove the dust protector. (Be careful not to touch the glass on the dust protector.) 111 4 Turn the “D”-dial to the position and and button together. press the (The icon will be displayed on the top LCD panel, the shutter will open and you will be able to see the image sensor). 5 Carefully blow away any dust from the image sensor using the blower. Make sure that the tip of blower does not protrude inside the lens mount. If the power supply should suddenly shut off, the shutter curtain and mirror will close. These delicate parts could hit the blower and damage the camera. 6 Once you are done cleaning the image position. sensor, turn the “D”–Dial to the Check that there is no dust or dirt on the dust protector. Insert the upper tabs on the back of the dust protector into the two holes as shown in the illustration. 7 Push the lower section of the dust protector, as shown in the illustration, with your finger until it clicks into position. In order to avoid any damage, please ensure that the dust protector is correctly positioned. If the dust or dirt cannot be removed with the above-mentioned procedure, consult with Sigma- authorized service personnel. If you see fingerprints on the glass portion of the dust protector, first use a blower to remove any dust, then gently wipe it with a soft, clean cloth. 112 LCD OFF AND AUTO POWER OFF The SD15 has [LCD Off] and [Auto Power Off] functions in order to conserve battery power. If not used for a predetermined amount of time, the color LCD monitor or power will be turned off automatically. LCD Off If not used for a predetermined amount of time, the backlight of the color LCD monitor will be turned off automatically. Although the LCD monitor is turned off, the camera power remains ON. The backlight of the color LCD monitor will be turned on by operating the button or the button. It is possible to change to shooting mode, upon pressing the shutter button “half-way”. Auto Power Off If not used for a predetermined amount of time, the camera will be turned off button and the automatically. While camera is in Auto Power Off, the button will not function. It is necessary to press the shutter button “half-way” to terminate Auto Power off. It is possible to change to shooting mode upon pressing the shutter button “half-way”. LCD Off and Auto Power Off can be set from [LCD Off] and [Auto Power Off] of the Camera Set-up Menu (P.28). LCD Off Option Off 10 sec. 30 sec. 1 min. (Default) 2 min. 5 min. 10 min. • Auto Power Off Option Off 30 sec. 1 min. 2 min. 5 min. (Default) 10 min. icon is the recommended setting for conserving the electronic power. TIP • To disable LCD Off, set [LCD Off] to [Off]. • To disable Auto Power Off, set [Auto Power Off] to [Off]. WARNING !! • [Auto Power Off] setting has priority over the [LCD Off] setting. When you set [LCD Off] to [5 min.] and [Auto Power Off] to [1 min.], the camera will be turned off if not used for 1 minute. 113 EXPLANATION OF TERMS AE Auto Exposure; by using a built-in exposure meter, camera determines the correct exposure value, which is combinations of shutter speed and/or aperture value. AE Lock The camera will fix and memorize the exposure value with AE lock. For example, if a photographic subject is placed in the center and exposure value of the composition is fixed, the brightness of the background will not influence the exposure, even if the composition changes and the subject is moved from the center of a screen. (AE lock button must be used). AF Auto Focus; by using a built-in sensor, camera adjusts the focusing automatically. AF Lock In AF shooting mode, you can lock the focus on the main subject. For instance, compose the desired subject in the center of the viewfinder. With the focus fixed at the same setting, you can re-compose the picture with the subject off-center and take shots. (Please press the shutter button “Half-way” to use this feature with Sigma SD15). Aperture The lens opening of the iris diaphragm inside the lens. The amount of light, which strikes the image sensor, is adjusted by the iris diaphragm. The f-number (Focal Length/Diameter of the Aperture Opening) describes the size of this opening, the size of the hole can be made larger or smaller. Large aperture (low f-number) gives bright results and, small aperture (high f-number) gives darker results. Auto Power-Off For saving the battery power, the SD15 camera can automatically turn itself off, if you do not operate it. CMOS Complementary Metal Oxide Semiconductor (CMOS) can perform signal amplication on a per-pixel basis. Significant current flows only during the switching operation. Therefore a CMOS image sensor can scan data rapidly, sustain high-speed operation and consume less energy. Recent technological and production improvements in digital imaging systems are making CMOS more and more competitive in terms of image quality and cost. Color Temperature The numerical expression of the tone of the light, produced by a light source. The standard unit for color temperature is degrees Kelvin (K). The sunny daylight used as a standard near 5600 K. Low color temperature implies warmer more yellow/red light while high color temperature implies a colder more blue light. The typical color temperature of Tungsten light is 3200 K grade, a personal computer is 9300 K. 114 Exposure. The amount of light reaching the image sensor’s surface. The exposure is controlled by the combination of aperture and shutter speed. EV Exposure Value (EV) is a numerical value that expresses the amount of light for a given exposure, and depends on brightness of the photographic subject and sensitivity of the film. If a photographic subject is bright, then this numerical value will be large, and if the subject is dark then this numerical value will be small. If two-times of light reaches the film surface then the difference in exposure value will be +1, and if the amount of light is reduced by half, the exposure value changes by -1. Histogram The histogram function is a graphic representation of how bright and dark pixels are distributed in an image. The histogram function enables a precise check on the exposure of the photo. ISO Sensitivity ISO ( International Organization for Standardization ) ; refers to the number assigned to each silver halide film, which indicates film speed or the film's relative sensitivity to light, the higher the number, the greater photosensitivity and vice versa. Digital cameras also use standard ISO sensitivity ratings like silver halide films. JPEG Joint Photographic Experts Group has established a standard method for compressing and decompressing the digitized images. If the rate of compression is high the file size will be small but picture quality will be decreased. NTSC National Television Standards Committee (NTSC) video format is primarily used in the United States, Japan, Canada etc. The NTSC is a standard for television and videos, which defines a composite video signal with a refresh rate of 60 half-frames (interlaced) per second. Each frame contains 525 lines and can contain 16 million different colors. PAL Phase Alternating Line (PAL), video format primarily used in Europe, excluding France, as well as Australia and parts of the Far East. PAL delivers 625 lines at 50 half-frames per second. RAW The RAW image format is the data as it comes directly from the image sensor of the camera. No in-camera processing is performed before transferring the image to computer. 115 Shutter Speed The camera’s shutter opens for a length of time to control the amount of light that reaches the imaging element. The length of time that shutter blinds are open allowing light to strike the image sensor is called as shutter speed. White Balance The human eye and brain adapt to changes in lighting conditions, not only to intensity, but also to the color characteristic of the light source, so that colors of the objects look normal or accurate. For example, a white object will appear white whether it is viewed under sunlight, tungsten or fluorescent illumination. However, color film or digital camera must be adjusted, so that colors will be represented accurately, under different types of illumination. This adjustment is called white balance. The function to adjust a white balance automatically is called automatic white balance. WARNING DISPLAYS TOP LCD PANEL WARNING INDICATIONS Some part of battery icon is off Battery is low ► Have fresh battery ready. Battery icon blinks Battery is very low and just about exhausted. ► Replace battery with new one. (P.19-22) It is malfunctioning because of an unknown reason. ► Take battery out and reload again, then turn on the camera. (P.19-22) Exposure Blinks Exposure Control exceeds the operating range. ► Choose an exposure value until blinking disappears. (P.41-44) “ ” is displayed on the frame counter. Card is not inserted. ► Please insert card. (P.34) 116 Frame counter does not show a number other than Even if it is possible to record more than 9999 images on the Card, the maximum number of frames that can be seen on the counter is 9999. ► The frame counter changes, if frame counter is 9998 or less. (P.38) Shutter speed indicates “ indicators blink. ” and frame number shows “ ”, both No more space available to store images on card. ► Insert a new card or delete unnecessary images. (P.34-35) (P.94-96) Shutter speed indicates “-“ with animation and frame number shows ”. “ The camera is busy with image processing. ► Please wait until the process ends. (P.38) Shutter speed shows “ ” Camera is malfunctioning because of some reason. ► Please reset your camera by turn off the power switch and turn on again. If problem persist then please contact store that you purchased the camera. Frame counter shows “ - - - - ” The write protection switch of the card is in the ‘LOCK’ position. ► Eject the card and then unlock the write protection switch on the card (P.10) Card might be faulty. ► Please replace the card. (P.36) ► The Card may be damaged. 117 COLOR LCD MONITOR MESSAGES “No Memory Card” ► Please Insert the Card. (P.34) “Card Error” ► Format card. If the error persists, replace with new card. (P.36) ► The Card may be damaged. “Card Locked!” ► The write protection switch of the card is in the ‘LOCK’ position. Eject the card and then unlock the write protection switch on the card (P.10) “Card Full” ► Delete unwanted photos, choose a lower resolution setting, or use a different card. (P.34-35) (P.94-96) “No images on Memory card” ► To review images, insert a card with valid SD15 images, capture new images onto the card, or press button again to turn off display. “Cannot preview this image” ► It may have been taken by another camera or the image data may have collapsed. “Cannot magnify this image” ► It may have been taken by another camera or the image data may have collapsed. “Cannot save this image!” ► The Card may be damaged. Please transfer the data to another hardware such as a PC and then format the Card in the PC. If the same message is displayed, the Card may have collapsed. Please use a new card. An error has occurred! Error code # # #. ► Turn the camera off and back on. If the problem persists, call Technical Support and give them the error number. 118 TROUBLESHOOTING If you have a problem with your camera or cannot take good pictures, consult the list below as you check the camera before requesting repairs. No indication on the top LCD panel Battery is exhausted. ► Replace the battery. (P.19-22) Battery is improperly installed. ► Insert the battery in the proper direction. (P.20) The shutter does not release Battery is exhausted. ► Replace the battery. (P.19-22) D-dial is set outside of the Drive Area. ► Set the D-dial to the Drive Area to take a picture. (P.56) Camera is unable to get a focus lock when set to AF-S mode. ► Try focusing on a different subject or focus the camera manually. (P.51-55) Card is not inserted or is inserted improperly. ► Insert the card correctly. (P.34) The camera is busy writing to the card. ► Please wait until the card busy light goes off. (P.38) Card is full. ► Insert a new card or delete unwanted images. (P.34-35)(P.94-96) Autofocus does not operate The AF/M switch on the lens body is set to M. ► Set the AF/M switch on the lens to AF. (P.51) Lens is not properly mounted to the camera body. ► Mount the lens to the camera body correctly. (P.24) The buttons on the back of the camera don’t work Auto Power Off is activated. ► Press the shutter button halfway to reactivate the buttons. ► Disable Auto Power Off in the Set-up Menu. (P.113) 119 Difficulty seeing the images on the color LCD monitor. Dust or dirt has adhered to the color LCD monitor. ► Clean the color LCD monitor with a blower or eyeglass cloth. (P.110) The color LCD monitor is worn out. ► Please consult the retailer from which you purchased the camera or contact the nearest Sigma Service Center. Pictures are coming out blurred The AF/M switch on the lens body is set to M. ► Set the AF/M switch on the lens to AF. (P.51) Hand movement or camera shake occurred when the shutter button was pressed. ► To prevent blurring, press the shutter button more gently or use remote controller, cable release switch or a tripod. Cannot use the card Image data on the card is corrupted. ► Format the card. (P.36) The write protection switch of the card is in the ‘LOCK’ position. ► Eject the card and then unlock the write protection switch on the card (P.10) Cannot delete images Images may be locked. ► Unlock the images. (P.98-100) The write protection switch of the card is in the ‘LOCK’ position. ► Eject the card and then unlock the write protection switch on the card (P.10) Incorrect date and time is shown Date and time setting may be incorrect. ► Enter the correct date and time in the Set-up Menu. (P.27) No image appears on the TV monitor Video cable is not correctly inserted. ► Insert the video cable correctly. (P.93) 120 SPECIFICATIONS Camera Type Interchangeable Lens SLR Type Digital Camera Storage Media SD Card / Compatible with SDHC, Multi Media Card Image Sensor Size 13.8 x 20.7mm Lenses Used Picture Angle Sigma SA Mount Lenses Equivalent to 1.7x the focal length of a lens when used on a 35mm SLR camera. Lens Mount SA mount Imaging Element Type FOVEON® X3™ (CMOS) Color Photo Detectors 14.06 Million (2652 Columns x 1768 Rows x 3 Layers) Aspect Ratio 3:2 Image Recording Format Lossless compression RAW Data (12bit), JEPG HI:2640 x 1760 MED:1872 x 1248, LOW:1312 x 880 Resolution Interfaces White Balance USB 2.0, Video Out (NTSC/PAL) 8 Type (Auto, Sunlight, Shade, Overcast, Incandescent, Fluorescent, Flash, Custom white balance) Viewfinder Type Pentaprism SLR Viewfinder Viewfinder Frame Coverage 98% horizontal, 98% vertical Viewfinder Magnification 0.9x (50mm F1.4 at infinity) Eyepoint 18mm Diopter Adjustment Range -3dpt to +1.5dpt Auto Focus Type TTL phase difference detection system AF Operating Range EV 0 to 18 (ISO100) Focus Mode Single AF, Continuous AF (AF Predict function), MF Evaluative Metering, Center-Weighted Average Metering, Center Area Metering, Spot metering Metering Systems Metering Range ISO Sensivity EV 1 to 20 (with 50mm F1.4 at ISO100) (P) Program AE、(A) Aperture Priority AE、 (S) Shutter Speed Priority AE、(M) Manual ISO (50), 100, 200, 400, 800, 1600, (3200) *( )Extended Mode Exposure Compensation ±3EV (in 1/3steps) AE Lock Push button type Three or five frames (in 1/3steps, Appropriate Exposure – Under Exposure – Over Exposure) Vertical-travel metal focal plane shutter, electronically controlled through entire speed range Exposure Modes Auto Bracketing Shutter Type 121 Shutter Speeds Burst Rate External Flash Synchronization LCD Monitor Type Reviewing Images Language Power Source Dimensions Weight 1/4000sec to 30sec, Bulb up to 30 (120) sec *( ) Extended Mode Flash Synchronization at 1/180sec. 3.0fps for 21 frames Hot shoe (contact X, with dedicated flash linking contact) Aspect ratio3:2, 3.0" wide viewing angle TFT color LCD monitor, approx. 460,000 pixels, Coverage area 100% Single-Image display, Zoom-in display, 9 segments thumbnail display, Slide Show English / Japanese / German / Chinese (Simplified) / French Spanish / Italian / Korean / Russian lithium ion battery BP-21 AC Adapter SAC-4 (Optional) 144mm/5.7"(W) X 107.3mm/4.2"(H) X 80.5mm/3.2"(D) 680g / 24oz (without battery) CONNECTING YOUR CAMERA TO A COMPUTER The SD15 camera can be connected directly to a computer using the provided USB cable. Make sure that the camera is off before connecting it to the computer. Data transfer rates will vary depending on the computer and operating system used. For further information, please refer to the SIGMA Photo Pro User Guide, which is available in PDF format on the supplied CD-ROM. USB(2.0) Terminal CONNECTING THE CABLES z The shutter button and color LCD monitor will be disabled while the camera is connected to the computer via a USB cable. WARNING!! • Please use only the USB cable supplied with your camera. 122 SD15 This device complies with Part 15 of the FCC Rules. Operation is subject to the following two conditions: (1) This device may not cause harmful interference, and (2) this device must accept any interference received, including interference that may cause undesired operation. Tested To Comply With FCC Standards FOR HOME OR OFFICE USE SIGMA CORPORATION OF AMERICA 15 Fleetwood Court, Ronkonkoma, NY 11779, U.S.A. TEL: 631 585 1144 For customers in the U.S.A. Federal Communications Commission (FCC) Radio Frequency Interference Statement This equipment has been tested and found to comply with the limits for class B digital devices, pursuant to Part 15 of the FCC Rules. These limits are designed to provide reasonable protection against harmful interference in a residential installation. This equipment generates, uses and can radiate radio frequency energy and, if not installed and used in accordance with the instructions, may cause harmful interference to radio communications. However, there is no guarantee that interference will not occur in a particular installation. If this equipment does cause harmful interference to radio or television reception, which can be determined by turning the equipment off and on, the user is encouraged to try to correct the interference by one or more of the following measures: z Reorient or relocate the receiving antenna. z Increase the separation between the equipment and receiver. z Connect the equipment into an outlet on a circuit different from that to which the receiver is connected. z Consult the dealer or an experienced radio/TV technician for help. Use of interface cable is required to comply with class B limits in Subpart B of Part 15 of FCC Rules. Any changes or modifications to this equipment not specified in this manual may void your warranty. For customers in the Canada This Class B digital apparatus complies with Canadian ICES-003. Cet appareil numérique de la classe B est conforme à la norme NMB-003 du Canada. The CE Mark is a Directive conformity mark of the European Community (EC). SIGMA (Deutschland) GmbH Carl-Zeiss-Str. 10/2, D-63322 Roedermark, Germany Verkauf: 01805-90 90 85-0 Service: 01805-90 90 85-85 Fax (Service): 01805-90 90 85-35 SIGMA CORPORATION 2-4-16 Kuriki, Asao-ku, Kawasaki-shi, Kanagawa 215-8530 Japan Phone : 044 - 989 - 7430 Fax : 044 - 989 – 7451 124