1
Basic Setup
Follow the description to set up the DVR for date/time, recording and viewing video. All
configurations can be set via either DVR front panel or DVRRemote, the remote software, on PC
through LAN.
Enter OSD Setup menu:
•
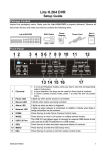
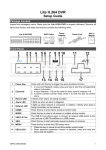
Press MENU to enter the OSD menu.
•
Enter password using Channel keys. The default passwords are as below.
•
Administrator Password
User Password
1234
4321
Strongly suggest changing the passwords to prevent unauthorized access.
Date / Time Setting:
•
Select <Date/Time> in System Setup menu to enter the Date/Time menu.
•
Select the date and time using LEFT/RIGHT keys; then adjust the value using UP/DOWN keys.
•
The new date and time settings take effect after confirm the changes.
To Define Recording Settings:
•
Select <Record Setup> from the Main menu.
•
Select a Preset Configuration setting from <Best Quality>, <Standard> and <Extended
Record>.
•
Adjust the Recording schedule, Pre-alarm, Circular and Audio parameters.
•
When the settings are complete, press ENTER to confirm and save the settings; or ESC to
abort.
To Select Viewing Mode:
•
Press MODE button repeatedly to select the wanted display mode. The available viewing
modes are full-screen, 2×2 and 4×4 split-window.
Network Setup
Using LAN / Cable Modem:
Use the LAN setup when you plan to use a LAN, WAN, or Internet connection without a dialup
modem. It requires an Ethernet connection to a network. The default ID of your Full-Featured
MPEG-4 series DVR must be changed to avoid network conflicts.
•
From Main menu, select <System Setup>Æ<Network Setup>, set the <LAN Select> item to
<LAN> or <PPPoE> according to your network application, and enter <LAN Setup>.
3