Download Eureka 2900 Series Specifications
Transcript
®
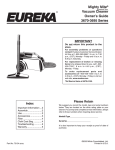
Upright
VACUUM CLEANER
Household Type
OWNER’S GUIDE
2900 SERIES
IMPORTANT
Do not return this product to the
store.
For assembly problems or
questions contact: Eureka’s
Customer Service Division toll free at
1-800-282-2886*, 8 a.m. to 7:30 p.m.,
(CST), Monday - Friday and 10 a.m.
to 6:30 p.m. Saturday.
For replacement of broken or
missing items to be shipped direct
to you, call 1-800-438-7352*, 8 a.m.
to 4:45 p.m., (CST), Monday - Friday.
To order replacement parts and
accessories call 1-800-438-7352*, 8
a.m. to 4:45 p.m., (CST), Monday Friday or visit our web site,
www.eureka.com.
*En Mexico llame al 5670-6169.
Index
Important Information ...2
Assembly Parts ............3
How to Assemble ..... 3-4
How to Use ...................4
Accessories ..................5
Filters ...........................5
Dust Bag .................. 5-6
Brush Roll .....................6
Brush Roll Belt .............6
Headlight ......................7
How to Clear
Blockages .....................8
Troubleshooting ............9
Warranty .....................10
Part No. 73286 (7/03)
Please Retain
We suggest you record the model, type and serial numbers
below. They are located on the silver rating plate on your
cleaner. For prompt and complete service information, always
refer to these numbers when inquiring about service.
Model& Type___________________________
Serial No. ______________________
It is also important to keep your receipt as proof of date of
purchase.
©2003 White Consolidated, Ltd.
Printed in U.S.A.
IMPORTANT SAFEGUARDS
When using an electrical appliance, basic precautions should always be followed, including the following:
READ ALL INSTRUCTIONS BEFORE USING THIS VACUUM CLEANER.
WARNING
To reduce the risk of fire, electric shock, or injury:
• Do not use outdoors or on wet surfaces.
• Do not leave vacuum cleaner when plugged in. Turn
off the switch and unplug the electrical cord when not in
use and before servicing.
• Do not allow to be used as a toy. Close attention is
necessary when used by or near children.
• Use only as described in this manual. Use only
manufacturer’s recommended attachments.
• Do not use with damaged cord or plug. If vacuum cleaner
is not working as it should, has been dropped, damaged,
left outdoors, or dropped into water, return it to a service
center before using.
• Do not pull or carry by cord, use cord as a handle, close
door on cord, or pull cord around sharp edges or corners.
Do not run vacuum cleaner over cord. Keep cord away
from heated surfaces.
• Do not use extension cords or outlets with inadequate
current carrying capacity.
• Turn off all controls before unplugging.
• Do not unplug by pulling on cord. To unplug, grasp the
plug, not the cord.
• Do not handle plug or vacuum cleaner with wet hands.
• Do not put any object into openings. Do not use with any
opening blocked; keep free of dust, lint, hair, and anything
that may reduce airflow.
• This vacuum cleaner creates suction and contains a
revolving brush roll. Keep hair, loose clothing, fingers, and
all parts of body away from openings and moving parts.
• Do not place cleaner on furniture or stairs as the brush roll
may cause damage. Place cleaner on floor with the handle
in storage position while using attachments.
• Do not pick up anything that is burning or smoking, such
as cigarettes, matches, or hot ashes.
• Do not use without dust bag in place.
• Belt pulleys can become hot during normal use. To prevent
burns, avoid touching the belt pulley when servicing the
drive belt.
• Use extra care when cleaning on stairs.
• Do not use to pick up flammable or combustible liquids
such as gasoline, or use in areas where they may be
present.
• Store your cleaner indoors in a cool, dry area.
• Keep your work area well lighted.
• Unplug electrical appliances before vacuuming them.
SAVE THESE INSTRUCTIONS
To reduce the risk of electric shock, this appliance has a
polarized plug (one blade is wider than the other). This plug
will fit in a polarized outlet only one way. If the plug does not fit
fully into the outlet, reverse the plug. If it still does not fit, contact
a qualified electrician to install the proper outlet. Do not change
the plug in any way.
DO NOT OIL the motor or the brush roll. The motor
and brush roll are permanently sealed and
lubricated.
GENERAL INFORMATION
Use the cleaner to pick up dirt and dust particles. Avoid picking
up hard or sharp objects that could damage the vacuum
cleaner.
Service Information
The instructions in this booklet serve as a guide to routine
maintenance. For additional service information, telephone
our toll free number for the nearest Eureka Authorized
Warranty Station. You should know the model, type and
serial number or date code when you call:
USA: 1-800-282-2886 Mexico: 5670-6169
Canada: 1-800-282-2886
If you prefer, you can write to The Eureka Company, Service
Division, 807 North Main St., Bloomington, Illinois 61701, USA.
In Canada, write to The Eureka Company, 866 Langs Drive,
Cambridge, Ontario N3H 2N7. Refer to The Eureka Warranty
for complete service information.
2
Thermal Cut Off
This vacuum cleaner has a special thermostat that protects
the cleaner in case of motor overheating. If the cleaner suddenly shuts off, push the on/off switch off (0) and unplug the
cleaner. Check the cleaner for a possible source of overheating such as a full dust bag, a blocked hose or clogged filter. If
these conditions are found, fix them and wait at least 30 minutes before attempting to use the cleaner. After the 30 minute
period, plug the cleaner back in and push the on/off switch on
(l). If the cleaner still does not run, then take it to a Eureka
Authorized Service Center for repair.
Assembly Parts
4
1
Wand and Crevice Wand. (Pull apart.)
2
Dusting Brush.
3
Hose.
4
Vacuum Cleaner Body.
5
Electrical Cord.
6
Handle.
7
Screws located in the accessory package.
3
5
2
1
6
How To Assemble
CAUTION: Assemble the cleaner before using.
CAUTION: Moving parts, make sure ON/OFF switch is in
the OFF position before plugging in.
1 Grasp dust bag cover
handle and pull away from
vacuum body to remove
door.
4 Place the tabs on the
bottom of the dust bag
cover into slots at the
bottom of the bag
compartment and rotate
door up and push against
the vacuum body until it
snaps shut.
5 Place the hose on the
back of the vacuum,
wrapping it up and over
the hose hook as shown.
2 Slide the handle into the
grooves at the top of the
vacuum body as shown.
3 Place the two screws
(supplied)into the holes at
the top of the bag
compartment and tighten
with a screwdriver.
6 Firmly push the end of the
hose into the hose
retainer in the hood of the
vacuum.
3
How To Assemble (continued)
7 Pull the electrical cord up
to the cord retainer and
firmly push down into
retainer. This will keep the
cord out of the way the
next time you vacuum.
8 Wind the cord around the
two cord hooks on the
back of the vacuum.
9 Secure plug to the cord to
prevent unwinding.
How To Use
WARNING: Avoid injury. Keep loose clothing, hair,
fingers, and all other parts of body away
from any moving part (such as the
revolving brush). Turn off the switch and
unplug the cleaner before changing the
cleaner height setting.
ON/OFF Switch.
International symbol I
means On, International
symbol O means Off.
Handle Release. Step on
handle release to pull handle
back to a comfor table
operating position. To lower
handle completely to the floor,
depress handle release a
second time.
10 Store the wands on the
side of the vacuum in
front of the hose.
Helpful Information:
Before cleaning under low
furniture, check area first for
objects that might harm the
unit or block the vacuum
hose.
Cleaner Height Setting. An adjustment that raises or
lowers the cleaner base to match the type of floor surface.
With the cleaner cord unplugged, set the adjustment to lowest
setting for maximum carpet cleaning. If the cleaner is difficult
to push, move adjustment to next highest setting until
cleaner is comfortable to push. The brush roll must reach
the carpet for effective cleaning. For ease in moving the
adjustment knob, place handle in operating position and tilt
cleaner back to remove weight from front wheels.
Helpful Information:
11 Store the dusting brush.
Listen to your cleaner. If you notice a change in the
sound of the motor or a change in performance, it could
simply indicate a common usage or maintenance
issue. Such as, a need to raise or lower the carpet
height adjustment, possible blockage in hose or brush
roll area, or a broken or loose brush roll belt. These
are all easy to fix and the instructions are included in
this owner’s guide. Becoming familiar with the
information in this guide will help you to get the best
possible performance from your new cleaner for many
years to come.
4
How To Use (continued)
Rountine Maintenance
NOTE:
NOTE: While using accessories, do not place cleaner
on furniture or steps as the brush roll may
cause damage. Place cleaner on floor with the
handle in storage position.
1. To use accessories remove hose from hose retainer in
hood of cleaner by lifting up and twisting.
2. Place desired accessory onto end of hose or wand.
Turn off the switch and unplug the electrical cord
before routine maintenance. Never operate the
vacuum cleaner without the dust bag or filter
assembly in place.
NOTE: When vacuuming carpet fresheners or cleaners,
powder, plaster dust, or similar fine substances,
the dust bag and filters will require more
frequent maintenance.
Removing the Dust Bag (Style J):
Dusting/
Upholstery
Brush
C r ev i c e
Wand
Remove dust bag
cover.
Dusting/Upholstery Brush is for furniture, blinds,
Grasp dust bag flaps and pull
dust bag from cleaner.
Check the filters each time the dust bag is changed.
Clean or replace as needed.
books, lamp shades, shelves, curtains, draperies, cushions
and fabrics.
Crevice Wand cleans corners, stairs, baseboards, and
between cushions.
Nested extension wands to add reach.
• Grasp both wands near ridges.
• Pull apart.
• Turn ridge end to center.
• Push wands together.
The instructions in this booklet serve as a guide to routine
maintenance. To avoid unnecessary service calls, check the
dust bag, filters, belt, and brush roll often.
Shake filter to remove excess dust. If necessary, the
filters can be cleaned by vacuuming with another
cleaner.
5
Routine Maintenance
(continued)
Installing New Dust Bag:
2. Remove the two screws from the top of the hood.
Fold dust bag flaps of new bag
back and slide into unit. Make
sure inlet goes into opening on
dust bag.
Replace dust bag cover
on unit.
NOTE: Dust bag cover
cannot be closed
unless the dust bag is
installed properly.
3. Lift hood to remove.
Periodic Maintenance
NOTE:
Turn off the switch and unplug the electrical cord
before periodic maintenance. Never operate the
vacuum cleaner without the dust bag or filter
assembly in place.
Brush Roll
The brush roll turns as it sweeps and combs the carpet nap.
Remove hair and threads from the brush roll so it continues
brushing the carpet. To maintain the most efficient cleaning,
the bristles must touch the carpet. To test the bristle length,
hold a ruler against the underneath side of the cleaner. If the
bristles no longer touch the ruler, replace the brush roll.
4.
5.
6.
7.
Lift left end of brush roll.
Remove and discard belt.
Place new belt around motor shaft.
Place new belt around brush roll pulley.
Brush Roll Belt, Style U
The brush roll belt turns the brush roll to agitate, sweep, and
comb the carpet nap. Check the belt regularly to be sure it is
in good condition. Replace the belt if it stretches, cracks or
loses tension. Cut away any hair or threads wound around
the brush roll or the belt pulley because the buildup could
cause the belt to rotate unevenly.
How To Replace Brush Roll Belt
8. Align left end cap with base. Push end cap securely into
place.
9. Pull right side of brush roll to stretch belt. Secure right
end cap into base.
IMPORTANT
1. Lower handle to floor to change belt.
6
10. Rotate brush roll by hand two full rotations to properly
position belt.
11. Place hood back on cleaner. Replace and tighten two
screws.
12. Return vacuum to upright position.
Periodic Maintenance (continued)
NOTE:
Turn off the switch and unplug the electrical cord
before periodic maintenance.
How to Change Light Bulb
1. Lower handle to floor to change lightbulb.
2. Remove dust bag cover.
3.
4.
5.
6.
7.
Remove the two screws from the lens cover.
Pull old light bulb out of socket.
Push new lightbulb into socket.
Replace lens cover.
Secure with screws.
NOTE: Use automotive style 904 bulb only. Eureka part
number, 57940-2.
8. Return vacuum to upright position.
7
To Clear Blockages in Hose
NOTE: Turn off the switch and unplug the electrical cord
before clearing hose.
3. Remove the hood from the cleaner and check for a
blockage in the brush roll area. Make sure the hose inlet is
clear. If no blockage is found, continue to step 4.
After the blockage is found and cleared, replace the hood
on the cleaner.
Hose
Retainer
Hose
1. Firmly pull the end of the hose from the hose retainer on
the hood of the vacuum.
2. Check for blockages in the hose and hose retainer. Flexing
the hose may help loosen any blockage. If no blockage is
found, continue to step 4.
If blockage is found, clear the blockage and replace the
hose in the hose retainer. If the blockage is in the hose
retainer and cannot be cleared, continue to step 3.
8
4. Twist the hose from the coupling elbow on the back of
cleaner. Check for blockages at cleaner opening and in
hose. If a blockage is found, clear the blockage.
The two screws attaching the clear hose adapter can be
removed for better access to a blockage.
5. Screw the hose back onto the back of the cleaner and
replace the other end of the hose into the hose retainer on
the hood of vacuum.
NOTE: Turn off the switch and unplug the electrical cord before servicing.
PROBLEM
CAUSE
SOLUTION
Motor will not start.
✓
Electric Plug
Push plug securely into outlet.
Try another outlet.
Check circuit breaker.
Motor suddenly stops.
✓
Thermal Cut Off
Page 2.
Does not clean the carpet
or floor.
✓
Filters
✓
Dust Bag
✓
Hose
✓ Belt
✓ Brush Roll
No suction at the end of hose.
✓ Hose Adapter
✓ Filters
✓ Dust Bag
Be sure hose adapter is secure. Page 8.
Clean or replace the filters. Hint: If picking up fine
dust, the filters may not look dirty, but a fine substance
tends to reduce suction when it blocks the airflow
through the filters.
Remove any clogs from the hose that restricts the
airflow. Check base hose and long hose. Page 8.
Change dust bag.
✓
Replace light bulb. Page 7.
✓ Hose
Headlight not working.
Noise from the brush roll
area.
Cleaner is hard to push.
Cleaner height knob will
not turn.
Clean or replace the filters. Hint: If picking up fine
dust, the filters may not look dirty but a fine substance
tends to reduce suction when it blocks the airflow
through the filter(s). Page 5.
Replace the dust bag with a new dust bag. Page 6.
Be sure the dust bag is properly seated into the
cleaner body. Page 6.
Be sure hose adapter is secure on back of cleaner.
Page 8.
Remove any blockages from the hose that restricts the
airflow. Page 8.
Check to see that the end of the hose is firmly pressed
into the hose retainer in the hood of the vacuum.
Check base hose and long hose. Page 8.
Replace a broken, cut, loose or out of shape belt.
Clean hair and thread from bristles and end cap area.
Replace brush roll if bristles are worn.
Light Bulb
✓ Brush Roll
✓
Belt
✓ Cleaner Height Setting
✓
Belt
✓
Cleaner Height Setting
Remove hood and clean debris or items from the brush
roll area.
Replace a broken, cut, loose or out of shape belt.
Page 6.
Put handle in operating position. Tilt the cleaner
back to raise the front wheels off floor. Then turn
the knob to a higher setting.
Replace a broken, cut, loose or out of shape belt.
Page 6.
Hint: Put handle in operating position. Tilt the
cleaner back to raise the front wheels off floor.
Then turn the knob.
Missing parts
Call 1-800-438-7352 between 8:00 a.m. and 4:45 p.m.,
central standard time, Monday through Friday. Know the
model and serial numbers when you call.
Questions?
Call 1-800-282-2886 between 8 a.m. to 7:30 p.m.,
(CST), Monday - Friday and 10 a.m. to 6:30 p.m. (CST)
Saturday. Know the model and serial numbers when
you call.
9
THE EUREKA LIMITED WARRANTY
What This Warranty Covers
Your Eureka cleaner is warranted to be free from all defects in material and workmanship in normal household use for a period of one year. The warranty is granted only to the
original purchaser and members of his or her immediate household. The warranty is subject to the following provisions.
What This Warranty Does Not Cover
• Parts of the cleaner that require replacement under normal use, such as disposable dust bags, filters, drive belts, light bulbs, brush roll bristles, impellers and cleaning.
• Damages or malfunctions caused by negligence, abuse, or use not in accordance with the Owner’s Guide.
• Defects or damages caused by unauthorized service or the use of other than Genuine Eureka parts.
What The Eureka Company Will Do
The Eureka Company will, at its option, repair or replace a defective cleaner or cleaner part that is covered by this warranty. As a matter of warranty policy, the Eureka Company
will not refund the consumer’s purchase price.
Warranty Registration
Please fill out and return the warranty registration card accompanying your cleaner.
Obtaining Warranty Service
To obtain warranty service you must return the defective cleaner or cleaner part along with proof of purchase to any Eureka Authorized Warranty Station.
You will find the nearest location in the Yellow Pages, under “Vacuum Cleaners–Service and Repair.” Be certain that the Warranty Station is “Eureka Authorized.”
For the location of the nearest Eureka Authorized Warranty Station or for service information, telephone toll free:
USA: 1-800-282-2886
Mexico: 5670-6169
Canada: 1-800-282-2886
If you prefer, you can write to The Eureka Company, Service Division, 807 North Main Street, Bloomington, Illinois 61701, USA. In Canada write to The Eureka Company, 866
Langs Drive, Cambridge, Ontario N3H 2N7.
If it is necessary to ship the cleaner outside your community to obtain warranty repair, you must pay the shipping charges to the Eureka Authorized Warranty Station.
Return shipping charges will be paid by the Warranty Station. When returning parts for repair, please include the model, type, and serial number from the data plate on the cleaner.
Further Limitations and Exclusions
Any warranty that may be implied in connection with your purchase or use of the cleaner, including any warranty of Merchantability or any warranty for Fitness For A Particular
Purpose is limited to the duration of this warranty. Some states do not allow limitations on how long an implied warranty lasts, so the above limitations may not apply to you.
Your relief for the breach of this warranty is limited to the relief expressly provided above. In no event shall Eureka be liable for any consequential or incidental damages you
may incur in connection with your purchase or use of the cleaner. Some states do not allow the exclusion or limitation of incidental or consequential damages, so the above
limitation or exclusion may not apply to you.
This warranty gives you specific legal rights. You may also have other rights which vary by state.
GENUINE
EUREKA PRODUCT
Questions & Answers about Genuine Eureka Products
Q: Why should I use only Genuine Eureka paper bags, belts, and parts in my Eureka vacuum cleaner?
A: Using Genuine Eureka Products, which are made to our exacting specifications and engineered with emphasis on quality, performance, and customer satisfaction,
ensures the long life and cleaning efficiency of your vacuum cleaner. Overall, this saves you money and helps to keep your home clean.
Q: How can I be sure I am using only genuine Eureka products in my vacuum cleaner?
A: Typically, packaged products and paper bags can be identified by a “Genuine Eureka Product” symbol (see illustration above). For further identification assistance,
you may call our toll-free number, 1-800-282-2886, for the location of a nearby Eureka Authorized Warranty Station.
Q: Are there any differences between “made to fit” or “imitation” and Genuine Eureka paper bags, belts, and parts?
A: Yes, there are some very important differences in materials, quality, and reliability. Many customers have mistakenly purchased “imitation” paper bags and parts
while thinking they purchased genuine. Unfortunately, many of these customers discovered the differences after they experienced related difficulties.
For Genuine Eureka Value, Accept No Imitations!
THE EUREKA COMPANY
Household Warranty
abs 190
10
Bloomington, Illinois 61701


