1
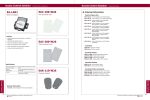
Volume
1
EverAccess
Instruction Manual
EverAccess Desktop Reader
ERS-871
EVERFOCUS ELECTRONICS CORPORATION
ERS-871
Instruction Guide
© 2004 Everfocus Electronics Corp
1801 Highland Ave Duarte CA 91010
Phone 626.844.8888 • Fax 626.844.8838
All rights reserved. No part of the contents of this manual may be reproduced or transmitted in any
form or by any means without written permission of the Everfocus Electronics Corporation.
Table of Contents
CHAPTER
1
Product Overview
1
Features
1
Parts List
2
Specifications
2
Desktop Reader Layout
3
CHAPTER
2
Installation
4
Wiring the RJ45 Port (RS485 BUS)
5
Determine the Serial Port
5
CHAPTER
3
Install the Windows Driver
7
Install
7
Uninstall
8
Notes
9
Chapter
1
Product Overview
The EverAccess desktop reader, ERS-871, incorporates state-of-the-art technology,
reliable performance, easy-to-use features, and elegant appearance. The desktop reader
can be used to enroll cards into the access control system and bridge multiple
controllers via RS485 bus. The EverAccess desktop reader is simple to install; it
connects to the computer via USB port. EverAccess Desktop Readers are an ideal
choice to enhance your EverAccess Access Control System.
Features
125kHz proximity technology
3 LED indicators
Two RS485 interfaces (RJ45 connector)
USB 1.1
Built-in audio buzzer
200ms read time
Elegant Design
Built-in transient voltage suppressor
Saves time by allowing fast and easy card enrollment at system PC
1
Parts List
Please be careful when you unpack the box due to the electronics devices inside. Check
and make sure that you have all the items below inside the original box:
1 125kHz Desktop Reader
1 User manual
1 USB cable
2 RJ45 connectors
If an item appears to have been damaged during shipping, replace it properly in its
carton and notify the shipper. If any items are missing, notify your Everfocus
Electronics Corp. Sales Representative or Customer Service. The shipping carton is the
safest container in which the unit may be transported. Save it for possible future use.
In addition, EverAccess recommends the following parts, to be provided by the
installer:
EverAccess Flex Series access control management software
EverAccess Flex Series controller
EverAccess Flex Series card readers
Specifications
Frequency:
Data Format:
Read Range:
Read Time:
Output Format:
Buzzer:
Indicator:
Power Supply:
Operating Temperature:
Dimensions:
Temper Switch:
Transmission distance:
Keypad:
125 KHz
64 bit
5cm-10cm
200ms
RS485
Built-in
4 LEDs
USB
-10°C ~ +60°C (14°F ~ 140°F)
3” x 4.5” x 1.1” (7.6 x 11.6 x 2.9 cm)
N/A
4000 feet
N/A
2
Desktop Reader Layout
The figure below shows the top view of the desktop reader. The purposes of four
LEDs are given in the figure.
EverAccess
POWER CARD
POWER
TX
RX
CARD TX RX
The front view of the desktop reader is shown in the following figure. The definitions
of the ports from left to right are USB port, RS485 port 1 and RS485 port 2. No
specific sequence is required on two RS485 ports. The RS485 device can be connected
to any one of them. The RS485 signal definitions on RJ45 connector are described in
next section.
USB
RS485-1 RS485-2
3
Chapter
2
Installation
The EverAccess desktop is easy to install. A large-size RS485 bus based access
control system can be established with a desktop reader. The figure below is an
illustration of the system structure.
Desktop reader
EverAccess
EverAccess
EverAccess
1
2
ABC
4
G HI
POWER CARD
TX
3
1
ARM
D EF
5
6
J KL
MNO
7
8
9
PQ RS
TUV
WXYZ
CLR
0
ENT
2
ABC
4
G HI
SYS
3
ARM
D EF
5
6
JKL
MNO
7
8
PQ RS
TUV
WXYZ
CLR
0
ENT
SYS
3
ARM
9
RX
Controller
Controller
Controller
Computer
Controller
EverAccess
EverAccess
1
2
ABC
4
G HI
3
6
MNO
8
9
TUV
WXYZ
CLR
0
ENT
2
ARM
1
7
8
9
PQ RS
TUV
WXYZ
SYS
CLR
0
ENT
D EF
5
J KL
7
PQ RS
ABC
4
G HI
D EF
5
6
JKL
MNO
SYS
The installation process is described below:
1. Install the driver program on the computer. Refer to chapter 3 for details.
2. Connect one end of the USB cable to the desktop reader, connect the other
end to any USB port on the computer. You will hear two beeps once the
desktop reader is connected to the computer.
3. Determine the serial port number for the desktop reader to verify that the
installation has been successfully completed. Refer to the section “Determine
the Serial Port for Desktop Reader” for details.
4. Connect the desktop reader to the controller. Use the RJ45 port on the
desktop reader and the RS485 port on the controller. Refer to the controller
manual for instructions on connecting the RS485 bus for a controller.
5. If applicable, connect additional controllers via RS485 bus.
6. Run the access control management software. Use the serial port identified in
step 3 as the controller serial port. The computer should now be able to
communicate with the controller. If this is not the case, double check the
installation process. If communication still cannot be established, contact
technical support.
Note: If the desktop reader continuously beeps, check the voltage of the power
supply on your motherboard. A variation on the power supply voltage may result
in a problem.
4
Wiring the RJ45 Port (RS485 Bus)
The pins on the RJ45 connector, from left to right, are RS485-B, RS485-A and GND.
Connect these three pins with the corresponding terminals on the controller. For
information on the terminal definition on the controller, please refer to the controller
manual.
A brief pin definition is shown in the following figure:
B AGND
Determine the Serial Port
The installed driver will simulate a serial port on your computer. (The installation of the
driver will be introduced in next Chapter.) In order for the management software to
establish communication with the controller, the user must specify which com port has
been assigned to the simulated port on the computer. In order to determine the serial
port, please follow these steps:
1. After installing the driver and connecting the desktop reader to the computer via
USB, right click “My Computer”. Then click “Properties” in the context menu.
2. A dialog box will pop up (shown in the figure below). Open the hardware tab by
clicking “Hardware”. Next, click “Device Manager”.
4
3. The device manager dialog box will appear. Expand the node of “Ports (COM
& LPT). “Prolific USB-to-Serial Comm Port” is mapped to the desktop
reader. If this item is shown, the driver installation was successful and the
desktop reader is connected to the computer correctly. The serial port for the
desktop reader is displayed in parenthesis immediately after the “Prolific USBto-Serial Comm Port” tag.
5
Chapter
3
Install the Windows Driver
In order for the desktop reader to be recognized by the computer, the driver must
be installed. Before installing the desktop reader hardware, please follow the
instructions below to install the driver.
Install
1. Insert the installation CD included with the EverAccess controller in the
computer’s CD drive. Run the driver installation program “PL-2303 Driver
Installer.exe”.
The follow dialog box will pop up:
6
2. Click the “next” button.
3. Click the “Finish” button to confirm.
4. Click the “Finish” button again to restart the computer.
7
Uninstall
To uninstall the driver, run the same installation program (PL-2303 Driver
Installer.exe). Check “Uninstaller driver” and click “Next”
After uninstalling the driver, click “Finish” to restart the computer.
8
Notes
9
Head Office
12F, No.79 Sec.1 Shin-Tai Wu Road,
Hsi-Chi, Taipei, Taiwan
Tel
:+ 886-2-26982334
Fax
:+ 886-2-26982380
European Office
Albert-Einstein-Strasse 1,
D-46446 Emmerich, German
Tel
: + 49-2822-9394-0
Fax
: + 49-2822-939495
USA Office
1801 Highland Ave.Duarte,CA
91010 ,U.S.A
Tel
:+ 1-626-844-8888
Fax
:+ 1-626-844-8838
Beijing office:
Room 609,Technology Trade Building.
Shangdi Information Industry Base,
Haidian District,Beijing China
Tel
:+ 86-10-62971096
Fax
:+ 86-10-62971423
Japan Office
1809 WBG Marive East 18F,
2-6 Nakase, Mihama-ku,
Chiba city 261-7118, Japan
Tel
: + 81-43-212-8188
Fax
: + 81-43-297-0081
EverAccess