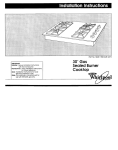
1
.I
--_..
wdlt;
IIU~IALL~IC: Leave
hktiatlon
instructions with tie
homeowner. HOMEOWNER:
Keep installation instructions for
future reference.
30” Gas Eye-level
Microwave Ranae
Before you start...
‘roper mlollol~on
IS your rssponsiblllty
4 qual~lled lechnlaan
should ~nslall thls
ange Make sure you hove everylhl”Q
~cessary for correct inslollahon
It IS the
esponslbillty ol tie insialler lo comply with
“e rxtallotion
clearance
specified on the
eriollrating
plate The setlallrahng
plate
i localed under the cooklop.
ALL OPENINGS IN THE WALL OR
FLOOR WHERE THE RANGE IS TO BE
INSTALLED MUST BE SEALED
Remove all packing molellol
from m~crowove oven covltv
Check the oven orea for
damage
See For Your Safety
If any domoge
is ewdenl do
no, operate rmcrowave
oven
un,:l 1115checked by on
aulhor,zed
Whirlpool sewvce
lechrxclan
WARNING: Reochng
over
heated surface burners
codses r\sk of being burned
To reauce risk. ~nslallal~on
StOiCIQe above
Of Coblnel
surface ““Its should be
waded
Important.
governing
ordlnonces.
Mobile
home instollafion
The lnstallalion
01 thls ro”ge must ConfOrm
lo ,he Manufoclured
Home Construcl~or~ and
Safety Standards. Tllle 24 CFR. Par. 32~80
[formerly the Federal Standard for MoblIe
Home Conslructlon
and Safety.Title 24. HUD.
Pari ZEO]
UOTL
318 for comb”sl,ble’walls
and
molenals thoi hove o density
3120 a more pounds per
Copes of the slandords
obiolned
from
ovalable
See Gas
supply reqwements
nstolloticns
adiacenl
to
llatefiols
lld are less than 20
cwnds per cu. fl. OT lo plastic
‘I& and sheet1”Q
Observe all
codes and
\
Grounded
electrical
outlet
IS requred
See Eleclr~cal
requirements
1FOR YOUR SAFETY
Do not obstruct the flow of
combustion and ventilation air.
1FOR YOUR SAFETY/
\
dimensions
that
are shown mus! oe
used Given dlmenslons
ore min,mum clearances
and
prowde requlred V cleoronce
1FOR YOUR SAFETY
If you smell gas:
1. Open windows.
2. Don’t touch electrical switches.
3. Extinguish any open flame.
4. Immediately call your gas
supplier.
lisled may be
‘Notional
Fire Proleclion
Assoclolion
Batterymarch
Pork
Quincy. Morsochuselis
02269
“American
Gas Association
1575 Wilson Boulevard
Arknglon.Virginia
22209
Tools needed for
installation
1FOR YOUR SAFETY
FOR YOUR SAFETY
To avoid possible exposure to
excessive microwave energy:
1. Do not attempt to operate this
oven with the door open. Opendoor operation can result in
harmful microwave energy
exposure.
2. Do not tamper with or defeat the
safety interlocks.
3. Do not place objects between
the oven front face and the door.
4. Do not allow soil or cleaner
residue to accumulate on sealinS
surface of door.
5. Do not operate oven if damaged.
The door MUST close properly to
provide safe operation. Do not
use the microwave if:
l door is bent.
l hinges and latches are broken
or loose.
l door seals, sealing surfaces
or glass is broken.
The oven should only be
adjusted and repaired by a
qualified repair person.
6. Have a qualified repair person
check oven for microwave
leakage after a repair is made.
‘ANEL A
Do not store or use gasoline
or other flammable vapors and
liquids in the vicinity of this
or any other appliance.
1FOR YOUR SAFETY
Special care must be taken when
drilling holes into the wall.
Electrical wires may be concealed
behind wall covering.
IWARNING:
It is the customer’s responsibility:
To contact a qualified electrical
installer.
l To assure that electrical
installation is adequale and in
conformance with National
Electrical Code, ANSVNFPA
70-1987’ and local codes and
ordinances.
l
WARNING:
The microwave oven in this unit is
designed for household use only.
Do not use microwave for
commercial purposes.
mber
sowIwavddvel
Gas supply
requirements
Observe all governing
and ordinances.
A.
codes
This insiallollw
must conform with
local codes and ordinances
I” the
absence of local codes. l”slollot~On must
conform with American
Nal~onol Standard.
Nal~onol Fuel Gas Code ANSI 2223.1-1987 -*
C.
Tt$rangeisequi~for”se
wrth NATURAL gas. It is certified by
AG.A. for NATURAL and L.f? gaws with
awr&ate
conversion.The
serial/rating
plde lbcabd
under the cooktop has
infamdrOn
on the m
of gas that can be
used If this Information does rot agree with
the tVpe of gas available,
check with the
l3cc1 gas supplier See back cover for L.P gas
ccwers~on instructions.
Dm
Provrde o gas sup&
line of %”
tigidpipetottwerongefccotlon
A smaller size pipeon long runi may result in
insutlicient gas sup&
Prfx jolnl compounds
resistant lo the action of L.P gas must be used
With L.P gas. piping M tubing size con be %”
minimum. L.P gas suppliers usually determine
the we and materials used on lhe system
Recommended
grounding method
DO NOT, UNDER ANY CIRCUMSTANCES.
REMOVE THE POWER SUPPLY CORD
GROUNDtNG
PRONG.
Fw Your persaw
safety. this appliance
musf
be grwn&.This
applrance
is equipped
with a power supply cad having 0 3.prong
groundrng
plug To minrmlze possrble shock
hazard. tt?e cord must be plugged rnlo a
matlna 3.prona aroundino
twx wall
recepiacie.
grwnded
I” &&rda”ce
wrth
the National Eleclncal Code. ANSIINFPA
704987’ or-d local codes and ordlnonces
See Figure 1. If 0 mating wall recepfacle
IS
not avarIable.
it is the celyxlal
reswrwbll~lv
“IN
E.
If local codes permit. A.G A.
approved
flexible metal tubmg IS
recommended
fcf connecfing
this range to
the gas supply line. Do Not kink or domaae
the flexible tubing when moving the range.
A K” male pipe thread is needed fa
connection
lo pressure regul
pipe mrecds
The supply lkne should be equrpped
wth CI shutotf valve. This valve should
be lxutec
in the same rca- as the range
and should be ,n o locot~on tha allows ease
of opening and closing Do Not block c~ccess
to shuioff valve
G.
If rIgid pope is used a o gas supply
Ikrn?. o combination
of pice finrnas
must be used to obtorn an in-line’cbnnecti&
to the range. All strains must be removed from
the supply and fuel lines so range will be
level and in line
H.
operation
The inlet pressure lo the regulatw
should be OS follows for both
and checkrng regulatcx setting.
vy,,~““c”
VI
Recommended
duct
length
Use 3%” x 1o’or.Y d”Ct with a maximum
length of 26 feel fo( duel syslem FM best
cerlmonce
perfcxrnonce
us3 r,a
use
ro more
me
man three
than
rr..-- W
.!Jtt of system you
elbows. To calculate
tt~ length
yw
neea add
cua the
me equivalent
equ,vo,ar,r feet
wet for each dud
need
piece used in me system. See the following
example
3%”
x 10” duct
ddi”.;d,”
/_
system
wall =arl
61,. 7
II ,v
customer to hove o
properly grounded
3-prong wall
receptacle
inSfoIled by
cl quaIlfled
elecfriclan
Recommended
1 -wall cap
9 feet straight
= on
= 9n.
Length Of
3Yd”xl(Y’system
= 14 ft
standard
fittings
Venting
requirements
Ductwork
needed
for installation
Is not
Included.
Wall or roofcops
used must
have back-dratt
damper.
DetermIne which outside veni~ng method
needs to be used Note If o nonvenl~ng
(recircul~tlng]
inslallatlon
1sdewed, you WIII
r!eed to order Non-vent Krt 814023 and follow
instollatw
imtructlons provided with the kil.
The length of ductwork and number of
elbows shcxld be keel to a minrmum 10
provide efficient petiotmonce
The s& of the
ductwwk
should be unlfam
Do Not lnstoll
bd0 elbows together Use duct tape lo meal all
joints in duct system. Ductwork can lermrnate
erther through me 1001 or wall. Figures 2-d
methods and whit
show cOrnma- venting
!WC% Of mdenalS ore needed
Use caulking
t0 Seal R&riCd Wed 0, roOfO~“l,,Q
around
exhaust hood
6” duct
system
NATURAL
Mlnlmum
Maxlmum
GAS:
pressure
pressure
6 Inches
14 Inches
Maximum
L.P. GAS:
Minlmum
Maximum
pressure
pressure
11 Inches
14 Inches
2-weltxws
1 -wall cop
8 feet slraighi
feet.
= 4.5n.
= ion
= OH
= BH.
Length of @ system
= 22 5 ft
I .
Line Pressure
Testing
Testing above
YZ tbs. PSI [Gauge)
The range and its lndlvrdual shutoff
valve must be dlsconnecled
from the
gas supply piping syslem during any pressure
lest~ng of that system al iesl pressures greater
than K psig 13 5 kPa).
Testing at YZ Ibs. PSI [Gauge)
or lower
The range must be isolated from the gas
supply plplng sysiem by closrng 11srndrvldual
manual shuiofl valve during any pressure
tesllng Of the gas supply prplng system af
lestpressurese-waf to or les many2psig
(3.5 kPa).
Electrical
requirements
A 120 Volt. 60 Hz. AC only. 20 Ampere~fused
electrical supply is required A trme-delay
fuse orcirculf breaker is recommended.
It ISrecommended
that o separate clrcult
sew,ng onlyttx
appl~once be provlded
Do NOT USE AN EXTENSION CORD.
WiilnQ
dragrams ore mcluded on Panel C of
hese rnslructior~s A techrwdl
sheet that
Includes the wlrlng diagrams
can be found
behInd the control panel
PANEL B
length=26
Now start...
With range In kitchen.
racks
and
other
pats
tom
1 Remve
n inside eve”.
2
Place one fwt on the shippIng base
n Till range forward slightly to free rear
legs. Genflv lower range to floor nn rmge
backwards
until lront legs are free
3
Remove shlpping materials.
lope
a and Prolechve fllrn from range
DC not 1wnov8 cordbwrd
shipping base
at this time.
not touchlhe
Aca
Detenine
which venllng method
n [rwt or WcIll venting ofverltless)
5
You need to use ltGs ronae is manufactured
fofalside
venfi”Q If o r&venting
[r&r&
lotingl lnslollafion is desired. you will need
to or&rNwwnt
Kit 814023 and follow
if!Stolloflocl iwfructions provided with the kit.
6 -
Remove cover Iroom
B
appropriate
venl opening
hood Iroof w WOII
ventral.
I”
Numbers
correspond
to steps.
opening
D&ermine and clearly mark o
vertical line in the area the we”t
will ix mu&.
II
9
,
PIUQ the electrical
grou”ded
ouIel.
cord into the
II
Install duct hrough the venl opening
n in the uppercoblnel
or wall
Complete the venting system according
to the method needed See Venting
requiemants
Use caulklna to seal exterior
wall or cd Opsn,ng around ezhousl hod
12
Move range close to cabinet
Remove ax&card
shIppIng piece from underronge
Move
rongs lnlo cablnet opening and cenier
Connect duciwak
lo range tuxi
n opening.
8
To vent ituough the rool. mark on Ihe
m UndersIde of the Coblnet IWin l,orn
back wall Measure and mati o line !? fa
rlghl and I&i of the canterl~ne Then measure
3’lC towards the front Ot fhe coblnel and
mark another line a betwe Use o sober saw
lo CU?D recfongularopen~ng
for ductwork
The opening must be large enough to fll J1%”
x 10’ duct svstem
To vent lhrough the wall. measure from ihe
flwr 71”ond67’~“a”dmorkonIhebock
wall Meosure o”d mob o lone Y to right o”d
lefl of the centeilins ot both he,Qh,s Use
a saber sow lo cti 0 rectorQulorope”i”g
to,
ductwork
Theopening
musi be large
BMUQh lo fli 3’ja” x 1W duct system
PANEL C
----dampe,io
seleded
wn,
loAttoch
n opening If damper 1soHached
to the bock of hc&. be sure damper hinge IS
toward the top
odwst NOTE- Oven must t% level for
s~~slaciorv baking condltlons
oven control knob lo “BROIL:‘The oven
bra,, burner should IlQht I” 50 to W seconds
Thrs delay IS normal. ihe coven safety valve
requ,res cl Catal” time below II Will open
ond allow gas to flow
‘li/#ii’
19
WARNING: THE REGULATOR IS DIE CAST. IF
THE CONNECTION
IS MADE TOO TIGHT. IT
WILL CRACK, RESULTINGIN AGAS LEAK AND
POSSIBLE FIRE OR EXPLOSION.
14
Remove
storage
After burner Ilghts.lurn control
q knob to “HI” wsi11on Check each
cooklop burner for proper flame The small
rnner cone should have o very dlstlncl blue
flame Ya” to Yz” long The outer cone IS noi OS
dlstrnct OS the inner cone
25
No adtustmeni
of the oven
n brort burner IS necessary
drawer
n Assemble the flexrble connec~ol
from me gas supplypopelo mepressure
regu,oior ,n lhas order ‘/a” nipple. %” to YI”
reducer, Y$ nrpple, manual shutofl valve. K”
nIppIe.
If t3urnets need a*,urli”g
for
proper Home. ad,uil the 011
shu”er to the wrdest opening thol Wlli “of
cause the flame to lrft or blow off of the burner
Repeat or necesiarywth
each burnel
shutoff vol% ISopen between the regulalor
and gas valves If flexible connecl~ons ore
used, be ceria~n connectors ore nol klnked
16
17
lorgos
Open the shutoff valve I” the gas
n supply llne WOIi 0 few minutes
to move through
the gas lrne
Use a brush and lrquid d&agent
for
laaks. Bubbles around connecl~~ns will
indicate o leak If a leak appears. shut off
gasvalve
ccntrols ow! adtust connecl~ons
Then check ccnnections
ooan
NEVER TEST
FOR GAS LEAKS WITH A MAiCH OR OTHER
FLAME. Clean all detergent solulion from
range.
21
Check the operoiion
of the
H oven burner Remove oven rocks
and oven botiom Push I” and turn Ihe oven
selector knob to “BAKE”Turn the o”e”
temperature
control knob lo 300°F The o”e”
burner should lrght ,n 50 to 60 seconds This
delay IS normal The oven sufeiy valve
requires a certain lime before It will open and
allow gas to flow
n to test all gas cOnnectiOns
Electronic Ignition System initial lighting and gas flame
adjustments.
Electronic ignltlrx systems operate wIthIn
wide&loge
Irmits. bui propergroundng
and polarity is necessary In addrtion to
checking that the outlet provides 120 volt
powet and IScorwctly Qrounded. the outlet
must be checked by o quaIllied
electncian
to see 11II is wired
with correct polarity
If microwave
eye-level range
does not operate...
Check that the circuit breaker Is Mt tripped
a, the fuse blown. Check thai power SupPlY
cord 1splugged into wall receptacle
If you need
assistance...
22.the
oven
Check
burner for proper flame
This flame shwld be Yz”
long. with inner cone of bluish~green. ond
outer mantle of dark blue. and should be
clean and soH I” character
No yellow tlPS
blowing or lining of flame should occur
During nanal
business hours the Whrrlpml
COOL-LINE” Serwce WIII answer a””
questIon oboui operotrng or malnlalning
Your range not covered rn the installation
Instructlax
The Whirlpool COOL-LINE”
Service number is (800) 2534301. Dual lust a
You normally dial long d&lancethe call
IS free
When You call. You need the range model
number and serial number Both numben
can be found on the senallraf~ng piale
locate2 under the cooktop
If you need
service...
Cooklop and lower oven burner use
electronic Igniters in place of slandrng pilots
When the cooMop control knob is turned to
me “LITE” posifion. the system creates o spark
to light the burner. This yMrking
contrnues
until the control knob is turned io the dewed
setnng When the oven control IS turned on.
the spotirng wrll rxnbnue untrl oven pilot
rgnlles. Then the spaking
stops automatrcally
23
If oYen flame needs
to be adwsled.
the drawer
and locate the o,r shutler near the center
rear of the range, next to the pressure
regulator. Laxen screw and adlust the arr
shuHer untrl the proper flame oppeors
Tighten screw Replace drawer. oven
n rano~e
b0tt0mand 0%” rocks
18
Check
the operol~on of the
Push I” and
n cooCloD burners
km soch ~o”hol kdb to “LIE” pos,t,onThe
flame should lrght wrthin A seconds Do
Not leave the knob In the “LtTE” positron
atier burner lights.
‘ANEL D
24
n
Check the operation
of the oven brorl burner
Push I” and turn the
In the evenl ywr Whlrlpx
appliance
should
med smce. call tte de&r
from whom YOU
purchased the oppl~ance 010 Whirlpool
franchised TECH-CARE” sewice company
He
IS I” me Yellow Pages of your phone directory
l~sled under ‘Xpplrances
- Household - Maior
- Serme M Repa”
You con also obtain his
name and number by droling. free. wrthin the
conllnental
Unrled Stales the Whldfxxi
COOL-LINE” Service number. (BOO) 253-1301
A spaal
operator wrll tell You the name and
number of Your nearesl Whrrlpool TECHCARE” sew,ce wtlet
Manta,n
the quollh/ burl1 lnlo Your Whrrlwl
oppI,once
call TECH-CARE” SERVICE.
If you prefer
to write...
Please ~nciude in Your letier the model
number. ser~ol number, date of purchase and
o compete
descrrphon of Your request or
probIeT
This lnformatlo”
will help us to
prowce exactly the osslslance you need
Address Your letier to
Mr Roberl Stanley
Dlws~on “,ce Pres~aent
V/h”,ccxJ Corporotlon
ZOOZ M~63 Norih
L.P. Gas
Conversion
Converting
to L.P. gas should
by o quolifmd
InsfaIler.
be done
A.
Only 0 qualIt&
installershwld
install
ci adlust you, Qos ,“nge
Pressure Regulator:
Tile pressure regulatoc on
your range may be one of five
dIKerent tyvpes Check Flgures5
9 lo
delermne
which pressure re~ulalor you hat
lo convert Only lollow the ~&,ucllons
lhat
apply to thol pressure regulalor
L.P Gas
NO,. Gas
Figure
5
1. Remove the cap marked “NAT ‘and iurn II
““er so II reads “L P” Then replace the cop
Do nOi dlstuti or ,em”ve the spring beneath
lhe cap Check that the fiber washer IS
between the cap and the body ot the
reQ”l”iW. See Figure 5 for ihe correcl poslt,on
of me cop.
COP,
Spring -
Figure
Not. Gas
L.P Gas
Figure
6
2. Remove the cap with screwdriver slot, turn
It 0”~. then replace he cap. This cop WIII
“LPGIO” Do nol d&,b
men have the “3”hlnQ
or remove the sp,,ng beneath this cap See
FIgwe
r4or.Gar
9
5. Use o wrench lo umcrew the c”p r,om Ihe
top by t”,rY”Q counter-clockwIse
Turn the
cap “ve, so the hole end IS up Replace the
cop “nd Qaskd
on the regulolo,
DO NOT
REMOVE THE PRESSURE REGULATOR
D.
Broil Burner: Remove the two
screws loslenlng the broil burner
assembly to ihe “ven Carefully. pill the
burner lowards you then downward
to
“CCtxS the burner Orlflce spud in merear
wall Extra c”,e IS needed to amd breaking
the igniter co11 Place burner screen side up
in o sale “rea Remove the Notural gas
burner orlflce spud Inslall the L.P burner
otlfice spud using ” x” nut dwer Place the
Natural gas burner Onhce spud in the bu,W
box for future conver%n
Replace the burner
screen with lowers taclng the rear of oven.
L.P.mr
Figure
7
3. Remove the cop with screwdrlver slot
Remove the black insert marked “NAT” from
the cop (Ihe insert flls very tlghlly) Reverse Ihe
lnsat and push 11firmly back Into the cop
The markIng “L P” should “ppe”,
on ,he
insert Be sure the insert ISpressed lnlo the
shoulder Donot drstuti Ihespnng I” the body
of me regulalor
IReplace the cop I” the body of Ihe regulalor
and ,,gh,en See FIgwe 7
. ‘, -- _
hoods down 2 lo 2%
turns DO NOT OVERTIGHTEN
The burner flames cannot be properly
adjusted II this c”n”e,s,o”
IS nol m”de Adjust
the “I, shutters for proper flame See Panel D
Step 20 L P gas has” SllQhlly yellow I,p on
lop 01 burner flames in addltlon 10 the olher
piopt?, charoclerlst~cs
COP
WI
‘53
tower Oven Burner
m Remove drawer Screw me “,I,Ic~
hood down 2 lo 23/2turns DO NOT
OVERTIGHTEN The burner llomz c”nria
be
“dlus!ed
prop&y
I( this c”“ves,on
15no’
made The burner ilame should me %” Iong
when “11 shutter IS c”,,ecily
adtusled
Ac,usl
Ihe “I, shutter us needed lo’ prope, flame
See Panel 0. Slep 23 Replace drawer ““en
bottom and rocks
C
4. Renove the cop w,th screudwe,
~101
Carelutl” iemm’e Ihe spring therl The w”she,
Place !he spr,ng on the regula!or (,,sI then the
washer Replace the cap over the kashe,
and sp,InQ TlQhlen C”p See fIQU,e 6
PANEL E
AKer “11 the burnen have been
CCWerted t” t P QOS USOQe “nd
gas line ISconnected.
check for leaks Use
” brush and llquld delerQent IO lesl all
gas connections
for leaks Bubbles “round
connectlow
WIII indlc”te”
leak If” leak
“ppeors.
shut OK Q”S ~“1% conlrols “nd
“djusl cunnectlons
Then check connecl~ons
ogan NEVER TEST FOR GAS LEAKS WITH A
MATCH OR OTHER FLAME.
E.
E
NEUTRAL
GM0
,m
”
I
YAIIIRKO
SWllcN
OVCN LAMP
NOTES
1. Color flogging
is 0 common
practice.
check for flogs at each termlnahon.
2. All replacement
wres
3. All wires t8 GA and
4. S&em&c
conditions:
Selector in BAKE
Thermostat
in BAKE
Lights off
Door unlatched
and
5. For complete
sheet locat&
FUSE
SAYP
must have
some
XL unless otherwise
When
ratings
tracing
wires.
OS original
wires.
noted
open
wiring schematlc
of m~crowc~ve module
behind mIcrowave
control panel.
see tech
LOWER OVEN
MODEL
SM988PES (SERIES)
Part No. 36-C&J34-02-014179l12
Prepared
by Whirlpool
Corporation.
Benton
Haboor.
Mlchlgon
49022
Printed
in U.S.A.