1
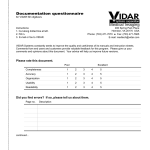
DiagnosticPRO™ DiagnosticPRO™ plus VXR-16 DosimetryPRO™ VXR-16™ Installation Guide Warranty information for VIDAR film digitizers Instructions: 1. Cut along dotted line at left. 2. Fill in. 3. Make a copy for your records. 4. E-mail or fax to VIDAR. 460 Springpark Place Herndon, VA 20170 USA Phone: 1-703-471-7070 z Fax: 1-703-471-7665 E-mail: [email protected] Date ___________________________ System integrator information System integrator administrative contact Name Title Company name Telephone no. E-mail address Fax no. System integrator technical contact Name Title Company name Telephone no. E-mail address Fax no. Shipping information Company name Street address City State Postal code Country Telephone no. Fax no. Product information What product are you registering? (Select only one) DiagnosticPRO DiagnosticPRO plus VXR-16 VXR-16 DosimetryPro What is the product’s serial number? __________________________________________ What is the SCSI ID? ___________________ How is the SCSI termination set? On Off Where is this film digitizer installed? (Or where will it be installed?) Hospital Office Clinic Other _________________________________ Why did you purchase this product? (Select all that apply and rate importance) Feature Not important Important Price 1 2 3 4 5 Performance 1 2 3 4 5 Style 1 2 3 4 5 Reliability 1 2 3 4 5 Size 1 2 3 4 5 Maintenance record 1 2 3 4 5 Image quality 1 2 3 4 5 Packaging 1 2 3 4 5 Documentation 1 2 3 4 5 Software (TWAIN) 1 2 3 4 5 Multi-sheet capability 1 2 3 4 5 Service and support 1 2 3 4 5 Other ___________________ 1 2 3 4 5 End user information End user administrative contact Name Title Company name Telephone no. E-mail address Fax no. End user technical contact Name Title Company name Telephone no. E-mail address Fax no. Documentation questionnaire for VIDAR film digitizers Instructions: 1. Cut along dotted line at left. 2. Fill in. 3. E-mail or fax to VIDAR. 460 Springpark Place Herndon, VA 20170 USA Phone: 1-703-471-7070 z Fax: 1-703-471-7665 E-mail: [email protected] VIDAR Systems constantly seeks to improve the quality and usefulness of its manuals and instruction sheets. Comments from end users and customers provide valuable feedback for this program. Please give us your comments and opinions about this document. Your advice will help us improve future versions. Please rate this document. Poor Excellent Completeness 1 2 3 4 5 Accuracy 1 2 3 4 5 Organization 1 2 3 4 5 Usability 1 2 3 4 5 Readability 1 2 3 4 5 Did you find errors? If so, please tell us about them. Page no. continued... Description How could this document be improved? Other comments or suggestions on how VIDAR Systems can improve its documentation and products: Comments are from... Name Title Company name Department Street address City Country State Postal code Installation guide for DiagnosticPRO™ DiagnosticPRO plus™ VXR-16 DosimetryPRO™ VXR-16™ 2 VIDAR Part Number 13022-006 Rev A October, 2003 © Copyright 2003 by VIDAR Systems Corporation. All rights reserved. Printed in the USA. No part of this publication may be reproduced, stored in a retrieval system, or transmitted, in any form or by any means, electronic, mechanical, photocopying, recording or otherwise, without the prior written permission of VIDAR Systems Corporation. Terms denoted by the trademark symbol ( or ®) used in this publication are trademarks or service marks registered in the United States or other countries. DiagnosticPro, DiagnosticPro plus, VXR-16 and VXR-16 DosimetryPro, are all registered trademarks of VIDAR Systems Corporation. This equipment has been tested and found to comply with the limits for a Class A digital device, pursuant to Part 15 of the FCC Rules. These limits are designed to provide reasonable protection against harmful interference when the equipment is operated in a commercial environment. This equipment generates, uses, and can radiate radio frequency energy and, if not installed and used in accordance with the instruction manual, may cause harmful interference to radio communications. Operation of this equipment in a residential area can cause harmful interference, in which case the user will be required to correct the interference at his or her own expense. Product compliance testing was conducted using VIDAR shielded cables. Modifications to VIDAR shielded cables or the use of cables other than those available from VIDAR could void the user’s authority to operate the equipment. Caution: No operator-serviceable parts inside. Refer servicing to qualified personnel. Achtung: Gehäuse nicht öffnen. Wartung uno reparatur nur durch eletrofachkräfte. Attention: Aucune piece ne peut etre remplacee par l’utilisateur. Toute operation de maintenance doit etre effectuee par une personne qualiee. Atencion: Acceso interno solo autorizado a personal tecnico cualificado. Attenzione: Non appire. Rivolgersi a personale qualificado. Authorized representative in Europe 460 Spring Park Place Herndon, VA 20170 U.S.A. Sales: 1-800-471-SCAN or 1-800-471-7226 Email: [email protected] Phone: (703) 471-7070 Fax: (703) 471-7665 Internet: www.filmdigitizer.com Technical Support: 1-888-INFO-471 or 1-888-463-6471 E-mail: [email protected] Emergo Europe P.O. Box 149 4300 AC Zierikzee The Netherlands Phone: (31) 1114 11515 Fax: (31) 1114 10104 Email: [email protected] 3 Contents Unpacking............................................................................................................5 Look for damage....................................................................................5 Identify the components ........................................................................7 If anything is missing... ..........................................................................8 Activate your product warranty ..............................................................8 Setting up ............................................................................................................9 Install the Multi-Film Feeder ..................................................................9 If necessary, set the digitizer’s SCSI ID ..............................................11 Terminate the SCSI bus ......................................................................12 Connect the SCSI cable ......................................................................13 Connect the power cord ......................................................................14 Installing SCSI hardware ..................................................................................15 Unpack the SCSI accessory box. ........................................................15 Install the SCSI card. ...........................................................................17 Installing device drivers ...................................................................................19 1. Turn on the digitizer .........................................................................20 2. Use the SCSI utility to configure the SCSI BIOS.............................21 3. Install the scanning application........................................................24 4. Determine the correct device driver for your system, then install the driver ...............................................................................................24 VIDAR Drivers and Toolkit Installation CD ..........................................25 VIDAR device driver summary........................................................26 Computers with Windows 2000 and Windows XP ..............................27 Installing the STI driver ...................................................................27 About the STI drivers ......................................................................32 Computers with Windows NT 4.0 (Service Pack 5 or higher) .............34 Computers with Windows 98 Second Edition......................................41 Operating ...........................................................................................................43 About digitizers and film sizes .............................................................43 DiagnosticPRO™ plus specifications .............................................43 VXR-16 DosimetryPRO™ specifications ........................................44 VXR-16™ specifications .................................................................44 About films ...........................................................................................45 Basic operating instructions.................................................................46 Scanning a single film..........................................................................47 4 Scanning multiple films ........................................................................49 Cleaning the Auto-Feed Roller ............................................................51 Appendix: SCSI information and troubleshooting guide .............................52 Introduction ..........................................................................................52 Overview of the installation process ....................................................52 Digitizer and SCSI controller compatibility ..........................................53 SCSI cables .........................................................................................53 Troubleshooting ...................................................................................55 5 Unpacking Look for damage Before unpacking the film digitizer, examine the shipping carton for damage. If the carton is damaged, notify the shipper immediately. Note: Save the carton and all packing materials. If you need to ship the digitizer later, you must repack it using the original plastic bags, foam supports and carton. See instructions on the next page. VIDAR Film Digitizer Installation Guide 6 Unpacking Repacking the film digitizer IMPORTANT: When shipping the film digitizer, you must use the original packing materials, including plastic bags, foam supports and carton. Improper packaging may allow damage to the digitizer, which will incur additional charges for repair. CAUTION: To prevent personal injury and damage to the digitizer, two people are needed to repack the digitizer. 1. Place the digitizer and film feeder in separate plastic bags (not shown here for clarity), and seal the bags. 2. Place one foam support on the digitizer. Note the digitizer’s orientation: front is up. 3. Place the other foam support on the digitizer. 4. Slide the film feeder into the slots near the top of the foam supports. 5. Gently lower the assembly into the carton. 6. Close and securely tape the carton. 2 IMPORTANT: You must include the film feeder. The unit cannot be properly repaired without its film feeder. 3 4 5 VIDAR Film Digitizer Installation Guide Unpacking 7 Identify the components Unpack the carton and identify each of these components: 9 Item Unpack from 9 Film digitizer Below foam insert Multi-film feeder Top foam insert Installation Guide Accessory box Quick Setup Guide (specific to the film digitizer) On film feeder Power cord (115V: p/n 4697-001; 230V: p/n 2104-006) Accessory box SCSI box (Adaptec™ 2930 card and software) Accessory box Accessory box SCSI cable: 6 foot MMD-50 to MMD-50 Film digitizer Multi-film feeder 9 Optional items SCSI cable: 10 foot MMD-50 to MMD-50 Mounting Kit for mobile applications (p/n 9727-001) VIDAR Film Digitizer Installation Guide 8 Unpacking If anything is missing... Immediately contact your VIDAR supplier. Activate your product warranty Complete the warranty information/customer survey form at the back of this manual and mail it to VIDAR Systems Corp. If your digitizer needs service, this information should be on file at VIDAR. Contact VIDAR Technical Support if you have any questions about installing or using your VIDAR film digitizer: Phone: +1.800.471.SCAN (+1.800.471.7226) +1.703.471.7070 outside the U.S. E-mail: [email protected] VIDAR Film Digitizer Installation Guide 9 Setting up Install the Multi-Film Feeder 1. Place the digitizer on a solid flat surface (such as a table) with the exit tray facing you (as shown here). 2. Attach the Multi-Film Feeder to the digitizer: a. Hold the feeder with the film guides facing you, and the film support at the top. b. Insert the square locator tabs on the bottom of the feeder into the square holes in the digitizer. Square locator tabs VIDAR Film Digitizer Installation Guide 10 Setting up c. On the back of the feeder, tighten both thumbscrews to secure the feeder to the digitizer. Thumbscrews Warning Before you begin the installation procedure, turn off all power to the computer and peripherals. Connecting the SCSI cable with the power on can cause serious damage to the unit or your computer. Précaution Avant de commencer la connexion, assurez vous que votre ordinateur soit bien éteint. Toute connexion du cable SCSI et courant, pourrait gravement endommager votre numériseur ou ordinateur. Advertencia Antes de continuar con la instalación, favor de apagar su computadora y periférico. Conectando el cable SCSI con la computadora prendida puede causar daño al equipo o a su computadora. Warnung Vor dem Installieren den Computer und angeschlossene Geräte ausschalten. Durch Anschluß des SCSI Kabels an angeschaltete Geräte können ernsthafte Schäden entstehen. VIDAR Film Digitizer Installation Guide Setting up 11 If necessary, set the digitizer’s SCSI ID A computer equipped with a SCSI bus can communicate with multiple SCSI devices (for example: a film digitizer, a scanner and a disk drive). Each device must have a unique SCSI ID number so the computer can distinguish it from other SCSI devices. Valid SCSI ID numbers range from 1 to 6. When selecting SCSI ID numbers: The SCSI Card 2930U is preset to SCSI ID 7 and should not be changed. Set the film digitizer to any SCSI ID between 1 and 6, as long as that number is not used by another SCSI device attached to the computer. Note: The digitizer is shipped from the factory with the SCSI ID preset to 3. If the system is configured to boot from a SCSI disk drive, it’s best to set the disk’s SCSI ID to 0 or 1. Most SCSI disks are preset to SCSI ID 0 at the factory. CAUTION: The digitizer and computer MUST be turned OFF before changing the SCSI ID. To set the digitizer’s SCSI ID: 1. Locate the SCSI ID switch on the back of the digitizer between the SCSI port connectors. 2. Change the SCSI ID switch using a 1/8" flat blade screwdriver. Note: Do not set the switch to position 0, 7, 8 or 9. CAUTION: Do not force switch rotation. Do not use a large screwdriver to rotate the switch. VIDAR Film Digitizer Installation Guide 12 Setting up Terminate the SCSI bus The film digitizer has two SCSI port connectors, enabling it to be placed in the middle or at the end of a SCSI chain. VIDAR strongly recommends that you install the digitizer at the end of a SCSI chain, and that you not change the factory SCSI termination setting. Note: If you cannot install the digitizer at the end of a SCSI chain, please contact VIDAR Technical Support for instructions (+1.703.471.7070 or [email protected]). Note: When the film digitizer is at the end of the SCSI chain, the SCSI termination switch must be set for SCSI termination. Consult your SCSI controller manual regarding proper use of termination. WARNING: Do not connect two SCSI controllers (i.e., two computers) to the digitizer. If you determine that the film digitizer’s SCSI termination is set for no internal termination (lower picture below), here is how to change the setting to activate internal termination: 1. Locate the SCSI termination switches on the back of the digitizer (location is shown on the next page). 2. Slide Switch 1 to the up position. (Switch 2 has no function.) Factory (recommended) termination switch setting Switch 1 set for internal termination 1 Not recommended 1 VIDAR Film Digitizer Installation Guide 2 2 Switch 1 set for no internal termination Setting up 13 Connect the SCSI cable For best performance, use the shielded SCSI cable available from VIDAR (part number 4137-001). Note: Attach or remove the SCSI cable carefully to avoid bending the connector pins. Insert the connector straight into the SCSI port. Inserting the connector at an angle may damage the pins. If the pins or cable are damaged, improper SCSI operation may result. Note: Before connecting the SCSI cable, be certain that the SCSI cable isn’t connected to anything else and the digitizer power supply is unplugged. 1. Carefully attach the SCSI connector to the one of the film digitizer’s SCSI ports. Apply even pressure to avoid bending SCSI connector pins. Do not force the connectors together. SCSI port connectors SCSI ID switch SCSI termination switches 1 2 2. Connect the other end of the cable to the SCSI port on the computer. WARNING: If the SCSI connector has bent pins, it will damage the SCSI port in the digitizer. Do not attempt to straighten bent pins. Discard any SCSI cable with bent pins and replace it with a new cable. VIDAR Film Digitizer Installation Guide 14 Setting up Connect the power cord 1. Connect the power cord to the digitizer’s Power Entry Module (PEM), located on the side of the digitizer. 2. Connect the other end of the power cord to a grounded power outlet. Power Entry Module (PEM) Note: Film digitizers described in this manual have an autosensing power supply. When you apply power, the digitizer will detect the voltage and set itself for proper operation. VIDAR Film Digitizer Installation Guide 15 Installing SCSI hardware A SCSI controller (host adapter) is required to enable the VIDAR film digitizer to communicate with your computer. A computer equipped with a SCSI bus can communicate with multiple SCSI devices (for example: a film digitizer, a scanner and a disk drive). Each device must have a unique SCSI ID number so the computer can distinguish it from other SCSI devices. Valid SCSI ID numbers range from 1 to 6. Instructions for setting the film digitizer’s SCSI ID number are provided in the previous chapter. This chapter shows you how to install the SCSI interface card in your computer. You will install the SCSI software the next chapter. Unpack the SCSI accessory box. Open the Adaptec™ SCSI accessories box and identify the following components: 9 Description Adaptec™ SCSI Card (CAUTION: Leave the card in its anti-static package until just before it is installed.) 50-pin internal SCSI cable (not used in this installation) Adaptec™ SCSI driver installer CD-ROM Adaptec™ documentation VIDAR Film Digitizer Installation Guide 16 Installing SCSI hardware Warning Before you begin the installation procedure, turn off all power to the computer and peripherals. Connecting the SCSI cable with the power on can cause serious damage to the unit or your computer. Précaution Avant de commencer la connexion, assurez vous que votre ordinateur soit bien éteint. Toute connexion du cable SCSI et courant, pourrait gravement endommager votre numériseur ou ordinateur. Advertencia Antes de continuar con la instalación, favor de apagar su computadora y periférico. Conectando el cable SCSI con la computadora prendida puede causar daño al equipo o a su computadora. Warnung Vor dem Installieren den Computer und angeschlossene Geräte ausschalten. Durch Anschluß des SCSI Kabels an angeschaltete Geräte können ernsthafte Schäden entstehen. VIDAR Film Digitizer Installation Guide Installing SCSI hardware 17 Install the SCSI card. a. Turn off power to the computer and disconnect the computer’s power cord from the electrical outlet. b. Remove the cover from the computer. (Refer to the computer’s manual for instructions on removing the cover.) Tip: If the computer is a tower model, it’s easier to install the SCSI card when the tower is laid on its side. c. Locate an unused PCI expansion slot (PCI connectors are typically white or ivory). Remove the expansion slot cover. Save the slot cover screw for use in step g. PCI expansion slots d. Before handling the SCSI card, discharge your static electricity by touching a metal part on the computer chassis. e. Remove the SCSI Card from its anti-static packaging. Handle the card only by its edges. continued VIDAR Film Digitizer Installation Guide 18 Installing SCSI hardware f. Insert the SCSI Card into the PCI expansion slot. Press down firmly until the SCSI card clicks into place. These slightly tilted cards are incorrectly seated in the slot When properly seated, the gold fingers along the bottom of the card should hardly show g. Secure the SCSI card with the expansion slot screw you removed in step c. h. Replace the cover on the computer. i. Attach the free end of the SCSI cable to the SCSI card’s external connector. VIDAR Film Digitizer Installation Guide 19 Installing device drivers So far, you have installed the SCSI hardware in your computer and assembled the film digitizer. This chapter covers the final installation phase: configuring the SCSI BIOS and installing device driver software on your computer. SCSI BIOS configuration is required for all installations to assure that the computer boots properly and recognizes the film digitizer. The procedure you follow for device driver software installation depends on the operating system resident on your computer. Instructions are provided for: Windows XP Professional Edition. Windows 2000 with Service Pack 2 or higher. Windows NT 4.0 with Service Pack 5 or higher. Windows 98 Second Edition. VIDAR Film Digitizer Installation Guide 20 Installing device drivers 1. Turn on the digitizer a. Ensure the PC is turned off. Note: Always apply power to the digitizer before turning on the computer. This enables the computer to recognize the digitizer. b. Turn on the digitizer. Note: Several minutes are required for the digitizer to carry out its internal diagnostics. These activities must be completed before you can load film into the digitizer. c. Proceed to step 2, next in this chapter. VIDAR Film Digitizer Installation Guide Installing device drivers 21 2. Use the SCSI utility to configure the SCSI BIOS In most cases, the digitizer is not properly detected after you install the SCSI adapter. This is because the computer tries to boot from the adapter, but no SCSI hard disk is connected. You must correct this behavior in the SCSI BIOS. a. Turn on the computer. b. When the computer boots up, it will detect the SCSI Adapter. When prompted, press <Ctrl A> to access the SCSI Utility. c. In the Options menu (see below), select the Configure/View Host Adapter Settings option. VIDAR Film Digitizer Installation Guide 22 Installing device drivers d. Under Additional Options, select SCSI Device Configuration (see below). Press <Enter>. e. You will see SCSI Device ID #s 0 to 7. Initiate Sync Negotiation will be set to Yes or No. Set them all to No. Set Maximum Sync Transfer Rate to 10.0 for all. Press <Esc> to exit. VIDAR Film Digitizer Installation Guide Installing device drivers 23 f. Select Advanced Configuration Options (see below) and press <Enter>. g. Select Host Adapter Bios. Set to Disabled. h. Press <Esc>, then SAVE SETTINGS, then REBOOT. i. Go to step 3, “Determine the correct device driver for your system,” next in this chapter. VIDAR Film Digitizer Installation Guide 24 Installing device drivers 3. Install the scanning application Follow the instructions provded with the scanning application. IMPORTANT: You must install the scanning application before you install the VIDAR Toolkit. If you install the digitizer drivers first, and the scanning application next, you must run the VIDAR Driver and Toolkit CD a second time to update the Toolkit. 4. Determine the correct device driver for your system, then install the driver If your computer uses Windows 2000 or Windows XP, then... Install the VIDAR STI driver and update the Toolkit (vscsi32.dll) using instructions in “Computers with Windows 2000 and Windows XP,” later in this chapter. If your computer uses Windows NT 4.0 with Service Pack 5 or higher, then... Install the Adaptec™ SCSI driver and EZ-SCSI software using instructions in “Computers with Windows NT 4.0,” later in this chapter. If your computer uses Windows 98 Second Edition, then... Install the Adaptec™ SCSI driver and EZ-SCSI software using instructions in “Computers with Windows 98 Second Edition,” later in this chapter. VIDAR Film Digitizer Installation Guide Installing device drivers 25 VIDAR Drivers and Toolkit Installation CD VIDAR Drivers and Toolkit Installation CD goes here IMPORTANT: Please save the CD. You will need it if you: Uninstall or reinstall the drivers. Upgrade the digitizer firmware. Replace the digitizer with another one having different firmware. Reinstall the scanning application. Install the digitizer and scanning application on another computer. VIDAR Film Digitizer Installation Guide 26 Installing device drivers VIDAR device driver summary Operating system Device driver EZ-SCSI Software Update Toolkit (vscsi32.dll) CDs needed Windows XP Professional Edition STI No Yes VIDAR Drivers and Toolkit Installation CD Windows 2000 with Service Pack 2 or higher STI No Yes VIDAR Drivers and Toolkit Installation CD Windows NT 4.0 with Service Pack 5 or higher ASPI Yes Yes Adaptec™ SCSI 2930 Card Installation CD VIDAR Drivers and Toolkit Installation CD Windows 98 Second Edition ASPI Yes Yes Adaptec SCSI 2930 Card Installation CD VIDAR Drivers and Toolkit Installation CD VIDAR Film Digitizer Installation Guide ™ Installing device drivers 27 Computers with Windows 2000 and Windows XP Note: On Windows 2000 computers, Service Pack 2 or higher must be installed. Computers without Service Pack 2 or higher will not be supported. STI drivers have been tested with Windows XP Professional Edition. VIDAR’s STI device driver provides compatibility between VIDAR film digitizers/scanners and Windows 2000 and Windows XP only. The STI driver takes advantage of Microsoft’s Still Image Architecture (STI) for digital imaging devices. You will need: VIDAR Drivers and Toolkit Installation CD. Installing the STI driver Note: These instructions have been successfully tested on a wide range of Windows 2000 and Windows XP systems. In rare instances, you may have difficulty installing the STI driver. If that happens, try again after logging on as Administrator, or as a user with Administrator rights. 1. Power up the digitizer and computer exactly as described in “Apply power: digitizer first, then PC,” earlier in this chapter. 2. Insert the VIDAR Drivers and Toolkit Installation CD into the CDROM. The installer should launch automatically. If the installer does not launch automatically, double-click the appropriate CD drive icon under My Computer in Windows Explorer. 3. Read and follow the on-screen instructions. VIDAR Film Digitizer Installation Guide 28 Installing device drivers 4. When you are prompted to restart the PC: a. Close all open applications and files. b. Restart the PC. Note: You must restart the PC for the changes made by the installer to take effect. 5. After the PC restarts, Windows will detect the digitizer and display the Found New Hardware window: Note: All VIDAR film digitizers are identified as “VXR-12” for backward compatibility. 6. Windows will launch the Found New Hardware Wizard. In the Welcome... page, click Next. VIDAR Film Digitizer Installation Guide Installing device drivers 29 7. In the Install Hardware Device Drivers page, activate Search for a suitable driver... , then click Next. 8. In the Locate Driver Files page, activate CD-ROM drives, then click Next. VIDAR Film Digitizer Installation Guide 30 Installing device drivers 9. When the Driver Files Search Results page confirms that the correct driver—vidarusd.inf—has been found, click Next. 10. In the Digital Signature Not Found window, click Yes. (VIDAR has not registered to receive a digital signature, but the software has been extensively tested with Windows.) VIDAR Film Digitizer Installation Guide Installing device drivers 31 11. In the Completing the Found New Hardware Wizard page, click Finish. 12. Remove the VIDAR Drivers and Toolkit Installation CD. IMPORTANT: Please save the CD. You will need it if you: Uninstall or reinstall the drivers. Upgrade the digitizer firmware. Replace the digitizer with another one having different firmware. Reinstall the scanning application. Install the digitizer and scanning application on another computer. VIDAR Film Digitizer Installation Guide 32 Installing device drivers About the STI drivers Previously, most system integrators built their scanning applications for VIDAR digitizers based on either the VIDAR SCSI Toolkit or the ActiveX control (based on the SCSI Toolkit). VIDAR’s SCSI Toolkit was based on Adaptec’s ASPI drivers. However, Adaptec™ is not supporting its ASPI drivers for Microsoft Windows 2000 or XP. Therefore, VIDAR has developed a new toolkit that takes advantage of Microsoft’s Still Image Architecture (STI) for digital imaging devices. The new VIDAR Toolkit and VIDAR STI driver support several operating system enhancements. The VIDAR STI driver was designed to provide compatibility between VIDAR medical film digitizers and Windows 2000 and XP. Features of this driver include: Installation/setup wizard for easy and consistent installation. Scanners and Cameras Control Panel, which provides a common interface for still image devices. Push-model event monitor and control center, a consistent model in which a still image device can initiate data transfer to an application (push model), in contrast to an application having to request data from the device (pull model). No need to rely on unsupported ASPI-layer drivers from Adaptec™ for SCSI adapters. The VIDAR STI driver works with the new Toolkit (vscsi32.dll), which is automatically installed with the STI driver. The Toolkit (version 3.0) was developed specifically to support the STI architecture: It is a direct replacement for previous vscsi32.dlls. No recompiles are necessary. Installation automatically replaces the current vscsi32.dll with the new one. Existing applications are easily configured to work with the Toolkit. VIDAR Film Digitizer Installation Guide Installing device drivers 33 WARNING: VIDAR has validated the STI driver and replacement of vscsi32.dll with all supported VIDAR digitizers on both Windows 2000 and Windows XP systems using several third party software applications. No bugs or problems were identified during validation testing. However, at the time this manual was published, very few system integrators were providing support for Windows 2000 and XP systems. Therefore, if you are using a scanning application—other than VIDAR’s TWAIN module—you must check with your system integrator or scanning software vendor to verify that they support the replacement of VIDAR’s vscsi32.dll. VIDAR Film Digitizer Installation Guide 34 Installing device drivers Computers with Windows NT 4.0 (Service Pack 5 or higher) You will need: Adaptec™ SCSI Card 2930 Installation CD. VIDAR Drivers and Toolkit Installation CD. Note: Windows NT Service Pack 6 is recommended. 1. Wait for the computer to reboot. 2. Open the Control Panel: Start > Settings > Control Panel. 3. In the Control Panel window, double-click SCSI Adapters. VIDAR Film Digitizer Installation Guide Installing device drivers 35 4. In the SCSI Adapters window, click the Drivers tab (see below). 5. In the Drivers tab, click the Add button. VIDAR Film Digitizer Installation Guide 36 Installing device drivers 6. In the Install Driver window (shown below): a. In the left list, select Adaptec. b. In the right list, select Adaptec AHA-294X/AHA-394X or AIC78XX PCI SCSI Controller. c. Click OK. Note: Do not click Have Disk. 7. In the Drivers window, click No. VIDAR Film Digitizer Installation Guide Installing device drivers 37 8. Insert the Adaptec™ SCSI Card 2930 Installation CD into the CD drive. 9. In the Insert Disk window, click OK. Note: The Windows NT Workstation CD is not needed. 10. In the Files Needed window, click the Browse... button. 11. In the Locate File window, go to the CD, select the file \WIN95-98NT4.0\WINNT\4_0\Aic78xx.sys, then click Open. VIDAR Film Digitizer Installation Guide 38 Installing device drivers 12. In the Files Needed window, confirm the path, then click OK. 13. In the System Settings Change window, click Yes. Wait for the computer to reboot. 14. After the computer has rebooted, open the Control Panel and doubleclick SCSI Adapters. VIDAR Film Digitizer Installation Guide Installing device drivers 39 15. In the SCSI Adapters window: a. Verify that the Adaptec SCSI adapter is listed in the Devices tab. 16. Verify that the driver is listed as Started in the Drivers tab. c. Click OK to close the SCSI Adapters window. 17. Insert the VIDAR Drivers and Toolkit CD and follow the on-screen instructions to complete ASPI driver and EZ-SCSI installation. VIDAR Film Digitizer Installation Guide 40 Installing device drivers 18. Remove the VIDAR Drivers and Toolkit Installation CD. IMPORTANT: Please save the CD. You will need it for: VIDAR Film Digitizer Installation Guide Reinstalling the drivers. Reinstalling the scanning application. Installing the digitizer and scanning application on another computer. Installing device drivers 41 Computers with Windows 98 Second Edition You will need: Adaptec™ SCSI Card 2930 Installation CD. VIDAR Drivers and Toolkit Installation CD. 1. After the computer boots, the Add New Hardware wizard appears. It will tell you that it has found a new device called Adaptec AHA2930CU PCI SCSI Controller. 2. Activate Display a list of all the drivers in a specific location. 3. Click Next. 4. Verify that Adaptec AHA-2930CU PCI SCSI Controller is selected. 5. Insert the Adaptec™ SCSI Card 2930 Installation CD into the CD drive. 6. Click Have Disk. 7. Locate the file \WIN95-98-NT4.0\4.0\WIN9X\aic78xx.inf on the CD, then click OK. 8. Click Next. 9. Click Finish in the New Hardware Wizard and allow the computer to reboot. 10. Insert the VIDAR Drivers and Toolkit CD and follow the on-screen instructions to complete ASPI driver and EZ-SCSI installation. VIDAR Film Digitizer Installation Guide 42 Installing device drivers 11. Remove the VIDAR Drivers and Toolkit Installation CD. IMPORTANT: Please save the CD. You will need it if you: VIDAR Film Digitizer Installation Guide Uninstall or reinstall the drivers. Upgrade the digitizer firmware. Replace the digitizer with another one having different firmware. Reinstall the scanning application. Install the digitizer and scanning application on another computer. 43 Operating About digitizers and film sizes This manual covers several digitizer models. This section describes important differences between the models. DiagnosticPRO™ plus specifications Nominal resolution Pixels (14"x17" film) Spot size (µm) DPI Line pairs per mm Digitizing speed 1k x 1.25k 1008 x 1124 340 75 1 9 sec 2k x 2.5k* 2002 x 2431 170 150 3 19.5 sec 4k x 5k 3990 x 4845 85 300 6 39 sec Mammography film: 18cm x 24cm 4k x 5k 4104 x 5472 44 570 11 44 sec *ACR Standard for Teleradiology Guideles [Revision 35 (1998)] recommends 2.5 line pairs/mm minimum Scan modes 16-bit mapped to 12-bit and 8-bit grayscale outputs Film sizes Width: Length: Thickness: 5" to 14" (12.7cm to 35.6cm) 5" to 51"† (12.7cm to 129.5cm) 0.006" to 0.010" (0.15mm to 0.51mm) †Longer films require user support during feeding, and a scanning application that handles long films Auto film feeder Standard 25-film capacity (mixed sizes, no presorting) ”Light box loading”: head-up, normal reading, left justified Film sizes up to 14" x 17" (35.6cm x 43.2cm) VIDAR Film Digitizer Installation Guide 44 Operating VXR-16 DosimetryPRO™ specifications Nominal resolution Pixels (14"x17" film) Spot size (µm) DPI Line pairs per mm 1k x 1.25k 997 x 1211 356 71.25 1.4 2k x 2.5k* 1995 x 2422 178 142.5 2.8 4k x 5k 3990 x 4845 89 285 5.6 *ACR Standard for Teleradiology [Revision 35 (1998)] recommends 2.5 line pairs/mm minimum Scan modes 16-bit output Film sizes Width: Length: Thickness: 5" to 14" (12.7cm to 35.6cm) 5" to 51"† (12.7cm to 129.5cm) 0.006" to 0.010" (0.15mm to 0.51mm) †Longer films require user support during feeding, and a scanning application that handles long films Auto film feeder Standard 25-film capacity (mixed sizes, no presorting) ”Light box loading”: head-up, normal reading, left justified Film sizes up to 14" x 17" (35.6cm x 43.2cm) VXR-16™ specifications Nominal resolution Pixels (14"x17" film) Spot size (µm) DPI Line pairs per mm 1k x 1.25k 997 x 1211 356 71.25 1.4 2k x 2.5k* 1995 x 2422 178 142.5 2.8 4k x 5k 3990 x 4845 89 285 5.6 *ACR Standard for Teleradiology [Revision 35 (1998)] recommends 2.5 line pairs/mm minimum Scan modes 16-bit mapped to 12-bit and 8-bit grayscale outputs: 8k and 10k mapped to 4k x 5k, 2k x 2.5k, 1k x 1.25k resolution output Film sizes Width: Length: Thickness: 5" to 14" (12.7cm to 35.6cm) 5" to 51"† (12.7cm to 129.5cm) 0.006" to 0.010" (0.15mm to 0.51mm) †Longer films require user support during feeding, and a scanning application that handles long films Auto film feeder Standard 25-film capacity (mixed sizes, no presorting) ”Light box loading”: head-up, normal reading, left justified Film sizes up to 14" x 17" (35.6cm x 43.2cm) VIDAR Film Digitizer Installation Guide Operating 45 About films The film digitizer handles standard radiograph films up to 14" x 17" (35.5cm x 43cm). You can feed multiple films (up to 25), and you can mix film sizes ranging from 8" x 10" (20.5cm x 24.5cm) to 14" x 17" (35.5cm x 43cm) in one stack—as long as you follow the rules below. IMPORTANT: Remove stickers, tape, staples, paper clips, etc. from films before scanning. These may cause serious film feeding problems and may damage the digitizer’s internal mechanisms. Failure to remove extraneous items from films will void your warranty. Load films just as you would view them on a light box, with this qualification: Films smaller than 5" wide x 7" long (12.7cm wide x 17.8cm long) must be loaded one at a time. You cannot load them in a stack. Follow instructions in “Scanning a single film,” later in this chapter. CAUTION: Films smaller than 5" x 7" (12.7cm x 17.8cm ) can fall into the internal optics box and cause damage not covered by your warranty. VIDAR Film Digitizer Installation Guide 46 Operating Basic operating instructions 1. Turn on the film digitizer. Note: Always turn on the film digitizer before turning on the computer. This enables the computer to recognize the digitizer. Note: Several minutes are required for the digitizer to carry out its internal diagnostics and establish communications with the scanning application. These activities must be completed before you can load film into the digitizer. 2. Turn on the computer. 3. Launch the scanning application. IMPORTANT: Remove stickers, tape, staples, paper clips, etc. from films before scanning. These may cause serious film feeding problems. Failure to remove extraneous items from films will void your warranty. 4. Load the film. How you load the film depends on whether you are digitizing one film or multiple films. See the next pages for details. CAUTION: X-ray images displayed on a computer monitor are representative only. A variety of factors influence image density and size—including monitor luminance and calibration, window and level settings, zoom level, and dimensional and grayscale inaccuracies resulting from build-up of tolerances in the digitizer, display board and computer. For this reason, special precautions must be exercised (e.g., calibrating the software ruler and computer monitor) when taking measurements from digitized images. Please refer to the user’s manual for your digitizing software for more information. VIDAR Film Digitizer Installation Guide Operating 47 Scanning a single film Options for scanning single films There are two ways to scan a single film: By manually inserting the film behind the blue area (as described in this section), or By treating the single film as a batch of one (if the scanning application supports this approach); for instructions, see “Scanning multiple films” (next section in this manual). The digitizer cannot scan films smaller than 5" x 7" (12.7cm x 17.8cm). 1. Hold the film in front of you as you would view it on a light box. 2. Align the left edge of the film with the film guide on the left of the feeder. 3. Place the film into the slot BEHIND the blue area. The blue area is defined by a lip and a groove on the top edge of the digitizer where the feeder is attached. Place a single film directly behind the the blue area. When the digitizer senses the film, it automatically stages the film in preparation for digitizing. The film will first move down, then up. This is normal operation. CAUTION: If the film is not staged properly, do not manually pull the film out of the digitizer. Instead, use the scanning application’s “eject” command to remove the film. continued VIDAR Film Digitizer Installation Guide 48 Operating Note: When a film has been staged, it is in the digitizer’s light path. The ADC (Automatic Digitizer Calibration) feature requires that the light path be clear of the film for proper background calibration of the digitizer. The digitizer will automatically adjust the film’s position to properly proceed with ADC. Depending on the location of the film’s leading or trailing edge, and the length of time the film has been blocking the light path, the film will be: a) pushed up, or b) pushed down. 4. Using your scanning software, execute the Scan command. Note: Proper orientation of the film during loading depends on the scanning application program you are using. Some scanning programs rotate images 180° for display. If images appear upside down, you may be able to set the default orientation in the scanning application. If this option isn’t available, then insert films into the digitizer upside down, as shown here. VIDAR Film Digitizer Installation Guide Operating 49 Scanning multiple films CAUTION: Do not load more than 25 films at one time. 1. Hold the film stack in front of you as you would view it on a light box. Films at the back of the stack are digitized first. Note: The digitizer cannot scan films smaller than 5" x 7" (12.7cm x 17.8cm). When loading small films, the vertical dimension must be at least 7" (17.8cm). 2. Align the left edge of the film stack with the film guide on the left edge of the feeder. 3. Place the film stack IN the blue area. Stack multiple films The blue area is defined by a lip and a groove on the top edge of the digitizer where the feeder is attached. Place the film stack in front of the feeder inside the groove of the blue area. IN blue area Note: If you are digitizing a single film, place the film BEHIND the blue area. continued VIDAR Film Digitizer Installation Guide 50 Operating Note: When a film has been staged, it is in the digitizer’s light path. The ADC (Automatic Digitizer Calibration) feature requires that the light path be clear of the film for proper background calibration of the digitizer. The digitizer will automatically adjust the film’s position to properly proceed with ADC. Depending on the location of the film’s leading or trailing edge, and the length of time the film has been blocking the light path, the film will be: a) pushed up, or b) pushed down. 4. Using your scanning software, execute the Scan command. Note: During extended batch scans (more than 5 films), the digitizer may pause periodically to recalibrate. This is normal operation. Note: Proper orientation of the film during loading depends on the scanning application program you are using. Some scanning programs rotate images 180° for display. If images appear upside down, you may be able to set the default orientation in the scanning application. If this option isn’t available, then insert films into the digitizer upside down, as shown here. VIDAR Film Digitizer Installation Guide Operating 51 Cleaning the Auto-Feed Roller After extensive use, dust or lint particles may build up on the Auto-Feed Roller and Idler Wheels. Idler Wheels To remove residue, loop a piece of light adhesive tape (such as Scotch® Magic™ Tape) around your fingers with the adhesive side out, then gently pat the roller and wheels as you turn them. Auto-Feed Roller CAUTION: Do not use any type of cleaning solvent on the feed roller and idler wheels, as this could damage these components and cause improper operation. Do not use tape with a strong adhesive, such as packing tape or strapping tape. Do not use tape requiring the adhesive to be wetted, such as brown paper packing tape. If the Idler Wheels don’t turn freely, contact VIDAR Technical Support. Contact VIDAR Technical Support if you have any questions about installing or using your VIDAR film digitizer: Phone: +1.800.471.SCAN (+1.800.471.7226) +1.703.471.7070 outside the U.S. E-mail: [email protected] VIDAR Film Digitizer Installation Guide 52 Appendix: SCSI information and troubleshooting guide Introduction VIDAR digitizer installation instructions provide basic guidance for installing SCSI hardware and software. That information enables most customers to successfully install and connect their digitizers to recommended SCSI controllers. Some customers, however, may encounter situations in which the basic SCSI installation information is insufficient. This appendix provides additional information, and offers troubleshooting guidance for common problems. Overview of the installation process SCSI installation involves four main steps (installation instructions for certain digitizer models may vary slightly from this sequence): 1. Install the recommended SCSI controller in your PC. 2. Set the VIDAR digitizer SCSI ID and termination. 3. Connect the digitizer to the SCSI controller with a shielded SCSI cable. 4. Install the SCSI drivers and software. VIDAR Film Digitizer Installation Guide Appendix: SCSI information and troubleshooting guide 53 Digitizer and SCSI controller compatibility VIDAR digitizers work with Adaptec™ 2940AU and 2930CU SCSI controllers in the following configurations: Digitizer model 2940AU VXR-16™ VXR-16 DOSIMETRYPRO™ DIAGNOSTICPRO™, DIAGNOSTICPRO™ plus 9 9 9 2930CU 9 9 9 SCSI cables Maximum total cable length (internal plus external cables) is determined by the number of devices on the controller and the maximum desired bandwidth. A longer total cable length limits maximum bandwidth due to attenuation, device impedance and signal propagation delays. Note: Total SCSI cable length should not exceed 5 meters (15 feet). For best performance, use the shielded SCSI cable available from VIDAR (part number 4137-001). Rules of thumb for maximum cable length Supported by VIDAR SCSI-1/2 (5MB/Sec): 6 meters (18 ft) Yes SCSI-2 fast (10MB/Sec): 3 meters (9 ft) Yes SCSI-2 fast/wide, ULTRA (20MB/Sec): 3 meters (9 ft) No SCSI-2 ULTRA Wide (40MB/Sec): 1.5 meters (>4 devices) No SCSI-2 ULTRA Wide (40MB/Sec): 3 meters (<4 devices) No SCSI-3 ULTRA2 Wide (80MB/Sec): 12 meters (>2 devices) No VIDAR Film Digitizer Installation Guide 54 Appendix: SCSI information and troubleshooting guide Connecting the cable Note: Attach or remove the SCSI cable carefully to avoid bending the connector pins. Insert the connector straight into the SCSI port. Inserting the connector at an angle may damage the pins. If the pins or cable are damaged, improper SCSI operation may result. Note: Before connecting the SCSI cable, be certain that the PC and digitizer are OFF. 1. Carefully attach the SCSI connector to the digitizer’s SCSI port. Apply even pressure to avoid bending SCSI connector pins. Do not force the connectors together. 2. Connect the other end of the cable to the SCSI port on the computer. WARNING: If the SCSI connector has bent pins, it will damage the SCSI port in the digitizer. Do not attempt to straighten bent pins. Discard any SCSI cable with bent pins and replace it with a new cable. VIDAR Film Digitizer Installation Guide Appendix: SCSI information and troubleshooting guide 55 Troubleshooting Tip: Check www.filmdigitizer.com for current troubleshooting information, tools and software updates. Problem: A BIOS banner does not appear for an adapter that has a BIOS chip. or A BIOS banner appears, but there is an error message (“Host Adapter Configuration Error”). This error at system boot indicates the PCI interrupt has not been configured correctly. Do not continue with installation until this problem has been resolved. Check these items in the system CMOS/BIOS (they will usually be found under PCI or PnP configuration): PCI slot should be enabled. Bus mastering should be enabled. IRQ triggering should be set to Level. There should be enough IRQs available for PCI/PnP. Also, try installing the adapter in another PCI slot. Problem: Driver is installed, but Windows fails to run when you reboot. There is probably a resource conflict. Problem: System locks up with memory errors or no video. There could be a BIOS address conflict. Contact the BIOS manufacturer and update the system BIOS to the most recent version. VIDAR Film Digitizer Installation Guide 56 Appendix: SCSI information and troubleshooting guide Problem: System locks up or freezes when the driver loads. Check for IRQ conflicts. Check the system CMOS for any PCI slot or IRQ options that enable you to reserve an IRQ for PCI/PnP. Try the adapter in another PCI slot (primary or first slot preferred). Problem: There are no boot problems and Windows launches, but the driver has a yellow exclamation point or red X in Device Manager. Update the driver with the latest version. See “Checking and updating the SCSI drivers,” earlier in this appendix. Problem: You installed a PnP adapter in Windows, and the PnP does not load the driver. Disable the PnP on the adapter. Check adapter documentation for instructions. Problem: Digitizer is not listed in Windows Device Manager (Windows 2000 or Windows XP). Update to STI drivers. See “Computers with Windows 2000 and Windows XP” in the “Installing device drivers” chapter. Check all SCSI cables and connectors. Problem: Digitizer is not detected on SCSI bus. Set up SCSI card. See the “Installing SCSI hardware” chapter. Check all SCSI cables and connectors. VIDAR Film Digitizer Installation Guide Appendix: SCSI information and troubleshooting guide 57 Problem: SCSI card driver not loading or hanging during Windows 2000 installation. This applies to all Adaptec™ PCI SCSI adapters/cards running the Windows 2000 operating system. Note: Use these troubleshooting steps in sequence. Stop when the problem is corrected and do not execute the next step! 1. Update the motherboard BIOS to make it A.C.P.I. compliant (ACPI= Advanced Configuration & Power Interface) 2. Disable P.M. and A.C.P.I. in motherboard CMOS (PM= Power Management). 3. Set the option for PnP OS to “No” in motherboard CMOS, even though Windows 2000 is a PnP OS. 4. Press the F6 key at Windows 2000 CD boot. It allows selecting another SCSI card if necessary. Unfortunately, only the four top drives are displayed, and there is no way to scroll (a Microsoft limitation). 5. Press the F6 key at Windows 2000 CD boot. Selecting “Standard PC” installs Windows 2000 without ACPI support. VIDAR Film Digitizer Installation Guide 460 Springpark Place Herndon, VA USA 20170 Phone: 1-703-471-7070 Fax: 1-703-471-1165 Technical Support: 1-703-471-7070 1-800-471-7226 [email protected] www.filmdigitizer.com