1
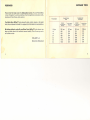
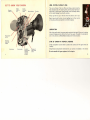
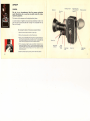
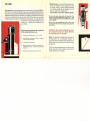
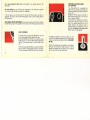
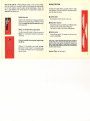
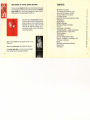
Before closing the camera door, press the release for' a fraction
that film is running correctly.
of a second to check
OPTICAL
Now close the door and lock it by turning the semicircular ring to F. Push the ring
back so that the single point mark is uncovered to indicate that the film is on its first
25 ft. run.
SUNSHADE
N. B. When the first half of your double-run
over in order to expose the other half.
film has been exposed,
ACCESSORIES
The sunshade supplied with the camera must always be used. It will eliminate any
risk of reflections from the front element of the lens. It can also be used as a mount for
the filters and close-up lens available as optional accessories.
turn the film
LENS CAP
Between shots it is recommended
with the camera.
FILM FOOTAGE
COUNTER
~
10
Press the release and ru n the f Im until the fig ure 0
appears opposite the white notch. The 4 ft. film leader
has now been run off.
by the lens cap supplied
FILTERS
You can improve your films by using standard filters series VII.
The film footage counter on the back of the camera
automatically indicates the amount of film that has been
exposed.
The film being loaded, the letters ft. (feet) will appear
behind the window, because the indicator automatically
returns to the starting point when the pressure-pad lever
is operated in the course of loading or unloading the
camera.
to replace the sunshade
f.
Note - The Bolex photo-electric
cell compensates for the light lost through
automatically. To determine the exposure you should therefore use the figure
true film speed (16 ASA for type A Kodachrome, for example) and not the film
corrected for the filter in use (10 AS A, for example, for type A Kodachrome with
version filter).
filters
for the
speed
a can
A close-up lens (with a focal length of 1 m) can also be used for filming at distances
down to 2 ft. Its presence does not exclude the use of the split-field rangefinder. A
special focusing table is supplied with this accessory.
Paillard-Bolex can also supply an additional ring with which two filters (one for correction and one
for conversion) or a close-up lens and a filter can be fitted to the camera at the same time.
23