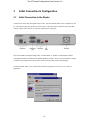
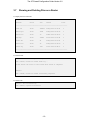
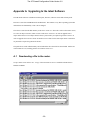
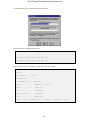
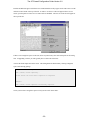
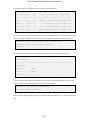
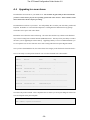
1
The AT-Firewall Configuration Guide Version 2.0
The AR320 & AT-Firewall Configuration Guide
Version 2.0
1
The AT-Firewall Configuration Guide Version 2.0
1
Contents
1
CONTENTS ....................................................................................................................................... 2
2
LEGAL NOTICES ............................................................................................................................ 5
3
INITIAL CONNECTION & CONFIGURATION ......................................................................... 6
3.1
INITIAL CONNECTION TO THE ROUTER ......................................................................................... 6
3.2
LOGIN TO THE ROUTER ................................................................................................................. 8
3.2.1
4
3.3
ONLINE HELP ................................................................................................................................ 9
3.4
ONLINE COMMAND PROMPT.......................................................................................................... 9
3.5
CHECKING THE SOFTWARE VERSION .......................................................................................... 10
3.6
CHECKING & SETTING THE SYSTEM DATE & TIME .................................................................... 11
3.7
SHOWING AND DELETING FILES ON A ROUTER ........................................................................... 12
3.8
RESTARTING THE UNIT ................................................................................................................ 14
SAVING YOUR ROUTER CONFIGURATION.......................................................................... 15
4.1
5
VIEWING THE DYNAMIC CONFIGURATION .................................................................................. 16
GENERAL CONFIGURATION .................................................................................................... 17
5.1
6
SETTING SYSTEM NAME, CONTACT, LOCATION & TERRITORY .................................................. 17
LAN CONFIGURATION ............................................................................................................... 19
6.1
BASIC LAN CONFIGURATION ..................................................................................................... 19
6.2
TESTING THE LAN CONFIGURATION........................................................................................... 20
6.3
CONFIGURING THE ROUTER AS A DHCP SERVER ........................................................................ 21
6.3.1
7
Resetting the DHCP server ................................................................................................ 24
CONFIGURING THE WAN SIDE................................................................................................ 25
7.1
CONFIGURING THE WAN SIDE WITH A STATIC IP ADDRESS ....................................................... 25
7.2
CONFIGURING THE WAN SIDE WITH A DHCP IP ADDRESS ........................................................ 27
7.2.1
8
Logging out of the Router .................................................................................................... 8
DNS relay........................................................................................................................... 28
THE AT-FIREWALL ..................................................................................................................... 29
8.1
FIREWALL POLICIES .................................................................................................................... 30
8.2
CONFIGURING THE FIREWALL TO PROVIDE NAT......................................................................... 31
8.3
ICMP HANDING .......................................................................................................................... 33
8.4
HOSTING SERVERS BEHIND THE FIREWALL ................................................................................. 34
8.5
LIMITING ACCESS TO WEBSITES .................................................................................................. 35
2
The AT-Firewall Configuration Guide Version 2.0
9
LOGGING AND NOTIFICATION ............................................................................................... 37
9.1
LOGGING TO THE INTERNAL TEMPORARY LOG ........................................................................... 37
9.2
LOGGING TO AN EXTERNAL SYSLOG SERVER ............................................................................ 39
9.3
LOGGING TO A SYSADMIN VIA E-MAIL ....................................................................................... 40
9.4.2
9.4
E-mail Firewall Notification .............................................................................................. 41
SNMP MANAGEMENT & TRAPS................................................................................................. 42
9.4.1
SNMP Linktrap Notification .............................................................................................. 42
9.4.2
SNMP Firewall Notification .............................................................................................. 43
9.5
10
FIREWALL EVENTS ..................................................................................................................... 44
SECURELY MANAGING YOUR FIREWALL ...................................................................... 45
10.1
VT100 TERMINAL ....................................................................................................................... 45
10.2
TELNET ....................................................................................................................................... 45
10.3
HTTP SERVER ............................................................................................................................ 47
10.3
SNMP MANAGEMENT................................................................................................................. 47
10.3
SECURESHELL ............................................................................................................................ 48
-3-
The AT-Firewall Configuration Guide Version 2.0
APPENDIX A. UPGRADING TO THE LATEST SOFTWARE....................................................... 50
A.1
DOWNLOADING A FILE TO THE ROUTER. ..................................................................................... 50
A.2
INSTALLING A NEW PATCH.......................................................................................................... 54
A.3
RELEASE LICENCES .................................................................................................................... 56
A.3.1
Entering a Service Release License ................................................................................... 56
A.3.2
Entering a Major or Minor Release license....................................................................... 57
A.4.1
Release Upgrade checklist. ................................................................................................ 59
APPENDIX B. VT100 COMMANDS ................................................................................................... 60
APPENDIX C. HANDLING CONFIGS & SCRIPTS......................................................................... 61
C.1
VIEWING AND EDITING A FILE AT THE PROMPT ........................................................................... 61
C.2
AR-EDIT 1.2 HELP...................................................................................................................... 62
C.3
VIEWING CONFIGURATION FILE AT THE PROMPT ......................................................................... 63
APPENDIX D. IP ADDRESSING GUIDES......................................................................................... 64
D.1
CIDR IP ADDRESS NOTATION .................................................................................................... 64
D.2
RFC 1918 PRIVATE ADDRESS SPACE ......................................................................................... 64
D.3
SUBNETTING GUIDE .................................................................................................................... 65
APPENDIX E. REFERENCES ............................................................................................................. 66
APPENDIX F. EXAMPLES .................................................................................................................. 68
F.1
BROADBAND CONNECTION WITH DYNAMIC IP........................................................................... 68
F.2
BROADBAND CONNECTION WITH STATIC IP ............................................................................... 70
F.3
HOSTING SERVERS BEHIND THE FIREWALL.................................................................................. 72
F.4
HOSTING MULTIPLE SERVERS BEHIND A MULTI-HOMED FIREWALL ............................................. 74
-4-
The AT-Firewall Configuration Guide Version 2.0
2
Legal Notices
Copyright © 2001 Allied Telesyn International, Corp.
All rights reserved. No part of this publication may be reproduced without prior written permission from
Allied Telesyn.
Allied Telesyn International, Corp. reserves the right to make changes in specifications and other
information contained in this document without prior written notice. The information provided herein is
subject to change without notice. In no event shall Allied Telesyn be liable for any incidental, special,
indirect, or consequential damages whatsoever, including but not limited to lost profits, arising out of or
related to this document or the information contained herein, even if Allied Telesyn has been advised of,
known, or should have known, the possibility of such damages.
All trademarks are the property of their respective owners.
-5-
The AT-Firewall Configuration Guide Version 2.0
3
Initial Connection & Configuration
3.1
Initial Connection to the Router
Connect to the router using the supplied Async cable. The cable should connect a free COM port on your
PC. The cable will plug onto the D9 port on the router. If the router has more than one Async port then
connect to Port0, also referred to as Asyn0 or sometimes the 'config port'.
The router should be configured using a DEC VT100 terminal. A suitable VT100 terminal emulator
called HyperTerminal is included in the standard Windows 9x build. There are many alternative terminal
emulators on the market such as the excellent TeraTerm, Putty and ProComm Plus packages.
In HyperTerminal, make a 'New Connection' and connect using 'Direct out of Com 1' or 'Com 2' if
appropriate.
-6-
The AT-Firewall Configuration Guide Version 2.0
The next screen will offer the appropriate Baud rate and flow control. The appropriate selections are:
Bits per second
9600
Data bits
8
Parity
None
Stop bits
1
Flow Control
Hardware
After selecting OK, you will be presented with the main screen. Now go to the 'File' menu and select
'Properties' to adjust some of HyperTerminal's default settings
Function, arrow,
Terminal keys
and ctrl keys act as
Emulation
VT100
Backscroll buffer
500
lines
Beep three times
Checked
when connecting or
disconnecting
-7-
The AT-Firewall Configuration Guide Version 2.0
3.2
Login to the Router
Upon reboot, the router will output the Power-on Self Test (POST) messages out of the Asyn0 port at
[9600, 8, n, 1, no-flow]. From then all console interaction will take place at [9600, 8, n, 1, hardware].
If you do not get a login prompt within one minute of a reboot, check your Async cable is fully wired and
that the flow control is set to 'hardware'.
The default username is 'manager' and the default password is 'friend'. Both are in lowercase.
3.2.1
Logging out of the Router
Remember to always logout of your firewall after having logged in.
Manager red>
Manager red>
Manager red> logout
red login:
-8-
The AT-Firewall Configuration Guide Version 2.0
3.3
Online help
The AlliedWareTM online help system can be accessed by typing 'help' at the command prompt. This
shows all the arguments and parameters for a specific software module. This is not intended to replace
the Software Reference Manual but is intended to prompt the user.
Manager > help
AR300 and AR700 Series Routers
HELP v2.2.1 Rev A, 09-May-2001
Help is available on the following topics.
HELP asynchronous
Async ports, TTY, & Asynchronous call control
HELP ETH
Ethernet interface commands
HELP SYN
Synchronous interface commands
HELP PPP
Point to Point protocol commands
HELP FR
Frame Relay protocol commands
--More--
3.4
(<space> = next page, <CR> = one line, C = continuous, Q = quit)
Online command prompt
AlliedWareTM also includes a command prompt that shows all the arguments for a specific software
module. This can be accessed using the question mark '?'.
Manager > sho ?
Options : ACC ALIas APPletalk BOOTp BRIDge BRI BUFfer CONfig CPU DECnet
DEBug DHCP DVMrp ENCo ETH EXception FIle FEAture FIREwall FFIle FLash
FRamerelay GRE GUI HTTP INSTall INTerface IP IPV6 IPSec IPX ISAkmp ISDN
L2TP LAPB LAPD LDAP LOAder LOG LPD MAnager MAIL MIOX NTP OSPF PATch
PBX PERM PIM PING PKT ASYn POrt PKI PPP PRI Q931 RADius RELease RSVP
SA SCript SERvice SNmp SSH STAR STARTup STReam SYN SYStem TELnet TPAD
TRAce TRIGger SESsions TCP TEST TIme TTy TACacs USEr VRRp X25T TDM
A command is shown with the minimum required command capitalised. Hence 'SHow' implies that 'sh' is
the minimum required to execute the command. Capital letters are not required at any stage in the router.
-9-
The AT-Firewall Configuration Guide Version 2.0
3.5
Checking the Software Version
First, check the software version of your unit with the <show system> command.
Manager > sho sys
Router System Status
Board
ID
Time 10:48:12 Date 30-Oct-2001.
Bay Board Name
Rev
Serial number
-------------------------------------------------------------------------------Base
82
AR320
M2-0
41912745
MAC
66
AR010 EMAC
M2-0
49881793
-------------------------------------------------------------------------------Memory -
DRAM :
8192 kB
FLASH :
2048 kB
-------------------------------------------------------------------------------SysDescription
Allied Telesyn AR320 version 2.2.2-01 06-Jul-2001
--More--
(<space> = next page, <CR> = one line, C = continuous, Q = quit)
It is recommended that you check the Allied Telesyn Research web-site to see that your router is loaded
with the latest patch for your software release.
http://www.alliedtelesyn.co.nz/support/patches
Details of upgrading patches & release are covered in Appendix A.
- 10 -
The AT-Firewall Configuration Guide Version 2.0
3.6
Checking & Setting the System Date & Time
It is essential with any computer equipment to ensure the date and time are accurately set. This is
important so that the router's internal logs will match up with other computer equipment's logs so that
problems such as attempted intrusions or attacks can be documented.
In order to check the time and the date
Manager > sho time
System time is 10:53:26 on Tuesday 30-Oct-2001.
In order to set the time
Manager > set time=9:48:00
System time is 09:48:00 on Tuesday 30-Oct-2001.
In order to set the date
Manager > set date=31-oct-2001
System time is 09:48:33 on Wednesday 31-Oct-2001.
The Router also supports Network Time Protocol to get an IP address from the Internet as a client and can
also act as an NTP server to devices on the LAN over IP. This is covered in the Network Time Protocol
Chapter of the Reference Manual.
- 11 -
The AT-Firewall Configuration Guide Version 2.0
3.7
Showing and Deleting Files on a Router
To display the files on the unit
Manager > sho file
Filename
Device
Size
Created
Locks
------------------------------------------------------------------------8-222.rez
flash
1668860
01-Aug-2001 09:47:41
0
8222-01.paz
flash
12264
01-Aug-2001 09:52:43
0
feature.lic
flash
39
23-Mar-2001 08:36:56
0
help.hlp
flash
139682
23-Jun-2001 01:03:44
0
prefer.ins
flash
64
01-Aug-2001 09:57:54
0
release.lic
flash
96
01-Aug-2001 09:32:29
0
test01.cfg
flash
1961
31-Oct-2001 09:49:17
0
-------------------------------------------------------------------------
To rename a file
Manager > rename test01.cfg test02.cfg
Info (131263): Flash file rename under way...
DO NOT restart the router or alter Flash until rename is completed.
Manager >
Info (131264): Flash file rename successfully completed.
To delete a file
Manager > del file=test02.cfg
Info (156003): Operation successful.
- 12 -
The AT-Firewall Configuration Guide Version 2.0
In order to check the integrity of all file files on the unit, the 'sho ffile check' command can be used. This
uses the checksum within the file to ensure the file is complete. This is similar to 'chkdsk' or 'scandisk'.
Manager > sho ffile check
dev
creator
name
type
size
file date & time
address check
----------------------------------------------------------------------------flash
help
hlp
139682
23-Jun-2001 01:03:44
01CC00B8
Good
flash
inst
release
lic
96
01-Aug-2001 09:32:29
01CE23A4
Good
flash
load
8222-01
paz
12264
01-Aug-2001 09:52:43
01C79B80
Good
flash
load
8-222
rez
1668860
01-Aug-2001 09:47:41
01CE2444
Good
The amount of free space within the flash can be see with the 'show flash' command.
Manager > sho flash
FFS info:
global operation ...... none
compaction count ...... 5
est compaction time ... 120 seconds
files .................
1821472 bytes
garbage ...............
85316 bytes
free ..................
59292 bytes
required free block ...
131072 bytes
total .................
2097152 bytes
--More--
(6 files)
(<space> = next page, <CR> = one line, C = continuous, Q = quit)
Garbage is wasted space which can be reclaimed with the 'activate flash compaction' command. This
defragments the flash to provide contiguous free space. Do not restart, reboot or turn off the router until
this process has completed.
Manager > act flash comp
Info (131260): Flash compacting...
DO NOT restart the router until compaction is completed.
Manager >
Info (131261): Flash compaction successfully completed.
- 13 -
The AT-Firewall Configuration Guide Version 2.0
3.8
Restarting the unit
There are two types of software restart:
restart router
reloads the router configuration file
restart reboot
reloads the release, patch and configuration file.
This may take up to 1 minute...
- 14 -
The AT-Firewall Configuration Guide Version 2.0
4
Saving your Router Configuration
Whenever a command is passed from a prompt, boot config file or runtime script to the command
interpreter, the command takes immediate effect and the configuration is updated in the Dynamic RAM.
If the router is restarted before the configuration is saved then the command is lost. In order to create a
copy of the 'Dynamic Configuration' into a 'Configuration file' in flash, the 'create config' command is
used. Configuration files are expected in 8.3 format with a *.cfg extension.
Manager > create config=test01.cfg
Info (149003): Operation successful.
The router can store more than one configuration file in the flash. Therefore the router needs to be told
which configuration file to boot from next time. This is achieved with the 'set config command'.
Manager > set config=test01.cfg
Info (149003): Operation successful.
The configuration file to boot from next time can be seen with the 'show config' command.
Manager > sho con
Boot configuration file: test01.cfg (exists)
Current configuration: None
- 15 -
The AT-Firewall Configuration Guide Version 2.0
4.1
Viewing the Dynamic Configuration
To see the dynamic configuration in the DRAM, the 'show config dynamic' command can be used. This
will list all the commands that differ from the router defaults. The commands are parsed and always
displayed in the same order. Long lines are sometimes split into two shorter lines. Commands are often
abbreviated.
Manager > sho con dyn
#
# SYSTEM configuration
#
#
# PPP configuration
#
create ppp=0 over=tnl-test
#
# IP configuration
#
enable ip
add ip int=eth0 ip=192.168.1.1
--More--
(<space> = next page, <CR> = one line, C = continuous, Q = quit)
The output of this command can be very long and it may take several presses of the space bar to reach the
page you require. In this case, 'show con dyn=module' can be used to jump straight to the appropriate
section
Manager > sho con dyn=ip
#
# IP configuration
#
enable ip
add ip int=eth0 ip=192.168.1.1
- 16 -
The AT-Firewall Configuration Guide Version 2.0
5
General Configuration
5.1
Setting System Name, Contact, Location & Territory
When managing an estate of communications devices, it is helpful to assign a system name, contact &
location. This means the device can be easily recognised, the manager can be easily identified and the
unit can be easily found. These directly correlate to SNMP MIB values.
Manager > set sys name=red
Info (134003): Operation successful.
Manager red> set sys [email protected]
Info (134003): Operation successful.
Manager red> set sys loc="abingdon, uk"
Info (134003): Operation successful.
It is possible to set the SysName as a Fully Qualified Domain Name (FQDN) such as
"red.mydomain.example". This means that Mail Subsystem and the Terminal Server (Telnet) modules
automatically consider the domain to be "mydomain.example". The unfortunate side affect of a long
system name is that it reduces the total VT100 command length and very long commands can no longer
be input. While configuring the unit, a short system name is recommended for convenience. RFC 1178
includes a convention for appropriate naming of network devices.
The output can be seen by typing 'show system'.
Manager red> sho sys
SysDescription
Allied Telesyn AR320 version 2.2.2-01 06-Jul-2001
SysContact
[email protected]
SysLocation
abingdon, uk
SysName
red
--More--
(<space> = next page, <CR> = one line, C = continuous, Q = quit)
- 17 -
The AT-Firewall Configuration Guide Version 2.0
Another important operation is to set the unit to operate in Europe. This defines defaults for Europe in a
variety of software modules such as ISDN, PBX & Q.931.
Manager red> set sys terr=europe
Info (134263): Q931, PRI and PBX parameters (where applicable) set to
defaults for specified territory.
Remember: Now that you have set the SysName, SysContact, SysLocation and
SysTerritory, remember to 'create' and then 'set' your config
Manager red> create con=test02.cfg
Info (149003): Operation successful.
Manager red> sho con
Boot configuration file: test01.cfg (exists)
Current configuration: test01.cfg
Manager red> set con=test02.cfg
Info (149003): Operation successful.
Manager red> sho con
Boot configuration file: test02.cfg (exists)
Current configuration: test01.cfg
- 18 -
The AT-Firewall Configuration Guide Version 2.0
6
LAN configuration
6.1
Basic LAN Configuration
Firstly enable the IP module and then Eth0 as an IP interface
Manager red> ena ip
Info (105287): IP module has been enabled.
Manager red> add ip int=eth0 ip=192.168.1.1
Info (105275): interface successfully added.
Now look at the interface table in the router with <show ip interface>
Manager red> sho ip int
Interface
Type
IP Address
Pri. Filt
Pol.Filt Network Mask
Bc Fr PArp
Filt RIP Met.
SAMode
IPSc
MTU
GRE
DBcast
Mul.
VJC
OSPF Met.
-------------------------------------------------------------------------------Local
---
Not set
-
-
-
---
--
Pass
--
---
---
Not set
1500
-
---
--
---
---
eth0
Static
192.168.1.1
1
On
---
01
Pass
No
---
---
255.255.255.0
1500
-
---
0000000001 No
n
Rec
--------------------------------------------------------------------------------
Now look at the routing table in the router with <show ip route>
Manager red> sho ip route
IP Routes
------------------------------------------------------------------------------Destination
Mask
DLCI/Circ.
Type
Policy
NextHop
Interface
Protocol
Metrics
Age
Preference
------------------------------------------------------------------------------192.168.1.0
255.255.255.0
0.0.0.0
eth0
-
direct
interface
1
0
66
0
-------------------------------------------------------------------------------
- 19 -
The AT-Firewall Configuration Guide Version 2.0
6.2
Testing the LAN configuration
You can ping devices on the LAN using the ping client from the router's prompt. Since a router has more
than one IP address by definition, the source address of the ping can be specified at the prompt with the
<sipaddress> argument. If you do not specify the source address then unpredictable results may occur
when traversing the routing table or using NAT.
It is assumed that there is a PC with an IP address of 192.168.1.5 and a default gateway of 192.168.1.1
connected to Eth0 via a hub, switch or crossover. You do not need the gateway on the PC to be set at this
stage, but it is easy to forget later.
Manager red> ping 192.168.1.5 sipaddress=192.168.1.1
Echo reply 1 from 192.168.1.5 time delay 3 ms
Echo reply 2 from 192.168.1.5 time delay 3 ms
Echo reply 3 from 192.168.1.5 time delay 2 ms
If you do not get a response then check the cable & the link-light.
- 20 -
The AT-Firewall Configuration Guide Version 2.0
6.3
Configuring the router as a DHCP server
The router can act as a DHCP server to hand out IP addresses to devices on the LAN. First, a DHCP
policy must be created which will be the settings to hand out to each PC.
Manager red> ena dhcp
Manager red> create dhcp poli=d lease=7200
Info (170003): Operation successful.
Manager red> add dhcp poli=d nbnode=b-node router=192.168.1.1 dnss=158.43.240.4,
193.113.212.38 subnet=255.255.255.0
Info (170003): Operation successful.
Now ranges or pools of addresses have to be defined
Manager red> cre dhcp range=d1 policy=d ip=192.168.1.16 num=8
Info (170003): Operation successful.
Manager red> cre dhcp range=d2 policy=d ip=192.168.1.32 num=8
Info (170003): Operation successful.
- 21 -
The AT-Firewall Configuration Guide Version 2.0
The output of <sho con dyn=dhcp> should look something like this:
Manager red> sho con dyn=dhcp
#
# DHCP configuration
#
enable dhcp
create dhcp poli="d" lease=7200
add dhcp poli="d" subn=255.255.255.0
add dhcp poli="d" rou=192.168.1.1
add dhcp poli="d" dnss=158.43.240.4,193.113.212.38
add dhcp poli="d" nbno=b-node
create dhcp ran="d1" poli="d" ip=192.168.1.16 num=8
create dhcp ran="d2" poli="d" ip=192.168.1.32 num=8
Use the following commands to review the DHCP config.
Manager red> sho dhcp
DHCP Server
State .................. enabled
BOOTP Status ........... disabled
Debug Status ........... disabled
Policies ............... d
Ranges ................. d1 ( 192.168.1.16 - 192.168.1.23 )
d2 ( 192.168.1.32 - 192.168.1.39 )
- 22 -
The AT-Firewall Configuration Guide Version 2.0
Manager red> sho dhcp poli
DHCP Policies
Name: d
Base Policy: none
01 subnetmask ....... 255.255.255.0
03 router ........... 192.168.1.1
06 dnsserver ........ 158.43.240.4
193.113.212.38
46 nbnodetype ....... b-node
51 leasetime ........ 7200
Manager red> sho dhcp range
DHCP Ranges
Name: d1
Policy ..................... d
Start Address .............. 192.168.1.16
End Address ................ 192.168.1.23
Used Address(es) ........... 192.168.1.16
Free Address(es) ........... 192.168.1.17
192.168.1.18
192.168.1.19
192.168.1.20
192.168.1.21
192.168.1.22
192.168.1.23
--More--
(<space> = next page, <CR> = one line, C = continuous, Q = quit)
Manager red> sho dhcp client
DHCP Client Entries
IP Address
ClientId
State
Type
Expiry
------------------------------------------------------------------------------192.168.1.16
inuse
dyn
192.168.1.17
unused
dyn
192.168.1.18
unused
dyn
192.168.1.19
unused
dyn
--More--
00-10-a4-ef-70-0c
31-Oct-2001 13:17:42
(<space> = next page, <CR> = one line, C = continuous, Q = quit)
- 23 -
The AT-Firewall Configuration Guide Version 2.0
6.3.1
Resetting the DHCP server
The DHCP server keeps a MAC address table in the flash RAM or NVS RAM (if fitted). In case of
major changes in the DHCP structure of the LAN, the following process will fully reset the DHCP server.
This should not be necessary unless you are experiencing problems with DHCP addressing.
Manager red> disable dhcp
Manager red> del fil=*.dhc
Info (156003): Operation successful.
Manager red> del fil=nvs:*.dhc
Info (156003): Operation successful.
Manager red> restart rou
- 24 -
The AT-Firewall Configuration Guide Version 2.0
7
Configuring the WAN side
7.1
Configuring the WAN side with a Static IP address
This process is very similar to configuring the LAN side of the router.
Manager red> add ip int=eth1 ip=200.20.20.7 mask=255.255.255.0
Info (105275): interface successfully added.
Manager red> sho ip int
Interface
Type
IP Address
Pri. Filt
Pol.Filt Network Mask
Bc Fr PArp
Filt RIP Met.
SAMode
IPSc
MTU
GRE
DBcast
Mul.
VJC
OSPF Met.
-------------------------------------------------------------------------------eth0
Static
192.168.1.1
1
---
---
255.255.255.0
eth1
Static
---
---
n
On
---
01
1500
-
---
0000000001 No
Rec
200.20.20.7
1
On
---
01
No
255.255.255.0
1500
-
---
0000000001 No
n
Pass
Pass
No
Rec
--------------------------------------------------------------------------------
Here we include a static route to the whole of the outside world.
Manager red> add ip route=0.0.0.0 mask=0.0.0.0 int=eth1 next=200.20.20.6
Info (105275): IP route successfully added.
Manager red> sho ip route
IP Routes
------------------------------------------------------------------------------Destination
Mask
NextHop
Interface
Age
------------------------------------------------------------------------------0.0.0.0
0.0.0.0
200.20.20.6
eth1
12
200.20.20.0
255.255.255.0
0.0.0.0
eth1
125
192.168.1.0
255.255.255.0
0.0.0.0
eth0
1159
-------------------------------------------------------------------------------
- 25 -
The AT-Firewall Configuration Guide Version 2.0
The output of <show config dynamic=ip> should now look something like this:
Manager red> sho con dyn=ip
#
# IP configuration
#
enable ip
add ip int=eth0 ip=192.168.1.1
add ip int=eth1 ip=200.20.20.7 mask=255.255.255.0
add ip rou=0.0.0.0 mask=0.0.0.0 int=eth1 next=200.20.20.6
- 26 -
The AT-Firewall Configuration Guide Version 2.0
7.2
Configuring the WAN side with a DHCP IP address
As an alternative to a static route, the router can be configured to receive an IP address, mask, default
gateway and DNS via DHCP.
Manager red> ena ip remote
Info (105287): Remote IP assignment has been enabled.
Manager red> add ip int=eth1 ip=dhcp
Info (105275): interface successfully added.
Manager red> sho ip int
Interface
Type
IP Address
Pri. Filt
Pol.Filt Network Mask
Bc Fr PArp
Filt RIP Met.
SAMode
IPSc
MTU
GRE
DBcast
Mul.
VJC
OSPF Met.
-------------------------------------------------------------------------------eth0
Static
192.168.1.1
1
---
---
255.255.255.0
eth1
Remote
---
---
n
On
---
01
1500
-
---
0000000001 No
Rec
200.20.20.163
1
On
---
01
No
255.255.255.0
1500
-
---
0000000001 No
n
Pass
Pass
No
Rec
--------------------------------------------------------------------------------
Manager red> sho ip route
IP Routes
------------------------------------------------------------------------------Destination
Mask
DLCI/Circ.
Type
Policy
NextHop
Interface
Protocol
Metrics
Age
Preference
------------------------------------------------------------------------------0.0.0.0
0.0.0.0
200.20.20.6
eth1
-
direct
static
1
200.20.20.0
255.255.255.0
0.0.0.0
eth1
-
direct
interface
1
192.168.1.0
255.255.255.0
0.0.0.0
eth0
-
direct
interface
1
0
0
0
42
360
42
0
1395
0
-------------------------------------------------------------------------------
- 27 -
The AT-Firewall Configuration Guide Version 2.0
7.2.1
DNS relay
When the DNS is received dynamically, PCs cannot be configured to use the address from the ISP
because it may change. In this scenario, the DNS relay function is used.
PCs would then set their DNS to be the Eth0 IP address of the router (192.168.1.1) and any requests the
router received, it would relay on to the real DNS.
Manager red> ena ip dnsrelay
Info (105003): Operation successful.
- 28 -
The AT-Firewall Configuration Guide Version 2.0
8
The AT-Firewall
In the default configuration, traffic from the private network can reach the public network. Traffic from
the public network cannot reach the private network unless it is in response to a flow that has originated
from the private network. The AT-Firewall protects against the most common forms of hacking attempt
and can either deny and/or log the event.
PINGOFDEATH. A denial of service attack in which a remote user sends ping packets with illegal
sizes, or an excessive number of ICMP messages
SMURF. An Internet Control Message Protocol (ICMP) echo request with a broadcast destination
address
HOSTSCAN. A scan of the hosts of the private network
PORTSCAN. A port scan of the firewall or private n1etwork
UDPATTACK. An attack using UDP packets to probe for open UDP ports
FRAGMENT. An attack using TCP fragments that are either too large or can never be reassembled
SMURFAMP. A TCP SYN packet with a broadcast destination address
SYNATTACK. An attack on a host using multiple opening TCP SYN packets to exhaust a host’s
available sessions or memory
TCPTINY. An attack on a host using TCP tiny fragments
IPSPOOF. An attack using IP packets in which the source address has been spoofed (altered)
LAND. A denial of service attack in which a remote user sends IP packets with the same address in the
source and destination address fields
- 29 -
The AT-Firewall Configuration Guide Version 2.0
8.1
Firewall policies
The configuration is policy based. More than one policy can exist on the router for complex
configurations.
If more than one policy is created, every IP interface must de defined within every policy. An interface
can only be defined as private in one security policy. An interface can only be defined as public in up to
two security policies.
- 30 -
The AT-Firewall Configuration Guide Version 2.0
8.2
Configuring the firewall to provide NAT
1. User
communicates
with Internet
using a private
IP address
2. Firewall substitutes
private address
to public address
and forwards
to the Internet
3. Firewall
translates
return flow from
Public to
Private address
The basic configuration for the router is that the LAN is considered private and the WAN is considered
public.
Manager red> ena fire
Info (177257): 31-Oct-2001 13:01:56
Firewall enabled.
Info (177003): Operation successful.
Manager red> create fire poli=f
Info (177003): Operation successful.
Manager red> add fire poli=f int=eth0 type=private
Info (177003): Operation successful.
Manager red> add fire poli=f int=eth1 type=public
Info (177003): Operation successful.
- 31 -
The AT-Firewall Configuration Guide Version 2.0
Now Network Address Translation (NAT) is used to ensure all traffic from the LAN is translated to
appear as if it has come from the WAN.
Manager red> add fire poli=f nat=enhanced int=eth0 gblint=eth1
Info (177003): Operation successful.
As an alternative to the above, if the Public IP address of the firewall is known, then this can be specified
in the firewall policy. This is used for added security, but is not necessary. In this case it is assumed that
the Public IP or Global IP address of the firewall is 200.20.20.7
Manager red> add fire poli=f nat=enhanced int=eth0 gblint=eth1 gblip=200.20.20.7
Info (177003): Operation successful.
The firewall policy can be reviewed using <show firewall policy>.
Manager red> sho fire policy
Policy : f
Accounting ........................ disabled
Enabled Logging Options ........... none
Enabled Debug Options ............. none
Identification Protocol Proxy ..... enabled
Enabled IP options ................ none
Enabled ICMP forwarding ........... none
Receive of ICMP PINGS ............. enabled
Private Interface : eth0
Public Interface
: eth1
Method .......................... dynamic
NAT ............................. enhanced
Method ........................ enhanced dynamic
Private Interface ............. eth0
Global IP ..................... 200.20.20.7
- 32 -
The AT-Firewall Configuration Guide Version 2.0
8.3
ICMP handing
By default the firewall is configured to receive & respond to ICMP pings.
Manager red> disable fire poli=f ping
Info (177003): Operation successful.
The firewall, in its default configuration, will not forward any ICMP packets. In order to allow the router
to pass on pings from the LAN to devices on the WAN, ICMP forwarding must be enabled for ping.
Manager red> enable fire poli=f icmp_forward=ping
Info (177003): Operation successful.
- 33 -
The AT-Firewall Configuration Guide Version 2.0
8.4
Hosting servers behind the Firewall
3. Traffic is address
translated, the
private address of
the server is never
published
1. Internet user
connects to
Public IP
address of
Firewall
2. Firewall checks
policy database and
only allows specific
services to specific
servers
It is often necessary to host web and mail servers behind the firewall which are accessible by the outside
world. This is provided using a firewall rule.
Manager red> add fire poli=f rule=2 int=eth1 gblip=200.20.20.7 ip=192.168.1.2 pr
ot=tcp po=25 gblpo=25 act=allow
Info (177003): Operation successful.
The firewall policy will now forward any SMTP traffic that is directed to 200.20.20.7 to the SMTP server
at 192.168.1.2.
Similar rules could be provided for HTTP servers.
Manager red> add fire poli=f rule=3 int=eth1 gblip=200.20.20.7 ip=192.168.1.3 pr
ot=tcp po=80 gblpo=80 act=allow
Info (177003): Operation successful.
- 34 -
The AT-Firewall Configuration Guide Version 2.0
8.5
Limiting access to websites
The firewall has the ability to contain access lists of banned websites by IP address. In the current 2.2.2
software, this does not filter on the actual URL, but filters on the IP address that relates to the URL.
The banned websites are stored as a text file in the router's flash. The advantage of this system is that the
router can use the 'trigger' scheduling facility to go and pick up an updated file from a TFTP server
automatically. This means that only one copy of the 'banned file' needs to be kept up to date.
A file can be generated on the router using the built in text editor. In this example the file only contains 2
rogue IP networks and 2 rogue hosts.
# Banned Networks
# IP
- IP
Label
Comment
# --------------------------------------------------------------------------200.1.1.1
- 200.1.1.254
another banned network
# banned
117.2.2.1
- 117.2.2.254
banned network
# banned
Label
Comment
# Banned Hosts
# IP
# --------------------------------------------------------------------------202.36.1.19
www.sexcity.example
# porn
111.111.111.111
www.porn.example
# illegal content
# --------------------------------------------------------------------------# end of file
Ctrl+K+H = Help | File = update.txt
|
Insert
|
|
1:1
Once the file is on the router the list is added to the firewall policy for use by a rule.
Manager red> add fire poli=f list="latest update" type=ip file=update.txt
Info (177003): Operation successful.
- 35 -
The AT-Firewall Configuration Guide Version 2.0
The list can now be viewed. Note this is not viewing the contents of the text file, this is the firewall's
interpretation of the text file now it has been parsed.
Manager red> sho fire poli=f list
Policy : f
IP List : latest update (update.txt )
IP
- IP
Label
------------------------------------------------------------------------------117.2.2.1
117.2.2.254
another banned network
168.1.1.1
168.6.1.1
banned network
202.36.1.19
www.sexcisy.example
111.111.111.111
www.porn.example
-------------------------------------------------------------------------------
So far we have only defined the list, we have not defined an action to take. In this example we will
consider all the contents of the file to be an illegal destination. We now need to add a rule applied to
Eth0.
Manager red> add firewall policy=f rule=7 action=deny interface=eth0
list="latest update" protocol=all
Info (177003): Operation successful.
A trigger could easily be defined that downloads a file via TFTP / HTTP transfer from a central file at
11.48pm every night. Obviously you would choose a random time during the quiet surfing window,
avoid activating triggers exactly on the hour - everyone else will be too.
- 36 -
The AT-Firewall Configuration Guide Version 2.0
9
Logging and Notification
9.1
Logging to the Internal Temporary Log
The internal log of the router stores the last 200 log messages on a scrolling basis. This is known as the
Temporary log. This can be seen by typing <show log>.
Manager red> sho log
Date/Time
S Mod
Type
SType Message
------------------------------------------------------------------------------31 11:21:36 4 ENCO ENCO
STAC
STAC SW Initialised
31 11:21:36 4 ENCO ENCO
CRYP
Cryptek Chip Startup Test Passed
31 11:21:36 4 ENCO ENCO
STAC
STAC SW History Allocated - 2 channels
31 11:21:36 7 SYS
NORM
Router startup, ver 2.2.2-00, 20-Jun-2001, Clock
REST
Log: 11:21:19 on 31-Oct-2001
--More--
(<space> = next page, <CR> = one line, C = continuous, Q = quit)
The log can be reviewed in reverse order:
Manager red> sho log rev
Date/Time
S Mod
Type
SType Message
------------------------------------------------------------------------------31 13:45:04 3 IPG
CIRC
CONF
Local request to reset eth1 IP accepted
31 13:01:57 6 FIRE FIRE
ENBLD 31-Oct-2001 13:01:56
31 11:45:04 3 IPG
CONF
CIRC
Firewall enabled
Remote request to set eth1 IP to 200.20.20.163
accepted
31 11:38:47 3 USER USER
LON
manager login on port0
31 11:21:36 4 ENCO ENCO
STAC
STAC SW History Allocated - 2 channels
31 11:21:36 7 SYS
NORM
Router startup, ver 2.2.2-00, 20-Jun-2001, Clock
--More--
REST
(<space> = next page, <CR> = one line, C = continuous, Q = quit)
- 37 -
The AT-Firewall Configuration Guide Version 2.0
This temporary log will be lost upon start-up. The log can also be flushed during troubleshooting. As a
rule, a log on a firewall should never be flushed during the working of a firewall since the log could
include information about an attempted attack.
Manager red> flush log out=te
Info (157003): Operation successful.
Manager red> sho log
Info (157292): No (matching) log messages found.
- 38 -
The AT-Firewall Configuration Guide Version 2.0
9.2
Logging to an External SysLog Server
The router can pass every message to an external SysLog server. Most Unix distributions include a
Syslog Daemon, a freeware Syslog Daemon for Win32 is available from
http://www.kiwi-enterprises.com.
Not all messages are of the same severity. Most users find that it is only necessary to process packets of
severity 3 and above.
To send messages of severity 3 and above to a Syslog Daemon on a PC with IP address 192.168.1.5,
Manager red> create log out=1 dest=syslog server=192.168.1.5
Info (157265): Output definition successfully created.
Manager red> add log out=1 filter=1 act=process severity=>3
Info (157273): Filter added successfully.
- 39 -
The AT-Firewall Configuration Guide Version 2.0
9.3
Logging to a SysAdmin via e-mail
The router has a built in e-mail client that can be used to send messages to a Manager via e-mail.
The router should be configured to point to a DNS.
Manager red> set ip nameserver=158.43.240.4
Info (105282): Name server successfully updated.
A hostname for the router should be chosen. This will be the hostname from whom the mail is sent.
Manager red> set mail hostname=red.mydomain.example
Info (134003): Operation successful.
Now a log output must be defined
Manager red> cre log out=2 dest=email messages=200 [email protected]
Info (157265): Output definition successfully created.
Manager red> add log out=2 filt=1 severity=>3 act=process
Info (157273): Filter added successfully.
The router will now buffer up the last 200 messages in memory and then send the log as an e-mail to
'[email protected]'.
- 40 -
The AT-Firewall Configuration Guide Version 2.0
9.4.2
E-mail Firewall Notification
When a firewall event such as a port scan or DoS attack occurs, by default the firewall will inform the
manager if he or she is logged into the unit at the time. The firewall can be configured to send an E-mail
to the sysadmin.
Manager red> ena fire notify=mail [email protected]
Info (177003): Operation successful.
The firewall notify configuration can be seen with the <show fire command>. In this case the firewall
will notify of attacks and scans to both the manager (if logged on) and send an E-mail
Manager red> sho fire
Firewall Configuration
Status .................... disabled
Enabled Notify Options .... manager mail
Notify Mail To ............ [email protected]
--More--
(<space> = next page, <CR> = one line, C = continuous, Q = quit)
- 41 -
The AT-Firewall Configuration Guide Version 2.0
9.4
SNMP Management & Traps
The router supports SNMP management and can be configured to send SNMP traps to an SNMP traphost. It is not recommended to use public or private as SNMP community names.
Manager red> ena snmp
Info (159003): Operation successful.
Manager red> create snmp community=secret open=no access=read
Info (159003): Operation successful.
Manager red> add snmp community=secret traphost=192.168.1.5
Info (159003): Operation successful.
Manager red> add snmp community=secret manager=192.168.1.5
Info (159003): Operation successful.
Manager red> enable snmp authenticate_trap
Info (159003): Operation successful.
In this case an SNMP management station such as CastleRock's SNMPc is situated at 192.168.1.5
configured to listen to SNMP traps. The SimpleWeb, referenced at the end of this document, includes
links to freeware SNMP Trap Recievers.
9.4.1
SNMP Linktrap Notification
When a link state changes on a router's interface, it can send a trap to the SNMP trap host. To enable
Linktraps on Eth0 & Eth1,
Manager red> ena int=eth0 linktrap
Manager red> ena int=eth1 linktrap
This means that if the Broadband Ethernet link drops (such as CPE reboot) the router will inform the
SNMP traphost.
- 42 -
The AT-Firewall Configuration Guide Version 2.0
9.4.2
SNMP Firewall Notification
When a firewall event such as a port scan or DoS attack occurs, by default the firewall will inform the
manager if he or she is logged into the unit at the time. The firewall can be configured to send an SNMP
trap to the traphost.
Manager red> ena fire notify=snmp
Info (177003): Operation successful.
The firewall notify configuration can be seen with the <show fire command>. In this case the firewall
will notify of attacks and scans to the manager (if logged on) and send an SNMP trap to the traphost.
Manager red> sho fire
Firewall Configuration
Status .................... enabled
Enabled Notify Options .... manager snmp
--More--
(<space> = next page, <CR> = one line, C = continuous, Q = quit)
- 43 -
The AT-Firewall Configuration Guide Version 2.0
9.5
Firewall Events
A useful command to look at all the firewall events that have occurred since boot up is <show firewall
event>. This lists all the Allow, Deny & Notify events. This cannot be cleared until the router has been
rebooted.
This is useful when adding firewall rules to the firewall policy. If a rule works, you will see a flow in the
allow table. If a rule fails, you will see the rule as a deny.
The <show fire event rev> dissplays the output in reverse time order.
Manager red> sho fire event
Policy : f - Notify Events:
Date/Time
Dir Prot Number IP:Port <map> Dest IP:Port /Reason /IP header
------------------------------------------------------------------------------31 13:01:56
Firewall enabled
31 13:54:14
Firewall disabled
-------------------------------------------------------------------------------
Policy : f - Deny Events:
Date/Time
Dir Prot Number IP:Port <map> Dest IP:Port /Reason /IP header
------------------------------------------------------------------------------31 13:42:15 IN
UDP
1 200.20.20.11:138 200.20.20.255:138
Policy rejected
450000e5 efdc0000 8011aeda 9523380b 952338ff 008a008a 00d1dca0
1102c048 9523380b 008a00bb 00002045 44454445 46464646 43455046 5
0454946
46454344
--More--
(<space> = next page, <CR> = one line, C = continuous, Q = quit)
- 44 -
The AT-Firewall Configuration Guide Version 2.0
10
Securely Managing your Firewall
You can manage your Firewall via either VT100 terminal, Telnet, SNMP or SecureShell.
10.1 VT100 terminal
Like all IT equipment, a unit is only as safe as the communications room door. Keep your door locked.
Always remember to logout when you have finished administering the firewall.
Manager red>
Manager red>
Manager red> logout
red login:
10.2 Telnet
It is possible to apply a filter to only allow Telnet to the router from a limited number of devices. In this
example we will limit the hosts which can telnet to the router to be only 192.168.1.5.
Manager red> add ip filt=1 ent=1 act=include so=192.168.1.5 sm=255.255.255.255
des=192.168.1.1 dm=255.255.255.255 prot=tcp dp=23
Info (105003): Operation successful.
Manager red> add ip filt=1 ent=2 act=exclude so=0.0.0.0 sm=0.0.0.0 des=192.168.1.1
dm=255.255.255.255 prot=tcp dp=23
Info (105003): Operation successful.
Manager red> add ip filt=1 entry=3 act=include so=0.0.0.0 sm=0.0.0.0
Info (105003): Operation successful.
Manager red> set ip int=eth0 filter=1
Info (105003): Operation successful.
- 45 -
The AT-Firewall Configuration Guide Version 2.0
An alternative mechanism is to disable the Telnet Server and rely on other forms of management.
Manager red> disable telnet server
Info (133003): Operation successful.
The other mechanism is to use 'System Security Mode' and enable Remote Security Officers for only
individual IP addresses.
Login as manager at 9600,8,n,1,hw and add a user into the User Accounts Database of Security Officer
Privilege.
Manager red> add user=secoff pass=mypassword priv=security
User Authentication Database
------------------------------------------------------------------------------Username: secoff ()
Status: enabled
Privilege: Sec Off
Logins: 0
Fails: 0
Telnet: no
Sent: 0
Login: yes
Rcvd: 0
Authentications: 0 Fails: 0
-------------------------------------------------------------------------------
Enable the Remote Security Officer (RSO) and add an IP range as able to login as RSO. In System
Secure Mode, Secuity Officers can only login to Asyn0 by default.
Manager red> ena user rso
Info (145057): RSO has been enabled.
Manager red> add user rso ip=192.168.1.5 mask=255.255.255.255
Remote Security Officer Access is enabled
Remote Security Officer ... 192.168.1.5/255.255.255.255
Now Enable System Security
Manager red> ena sys sec
Info (134003): Operation successful.
- 46 -
The AT-Firewall Configuration Guide Version 2.0
Telnet access as 'Security Officer' is now limited to the Asyn0 port and 192.168.1.5. It is now possible to
remove the manager's login privilege. Do not forget to change the ‘manager' password.
SecOff red> set user=manager login=no
Number of logged in Security Officers currently active.....1
User Authentication Database
------------------------------------------------------------------------------Username: manager ()
Status: enabled
Privilege: manager
Telnet: no
Login: no
10.3 HTTP server
Most of the AR Routers include an HTTP server, but not all routers are configurable via HTTP. in order
to ensure you are not DOS attacked by any of the popular internet worms, it is recommended that you
disable the HTTP server.
SecOff red> dis http server
Info (184003): Operation successful.
10.3 SNMP management
The firewall can generate SNMP traps to a Traphost and can be interrogated by SNMP get/set from a
Management Station.
Ensure that if you are using SNMP that 'Authenticate Traps' are enabled.
It is not recommended to allow write access a secure firewall from either a private or public device. The
security within SNMP is based entirely on the community name, where it is unlikly that the community
name remains a secret.
- 47 -
The AT-Firewall Configuration Guide Version 2.0
10.3 SecureShell
SSH offers a user the same interface as Telnet but protects and authenticates the session. RSA public
keys are used for connection and authentication. DES encryption is used for the Encryption. There are a
number of SecureShell packages available. Some are included in the references section at the end of this
guide.
An encryption key must first be created. This can only be done while logged in as a 'Security Officer'.
Connect to the router as manager at 9600,8,n,1,hw via the Asyn0 port. Add a 'Security Officer' to the
User Authentication Database.
Manager red> add user=secoff pass=mypassword priv=security
User Authentication Database
------------------------------------------------------------------------------Username: secoff ()
Status: enabled
Privilege: Sec Off
Logins: 0
Fails: 0
Telnet: no
Sent: 0
Login: yes
Rcvd: 0
Authentications: 0 Fails: 0
-------------------------------------------------------------------------------
Logout of the router and re-login as the 'Security Officer'
Manager red> logout
red login: secoff
Password:
Now Enable System Security Mode on the router.
SecOff red> enable sys security
Info (134003): Operation successful.
Create an RSA host key
SecOff red> create enco key=0 type=rsa length=1024 description=hostkey
Info (173278): RSA Key Generation process started.
Info (173279): RSA Key generation process completed.
- 48 -
The AT-Firewall Configuration Guide Version 2.0
Create an RSA server key
SecOff red> CREATE ENCO KEY=1 TYPE=RSA LENGTH=768 DESCRIPTION=serverkey
Info (173278): RSA Key Generation process started.
Info (173279): RSA Key generation process completed.
Inspect the Enco keys
SecOff red> sho enco key
ID
Type
Length Digest
Description
Mod
IP
--------------------------------------------------------------------------0
RSA-PRIVATE 1024 135E12CA hostkey
-
-
1
RSA-PRIVATE
-
-
768 83602F92 serverkey
Enable the SecureShell server
SecOff red> ena ssh server hostkey=0 serverkey=1 expirytime=1 logintime=60
Info (175003): Operation successful.
Add a SecureShell user. Since 'System Security Mode' has been enabled, SSH users get the same
privilege as the standard UAD users. The SSH username must therefore match the username of a
Security Officer in the User Accounts Database. Note the password does not have to be the same.
SecOff red> add ssh user=secoff pass=sshuser ip=192.168.1.0 mask=255.255.255.0
Info (175003): Operation successful.
The Security Officer, secoff, will now be able to login to the router via SSH from any point on the
192.168.1.0 network. This can be made more secure by stating a more specific mask in the SSH user
database.
It is recommended that both HTTP & Telnet servers be disabled.
SecOff red> dis http server
Info (184003): Operation successful.
SecOff red> dis telnet server
Info (133003): Operation successful.
- 49 -
The AT-Firewall Configuration Guide Version 2.0
Appendix A. Upgrading to the latest Software
The AR Router software is distributed in three parts; firmware, software release and software patch.
Firmware is stored on an EPROM on the motherboard. This contains a very basic operating system that
includes basic IP functionality. This is never changed.
The release is stored in the flash memory in the form <8-231.rez> where the 8 refers to the AR3xx series,
231 refers to major revision 2, minor revision 3 and service revision 1. In order to upgrade from a
major.minor release to a new major.minor release, a password key is required to generate a licence. In
order to upgrade from a service release to another service release for the same major.minor version then
no password is required to generate the licence.
The patch file is stored in flash memory and is loaded after the release file has been loaded. Patches are
in the format 8231-01, meaning patch 01 for software release 2.3.1.
A.1
Downloading a file to the router.
Set-up a TFTP server on the LAN. A copy of the AT-TFTP-32 server is available on the Reference
Manual CD-ROM.
- 50 -
The AT-Firewall Configuration Guide Version 2.0
Use File>Preferences to set the Default Transfer Directory.
Check your router can ping the TFTP server.
Manager red> ping 192.168.1.5 sipaddress=192.168.1.1
Echo reply 1 from 192.168.1.5 time delay 3 ms
Echo reply 2 from 192.168.1.5 time delay 3 ms
Check whether you have enough space on the router with <show flash>.
Manager > sho flash
FFS info:
global operation ...... none
compaction count ...... 5
est compaction time ... 120 seconds
files .................
1821472 bytes
garbage ...............
85316 bytes
free ..................
59292 bytes
required free block ...
131072 bytes
total .................
2097152 bytes
--More--
(6 files)
(<space> = next page, <CR> = one line, C = continuous, Q = quit)
- 51 -
The AT-Firewall Configuration Guide Version 2.0
Patches and Releases appear as different sizes in MS-Windows as they appear on the router since on a PC
include an extra header at the top of the file. In order to see the size a file will appear when it is on a
router, open the patch or release in a text editor such as WordPad. The true size of the file will appear at
the top of the file.
If there is not enough free space on the unit, delete any unnecessary files such as help files & old config
files. If upgrading a release you will typically have to delete the old release.
Activate the flash compaction on the router. This defragments the flash memory clearing contiguous
space and removing garbage.
Manager > act flash comp
Info (131260): Flash compacting...
DO NOT restart the router until compaction is completed.
Manager >
Info (131261): Flash compaction successfully completed.
Check you now have enough free space to load your file with <show flash>.
- 52 -
The AT-Firewall Configuration Guide Version 2.0
Confirm the integrity of all other files on the unit with <show ffile check>
Manager > sho ffile check
dev
creator
name
type
size
file date & time
address check
----------------------------------------------------------------------------flash
help
hlp
139682
23-Jun-2001 01:03:44
01CC00B8
Good
flash
inst
release
lic
96
01-Aug-2001 09:32:29
01CE23A4
Good
flash
load
8222-01
paz
12264
01-Aug-2001 09:52:43
01C79B80
Good
flash
load
8-222
rez
1668860
01-Aug-2001 09:47:41
01CE2444
Good
You are now ready to tell the router to go and get the file from the TFTP server. Remember the PC is the
server. You 'load' a file from the server to the router; you 'upload' a file from the router to the server.
Manager red> load dest=flash server=192.168.1.5 file=8222-02.paz
Info (148270): File transfer successfully completed.
Manager red>
If a large transfer is taking place you can check the progress of the transfer using <show load>.
Manager red> sho load
Loader Information
-----------------------------------------------------------------------------Current Load:
Method ............. TFTP
Status ............. Loading
Load Level ......... 30%
If you are doing a large number of file transfers, you can set the 'loader' defaults with <set load>. This
avoids the need to specify destination & server with every file transfer.
SecOff red> set load dest=flash server=192.168.1.5
Info (148003): Operation successful.
When a load is complete, check the integrity of the files with <show ffile check>. You file is now on the
unit.
- 53 -
The AT-Firewall Configuration Guide Version 2.0
A.2
Installing a new patch.
Download the correct patch for the operating release into the router. The latest files can be obtained from
the Allied Telesyn Research Website. A table shows the latest patch for each release. If visiting
frequently, remember to refresh your browser.
http://www.alliedtelesyn.co.nz/support/updates/patches.html
If flash space is tight you may have to delete and old patch and activate the flash compaction.
Check the file has loaded correctly, with <show ffile check>. Now check which patch the router is
currently booting off with <show install>. This will be detailed as the 'current install'.
Manager red> sho install
Install
Release
Patch
Dmp
------------------------------------------------------------------------Temporary
-
-
-
Preferred
flash:8-222.rez
flash:8222-01.paz
-
Default
EPROM (8-1.7.0)
-
-
------------------------------------------------------------------------Current install
------------------------------------------------------------------------Preferred
flash:8-222.rez
flash:8222-01.paz
-
-------------------------------------------------------------------------
Now tell the router that the new patch is the preferred install.
Manager red> set inst=pref rel=8-222.rez pat=8222-02.paz
Info (149003): Operation successful.
- 54 -
The AT-Firewall Configuration Guide Version 2.0
Now check the preferred install has been correctly recognised.
Manager red> sho inst
Install
Release
Patch
Dmp
------------------------------------------------------------------------Temporary
-
-
-
Preferred
flash:8-222.rez
flash:8222-02.paz
-
Default
EPROM (8-1.7.0)
-
-
-------------------------------------------------------------------------
Current install
------------------------------------------------------------------------Preferred
flash:8-222.rez
flash:8222-01.paz
-
-------------------------------------------------------------------------
Check you have created/set your configuration since you will now reboot the router. Creating / setting
the config has no affect on the upgrade, it is only so you do not lose any work.
Now do a full reboot with <restart reboot>.
Your router should now come up running the new patch. You can check this with either <show system>
or <show release>.
If using an untested or development patch, rather than setting the install to 'preferred' where the router
will boot from that patch from now on, you can set the install to 'temporary'. This will only make the
patch active for the following reboot. Rebooting the unit again will revert the router back to the
preferred.
- 55 -
The AT-Firewall Configuration Guide Version 2.0
A.3
Release Licences
If upgrading from one release to another release a licence is required. You can view the licences you
have on your unit with the command <show release>.
Manager red> sho release
Release
Licence
Period
------------------------------------------------------------------flash:load\8-221.rez
full
-
-------------------------------------------------------------------
Before loading a new operating system on to the unit, you will need to enter a release licence.
A.3.1 Entering a Service Release License
If upgrading a service release such as moving from 2.2.1 to 2.2.2, no password is required. A service
release is a compiled operating release incorporating many patches but does not contain new features. To
upgrade from 2.2.1 to 2.2.2, first check your 2.2.1 licence is still valid with <show release>. You then
use <enable release> to generate your licence for the operating system. Release licences are stored in a
file <release.lic> on the router.
Manager red> ena rel=8-222.rez num=2.2.2
Info (149261): Release licence added to dynamic list, wait for list to be saved
to FLASH.
Info (149264): Write of release licence file completed OK.
Now check your licence table with <show release>.
Manager red> sho release
Release
Licence
Period
------------------------------------------------------------------flash:load\8-222.rez
full
-
flash:load\8-221.rez
full
-
-------------------------------------------------------------------
- 56 -
The AT-Firewall Configuration Guide Version 2.0
A.3.2 Entering a Major or Minor Release license
If you are upgrading from a major.minor release to a different major.minor release such as 2.2.x to 2.3.x,
then new features have been added to the software and a serial number based password is required to
upgrade your unit. This is usually purchased from your local distributor or reseller. For more
information contact your local Allied Telesyn office.
When you purchase your upgrade, to generate the code a serial number is required. The simplest way to
find the serial number is to type <show system>.
SecOff red> sho sys
Router System Status
Board
ID
Time 18:47:35 Date 06-Nov-2001.
Bay Board Name
Rev
Serial number
-------------------------------------------------------------------------------Base
82
AR320
M2-0
41912745
--------------------------------------------------------------------------------
Upgrades can be processed quicker if your distributor / reseller gets the complete output of <show
system> rather than just the serial number. Reading the serial number from the cardboard box or the
bottom of the router leads to mistakes. The algorithm does not check the serial number on the cardboard
box, it checks the hard coded serial number on the motherboard.
The following is the format for a release password to enable software version 2.3.1.
Manager red> enable rel=8-231.rez num=2.3.1 pass=87AB1A801083
Info (149261): Release licence added to dynamic list, wait for list to be saved
to FLASH.
Info (149264): Write of release licence file completed OK.
Now check your release licence table with <show release> and ensure you have a full release licence.
Manager red> sho rel
Release
Licence
Period
------------------------------------------------------------------flash:load\8-231.rez
full
-
flash:load\8-221.rez
full
-
-------------------------------------------------------------------
Do not disable any of your old releases until you have thoroughly tested your new release.
- 57 -
The AT-Firewall Configuration Guide Version 2.0
A.4
Upgrading to a new release
Download the correct release to your TFTP server. Do not delete any files until you have ensured that
you have a release license for your new operating system with <show release>. Please read the section
above about release licences before proceeding.
Download the new release to your router. You will probably have to delete your old release, patches and
help-files. Remember to <activate flash compaction> to defragment the flash and clear any garbage.
Check there is free space with <show flash>.
Remember not to reboot the router at this stage. The router does not have any software in the flash and
may resort to booting from a limited firmware (EPROM) release. This may affect your ability to contact
the unit if you are upgrading the router remotely. Upgrading remotely is never recommended unless you
are an experience user or have someone on site with a config cable that can operate HyperTerminal.
Once you have downloaded the file, check the release file's integrity in the flash with <show ffile check>.
Now we are ready to set the preferred install. First view the old install with <show install>.
Manager red> sho install
Install
Release
Patch
Dmp
------------------------------------------------------------------------Temporary
-
-
-
Preferred
flash:8-222.rez
flash:8222-02.paz
-
Default
EPROM (8-1.7.0)
-
-
------------------------------------------------------------------------Current install
------------------------------------------------------------------------Preferred
flash:8-222.rez
flash:8222-02.paz
-
-------------------------------------------------------------------------
Now delete the preferred install. This is important since it ensures you do not just change the release but
leave an old patch as the preferred patch.
Manager red> del inst=pref
Info (149003): Operation successful.
- 58 -
The AT-Firewall Configuration Guide Version 2.0
Now set the new release as the preferrred release with <set inst=pref>.
Manager red> set inst=pref rel=8-231.rez
Info (149003): Operation successful.
Now check that the new release is selected as the preferred install and that the router is not trying to boot
from an old patch.
Manager red> sho install
Install
Release
Patch
Dmp
------------------------------------------------------------------------Temporary
-
-
-
Preferred
flash:8-231.rez
-
-
Default
EPROM (8-1.7.0)
-
-
------------------------------------------------------------------------Current install
------------------------------------------------------------------------Preferred
flash:8-222.rez
flash:8222-02.paz
-
-------------------------------------------------------------------------
A.4.1 Release Upgrade checklist.
Do you have a licence for the new release?
<show release>
Is the release file loaded into the flash uncorrupted?
<show ffile check>
Have you set the release as the preferred install correctly?
<show install>
You can now reboot your unit with <restart reboot>. When your router has rebooted, login to the unit and
use <show system> or <show release> to see that you are now running the new release.
- 59 -
The AT-Firewall Configuration Guide Version 2.0
Appendix B. VT100 Commands
Function
VT100 Command
Move cursor within command line
← or →
Move to start of line
Ctrl^A
Move to end of line
Ctrl^E
Delete character to left of cursor
[Delete] or [Backspace]
Toggle between insert/overstrike
Ctrl^O
Clear command line
Ctrl^U
Recall previous command
↑ or Ctrl^B
Recall next command
↓ or Ctrl^F
Display command history
Ctrl^C or <show port history>
Clear command history
<reset port history>
Recall matching command
Ctrl^I or [Tab]
Terminal Telnet session
[Ctrl/D]
- 60 -
The AT-Firewall Configuration Guide Version 2.0
Appendix C. Handling Configs & Scripts
C.1
Viewing and editing a file at the prompt
The VT100 built in text editor can be used to edit config files. This can be used to edit a file in the flash
memory. This is not a recommended method of configuring a router for a first-time user.
Ensure your terminal or Telnet window is set for VT100 emulation and that the control and arrows keys
are set to 'Terminal keys' rather than 'Windows keys'.
Handy Hint: In some terminal packages, lines may appear to 'jump around'. The
screen can be refreshed by typing the VT100 sequence Ctrl^W
To edit a file you can use the <edit test01.cfg>
Manager banana.mydomain.example> sho file=test01.cfg
#
# SYSTEM configuration
#
set system name="banana.mydomain.example"
set system location="abingdon, uk"
set system contact="[email protected]"
Ctrl+K+H = Help | File = test01.cfg
|
- 61 -
Insert
|
|
1:1
The AT-Firewall Configuration Guide Version 2.0
To bring up the help screen within the edit window, you can use Ctrl+K+H. To return to the editing
window you press Return.
Edit V1.2
Cursor Movement
Deletion
UpArrow ..... cursor up one line
Ctrl+T ...... delete one word right
DownArrow ... cursor down one line
Ctrl+Y ...... delete line
Ctrl+B ...... move to start of file
Ctrl+K+B .... begin block mark
Ctrl+D ...... move to end of file
Ctrl+K+C .... copy block to paste
Press <RETURN> to continue
C.2
AR-Edit 1.2 Help
Cursor Movement
Deletion
UpArrow
cursor up one line
Ctrl+T
delete one word right
DownArrow
cursor down one line
Ctrl+Y
delete line
RightArrow
cursor right one column
LeftArrow
cursor left one column
Block Operations
Ctrl+B
move to start of file
Ctrl+K+B
begin block mark
Ctrl+D
move to end of file
Ctrl+K+C
copy block to paste
Ctrl+A
move to start of line
Ctrl+K+D
unmark block
Ctrl+E
move to end of line
Ctrl+K+U
cut block to paste
Ctrl+U
move up one screen
Ctrl+K+V
paste block
Ctrl+V
move down one screen
Ctrl+K+Y
delete block
Ctrl+X
move down one line
Ctrl+Z
move up one line
Search
Ctrl+F
move one word right
Ctrl+K+F
find text
Ctrl+L
find again
Miscellaneous
Ctrl+I
insert mode
Exit
Ctrl+O
overstrike mode
Ctrl+K+X
exit editor, with save
Ctrl+W
refresh the screen
Ctrl+C
abort the editor
Ctrl+K+O
open a file
- 62 -
The AT-Firewall Configuration Guide Version 2.0
C.3
Viewing configuration file at the prompt
A particular config file in the flash can be viewed by typing <show file=filename>. This will output the
contents of the file to the TTY terminal, similar to the MS-DOS <more> command.
Manager banana.mydomain.example> sho file=test01.cfg
File : test01.cfg
1:
2:#
3:# SYSTEM configuration
4:#
5:set system name="banana.mydomain.example"
6:set system location="abingdon, uk"
7:set system contact="[email protected]"
8:--More--
(<space> = next page, <CR> = one line, C = continuous, Q = quit)
- 63 -
The AT-Firewall Configuration Guide Version 2.0
Appendix D. IP Addressing Guides
D.1
CIDR IP address Notation
CIDR Notation
DotQuad Notation
CIDR Notation
DotQuad Notation
/0
0.0.0.0
/16
255.255.0.0
/1
128.0.0.0
/17
255.255.128.0
/2
192.0.0.0
/18
255.255.192.0
/3
224.0.0.0
/19
255.255.224.0
/4
240.0.0.0
/20
255.255.240.0
/5
248.0.0.0
/21
255.255.248.0
/6
252.0.0.0
/22
255.255.252.0
/7
254.0.0.0
/23
255.255.254.0
/8
255.0.0.0
/24
255.255.255.0
/9
255.128.0.0
/25
255.255.255.128
/10
255.192.0.0
/26
255.255.255.192
/11
255.224.0.0
/27
255.255.255.224
/12
255.240.0.0
/28
55.255.255.240
/13
255.248.0.0
/29
255.255.255.248
/14
255.252.0.0
/30
255.255.255.252
/15
255.254.0.0
/31
255.255.255.254
/32
255.255.255.255
D.2
RFC 1918 Private Address Space
The Internet Assigned Numbers Authority (IANA) has reserved the following three blocks of the IP
address space for private internets:
10.0.0.0
10.255.255.255
(255.0.0.0 subnet mask)
172.16.0.0
172.31.255.255
(255.240.0 subnet mask)
192.168.0.0
192.168.255.255
(255.255.0.0 subnet mask)
- 64 -
The AT-Firewall Configuration Guide Version 2.0
D.3
Subnetting Guide
- 65 -
The AT-Firewall Configuration Guide Version 2.0
Appendix E. References
The following are third party links that the author has found useful during the configuration VPNs &
Firewalls. This is no commercial endorsement by Allied Telesyn International of the products or
companies below. Information believed to be correct at time of writing.
ICSALabs
TruSecure's ICSA Labs division have been the security industry's central authority for research,
intelligence and product certification for over a decade. The ICSA Labs set performance standards for
information security products and certify over 95% of the installed base of firewall, anti-virus,
cryptography, and IPSec products.
The ICSA Labs also leads security consortia that provide a forum for intelligence sharing among the
leading vendors of security products.
http://www.icsa.net
F-Secure SSH Client
F-Secure SSH Client consists of three integrated components. F-Secure SSH Terminal provides the user
with secure login connections over unknown or untrusted networks. F-Secure SSH Tunnel enables secure
tunnelling of Internet protocol services like email and web browsing. F-Secure SSH File Transfer
provides a secure method for file transfers over insecure networks. F-Secure SSH Client authenticates
server and encrypts traffic between the client and server. A 30 day trial is available from both the
Datafellows website and the AR Router Reference manual CD-ROM.
http://www.datafellows.com/products/ssh/client/
Analyzer
A protocol analyzer, sniffer & capture tool for Win32 using the PCAP driver.
http://netgroup-serv.polito.it/analyzer/
- 66 -
The AT-Firewall Configuration Guide Version 2.0
Kiwi's Syslog Daemon
A Shareware Syslog daemon for Win32. A Syslog Generator & Log Viewer are also available.
http://www.kiwi-enterprises.com
WSTTCP
A Packet Generation utility for Win32
http://www.pcausa.com/Utilities/pcattcp.htm
TeraTerm Pro
A VT100 telnet, terminal emulator supporting VT100 emulation. A SecureShell plug-in is also available
http://hp.vector.co.jp/authors/VA002416/teraterm.html
The SimpleWeb
This server, called the "SimpleWeb", provides links and information on network management, including
software, RFCs and tutorials. The focus is on SNMP and Internet management, but people interested in
other management technologies will also find interesting information
http://www.simpleweb.org/
- 67 -
The AT-Firewall Configuration Guide Version 2.0
Appendix F. Examples
F.1
Broadband Connection with Dynamic IP
This script is for a firewall where the WAN IP address is being assigned to the unit via DHCP. This is
commonly used in the UK behind a cable modem broadband connection such as ntl:home or Telewest
blueyonder Internet
The public IP address of the firewall is dynamically assigned
The broadband router next hop is dynamically assigned
The private syslog server exists at 192.168.1.5
The private tftp server exists at 192.168.1.5
#
# SYSTEM configuration
#
set system name="red"
set system location="abingdon, uk"
set system contact="[email protected]"
set system territory=europe
#
# LOAD configuration
#
set loader server=192.168.1.5 dest=flash method=tftp
#
# IP configuration
#
ena ip
ena ip remote
add ip int=eth0 ip=192.168.1.1
add ip int=eth1 ip=dhcp
#
- 68 -
The AT-Firewall Configuration Guide Version 2.0
# FIREWALL configuration
#
ena fire
cre fire poli="f"
ena fire poli="f" icmp_f=ping
dis fire poli="f" ping
add fire poli="f" int=eth0 type=private
add fire poli="f" int=eth1 type=public
add fire poli="f" nat=enhanced int=eth0 gblin=eth1
#
# LOG module configuration
#
cre log out=1 dest=syslog server=192.168.1.5 secure=no mess=20
add log out=1 filt=1 severity=>3 action=process
#
# HTTP configuration
#
dis http server
- 69 -
The AT-Firewall Configuration Guide Version 2.0
F.2
Broadband Connection with Static IP
This script is for a firewall where the WAN IP address is static. This is commonly used behind a DSL
router broadband connection such as BT OpenWorld business PLUS
The public IP address of the firewall is 200.20.20.7
The broadband router next hop is situated at 200.20.20.6
The private syslog server exists at 192.168.1.5
The private tftp server exists at 192.168.1.5
This example also includes a DHCP server that hands out a pool of 8 IP addresses starting at 192.168.1.16
#
# SYSTEM configuration
#
set system name="red"
set system location="abingdon, uk"
set system contact="[email protected]"
set system territory=europe
#
# LOAD configuration
#
set loader server=192.168.1.5 dest=flash method=tftp
#
# IP configuration
#
ena ip
add ip int=eth0 ip=192.168.1.1 mask=255.255.255.0
add ip int=eth1 ip=200.20.20.7 mask=255.255.255.240
add ip rou=0.0.0.0 mask=0.0.0.0 next=200.20.20.6 int=eth1
#
# FIREWALL configuration
- 70 -
The AT-Firewall Configuration Guide Version 2.0
#
ena fire
cre fire poli="f"
ena fire poli="f" icmp_f=ping
dis fire poli="f" ping
add fire poli="f" int=eth0 type=private
add fire poli="f" int=eth1 type=public
add fire poli="f" nat=enhanced int=eth0 gblin=eth1 gblip=200.20.20.7
#
# LOG module configuration
#
cre log out=1 dest=syslog server=192.168.1.5 secure=no mess=20
add log out=1 filt=1 severity=>3 action=process
#
# DHCP configuration
#
ena dhcp
cre dhcp poli="d" lease=7200
add dhcp poli="d" rou=192.168.1.1 subn=255.255.255.0
add dhcp poli="d" dnss=158.43.240.4,193.113.212.38
add dhcp poli="d" nbno=b-node
cre dhcp ran="d1" poli="d" ip=192.168.1.16 num=8
#
# HTTP configuration
#
dis http server
- 71 -
The AT-Firewall Configuration Guide Version 2.0
F.3
Hosting servers behind the firewall
This script is for a firewall where the WAN IP address is static. This is commonly used behind a DSL
router broadband connection such as BT OpenWorld business PLUS
This configuration uses firewall rules to redirect traffic destined for the WAN to services hosted on
servers on the LAN
The public IP address of the firewall is 200.20.20.7
The broadband router / next hop is situated at 200.20.20.4
The internet e-mail/SMTP server exists at 192.168.1.2
The internet WWW/HTML server exists at 192.168.1.3
The private syslog server exists at 192.168.1.5
The private tftp server exists at 192.168.1.5
#
# SYSTEM configuration
#
set system name="red"
set system location="abingdon, uk"
set system contact="[email protected]"
set system territory=europe
#
# LOAD configuration
#
set loader server=192.168.1.5 dest=flash method=tftp
#
# IP configuration
#
ena ip
add ip int=eth0 ip=192.168.1.1 mask=255.255.255.0
add ip int=eth1 ip=200.20.20.7 mask=255.255.255.240
add ip rou=0.0.0.0 mask=0.0.0.0 next=200.20.20.6 int=eth1
- 72 -
The AT-Firewall Configuration Guide Version 2.0
#
# FIREWALL configuration
#
ena fire
cre fire poli="f"
ena fire poli="f" icmp_f=ping
dis fire poli="f" ping
add fire poli="f" int=eth0 type=private
add fire poli="f" int=eth1 type=public
add fire poli="f" nat=enhanced int=eth0 gblin=eth1 gblip=200.20.20.7
add fire poli="f" rule=2 act=allow int=eth1 protocol=tcp port=25 ip=192.168.1.2
set fire poli="f" rule=2 gblport=25 gblip=200.20.20.7
add fire poli="f" rule=3 act=allow int=eth1 protocol=tcp port=80 ip=192.168.1.3
set fire poli="f" rule=3 gblport=80 gblip=200.20.20.7
#
# LOG module configuration
#
cre log out=1 dest=syslog server=192.168.1.5 secure=no mess=20
add log out=1 filt=1 severity=>3
#
# HTTP configuration
#
dis http server
- 73 -
The AT-Firewall Configuration Guide Version 2.0
F.4
Hosting multiple servers behind a multi-homed firewall
This example uses IP multihoming where the firewall appears as more than one IP address to the outside
world
This is particuloarly useful when hosting more than one web server on different public IP or from
migrating servers from public addresses to behind the firewall
The main public IP address of the firewall is 200.20.20.7
The secondary public IP address of the firewall is 200.20.20.8
The broadband router / next hop is situated at 200.20.20.4
The internet e-mail/SMTP server exists at 192.168.1.2
The internet WWW/HTML server exists at 192.168.1.3
The extranet WWW/HTML server exists at 192.168.1.4
The private syslog server exists at 192.168.1.5
The private tftp server exists at 192.168.1.5
#
# SYSTEM configuration
#
set system name="red"
set system location="abingdon, uk"
set system contact="[email protected]"
set system territory=europe
#
# LOAD configuration
#
set loader server=192.168.1.5 dest=flash method=tftp
#
# IP configuration
#
ena ip
add ip int=eth0-0 ip=192.168.1.1
- 74 -
The AT-Firewall Configuration Guide Version 2.0
add ip int=eth1-0 ip=200.20.20.7 mask=255.255.255.240
add ip int=eth1-1 ip=200.20.20.8 mask=255.255.255.255
add ip rou=0.0.0.0 mask=0.0.0.0 int=eth1-0 next=149.35.45.6
#
# FIREWALL configuration
#
ena fire
cre fire poli="f"
ena fire poli="f" icmp_f=ping
dis fire poli="f" ping
add fire poli="f" int=eth0-0 type=private
add fire poli="f" int=eth1-1 type=public
add fire poli="f" int=eth1-0 type=public
add fire poli="f" nat=standard int=eth0-0 gblin=eth1-1 gblip=200.20.20.8
add fire poli="f" nat=enhanced int=eth0-0 gblint=eth1-0 gblip=200.20.20.7
add fire poli="f" rule=2 act=allow int=eth1-0 protocol=tcp port=25 ip=192.168.1.2
set fire poli="f" rule=2 gblport=25 gblip=200.20.20.7
add fire poli="f" rule=3 act=allow int=eth1-0 protocol=tcp port=80 ip=192.168.1.3
set fire poli="f" rule=3 gblport=80 gblip=200.20.20.7
add fire poli="f" rule=4 act=allow int=eth1-1 protocol=tcp port=80 ip=192.168.1.4
set fire poli="f" rule=4 gblport=80 gblip=200.20.20.8
#
# LOG module configuration
#
cre log out=1 dest=syslog server=192.168.1.5 secure=no mess=20
add log out=1 filt=1 severity=>3
#
# HTTP configuration
#
dis http server
- 75 -