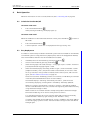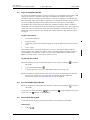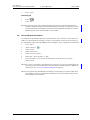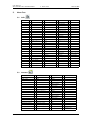
1
OpenStage WL 3 / OpenStage WL 3 Plus WLAN Handset User Manual A31003-M2000-U101-3-7619 Our Quality and Environmental Management Systems are implemented according to the requirements of the ISO9001 and ISO14001 standards and are certified by an external certification company. Copyright © Unify GmbH & Co. KG 01/2014 Hofmannstr. 51, 81379 Munich/Germany All rights reserved. Reference No.: A31003-M2000-U101-3-7619 The information provided in this document contains merely general descriptions or characteristics of performance which in case of actual use do not always apply as described or which may change as a result of further development of the products. An obligation to provide the respective characteristics shall only exist if expressly agreed in the terms of contract. Availability and technical specifications are subject to change without notice. Unify, OpenScape, OpenStage and HiPath are registered trademarks of Unify GmbH & Co. KG. All other company, brand, product and service names are trademarks or registered trademarks of their respective holders. unify.com User Manual WL3 and WL3 Plus WLAN Handset TD 92929EN About this document Cross-references in the document Throughout this document you will find cross-references in the text which indicate further details that can be found in other sections of this document. The cross-references are colored blue and linked to the relevant place in the document (example: see chapter 17. Document History on page 76). Positioning your cursor over the cross-reference text and clicking the left mouse button will take you to the relevant section. To return to the original page after viewing a cross-referred page in Adobe Acrobat or Adobe Reader, click on the “Previous View” arrow ( or ). 20 December 2013 / Ver. B User Manual WL3 and WL3 Plus WLAN Handset TD 92929EN Contents 1. Introduction ................................................................................................................... 1 1.1 Target Group ........................................................................................................... 1 1.2 Prerequisite ............................................................................................................. 1 1.3 How to Use This Document ..................................................................................... 2 1.3.1 System Administrators................................................................................... 2 1.3.2 End Users ........................................................................................................ 2 1.4 Abbreviations and Glossary ................................................................................... 2 1.5 Functions and Accessories ...................................................................................... 3 2. Safety and Regulatory Instructions ............................................................................ 5 2.1 Precautions.............................................................................................................. 5 2.1.1 Frequency Range ............................................................................................ 6 2.2 Regulatory Compliance Statements (EU/EFTA only) .............................................. 6 2.2.1 Restrictions for Wireless LANs (EU/EFTA and USA/Canada) ........................ 6 2.2.2 Additional National Restrictions..................................................................... 6 2.3 Regulatory Compliance Statements (USA and Canada only) ................................ 7 2.3.1 FCC and IC Compliance Statements................................................................. 7 2.3.2 Exposure to Radio Frequency Signals............................................................. 7 2.3.3 Information to User ........................................................................................ 7 2.4 Environmental Requirements.................................................................................. 8 2.4.1 WLAN Handset................................................................................................ 8 2.4.2 Battery ........................................................................................................... 8 3. Description .................................................................................................................. 10 3.1 WLAN Handset ...................................................................................................... 10 3.1.1 Alphanumeric Keys ....................................................................................... 12 3.1.2 Hot Keys........................................................................................................ 13 3.1.3 Icons and Text in the Display........................................................................ 13 3.2 Accessories ............................................................................................................ 16 3.2.1 Desktop Charger ........................................................................................... 16 3.2.2 Rack Charger ................................................................................................. 17 3.2.3 Battery Pack Charger .................................................................................... 17 3.2.4 Clip ................................................................................................................ 17 3.2.5 Security Cord................................................................................................. 17 3.2.6 Leather Casing .............................................................................................. 17 3.2.7 Headset......................................................................................................... 17 4. Basic Operation............................................................................................................ 18 4.1 Switch the Handset On/Off ................................................................................... 18 4.2 Easy Deployment................................................................................................... 18 4.3 Log a Shared Phone On/Off................................................................................... 19 20 December 2013 / Ver. B User Manual WL3 and WL3 Plus WLAN Handset TD 92929EN 4.4 Turn the Audible Signal On/Off............................................................................. 19 4.5 Lock/Unlock the Keypad ....................................................................................... 19 4.6 Lock and Unlock the Handset................................................................................ 20 5. Menu Tree..................................................................................................................... 21 5.1 Calls .................................................................................................................... 21 ............................................................................................................ 21 5.2 Contacts 5.3 Profiles ............................................................................................................... 22 5.4 Messaging ............................................................................................................ 22 5.5 Services ................................................................................................................. 23 5.6 Short cuts 5.7 Connections .......................................................................................................... 25 ....................................................................................................... 25 5.8 Settings .............................................................................................................. 27 5.9 In Call ..................................................................................................................... 28 5.10 Customizing the Menu Tree ................................................................................ 29 6. Calling........................................................................................................................... 30 6.1 Incoming Call ......................................................................................................... 30 6.1.1 Answer a Call ................................................................................................ 30 6.1.2 End a Call....................................................................................................... 30 6.2 Outgoing Call ......................................................................................................... 30 6.2.1 Pre-Dial ......................................................................................................... 30 6.2.2 Dial Using a Pre-Programmed Key/Button................................................... 31 6.2.3 Dial a Number from the Call List ................................................................... 31 6.2.4 Dial the Sender of a Message ....................................................................... 31 6.2.5 Dial a Number from the Local Phonebook.................................................... 31 6.2.6 Dial a Number from the Company Phonebook ............................................. 31 6.2.7 Dial a Name from the Central Phonebook .................................................... 32 6.3 In Call ..................................................................................................................... 32 6.3.1 Adjust Volume During Call ............................................................................ 32 6.3.2 Turn Microphone On/Off During Call ............................................................ 32 6.3.3 Start New Call During Conversation.............................................................. 33 6.3.4 Switch Between Calls .................................................................................... 33 6.3.5 End Call ......................................................................................................... 33 6.3.6 Transfer Call .................................................................................................. 33 6.3.7 Transfer to New Call...................................................................................... 33 6.3.8 Conference Call.............................................................................................. 34 6.3.9 Hold Call ........................................................................................................ 34 6.3.10 Call Back...................................................................................................... 34 6.3.11 Call Waiting ................................................................................................ 34 6.4 Loudspeaking Function ......................................................................................... 35 6.5 Call Diversion ......................................................................................................... 35 20 December 2013 / Ver. B User Manual WL3 and WL3 Plus WLAN Handset TD 92929EN 6.6 Emergency Calls..................................................................................................... 35 6.7 Push-to-Talk Group Call......................................................................................... 35 6.7.1 Accept a PTT Invitation................................................................................. 36 6.7.2 Re-join a PTT Group ...................................................................................... 36 6.7.3 Call a PTT Group ............................................................................................ 36 7. Alarm Operation .......................................................................................................... 37 7.1 Push-button Alarm................................................................................................ 37 7.2 Acoustic Location Signal ....................................................................................... 37 7.3 Test Alarm ............................................................................................................. 37 7.4 Man-down and No-movement Alarm .................................................................. 37 7.5 Automatic Call after Alarm.................................................................................... 38 7.6 Alarm with Additional Information ....................................................................... 38 8. Location........................................................................................................................ 40 9. Menu Operation ........................................................................................................... 41 9.1 Calls ....................................................................................................................... 41 9.1.1 Call List.......................................................................................................... 41 9.1.2 Missed Calls................................................................................................... 43 9.1.3 Call Diversion................................................................................................. 43 9.1.4 Call Services .................................................................................................. 44 9.2 Contacts................................................................................................................. 44 9.2.1 Call Contact ................................................................................................... 45 9.2.2 Add Contact .................................................................................................. 45 9.2.3 Edit Contact .................................................................................................. 46 9.2.4 Delete Contact .............................................................................................. 46 9.2.5 Central Phonebook........................................................................................ 46 9.3 Profiles................................................................................................................... 47 9.4 Messaging ............................................................................................................. 48 9.4.1 Inbox ............................................................................................................. 49 9.4.2 Write New Messages .................................................................................... 50 9.4.3 Unsent Messages.......................................................................................... 51 9.4.4 Sent Messages .............................................................................................. 51 9.5 Services.................................................................................................................. 52 9.5.1 Add Services ................................................................................................. 52 9.5.2 Delete Services.............................................................................................. 52 9.6 Short Cuts .............................................................................................................. 53 9.6.1 Define Soft Keys ........................................................................................... 53 9.6.2 Define Hot Keys ............................................................................................ 53 9.6.3 Define Navigation Key .................................................................................. 53 9.6.4 Define Multifunction Button......................................................................... 54 9.7 Settings ................................................................................................................. 54 20 December 2013 / Ver. B User Manual WL3 and WL3 Plus WLAN Handset TD 92929EN 9.7.1 Sound and Alert Settings ............................................................................. 54 9.7.2 Locks ............................................................................................................. 56 9.7.3 Display Settings ............................................................................................ 58 9.7.4 Time & Date Settings .................................................................................... 59 9.7.5 Answering..................................................................................................... 60 9.7.6 Change Text size for Messages .................................................................... 60 9.7.7 Change the Menu Language ......................................................................... 61 9.7.8 Change Owner ID .......................................................................................... 61 9.7.9 Alarm Settings .............................................................................................. 61 9.8 Connections ........................................................................................................... 62 9.8.1 Headset......................................................................................................... 62 9.8.2 Network ........................................................................................................ 62 9.8.3 In Charger Action .......................................................................................... 63 10. Advanced Functions.................................................................................................. 64 10.1 Device Information.............................................................................................. 64 10.2 Administration Menu .......................................................................................... 64 11. Advanced Messaging ................................................................................................ 65 11.1 Voice Mail ............................................................................................................ 65 11.1.1 Receive a Voice Mail ................................................................................... 65 11.1.2 One Key Voice Mail Access.......................................................................... 65 11.2 Receive a Message with Request for Answer ..................................................... 65 11.2.1 Accept/Reject the message........................................................................ 65 11.3 Message Queuing and Message Priority ............................................................. 65 11.4 Colored Messaging .............................................................................................. 66 11.5 Interactive Messaging......................................................................................... 66 11.6 Mobile Data ......................................................................................................... 67 11.6.1 Send Mobile Data........................................................................................ 67 11.6.2 Send Mobile Data with a Prefix .................................................................. 67 12. Operation Notice ....................................................................................................... 68 12.1 Accessibility and Voice Quality ........................................................................... 68 13. System Handling ....................................................................................................... 69 13.1 Software Upgrade ............................................................................................... 69 14. Maintenance .............................................................................................................. 70 14.1 Maintenance of Batteries.................................................................................... 70 14.1.1 Battery Warnings ...................................................................................... 70 14.1.2 Charge the Battery ..................................................................................... 70 14.1.3 Charge Spare Batteries ............................................................................... 70 14.1.4 Replace the Battery .................................................................................... 70 14.2 Attach the Hinge-type Clip ................................................................................. 71 20 December 2013 / Ver. B User Manual WL3 and WL3 Plus WLAN Handset TD 92929EN 14.3 Attach the Swivel-type Clip ................................................................................ 72 14.4 Attach Cover for No Clip ...................................................................................... 72 14.5 Replacement of Handsets ................................................................................... 72 15. Troubleshooting ........................................................................................................ 73 16. Related Documents .................................................................................................. 75 17. Document History ..................................................................................................... 76 Index ................................................................................................................................ 79 20 December 2013 / Ver. B User Manual WL3 and WL3 Plus WLAN Handset 1. 1. Introduction TD 92929EN Introduction This document describes features and settings of the WLAN Handset. The WLAN Handset is feature-rich with color display, telephony, and messaging. It is designed to be used in medium demanding environments such as hospital environments, but also in office environments. The handset is aimed at users that need to be reachable and that need mobile voice and messaging features. This makes it ideal for applications where the user needs either one way messaging or to be able to interact with other users. The color display enhances and simplifies the use of the handset. All procedures in this document are according to default programmed versions, but additional functions and factory settings are also included as an attempt to cover all functionality. NOTE: Some functions are dependent on the PBX and protocol (H.323/SIP) versions, and your system does not support all functions described in this document. For more information about your system, please contact the person (or department) responsible for the system in your organization, or contact your supplier. There are two versions of the WLAN Handset: • • WL3 WL3 Plus with messaging and alarm functions. NOTE: WL3 may be upgraded by license to use messaging. Refer to the Data Sheet for a complete list of licenses. Read chapter 2. Safety and Regulatory Instructions on page 5 before using the WLAN Handset. For software download and parameter set up, refer to the Installation and Operation Manual, Portable Device Manager, Windows version TD 92712EN, and the Configuration Manual, WL3 WLAN Handset and WL3 Plus WLAN Handset, TD 92930EN. 1.1 Target Group This document is targetted at personnel responsible for handling the administration and distribution of handsets at the end customer site, or anyone interested in aquiring deeper knowledge about the product. For example, a system administrator, or an end user. 1.2 Prerequisite Before using the handset, the system administrator must register the handset in the PBX for voice, and in the applicable WSG modules for messaging and the optional central management. Refer to the Configuration Manual, WL3 WLAN Handset and WL3 Plus WLAN Handset, TD 92930EN. 20 December 2013 / Ver. B 1 User Manual WL3 and WL3 Plus WLAN Handset 1.3 1. Introduction TD 92929EN How to Use This Document 1.3.1 System Administrators The following chapters describe functions configured by the system administrator. For more information on configuration, see the Configuration Manual, WL3 WLAN Handset and WL3 Plus WLAN Handset, TD 92930EN. • • • • • • • • • • • 4.2 Easy Deployment on page 18 4.3 Log a Shared Phone On/Off on page 19 5.10 Customizing the Menu Tree on page 29 6.3 In Call on page 32 6.7 Push-to-Talk Group Call on page 35 7. Alarm Operation on page 37 8. Location on page 40 9.2 Contacts on page 44 10. Advanced Functions on page 64 11. Advanced Messaging on page 65 13. System Handling on page 69 1.3.2 End Users For end-users, it is recommended to read the following chapters to get started: • • 1.4 3. Description on page 10 4. Basic Operation on page 18 Abbreviations and Glossary GUI Graphical User Interface. IP Internet Protocol: Global standard that specifies the format of datagrams and the addressing scheme. SNMP Simple Network Management Protocol VoIP Voice over Internet Protocol VoWiFi Voice over Wireless Fidelity: A wireless version of VoIP. Refers to IEEE 802.11a, 802.11b, 802.11g, or 802.11n network. WiFi Wireless Fidelity: Used generically when referring of any type of 802.11 network. WinPDM Portable Device Manager (Windows version): Used for management of portables, editing of parameters and updating the portables with new software. WSG Wireless Service Gateway: Module that enables wireless services to and from the handsets in a WLAN system. It also includes the Device Manager. 20 December 2013 / Ver. B 2 User Manual WL3 and WL3 Plus WLAN Handset TD 92929EN WL3 Messaging WL3 Plus Functions and Accessories WL3 1.5 1. Introduction x - - - - x - - x - - x - - x - - x - x x - x x - - x - - x Ekahau RTLS x x x Cisco MSE x x x - x x - x x - x x - x x x x x - x x x x x Five configurable emergency numbers x x x Dynamic output power according to 802.11h x x x Multifunction button x x - 3 programmable soft keys x x x 9 programmable hot keys x x x Programmable navigation key x x x Vibrator function x x x Centralized management x x x Customized GUI x x x Profiles x x x Easy replacement of handset x x x Easy replaceable battery x x x Local phonebook (250 contacts) x x x Central phonebook x x x Company phonebook (1000 contacts) x x x Clear lists in charger x x x Supports SNMP x x x 18 languages and 1 customizable x x x Functions Upgradable to Messaginga Personal alarm b Man-down and No-movement alarm b Automatic call after alarm Acoustic Location Signal (ALS) b Alarm on outgoing call (e.g. 911/912) Data sendb b Data with prefix Alarm with data b Alarm with location, access pointsb b Messagingb b Interactive Messaging Colored messaging b Message acknowledgement Voice b mailc b Push-to-talk (PTT) Shared phone b b b, c 20 December 2013 / Ver. B 3 1. Introduction WL3 Messaging WL3 Plus TD 92929EN WL3 User Manual WL3 and WL3 Plus WLAN Handset Standard headset connector 2.5 mm x x x Loudspeaking function x x x Microphone on/off during call (mute) x x x Manual and automatic keypad lock x x x Phone lock x x x Site Survey tool x x x Functions WL3 WL3 Messaging WL3 Plus a. This function requires a license. b. This function is configured by the administrator. c. This function is system dependent. Leather case x x x Spare clip (Hinge-type) x x x Swivel-type clip x x x Cover for no clip x x x Security cord x x x Desktop charger x x x Desktop programmer USB x x x Charging rack x x x Multiple battery charger x x x Battery pack x x x Accessories 20 December 2013 / Ver. B 4 User Manual WL3 and WL3 Plus WLAN Handset 2. 2. Safety and Regulatory TD 92929EN Safety and Regulatory Instructions Read this chapter before using the WLAN Handset. For safe and efficient operation of the handset, observe the guidelines given in this manual and all necessary safety precautions when using the handset. Follow the operating instructions and adhere to all warnings and safety precautions located on the product, the Quick Reference Guide and the User Manual. Do not disassemble the handset. Disassembling the handset voids the warranty. The handset consists of no consumer serviceable components. Service should be performed by Authorized Service Center only. Changes or modifications to the equipment not expressly approved by the party responsible for compliance could void the user’s authority to operate the equipment. This product shall only be used with the following batteries: Permitted rechargeable batteries: OpenStage WL3 Lithium-Ion 930 mAh Order number: S30122-X8008-X38 Single chargers shall only be connected with power adapters supplied by the manufacturer. • Available power adapters (Suppliers Designation) are: • OpenStage WL3 desktop charging unit and power supply unit: European Union, Order number: S30122-X8008-X24 • OpenStage WL3 desktop charging unit and power supply unit: UK, USA, CAN, AUS, Order number: S30122-X8008-X26 • OpenStage WL3 desktop charging unit without power supply unit: Order number: S30122-X8008-X27 The Charging Rack shall only be connected with the following power supply: • 100–240 VAC/0.7A 50/60 Hz. IMPORTANT: In Sweden, Norway and Finland a connection to protective earth (safety grounding) must be provided. IMPORTANT: In the USA and Canada the Charging Rack must only be installed as a single unit, serial configuration is not permitted. 2.1 Precautions • • • • • • Save this manual. It includes important safety information and operating instructions. Save all instructions for future reference. Avoid volume levels that may be harmful to your hearing. Exposure to excessive sound pressure from a handset’s earpiece or headset may cause permanent hearing loss. The handset may retain small metal objects around the earpiece region. Connect AC (power supply) to the Desktop Charger only to designated power sources as marked on the product. Danger: Never change the AC cord or plug. If the plug does not fit into the outlet, have a proper outlet installed by a qualified electrician. Improper connection increases the risk of electric shock. Position the electrical cord to the AC power supply where it is least likely to be subjected to damage or stress. Remove the electrical cord from an outlet by pulling gently on the AC adapter, not by pulling the cord. 20 December 2013 / Ver. B 5 User Manual WL3 and WL3 Plus WLAN Handset • • • • • • • 2.1.1 2. Safety and Regulatory TD 92929EN Unplug the Desktop Charger from a power source (or remove handset from charger) before cleaning the handset to reduce risk of electric shock. Do not use auxiliary equipment with the handset which is not exclusively recommended by the manufacturer, see the User Manual. The use of any auxiliary equipment not recommended by the manufacturer may result in fire, electric shock, or injury, and will void the warranty. Do not expose the handset to open flame. Do not expose the handset and/or the charger to direct sunlight for long periods. Keep the handset and/or charger away from excessive heat and moisture. Do not allow heavy objects to fall on the handset. Do not allow children to play with the product packaging material. Product packaging material is often small and may present a choking hazard. Do not allow children to play with the handset. It is not a toy. Children could hurt themselves or others. Children could also damage the handset. Frequency Range The handset is a radio transmitter and receiver. When it is on, it receives and sends out radio frequency (RF) energy. The handset operates on different frequency ranges depending on market and employs commonly used modulation techniques: EU (ETSI): b/g: 2400–2483.5 MHz (Ch 1–13) and a: 5150–5350 MHz (Ch 36, 40, 44, 48, 52, 56, 60, 64), 5470–5710 MHz (Ch 100, 104, 108, 112, 116, 120, 124, 128, 132, 136, 140) USA/ Canada (FCC): 2.2 b/g: 2400–2483.5 MHz (Ch 1-11) and a: 5150–5350 MHz (Ch 36, 40, 44, 48, 52, 56, 60, 64), 5470–5710 MHz (Ch 100, 104, 108, 112, 116, 120, 124, 128, 132, 136, 140), 5725–5875 (Ch 149, 153, 157, 161, 165) Regulatory Compliance Statements (EU/EFTA only) This equipment is intended to be used in the whole EU & EFTA. This equipment is in compliance with the essential requirements and other relevant provisions of R&TTE Directive 1999/5/EC and 2009/125/EC (Eco Design). The Declaration of Conformity may be obtained from your installer. The handset is marked with the label 2.2.1 Restrictions for Wireless LANs (EU/EFTA and USA/Canada) Frequency Band (MHz) and Channel Max Power Level (EIRP)(mW) 2400–2483.5 Ch 1–13 100 a 5150–5350 Ch 36–64 5470–5725a Ch 200 100–140 1000 Indoor ONLY Indoor and Outdoor X X X a. Dynamic Frequency Selection and Transmit Power Control are required in the 5250 to 5350 MHz and 5470 to 5725 MHz frequency range. 2.2.2 Additional National Restrictions Always consult local authorities for the latest status of National Regulations for both 2400 and 5000 MHz wireless LANs. 20 December 2013 / Ver. B 6 User Manual WL3 and WL3 Plus WLAN Handset 2.3 2. Safety and Regulatory TD 92929EN Regulatory Compliance Statements (USA and Canada only) FCC ID: BXZWH1 IC: 3724B-WH1 US: 9FVIPNANWH1 HAC 2.3.1 FCC and IC Compliance Statements This equipment has been tested and found to comply with the limits for a Class B digital device, pursuant to part 15 of the FCC Rules. These limits are designed to provide reasonable protection against harmful interference in a residential installation. This equipment generates, uses and can radiate radio frequency energy and, if not installed and used in accordance with the instructions, may cause harmful interference to radio communications. However, there is no guarantee that interference will not occur in a particular installation. If this equipment does cause harmful interference to radio or television reception, which can be determined by turning the equipment off and on, the user is encouraged to try to correct the interference by one or more of the following measures: • • • Reorient or relocate the receiving antenna. Increase the separation between the equipment and receiver. Connect the equipment into an outlet on a circuit different from that to which the receiver is connected. • Consult the dealer or an experienced radio/TV technician for help. This Class B digital apparatus complies with Canadian ICES-003. Cet appareil numérique de la Classe B conforme á la norme NMB-003 du Canada. Privacy of communications may not be ensured when using this handset. 2.3.2 Exposure to Radio Frequency Signals This equipment complies with FCC radiation exposure limits set forth for an uncontrolled environment. This device complies with FCC SAR limit of 1.6 W/kg. The maximum SAR value measured when used at the ear is 1.38 W/kg. The telephone has also been tested when worn on the body using belt clip. The maximum measured SAR value in this configuration is 1.16 W/kg. This device must not be co-located or operating in conjunction with any other antenna or transmitter. Use of non-Siemens approved accessories may violate the FCC and IC guidelines for RF exposure and should be avoided. 2.3.3 Information to User This device complies with Part 15 of the FCC rules and with Industry Canada license-exempt RSS standard(s). Operation is subject to the following two conditions: 1 this device may not cause harmful interference, and 2 this device must accept any interference received, including interference that may cause undesired operation. Le présent appareil est conforme aux règles FCC partie 15 et aux CNR d’Industrie Canada applicables aux appareils radio exempts de licence. L’exploitation est autorisée aux deux conditions suivantes: 1 l’appareil ne doit pas produire de brouillage, et 20 December 2013 / Ver. B 7 User Manual WL3 and WL3 Plus WLAN Handset 2 2.4 2. Safety and Regulatory TD 92929EN l’utilisateur de l’appareil doit accepter tout brouillage radioélectrique subi, même si le brouillage est susceptible d’en compromettre le fonctionnement. Environmental Requirements 2.4.1 • • • • • • • • • WLAN Handset Only use the handset in temperatures between -5 °C and +45 °C (23 °F and 113 °F). Avoid exposing the handset for direct sunlight or close to other heat sources. Do not expose the handset to open flame. Keep the handset away from excessive heat and moisture. Avoid sudden temperature changes to prevent condensation in the handset. It is recommended to put the handset into an air tight plastic bag until the temperature is adjusted, for example, when entering or leaving a cold/heated building on a warm/cold day. Protect your handset from aggressive liquids and vapors. If the handset has been exposed for water or condense, remove the battery immediately and let it dry completely before re-inserting the battery. Keep the handset away from strong electromagnetic fields. Do not place a cold handset in a charger. Chemical Resistance The alpha and numeric characters printed on the exterior of the handset have been tested and found resistant to chipping, fading or wearing off when the handset is treated with common cleaners and disinfectants or perspiration. The following chemicals have shown no harmful effect: • • • • 2.4.2 • • • • • • • • • 3 % Hydrochloric Acid M-alcohol (70 % Methylated Ethanol) 60 % Chlorhexidine 0.5 mg/ml Acetone can be damaging to the plastic casing of the handset and should not be used. Battery Do not immerse the battery into water. This could short-circuit and damage the battery. Do not expose a battery to an open flame. This could cause the battery to explode. Do not allow the metal contacts on the battery to touch another metal object. This could short-circuit and damage the battery. Do not leave a battery where it could be subjected to extremely high temperatures, such as inside a car on a hot day. Use the Desktop Charger or the wall-mounted Charging Rack for charging. Charge the battery for at least one hour the first time you use the battery. Note that the wallmounted Battery Pack Charger has to be used if the battery alone is to be charged. Do not charge a battery when the ambient room temperature is above 40 °C or below 5 °C (above 104 °F or below 41 °F). Do not attempt to take a battery apart. Do not disconnect the battery unless it needs to be replaced. Power off the handset before removing the battery. 20 December 2013 / Ver. B 8 User Manual WL3 and WL3 Plus WLAN Handset 2. Safety and Regulatory TD 92929EN Battery Disposal Defective batteries must be returned to a collection point for chemical waste disposal. 20 December 2013 / Ver. B 9 User Manual WL3 and WL3 Plus WLAN Handset 3. 3. Description TD 92929EN Description 3.1 WLAN Handset Figure 1. The WLAN Handset. 1 18 2 17 3 4 16 5 6 7 15 8 14 9 10 13 11 12 1 Multifunctiona/Alarm button This button can be used as a short cut to functions. The button has two modes, long mode or double press mode. In the WL3 Plus, the button is used as an alarm push button only. See 9.6.4 Define Multifunction Button on page 54 and 7.1 Push-button Alarm on page 37. 2 Earpiece speaker 3 Volume button (up) To increase the earpiece speaker, headset, and the loudspeaker volume. 4 Volume button (down) To decrease the earpiece speaker, headset, and the loudspeaker volume. 5 Mute and PTT button To turn on/off audible signals in standby mode, or silence the ring signal for an incoming call. During a call, a long press on the button changes between microphone on/off. This button has the same function as (13) Sound off key. To open the microphone during a Push-to-Talk (PTT) group call. The microphone is open as long as the button is depressed. 6 Soft keys The three Soft keys can be pre-programmed, see 9.6.1 Define Soft Keys on page 53, or used with the GUI. The function of each Soft key is indicated by text in the display just above the keys. 7 Call key To answer a call, to pre-dial a number, and used as a short cut to the Call list. 20 December 2013 / Ver. B 10 User Manual WL3 and WL3 Plus WLAN Handset 3. Description TD 92929EN 8 Five-way navigation key Navigation key with Left, Right, Up, Down, and Confirmation (in the middle). It is also possible to program these keys for short cuts, except the middle key. The Up is by default a short cut to the Inbox, and Down is a short cut to Call contact. See also 9.6.3 Define Navigation Key on page 53. 9 Voice mail accessa A quick access to the handset’s Voice mail by long press. See also 11.1 Voice Mail on page 65. 10 Key lock and upper/lower case Combined key lock to lock the keypad and upper/lower case. This key locks the keypad in combination with the soft key “Lock”. This key also switches between upper/lower case and digits. 11 Microphone 12 Space To add space between text. 13 Sound off key To turn on/off audible signals in standby mode, or silence the ring signal for an incoming call. During a call, a long press on the key/button changes between microphone on/off. This button has the same function as (5) Mute button. 14 Tactile indicators There are two tactile indicators to indicate the center of the key pad. 15 End key and On/Off Combined button; to end a call, to return to standby mode, and to switch the handset on/off by long press. 16 Color display The full graphic type display is 176 pixels wide and 220 pixels high. The display has multiple colors and backlighting. 17 Headset connector The headset connector is used to connect a headset. It is protected against dust by using the headset connector cover. 18 LED Indicates incoming call, messaging, low battery, and charging. a. This feature is system dependent. IMPORTANT: The handset may retain small metal objects around the earpiece region. Case The plastic cover parts are made of durable PC/ABS material. The WLAN Handset has the enclosure protection IP44, and fulfills IEC 60068-2-32, procedure 1, which makes it drop proof from 1 meter onto concrete. Ascom approves 12 drops from 1.5 meter. Antenna The antenna is integrated inside the handset. Display The display is an illuminated 28 x 35 mm, TFT display. 20 December 2013 / Ver. B 11 User Manual WL3 and WL3 Plus WLAN Handset 3. Description TD 92929EN Keypad While not in use, the keypad should be locked to prevent accidentally pressing a key. Loudspeaker The handset has a separate loudspeaker for the loudspeaking function. It is placed on the back side of the handset. Microphone The microphone is placed on the front bottom side of the handset. Clip There are two different belt clip options for the handset; a hinge-type clip (standard), and a swivel-type clip. See 15. Troubleshooting on page 73 or 14.3 Attach the Swivel-type Clip on page 72. Use the clip to attach the handset to a pocket, belt, or similar. It is also possible to use the handset without any clip on, see 14.4 Attach Cover for No Clip on page 72. Battery The battery is a rechargeable Li-Ion battery, placed under a battery cover. See 14.1.4 Replace the Battery on page 70. The battery is fully charged within 2.5 hours. See 14.1.2 Charge the Battery on page 70. The battery can be charged separately with a special battery rack charger. See 14.1.3 Charge Spare Batteries on page 70. 3.1.1 Alphanumeric Keys Figure 2. Available characters. .,?!-‘”1 abcàâæç2 deféèêë3 jkl5 ghiîï4 mnoñôöœ6 wxyz9 pqrs7 tuvû8 Space + * 0 # NOTE: Depending on the selected menu language, other characters are also available. This means that the character order can differ from the figure above. In idle mode, and number input mode • • • and #. A short press on a key enters the digits “0”–“9” and the characters A long press on 0 enters the character + (used, for example, to enter an international number), if the hot key function on key 0 is deactivated, see 9.6.2 Define Hot Keys on page 53. Enter a pause in number input mode by a long press on the *-key. A pause is indicated by a “P” in the display. 20 December 2013 / Ver. B 12 User Manual WL3 and WL3 Plus WLAN Handset 3. Description TD 92929EN In text input mode • • • • • • 3.1.2 A short press on a key 0–9, displays the first available character on that specific key. The marked character is selected after a timeout, or when another key is pressed. To change to upper/lower case, press the -key before entering the character. A short press on the -key can also be used to display only the digits. To add space in the text, short press key 0. The first character entered in a message or when adding/editing a name in the Contacts menu, is an upper level character followed by lower level characters, unless the *-key is pressed before entering the character. To switch between “Abc”, “ABC”, “abc”, and “123”, press the -key. A long press on the #-key displays special characters. A long press on the -key changes the language used while entering text. It is possible to enter specific characters, like for example Å, Ä, Ö, during a Central Phonebook search, or when writing a message, if “Writing lang.” is changed to “Svenska”. Depending on the current writing language, other language characters can be chosen. Hot Keys Any key “0”, “2”–“9” can be set to a Hot Key. A long press on any of these numbers in idle mode is by default a short cut to the Call contact list. The list is in alphabetic order, and depending on which key that is pressed is dependent on where in the list the contact appears. A Hot Key can be programmed to give access to frequently used functions such as dialing a specific number, a short cut on the menu, or sending a message. See 9.6.2 Define Hot Keys on page 53. 3.1.3 Icons and Text in the Display The icons and text in the display indicate functions and settings that the user has access to. The display shows the date and time, the Owner ID, and handset number. The Owner ID can be set by the user manually. Figure 3. Example of a display configuration in idle mode. 11:00 Status bar 05/17/2011 Header bar Marie Curie 1234 Active area Scroll bar Menu Soft key bar The top row (Status bar) is used for icons that provide the user information about signal strength, missed call, new message, phone lock, key lock, sound off, time and battery status. This row is always visible in all screens. The next row (Header bar) displays the current date, headset connection, and profile. During a call, this row also displays microphone on and loudspeaker on. The next rows (Active area) are used for user identity provided from the system and/or an Owner ID can also be displayed if configured in the Settings menu. This is also the area for dialog window text, for example “missed calls” or to confirm an action. The bottom row (Soft key bar) is used for Soft keys that can be used as short cuts for functions in the handset. 20 December 2013 / Ver. B 13 User Manual WL3 and WL3 Plus WLAN Handset 3. Description TD 92929EN The (Scroll bar) is placed to the right of the “Active area”. It becomes visible when a menu screen has more than six menus, or if the complete text in a message cannot be displayed on the screen simultaneously. Icons “Signal strength” icon is visible in the upper left corner. The staples shown in display depends on the signal strength. “Full battery” icon is displayed in upper right corner. “Low battery warning” icon is shown when the battery has 10% or lower of its capacity left. “Empty battery warning” icon is flashing when the battery has 5% or lower of its capacity left. “Microphone off” icon indicates a silenced microphone. It is displayed after a long press on the Sound off key or Mute button during a call. “Loudspeaker on” icon is displayed in the soft key bar during an incoming call. Pressing this icon turns the loudspeaker on. The icon remains in the header bar during the call as long as the loudspeaker is on. “Loudspeaker off” icon. “Sound off” icon is displayed when the Sound off key or Mute button is pressed in idle mode. “Silent volume” icon is displayed when the volume is set to “Silent”. “Headset connected” icon indicates that a wired headset is connected to the handset. “New message” icon or “Interactive message” icon indicates that a new text message (or messages) has arrived. The icon remains in the status bar until all new messages in the inbox are read. “New message with request for answer” icon in front of a message indicates that the message must be acknowledged or rejected. “New message, important” icon indicates high priority of a message. “New message, alarm priority” icon indicates alarm priority of a message. 10 “Voice mail” icon is displayed in the status bar when there are voice mails. The icon remains until the voice mail is listened to. “Read message” icon or “Read Interactive message” icon in front of a message shows that this message has been read once. “Sent message” icon “New colored message” icon indicates that a new colored text message(s) has arrived. The messages can be labeled with different colors. “Read colored message” icon indicates that a colored text message(s) is read. The messages can be labeled with different colors. “Man-down“ icon indicates that the Man-down alarm is enabled. “No-movement“ icon indicates that the No-movement alarm is enabled. “Profile active” icon. 20 December 2013 / Ver. B 14 User Manual WL3 and WL3 Plus WLAN Handset 3. Description TD 92929EN “Missed call” icon is added to all missed calls in the call list. “Incoming call” icon is added to all answered calls in the call list. “Outgoing call” icon is added to all outgoing calls in the call list. “Call diverted internally” icon is added to all internally diverted calls in the call list. “Call diverted externally” icon is added to all externally diverted calls in the call list. “Missed call” icon indicates missed calls in the status bar. “Connected call” icon indicates an ongoing call. “Call on hold” icon indicates a paused call. “Call diverted internally” icon indicates that all calls are diverted to another internal handset. “Call diverted externally” icon indicates that all calls are diverted to another external handset. “To contacts” icon indicates a soft key function that opens the contact list. “Secure call” icon indicates a secure voice connection during a call “Non-secure call” icon indicates a not secure voice connection during a call “Locked keypad” icon indicates a locked keypad. “Locked entry” icon indicates that the contact cannot be edited or deleted by the user, for example, an entry in the company phonebook. “Locked handset” icon indicates a locked handset. “Do not disturb” icon indicates a handset that does not want to be disturbed. Handset with WL3 Plus license including Personal Alarm. Handset with WL3 Messaging license. 20 December 2013 / Ver. B 15 User Manual WL3 and WL3 Plus WLAN Handset 3. Description TD 92929EN Menu Icons The “Contacts” menu contains all names/numbers in the local phonebook. In addition, a company phonebook with up to 1000 entries can be downloaded to the phone using the Device Manager. It is also possible to access a central phonebooka from the “Contacts” menu. The “Services” menu contains short cuts to services such as phone calls, data send, and PTT calls. The “Messaging” menu contains messages handling functions, such as reading and writing messages. The “Calls” menu contains Call list, Missed calls, Diverted Callsa and Call Services, such as, Call waiting, Divert callsa, Do not disturba, and Hide calling ID. The “Connections” menu contains Headset selection, Network selection, and In charger selection. The “Settings” menu contains personal handset settings such as ringer volume, language, etc. The “Short cuts” menu contains shortcuts for the Soft keys (of the active profile), Hot keys, Navigation keys, and the Multifunction button (if applicable). The “Profiles” menu contains the possibility to add/select up to four additional profiles with individual settings for incoming calls and their ring signals and volume, message alerts, vibrating alerts, key sound, answer behavior, diversion etc. This menu also contains the complete list of added Soft keys. By default, the “Normal” profile is active. a. This feature is system dependent. 3.2 Accessories 3.2.1 Desktop Charger Figure 4. Desktop Charger for WLAN Handset There is one desktop charger available, (DC3) which charges the handset. There is also a desktop programmer (DP1) used to download new software and to synchronize parameters. They look the same except that the DP1 has a USB connection. The handset is fully operational while placed in the charger. The charger is delivered with a plug-in power supply, and is connected to an ordinary wall socket. NOTE: Only use the charger within the temperature range of +5° C – +40° C. 20 December 2013 / Ver. B 16 User Manual WL3 and WL3 Plus WLAN Handset 3. Description TD 92929EN IMPORTANT: Only use the power supply provided. 3.2.2 Rack Charger The rack charger is used to charge up to six handsets at the same time. Refer to the Installation and Operation Manual, CR3 Charging Rack, TD 92825EN. 3.2.3 Battery Pack Charger The battery pack charger (CR4) is used to charge up to six spare batteries. Refer to the Installation Guide, CR4 Battery Pack Charger, TD 92883EN. 3.2.4 Clip NOTE: It is possible to use the handset without any attached clip, see 14.4 Attach Cover for No Clip on page 72. NOTE: The belt clips cannot be used if the handset is placed in a case. See 3.2.6 Leather Casing on page 17 for more information. There are two belt clips available: • • 3.2.5 Hinge-type clip To prevent the handset from slipping out of, for example, a pocket or belt, see 15. Troubleshooting on page 73. Swivel-type clip To be able to rotate the handset without slipping out from, for example, a pocket or belt, see 14.3 Attach the Swivel-type Clip on page 72. Security Cord The security cord is 800 mm long. It is attached directly to the handset. 3.2.6 Leather Casing The leather casing is specially designed for the handset. The casing comes with a swivel type belt clip, and the handset is fully operational while it is placed in the casing. 3.2.7 Headset A headset is recommended if the handset is frequently used and/or if the user wants to have both hands free. The headset comes in three versions; microphone integrated in the cable, or microphone on a boom, and hearing protection. It is also possible to use any headset with a 2.5 mm connector and configure parameters for the headset using the user’s headset profile. To achieve optimal audio quality with the different headset types, it is recommended to select the corresponding headset profile. See 9.8.1 Headset on page 62 for more information. 20 December 2013 / Ver. B 17 User Manual WL3 and WL3 Plus WLAN Handset 4. 4. Basic Operation TD 92929EN Basic Operation NOTE: For information on how to answer/end a call, see 6.1 Incoming Call on page 30. 4.1 Switch the Handset On/Off Switch the Handset On 1 Press and hold the End key . When pressing the End key, the display lights up. Switch the Handset Off NOTE: The handset must be in idle mode. While in a menu, press the End key idle mode. 4.2 to return to . 1 Press and hold the End key 2 A control question “Switch off?” is displayed. Confirm by pressing “Yes”. Easy Deployment A handset is automatically installed in the WLAN system without the need for the WinPDM, if the WLAN system is configured for Easy Deployment, refer to the Configuration Manual, WL3 WLAN Handset and WL3 Plus WLAN HandsetTD 92930EN. 1 If needed, switch off the handset by pressing the End key 2 Switch on the handset by pressing the End key 3 Select the language to be used (Settings > *Language) or press “Cancel”. If Cancel is pressed, the default language English is used. 4 When the handset displays the dialog window “Login:”, enter the handset´s Call ID (endpoint number), that is, the phone number of the handset, in the “User:” field. TIP: If, by mistake, a wrong number is entered, make a factory reset, and start over again, see 10.2 Administration Menu on page 64. Leave the “Password:” field empty (if there is no common, or individual, password set in the IMS3/Unite CMWSM3WSM server for the handset). The handset displays “Searching” followed by “No access”, (and can restart automatically, displaying “Shutting down” followed by “Remotely updated”. NOTE: If no system is found within 2 minutes or “Cancel” is pressed, the handset returns to the Idle mode. In this case, continue with registering the handset manually, using the Device Manager in WSG. NOTE: If there are no “Number records” already configured in the Device Manager before the handset logs in for the first time, perform as follows: 1) In the Device Manager, be sure to manually check and save the automatically created “Numbers record” by right-clicking on the “Number’s” entry. 2) Check in the created record, under Device >Unite > IP address, that the IP address for the Messaging system is correct. Then the handset can login to the same Device Manager again. 20 December 2013 / Ver. B 18 User Manual WL3 and WL3 Plus WLAN Handset 4.3 4. Basic Operation TD 92929EN Log a Shared Phone On/Off The feature shared phone allows more than one user to use a handset. All parameters and settings that are set in the Device Manager are loaded to the handset upon logon. Parameters that are changed in the handset by a user that is logged in, are stored by the Device Manager. When the handset is logged out or switched off, the message list and call list in the handset disappears and is empty when a new user logs on to the handset. The handsets are configured to be shared using the Device Manager. When a handset is configured to be a shared phone, it can be used by any shared phone user in the system. The user profile must have the phone mode “Personal” disabled in the WinPDM. If the user is configured as personal (that is not shared), the handset becomes a personal phone upon first log on. Log On to the Handset 1 Switch the handset on. 2 Enter the Call ID. 3 If required, enter the password. Navigate by using Up and Down on the Navigation key. 4 Press “Login”. If the handset does not find the WLAN upon start-up, a “No system” dialog window is shown together with a beep tone and/or vibrator, if enabled. When the dialog window is acknowledged, a “No Network” screen is shown. If the handset does not receive an IP address from the system, a “No Access” screen is shown. Log Off from the Handset NOTE: The handset must be in idle mode. While in a menu, press the End key idle mode. to return to . 1 Press and hold the End key 2 A control question “Log off?” is displayed. Confirm by pressing “Yes”. NOTE: If a handset is shared and one of the users logs off the shared phone, the lock that prevents the handset from unauthorized use is deactivated. For additional information, see 4.6 Lock and Unlock the Handset on page 20. 4.4 Turn the Audible Signal On/Off NOTE: The handset must be in idle mode. While in a menu, press the End key idle mode. A long press on the Sound off key or Mute button on/off. The icon indicates a silent handset. 4.5 to return to changes between ring signal Lock/Unlock the Keypad To prevent accidentally pressing keys and making a call, the keys can be locked. Lock Keypad 1 Press 20 December 2013 / Ver. B . 19 User Manual WL3 and WL3 Plus WLAN Handset 2 4. Basic Operation TD 92929EN Press “Lock”. Unlock Keypad 1 Press 2 Press “Yes”. . NOTE: An incoming call can be answered and the alarm button can be pressed while the keypad is locked. If configured in the WinPDM/Device Manager, an emergency call can also be made while the keypad is locked. See the Configuration Manual, WL3 WLAN Handset and WL3 Plus WLAN Handset, TD 92930EN. 4.6 Lock and Unlock the Handset The handset can be locked to prevent unauthorized use. If this function is activated, a PIN code has to be entered, for example, to switch on the handset, to answer an incoming call etc. The default phone lock code (0000) can be changed to any 4–8 digit personalized code. 1 Press “Menu”. 2 Select “Settings” 3 Select “Locks”. 4 Select “Phone lock”. 5 Select “Auto phone lock”. 6 Select “On”, “On in charger”, or “Off”. 7 Enter PIN code. If a user forgets the PIN code, it can be reset by the system administrator. . NOTE: Press “OK”. If a handset is shared and one of the users logs off the shared phone, the lock that prevents the handset from unauthorized use is deactivated. For additional information, see 4.3 Log a Shared Phone On/Off on page 19. NOTE: If configured in the WinPDM/Device Manager, an emergency call can be made while the handset is locked. See Configuration Manual, WL3 WLAN Handset and WL3 Plus WLAN Handset, TD 92930EN. 20 December 2013 / Ver. B 20 User Manual WL3 and WL3 Plus WLAN Handset 5. 5. Menu Tree TD 92929EN Menu Tree 5.1 Calls Call list > 1234 12:00 > 1235 14:00 Call More > Time of call etc. Edit number Save number > Work number Mobile number Other number Send message > Delete > Yes Delete all > Yes No Back Missed calls > 2345 15:00 > No Call 2346 23 Sep 03 More etc. Back > (same as above) > All calls Diverted calls Call Services > Call waiting > On Divert callsa > Internal Off External Do not disturb > On Hide calling ID > On > > Enter number: No reply (same as above) When busy (same as above) All calls > Enter number: No reply (same as above) When busy (same as above) Off Off a. Depends on the VoIP protocol used. 5.2 Contacts Call contact > Search From contact list Add contact > New From call list Edit contact > > Name > Work number > Mobile number > Other number > Ring signal > > Search From contact list > Name Work number Mobile number Other number Ring signal Delete contact > Search Central Phonebooka > From contact list Search by name (First name:) (Last name:) > > > Call More > View contact Add to cont. Send message 20 December 2013 / Ver. B 21 User Manual WL3 and WL3 Plus WLAN Handset 5. Menu Tree Search by number TD 92929EN > Call > Call (Phone number:) Last result More > (same as above) More > (same as above) Internal call > Play External call > (same as above) Callback > (same as above) a. This function is system dependent. 5.3 Profiles Normal/Profile X > Name Volume > Ring signals > Back Message alert > Play Vibrating alert > On Back On if silent Off Key sound > Click Tone Silent Answering > Answering key > Call key > Answer behavior > Automatically > All calls > Loudspeaking Enter number No reply > (same as above) When busy > (same as above) > Name Any key Divert callsa Off Activate alarmb [Edit] > Man-down No-movement Soft keys > Left Function Value Control question Add new > Middle > (same as above) Right > (same as above) (same as Normal above) a. Depends on the VoIP protocol used. b. Applicable to WL3 Plusonly. 5.4 Messaging NOTE: Applicable to WL3 Messaging and WL3 Plus only. Inbox > Message list > View > Reply More > Enter text > Send > Delete Forward Call sender Call no. in texta > Call Back Save number 20 December 2013 / Ver. B 22 User Manual WL3 and WL3 Plus WLAN Handset 5. Menu Tree TD 92929EN Close More > Delete > Yes No Delete all > Yes No Back Write new > Enter text > Send > Enter number message > Send “Contacts access” > Send Back Unsent > Message list > Edit > Send > Enter number > “Contacts access” More > Delete > Yes No Delete all > Yes No Back Sent > Message list > View > Forw. > Send > Enter number > Send “Contacts access” > Send Clear Back More > Delete > Yes No Call no. in texta > Call Save number > Work No. Mobile No. Other No. Close More > Delete > Yes No Delete all > Yes No Back a. Visible if number consists of a minimum of 3 digits. 5.5 Services NOTE: Applicable to WL3 Plus only. NOTE: This function is configured by the administrator. Add new > Enter name > Phone call > Phone number > > Save “Contacts access” > Enter number Save Back Send data > Enter prefix > Enter number > Save Clear Back Send message > Phone number > Enter number > Save “Contacts access” > Save Back 20 December 2013 / Ver. B PTT > PTT Groupsa (example) Edit alarm data > Alarm data (example) 23 User Manual WL3 and WL3 Plus WLAN Handset Service 1 > (example) 5. Menu Tree Select > More > TD 92929EN (Sending message) Edit Delete > Yes No a. This function is configured by the administrator. 20 December 2013 / Ver. B 24 User Manual WL3 and WL3 Plus WLAN Handset 5.6 5. Menu Tree TD 92929EN Short cuts Soft Keys > Left > Name Function > Not used Phone call > Enter number Send message > Enter number Change profile > Profile X (example) Open a menu > Main menu Phone call “Loudsp” Call list Contact list Central Phonebooka Message inbox Calls Connections Contacts Messaging Services Profiles Settings Call services Services > Logout Divert calls Show RSSI Valueb Control question > Off On Hot Keys > Middle > (same as Left key) Right > (same as Left key) 0, 2–9 > Function > (same as above) Control question > Off On Navigation keys > Up > Function > (same as above) Control question > Off On Multifunction > buttonc Down > (same as Up key) Left > (same as Up key) Right > (same as Up key) Long press > Function > Valueb > Control question > (same as above) Off On Multi press > (same as Long press) a. This function is system dependent. b. Dynamic, appears only for certain functions. c. Applicable to WL3 and WL3 Messaging only. 5.7 Connections Headset > Mic on boom Mic on cable 20 December 2013 / Ver. B 25 User Manual WL3 and WL3 Plus WLAN Handset 5. Menu Tree TD 92929EN Hearing protection Network > Select In charger > No action > Network A (example) Switch off Sound off Change profile > Edit Back 20 December 2013 / Ver. B 26 User Manual WL3 and WL3 Plus WLAN Handset 5.8 5. Menu Tree TD 92929EN Settings Sound & Alerts > Volume > Silent, Volume: 1–8 Ring signals > Internal call > 15 different signals External call > (same as above) Callback > (same as above) > Play Message alert > Message alert 1 (example) Vibrating alert > On Back On if silent Off Key sound > Click > Play Back Tone > (same as above) Silent Battery warning > Repeated sound Sound once Sound off Hearing aid > Off On Locks > Automatic key lock > Phone lock > On Off Auto phone lock > On On in charger Off Change PIN code > > Auto lock time > 5sec (example) Auto key unlock > On Brightness > Normal Screen saver > Information Select Back Off Display > Power save Black Black also in call Rotate display text > Normal Font style > Normal Time format > 12:00am/pm Date format > Inverted Bold Time & Date > 12:00 01 Jul 10 Jul 01 2010 2010-07-01 07/01/2010 01/07/2010 01-07-2010 01.07.2010 Answering > Answering key > Answering behavior > Call key Any key Automatically > Change Back Messages > Text size > Loudspeaking > (same as above) Quick answer > (same as above) Normal Large 20 December 2013 / Ver. B 27 User Manual WL3 and WL3 Plus WLAN Handset Language > 5. Menu Tree TD 92929EN Czech (Ceština) Danish (Dansk) German (Deutsch) Greek ( ) English (English) Spanish (Español) French (Français) Italian (Italiano) Hungarian (Magyar) Dutch (Nederlands) Norwegian (Norsk) Polish (Polski) Portuguese, Brazilian (Português (Br)) Russian ( Slovak ( ) ) Finnish (Suomi) Swedish (Svenska) Turkish (Türkçe) Owner ID Alarma > > Name: Activate alarm > Man-down No-movement Edit alarm data Device info > Software Hardware License WLAN info Network info User ID a. Applicable to WL3 Plus only. 5.9 In Call The In call menu can be reached during an ongoing call by pressing the soft key “More“. New call > Call “Phonebook access” Cancel Transfera > Transf. to newb > Call “Phonebook access” > Retrieveb > Hold > Cancel Retr. More End Conferencea > Contacts > Call contact > Call View Back Add contact > New From call list 20 December 2013 / Ver. B > Name > Work number > Mobile number > > Other number > > Ring signal > > 28 User Manual WL3 and WL3 Plus WLAN Handset 5. Menu Tree Edit contact > Delete contact > Central Phonebookc > Search by name TD 92929EN > Search Clear Back Search by number > (same as above) Last result > Call More > Back Messaging > Inbox Write new message Unsent Sent Loudspeaker on > More > Loudspeaker off > Microphone off More > Microphone on > Select Close > (same as above) a. Dynamic, appears only for certain call situations. b. Can appear on left soft key or in More menu depending on the current call status. c. This function is system dependent. 5.10 Customizing the Menu Tree The menu tree can be customized by hiding some of the functions that are available but for example not in use. Which functions that could be hidden are defined in the Device Manager. Refer to the Configuration Manual, WL3 WLAN Handset and WL3 Plus WLAN HandsetTD 92930EN. 20 December 2013 / Ver. B 29 User Manual WL3 and WL3 Plus WLAN Handset 6. 6. Calling TD 92929EN Calling 6.1 Incoming Call The flashing LED, accompanied by a ring signal and/or a vibrating handset signals a call. Ring signal and vibrator can be disabled, see 9.7.1 Sound and Alert Settings on page 54. The calling party’s handset information or name is shown. The local phonebook name is displayed if the calling party’s handset number is stored in the local phonebook, else the calling name or calling number is shown. NOTE: When a headset is connected to the handset, the headset button can be used to answer the call. In addition, it is possible to configure the headset button with a specific function, such as dial last called number, or dial a predefined number. See Configuration Manual, WL3 WLAN Handset and WL3 Plus WLAN Handsetfor more information. Other answering keys and methods can also be set in the Settings menu. For example, it is possible to set the answering behavior to any key (with exceptions). The answering methods are; Automatically, Loudspeaking, and Quick answer. When “Automatically” is enabled, all incoming calls are connected automatically. At “Quick answer”, the call is connected by lifting the handset out of the charger. See 9.7.5 Answering on page 60. 6.1.1 Answer a Call to answer the When the signal sounds, press , “Accept” on the left soft key, or press call in loudspeaking mode. The name/number of the calling party is displayed, if calling line information is available. Secure voice transmission NOTE: The secure voice transmission must be activated by the administrator. If you call a party or receive a call from a party over a secure connection, the “Secure call” icon , appears up left in the display. A non-secure call transmission is indicated by the “Non-secure call” icon . 6.1.2 End a Call A press on the End key is shown in the display. 6.2 or the right Soft key “End” ends the call. The duration of the call Outgoing Call 6.2.1 Pre-Dial Enter the number and press or the soft key “Call” to get the line. The number is shown on the display while dialing. If needed, press “Clear” to erase the number. By using the Navigation key, it is possible to step and add/delete a digit in a number. An international number can be dialed from the handset by entering a + character followed by the country code and local number. To enter the + character, long press the 0 key until the character is shown in the display. 20 December 2013 / Ver. B 30 User Manual WL3 and WL3 Plus WLAN Handset 6. Calling TD 92929EN NOTE: The + character cannot be entered and international numbers cannot de dialed this way, if the 0 key has been configured as a hot key, see 9.6.2 Define Hot Keys on page 53. 6.2.2 Dial Using a Pre-Programmed Key/Button Some keys and buttons can be programmed with a number, as described in 9.6 Short Cuts on page 53. Press the pre-programmed key/button to dial the number. The call is automatically connected. 6.2.3 Dial a Number from the Call List NOTE: It is also possible to dial a number from the Call list by pressing the Call key . selecting a number from the list, and then pressing “Call” or the Call key , 1 Press “Menu”. 2 Select “Calls” 3 Select “Call list”. 4 Select a number. 5 Press or the soft key “Call” to dial. The number can be edited before the call is dialed. Press “More” and select “Edit number”. The 25 last received, dialed, or missed calls are stored in a call list. See 5.1 Calls on page 21. 6.2.4 . Dial the Sender of a Message1 It is possible to call the sender of a message stored in the message list. 1 Open the menu by pressing the “Menu” soft key. 2 Select “Messaging” 3 Select “Inbox”. 4 Select message in the message list. 5 Press “View”. 6 Press “More”. 7 Select “Call sender”. 6.2.5 . Dial a Number from the Local Phonebook 1 Open the menu by pressing the “Menu” soft key. 2 Select “Contacts” 3 Select “Call contact”. 4 Select contact from the list, or search name/number by entering characters in the search field. 5 Press “Call” or . to make the call. TIP: Use the Navigation key Down in the Idle mode to open the local phonebook. 6.2.6 1 Dial a Number from the Company Phonebook Open the menu by pressing the “Menu” soft key. 1. Applicable to WL3 Messaging and WL3 Plus only. 20 December 2013 / Ver. B 31 User Manual WL3 and WL3 Plus WLAN Handset 6. Calling TD 92929EN 2 Select “Contacts” 3 Select “Call contact”. 4 The local and company phonebook appears in the same list but the company names are indicated by a “Locked entry” icon in front of the name. Select contact from list, or search name/number by entering characters and select search. 5 Press the soft key “Call” or 6.2.7 . to make the call. Dial a Name from the Central Phonebook1 1 Open the menu by pressing the “Menu” soft key. 2 Select “Contacts” 3 Select “Central phonebook”. 4 Select “Search by name”. 5 Enter the first name and/or last name. The whole name does not have to be entered. . TIP: When searching for a contact, adding or editing a contact, it is possible to change the language by a long press on the *-key. This can be used to access characters in a foreign language. 6.3 6 Press “Search”. 7 Select the name to call from the list. 8 Press “Call”, or to make the call. In Call NOTE: Some of these functions are system-dependent. The parameters are set up in the Device Manager, refer to the Configuration Manual, WL3 WLAN Handset and WL3 Plus WLAN HandsetTD 92930EN, and Installation and Operation Manual, Portable Device Manager, Windows versionTD 92712EN. Additional In call functions can be added by the administrator. 6.3.1 Adjust Volume During Call Press to increase the volume, and and maintains the new volume level. 6.3.2 to decrease the volume. The handset now stores Turn Microphone On/Off During Call NOTE: If configured in the Device Manager, it is possible to make an emergency call while the handset/keypad is locked. During the ongoing emergency call, the soft key “More” is disabled. 1 Press “More” during the call. 2 Select “Microphone off”. 3 Press “Select”. The icon indicates a muted microphone. This means that the other party in an ongoing call cannot hear you. To turn the microphone back on, do as follows: 1 Press “More” during the call 2 Select “Microphone on”. 1. This function is system dependent. 20 December 2013 / Ver. B 32 User Manual WL3 and WL3 Plus WLAN Handset 3 6. Calling TD 92929EN Press “Select”. It also possible to turn the microphone off/on by a long press on 6.3.3 or . Start New Call During Conversation NOTE: If configured in the Device Manager, it is possible to make an emergency call while the handset/keypad is locked. During the ongoing emergency call, the soft key “More” is disabled. 1 Press “More” during the call. 2 Select “New Call”. The first call is automatically put on hold. 3 Press “Select”. 4 Enter the number or pr press 5 Press 6.3.4 to access the phonebook. , or “Call”. Switch Between Calls To switch between two ongoing calls: 1 Select the call on hold using the Navigation key. 2 Press the left soft key “Retr.”. The retrieved call is indicated with 6.3.5 . The call on hold is indicated with . End Call Prerequisite: A new call has been started during the conversation, see 6.3.3 Start New Call During Conversation on page 33. 1 Select the call to end by using Up and Down on the Navigation key. 2 Press the right soft key “End”. The selected call ends. 3 If needed, press the left soft key “Retr.” to resume the remaining call. 6.3.6 Transfer Call Prerequisite: There are two ongoing calls. 1 Select the call on hold using Up and Down on the Navigation key. 2 Press “More”. 3 Select “Transfer to”. The two calls are connected. “Transferred” is displayed and the handset enters idle mode. 6.3.7 Transfer to New Call Prerequisite: There is one ongoing call. 1 Press “More” during the call. 2 Select “Transf. to new”. 3 Press “Select”. 4 Enter the number to which the other party will be connected. It is also possible to make a phonebook lookup to select a contact in the local phonebook and the company phonebook. 5 Press “OK” or 20 December 2013 / Ver. B to transfer the call. 33 User Manual WL3 and WL3 Plus WLAN Handset 6.3.8 6. Calling TD 92929EN Conference Call Prerequisite: A new call has been started during the conversation, see 6.3.3 Start New Call During Conversation on page 33. Invite a call to the conference as follows: ) with the five-way Navigation key. Press 1 Step to the call on hold (indicated with “More” during the call. 2 Select “Conference”. Now the two dialed persons are in a conference call with the person who initiated the call. (An ongoing call is indicated with ). The person initiating the conference call is the conference leader, and the other persons are participant members of the conference call. If desired, either of the persons in the ongoing conference call can be put on hold by the conference leader, by selecting the soft key “Hold”. The person on hold is invited to the conference call again, by selecting “More” and “Conference”. (“Retr.” toggels between the two calls.) TIP: The conference leader can return to idle mode and let the other two parties continue the conversation by pressing the left soft key “Hold” for one call and then select the soft key “More” and “Transfer to name”. NOTE: If you already are involved in a secure connection with a party when you initiate a consultation call, the original party is placed on hold. The new consultation connection can either be secure or non-secure. The entire conference is non-secure if any connection is non-secure. The relevant icon appears on each of the handset displays, see 6.1.1 Answer a Call on page 30. 6.3.9 Hold Call 1 Press the soft key “More” during the call. 2 Select “Hold” to put the call on hold. To retrieve the held call: 1 Press the left soft key “Retr.”. 6.3.10 Call Back When a call is made to a busy handset, it is possible to automatically call back when the busy handset is free. Do as follows: 1 When a busy tone sounds, “User busy. Order callback” and the soft keys “Yes” and “No” are displayed. 2 Select “Yes” if it is desired to call the person back automatically. 3 When the handset alerts, press and the call is automatically started. 6.3.11 Call Waiting During an ongoing conversation, when a short two-beep tone sounds and the Incoming call dialog window appears, do as follows: 1 Press “Accept” to answer the other call (the first call is put on hold), or press “Decline” to reject the call (which is indicated as missed call). The call on hold is indicated with , and the ongoing call is indicated with the soft key “Retr.” to switch between the calls. 20 December 2013 / Ver. B . Use 34 User Manual WL3 and WL3 Plus WLAN Handset 6.4 6. Calling TD 92929EN Loudspeaking Function There are two ways to activate loudspeaking: • When receiving a call, press the middle soft key . • During a call, press the left soft key . To turn off loudspeaking, press the left soft key . This function can also be activated by selecting the answering method “Loudspeaking”. See 9.7.5 Answering on page 60. 6.5 Call Diversion All calls; internal calls, external calls, calls when busy, or calls at no answer can be diverted to another handset number. The diversion is made via the Divert calls menu. See 9.1.3 Call Diversion on page 43 or edit the Profile, see Edit Profile on page 48. It is also possible to program a Soft key, Hot key, or Multifunction1 button with a short cut to the “Call diversion” menu. Refer to 9.6 Short Cuts on page 53, and Divert All Calls on page 43. Depending on if the SIP or H323 protocol is used, the Call Diversion differs when the handset is out of range of the VoWiFi network. Using the SIP protocol, the Call Diversion function is managed by the handset and the Call Diversion does not work until the handset is within range again. Using the H323 protocol, the Call Diversion function is managed by the PBX and is available in the handset, even if it is out of range. The protocol used can be viewed in the Administration menu in the Device Manager. 6.6 Emergency Calls If configured in the WinPDM/Device Manager, any one of up to five predefined emergency numbers can be called, even if the handset or keypad has been locked. For additional information, see section 9.7.2 Locks 6.7 Push-to-Talk Group Call2 Push-to-talk (PTT) provides instant voice connectivity to a group of persons. Push-to-talk is a one-way (half-duplex) communication. When a person wants to talk, he presses and holds down the button. Letting go of the button gives another person the opportunity to push-to-talk. In order to participate in the conference, the group members must accept an invitation received as a text message, see 6.7.1 Accept a PTT Invitation on page 36. If a member declines an invitation, the member can re-join the group/conference later on, see 6.7.2 Re-join a PTT Group on page 36. A user can also invite a group of members to participate in a conference call by calling a PTT group, see 6.7.3 Call a PTT Group on page 36. NOTE: PTT group(s) must be defined in the Device Manager, and Messaging Group(s) in the Configuration tool (WSG), to be able to use this function. Refer to the Configuration Manual, WL3 WLAN Handset and WL3 Plus WLAN HandsetTD 92930EN and Installation and Operation Manual, OpenStage Wireless Service Gateway 1. Applicable to WL3 and WL3 Messaging only. 2. Applicable to WL3 and WL3 Messaging only. 20 December 2013 / Ver. B 35 User Manual WL3 and WL3 Plus WLAN Handset 6. Calling TD 92929EN (WSG)TD 92442EN. TIP: Set the automatic key lock to “On”, if it is desired to have key lock during an ongoing call, see Activate the Automatic Key Lock on page 56. 6.7.1 Accept a PTT Invitation A PTT invitation is viewed the same way as an ordinary message. The message can contain up to 255 characters. Figure 5. Incoming PTT invitation 12:34 Fire alert in building A... Accept 1 Reject Press “Accept”. The handset can accept the invitation automatically, start in mute mode, and start in loudspeaking mode, depending on the configuration of the received invitation. When the invitation is accepted, you can delete or close the invitation by clicking the soft key “Delete” or “Close”, respectively. The call is not disconnected when clicking these soft keys. The soft key “Re-join” is used for re-joining a group only. 2 to open the microphone for transmitting. The microphone is Press and hold is released. muted again when Decline a PTT Invitation Press “Reject” to decline the invitation. The handset returns to the previously shown screen. See also 6.7.2 Re-join a PTT Group on page 36 for more information. 6.7.2 Re-join a PTT Group If you received a PTT invitation but rejected it, you can dial the PTT group by selecting the message in the Message inbox, and then press the soft key “Call”. See figure 5 on page 36 6.7.3 Call a PTT Group To call a PTT group, you must first connect a service or a short cut to a PTT group, see 9.5 Services on page 52 and 9.6 Short Cuts on page 53. Then you call the PTT group by selecting that service or short cut. 20 December 2013 / Ver. B 36 User Manual WL3 and WL3 Plus WLAN Handset 7. 7. Alarm Operation TD 92929EN Alarm Operation NOTE: The following system dependent features are applicable to Siemens WL3 Plus WLAN Handset only, see the Configuration Manual, WL3 WLAN Handset and WL3 Plus WLAN HandsetTD 92930EN. IMPORTANT: If a shared phone is used, it must be logged in to the system to be able to send alarm. See 4.3 Log a Shared Phone On/Off on page 19. 7.1 Push-button Alarm Press the red alarm button twice within two seconds to activate the alarm. An information text is displayed, default “Personal alarm” is displayed. The alarm is sent to the alarm central that distributes it further. After that the handset returns to stand-by mode. Note that you can always trigger the alarm when you are speaking, editing your settings, or while the handset is locked. 7.2 Acoustic Location Signal An alarm can be followed by an Acoustic Location Signal (ALS). The ALS is a signal from the handset that sounds for a predefined period of time. Press to turn the ALS off. 7.3 Test Alarm Press and hold the red alarm until the information text is displayed, default “Test alarm” is displayed. 7.4 Man-down and No-movement Alarm NOTE: Applicable to WL3 Plus only. The Man-down alarm reacts if the handset is tilted (default 45°) from the vertical for a predefined period of time (default 7 seconds). The No-movement alarm will react if no movement is detected during a predefined period of time (default 30 seconds). The handset alerts by beep, vibrator, and LED signals, depending on the settings, during a predefined period of time (default 7 seconds). At the same time, the handset displays the message “Man-down warning. Cancel?“ or “No-movement warning. Cancel?“. The handset then sends the alarm, unless the alarm is cancelled. The handset confirms that the alarm has been sent by beep, vibrator, and LED signals. In addition, the handset displays the message “Man-down warning sent“ or “No-movement warning sent“. The handset location is sent along with the alarm, see 7.6 Alarm with Additional Information on page 38. If configured in the Device Manager, an Acoustic Location Signal (ALS) is activated after the alarm has been sent, see 7.5 Automatic Call after Alarm on page 38. The handset can be programmed to automatically call a predefined telephone number after the alarm has been sent, see 7.5 Automatic Call after Alarm on page 38. The Man-down and No-movement alarm functions are inactive under the following conditions: • While the handset is placed in a charger. 20 December 2013 / Ver. B 37 User Manual WL3 and WL3 Plus WLAN Handset • • 7. Alarm Operation TD 92929EN During calls (depending on settings), to avoid false alarms if the user tilts the handset, or is motionless during a call. For a predefined period of time (default 10 minutes) if the Mute button is pressed during the alert signal. Activate/Deactivate the Man-down and/or No-movement Alarm Enter “Settings” , and step to “Alarm”. Then select the wanted alarm(s) and press Back repeatedly. The corresponding icon(s) appear on the display. Follow the same steps to deactivate the alarm(s). Cancel Man-down and No-movement Alarm Press the soft key “OK“ to confirm “Man-down warning. Cancel?“ or “No-movement warning. Cancel?“, which appears in the display during the alert signal or press any key. Delay Man-down and No-movement Alarm Temporarily Press the Mute button during the alert signal and then press “Yes“ to confirm the message “Delay MD/NM detection?“. The corresponding display icon flashes until the alarm is active again (default 10 minutes). Reset Alarm To reset the alarm function after an alarm has been sent: • • • 7.5 Move the handset to an upright position (after Man-down). Move the handset (after No-movement). if the ALS is sounds. Press the Mute button Automatic Call after Alarm A handset can be set up to call a predefined number after an alarm has been sent, for example to “112” which is the common emergency call number inside the European Union. Depending on the settings, the call can be established in the following modes; • Loudspeaking mode, or • Monitor mode, or • Normal mode Refer to the Configuration Manual, WL3 WLAN Handset and WL3 Plus WLAN HandsetTD 92930EN for more information. 7.6 Alarm with Additional Information Information about the approximate location of the handset is automatically sent along with an alarm, see Associated Access Point (AP) Location on page 39. It is also possible to add the location manually, see Alarm with Data on page 39. 20 December 2013 / Ver. B 38 User Manual WL3 and WL3 Plus WLAN Handset 7. Alarm Operation TD 92929EN Associated Access Point (AP) Location This function is used together with an alarm. The AP communicates to the handset where the handset is located for the time being. This gives a fair indication of the location. An approximate location of the handset is added to alarms sent from the handset. The handset sends the current and previous AP location to indicate where the alarm was activated. Alarm with Data The data can be defined and stored manually by the user. To use the function, one Soft/Hot key/Navigation key in the handset must be defined as a shortcut to the menu “Edit alarm data”, see 9.6 Short Cuts on page 53. The stored data is added to all types of alarms at transmission. 20 December 2013 / Ver. B 39 User Manual WL3 and WL3 Plus WLAN Handset 8. 8. Location TD 92929EN Location The handset (8128-HE) is compatible with both Cisco Mobility Services Engine (MSE) and Ekahau Real Time Location System (RTLS), which give a more accurate location than AP Location. Cisco MSE Location APs measure the client signal strength for received data packets and forward those measurements to the Cisco Mobility Services Engine (MSE). Your system administrator must configure the handset for Cisco RTLS, refer to the Configuration Manual, WL3 WLAN Handset and WL3 Plus WLAN HandsetTD 92930EN, for more information. Ekahau RTLS The handset collects information about the APs and their measured radio field strength and forwards this information to the Ekahau Positioning Engine, which calculates the location of the handset. Your system administrator must configure the handset for Ekahau RTLS, refer to the Configuration Manual, WL3 WLAN Handset and WL3 Plus WLAN HandsetTD 92930EN, for more information. NOTE: This function requires a license. 20 December 2013 / Ver. B 40 User Manual WL3 and WL3 Plus WLAN Handset 9. 9. Menu Operation TD 92929EN Menu Operation Figure 6. The Main menu. Messaging 13:00 Calls Connections Short cuts Services Settings Profiles Contacts Select 9.1 Back Calls 9.1.1 Call List The 25 last received, dialed, missed, or declined calls are stored in a call list. If a number appears more than once, the last time stamp, together with the total number of occurrences, is shown. NOTE: If supported by the system, the number’s contact name can be displayed in the call list. Dial a Number from the Call List 1 Enter the menu by pressing the “Menu” soft key. 2 Select “Calls” 3 Press “Select”. 4 Select “Call list”. 5 Step with Up and Down to select number in the list. 6 Press “Call” or NOTE: A short press on in the menu. to dial. replaces steps 1–4. View the Time of a Call 1 Enter the menu by pressing the “Menu” soft key. 2 Select “Calls” 3 Press “Select”. 4 Select “Call list”. 5 Step with Up and Down to select number in the list. 6 Press “More”. 7 Select “Time of call”. The time and date is displayed. in the menu. Edit a Number from the Call List 1 Enter the menu by pressing the “Menu” soft key. 2 Select “Calls” 3 Press “Select”. 20 December 2013 / Ver. B in the menu. 41 User Manual WL3 and WL3 Plus WLAN Handset 9. Menu Operation 4 Select “Call list”. 5 Step with Up and Down to select number in the list. 6 Press “More”. 7 Select “Edit number”. TD 92929EN Save Number 1 Enter the menu by pressing the “Menu” soft key. 2 Select “Calls” 3 Press “Select”. 4 Select “Call list”. 5 Step with Up and Down to select number in the list. 6 Press “More”. 7 Select “Save number”. 8 Select “Work number”, “Mobile number”, or “Other number”. 9 Add name and press “OK”. 10 If desired, a specific ring signal can be chosen for this contact. in the menu. Send Message1 1 Enter the menu by pressing the “Menu” soft key. 2 Select “Calls” 3 Press “Select”. 4 Select “Call list”. 5 Step with Up and Down to select number in the list. 6 Press “More”. 7 Select “Send message”. in the menu. Delete Entry from the Call List 1 Enter the menu by pressing the “Menu” soft key. 2 Select “Calls” 3 Press “Select”. 4 Select “Call list”. 5 Step with Up and Down to select number in the list. 6 Press “More”. 7 Select entry to delete. 8 Select “Delete”. 9 Select “Yes” to delete the entry from the list. in the menu. Delete all Entries from the Call List 1 Enter the menu by pressing the “Menu” soft key. 2 Select “Calls” 3 Press “Select”. 4 Select “Call list”. in the menu. 1. This function is system dependent. 20 December 2013 / Ver. B 42 User Manual WL3 and WL3 Plus WLAN Handset 9. Menu Operation 5 Press “More”. 6 Select “Delete all”. 7 Select “Yes” to delete ALL entries from the Call list. 9.1.2 TD 92929EN Missed Calls NOTE: Also declined calls are counted as missed calls. 1 Enter the menu by pressing the “Menu” soft key. 2 Select “Calls” 3 Press “Select”. 4 Select “Missed calls”. 5 Step with Up and Down to select number in the list. 6 Press “Call”, or in the menu. to call back. As in the Call list, there is a Soft Key “More” which can be used to view the time/date of the call, edit the received number, add to contacts, delete received numbers. See 9.1.1 Call List on page 41 for information about the functionality in Soft Key “More”. NOTE: If supported by the system, the number’s contact name can be displayed in the list. 9.1.3 Call Diversion NOTE: This function is system-dependent. The parameters are set up in the Device Manager, refer to the Configuration Manual, WL3 WLAN Handset and WL3 Plus WLAN HandsetTD 92930EN. Divert All Calls 1 Enter the menu by pressing the “Menu” soft key. 2 Select “Calls” 3 Select “Call services”. 4 Select “Divert calls” > “Internal” or “External”. 5 Select “All calls” > “Edit”. 6 Enter number (maximum 24 digits) to divert to. 7 Select “OK” or “Back” > “Yes”. The check box is marked. 8 Press “Back” until the screen turns to idle mode. in the menu. The handset sends a diversion reason code to the system when establishing a call. The call is automatically disconnected after a few seconds. 9 To stop the diversion select “All calls” and unmark the check box. Press the Soft Key “Back” until the screen turns to idle mode. Divert Calls if No Reply 1 Enter the menu by pressing the “Menu” soft key. 2 Select “Calls” 3 Select “Call services”. 4 Select “Divert calls” > “Internal or External”. 5 Select “No reply” > “Edit”. 6 Enter number (maximum 24 digits) to divert to. 20 December 2013 / Ver. B in the menu. 43 User Manual WL3 and WL3 Plus WLAN Handset 9. Menu Operation 7 Select “OK” or “Back” > “Yes”. The check box is marked. 8 Press “Back” until the screen turns to idle mode. TD 92929EN The handset sends a diversion reason code to the system by establishing a call. The call is automatically disconnected after a few seconds. 9 To stop the diversion, select “All calls” and unmark the check box. Press the Soft Key “Back” until the screen turns to idle mode. Divert Calls When Busy 1 Enter the menu by pressing the “Menu” soft key. 2 Select “Calls” 3 Select “Call services”. 4 Select “Divert calls” > Internal or External. 5 Press “When busy” > “Edit”. 6 Enter number (maximum 24 digits) to divert to. 7 Select “OK” or “Back” > “Yes”. The check box is marked. 8 Press “Back” until the screen turns to idle mode. in the menu. The handset sends a diversion reason code to the system by establishing a call. The call is automatically disconnected after a few seconds. 9 9.1.4 To stop the diversion, select “All calls” and unmark the check box. Press the Soft Key “Back” until the screen turns to idle mode. Call Services Do Not Disturb 1 Enter the menu by pressing the “Menu” soft key. 2 Select “Calls” 3 Press “Select”. 4 Select “Call services”. 5 Press “Select”. 6 Select “Do not disturb”. 7 Press “Select”. 8 Select “On”. 9 Press “Back” repeatedly until the idle screen appears. in the menu. The text “Do not disturb” remains on the idle screen as long as the function is active. Calls are rejected and indicated as missed calls. The calling party gets the message “Temporarily unavailable”. To deactivate the function, follow the same steps and select “Off”. 9.2 Contacts The handset has a local phonebook with 250 entries, where names and numbers freely can be added, deleted, and edited by the user. The phonebook lists all names in alphabetical order (language dependent), where three numbers can be added for each contact; work number, mobile number, and other number. In addition, a company phonebook with up to 1000 entries can be downloaded to the handset via the WinPDM/Device Manager. The company phonebook names and numbers 20 December 2013 / Ver. B 44 User Manual WL3 and WL3 Plus WLAN Handset 9. Menu Operation TD 92929EN can not be edited or deleted by the user. The phonebook lists all names in alphabetical order. The local and company phonebook appears in the same list, but the company contacts are indicated by a “Locked entry” icon , which means that they cannot be edited. The contacts only include the work number. The local phonebook and central phonebook together have up to 1250 entries. See 6.2.6 Dial a Number from the Company Phonebook on page 31 It is also possible to access a central phonebook1, see 6.2.7 Dial a Name from the Central Phonebook on page 32, or 9.2.5 Central Phonebook on page 46. 9.2.1 Call Contact 1 Enter the menu by pressing “Menu”. 2 Select “Contacts” 3 Select “Call contact”. 4 Select contact from the list, or enter name or number in the search field. 5 Press “Call”. in the menu. It is also possible to edit the contact and to send a message by selecting “View” > “More”. NOTE: It is not possible to edit a contact indicated by a “Locked entry” icon in front of the name. 9.2.2 Add Contact Add New Contact 1 Enter the menu by pressing “Menu”. 2 Select “Contacts” 3 Select “Add contact”. 4 Select “New”. 5 Select “Add”. 6 Enter a name, see 3.1.1 Alphanumeric Keys on page 12. 7 Press “OK”. 8 Select “Work Number”, “Mobile number”, or “Other number”. 9 Press “Add”. 10 Enter number. It is possible to add a pause “P” in phone numbers by pressing the Space key 5 times. 11 Press “OK”. 12 If desired, a specific ring signal can be chosen for this contact by selecting “Ring signal”. in the menu. Add from Call List 1 Press “Menu”. 2 Select “Contacts” 3 Select “Add contact”. 4 Select “From call list”. 5 Select number in the list. in the menu. 1. This function is system dependent. 20 December 2013 / Ver. B 45 User Manual WL3 and WL3 Plus WLAN Handset 9. Menu Operation 6 Press “Add”. 7 Select “Work Number”, “Mobile number”, or “Other number”. 8 Press “Add”. 9 Enter name, see 3.1.1 Alphanumeric Keys on page 12. 10 Press “OK”. 11 Press “Save”. TD 92929EN It is also possible to save a contact by opening the call list: 1 Press “Menu” and select “Calls” 2 Select “More”. 3 Select “Save number”. 4 Perform step 7) to 11) above. 9.2.3 and “Call list” or just press the Call key . Edit Contact NOTE: It is not possible to edit a Company Phonebook contact. The contacts are indicated by a “Locked entry” icon in front of the name. 1 Press “Menu”. 2 Select “Contacts” 3 Select “Edit contact”. 4 Select contact. 5 Press “Edit”. 6 Select “Name”, “Work number”, “Mobile number”, “Other number”, or “Ring signal”. 7 Press “Edit”. 8 Enter new name/number, and/or select new ring signal. 9 Press “OK”. 10 Press “Save”. 9.2.4 in the menu. Delete Contact NOTE: It is not possible to delete a company phonebook contact. The contacts are indicated by a “Locked entry” icon in front of the name. 1 Press “Menu”. 2 Select “Contacts” 3 Select “Delete contact”. 4 Select contact. 5 Press “Delete”. 6 Press “Yes” to confirm. 9.2.5 in the menu. Central Phonebook1 In the central phonebook, it is possible to search by name or number. One or more search results can be displayed. 1. This function is system dependent. 20 December 2013 / Ver. B 46 User Manual WL3 and WL3 Plus WLAN Handset 9. Menu Operation TD 92929EN When the search result is displayed, it is possible to view contact information, add the number to new contact, and to send a message by pressing “More”. You can also call the number by pressing “Call”. When the search result is displayed, it is possible to view contact information and add the number to new contact by pressing “More”. You can also call the number by pressing “Call”. Search by Name 1 Press “Menu”. 2 Select “Contacts” 3 Select “Central phonebook”. 4 Select “Search by name”. 5 Enter First name and/or Last name. 6 Press “Search”. The search result will be displayed. in the menu. Search by Number 1 Press “Menu”. 2 Select “Contacts” 3 Select “Central phonebook”. 4 Select “Search by number”. 5 Enter number. 6 Press “Search”. The search result is displayed. in the menu. View Last Search Result 9.3 1 Press “Menu”. 2 Select “Contacts” 3 Select “Central phonebook”. 4 Select “Last result”. Only the last result will be displayed. in the menu. Profiles An own profile can be set up, for incoming calls and their ring signals and volume, message alerts, vibrating alerts, key sound, answer behavior, diversion etc. This can be useful when there are many users on the same handset, and they want different sound profiles. It can also be used for temporary settings. For example, while in a meeting, all incoming calls should be silent. It is easy to switch between the different profiles. If no profile is selected, the “Normal” profile setting is used. The Profile menu also contains the complete list of added Soft keys to choose from. (The active Soft key is also shown in the “Short cut” menu). Add New Profile 1 Press “Menu”. 2 Select “Profiles” 3 Select “Add new”. 4 Enter name of the profile. 5 Press “Save”. 20 December 2013 / Ver. B in the menu. 47 User Manual WL3 and WL3 Plus WLAN Handset 6 9. Menu Operation TD 92929EN Select profile from list and change profile as wanted. Activate Profile 1 Press “Menu”. 2 Select “Profiles” 3 Select profile from the list. in the menu. When a profile is activated, the icon idle mode. and the name of the profile is displayed in Delete Profile 1 Enter “Menu”. 2 Select “Profiles” 3 Select profile from the list. 4 Press “More”. 5 Select “Delete” from menu. 6 Press “Select”. 7 Press “Yes” to confirm. in the menu. Edit Profile 9.4 1 Enter “Menu”. 2 Select “Profiles” 3 Select profile from the list. 4 Press “More” and then select “Edit”. 5 The following options can be performed: - Edit the required setting by marking it, and then press “Edit”. - Add additional settings by pressing “More” and then select “Add setting” or “Import from”. - Remove a setting by marking it and then select “More” > “Remove setting”. 6 If needed, mark the added settings, and press “Edit” to make the changes. in the menu. Messaging The following features are applicable to WL3 Messaging and WL3 PlusConfiguration Manual, WL3 WLAN Handset and WL3 Plus WLAN HandsetTD 92930EN. When a text message is received, the LED starts flashing and the message alert signal sounds. The “New message” icon , and the content of the received message are automatically displayed. The icon is displayed until all new messages are opened. If the message is received during a call, a beep notifies the user. The handset user can reply, forward the message, call the sender, and call number1 included in a text. It is also possible to read the message later by pressing “Close”. A received message is stored in the Inbox. See Read a Stored Message on page 49. The last thirty messages received are stored in the inbox. Time and date information is included in the message. 1. The number must consist of minimum 3 digits. 20 December 2013 / Ver. B 48 User Manual WL3 and WL3 Plus WLAN Handset 9. Menu Operation TD 92929EN If the handset receives a message while the handset is locked (phone lock), a New message(s) dialog window is shown in the display. It shows the total number of received messages and asks if the user wants to view them. The message(s) can be read after entering the PIN code. 9.4.1 Inbox Read a Stored Message 1 Press “Menu”. 2 Select “Messaging” 3 Select “Inbox” to view the message list. 4 Select a message by using Up and Down on the Navigation key. 5 Press “View”. in the menu. Reply to Sender 1 Press “Menu”. 2 Select “Messaging” 3 Select “Inbox” to view the message list. 4 Select a message by using Up and Down on the Navigation key. 5 Press “View”. 6 Press “Reply”. 7 Enter text. See 3.1.1 Alphanumeric Keys on page 12. 8 Press “Send”. in the menu. Delete Message 1 Press “Menu”. 2 Select “Messaging” 3 Select “Inbox” to view the message list. 4 Select a message by using Up and Down on the Navigation key. 5 Press “More”. 6 Select “Delete”. 7 Press “Yes” to delete the message. in the menu. Forward Message 1 Press “Menu”. 2 Select “Messaging” 3 Select “Inbox” to view the message list. 4 Select a message by using Up and Down on the Navigation key. 5 Press “More”. 6 Select “Forward”. 7 Enter additional text if needed. See 3.1.1 Alphanumeric Keys on page 12. 8 Press “Send”. 9 Enter number, or press company phonebook. 20 December 2013 / Ver. B in the menu. to access contacts in the local phonebook and the 49 User Manual WL3 and WL3 Plus WLAN Handset 10 9. Menu Operation TD 92929EN Press “Send” to forward the message. Call Sender 1 Press “Menu”. 2 Select “Messaging” 3 Select “Inbox” to view the message list. 4 Select a message by using Up and Down on the Navigation key. 5 Press “View”. 6 Press “More”. 7 Select “Call Sender”. in the menu. Call Number in Text 1 Press “Menu”. 2 Select “Messaging” 3 Select “Inbox” to view the message list. 4 Select a message by using Up and Down on the Navigation key. 5 Press “View”. 6 Press “More”. 7 Select “Call no. in text”1. 8 Select number from the list. 9 Press “Call” in the menu. Save Number 1 Press “Menu”. 2 Select “Messaging” 3 Select “Inbox” to view the message list. 4 Select a message by using Up and Down on the Navigation key. 5 Press “View”. 6 Press “More”. 7 Select “Save number”. 8 Select “Work Number”/“Mobile number”/“Other number”. 9 Press “Add”. 10 Enter name. See 3.1.1 Alphanumeric Keys on page 12. 11 Press “OK”. 12 Press “Save”. The number is stored in the contact list. 9.4.2 in the menu. Write New Messages 1 Press “Menu”. 2 Select “Messaging” 3 Select “Write new message”. 4 Enter text. See 3.1.1 Alphanumeric Keys on page 12. to view the message list. 1. Visible if the number consists of minimum 3 digits. 20 December 2013 / Ver. B 50 User Manual WL3 and WL3 Plus WLAN Handset 5 9. Menu Operation TD 92929EN Press “Send”. A message can be saved and sent later by pressing the Soft Key “Back” and select “Yes”. The message is stored under Unsent messages. See 9.4.3 Unsent Messages. 6 Enter number, or press middle Soft Key to get the number from contact list. 7 Press “Send”. 9.4.3 Unsent Messages 1 Press “Menu”. 2 Select “Messaging” 3 Select “Unsent” to view the list. 4 Select message to edit/send. 5 Select “Edit”, edit text and/or just select “Send”. to view the message list. Delete/Delete All 1 Press “Menu”. 2 Select “Messaging” 3 Select “Unsent” 4 Select message in the list. 5 Select “More”. 6 Select “Delete” or “Delete all”. 7 Select “Yes” if the unsent message(s) should be deleted. to view the message list. 9.4.4 Sent Messages 1 Press “Menu”. 2 Select “Messaging” 3 Select “Sent” to view the list. 4 Select message in the list. 5 Press “View”. to view the message list. Forward message 1 Press “Menu”. 2 Select “Messaging” 3 Select “Sent” to view the list. 4 Select message in the list. 5 Press “View”. 6 Enter additional text, if needed. 7 Enter number. 8 Select “Send”. to view the message list. Delete Message 1 Press “Menu”. 2 Select “Messaging” 3 Select “Sent” to view the list. 20 December 2013 / Ver. B to view the message list. 51 User Manual WL3 and WL3 Plus WLAN Handset 9. Menu Operation 4 Select message in the list 5 Press “View”. 6 Select “Delete”. 7 Select “Yes” to delete the message. TD 92929EN Delete/Delete All 9.5 1 Press “Menu”. 2 Select “Messaging” 3 Select “Sent” to view the list. 4 Select “More”. 5 Select “Delete” or “Delete all”. 6 Select “Yes” if the unsent message is to be deleted. to view the message list. Services The following features are applicable to WL3 Plus only, refer to the Configuration Manual, WL3 WLAN Handset and WL3 Plus WLAN HandsetTD 92930EN. With this menu you can customize your own menu with services/functions that are used often. After adding a name for a new service, a list of predefined services/functions is available: Phone call, Send data, Send message, PTT, and Edit alarm data. 9.5.1 Add Services 1 Press “Menu”. 2 Select “Services” 3 Select “Add new”. 4 Enter a name for the menu alternative. 5 Press “OK”. 6 Select a service/function. 7 Enter required data for the service/function. 8 Press “Save”. in the menu. 9.5.2 Delete Services 1 Press “Menu”. 2 Select “Services” 3 Mark a service/function usingUp and Down on the Navigation key. 4 Press “More”. 5 Select “Delete”. 6 Press “Yes”. 20 December 2013 / Ver. B in the menu. 52 User Manual WL3 and WL3 Plus WLAN Handset 9.6 9. Menu Operation TD 92929EN Short Cuts Predefined functions can be set as short cuts for the Soft Keys, Hot keys, Navigation keys, and the Multifunction1 button. For example, a Soft Key can be defined to make a call, or as a short cut to send a message. NOTE: The active Soft key is shown in the “Short cut” menu. The complete list of added Soft keys to choose from is in the “Profiles” menu. 9.6.1 Define Soft Keys 1 Press “Menu”. 2 Select “Short cuts” 3 Select “Soft Keys”. 4 Select “Middle” or “Right”. 5 Press “Select”. 6 Enter a name for the Soft Key. See 3.1.1 Alphanumeric Keys on page 12. 7 Press “OK”. 8 Select “Function”, and press “Select”. 9 Select function from list, and press “Back”. 10 Select “Value” (only for some of the functions), and press “Select”. Enter a value, for example a number. Press “OK”. 11 Select “Control question”, and press “Select”. It is off by default. Press “Back”. in the menu. If the control question is enabled, a dialog window “Proceed?” is displayed when pressing the defined Soft key. Press “Yes” to proceed. 12 9.6.2 Press “Save”. Define Hot Keys 1 Press “Menu”. 2 Select “Short cuts” 3 Select “Hot keys”. 4 Select “0”, “2” to “9”. 5 Select “Function”, and press “Select”. 6 Select function from list, and press “Back”. 7 Select “Value” (only for some of the functions), and press “Select”. Enter a value, for example a number. Press “OK”. 8 Select “Control question”, and press “Select”. It is off by default. in the menu. If the control question is enabled, a dialog window “Proceed?” is displayed when pressing the defined Hot key. Press “Yes” to proceed. 9 Press “Save” TIP: Select Function: Not used to turn the hot key function off. 9.6.3 Define Navigation Key 1 Press “Menu”. 2 Select “Short cuts” in the menu. 1. Applicable to WL3 and WL3 Messaging only. 20 December 2013 / Ver. B 53 User Manual WL3 and WL3 Plus WLAN Handset 9. Menu Operation TD 92929EN 3 Select “Navigation keys”. 4 Select “Up”, “Down”, “Left”, or “Right”. 5 Select “Function”, and press “Select”. 6 Select function from list, and press “Back”. 7 Select “Value” (only for some of the functions), and press “Select”. Enter a value, for example a number. Press “OK”. 8 Select “Control question”, and press “Select”. It is off by default. If the control question is enabled, a dialog window “Proceed?” is displayed when pressing the defined key. Press “Yes” to proceed. 9 9.6.4 Press “Save”. Define Multifunction Button NOTE: Applicable to WL3 and WL3 Messaging only. The Multifunction button can be defined with two different functions, a long press activates one function, and a double press activates another function. 1 Press “Menu”. 2 Select “Short cuts” 3 Select “Multifunction button”. 4 Select “Long press”, or “Multi press”. 5 Select “Function”. 6 Press “Select” to select function. 7 Select function from list. 8 Press “Select” and then press “Back”. 9 Select “Value” (only for some of the functions), and press “Select”. Enter a value for example a number. Press “Back”. 10 Select “Control question”, and press “Select”. It is off by default. in the menu. If the control question is enabled, a dialog window “Proceed?” is displayed when pressing the defined button. Press “Yes” to proceed. 11 9.7 Press “Save”. Settings 9.7.1 Sound and Alert Settings Adjust the Ringer Volume 1 Press “Menu”. 2 Select “Settings” 3 Select “Sound & Alerts”. 4 Select “Volume”. 5 Use the Navigation key to adjust the volume. Press “OK” to save the setting. in the menu. NOTE: It is also possible to adjust the ringer volume with the volume buttons in idle mode. 20 December 2013 / Ver. B 54 User Manual WL3 and WL3 Plus WLAN Handset 9. Menu Operation TD 92929EN NOTE: If a handset restriction is enabled, it might not be possible to set the ring volume to “Silent”, see the Configuration Manual for the handset. Set different Ring Signals for Internal Call, External Call and Call Back 1 Press “Menu”. 2 Select “Settings” 3 Select “Sound & Alerts”. 4 Select “Ring signals”. 5 Different signals for internal calls, external calls, and call back can be set. Select “Internal call”, “External call”, or “Callback”. The handset has 15 different ring signals. 6 Select sound using “Select”. By pressing “Play”, you can listen to the different sounds. Use “Stop” to stop listening. 7 Press “Back”. in the menu. Set Alert for Messages 1 Press “Menu”. 2 Select “Settings” 3 Select “Sound & Alerts”. 4 Select “Message alert”. 5 Select between 10 different message alerts from list. By pressing “Play”, you can listen to the different alerts. in the menu. NOTE: The “Play” soft key is not available for Enhanced beeps. Instead, send a message to the handset to listen to the sound. 6 Press “Back”. TIP: By default, the message volume follows the ring volume setting, but you can set a different message volume in the handset, see the Configuration Manual, WL3 WLAN Handset and WL3 Plus WLAN Handset, TD 92930EN. Turn the Vibrator on/off 1 Press “Menu”. 2 Select “Settings” 3 Select “Sound & Alerts”. 4 Select “Vibrating alert”. 5 Select “On”, “On if silent” (that is, the vibrator is on when the handset is muted), or “Off” 6 Press “Back”. in the menu. Set the Key Sound This means that every time a key is used, the handset produces a small sound. 1 Press “Menu”. 2 Select “Settings” 3 Select “Sound & Alerts”. 4 Select “Key sound”. 20 December 2013 / Ver. B in the menu. 55 User Manual WL3 and WL3 Plus WLAN Handset 5 9. Menu Operation TD 92929EN Select “Silent, “Click”, or “Tone”. You can listen to the key sound by pressing “Play”. 6 Press “Back”. Set the Battery Warning Tone If desired, a low battery can be indicated by a tone, a repeated sound, or set to be silent. 1 Press “Menu”. 2 Select “Settings” 3 Select “Sound & Alerts”. 4 Select “Battery warning”. The default battery warning is “Repeated sound”. 5 Select “Repeated sound, “Sound once”, or “Sound off”. 6 Press “Back”. in the menu. Configure Handset for Hearing Aid The handset can be configured for use with hearing aid. 1 Press “Menu”. 2 Select “Settings” 3 Select “Sound & Alerts”. 4 Select “Hearing aid”. 5 Select “On“ or “Off”. 6 Press “Back” repeatedly until the idle screen appears. 9.7.2 in the menu. Locks Activate the Automatic Key Lock NOTE: You can answer/end an incoming call, read messages, and/or press the alarm button while the keypad is locked. Any one of five predefined emergency numbers can also be called while the keypad is locked, if configured in the WinPDM/Device Manager. Refer to the Configuration Manual, WL3 WLAN Handset and WL3 Plus WLAN HandsetTD 92930EN. 1 Press “Menu”. 2 Select “Settings” 3 Select “Locks”. 4 Select “Automatic key lock”. 5 Select “On” for activation of automatic key lock, also during an ongoing call. in the menu. TIP: You can change the time for activation of this lock (default 20 seconds). It is also possible to select wether the handset should not automatically be unlocked at incoming calls and messages (default), to avoid unintentional key presses, see Automatic lock time on page 58 and Deactivate automatic key unlock on page 58. Deactivate the Automatic Key Lock 1 Press “Menu”. 2 Select “Settings” 3 Select “Locks”. 20 December 2013 / Ver. B in the menu. 56 User Manual WL3 and WL3 Plus WLAN Handset 9. Menu Operation 4 Select “Automatic key lock”. 5 Select “Off” for deactivation of automatic key lock. TD 92929EN Activate the Phone Lock The handset can be protected for unauthorized use. If this function is activated, a PIN code has to be entered at power on, or when the handset is placed in a charger. This behavior is activated when the handset is placed in the charger. The default phone lock code (0000) can be changed to any 4–8 digit personalized code. You can change the time for activation of this lock (default 20 seconds), see Automatic lock time on page 58. NOTE: Any one of up to five emergency numbers can be called while the handset is locked, if configured in the WinPDM/Device Manager. See the Configuration Manual for the handset. 1 Press “Menu”. 2 Select “Settings” 3 Select “Locks”. 4 Select “Phone lock”. 5 Select “Auto phone lock”. 6 Select “On”, or “On in charger”. 7 Enter PIN code 8 Press “OK”. in the menu. If a user forgets the PIN code, it can be reset by the distributor. Deactivate the Phone Lock 1 Press “Menu”. 2 Select “Settings” 3 Select “Locks”. 4 Select “Auto phone lock”. 5 Select “Off”. 6 Enter PIN code 7 Press “OK”. in the menu. If a user forgets the PIN code, it can be reset by the distributor. Change PIN Code 1 Press “Menu”. 2 Select “Settings” 3 Select “Locks”. 4 Select “Phone lock”. 5 Select “Change PIN code”. 6 Enter the old PIN code. 7 Press “OK”. 8 Enter the new PIN code. 9 Change field by using Down on the Navigation key and enter the new PIN code again. 20 December 2013 / Ver. B in the menu. 57 User Manual WL3 and WL3 Plus WLAN Handset 10 9. Menu Operation TD 92929EN Press “Save”. Automatic lock time You can change the lock time for the phone lock or key lock to suit personal choice, for example, to shorten it from 20 seconds (default) to 5 seconds, for example, to avoid accidental redialling when the handset is in a pocket. It can also be good to extend it 1 Press “Menu”. 2 Select “Settings” 3 Select “Locks”. 4 Select “Auto lock time”. 5 Select desired lock time of 5, 10, 20 30 seconds or 1 or 3 minutes 6 Press “Back”. in the menu. Deactivate automatic key unlock You can turn off the automatic key unlock at incoming calls and messages, to avoid unintentional key presses. 1 Press “Menu”. 2 Select “Settings” 3 Select “Locks”. 4 Select “Auto key unlock”. 5 Select “Off”. 6 Press “Back”. 9.7.3 in the menu. Display Settings Brightness 1 Press “Menu”. 2 Select “Settings” 3 Select “Display”. 4 Select “Brightness”. 5 Select “Normal” or “Power save”. 6 Press “Back”. in the menu. Screen Saver 1 Press “Menu”. 2 Select “Settings” 3 Select “Display”. 4 Select “Screen saver”. 5 Select “Information”, “Black”, or “Black also in call”. Time, Owner ID and status information is displayed when “Information” is selected, and the display turns off when the handset is not used. NOTE: It is recommended to only use the screen saver setting “Black also in call”, when extended battery life is needed. Also use screen saver settings other than “Black also in call”, if the handset needs to be set to silent (muted). 20 December 2013 / Ver. B in the menu. 58 User Manual WL3 and WL3 Plus WLAN Handset 9. Menu Operation TD 92929EN TIP: When using the screen saver “Information”, the Owner ID is also shown when the handset is in the charger (even if switched off). This simplifies identification when many handsets are charged together. 6 Press “Back”. Rotate Display Text The handset can be configured to show the contents of the display (except the soft key bar) upside-down at incoming calls or messages. This setting makes it possible to check the display while the handset remains clipped to a belt or pocket. The display reverts to normal when any key is pressed (except up/down on the Navigation key). 1 Press “Menu”. 2 Select “Settings” 3 Select “Display”. 4 Select “Rotate display text”. 5 Select “Normal” or “Inverted”. 6 Press “Back” repeatedly until the idle screen appears. in the menu. Font style The handset may be configured to show menu texts in bold font for increased readability. 1 Press “Menu”. 2 Select “Settings” 3 Select “Display”. 4 Select “Font style”. 5 Select “Normal” or “Bold”. 9.7.4 in the menu. Time & Date Settings Time and date format changes in the handset appear directly, but changes in the system appear after a maximum of 24 hours after a change in the system or by turning the handset off and on again. Set Time Format 1 Press “Menu”. 2 Select “Settings” 3 Select “Time & Date”. 4 Press “Select”. 5 Select Time format. The actual time format is displayed. Selectable time format: 6 • 12:00 (am/pm) • 24:00 in the menu. Press “Select” to save the setting. Set Date Format 1 Press “Menu”. 2 Select “Settings” 20 December 2013 / Ver. B in the menu. 59 User Manual WL3 and WL3 Plus WLAN Handset 9. Menu Operation 3 Select “Time & Date”. 4 Press “Select”. 5 Select “Date format”, press “Select”. Selectable date format: 6 9.7.5 Date format Example DD MMM YY 10 Jan 09 MMM DD YYYY Jan 10 2009 YYYY-MM-DD 2009-01-10 (ISO 8601) MM/DD/YYYY 1/10/2009 (also called US) DD/MM/YYYY 10/01/2009 (also called Europe) DD-MM-YYYY 10-01-2009 DD.MM.YYYY 10.01.2009 TD 92929EN Designation Press “Select” to save the setting. Answering The default setting for the handset is to use the Call key when answering a call. The answering behavior can be configured to answer the call automatically, that is, without pressing a key, or/and in loudspeaking mode. It is also possible to set the answering behavior to any key. If “Any key” is selected, any key except the End key , Sound off key and Mute button can be used to answer a call. Answering Key The answering key is by default set to the Call key. 1 Press “Menu”. 2 Enter “Settings” in the menu. 3 Select “Answering”.’ 4 Select “Answering key”. 5 Select “Call key”, or “Any key”. 6 Press “Back” to save the settings. Answering Behavior 1 Press “Menu”. 2 Enter “Settings” 3 Select “Answering”.’ 4 Select “Answer behavior”. 5 Select “Automatically”, “Loudspeaking”, or “Quick answer”. If Automatically is selected, all incoming calls are connected automatically. If Quick answer is selected, the call is connected by lifting the handset out of the charger. 6 Press “Change” to change the setting. The check box is marked. 7 Press “Back” to save the setting. To remove the setting, press “Change”. The check box is unmarked. 9.7.6 1 in the menu. Change Text size for Messages1 Press “Menu”. 1. Applicable to WL3 Messaging and WL3 Plus only. 20 December 2013 / Ver. B 60 User Manual WL3 and WL3 Plus WLAN Handset 9. Menu Operation 2 Enter “Settings” 3 Select “Messages”. 4 Select “Text size”. The default text size is “Normal”. 5 Select “Normal” or “Large” size. 6 Press “Back”. 9.7.7 TD 92929EN in the menu. Change the Menu Language NOTE: The language menu is easy to find by the *-icon in the “*Language” menu. 1 Press “Menu”. 2 Enter “Settings” 3 Select “*Language”. 4 Select: Czech (Ceština) Danish (Dansk) German (Deutsch) Greek ( ) English (English) Spanish (Español) French (Français) Italian (Italiano) Hungarian (Magyar) Dutch (Nederlands) Norwegian (Norsk) Polish (Polski) Portuguese, Brazilian (Português (Br)) ) Russian ( ) Slovak ( Finnish (Suomi) Swedish (Svenska) Turkish (Türkçe) 5 Press “Back”. 9.7.8 in the menu. Change Owner ID The Owner ID is set to identify the handset. 1 Press “Menu”. 2 Enter “Settings” 3 Select “Owner ID”. 4 Enter name/identity. See 3.1.1 Alphanumeric Keys on page 12. 5 Press “Save”. 9.7.9 in the menu. Alarm Settings TIP: It is recommended to configure a short cut to this menu if it is frequently used, see 9.6 Short Cuts on page 53. Activate Man-down and No-movement Alarms NOTE: Applicable to WL3 Plus only. 20 December 2013 / Ver. B 61 User Manual WL3 and WL3 Plus WLAN Handset 9. Menu Operation TD 92929EN To activate the Man-down and No-movement alarms: 1 From the Settings menu, select Alarm. 2 Select the wanted alarm(s) and press Back repeatedly. The corresponding icon(s) appear on the display. Follow the same steps to deactivate the alarm(s). Edit Alarm Data Information (for example a handset’s location) can be sent along with an alarm. It is recommended to create a shortcut for quick access to the “Edit alarm data“ menu, see 9.6 Short Cuts on page 53. 9.8 1 Enter the menu by pressing “Menu“. 2 Select 3 Select “Alarm“. 4 Select “Edit alarm data“. 5 Enter alarm data. 6 Press “Save“. in the menu. Connections 9.8.1 Headset To achieve optimal audio quality with the different headset types, it is recommended to select the corresponding headset profile. The default setting is microphone on a boom, that is, the audio is optimized for using a headset with microphone on a boom. The headset profile can be changed in the menu as follows: 1 Enter the menu by pressing the “Menu” soft key, or Confirmation on the Navigation key. 2 Select “Connections” 3 Select “Headset” with the soft-key Select or Confirmation on the Navigation key. 4 Select the corresponding headset profile from list, that is, “Mic on boom”, “Mic on cable”, “Hearing protection”, or “Customized headset profile”1 5 Press “Select”, or the confirmation button on the Navigation key. . If the preconfigured headset profiles do not match the headset in use, or the audio performance is bad, an own headset profile can be configured. This is done in the Device Manager, refer to the Configuration Manual, WL3 WLAN Handset and WL3 Plus WLAN HandsetTD 92930EN. If an own profile is configured in the Device Manager, the profile is selectable in the handset menu. 9.8.2 Network 1 Enter the menu by pressing the “Menu” soft key. 2 Select “Connections” 3 Select “Network”. 4 Select network in the list. The handset restarts if the network is changed. in the menu. 1. Available if the headset profile has been configured in the Device Manager. 20 December 2013 / Ver. B 62 User Manual WL3 and WL3 Plus WLAN Handset 9.8.3 9. Menu Operation TD 92929EN In Charger Action You can determine actions to be performed when a handset is placed in the charger. Switch the handset off The handset can be switched off automatically when it is placed in the charger. When it is removed from the charger, it switches on again. When the handset is switched off in the charger, the Owner ID of the handset is shown. This simplifies the identification of the handset when, for example, charging it together with other handsets. 1 Enter the menu by pressing the “Menu” soft key. 2 Select “Connections” 3 Select “In charger”. 4 Select “Switch off”. in the menu. Turn the sound off When the handset is placed in the charger, it will be muted. When the handset is removed from the charger, the sound switches on again. When the handsets sound is off/muted in the charger, the Owner ID of the handset is shown. This simplifies the identification of the handset when, for example, charging it together with other handsets. NOTE: If handset restrictions are enabled, the handset might not be switched off/muted when placed in the charger. 1 Enter the menu by pressing the “Menu” soft key. 2 Select “Connections” 3 Select “In charger”. 4 Select “Sound off”. in the menu. Change profile The handset can change profile automatically when it is placed in the charger (WL3 Plus only). The profile is changed back when the handset is removed from the charger. 1 Enter the menu by pressing the “Menu” soft key. 2 Select “Connections” 3 Select “In charger”. 4 Select “Other actions”. 5 Select “Change profile”. 6 Press “Edit”. 7 Select a profile. in the menu. Deactivate the In charger action 1 Enter the menu by pressing the “Menu” soft key. 2 Select “Connections” 3 Select “In charger”. 4 Select “No action”. 20 December 2013 / Ver. B in the menu. 63 User Manual WL3 and WL3 Plus WLAN Handset 10. Advanced Functions TD 92929EN 10. Advanced Functions 10.1 Device Information In the Device Information menu, you can view information about the handset, which can be useful when contacting the system administrator to get support: • Software version • Hardware version • Licenses • WLAN information • Network information • User ID To enter the Device Information menu, press “Menu”, select “Settings” then select “Device info”. in the menu, and For quick access to the Device Information menu in idle mode, press the keys is #34#) (DI as in Device Information). #DI# (that 10.2 Administration Menu The handset has a hidden “Admin menu” for system administrators. Refer to the Configuration Manual, WL3 WLAN Handset and WL3 Plus WLAN HandsetTD 92930EN. 20 December 2013 / Ver. B 64 User Manual WL3 and WL3 Plus WLAN Handset 11. Advanced Messaging TD 92929EN 11. Advanced Messaging The following features are applicable to WL3 Messaging and WL3 Plus only, refer to the Configuration Manual, WL3 WLAN Handset and WL3 Plus WLAN Handset, TD 92930EN. 11.1 Voice Mail NOTE: This feature is only available, if configured in the system. 11.1.1 Receive a Voice Mail When receiving a voice mail, this is indicated by the icon 10 in the status bar. 11.1.2 One Key Voice Mail Access A long press on digit key “1” in idle mode calls the voice mail. If the extension number is not available, a dialog window “Voice mail number not defined” is displayed. Some systems require that the mailbox extension number is downloaded to the handset, refer to the Configuration Manual, WL3 WLAN Handset and WL3 Plus WLAN Handset, TD 92930EN. 11.2 Receive a Message with Request for Answer In the status bar, a message with request for answer is indicated the same way as an ordinary message, see 9.4 Messaging on page 48. In the message list, the message with request for answer is indicated by the icon . 11.2.1 Accept/Reject the message Press the soft key “Accept” or “Reject”. is shown in the message When an acknowledged message has been replied to, the icon list. The text “Accepted” or “Rejected”, and time and date is also added in the acknowledged message. NOTE: The option “Delete” is not available for a message with request for answer. An unacknowledged message can only be deleted from the message list. 11.3 Message Queuing and Message Priority To notify about new incoming messages, all incoming messages are placed in a message queue. The sorting order for the message queue depends on the system settings. By default, the messages are sorted according to the message priority, and thereafter according to arrival time. The messages in the message queue are automatically displayed for 20 seconds until all messages are displayed. You can extend the time to display a message by pressing any button. You can also close a message to immediately see the next message in the message queue. The messages that you do not close are placed last in the message queue and remain in the message queue until you close them. They are shown as unread in the message list and are not shown as read until you have closed them. 20 December 2013 / Ver. B 65 User Manual WL3 and WL3 Plus WLAN Handset 11. Advanced Messaging TD 92929EN Refer to the Configuration Manual, WL3 WLAN Handset and WL3 Plus WLAN Handset, TD 92930EN for information on how to configure the message queue. 11.4 Colored Messaging You can receive colored messages in the handset. The application that sends the message determines the color. Colored messaging can be useful for categorizing messages. In the figure below, there are two colored messages (a new message, and a read message) in the Message inbox (left in the figure). The messages are indicated by a gradient, color bar behind the envelopes. In addition, a gradient color bar is shown below the envelop when reading a colored message (right in the figure). Figure 7. Example of a colored message. 12:34 12:34 Inbox 2011-05-17 12:00 Patient ready... 2011-05-17 Patient ready for transport. From: X-ray To: B/12/3 Patient ready... 2011-05-17 View More Back Call Help Reject 11.5 Interactive Messaging Interactive Messaging (IM) is a function that extends basic messaging. It makes it possible for a handset user to access information from a client application in the system. An example can be a customized application that can be accessed from the handset. A list of actions can be included in the message sent from the application to the handset. An IM is indicated and viewed the same way as an ordinary message, see 9.4.1 Inbox on page 49. It is saved along with other messages in the message list. NOTE: The indication of an IM can differ from an ordinary message depending on the settings in the IM. The application that sends the IM can determine the alert signal volume and LED indication. When an IM has been read, the IM may display several options. Mark the one required and press “Select”. If the selected option requests input, enter the information needed and press “Ok”. A press on the middle Soft key will change to digit or text input mode depending on if it is digit or text format in the message. A read message is indicated the same way as an ordinary message. NOTE: If a handset receives an IM update when the original message already has been deleted, the handset automatically sends a negative acknowledge (NAK) to the system, if requested. 20 December 2013 / Ver. B 66 User Manual WL3 and WL3 Plus WLAN Handset 11. Advanced Messaging TD 92929EN A very simple interactive message can look like the one in figure 8. The options depends on the configuration in the client application. Figure 8. Example of an interactive message. 12:34 12:34 2011-05-17 12:00 2011-05-17 12:00 Conference this evening! Will you be there? “Fred Smith” <Fred.Smith @company.com More Delete Close Conference this evening! Will you be there? “Fred Smith” <Fred.Smith @company.com Yes No Select Help Close Mobile data from the handset can initiate the application to send the interactive message, see 11.6 Mobile Data on page 67. The user can then select one action from the list. The action can be sending a message back to the application and/or dialing a specific number etc. 11.6 Mobile Data 11.6.1 Send Mobile Data You can send data entered by a user from the handset by selecting a service. Mobile data can be used to open a door, or to start or stop a machine. The data can either be predefined, or entered after the service is selected. The data can be predefined when programming the service, see 9.5.1 Add Services on page 52. 11.6.2 Send Mobile Data with a Prefix Mobile data with a prefix is sent from the handset by entering data and then selecting a service. Mobile data with prefix can be used to send information to an application in the system. The prefix is predefined by the user when programming the service, see 9.5.1 Add Services on page 52. 20 December 2013 / Ver. B 67 User Manual WL3 and WL3 Plus WLAN Handset 12. Operation Notice TD 92929EN 12. Operation Notice 12.1 Accessibility and Voice Quality The WLAN network is not always available. If you do not get in contact with your system, contact your system administrator. For best voice quality, avoid positioning near computer, radio or similar equipment. Operating Area You can only use the handset in the area that is covered by your system. Outside this area you lose contact with the system. The signal strength icon is low and the text “No network” appears in the display. Out of Range When you leave the system's coverage area, a short beep sounds and the text “No network” appears in the display. The out of range beep is repeated every minute for 30 minutes. You can turn the sound off by using a long press on , or . The Volume button (down) can also be used. When re-entering the coverage area, it can take a couple of minutes before the handset automatically has registered in the system. 20 December 2013 / Ver. B 68 User Manual WL3 and WL3 Plus WLAN Handset 13. System Handling TD 92929EN 13. System Handling 13.1 Software Upgrade Software and parameters in the handset can be upgraded using the following tools: • The DP1 Desktop Programmer connected to the WinPDM, see Installation and Operation Manual, Portable Device Manager, Windows version, TD 92712EN. • The Device Manager in WSG, see Installation and Operation Manual, OpenStage Wireless Service Gateway (WSG), TD 92442EN. • A TFTP server over the air, see Installation and Operation Manual, OpenStage Wireless Service Gateway (WSG), TD 92442EN. See the Configuration Manual, WL3 WLAN Handset and WL3 Plus WLAN HandsetTD 92930EN. To view the handset’s software version, enter *#34# in idle mode. See also 10.1 Device Information on page 64. 20 December 2013 / Ver. B 69 User Manual WL3 and WL3 Plus WLAN Handset 14. Maintenance TD 92929EN 14. Maintenance 14.1 Maintenance of Batteries 14.1.1 Battery Warnings The “Low battery” icon is displayed when the battery has 10% or lower of its capacity left. In addition; a warning signal sounds every minute, the LED flashes orange, and the dialog window “Battery low! Charge now!” appears. The “Empty battery” icon flashes when the battery has 5% or lower of its capacity left. In addition; a warning signal sounds every second, the LED flashes red, and the dialog window “Battery empty! Shutting down!” appears. The “Half battery” icon is displayed when the battery has 50% of its capacity left. The “Full battery” icon is displayed when the battery is fully charged and has 100% of its capacity. During a call, only the corresponding battery warning signal notifies the user. The battery warning signal cannot be silenced during a call. When not in call, the battery warning signal can be silenced by pressing or . 14.1.2 Charge the Battery Place the handset in the desktop charger or in the rack charger. The battery charges when the LED on the handset is steady orange. When the battery is fully charged, the LED turns green. An animated battery icon is also shown in the display indicating charging by starting with its current charge and ending with the full charge. A filled battery icon indicates a fully charged battery. NOTE: Only use the prescribed chargers for charging. 14.1.3 Charge Spare Batteries Spare batteries can be charged with a separate battery pack charger. It can charge six batteries at the same time. 14.1.4 Replace the Battery If the standby time for the handset becomes too low, the battery should be replaced by a new one. Please contact your system administrator or your supplier, for information about new batteries. Attach the battery as described in the illustration below. The battery is easy 20 December 2013 / Ver. B 70 User Manual WL3 and WL3 Plus WLAN Handset 14. Maintenance TD 92929EN to replace. It is attached inside the battery lid and is connected to the handset in such a way that no improper contact is possible. Figure 9. Easy replaceable battery, unlock the lid and remove the battery. 14.2 Attach the Hinge-type Clip Attach the hinge-type belt clip as described in the illustration below. Figure 10. Screw the hinge-type clip into position. 20 December 2013 / Ver. B 71 User Manual WL3 and WL3 Plus WLAN Handset 14. Maintenance TD 92929EN 14.3 Attach the Swivel-type Clip Attach the swivel-type belt clip as described in the illustration below. Figure 11. Screw the swivel-type clip into position. 14.4 Attach Cover for No Clip Attach the enclosed cover as described in the illustration below, when no clip is to be used. Figure 12. Screw the cover into position. 14.5 Replacement of Handsets A handset can be replaced with a new handset if it is broken. Refer to Configuration Manual, WL3 WLAN Handset and WL3 Plus WLAN HandsetTD 92930EN. 20 December 2013 / Ver. B 72 User Manual WL3 and WL3 Plus WLAN Handset 15. Troubleshooting TD 92929EN 15. Troubleshooting This section contains information on how to solve common operational problems and warnings. Go through the following lists, if you encounter any problems. If this checklist does not solve the problem, contact your system administrator. If others have similar problems, there may be a system error. 20 December 2013 / Ver. B 73 User Manual WL3 and WL3 Plus WLAN Handset 15. Troubleshooting TD 92929EN Operational Problems Fault Probable cause No network The handset has lost connection and is in one of the following The handset beeps states: once a minute (for max 30 minutes) in a low - No network tone, followed by a - No access high tone (if enabled, - Voice only the vibrator also - Messaging only follows the beeps). Action or comment Acknowledge the dialog window or press the mute button (the later keeps the dialog window visible). You can configure the beep to Sound off or Sound once (for each new state), contact the system administrator Note: When leaving a bad state for another bad state, the dialog window reopens, and the beep sounds again (if enabled). No display Charge the battery, change The battery level is low, screen saver is set to “Black also in call”, screen saver setting or the handset is defective. (Display>Screen saver) or contact the system administrator. No ringing The sound off icon is on, or the ringer volume is set to silent, or the handset is defective. Not possible to mute A handset restriction preventing the handset by long the user to silence the handset. press on the Sound off key/mute button Long press the Sound off key or Mute button, or increase the volume, or contact system administrator. Enable the parameter Prevent silent, see Configuration Manual for the handset. Not possible to set the ring volume to “Silent”. Handset with In Charger > Other actions > Sound off enabled, is not muted when placed in charger. No entries in Call list A handset restriction preventing calls from being saved in the call list. Enable the parameter Enable call list, see Configuration Manual for the handset. No change in time & date setting PBX dependent. Changes in the handset appear after a maximum of 24 hours after a change in the system or by turning the handset off and on again. Remotely updated The handset restarts after a parameter upgrade. Error or Warning Messages Refer to the Configuration Manual, WL3 WLAN Handset and WL3 Plus WLAN HandsetTD 92930EN. 20 December 2013 / Ver. B 74 User Manual WL3 and WL3 Plus WLAN Handset 16. Related Documents TD 92929EN 16. Related Documents Data Sheet, WL3 WLAN Handset and WL3 Plus WLAN Handset TD 92927EN Configuration Manual, WL3 WLAN Handset and WL3 Plus WLAN Handset TD 92930EN Data Sheet, Portable Device Manager (PDM), Windows version TD 92635EN Installation and Operation Manual, Portable Device Manager, Windows version TD 92712EN Data Sheet, OpenStage Wireless Service Gateway (WSG) TD 92972EN Installation and Operation Manual, OpenStage Wireless Service Gateway (WSG) TD 92442EN Data Sheet, DC3 Desktop Charger TD 92885EN Installation and Operation Manual, CR3 Charging Rack TD 92825EN Installation Guide, CR4 Battery Pack Charger TD 92883EN Data Sheet, DP1 Desktop Programmer for WLAN Handset TD 92932EN 20 December 2013 / Ver. B 75 User Manual WL3 and WL3 Plus WLAN Handset 17. Document History TD 92929EN 17. Document History For details in the latest version, see change bars in the document. Version Date Description A 5 November 2012 First version of document B 20 December 2013 • Added “Writing language” in 3.1.1 Alphanumeric Keys and 6.2.7 Dial a Name from the Central Phonebook • Added disable permanent mute function as a note in 9.7.1 Sound and Alert Settings, 9.8.3 In Charger Action and in 15. Troubleshooting • Added “Silent” - icon in 3.1.3 Icons and Text in the Display • Added “No system” with popup and beep info in 12. Operation Notice , 15. Troubleshooting and 4.3 Log a Shared Phone On/Off • Added Configurable automatic key lock in Automatic lock time, Deactivate automatic key unlock and 5.8 Settings • Added Central phonebook accessible from New call/ Transfer options in 6.3.3 Start New Call During Conversation • Added Owner ID is shown in screen saver in section “Screen saver” in 9.7.3 Display Settings • Added that Owner ID is shown when handset is set to sound off/muted or switched off in the charger in section “Switch the handset off” and “Turn the sound off”. Edited heading and body text. in 9.8.3 In Charger Action • Added extended headset functionality in Note in 6.1 Incoming Call • Added new image in Common Images “Asterisk key symbol.eps” and in 3.1.1 Alphanumeric Keys • Changed “System A” in image “2929_009.eps” to an owner ID in 3.1.3 Icons and Text in the Display • Removed from (Active area) “name of the system” in 3.1.3 Icons and Text in the Display • Edited ”Menu icons text” in 3.1.3 Icons and Text in the Display • Edited “Note” in Swivel type clip text in 3.2.4 Clip • Added “Tip” in 6.2.5 Dial a Number from the Local Phonebook • Added 7) in 6.2.7 Dial a Name from the Central Phonebook • Inserted note about handset variants in 6.7 Push-toTalk Group Call • Changed “Deactivate the Charging mode” title in 9.8.3 In Charger Action • Removed “Unite” from WSG in 1.4 Abbreviations and Glossary 20 December 2013 / Ver. B 76 User Manual WL3 and WL3 Plus WLAN Handset Version Date 17. Document History TD 92929EN Description • Added “Messaging” and “Services” in image (2929_008.eps) in 9. Menu Operation • Edited section “Alarm with Data” in 7.6 Alarm with Additional Information • Edited 9.7.4 Time & Date Settings • Edited section Associated Access Point (AP) Location in 7.6 Alarm with Additional Information • Added info about phonebook entries in 9.2 Contacts • Edited 9.5 Services • Edited 6.3.8 Conference Call • Added text about “Remotely updated” when handset parameter is upgraded in 15. Troubleshooting. • Edited “Automatic key lock” in sections “Activate the Automatic Key Lock and “Deactivate the Automatic Key Lock” in 9.7.2 Locks and 6.7 Push-to-Talk Group Call. • Changed heading “9.7.2 Phone Lock Settings” to 9.7.2 Locks • Replaced “popup” with “dialog window” • Added that a “New message(s)” dialog window is shown at incoming message if handset is locked (PIN code) in9.4 Messaging. • Edited 9.3 Profiles. Added “Profiles” in 1.5 Functions and Accessories • Edited “Short cuts” and “Profiles” in the Menu icons section in 3.1.3 Icons and Text in the Display. Soft keys are moved Profiles menu (active Soft key is still in “Short cuts”. Also edited in 9.3 Profiles, 9.6 Short Cuts, 5.3 Profiles and 5.6 Short cuts. • Edited Screen saver section in 9.7.3 Display Settings and 15. Troubleshooting • Changed Hook-off to Call key • Edited 4.3 Log a Shared Phone On/Off • Added 6.6 Emergency Calls • Added 5 emergency numbers in 1.5 Functions and Accessories • Edited “Activate the automatic Key Lock” and “Activate the Phone Lock” sections in 9.7.2 Locks • Added new “Secure voice transmission” section in 6.1.1 Answer a Call - Added “NOTE:” in 6.3.8 Conference Call - Added two new icons (non_secure_call_wl3.eps and secure_call_wl3.eps) in “Icons” section 3.1.3 Icons and Text in the Display and 6.1.1 Answer a Call • Added 4.2 Easy Deployment • Added + to use with international number in 3.1.1 Alphanumeric Keys and 6.2.1 Pre-Dial, and entered TIP: in 9.6.2 Define Hot Keys 20 December 2013 / Ver. B 77 User Manual WL3 and WL3 Plus WLAN Handset Version Date 17. Document History TD 92929EN Description • Replaced “PDM” with “WinPDM” • The entire document is updated with regard to US English • Minor text and layout changes 20 December 2013 / Ver. B 78 User Manual WL3 and WL3 Plus WLAN Handset Index A Accessories ............................................................ 4, 16 Acoustic Location Signal ........................................ 38 Administration menu.............................................. 64 Alarm..................................................................... ??–39 Acoustic Location Signal.................................. 38 AP location .......................................................... 39 automatic call after........................................... 38 data....................................................................... 39 push-button alarm ............................................ 37 test alarm ............................................................ 37 Alarm button............................................................. 10 Alphanumeric keys .................................................. 12 Answer................................................................. 30, 60 Answering behaviour.............................................. 60 Answering key .......................................................... 60 Antenna...................................................................... 11 AP location................................................................. 39 Automatic call after alarm..................................... 38 B Battery........................................................................ 12 charge................................................................... 70 disposal ................................................................... 9 environmental requirements............................. 8 maintenance ....................................................... 70 replace .................................................................. 70 warning tone ...................................................... 56 warnings .............................................................. 70 Battery pack charger............................................... 17 Belt clip ....................................................................... 17 Brightness.................................................................. 58 Buttons ................................................................ 10–11 C Call.......................................................... 30–36, 41–44 answer........................................................... 30, 60 call back................................................................ 34 call waiting .......................................................... 34 conference........................................................... 34 dial......................................................................... 30 divert ..................................................... 35, 43–44 duration ........................................................ 30, 41 end......................................................................... 30 multiple calls....................................................... 33 transfer ................................................................ 33 volume.................................................................. 32 Call key........................................................................ 10 Call list.......................................................... 31, 41–43 Case ............................................................................. 11 Central phonebook ................................... 32, 45–46 Charge battery.......................................................... 70 charging behaviour ........................................... 63 charging rack ...................................................... 17 Cisco RTLS .................................................................. 40 20 December 2013 / Ver. B TD 92929EN Clip......................................................................... 12, 17 attach............................................................ 71–72 Coloured messages .................................................. 66 Company phonebook ....................................... 31, 44 Conference call .......................................................... 34 Connections ....................................................... 62–63 Contacts .............................................................. 44–47 Customized menu settings................................................................. 52 D Date ............................................................................. 13 format................................................................... 59 Desktop charger ....................................................... 16 Desktop programmer .............................................. 16 Device information................................................... 64 Dial ............................................................................... 30 Dialling International number........................................ 30 Display......................................................................... 11 brightness............................................................ 58 icons ...................................................................... 13 screen saver ........................................................ 58 Divert call..................................................... 35, 43–44 Documentation ......................................................... 75 Duration of call................................................... 30, 41 E Earpiece....................................................................... 10 volume .................................................................. 32 Easy Deployment...................................................... 18 Ekahau RTLS .............................................................. 40 End call ........................................................................ 30 End key ....................................................................... 11 End second call.......................................................... 33 Environmental requirements.................................... 8 Error messages.......................................................... 74 F Frequency range.......................................................... 6 Functions ....................................................................... 3 H Hardware version ..................................................... Headset....................................................................... connector ............................................................. Hot keys...................................................................... 64 17 11 53 I Icons display................................................................... 13 Inbox............................................................................ 49 Interactive messages............................................... 66 K Keys ..................................................................... 10–12 alphanumeric keys............................................. 12 lock ................................................................. 11, 19 79 User Manual WL3 and WL3 Plus WLAN Handset lock automatically ............................................. 56 sound .................................................................... 55 L Language ................................................................... 61 Licenses ...................................................................... 64 Local phonebook ............................................... 31, 44 Location ...................................................................... 40 AP location .......................................................... 39 Cisco RTLS ............................................................ 40 Ekahau RTLS........................................................ 40 Lock/unlock ........................................................ 19–20 Log on/off.................................................................. 19 Loudspeaker....................................................... 12, 35 Lower case .......................................................... 11, 13 M Maintenance....................................................... 70–72 Man-down alarm...................................................... 37 Menu......................................................... ??–2941–63 Calls ................................................................ 41–44 Connections.................................................. 62–63 Contacts ........................................................ 44–47 customize ............................................................ 52 language .............................................................. 61 Messaging ..................................................... ??–52 Profiles.................................................................. 47 Services ................................................................ 52 Settings......................................................... 54–61 Short cuts ...................................................... ??–54 Message.................................................. ??–52, ??–67 alert....................................................................... 55 coloured ............................................................... 66 delete.................................................................... 49 display time......................................................... 65 forward................................................................. 49 interactive ........................................................... 66 priority.................................................................. 65 queue.................................................................... 65 read ....................................................................... 49 receive .................................................................. 48 reply ...................................................................... 49 sent ....................................................................... 51 unsent................................................................... 51 write...................................................................... 50 Message list............................................................... 31 Message volume....................................................... 55 Messenger..................................................................... 3 Microphone......................................................... 11–12 Missed calls................................................................ 43 Mobile data................................................................ 67 Multifunction button........................................ 10, 54 Multiple calls.............................................................. 33 Mute button .............................................................. 10 N Navigation key................................................... 11, 53 Network 20 December 2013 / Ver. B TD 92929EN information.......................................................... select ..................................................................... No-movement alarm ............................................... Number input mode ................................................ 64 62 37 12 O Operating area .......................................................... Out of range............................................................... Owner ID ..................................................................... change .................................................................. 68 68 13 61 P Parameter set up......................................................... 1 Pause in phone number.......................................... 12 Phone lock .................................................................. 57 Phonebook .......................................... 31–32, 44–47 PIN code ............................................................... 20, 57 Power on/off ...................................................... 11, 18 Power supply ................................................................ 5 Problems..................................................................... 74 Profiles ........................................................................ 47 Protector........................................................................ 3 Push-button alarm................................................... 37 Push-to-Talk button ................................................ 10 R Rack charger .............................................................. 17 Regulatory compliance .............................................. 6 Replace handset ....................................................... 72 Ring signal turn on/off........................................................... 19 type ....................................................................... 55 volume .................................................................. 54 S Safety precautions...................................................... 5 Screen saver............................................................... 58 Second call.................................................................. 33 Services ....................................................................... 52 Settings............................................................... 54–61 Shared phone ............................................................ 19 Short cuts ............................................................. ??–54 Soft keys....................................................... 10, 13, 53 Software download ................................................................ 1 upgrade ................................................................ 69 version .................................................................. 64 Sound off key ............................................................ 11 Sound, keys................................................................ 55 Space .................................................................... 11, 13 Special characters..................................................... 13 Switch between calls ............................................... 33 T Talker.............................................................................. 3 Test alarm .................................................................. 37 Text input mode ....................................................... 13 Time ............................................................................. 13 80 User Manual WL3 and WL3 Plus WLAN Handset TD 92929EN format................................................................... 59 Transfer call ............................................................... 33 Troubleshooting ....................................................... 73 U Upper case .......................................................... 11, 13 User ID......................................................................... 64 V Vibrator....................................................................... Voice mail access key.............................................. Volume earpiece................................................................ ring signal............................................................ Volume button.......................................................... 55 11 32 54 10 W Warning messages .................................................. 74 WLAN information................................................... 64 WLAN restrictions ....................................................... 6 Write text/numbers ......................................... 12–13 20 December 2013 / Ver. B 81