1
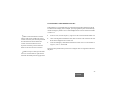
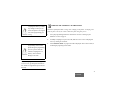
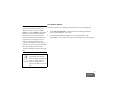
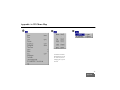
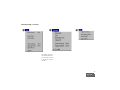
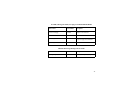
TETRA Customer Programming Software (CPS)
for d700/d1700/MTH300/MTH300S/MTP200/MTP300/MTM300
Start-up User Guide
68P02956C20-D
04/01
TRADEMARKS
COMPUTER SOFTWARE COPYRIGHTS
Motorola,
The Motorola products described in this instruction manual may include copyrighted
MOTOROLA computer programmes. Laws in the United States and other countries
preserve for MOTOROLA certain exclusive rights for copyrighted computer programmes.
Including the exclusive right to copy or reproduce in any form the copyrighted computer
programme. Accordingly, any copyrighted MOTOROLA computer programmes
contained in the MOTOROLA products described in this Instruction manual may not be
copied or reproduced in any manner without the express written permission of
MOTOROLA. Furthermore, the purchase of MOTOROLA products shall not be deemed
to grant either directly or by implication, steeply or otherwise, any license under the
copyrights, patents or patent applications of MOTOROLA, except for the normal
nonexclusive, royalty free license to use that arises by operation of law in the sale of a
product.
are trademarks of Motorola Inc.
IBM™
is a trademark of International Business
Machines, Inc.
Windows®, Windows®95, Windows®98, and
Windows® NT are registered trademarks of
Microsoft in the U.S. and other countries.
InstallShield is a registered trade mark of
InstallShield Software Corporation.
™ is
a trademark of TETRA by
Motorola. TErrestial Trunked RAdio (TETRA)
is an open digital standard defined by the
European Telecommunications Standards
Institute (http://www.tetramou.com/)
COPYRIGHT
Copyright © 1999-2001 Motorola Inc. All rights reserved. No part of this manual may be
reproduced, transmitted, stored in a retrieval system, or translated into any language or
computer language, in any form or by any means, without the prior written permission of
Motorola Inc.
Preview . . . . . . . . . . . . . . . . . . . . . . . . . . . . . . . . . . . . . . . . . . . . . . . . . . . . . . . . . . . . . . . 4
WHO SHOULD USE THIS GUIDE . . . . . . . . . . . . . . . . . . . . . . . . . . . . . . . . . . . . .
WHAT TO LOOK FOR IN THIS GUIDE. . . . . . . . . . . . . . . . . . . . . . . . . . . . . . . . .
WHAT TO LOOK FOR IN THIS GUIDE (continued) . . . . . . . . . . . . . . . . . . . . . . .
WHAT TO LOOK FOR ON-LINE . . . . . . . . . . . . . . . . . . . . . . . . . . . . . . . . . . . . . .
CONVENTIONS USED IN THIS GUIDE:. . . . . . . . . . . . . . . . . . . . . . . . . . . . . . . .
4
4
5
5
6
Section 1: Installing the Software . . . . . . . . . . . . . . . . . . . . . . . . . . . . . . . . . . . . . . . . . . 7
SYSTEM REQUIREMENTS. . . . . . . . . . . . . . . . . . . . . . . . . . . . . . . . . . . . . . . . . . . 7
INSTALLING THE CPS . . . . . . . . . . . . . . . . . . . . . . . . . . . . . . . . . . . . . . . . . . . . . . 8
VERIFYING THE INSTALLATION . . . . . . . . . . . . . . . . . . . . . . . . . . . . . . . . . . . 10
Section 2: Setting Up the Hardware . . . . . . . . . . . . . . . . . . . . . . . . . . . . . . . . . . . . . . . 11
HARDWARE SETUP: PROGRAMMING d700/MTH300 WITH PROGRAMMING
KITS FLN2686 (UK plug)/FLN2687 (Euro plug) . . . . . . . . . . . . . . . . . . . . . . . . . . 11
PROGRAMMING d700/MTH300 WITH PROGRAMMING KITS FLN2686 (UK
plug)/FLN2687 (Euro plug)—continued . . . . . . . . . . . . . . . . . . . . . . . . . . . . . . . . . 12
HARDWARE SETUP: PROGRAMMING d700/MTH300/MTH300S WITH PROGRAMMING KITS FLN2908 (UK plug)/FLN2909 (Euro plug) . . . . . . . . . . . . . . 13
PROGRAMMING d700/MTH300/MTH300S WITH PROGRAMMING KITS
FLN2908 (UK plug)/FLN2909 (Euro plug)—continued . . . . . . . . . . . . . . . . . . . . . 14
HARDWARE SETUP: PROGRAMMING d1700
WITH DATA CABLE FKN4897. . . . . . . . . . . . . . . . . . . . . . . . . . . . . . . . . . . . . . . 15
PROGRAMMING d1700 WITH DATA CABLE FKN4897 (continued). . . . . . . . 16
HARDWARE SETUP: DIMETRA MTP200/MTP300/MTM300 . . . . . . . . . . . . . 17
HARDWARE SETUP: DIMETRA MTP200/MTP300/MTM300 (continued) . . . . 18
i
Section 3: Using the CPS . . . . . . . . . . . . . . . . . . . . . . . . . . . . . . . . . . . . . . . . . . . . . . . . 19
FEATURES OF THE CPS APPLICATION WINDOW . . . . . . . . . . . . . . . . . . . . .
ACCESSING THE ON-LINE HELP SYSTEM . . . . . . . . . . . . . . . . . . . . . . . . . . .
GETTING AROUND IN THE CPS. . . . . . . . . . . . . . . . . . . . . . . . . . . . . . . . . . . . .
USING THE MENUS . . . . . . . . . . . . . . . . . . . . . . . . . . . . . . . . . . . . . . . . . . . . . . .
USING THE TREE AND CONTENT VIEWS . . . . . . . . . . . . . . . . . . . . . . . . . . . .
19
20
21
21
22
Section 4: Tutorial . . . . . . . . . . . . . . . . . . . . . . . . . . . . . . . . . . . . . . . . . . . . . . . . . . . . . 23
OPENING A CODEPLUG FILE . . . . . . . . . . . . . . . . . . . . . . . . . . . . . . . . . . . . . . .
READING A CODEPLUG FILE FROM THE PHONE . . . . . . . . . . . . . . . . . . . . .
CREATING A BACKUP CODEPLUG FILE . . . . . . . . . . . . . . . . . . . . . . . . . . . . .
CONFIGURING USER PERSONAL DATA . . . . . . . . . . . . . . . . . . . . . . . . . . . . .
CONFIGURING CALL LISTS . . . . . . . . . . . . . . . . . . . . . . . . . . . . . . . . . . . . . . . .
COPYING CALL LIST ENTRIES BETWEEN CODEPLUGS . . . . . . . . . . . . . . .
SAVING A CODEPLUG FILE . . . . . . . . . . . . . . . . . . . . . . . . . . . . . . . . . . . . . . . .
COPYING THE CODEPLUG TO THE PHONE . . . . . . . . . . . . . . . . . . . . . . . . . .
WRITING THE CODEPLUG TO THE PHONE . . . . . . . . . . . . . . . . . . . . . . . . . .
WRITING CODEPLUG TO THE PHONE USING THE COPY WIZARD. . . . . .
WRITING SOFTWARE TO THE PHONE (FLASHING) . . . . . . . . . . . . . . . . . . .
UPGRADING PHONE . . . . . . . . . . . . . . . . . . . . . . . . . . . . . . . . . . . . . . . . . . . . . .
FINAL THOUGHTS . . . . . . . . . . . . . . . . . . . . . . . . . . . . . . . . . . . . . . . . . . . . . . . .
23
24
25
26
27
28
29
30
31
32
33
34
35
Appendix A: CPS Menu Map . . . . . . . . . . . . . . . . . . . . . . . . . . . . . . . . . . . . . . . . . . . . 36
CPS Menu Map (continued) . . . . . . . . . . . . . . . . . . . . . . . . . . . . . . . . . . . . . . . . . . 37
Appendix B: Keyboard Shortcuts . . . . . . . . . . . . . . . . . . . . . . . . . . . . . . . . . . . . . . . . 38
Keyboard Shortcuts (continued) . . . . . . . . . . . . . . . . . . . . . . . . . . . . . . . . . . . . . . . . 39
ii
Appendix C: Troubleshooting . . . . . . . . . . . . . . . . . . . . . . . . . . . . . . . . . . . . . . . . . . . 40
TROUBLESHOOTING THE SOFTWARE INSTALLATION . . . . . . . . . . . . . . . 40
TROUBLESHOOTING THE HARDWARE SETUP . . . . . . . . . . . . . . . . . . . . . . . 41
Appendix D: Contacting Motorola . . . . . . . . . . . . . . . . . . . . . . . . . . . . . . . . . . . . . . . . 42
European Radio Support Centre (ERSC) . . . . . . . . . . . . . . . . . . . . . . . . . . . . . . . . . 42
ORDERING PARTS . . . . . . . . . . . . . . . . . . . . . . . . . . . . . . . . . . . . . . . . . . . . . . . . 44
iii
Preview
This User’s Guide contains the information necessary to install and get a basic
understanding of how to use TETRA Customer Programming Software (CPS). The
TETRA CPS is a PC-based software programme from Motorola that is used to program
features into TETRA phones to customise their operation.
WHO SHOULD USE THIS GUIDE
Note: This guide assumes that you are
familiar with basic Windows operations. If
this is not the case, be sure to read the
documentation that came with your version
of Windows before you proceed.
This Guide is intended for anyone who will use the CPS to program TETRA phones.
WHAT TO LOOK FOR IN THIS GUIDE
This guide is organised as follows:
Section 1 describes the CPS installation process.
Section 2 explains the hardware setup required to program TETRA phones.
Section 3 provides an overview of the CPS. It shows you how to obtain on-line help and
navigate through the user interface.
4
Preview
WHAT TO LOOK FOR IN THIS GUIDE (continued)
Section 4 is a tutorial that provides step-by-step instructions on how to perform selected
tasks using the CPS.
The Appendixes contain:
•
•
•
•
CPS menu map
Keyboard shortcuts
Troubleshooting information
Details on contacting Motorola for technical support or to order programming
hardware.
WHAT TO LOOK FOR ON-LINE
This guide is designed to supplement the on-line help installed with the CPS. Be sure to
refer to the on-line help for context-sensitive information:
• Phone codeplug blocks
• CPS menus and menu functions
• CPS fields
For information on how to access the on-line help, turn to page 20.
5
Preview
CONVENTIONS USED IN THIS GUIDE:
Convention
Description
italics
Used for emphasis and for new terms.
bold
Used to indicate keyboard keys.
File/Open
Used to designate the location and name of a CPS menu function. For
example, File/Open refers to the Open function in the File menu.
TIP:
Denotes tips and hints on using the CPS.
Indicates that the task procedure continues on the following page.
Note:
Indicates an operational procedure, practice, or condition to which you
should pay special attention.
Alerts you of conditions which can result in loss or corruption of data, or
damage to application files.
TETRA Phone
Designates: d700, d1700, MTH300, MTH300S, Dimetra MTP200,
Dimetra MTP300 handsets, or MTM300 mobile radio.
6
Preview
Section 1: Installing the Software
SYSTEM REQUIREMENTS
Note: The CPS allows you to keep multiple
codeplug windows open simultaneously. The
number of codeplug windows that can remain
open at any given time is determined by the
amount of memory available to the CPS.
Note: To access the carrier and depot
programming levels, use a hardware key
called dongle. Ask your local customer
service representative for more information.
Plug the dongle into the PC’s parallel printer
port. When using a programming kit cable
with parallel connection, connect the cable to
the PC through the dongle.
The TETRA CPS requires an IBM® PC or compatible computer with the following
minimum configuration:
Processor
Pentium 133 or later
Memory (RAM)
16 MB
Free hard disk space for installation
50 MB
Drive
CD-ROM
Operating system
Microsoft Windows 95/98
The TETRA CPS has three programming levels: organiser, carrier, and depot. The screens
shown as examples in this guide belong to the Carrier level.
7
1 Installing the Software
INSTALLING THE CPS
Do not delete or move any files
installed with the CPS. They are
required to run the CPS.
Follow the steps below to install the CPS on your hard drive:
1
Quit all Windows applications to ensure a successful installation.
2
Insert the CD-ROM into its drive.
3
The Autorun screen appears. Select Install CPS from the screen.
Note: If the Autorun screen is deactivated, start the Explorer. Navigate to the CD folder
called “Autorun”. Double click on autorun.exe.
The setup programme will run InstallShield wizard to guide you through the
installation process.
If a version of the CPS already exists on your computer, you will be prompted if you
want to remove that version. We recommend that you remove the existing version.
Any files that you may have saved to the existing CPS directory will not be deleted
during the remove process.
4
When the Welcome screen appears, read the instructions and click Next.
5
In the Choose Destination Location screen, click Next to install the CPS in the
default location. To select a different installation directory, click the Browse button.
8
1 Installing the Software
It is recommended to restart the
computer for a correct
functioning of the CPS.
6
Select the desired Programme Folder name for describing the CPS in the Windows
Start menu. Click Next to begin the installation.
7
When the setup is complete, you will be prompted if you want to create a desktop
shortcut to the CPS. Click Yes to create the shortcut. As an option, you can choose to
read the Readme file. Then click Finish to exit setup.
9
1 Installing the Software
VERIFYING THE INSTALLATION
Once the CPS is installed, verify that the installation was successful.
1
Launch the CPS from the Windows Start menu, or double-click the desktop shortcut.
2
Select Help/About CPS... Verify CPS version number and programming level. Click
Details... for further information on: database version, supported model, current
codeplug version, current software version, model number, and model type. Click
OK, and OK again to return to the screen shown below.
If the CPS does not start up as described above, see the “Troubleshooting” section on
page 40.
10
1 Installing the Software
Section 2: Setting Up the Hardware
Note: For complete information on the d700
programming kits, contact your local
customer service representative.
Before you proceed, make sure you have all the necessary hardware from the list from
page 44 on.
HARDWARE SETUP: PROGRAMMING d700/MTH300 WITH
PROGRAMMING KITS FLN2686 (UK plug)/FLN2687 (Euro plug)
Use the programming kit with the following software items:
Make sure that you are using a
fully charged battery in the
handset prior to running the
CPS. This will ensure that the
unit does not power down
during programming.
During programming of the
d700/MTH300 handsets, ESD
(Electrostatic Discharge) might
cause a “Reset” in the
programming software. When
the “Tetra Carrier CPS!”
message is displayed on the PC
screen, you must start the
programming process from the
beginning.
Description
Release 1.1
Release 2.0
Release 3.1
d700 CPS
FVN4815
FVN4960
---
MTH300 CPS
---
---
FVN4862
MTH300S CPS
---
FVN4892
----
The programming kit interfaces between the handset and an IBM PC (or compatible
computer) running the Terminal Programming Application (TPA) and/or CPS. To connect
the programming kit, proceed as follows:
1
Make sure the handset is turned off.
2
Connect the programming kit as illustrated on page 12.
3
Follow the instructions on your PC.
11
2 Setting Up the Hardware
Note: Programming kits FLN2686/FLN2687
consist of all required cables per table on
page 44.
PROGRAMMING d700/MTH300 WITH PROGRAMMING KITS
FLN2686 (UK plug)/FLN2687 (Euro plug)—continued
12
2 Setting Up the Hardware
HARDWARE SETUP: PROGRAMMING d700/MTH300/MTH300S WITH
PROGRAMMING KITS FLN2908 (UK plug)/FLN2909 (Euro plug)
Use the programming kit with the following software items:
Description
Release 1.1
Release 2.0
Release 3.1
d700 CPS
FVN4815
FVN4960
---
MTH300 CPS
---
---
FVN4862
MTH300S CPS
---
FVN4892
----
1
Make sure the handset is turned off.
2
Connect the programming kit as illustrated on page 14.
3
Follow the instructions on your PC.
13
2 Setting Up the Hardware
Note: Programming kits FLN2908/FLN2909
consist of all required cables per table on
page 45.
PROGRAMMING d700/MTH300/MTH300S WITH PROGRAMMING
KITS FLN2908 (UK plug)/FLN2909 (Euro plug)—continued
Engage
Hook Here
Pivot
Accessory
Connector
Latch
FKN4875
Connect to
PC Parallel
Port
PC
Power Supply EPN4040 UK
EPN4041 Euro
RFI Filter
5804126K03
14
2 Setting Up the Hardware
HARDWARE SETUP: PROGRAMMING d1700 WITH DATA CABLE
FKN4897
Use the cable with the following software item:
Description
Release 1
d1700 CPS
FVN4824
The data cable interfaces between the handset and an IBM PC (or compatible computer)
running the TETRA CPS. To perform the programming, proceed as follows:
1
Connect the data cable as illustrated on page 16.
2
Run the Customer Programming Software (CPS) on your computer.
3
On the handset, press the “1” and “9” keys together and then the On/Off key for
about 3 seconds. Verify that no display appears on the LCD screen.
4
Click the Toolbar “Read Phone” icon.
5
Follow the instructions on your PC.
15
3 Using the CPS
PROGRAMMING d1700 WITH DATA CABLE FKN4897 (continued)
TO PC 9-PIN
CONNECTOR
TO d1700
ACCESSORY
CONNECTOR
FKN4897
16
3 Using the CPS
HARDWARE SETUP: DIMETRA MTP200/MTP300/MTM300
Use the programming kit with the following software item:
Description
Release 3.1
MTP200/MTP300/MTM300 CPS
FVN4862
Programming Box FLN2605 interfaces between the Dimetra unit and an IBM PC (or
compatible computer) running the TETRA CPS. To connect the programming box,
proceed as follows:
1
Connect the programming box as illustrated on page 18.
2
Follow the instructions on your PC.
17
3 Using the CPS
Note: Programming kit FLN2505 consists of
all required cables per table on page 46.
HARDWARE SETUP: DIMETRA MTP200/MTP300/MTM300 (continued)
18
3 Using the CPS
Section 3: Using the CPS
FEATURES OF THE CPS APPLICATION WINDOW
Title bar
Menu bar
Toolbar
Codeplug file name
Codeplug window
CODEPLUG TREE
VIEW: Shows codeplug blocks in a tree
structure. The items in
the tree view may vary
based on the phone
model.
CODEPLUG CONTENT
VIEW: Displays contents of
block that is highlighted in the
tree view.
Status bar
19
4 Tutorial
TIP: The information in the on-line help
is presented in the following categories:
•
•
•
•
•
•
•
•
•
Introduction to the CPS
Using the Help Function
Help on Specific CPS Tasks
Help on Codeplug Blocks
Menu Topics
CPS Keyboard Shortcuts
Troubleshooting
Glossary
Contacting Motorola
To access this topic list, select Help/CPS
Help Topics from the CPS.
ACCESSING THE ON-LINE HELP SYSTEM
The on-line help contains detailed context-sensitive help on using the CPS. Here’s how to
access the help system:
For...
Do this:
General help on using
Windows
Click the Windows Start menu and select Help.
Help contents
From the CPS, select Help/CPS Help Topics.
Help on a part of the CPS
window
Help on a CPS dialogue box
Click the
button on the CPS toolbar and click the part of the
window on which you need help.
Click the Help button in the dialogue box.
For help on parts of a dialogue box, click the
button on the
dialogue box title bar and then click the part of the dialogue box
on which you need help.
Context-specific help on a
CPS field
Press the F1 key when the cursor is in that field, or right-click
the field and select Help.
Help on a specific CPS menu
item or field
Click the CPS Help Topics button in the Help window and click
the Index or Find tab. Type the desired search keyword in the
space provided. A list of topics that contain the search keyword
will be displayed.
20
4 Tutorial
GETTING AROUND IN THE CPS
All CPS functions can be accessed using the menus, and some can be accessed using
keyboard shortcuts as described on page 38. Data in the phone codeplug block can be
accessed from the tree and content view of the codeplug window. These methods of
navigation are explained below.
USING THE MENUS
There are six menus in the CPS, as shown below:
The Edit menu and some functions in other menus will be available only when a codeplug
block is already open in the CPS or based on the context. For instance, the Copy function
will be available only when you highlight item(s) that can be copied.
Refer to the menu map on pages 36 and 37 to familiarise yourself with the functions you
can perform from each menu.
21
4 Tutorial
USING THE TREE AND CONTENT VIEWS
When a codeplug is opened, the CPS will display its contents in a codeplug window. The
codeplug window is divided into two areas – the tree view and the content view – which
make it easy to view the codeplug structure, and view or modify field values. The
illustration below shows the relationship between the tree and content views.
This column displays
the field name.
This column displays
the field value.
Highlight an item in the tree
view to display its contents
in the content view.
Click on plus and minus signs to
expand and collapse (that is,
open and close) folders.
This column contains a Reset
button if a field is resettable.
Clicking the button resets the
field to its default value. If
there is no entry in this
column, the field cannot be
initialised.
Click on an editable or initialisable field to modify the field
value.
22
4 Tutorial
Section 4: Tutorial
If you are new to the CPS, we
suggest that you try these
operations on a backup
codeplug file until you become
thoroughly familiar with the
CPS.
This tutorial provides an overview of the tasks you will perform most frequently using the
CPS. Refer to the “Help on Specific CPS Tasks” section in the on-line help for a more
comprehensive task list.
Before you start, make sure the CPS is up and running as described on page 10. You will
begin by opening a codeplug (or reading a codeplug from the phone) and making a backup
copy that you can use in the tutorial.
OPENING A CODEPLUG FILE
If you wish to read the codeplug from a phone, proceed to the next task. To open a
codeplug or archive file from disk:
1
Select File/Open.
2
In the File Open dialogue box, navigate to the drive and folder or directory where the
codeplug file is located.
3
Double-click the desired file name or highlight it and click OK. The CPS will display
the codeplug window.
4
Click on the (+) sign next to the Codeplug folder in the tree view. The codeplug
window should look similar to the one on page 19.
23
4 Tutorial
Never disconnect the
programming cable from the
phone during the programming
process or power off the PC
while the codeplug file is in
memory. This will destroy your
phone data.
Note: If the progress bar does not appear or
an error occurs, go through the checklist in
the “Troubleshooting: Unable to Read
Codeplug” topic in the on-line help.
READING A CODEPLUG FILE FROM THE PHONE
If you have already opened a codeplug file from disk, proceed to create a backup copy of
the file as described in the next task. To read a codeplug:
1
Set up the programming hardware as described in “Section 2: Setting Up the
Hardware” section on page 11.
2
Select File/Read Phone. A progress bar will appear and should begin progressing
toward 100%. When the read process is complete, the CPS will display the codeplug
window.
3
Click on the (+) sign next to the Codeplug folder in the tree view. The codeplug
window should look similar to the one on page 19.
4
When you have completed viewing the phone codeplug information using the CPS,
select Tools/Reset Phone before disconnecting the phone from the programming
cable. This function returns the phone to its normal mode of operation.
24
4 Tutorial
CREATING A BACKUP CODEPLUG FILE
To avoid loss of data, you
should make back up copies of
all codeplugs that you work on.
Backups can be extremely
useful in restoring codeplugs
that get corrupted or are
inadvertently erased.
To make a backup of the codeplug file:
1
Make the codeplug file active by clicking on its title bar.
2
Select File/Save As. In the File Save As dialogue box, navigate to the drive and
folder where you want to save the file.
3
Enter a new file name in the File name field and click OK to save the file.
Take a few moments now to review the CPS menus and the various features of the
codeplug window. These are described in the “Using the CPS” section beginning on
page 19. Then proceed to the next task.
25
4 Tutorial
CONFIGURING USER PERSONAL DATA
Fields relating to User Personal Data are grouped in the Ergonomic Parameters and Call
List block of the codeplug. In this example, you will program the phone to automatically
resend an emergency alarm in case no acknowledgement arrived. You will set the number
of retries to 3.
TIP: Use the Find feature in the Edit
menu to easily locate a field in the current
content view. Enter your search keyword and
the CPS will locate the first field in the
content view that contains the search
keyword. If necessary, use the Find Next
feature to search for the next occurrence.
1
In the tree view, click on the plus (+) sign next to the User Personal Data folder icon.
2
Click on the Ergonomic Parameters block, then on General. The contents of this subblock will be displayed in the content view.
3
Locate the Emergency Alarm Retries field in the content view. To set the number of
rings to 3, enter “3” in this field.
This is the same procedure that you will use to configure other user ergonomic features for
the phone.
TIP: For help on a field, press F1 while
the cursor is in that field. Or right-click the
field and choose Help from the popup menu.
26
4 Tutorial
CONFIGURING CALL LISTS
Note: You can use upper or lowercase
characters, punctuation and extended foreign
language characters such as “ç” in a call list
alias. The phone will display uppercase,
lowercase and punctuation. However, it may
not display extended foreign language
characters correctly.
In this example, you will add a couple of entries to the Phone List.
1
Click on the plus (+) sign next to the Call Lists folder in the tree view.
2
Highlight Phone List in the tree view. The phone list spreadsheet will be displayed in
the content view.
3
Add the entries listed below to the phone list. Click on an empty row in the Phone list
and add the first phone number alias by typing “LOCAL” in the Name column. Then
type “5551212” in the Phone Number column. Repeat this procedure for the second
entry.
TIPS: Cut, Copy, Paste, Undo, Redo,
Clear, and Find functions are available from
the Edit menu. The Find function makes it
possible to locate an entry in the current call
list that contains the search keyword.
For a list of Call List editing shortcuts, refer
to the “Keyboard Shortcuts” topic in the online help.
LOCAL
OUT-OF-AREA
5551212
8005551212
4
Enable each entry by placing a corresponding check mark in the Status column.
5
To practice deleting an entry, highlight the “LOCAL” entry and select Edit/Cut.
Then select Edit/Undo to retrieve the deleted entry.
This completes the task. Call list entries can be added, modified or deleted as described
here.
27
4 Tutorial
COPYING CALL LIST ENTRIES BETWEEN CODEPLUGS
Note: CPS copy and paste operations will
function only under certain conditions. For
instance, if you copy a set of cells and
highlight another set of cells in which to paste
them, the row and column sizes of the copied
cells and the highlighted cells must match.
Refer to the “Copy and Paste Operations”
topic in the on-line help for details.
Note: If you paste the new entries over
existing entries, the existing entries will be
erased.
A new feature in the Windows CPS makes it possible for you to copy call list entries from
one codeplug to several other codeplugs. For the purpose of this example, you will copy
the entries from the same codeplug file you used in the previous task. You will need a spare
backup codeplug file to copy the entries to. (See page 25 for help on creating a backup
codeplug file.)
1
Double-click on the Call List folder in the tree view to open the folder.
2
Click on Phone List in the tree view. The two entries from the previous example will
be displayed in the content view.
3
Click and drag the cursor across the two entries in the content view to highlight them.
(To copy the entire Call List, highlight the desired type of Call List in the tree view.
Then click the Copy button on the toolbar.)
4
Select Edit/Copy. The highlighted entries will be copied to the clipboard.
5
Select File/Open. Locate the spare backup codeplug and double-click on the file
name to open it.
6
When the file is opened, double-click on the Call List folder in the tree view. Click on
Phone List.
7
Click (that is, highlight) the cell in the codeplug content view where you want to
begin pasting the entries from the clipboard.
8
Select Edit/Paste to complete the operation.
28
4 Tutorial
SAVING A CODEPLUG FILE
Note: The CPS identifies codeplug files by
their .dbf file name extension. If you do not
use this extension when saving a codeplug
file, the CPS will automatically add this
extension to the file name when it saves the
file.
TIP: If you wish to save the file under a
different name, select File/Save As.
When you have finished programming the codeplug, make sure you save a copy to a hard
disk or diskette before writing it to the phone. To save a codeplug file that is already open
in the CPS:
1
Click on the title bar of the codeplug file to make it active.
2
Select File/Save.
3
If the codeplug file is being saved for the first time, the File Save dialogue box will
appear. Specify the file name and directory location where the file should be saved
and click OK to complete the task.
29
4 Tutorial
COPYING THE CODEPLUG TO THE PHONE
Note: If the progress bar does not appear or
an error occurs, go through the checklist in
the “Unable to Copy Phone” topic in the online help.
This task is synonymous with “writing partial codeplug” to a phone. This function enables
you to clone a group of phones with a working codeplug and does not change the Radio
ISSI (Individual Short Subscriber Identity) and other parameters during the cloning
operation.
1
Set up the programming hardware as described in “Section 2: Setting Up the
Hardware” section on page 11.
2
Select File/Copy Phone. A progress bar will be displayed and should begin
progressing toward 100%, indicating the progress of the write process.
30
4 Tutorial
Remember to save the original
codeplug data before you make
any changes, so that you can
restore the phone to its original
state if the programming goes
wrong.
Never disconnect the
programming cable from the
phone during the programming
process or power off the PC
while the codeplug file is in
memory. This will cause
damage to the radio.
WRITING THE CODEPLUG TO THE PHONE
This task is synonymous with “writing entire codeplug” to the phone. A codeplug read
from one phone can only be written to that same phone using this process.
1
Set up the programming hardware as described in “Section 2: Setting Up the
Hardware” section on page 11.
2
If multiple codeplugs are open in the CPS, make the correct source codeplug file
active by clicking on its title bar.
3
Select File/Write Phone. A progress bar will be displayed. After a few seconds, it
should begin progressing toward 100%.
Note: If the progress bar does not appear or
an error occurs, go through the checklist in
the “Unable to Copy Phone” topic in the online help.
31
4 Tutorial
WRITING CODEPLUG TO THE PHONE USING THE COPY WIZARD
TIP: Use Copy Wizard when you want to
clone multiple phones with the same set of
codeplug data. Once the data is written to one
phone, simply connect the next phone and click the
Write button. Repeat this process until you have
cloned all the phones.
Note: Set up the programming hardware as
described in “Section 2: Setting Up the Hardware”
section on page 11. Select Tools/Options to
check the setting in the Serial/Parallel Port field.
Never disconnect the programming
cable from the phone during the
programming process or power off
the PC while the codeplug file is in
memory. This will cause codeplug
data to be corrupted.
In the previous task, you wrote codeplug data from a file to the phone. With the CPS Copy
Wizard function, you can read codeplug data from a phone or a file, select the codeplug
blocks to be copied, and write the codeplug to one or more phones – all in one step. In this
task, you will use the Copy Wizard to write a codeplug to the phone.
1
Select Tools/Copy Wizard. The first Copy Wizard dialogue box will be displayed.
2
Click the appropriate radio button depending on whether you want to read codeplug
data from a phone or from a file. In this case, select “Read from a file”.
3
In the space provided, specify the correct path to the data file. Click Next to display
the second Copy Wizard dialogue box.
4
In the scroll list, select the codeplug blocks that you want to write to the phone. Click
Next.
5
Click the Write button to transfer the selected data to the phone. A progress bar will
be displayed and should begin progressing toward 100%.
6
When the process is complete, click Done to exit the Copy Wizard.
Note: If the progress bar does not appear or an
error occurs, go through the checklist in the
“Unable to Copy Phone” topic in the on-line help.
32
4 Tutorial
WRITING SOFTWARE TO THE PHONE (FLASHING)
Notes:
Set up the programming hardware as
described in “Section 2: Setting Up the
Hardware” section on page 11.
If the progress bar does not appear or an error
occurs, go through the checklist in the
“Unable to Write Software” topic in the online help.
This function enables you to update the phone software application version.
1
Select Tools/Write Software.
2
Click the Write button. After approximately 15-30 seconds, the progress bar should
begin to move toward 100%.
Never disconnect the
programming cable from the
phone during the programming
process or power off the PC
while the codeplug file is in
memory. This can cause call list
data to become corrupted.
33
Appendix
UPGRADING PHONE
Notes: Set up the programming hardware as
This function enables you to update the phone software version and codeplug data.
described in “Section 2: Setting Up the
Hardware” section on page 11. From the
1
Select Tools/Upgrade Phone. A Write Software and Codeplug confirmation
Tools menu, choose Options. In the Options
message will be displayed on the screen.
dialogue box, make sure that the default
2
In the Confirmation Message dialogue box, click the Write button. After
software path is set to the directory that
approximately 15-30 seconds, the progress bar should begin to move toward 100%.
contains the subscriber software files. If the
progress bar does not appear or an error
occurs, go through the checklist in the
“Unable to Write Software” topic in the online help. If an error occurs during the update
phase, go through the checklist in the
“Unable to Read Phone” topic on the on-line
help.
Never disconnect the
programming cable from the
phone during the programming
process or power off the PC
while the codeplug file is in
memory. This will corrupt radio
data.
34
Appendix
FINAL THOUGHTS
This completes the TETRA Windows CPS tutorial and the “Using the CPS” section. We
hope that, after reviewing this guide, you have gained a basic understanding of:
•
•
•
•
The application and codeplug windows
The relationship between the codeplug tree and content views
CPS menus and menu functions
CPS tasks and how to perform them
Be sure to review this material as necessary and refer to the on-line help for contextsensitive help as you use the CPS.
35
Appendix
Appendix A: CPS Menu Map
1
2
3
The Edit menu and the
detailed File menu will
be visible only when a
codeplug file is open in
the CPS.
36
Appendix
CPS Menu Map (continued)
4
5
6
The Window menu and
the detailed Tools menu
will be visible only when
a codeplug file is open in
the CPS.
37
Appendix
Appendix B: Keyboard Shortcuts
TIP: Use these shortcuts in situations
where you cannot use a mouse (for instance,
programming a phone in the field).
Any CPS function or action that can be performed using the mouse can also be performed
using the keyboard keys. This includes navigating through the CPS, accessing menu
functions, and changing field values.
Here is a listing of shortcuts for frequently used CPS functions:
To perform this action...
Note: Refer to the “Keyboard Shortcuts”
section in the on-line help for a list of
spreadsheet and CPS navigation shortcuts.
Press:
Open a codeplug file
Ctrl+O
Save a codeplug file
Ctrl+S
Print a codeplug file
Ctrl+P
Read codeplug data from the phone
Ctrl+R
Write codeplug data to the phone
Ctrl+W
Cut the current entry
Ctrl-X
Copy the highlighted item (or its contents) to the clipboard
Ctrl+C
Paste the data from the clipboard
Ctrl+V
38
Appendix
Keyboard Shortcuts (continued)
To perform this action...
Press:
Undo
Ctrl+Z
Redo
Ctrl+Y
Find an entry in the current content view
Ctrl+F
Reset the phone
Ctrl+E
Access the Copy Wizard
Ctrl+I
Write software
Ctrl+T
Upgrade phone
Ctrl+U
Access help on the current item or entry
F1
39
Appendix
Appendix C: Troubleshooting
TROUBLESHOOTING THE SOFTWARE INSTALLATION
Note: Make sure that your computer meets
the minimum requirements for installation
that appear on page 7.
If there is a problem during the installation, the CPS will display an error message to
indicate the type of problem that occurred. Some error messages are reproduced below
along with information on how to troubleshoot them:
If you see this message...
Do this:
Cannot create... directory.
Make sure that the directory path you entered is valid.
If not, specify a valid path.
There is not enough space available xx
bytes on disk XX.
Make sure you have the amount of free disk space
available and try the installation again.
An error occurred during the move
process.
Quit all open applications and try the installation
again.
40
Appendix
TROUBLESHOOTING THE HARDWARE SETUP
Hardware setup problems usually show up when reading or writing codeplug to the phone.
CAUTION
Never disconnect the
programming cable from the
phone during the programming
process or power off the PC
while the codeplug file is in
memory. This will destroy your
phone data.
TIP: You can print any help topic
(including troubleshooting topics) from the
Help window by choosing File/Print Topic.
To solve the problem:
1
Make sure that the programming hardware you are using match the parts listed from
page 44 on.
2
Check for loose hardware or power supply connections.
3
Examine the metal contacts on the phone and on the programming cable for dust or
grime. If necessary, clean the contacts with alcohol and let dry.
4
Select Tools/Options. Make sure that the setting in the Serial or Parallel Port fields
refer to the correct COM port.
5
Access the “Troubleshooting” section in the on-line help. It contains a
comprehensive list of topics to help you solve computer-to-phone communication
problems. Select the link that best describes the problem you are experiencing. The
help topic will provide step-by-step instructions on the troubleshooting procedure.
41
Appendix
Appendix D: Contacting Motorola
Motorola has made every effort to ensure that the TETRA CPS is of excellent quality.
However, if you experience any problems with the product, we suggest that you refer to
the following sources:
• This guide which is designed to help you install and get an overview of the CPS
• The on-line help which has a detailed Troubleshooting section
• The README.TXT file that was installed with the CPS
European Radio Support Centre (ERSC)
The ERSC Customer Information Desk is available through the following service
numbers:
Austria: 06 60 75 41
Belgium: 08 00 72 471
Denmark: 80 01 55 72
Finland: 08 00 11 49 10
France: 05 90 30 90
Germany: 01 30 18 75 24
Greece: 00 80 04 91 29 020
UK: 08 00 96 90 95
Ireland: 18 00 55 50 21
Italy: 16 78 77 387
Luxembourg: 08 00 23 27
Netherlands: 60 22 45 13
Norway: 80 01 11 15
Portugal: 05 05 49 35 70
Spain: 90 09 84 902
Sweden: 02 07 94 307
Switzerland: 1 55 30 82
Iceland: 80 08 147
42
Appendix
Or dial Customer Care Centre:
Tel.: 0049 6128 70 2618
Please use these numbers for repair enquiries only
Please have the following information ready when you call:
1
Nature and description of the problem.
2
When the problem occurred and what specific actions led to it.
3
Type of PC, manufacturer, version and type of operating system, memory size, disk
space, CPS version, phone model type, and part numbers of programming kits used.
43
Appendix
ORDERING PARTS
Note: The part numbers provided here do not
contain version suffixes. You will
automatically receive the latest version of the
part when you place your order.
For complete information on ordering required parts and kits, contact your local customer
service representative.
FLN2686 (UK plug)/FLN2687 (Euro Plug) for d700/MTH300
Name of Part
Part Number
Description
UK Power Supply
or Euro Power Supply
EPN4040 or
EPN4041
Supplies power to the RIB and to the
computer via the adapter.
Serial Cable (comprises 3080369B71 FKN4723
and 3080369B72 cables)
Connects the RIB to the computer.
Adapter
FLN9348
Programming Adapter Cable
NKN6497
Connects the phone to the
programming cable from the computer
(RKN4066).
Programming Cable
RKN4066
Connects the computer to the RIB, the
phone, and the power supply via the
adapter.
Radio Interface Box (RIB)
RLN4008
Connects the phone to the computer.
Operation and Service Manual
68P02956C82
44
Appendix
FLN2908 (UK Plug)/FLN2909 (Euro plug) for d700/MTH300/MTH300S
Name of Part
Part Number
Description
UK Power Supply
or Euro Power Supply
EPN4040 or
EPN4041
Supplies power to the handset and
computer via the RFI filter.
RFI Filter
5804126K03
Programming Cable
FKN4875
Programming Kit User’s Guide
68P02961C10
Connects the computer to the phone
and power supply via the RFI filter.
FKN4897 Data/Programming Cable for d1700
Name of Part
Part Number
Description
Data/Programing Cable
FKIN4897
Connects the computer to the phone.
45
FLN2505 Programming Kit for Dimetra MTP200/MTP300/MTM300
Name of Part
Part Number
Description
Parallel Cable
FKN4696
Connects the Programming Box to the
parallel port of the computer.
Accessory Cable (Mobile)
FKN4697
Connects the MTM300 to the
programming box.
Accessory Cable (Portable)
FKN4698
Connects the MTP200/MTP300 to the
programming box.
Serial Cable
FKN4723
Connects the programming box to the
serial port of the computer.
Programming Box
FLN2605
Operation and Service Manual
68P02955C62
46
Index
A
D
Application window, features of 19
Dialog boxes 5, 20
dongle 7
C
Call Lists
configuring 27
copying between codeplugs 28
Codeplug
reading from phone 24
writing entire codeplug to the phone 31
writing partial codeplug to the phone 30
Codeplug blocks 5
Codeplug file
making a backup 25
opening 23
programming the phone with 31
saving 29
Codeplug window 22
Codeplug, copying to the phone 30
Content view 19, 22
Context-sensitive Help 20
Copy Wizard function 32
E
Edit menu 21
Equipment Setup
troubleshooting 41
Equipment setup 11
Error messages 40
F
Fields 5, 20, 22
File menu 21
Flashing 33
Folders 22
G
Getting around the CPS 21
H
Hardware Setup
troubleshooting 41
Hardware setup 11
Help menu 21
How to
Access help on Windows 20
Access the on-line help 20
Back up a codeplug file 25
Configure call lists 27
Configure User Personal Data 26
Contact Motorola 42
Copy call list entries between codeplugs
28
Copy the codeplug to the phone 30, 31
Install the CPS 7
Open a codeplug file 23
Read codeplug from phone 24
Save a codeplug file 29
Selectively save codeplug data 30
Set up the programming hardware 11
Troubleshoot problems 40, 41
Use CPS menus 21
Use tree and content views 22
Write codeplug to the phone using Copy
Wizard 32
Write entire codeplug to the phone 31
47
Index
Write partial codeplug to the phone 30
I
Installing the CPS 7
troubleshooting 40
M
Menu bar 19
Menu map 36
Menus 21
Motorola, contacting 42
T
U
Navigation 22
Upgrading
write software and codeplug 34
User Personal Data, configuring 26
O
V
On-line Help 20
On-line help 5
Verifying the installation 10
View menu 21
P
W
parallel connection 7
Partial codeplug, writing to the phone 30
Programming the phone 31
Window menu 21
Windows help 20
Writing entire codeplug to the phone 31
Writing partial codeplug to the phone 30
Writing software to the phone
flashing 33
Writing the codeplug to the phone using
N
S
Selectively saving codeplug data 30
Setting up the hardware 11
Status bar 19
Copy Wizard 32
Title Bar 19
Toolbar 19
Tools menu 21
Tree view 19, 22
Troubleshooting 40
hardware setup problems 41
software installation problems 40
48
Index